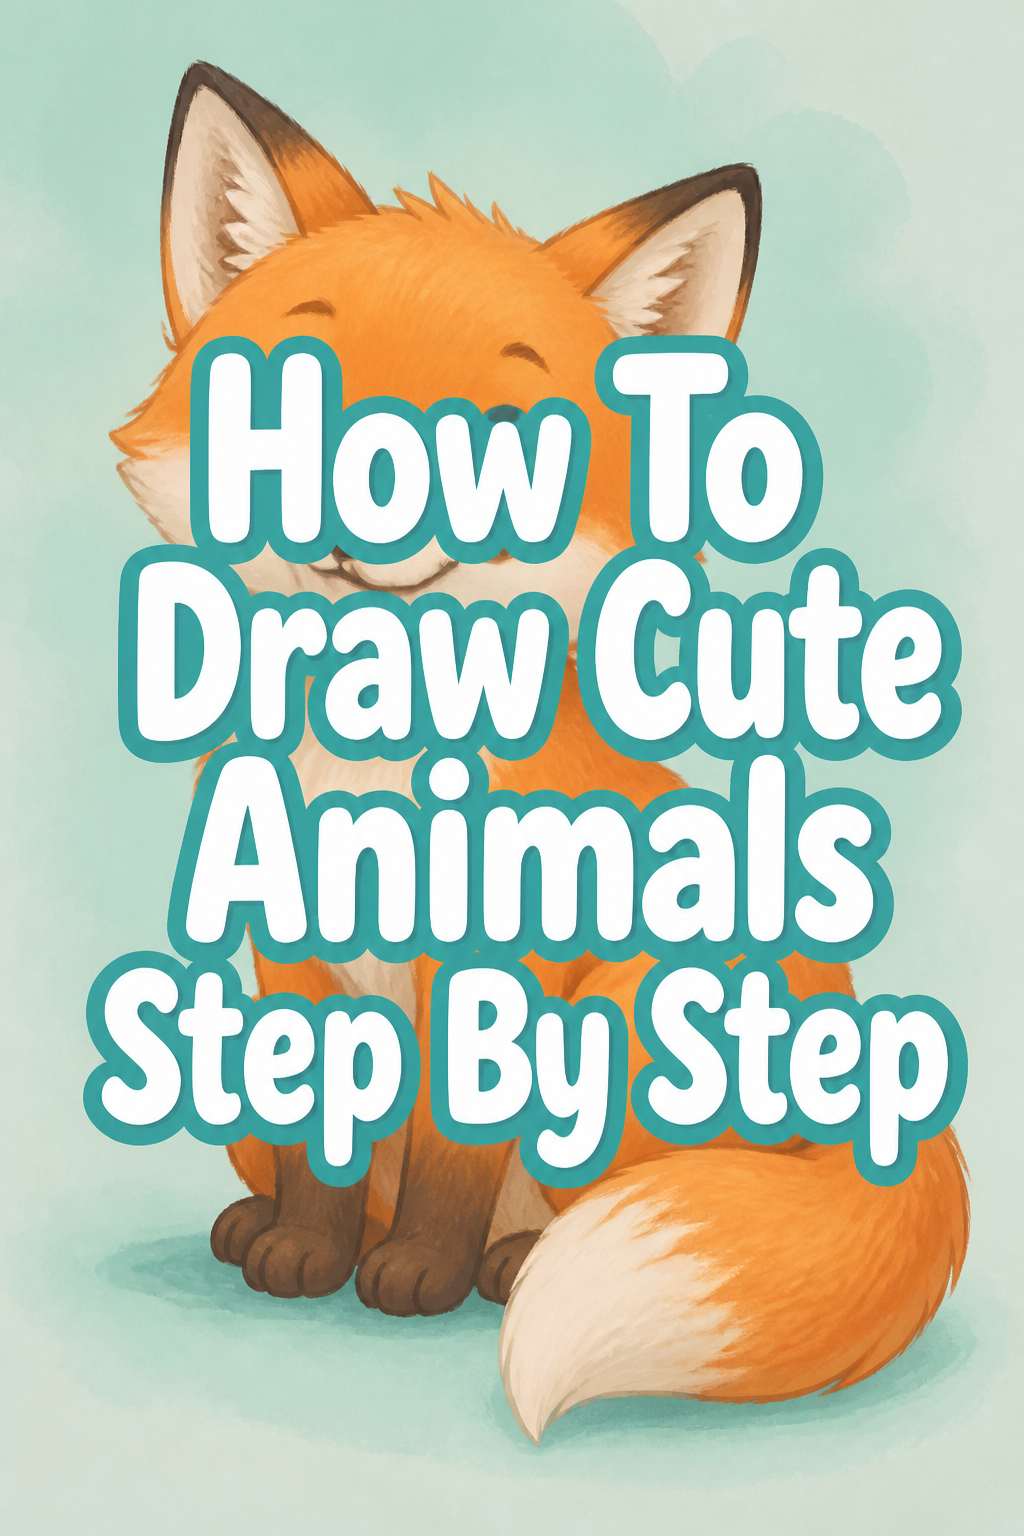
🎨 How To Draw Cute Animals Step By Step

& Painting
No rigid rules or pretension. Just practical guides, medium comparisons, and encouraging tips to help you enjoy the drawing & painting process.
Drawing is one of the most relaxing ways to spend your free time.
I remember sitting at my kitchen table for hours as a kid, trying to make my puppy sketches look less like potatoes and more like actual dogs.
After years of practice and filling dozens of sketchbooks, I discovered that “cute” is actually a formula you can learn and repeat.
Quick Overview
This guide will teach you the fundamental shapes and proportions used to create adorable animal characters.
- Time needed: 20 to 30 minutes per character
- Difficulty: Beginner
- What you’ll need: Sketch paper, a HB pencil, an eraser, and a fine-liner pen.
Step-by-Step Instructions
Step 1: Start With Basic Circles
Begin by drawing a large, soft circle for the head of your animal.
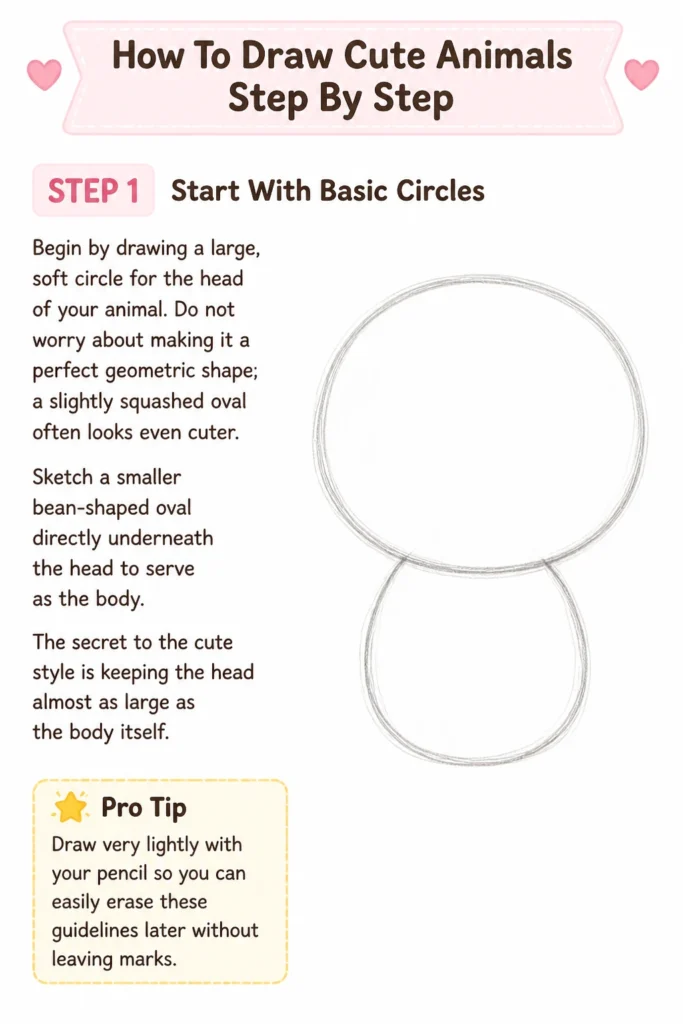
Do not worry about making it a perfect geometric shape; a slightly squashed oval often looks even cuter.
Sketch a smaller bean-shaped oval directly underneath the head to serve as the body.
The secret to the “cute” style is keeping the head almost as large as the body itself.
Pro Tip: Draw very lightly with your pencil so you can easily erase these guidelines later without leaving marks.
Step 2: Map Out The Face Grid
Draw a horizontal line across the lower third of the head circle.
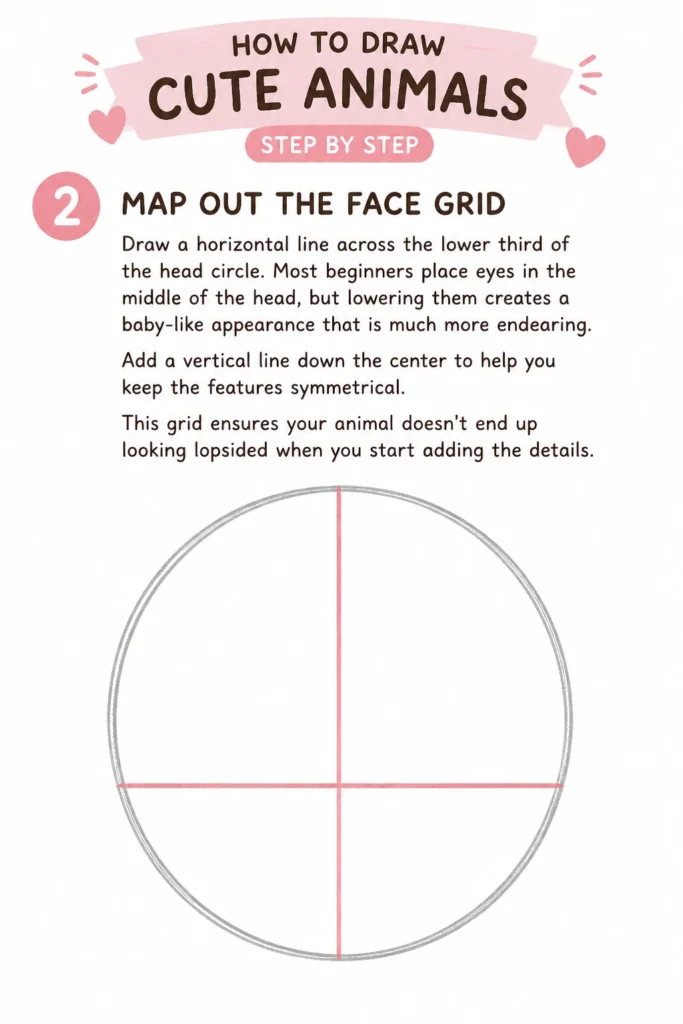
Most beginners place eyes in the middle of the head, but lowering them creates a “baby-like” appearance that is much more endearing.
Add a vertical line down the center to help you keep the features symmetrical.
This grid ensures your animal doesn’t end up looking lopsided when you start adding the details.
Step 3: Place The Eyes Low And Wide
Position two large ovals or circles on that horizontal line you just drew.
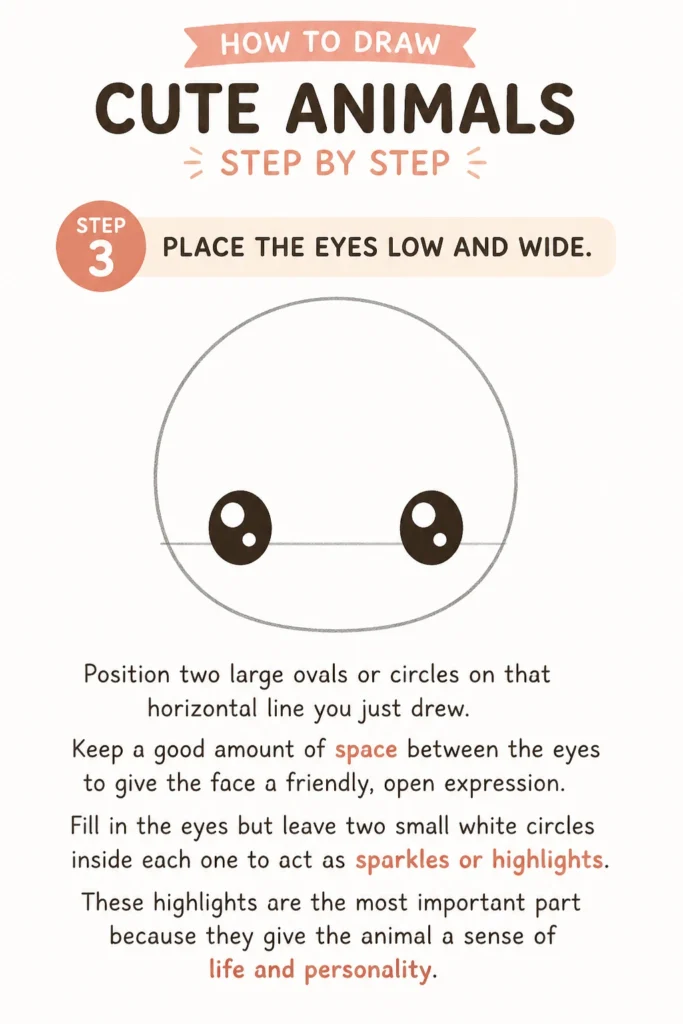
Keep a good amount of space between the eyes to give the face a friendly, open expression.
Fill in the eyes but leave two small white circles inside each one to act as “sparkles” or highlights.
These highlights are the most important part because they give the animal a sense of life and personality.
Step 4: Create A Tiny Snout
Draw a small upside-down triangle or a tiny oval right between the eyes.
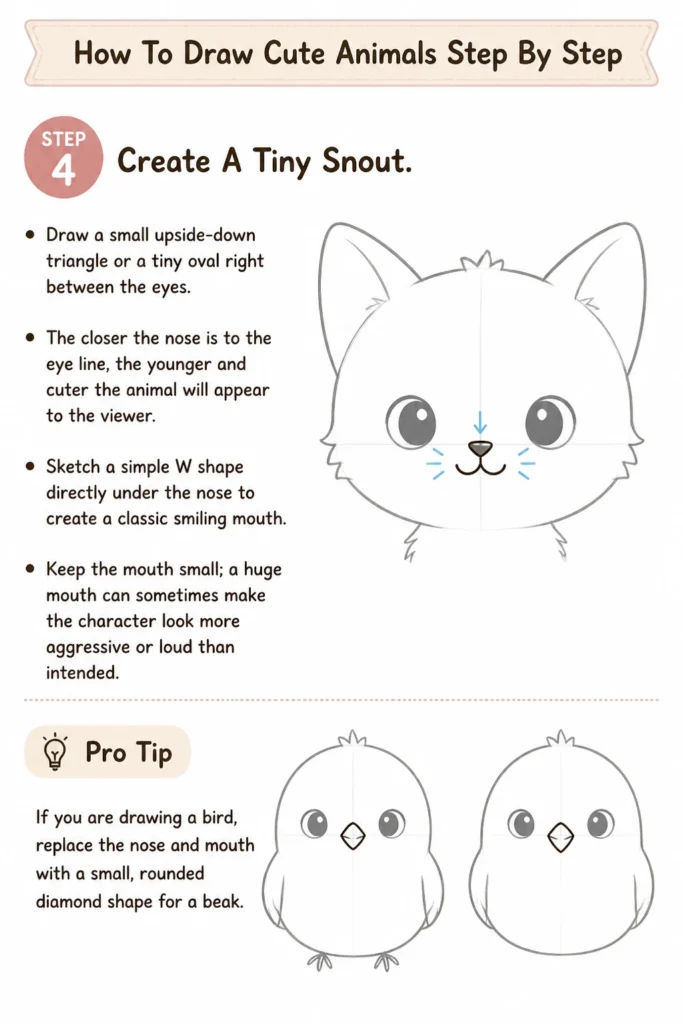
The closer the nose is to the eye line, the younger and cuter the animal will appear to the viewer.
Sketch a simple “W” shape directly under the nose to create a classic smiling mouth.
Keep the mouth small; a huge mouth can sometimes make the character look more aggressive or loud than intended.
Pro Tip: If you are drawing a bird, replace the nose and mouth with a small, rounded diamond shape for a beak.
Step 5: Define The Ears For Species
Add two large triangles if you want to draw a cat or a fox.
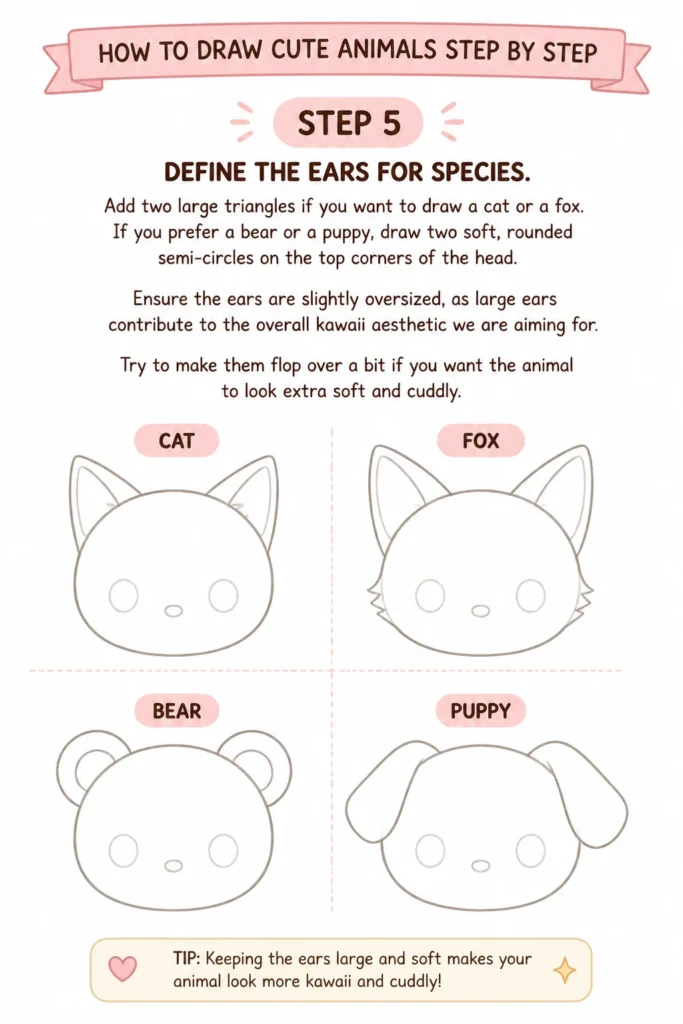
If you prefer a bear or a puppy, draw two soft, rounded semi-circles on the top corners of the head.
Ensure the ears are slightly oversized, as large ears contribute to the overall “kawaii” aesthetic we are aiming for.
Try to make them flop over a bit if you want the animal to look extra soft and cuddly.
Step 6: Sketch Simple Stubby Limbs
Draw four small U-shaped tubes attached to the bean-shaped body for the legs.
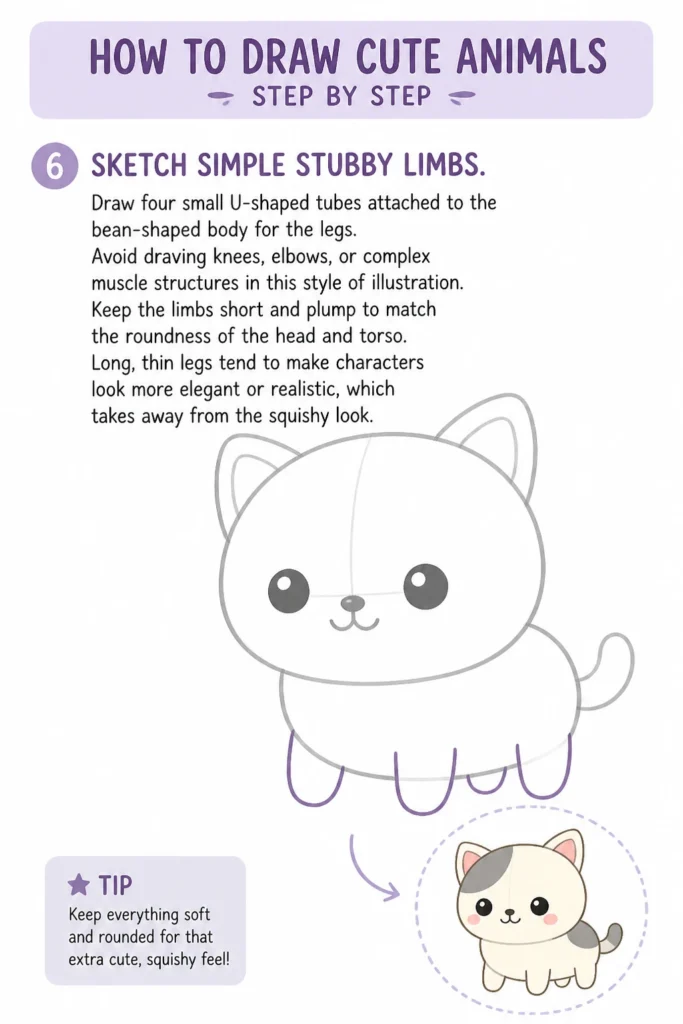
Avoid drawing knees, elbows, or complex muscle structures in this style of illustration.
Keep the limbs short and plump to match the roundness of the head and torso.
Long, thin legs tend to make characters look more elegant or realistic, which takes away from the “squishy” look.
Step 7: Add The Tail And Texture
Attach a tail to the back of the body based on the animal you chose earlier.
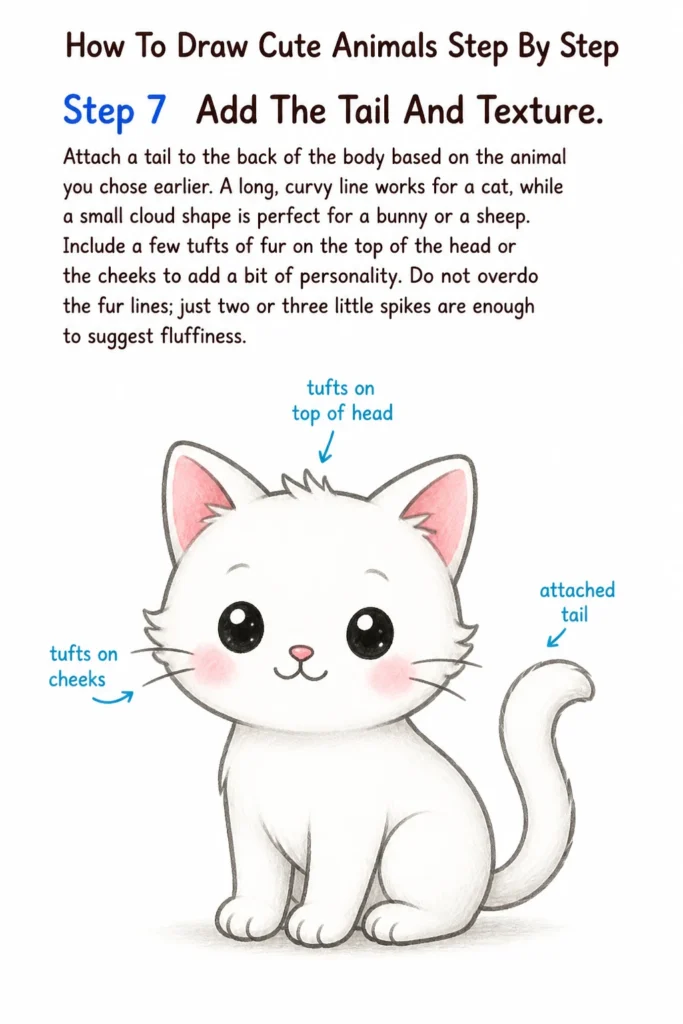
A long, curvy line works for a cat, while a small “cloud” shape is perfect for a bunny or a sheep.
Include a few tufts of fur on the top of the head or the cheeks to add a bit of personality.
Do not overdo the fur lines; just two or three little spikes are enough to suggest fluffiness.
Step 8: Outline With Ink
Trace over your final pencil lines using a black fine-liner or a felt-tip pen.
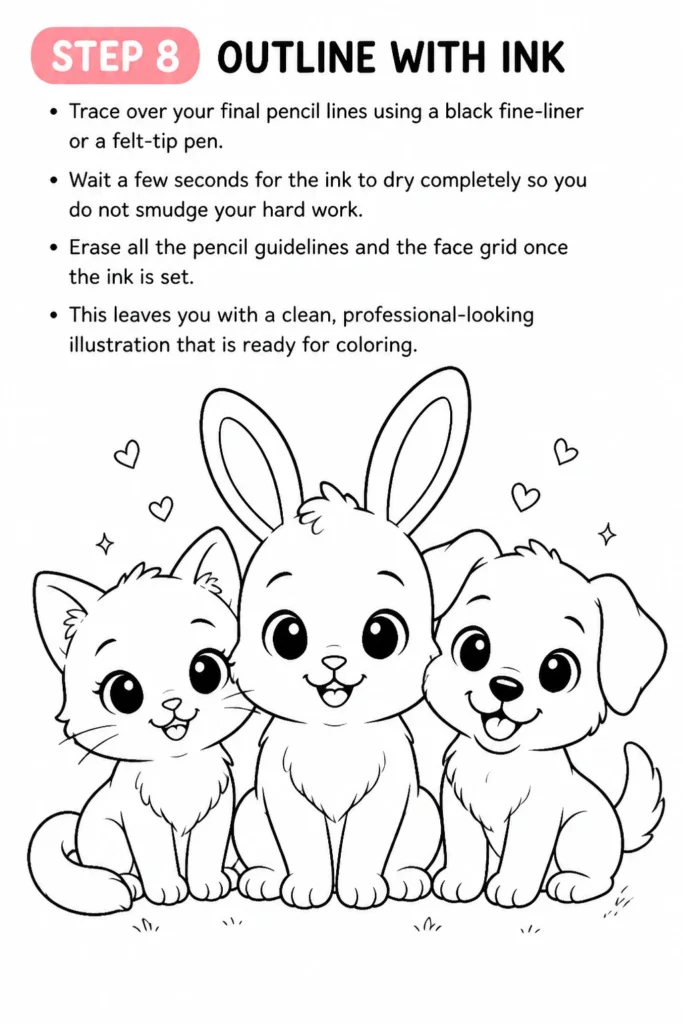
Wait a few seconds for the ink to dry completely so you do not smudge your hard work.
Erase all the pencil guidelines and the face grid once the ink is set.
This leaves you with a clean, professional-looking illustration that is ready for coloring.
Step 9: Apply Soft Colors
Choose a limited palette of pastel colors to fill in your animal.
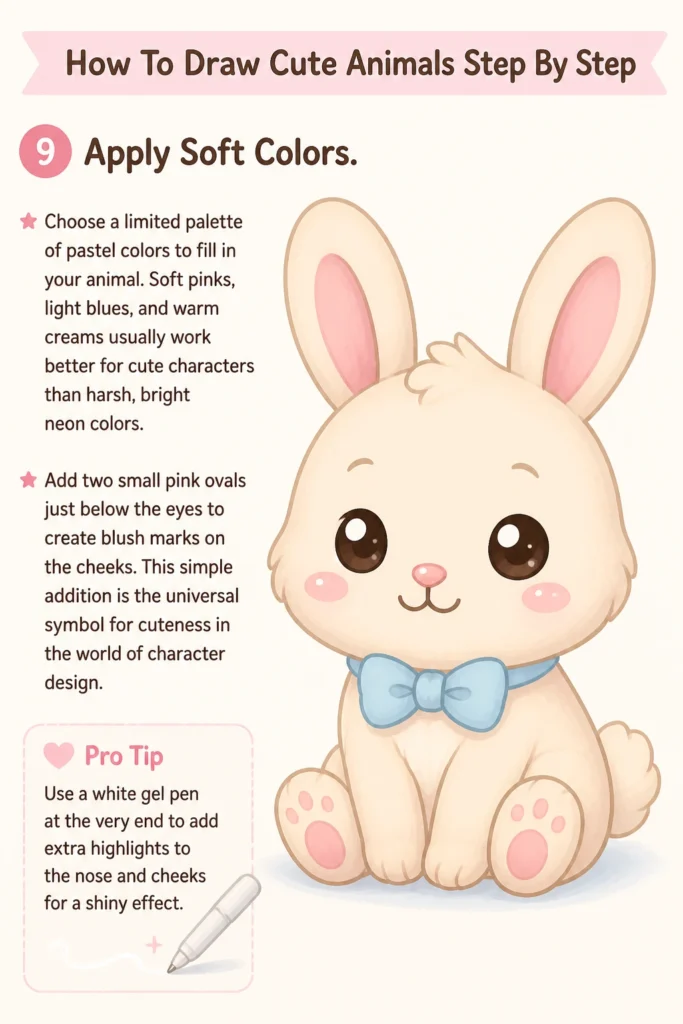
Soft pinks, light blues, and warm creams usually work better for cute characters than harsh, bright neon colors.
Add two small pink ovals just below the eyes to create “blush” marks on the cheeks.
This simple addition is the universal symbol for cuteness in the world of character design.
Pro Tip: Use a white gel pen at the very end to add extra highlights to the nose and cheeks for a “shiny” effect.
Common Mistakes to Avoid
Making Features Too Realistic
One of the biggest hurdles for artists is trying to include too much anatomical detail.
If you draw realistic claws, individual teeth, or complex muscle groups, the animal loses its “squishy” appeal.
Focus on simplifying everything into circles and soft curves rather than sharp angles.
Placing Eyes Too High
When you place the eyes in the middle or top half of the head, the character looks more like an adult.
Human brains associate low-set eyes and a large forehead with babies and puppies.
Always keep your facial features clustered in the bottom half of the face circle to maximize the charm factor.
Using Thin Shaky Lines
Many beginners use “hairy” lines, which are lots of tiny little strokes instead of one smooth motion.
This makes the animal look nervous or messy rather than soft and clean.
Try to ghost your hand over the paper and commit to a single, confident stroke for each part of the body.
Troubleshooting
The Animal Looks Creepy Instead Of Cute
This usually happens when the eyes are too small or if they lack the white “sparkle” highlights.
Small, solid black eyes can sometimes look soulless or intense in a way that feels unsettling.
Make the eyes larger and ensure the highlights are big enough to be clearly visible from a distance.
The Character Feels Stiff Or Robotic
If your animal looks like a statue, it might be because the body is perfectly straight and symmetrical.
Try tilting the head slightly to one side or drawing one ear a little lower than the other.
Adding a slight curve to the spine or a “lean” to the body gives the character a sense of weight and motion.
The Ink Is Smudging Everywhere
This is a common frustration when using liquid ink pens or markers on certain types of paper.
Always work from the top-left corner of the page to the bottom-right if you are right-handed.
If you are left-handed, work from the top-right to the bottom-left to keep your palm out of the wet ink.
Key Takeaways
- Use large heads and small bodies to create a “chibi” or baby-like proportion.
- Keep all facial features on the lower third of the head for maximum cuteness.
- Incorporate large eye highlights to give your character a lively and friendly expression.
- Avoid sharp corners and instead use rounded, soft shapes for every part of the anatomy.
- Add blush marks on the cheeks as a final touch to enhance the endearing quality of the drawing.
- Stick to a simple color palette to keep the focus on the character’s shape and personality.
Frequently Asked Questions
What is the best paper for drawing cute animals?
A smooth bristol board or a dedicated marker paper is usually the best choice for this style.
Smooth paper allows your pen to glide without catching, which helps in creating those clean, round lines.
If you are just practicing, a standard 90lb sketchbook page will work perfectly fine for pencil and ink.
Do I need expensive markers to color my drawings?
You do not need professional-grade markers to get a great result when you are starting out.
Colored pencils or even basic school markers can work if you apply the color in light, even layers.
The key is the color choice; as long as you use soft, complementary tones, the brand of the tool matters very little.
How can I make my animals look more unique?
The best way to add personality is through accessories like tiny hats, bows, or scarves.
You can also give them human-like expressions, such as a wink or a tongue sticking out.
Small props like a piece of fruit or a flower for the animal to hold can also tell a story about their character.
Why do my circles always look like lumpy eggs?
Drawing perfect circles is a physical skill that takes time for your arm muscles to learn.
Try drawing with your whole arm moving from the shoulder instead of just flicking your wrist.
You can also practice “ghosting,” where you move your pencil in a circular motion above the paper before actually touching it down.
Our Top Recommended Finds
- Dual-Tip Alcohol Markers: These are excellent for creating smooth, streak-free color fills that look like professional illustrations.
- Waterproof Fine-Liner Set: These pens won’t bleed when you color over them with markers or paint, keeping your outlines crisp.
- Kneaded Eraser: This tool allows you to lift pencil marks without damaging the surface of the paper or leaving crumbs behind.
Taking Your Art To The Next Level
Now that you have mastered the basics of drawing round, happy animals, the possibilities are endless.
You can start creating your own characters or even making small comic strips to share with friends and family.
Try drawing different animals today, like a tiny chubby dragon or a round little hamster.
The more you practice these simple shapes, the more natural and fluid your drawing style will become.
Grab your sketchbook right now and try to draw three different animals using the “low-eye” rule we discussed.
You might be surprised at how quickly you can create something truly adorable.
& Painting
No rigid rules or pretension. Just practical guides, medium comparisons, and encouraging tips to help you enjoy the drawing & painting process.