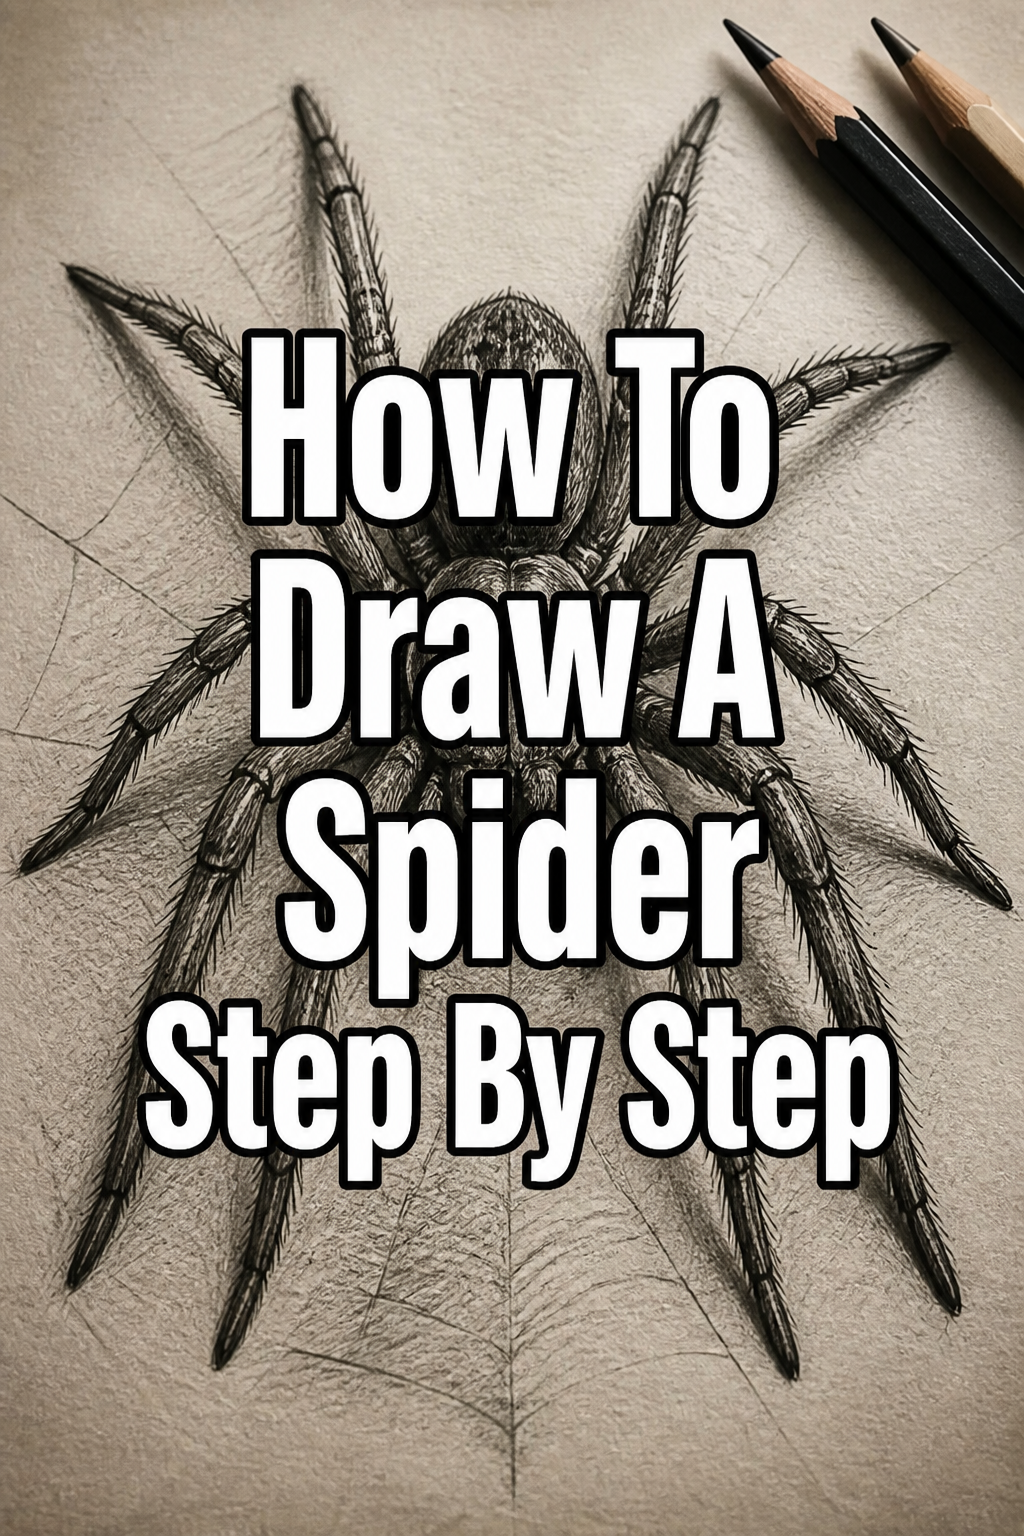
🕷️ How To Draw A Spider Step By Step

& Painting
No rigid rules or pretension. Just practical guides, medium comparisons, and encouraging tips to help you enjoy the drawing & painting process.
Have you ever wanted to sketch a creature that’s both fascinating and a little bit spooky? Drawing a spider can seem tricky, but it’s incredibly rewarding. I’ve spent countless hours practicing creature designs, and spiders offer a fantastic way to learn about anatomy and shading.
This guide will break down the process into simple, manageable steps, ensuring you can create your own eight-legged friend with confidence. You’ll soon discover the joy of bringing these intricate creatures to life on paper.
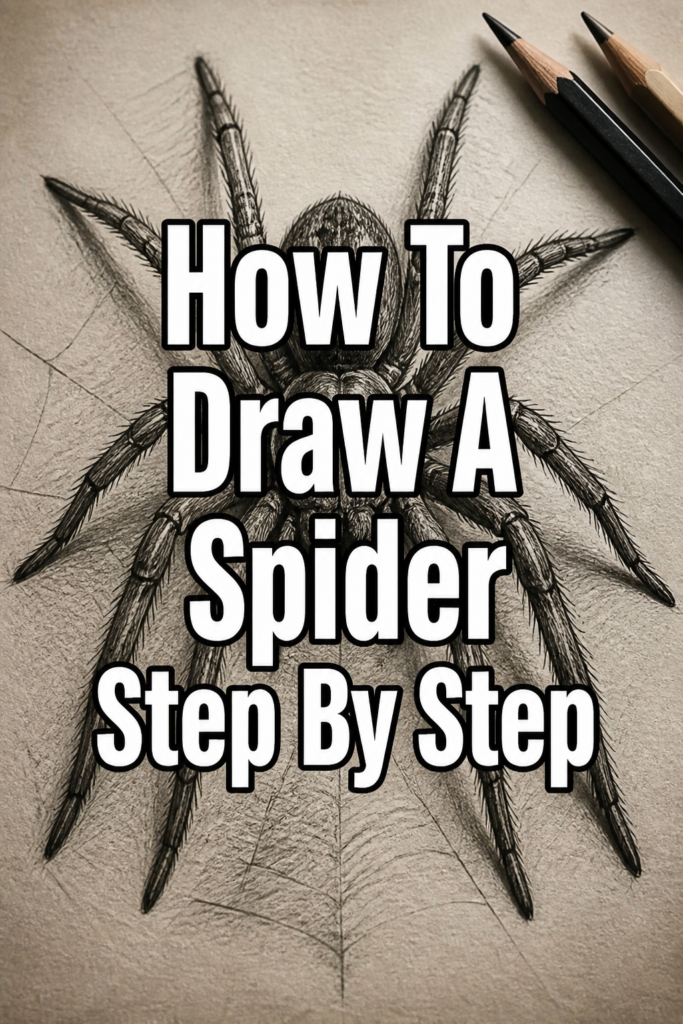
Quick Overview
By the end of this guide, you will have created a detailed spider drawing, complete with its segmented body and multiple legs. We will focus on building the form from basic shapes, adding details, and applying simple shading. It’s a journey into creature illustration that’s accessible for everyone.
- Time needed: 45-75 minutes
- Difficulty: Beginner
- What you’ll need: Pencil (HB, 2B, 4B recommended), eraser, drawing paper, a blending stump or cotton swab (optional)
Step-by-Step Instructions
Step 1: Sketch the Basic Body Shapes
Begin by lightly sketching two overlapping ovals to form the spider’s main body. The smaller oval will be the cephalothorax (head and thorax combined), and the larger, more elongated oval behind it will be the abdomen. Think of a figure-eight shape, but with one loop larger than the other.
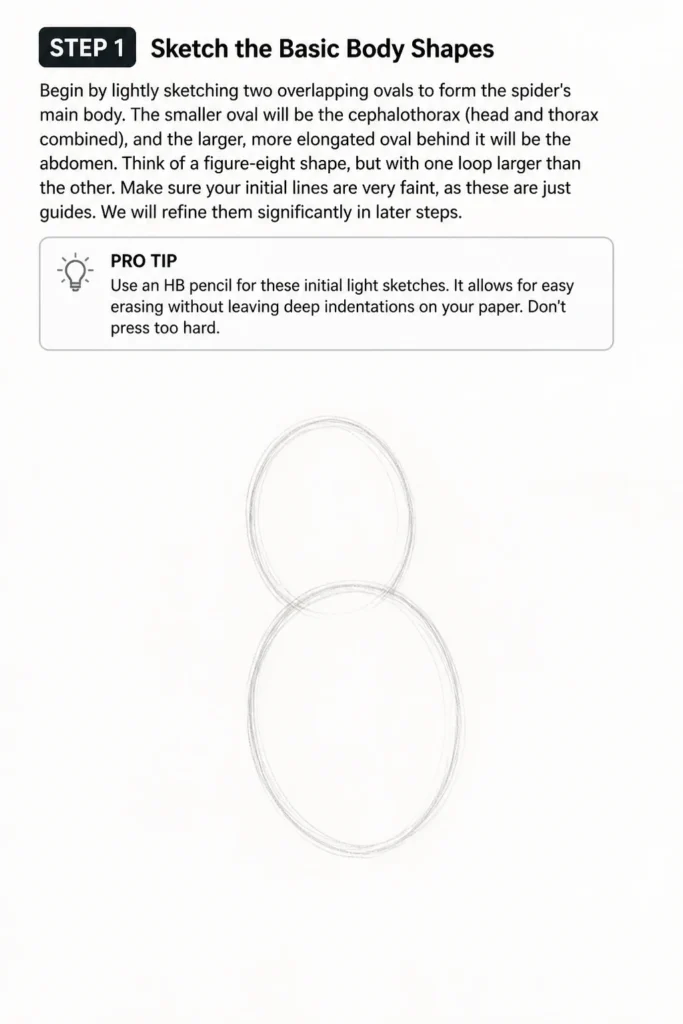
Make sure your initial lines are very faint, as these are just guides. We will refine them significantly in later steps. Position these shapes towards the center of your paper, leaving plenty of room for the legs.
Pro Tip: Use an HB pencil for these initial light sketches. It allows for easy erasing without leaving deep indentations on your paper. Don’t press too hard.
Step 2: Add the Leg Attachment Points
Now, we need to mark where the legs will connect to the cephalothorax. Spiders have eight legs, all attaching to this front section of their body. Draw four small, short lines on each side of the cephalothorax oval.
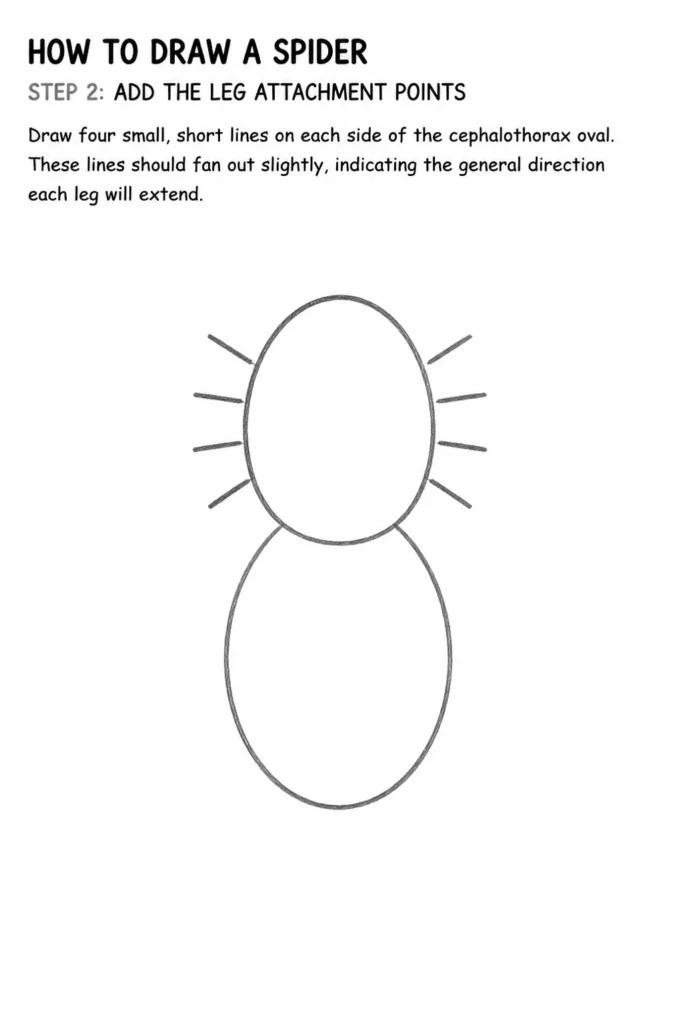
These lines should fan out slightly, indicating the general direction each leg will extend. Imagine them radiating from the center, but not perfectly symmetrical. This helps create a more natural, dynamic pose.
Step 3: Draw the Basic Leg Structure
From each of the attachment points, extend two simple, curved lines for each leg. Each leg typically has three main segments visible from a basic drawing perspective: the upper leg, the middle leg, and the lower leg. Don’t worry about perfect anatomy yet.
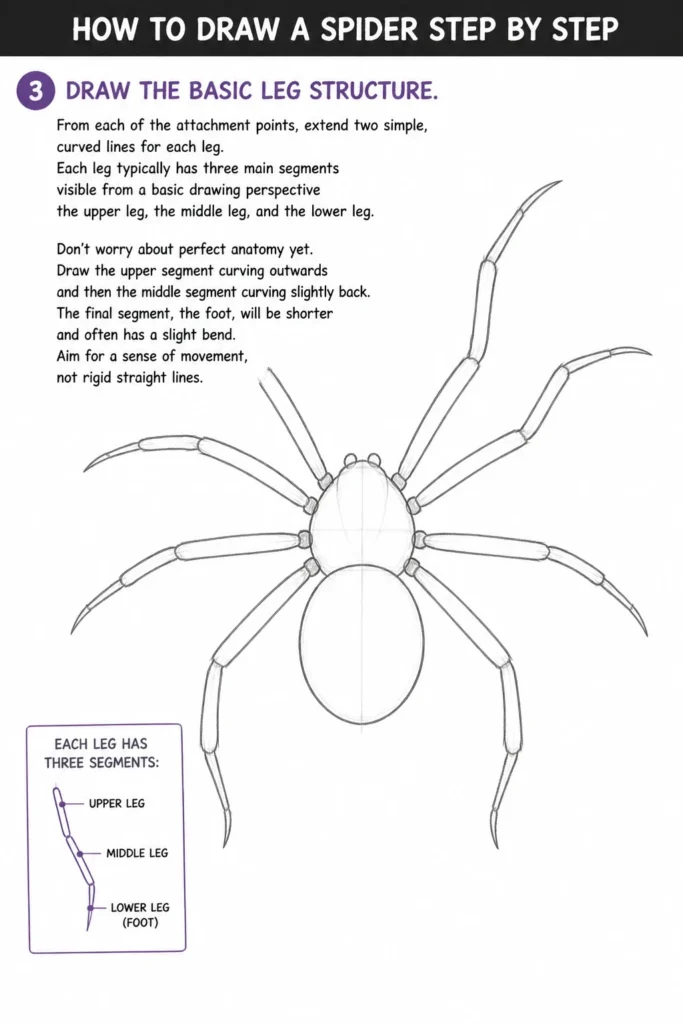
Draw the upper segment curving outwards and then the middle segment curving slightly back. The final segment, the foot, will be shorter and often has a slight bend. Aim for a sense of movement, not rigid straight lines.
Step 4: Refine the Body and Leg Thickness
Go back to your initial body ovals and begin to define their shape more clearly. Spiders often have a slightly flattened or rounded top to their cephalothorax and a more bulbous, egg-like abdomen. Darken these outlines with a slightly firmer hand.
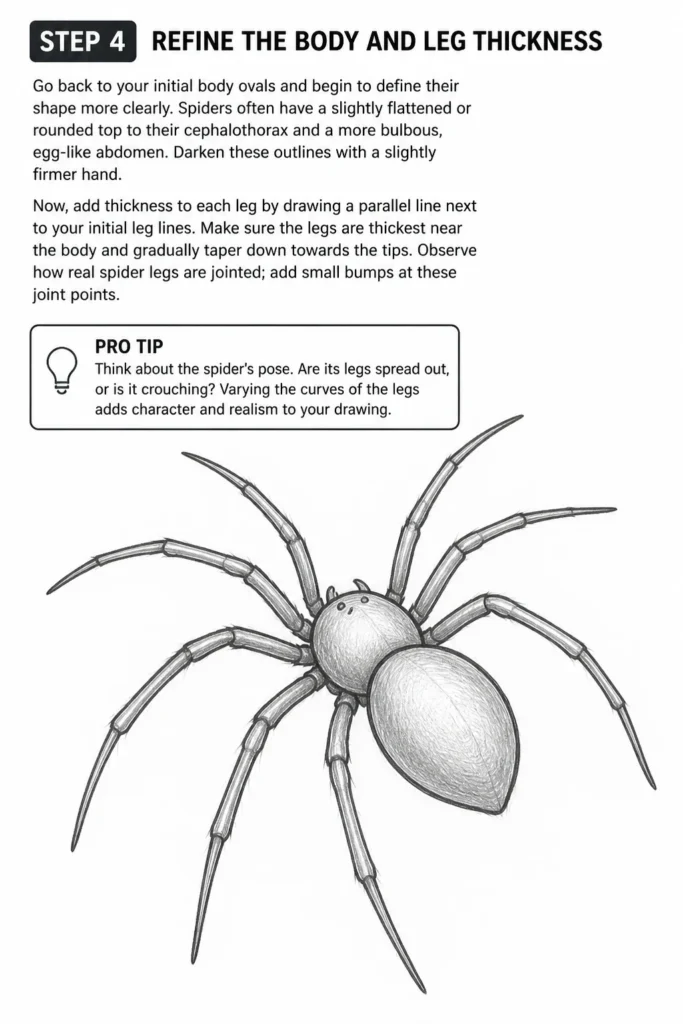
Now, add thickness to each leg by drawing a parallel line next to your initial leg lines. Make sure the legs are thickest near the body and gradually taper down towards the tips. Observe how real spider legs are jointed; add small bumps at these joint points.
Pro Tip: Think about the spider’s pose. Are its legs spread out, or is it crouching? Varying the curves of the legs adds character and realism to your drawing.
Step 5: Add the Head Details and Pedipalps
Focus on the front of the cephalothorax. Spiders have small features here. Draw two small bumps or circles for the eyes, usually clustered together. Some spiders have many eyes, but for a basic drawing, two prominent ones are sufficient.
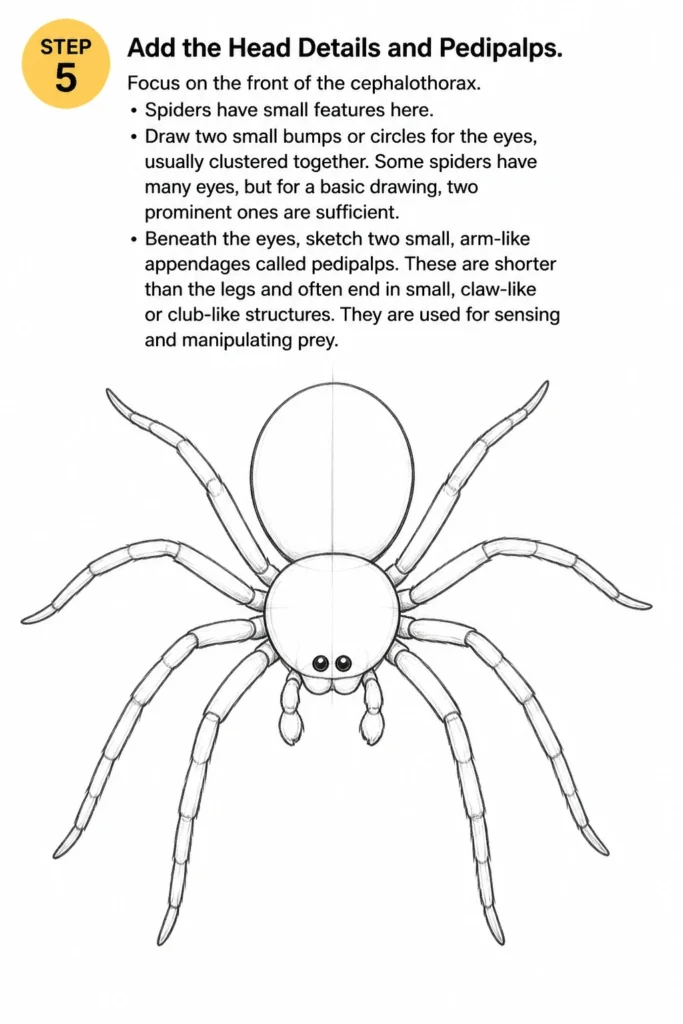
Beneath the eyes, sketch two small, arm-like appendages called pedipalps. These are shorter than the legs and often end in small, claw-like or club-like structures. They are used for sensing and manipulating prey.
Step 6: Introduce Texture and Hair
Spiders are often covered in fine hairs or bristles, which contribute to their unique texture. Use short, fine lines along the body and legs to suggest this hairiness. Don’t draw individual hairs; instead, use many short strokes that follow the contours of the body.
This step adds a lot of realism and character. Consider the direction the hairs might grow, usually pointing away from the body. This texture will also help with shading later.
Step 7: Begin Basic Shading and Form
Now it’s time to add dimension to your spider. Identify a light source – imagine where the light is coming from. Areas facing the light will be brighter, and areas opposite will be darker. Use a 2B pencil to lightly shade the underside of the body and legs.
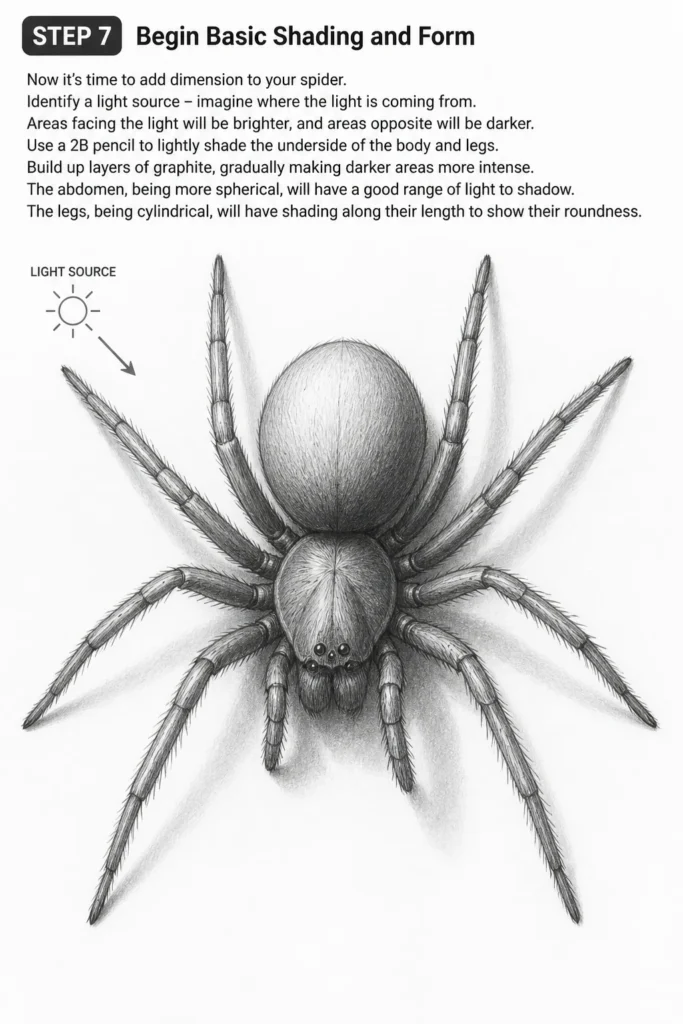
Build up layers of graphite, gradually making darker areas more intense. The abdomen, being more spherical, will have a good range of light to shadow. The legs, being cylindrical, will have shading along their length to show their roundness.
Step 8: Develop Deeper Shadows and Highlights
With a 4B pencil, deepen the shadows in areas that would receive very little light, such as the undersides of joints, where legs meet the body, and the deepest parts of the abdomen. This contrast makes your spider pop off the page.
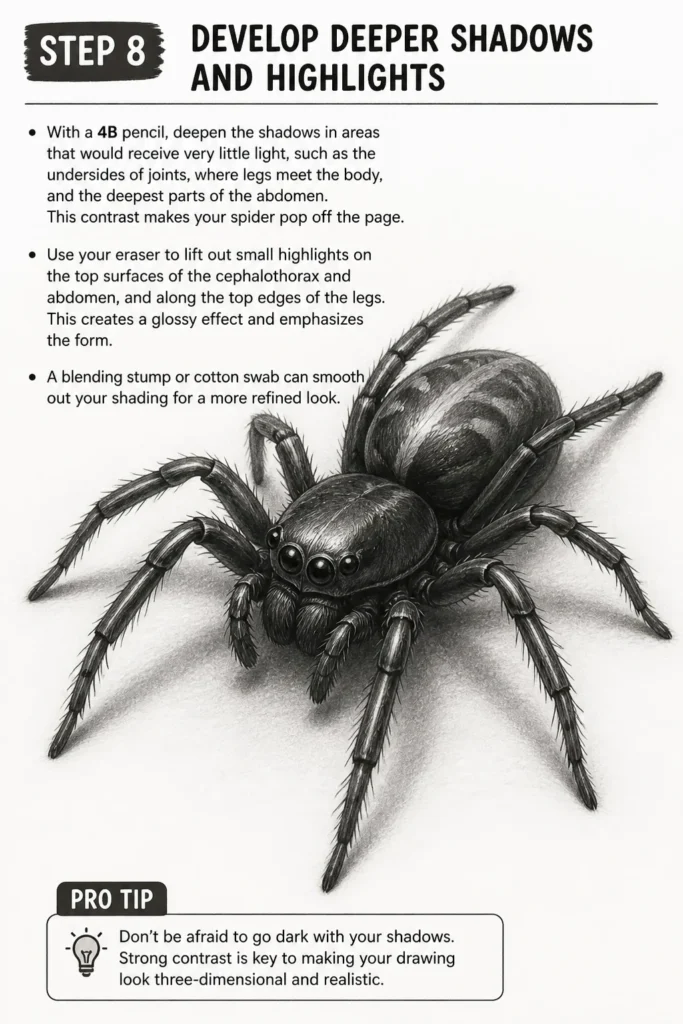
Use your eraser to lift out small highlights on the top surfaces of the cephalothorax and abdomen, and along the top edges of the legs. This creates a glossy effect and emphasizes the form. A blending stump or cotton swab can smooth out your shading for a more refined look.
Pro Tip: Don’t be afraid to go dark with your shadows. Strong contrast is key to making your drawing look three-dimensional and realistic.
Common Mistakes to Avoid
Making Legs Too Stiff or Symmetrical
One common pitfall is drawing spider legs as perfectly straight or mirroring each other exactly. Real spiders rarely hold such rigid poses. This makes the drawing look unnatural and robotic.
Instead, allow for natural curves and slight variations in the angle and length of each leg. Study reference photos to see how spider legs bend and articulate. A little asymmetry adds immense realism to your creature.
Ignoring Body Segmentation
Many beginners draw the spider’s body as one continuous oval. However, a spider has two distinct body segments: the cephalothorax and the abdomen. Failing to clearly define this separation makes the drawing look less like a spider and more like a blob.
Always start with two overlapping ovals and work to clearly show the slight constriction or joint where these two parts meet. This is a fundamental anatomical feature you shouldn’t overlook.
Lack of Proportionality
Sometimes, the legs might be drawn too short or too long in relation to the body, or the abdomen might be disproportionately large or small compared to the cephalothorax. This distorts the spider’s overall appearance.
Take time in your initial sketching phase to establish good proportions. Compare the length of the legs to the body and the size of the two body segments. Step back frequently to assess your drawing from a distance.
Skipping Texture and Detail
Leaving the spider as a smooth, untextured form makes it appear flat and less lifelike. Spiders are often hairy, bumpy, or have specific patterns. Ignoring these details misses a great opportunity for realism.
Even subtle suggestions of hair, small bumps at joints, or slight patterns on the abdomen can elevate your drawing significantly. These small touches add depth and interest.
Troubleshooting
My Spider Looks Flat
If your spider drawing appears two-dimensional, it likely needs more contrast in its shading. Flatness often comes from not having a wide enough range of tones, from light to dark.
Go back and deepen your shadows, especially in areas that would be furthest from your light source or tucked underneath the body and legs. Also, ensure you have crisp highlights where the light directly hits. Strong darks next to bright lights create the illusion of form.
The Legs Don’t Look Natural
Unnatural-looking legs can stem from a few issues: they might be too straight, too uniform in thickness, or lack proper joint indications. Spider legs are segmented and taper.
Review your leg structure. Ensure each leg has visible segments and that it gradually thins towards the tip. Add small, subtle bumps at the joints. Most importantly, give them natural, organic curves rather than rigid lines. Practice drawing varied curves until they feel fluid.
My Drawing Lacks Detail/Realism
If your spider feels generic or lacks a “wow” factor, you might be missing crucial details or texture. Realism comes from observing and incorporating those smaller elements.
Consider adding more subtle texture with fine, short lines to suggest hair. Look at reference photos for specific eye arrangements, pedipalp shapes, or patterns on the abdomen. Even small details, like tiny claws at the end of the legs, can make a big difference.
Key Takeaways
- Always start with light, basic geometric shapes for the body and initial leg guides.
- Proportion is crucial; ensure the body segments and leg lengths are balanced.
- Add thickness to the legs, tapering them from the body towards the tips.
- Refine the head with eyes and pedipalps for a complete look.
- Use short, fine lines to suggest texture and hair on the body and legs.
- Shading is vital for dimension; build up tones from light to dark, creating strong contrast.
- Don’t be afraid to use an eraser for highlights to make surfaces appear shiny.
- Practice observing real spiders or high-quality reference images to understand their anatomy and poses.
Frequently Asked Questions
What kind of pencil is best for drawing spiders?
Starting with an HB pencil for initial sketches is ideal because it’s light and easy to erase. For shading, a range of softer pencils like 2B and 4B will allow you to achieve darker tones and richer shadows, adding depth to your drawing.
How do I make the legs look hairy without overdoing it?
To create a hairy texture without making it look messy, use many short, fine lines that follow the curve of the leg or body. Don’t draw individual hairs; instead, suggest the texture through density and direction of these strokes. Vary the pressure slightly for a more natural feel.
Should I draw all eight eyes on a spider?
For a beginner’s guide, drawing just two prominent eyes is perfectly fine and often sufficient to convey “spider.” If you want more realism, you can add more eyes, usually clustered in specific patterns depending on the spider species. Reference photos are very helpful for this.
How can I make my spider look less scary?
To make a spider look less intimidating, focus on softer lines and perhaps a slightly more rounded, less angular shape for the body and legs. Avoid overly sharp fangs or aggressive poses. You can also give it a slightly curious or contemplative posture rather than an attacking one.
Our Top Recommended Finds
- Sketching Pencil Set: A good set with a range of graphite hardness (HB, 2B, 4B, 6B) will provide all the tools you need for sketching and shading.
- Kneaded Eraser: This type of eraser is fantastic for lifting graphite gently, creating soft highlights, and cleaning up without smudging or damaging the paper.
- Blending Stumps or Tortillons: These paper tools help you smooth out graphite, create even shading, and blend transitions between tones for a professional finish.
Embrace Your Inner Arachnid Artist
You’ve just completed a journey into the intricate world of drawing spiders. From basic shapes to detailed shading, each step builds confidence and skill. This process isn’t just about drawing a spider; it’s about understanding form, light, and texture.
Keep practicing these techniques, and don’t be afraid to experiment with different spider species or poses. Pick up your pencil right now and try drawing another one, perhaps from a new angle. The more you draw, the better you’ll become at capturing the beauty in every creature.
& Painting
No rigid rules or pretension. Just practical guides, medium comparisons, and encouraging tips to help you enjoy the drawing & painting process.