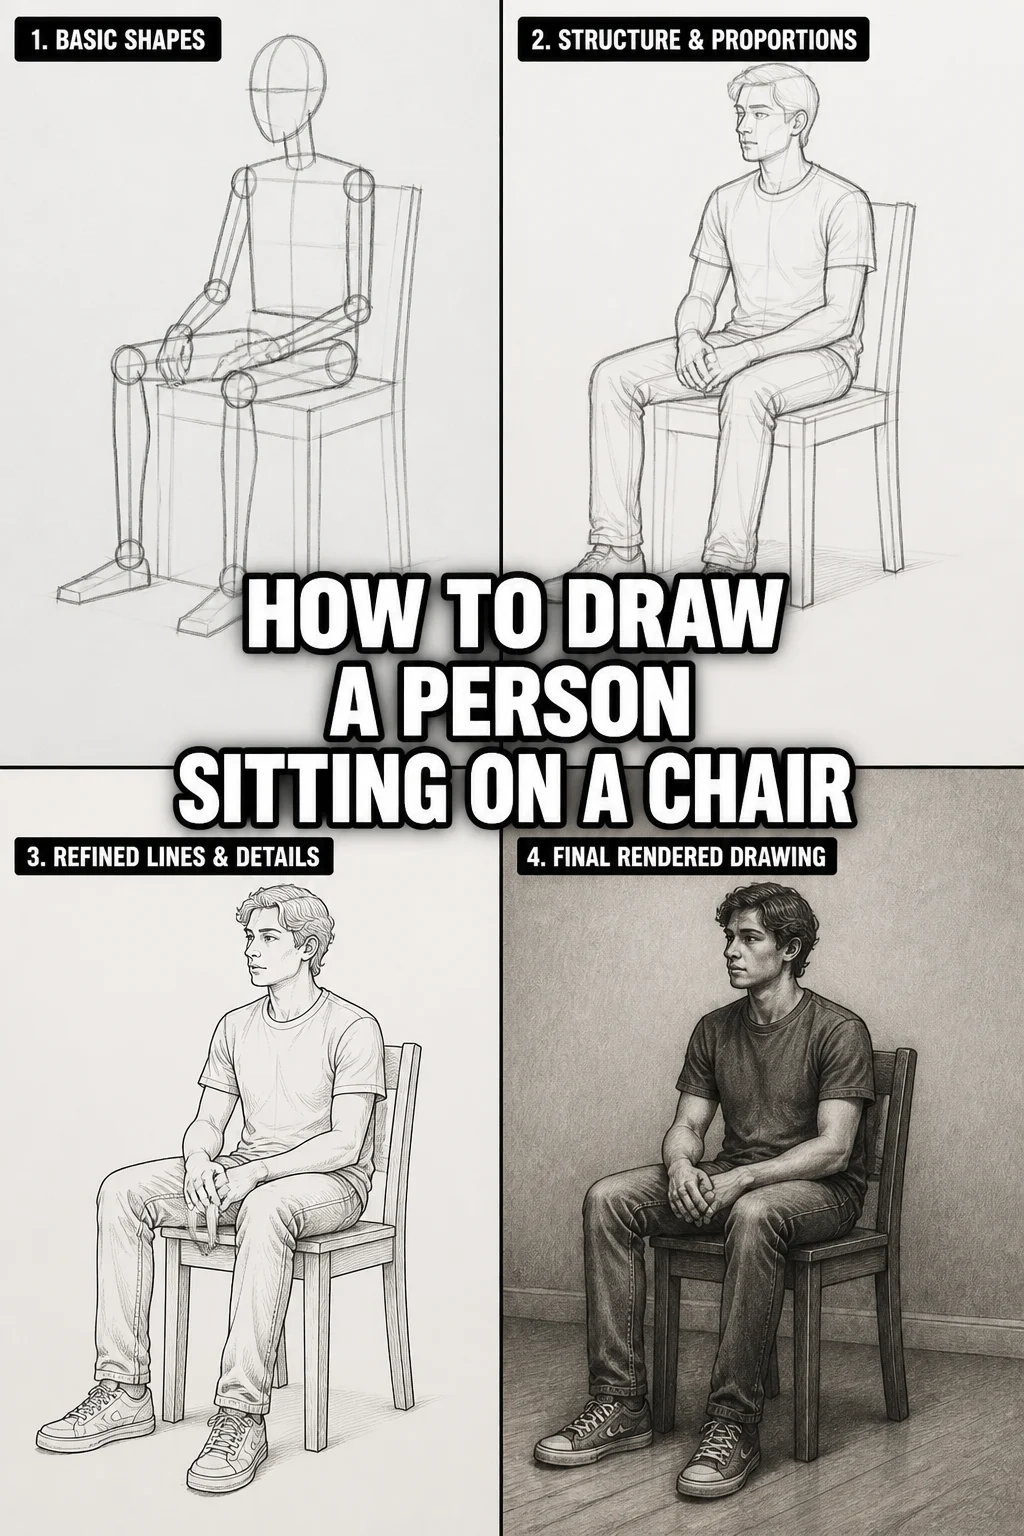
🪑 How To Draw A Person Sitting On A Chair
Have you ever tried to draw someone relaxing, only for them to look like they’re floating or about to fall off their seat? It’s a common challenge. Getting a person and their furniture to feel connected on paper can be tricky.
I remember my early attempts often resulted in stiff figures awkwardly perched. This guide will help you create a natural, believable scene. We’ll build confidence and skill together.
Quick Overview
This guide will walk you through the process of drawing a person comfortably seated on a chair. You’ll learn to establish proportion, perspective, and natural posture. By the end, you’ll have a drawing that feels grounded and lifelike.
- Time needed: 60-90 minutes (can be longer for detailed work)
- Difficulty: Intermediate
- What you’ll need: Pencil (HB, 2B), eraser (kneaded and vinyl), drawing paper, reference photos
Step-by-Step Instructions
Step 1: Gather Your References and Set Up
Begin by finding good reference images. Look for photos of people sitting in various chairs, paying attention to posture and how the body interacts with the seat. A clear understanding of your subject is crucial.
Choose a comfortable drawing environment with good lighting. Ensure you have all your materials ready. This preparation saves time and reduces frustration.
Pro Tip: Don’t just use one reference. Combine several to understand different angles and details. This prevents your drawing from looking like a direct copy.
Step 2: Establish the Overall Composition and Eye Level
Lightly sketch the general placement of your subject and chair on the page. Think about where the horizon line or eye level will be. This initial placement dictates the perspective of both the chair and the figure.
Draw a faint horizontal line across your paper to represent the eye level. This line is fundamental for consistent perspective later on. It helps to ground your scene.
Step 3: Block Out the Chair’s Basic Form
Start by drawing the chair as a series of simple geometric shapes. Use cubes and cylinders to represent the seat, back, and legs. Focus on getting the basic dimensions and perspective right.
Pay close attention to how the chair recedes into space. Use your eye level line to guide the convergence of lines. Ensure the chair looks solid and stable.
Pro Tip: Imagine the chair as a transparent box. This helps you understand its three-dimensional form and how the legs connect to the seat and back.
Step 4: Sketch the Human Figure’s Major Masses
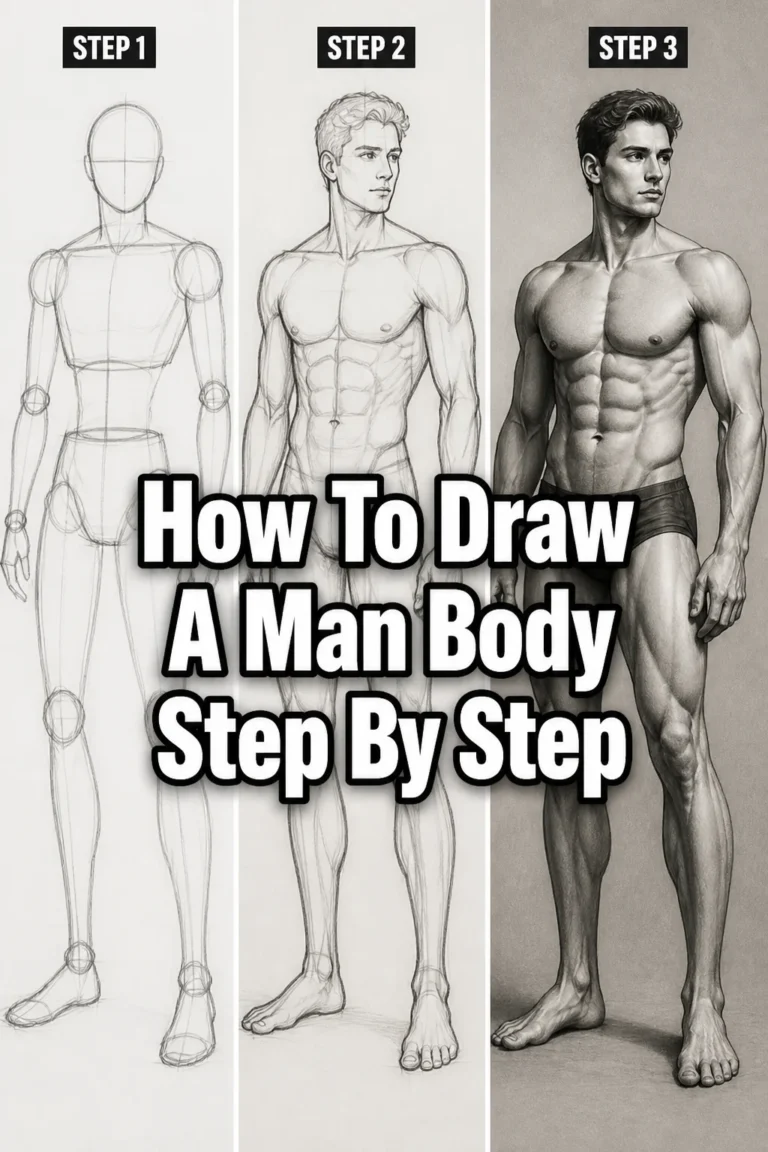
Now, lightly block in the major forms of the human figure. Use simple ovals for the head, ribcage, and pelvis. Connect these with a curved line to represent the spine. This establishes the gesture and overall pose.
Place these masses within the chair’s structure. Ensure the pelvis sits firmly on the seat and the back rests against the chair back. Think about the figure’s weight distribution.
Step 5: Refine the Figure’s Pose and Add Limbs
Once the main masses are in place, connect them with lines for the limbs. Use circles for joints (shoulders, elbows, wrists, hips, knees, ankles). These act as pivots.
Draw the upper and lower arm, and upper and lower leg segments. Consider foreshortening if parts of the limbs are coming towards or away from you. Make sure the limbs follow the natural curvature of the body.
Pro Tip: Focus on the “line of action” for the entire figure. This is an imaginary line that conveys the main movement and energy of the pose, making it feel more dynamic.
Step 6: Develop Proportions and Anatomy
With the basic structure down, start refining the shapes. Flesh out the limbs and torso, paying attention to anatomical landmarks. Ensure the proportions are accurate.
Use your references to check the length of arms, legs, and the size of the head in relation to the body. Don’t worry about details yet; focus on the overall form. This stage is about making the figure look anatomically correct.
Step 7: Add Details to the Figure and Chair
Now, it’s time to add clothing, facial features, hands, and feet to your figure. Draw the folds in the clothing, considering how they drape and wrinkle over the body’s forms. Think about gravity and tension.
Refine the chair’s details, such as armrests, upholstery, or specific design elements. Ensure these details align with the chair’s overall perspective. Make the chair look like it belongs in the scene.
Step 8: Clean Up Lines and Introduce Shading
Erase your initial construction lines lightly. Then, go over your preferred lines to make them clearer and more confident. This defines the final outline of your drawing.
Begin adding basic shading to create form and depth. Identify your light source and shade accordingly. Darker areas will recede, while lighter areas will come forward.
Pro Tip: Use a kneaded eraser to lift graphite without smudging. This is excellent for refining edges and cleaning up stray marks.
Step 9: Final Touches and Blending
Deepen your shadows and refine your mid-tones. Use blending tools like a tortillon or cotton swab for smooth transitions, if desired. Add textures to clothing, hair, and the chair material.
Step back and review your drawing. Check for any inconsistencies in proportion, perspective, or shading. Make any final adjustments to bring the drawing to life.
Common Mistakes to Avoid
Floating or Sinking Figures
A common issue is when the person doesn’t seem connected to the chair. This often happens because the chair and figure are drawn as separate entities without considering their interaction. Always ensure the figure’s weight is convincingly resting on the seat, and the chair’s legs are firmly on the ground plane. Draw the overlap of the body over the chair.
Stiff or Unnatural Poses
Many beginners draw figures that look rigid, like mannequins. This usually comes from focusing too much on individual body parts rather than the overall gesture. Start with a line of action and basic masses to capture movement and flow. Let the body relax into the chair; observe how real people sit.
Incorrect Perspective for the Chair
The chair itself can be a challenge. If the perspective is off, the chair will look distorted or flat. Always establish your eye level and use vanishing points for the chair’s receding lines. Pay close attention to the angles of the seat and back, ensuring they align with your chosen perspective.
Inconsistent Proportions
Drawing a person with arms too long, a head too big, or legs too short can break the illusion. Always compare body parts to each other. Use your head unit as a basic measurement tool for the rest of the body. Regular practice with figure drawing helps develop an eye for accurate proportions.
Troubleshooting
My Figure Looks Stiff and Unnatural
This is a common hurdle. To fix it, go back to the gesture drawing stage. Instead of drawing outlines, focus on the flow and movement of the body. Use a single, flowing line to capture the spine’s curve and the overall lean of the pose. Exaggerate it slightly at first.
Consider the relationship between the major forms (head, ribcage, pelvis). How do they tilt and twist in relation to each other? Think about the weight of the body and how it settles into the chair.
The Chair Looks Flat or Doesn’t Have Depth
If your chair lacks dimension, it’s often a perspective issue. Revisit your eye level and vanishing points. Ensure all parallel lines on the chair (like the top and bottom of the seat, or the sides of the legs) converge towards the correct vanishing points on your horizon line.
Try drawing through the chair, imagining its back and bottom planes, even if they’re hidden. This helps reinforce its three-dimensional structure. Adding proper shading will also significantly enhance its depth.
My Proportions Are Off, Even With References
Sometimes, seeing the error is harder than fixing it. Try flipping your drawing upside down or viewing it in a mirror. This can reveal inconsistencies you missed. Use negative space (the space around the figure) to help gauge proportions.
Measure lengths with your pencil directly from your reference photo and transfer those ratios to your drawing. Don’t be afraid to erase and redraw sections. It’s part of the learning process.
Key Takeaways
- Start with simple shapes: Break down both the figure and the chair into basic geometric forms to establish structure.
- Prioritize gesture and flow: Capture the overall movement and relaxed posture of the figure before adding details.
- Master perspective for the chair: Use eye level and vanishing points to ensure the chair looks solid and three-dimensional.
- Integrate figure and chair: Ensure the person genuinely interacts with and is supported by the chair, avoiding a “floating” look.
- Layer your drawing: Begin with light construction lines, then refine and add details, finishing with shading.
- Use references wisely: Observe how real people sit and how clothing drapes, but don’t just copy; understand the underlying forms.
Frequently Asked Questions
Do I need to be an expert in anatomy to draw a person sitting?
No, you don’t need to be an anatomy expert. A basic understanding of human proportions and how the major joints work is sufficient. Focus on capturing the overall form and gesture rather than every muscle. References are your best friend here.
How do I make the pose look natural and not stiff?
To avoid stiffness, start with a loose “gesture” drawing. Use quick, flowing lines to capture the energy and movement of the pose. Think about the spine’s curve and how the body relaxes into the chair. Don’t press hard; keep your lines light and exploratory.
What if I can’t get the chair’s perspective right?
Perspective can be challenging. Start by drawing a simple box. Then, try to fit the chair within that box, using the box’s corners and edges as guides for perspective. Practice drawing simple cubes from different angles to build your understanding before tackling a complex chair.
Should I draw the person or the chair first?
It’s generally best to block out both simultaneously. Establish the main forms of the chair, then place the main masses of the figure within it. This ensures the person is correctly seated and the chair supports them. They should be drawn as an integrated unit.
Our Top Recommended Finds
- Strathmore 400 Series Sketch Pad: This paper has a good tooth for graphite and holds up well to erasing. It’s a reliable choice for practice and finished sketches.
- Staedtler Mars Lumograph Graphite Pencils (HB, 2B, 4B): A set of these pencils offers a versatile range of hardness for sketching, detailing, and shading. They are smooth and consistent.
- Faber-Castell Kneaded Eraser: Essential for lifting graphite gently without smudging. It’s perfect for cleaning up construction lines and creating highlights.
Embrace the Art of Observation
Drawing a person sitting on a chair is more than just putting lines on paper. It’s about observing weight, balance, and the subtle nuances of human posture. Each attempt refines your eye and strengthens your hand.
Don’t let perfection be the enemy of progress. Pick up your pencil right now and start sketching. The more you practice, the more intuitive the process will become. Keep exploring different poses and chair types to expand your skills even further.