🪶 How To Draw A Crow Step By Step Easy
I remember my first attempt at drawing a crow. It looked more like a lumpy pigeon than the intelligent, sleek bird I admired. This guide comes from years of sketching and understanding bird anatomy.
You can definitely learn to capture that distinctive crow silhouette. I’ll show you how to draw a crow that looks both realistic and full of character, even if you’re just starting out.
Quick Overview
You’re about to embark on a fun drawing journey. By the end, you’ll have a complete crow illustration you can be proud of. We’ll build the drawing up from simple shapes.
- Time needed: 30-45 minutes
- Difficulty: Beginner
- What you’ll need: Pencil, eraser, paper, optional fine-liner and shading tools
Step-by-Step Instructions
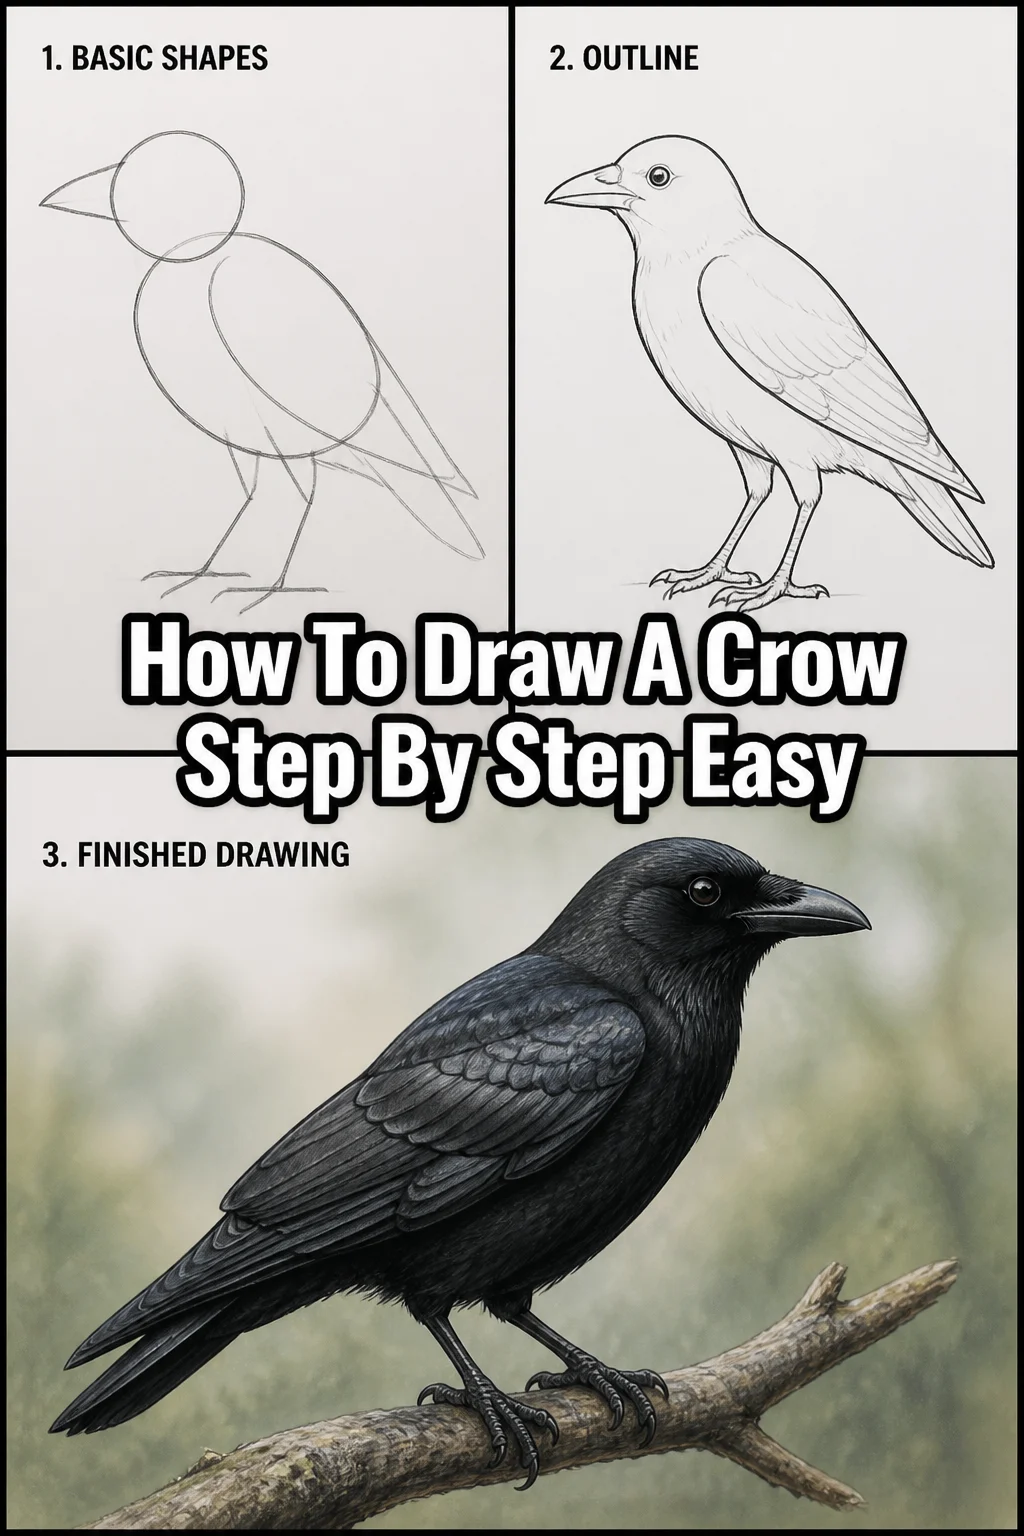
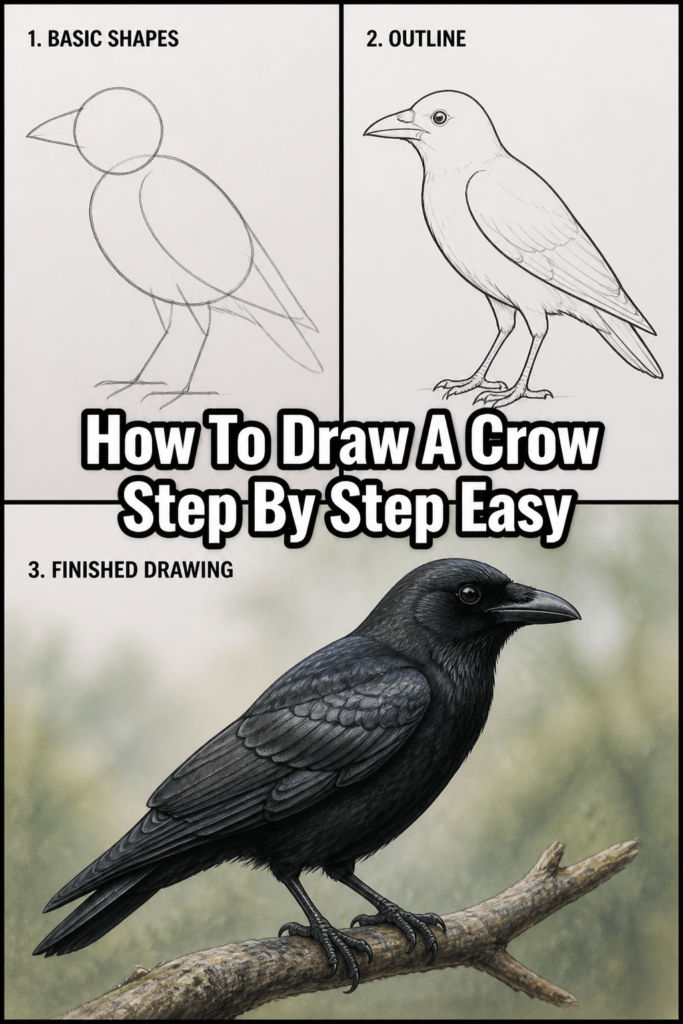
Step 1: Lay Down the Basic Shapes
Begin by lightly sketching two overlapping ovals for the crow’s body and head.
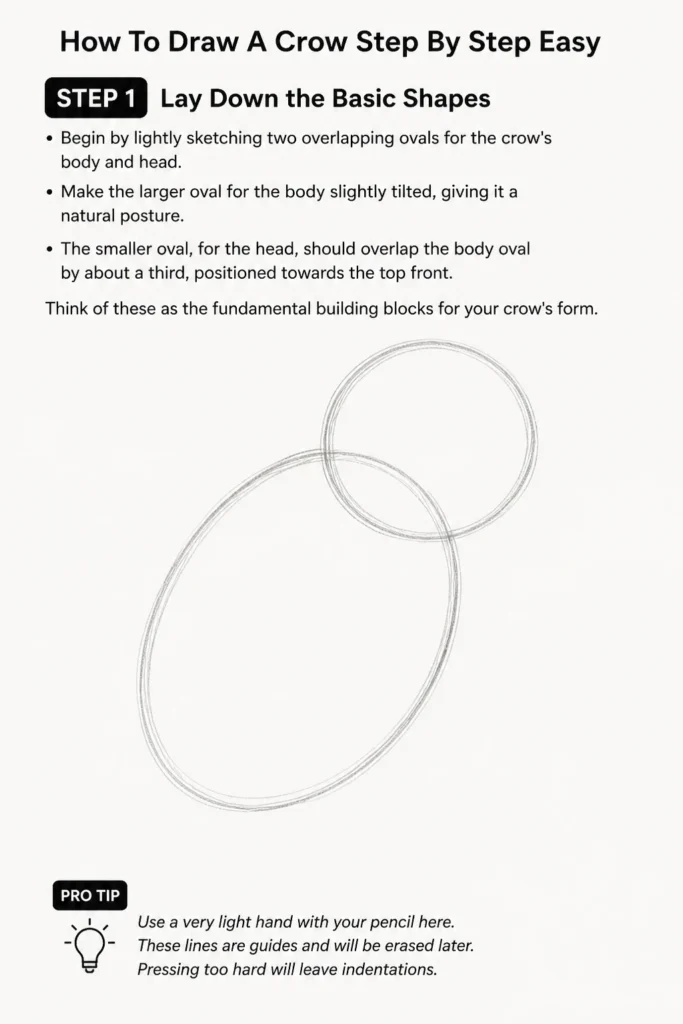
Make the larger oval for the body slightly tilted, giving it a natural posture.
The smaller oval, for the head, should overlap the body oval by about a third, positioned towards the top front.
Think of these as the fundamental building blocks for your crow’s form.
Pro Tip: Use a very light hand with your pencil here. These lines are guides and will be erased later. Pressing too hard will leave indentations.
Step 2: Connect the Neck and Add the Beak
Connect the head and body ovals with two curved lines to form the crow’s neck.
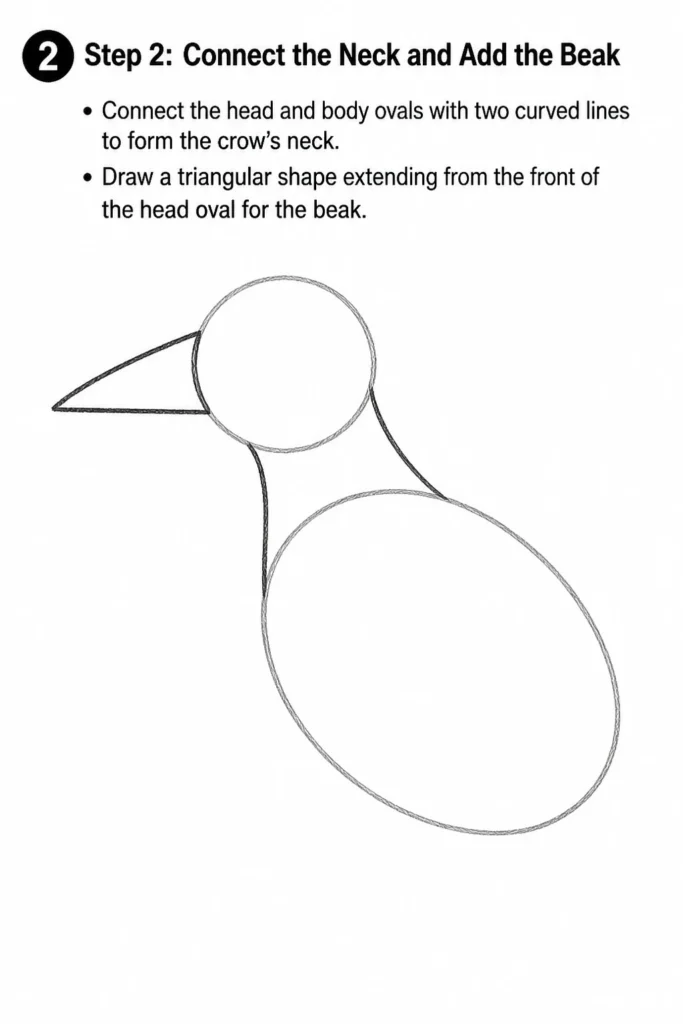
Crows have thick necks, so these lines should be relatively short and robust, not too thin.
Now, draw a triangular shape extending from the front of the head oval for the beak.
The crow’s beak is long and sturdy, so make sure it has a good sense of weight and purpose.
Step 3: Sketch the Tail and Legs
Add a broad, fan-like shape at the back of the body oval for the tail.
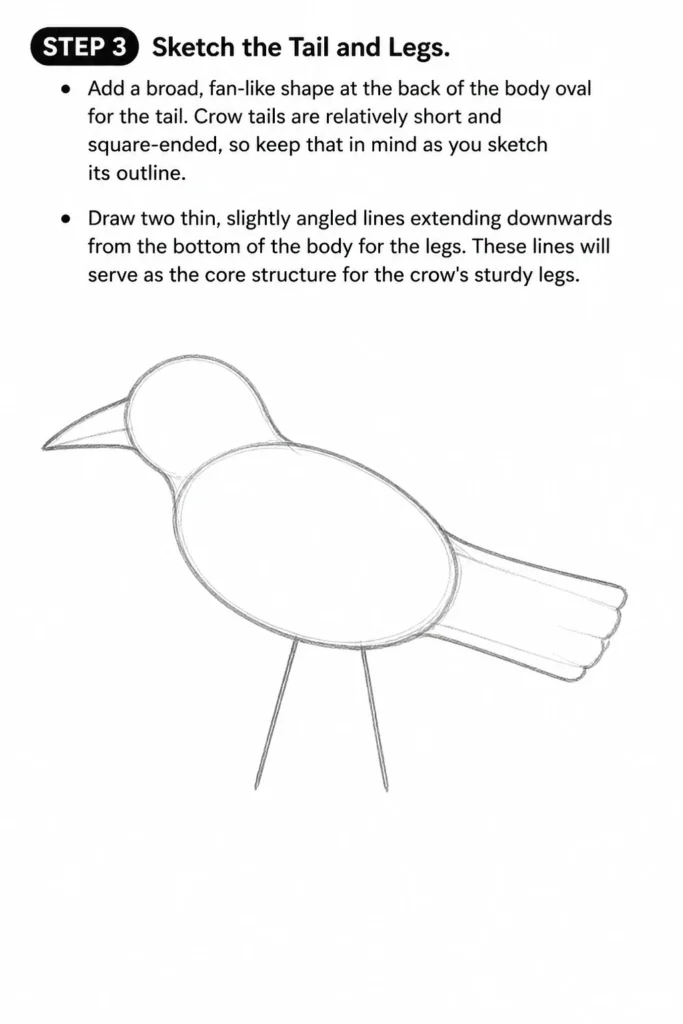
Crow tails are relatively short and square-ended, so keep that in mind as you sketch its outline.
Draw two thin, slightly angled lines extending downwards from the bottom of the body for the legs.
These lines will serve as the core structure for the crow’s sturdy legs.
Step 4: Refine the Body Outline
Start to smooth out the initial oval shapes, connecting them with more natural, flowing lines.
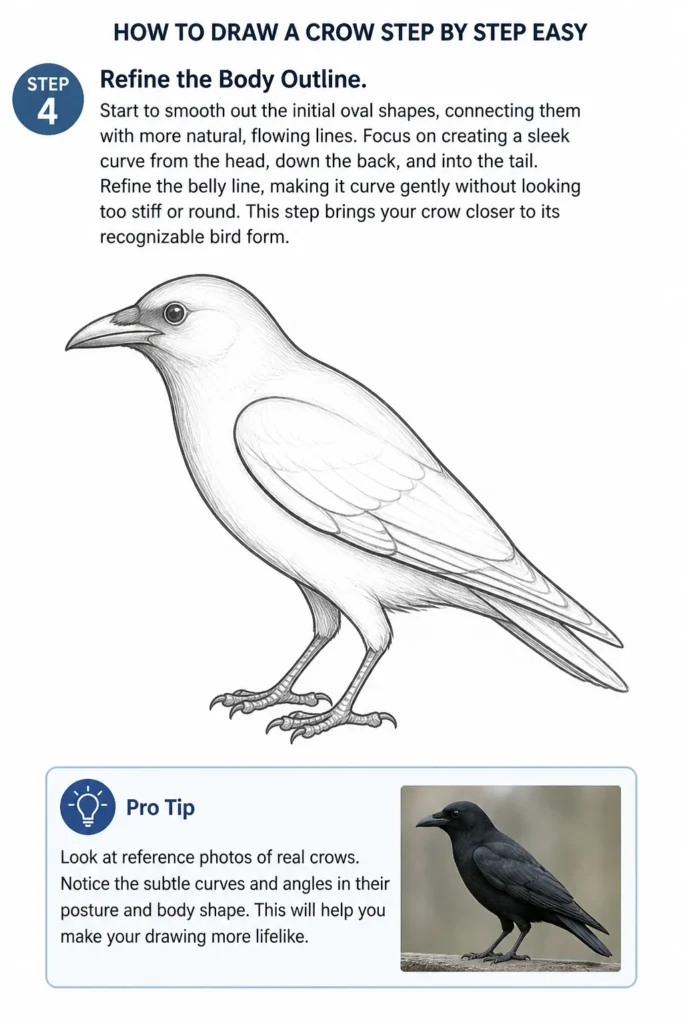
Focus on creating a sleek curve from the head, down the back, and into the tail.
Refine the belly line, making it curve gently without looking too stiff or round.
This step brings your crow closer to its recognizable bird form.
Pro Tip: Look at reference photos of real crows. Notice the subtle curves and angles in their posture and body shape. This will help you make your drawing more lifelike.
Step 5: Detail the Head and Legs
Draw a small circle for the eye, positioning it slightly above the beak line on the head.
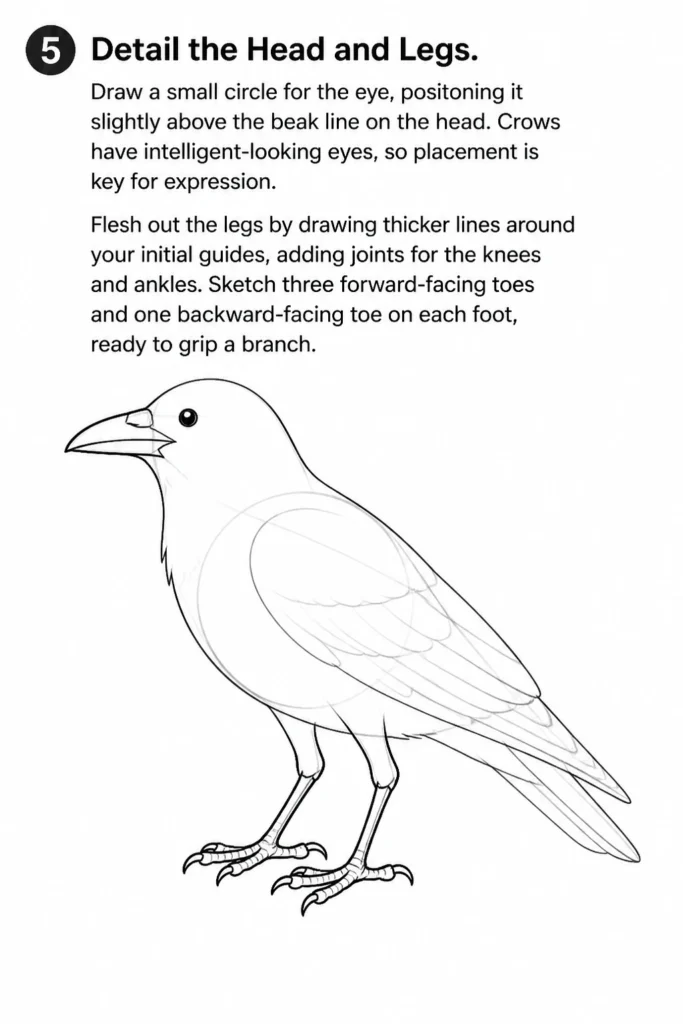
Crows have intelligent-looking eyes, so placement is key for expression.
Flesh out the legs by drawing thicker lines around your initial guides, adding joints for the knees and ankles.
Sketch three forward-facing toes and one backward-facing toe on each foot, ready to grip a branch.
Step 6: Outline the Wings
Indicate the primary wing shape, starting from the shoulder area on the back.
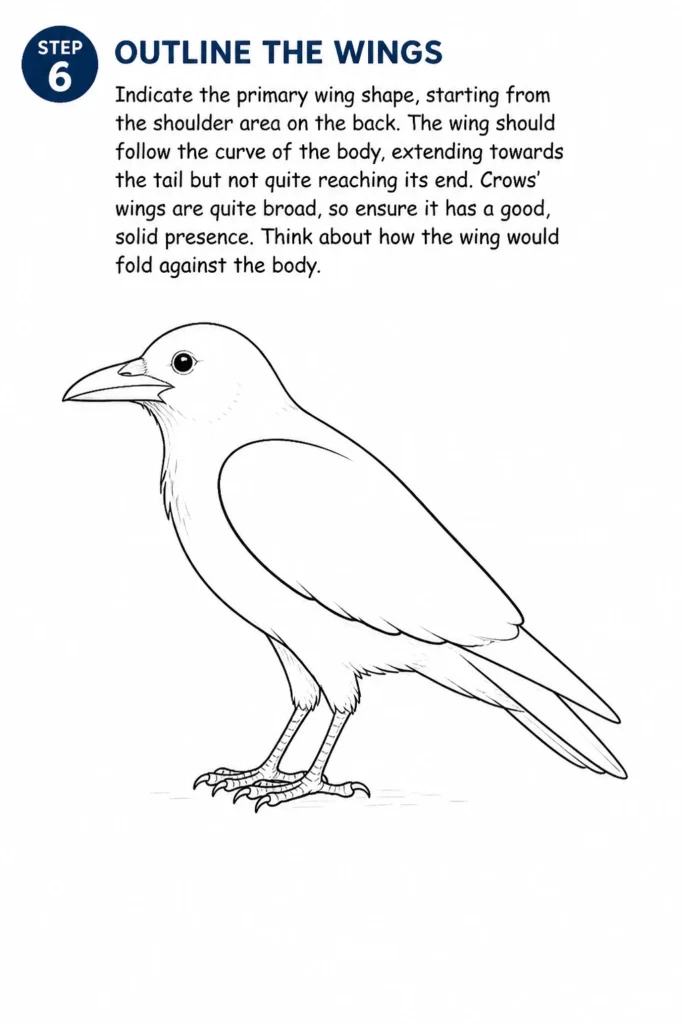
The wing should follow the curve of the body, extending towards the tail but not quite reaching its end.
Crows’ wings are quite broad, so ensure it has a good, solid presence.
Think about how the wing would fold against the body.
Step 7: Add Feather Details
Draw individual feather shapes along the edge of the wing, especially the primary flight feathers.
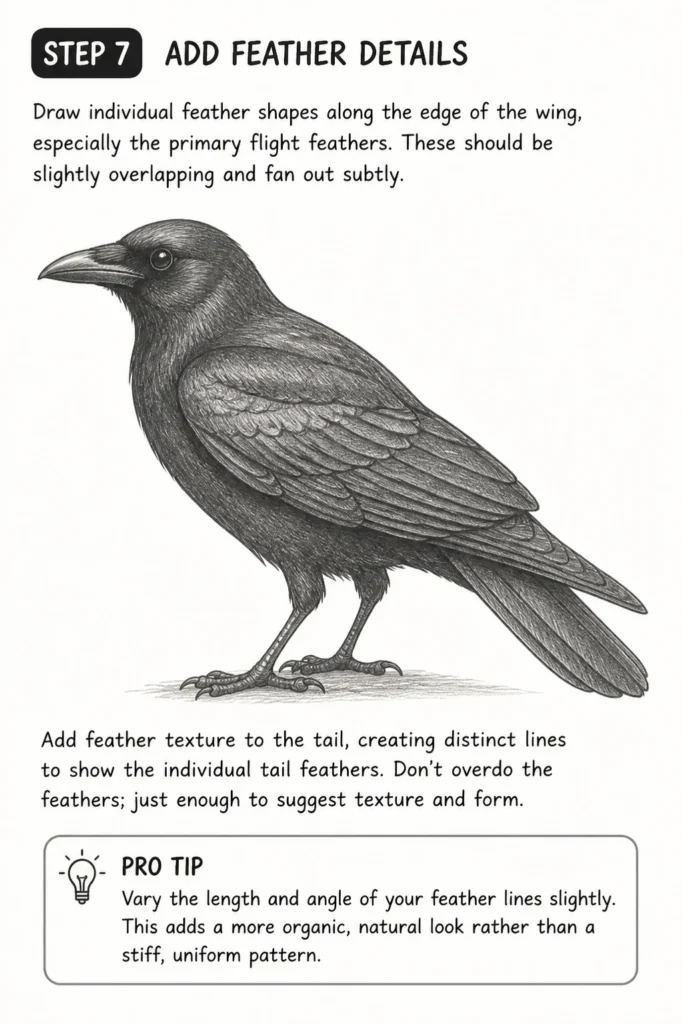
These should be slightly overlapping and fan out subtly.
Add feather texture to the tail, creating distinct lines to show the individual tail feathers.
Don’t overdo the feathers; just enough to suggest texture and form.
Pro Tip: Vary the length and angle of your feather lines slightly. This adds a more organic, natural look rather than a stiff, uniform pattern.
Step 8: Erase Guidelines and Clean Up
Carefully erase all the initial light sketch lines and overlapping oval guides.
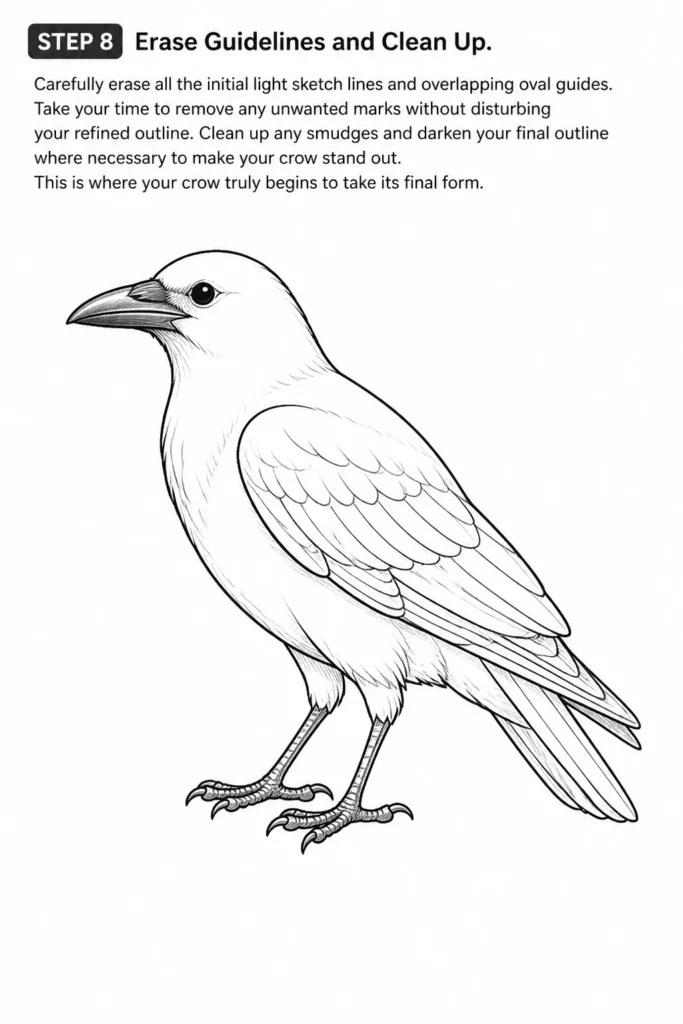
Take your time to remove any unwanted marks without disturbing your refined outline.
Clean up any smudges and darken your final outline where necessary to make your crow stand out.
This is where your crow truly begins to take its final form.
Step 9: Shading for Depth (Optional)
Consider adding some light shading to give your crow depth and dimension.
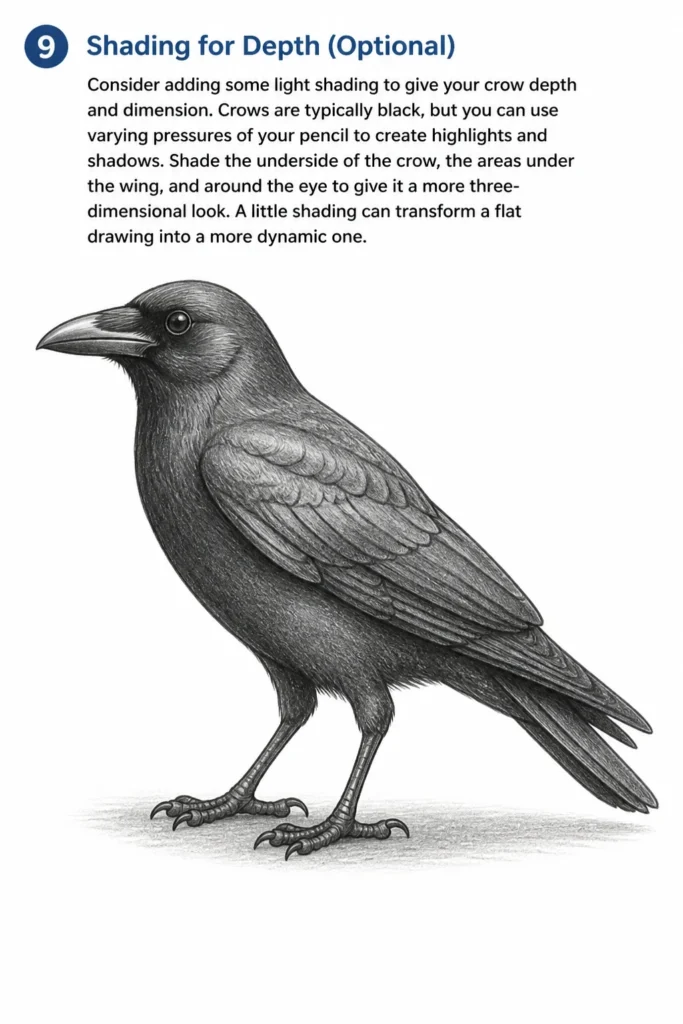
Crows are typically black, but you can use varying pressures of your pencil to create highlights and shadows.
Shade the underside of the crow, the areas under the wing, and around the eye to give it a more three-dimensional look.
A little shading can transform a flat drawing into a more dynamic one.
Common Mistakes to Avoid
Making the Body Too Round or Thin
Beginners often draw the crow’s body as a perfect circle or an overly slender tube. Crows have a stout, somewhat football-shaped body, with a noticeable curve to their back and belly.
Avoid making it look like a generic bird. Pay attention to the specific robust proportions of a crow. Their bodies have a solid, dense feel.
Disproportionate Beak Size
Another common error is drawing the beak too small or too large for the head. A crow’s beak is strong and quite prominent, but it should still be in proportion to its head size.
It’s a powerful tool for them, so give it the right length and thickness without making it look like an oversized novelty item. Practice getting the length just right, extending from the forehead to the tip.
Stiff or Unnatural Legs
Drawing legs as two straight, rigid sticks can make your crow look like it’s frozen. Crows have strong, jointed legs that allow them to perch, walk, and hop.
Focus on adding those subtle bends at the knee and ankle joints. Their feet are also designed for gripping, so ensure the toes have a natural, spread out appearance rather than being bunched together.
Over-detailing Feathers Too Early
It’s tempting to draw every single feather, but this can make your crow look busy and unrealistic. The goal is to suggest feathers, not to illustrate each one individually.
Focus on the overall feather patterns and textures on the wings and tail. Use a few well-placed lines to imply feather groups, especially along the edges of the wings and tail, rather than drawing a repetitive pattern all over the body.
Troubleshooting
My Crow Looks Flat
If your crow appears two-dimensional, it likely needs more depth and form. This often happens when lines are drawn too uniformly or without considering how light would fall on the bird.
To fix this, go back and add subtle shading. Darken the underside of the body, the areas under the wing, and around the eye. Use varying pencil pressure to create a sense of light and shadow, giving your crow a more rounded, three-dimensional appearance.
The Proportions Feel Off
If the head is too big for the body, or the tail is too short, your proportions are likely out of sync. This is a common issue that can be frustrating, but it’s fixable.
The best approach is to start over with very light sketch lines for the basic shapes. Continuously compare the size of one part to another. For example, check if the head is roughly one-fifth the size of the body. Use your eraser freely until the initial layout feels balanced before adding details.
My Lines Are Too Scratchy or Messy
Scratchy lines can make your drawing look unpolished, often a result of pressing too hard or trying to draw long lines in short, hesitant strokes. This can also happen when you’re uncertain about the shape you’re trying to create.
Practice drawing smooth, confident lines with a lighter touch. Instead of short, choppy strokes, try to draw longer, more fluid curves where possible. If you make a mistake, gently erase and redraw rather than trying to fix it with more scratchy lines.
Key Takeaways
- Start with Simple Shapes: Always begin with basic ovals and lines to establish the crow’s fundamental structure.
- Refine Gradually: Work from general shapes to specific details, progressively refining your lines and forms.
- Observe Proportions: Pay close attention to the relative sizes of the head, body, beak, and legs for a balanced drawing.
- Use Light Lines Initially: Keep your initial sketch lines very light for easy erasing and adjustments.
- Suggest, Don’t Over-detail: For features like feathers, aim to suggest texture and form rather than drawing every single detail.
- Practice Shading: Experiment with light and shadow to add depth and make your crow appear more three-dimensional.
Frequently Asked Questions
What kind of pencil is best for drawing a crow?
A standard HB pencil is excellent for initial sketching and outlining. For shading, you might find softer pencils like 2B or 4B useful for darker tones, while harder pencils like 2H can be great for light details and feathery textures. Ultimately, any pencil can work, but a range offers more versatility.
How do I make the crow look more realistic?
Realism comes from accurate proportions, subtle shading, and careful observation. Study reference photos of crows to understand their anatomy, feather patterns, and how light interacts with their dark plumage. Pay attention to the glint in their eye and the texture of their beak and feet. Adding a hint of context, like a branch, also helps.
Can I draw a crow in a different pose?
Absolutely! Once you master the basic standing pose, you can adapt these principles to other positions. Think about the crow’s action: is it flying, cawing, or foraging? Adjust the initial ovals and lines to reflect the new posture. For a flying crow, the wings would be extended, and the body position would be different. Always start with the core shapes of the new pose.
What if my crow looks too stiff?
A stiff crow often lacks natural curves and dynamic posture. Review your lines to ensure they flow rather than appearing rigid. Look at the neck, back, and wing lines. Are they too straight? Add subtle arcs and bends. Consider the crow’s weight distribution and how its body would naturally sag or curve. Exaggerating curves slightly can often add more life.
Our Top Recommended Finds
- Sketchbook with Smooth Paper: A good quality sketchbook provides a clean surface that handles erasing well and allows for smooth pencil strokes.
- Pencil Set with Varying Hardness: Having a range from H to B pencils gives you control over line weight and shading, making your drawing more dynamic.
- Kneaded Eraser: This type of eraser is fantastic for lifting graphite gently without smudging and can be molded into fine points for detailed corrections.
Embrace Your Inner Artist
You’ve just created a crow, a creature of intelligence and mystery, right there on your paper. This isn’t just about drawing a bird; it’s about building confidence in your artistic abilities. Every line you drew, every adjustment you made, honed your eye and your hand.
Keep practicing, keep observing the world around you, and let your creativity take flight. Why not try drawing a crow from a different angle next, or perhaps add a tree branch for it to perch on? The journey of an artist is one of continuous discovery.