🧍♀️ How To Draw A Person Easy Step By Step
Have you ever wanted to sketch a human figure but felt overwhelmed by its complexity? Many aspiring artists feel this way.
I remember my own early attempts, often ending with disproportionate stick figures or strangely angled limbs. It takes a clear method to simplify the process.
This guide breaks down drawing a person into manageable, confidence-building steps, helping you create figures you’ll be proud of.
Quick Overview
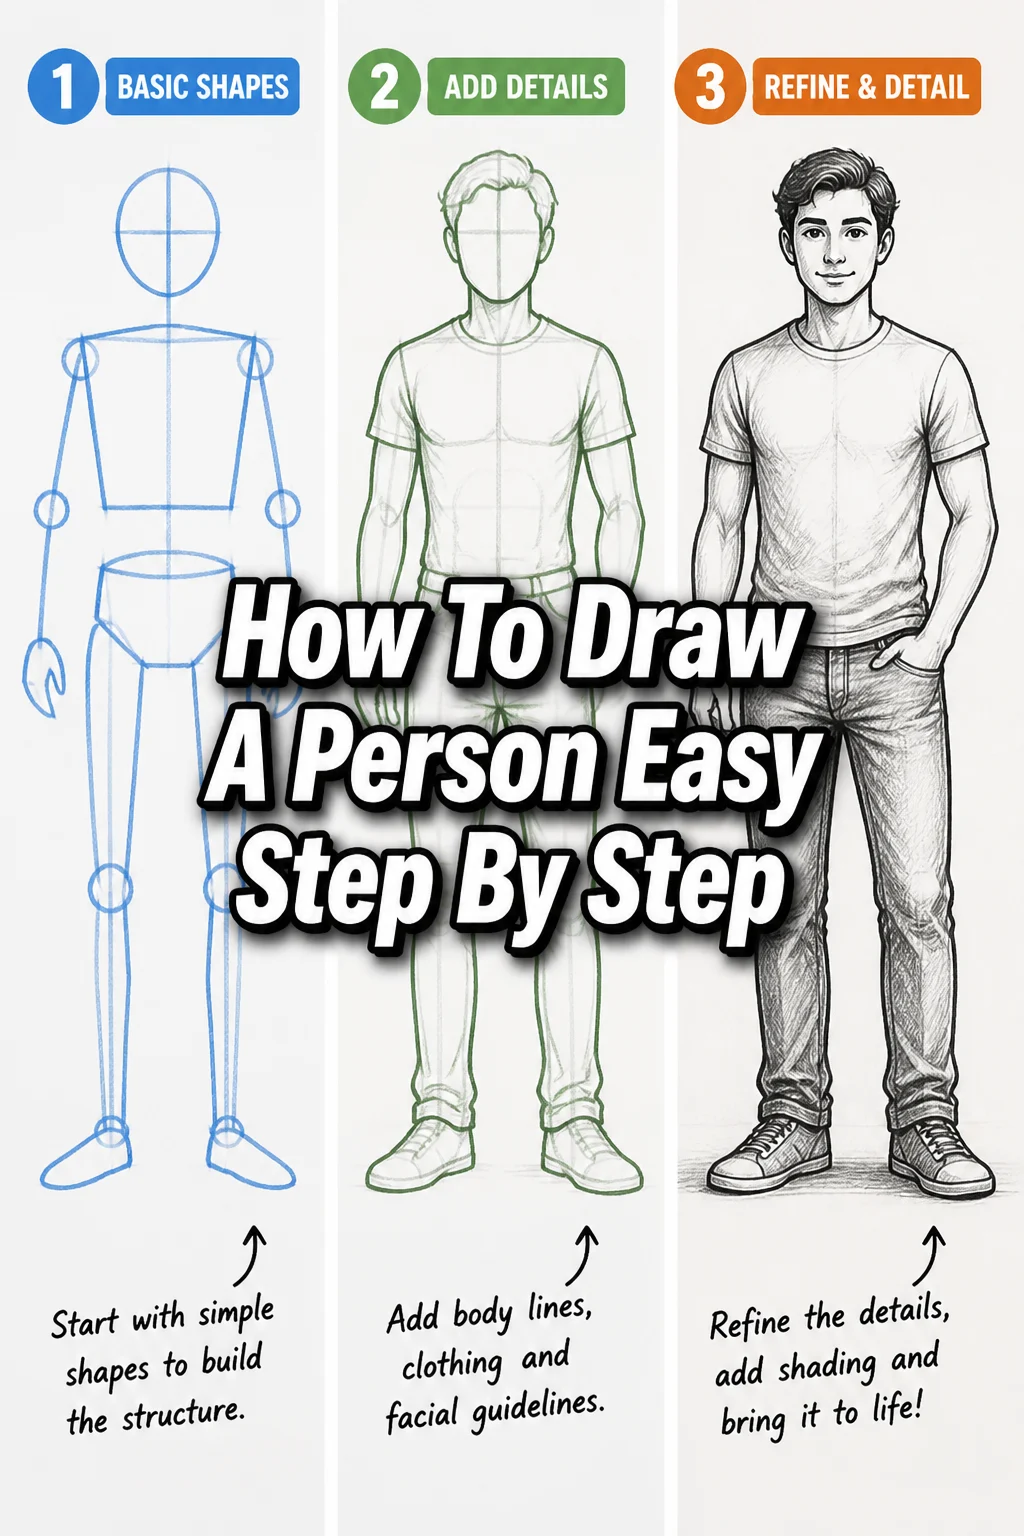
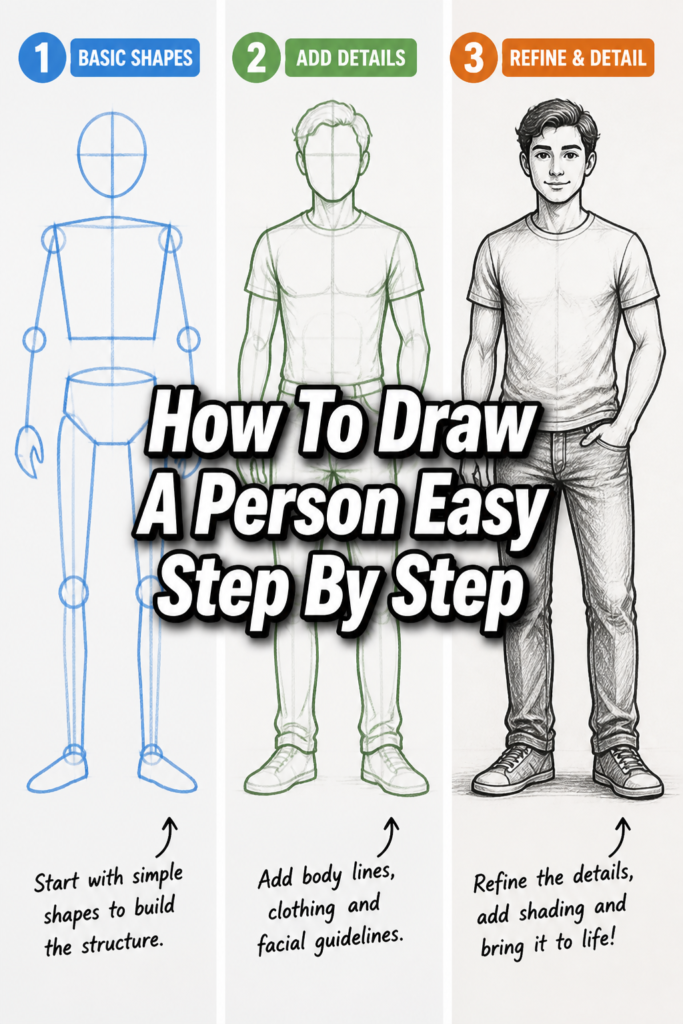
This guide will walk you through creating a full-body person drawing, focusing on simplified shapes and basic proportions. You will learn to build a figure from the ground up, making the entire process approachable.
- Time needed: 30-60 minutes
- Difficulty: Beginner
- What you’ll need: Pencil (HB or 2B recommended), Eraser, Paper
Step-by-Step Instructions
Step 1: Begin with a Gesture Line
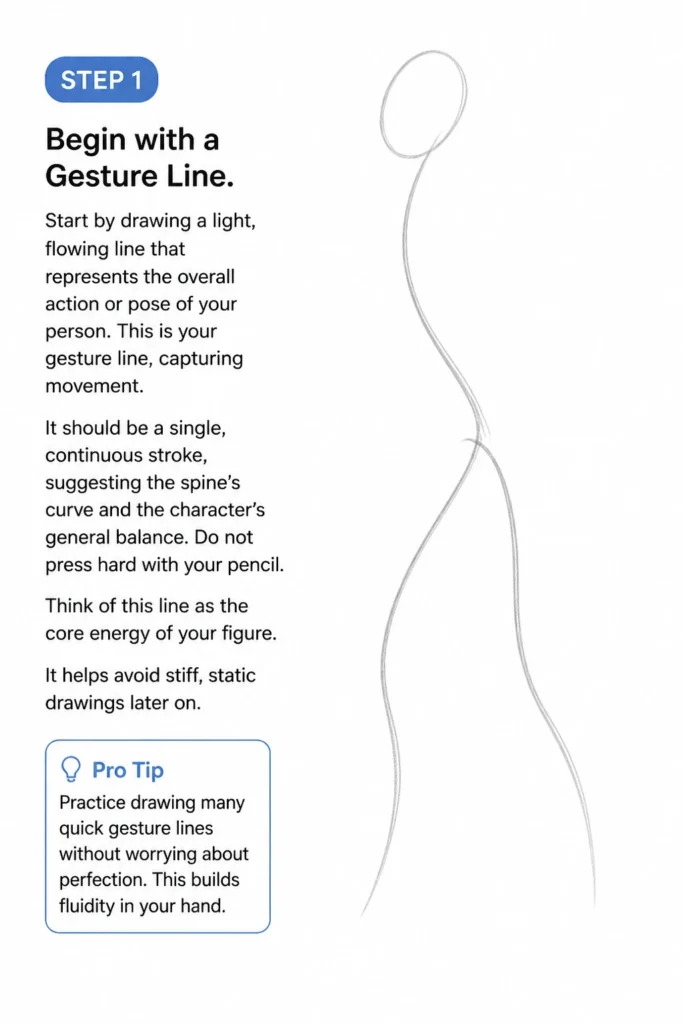
Start by drawing a light, flowing line that represents the overall action or pose of your person. This is your gesture line, capturing movement.
It should be a single, continuous stroke, suggesting the spine’s curve and the character’s general balance. Do not press hard with your pencil.
Think of this line as the core energy of your figure. It helps avoid stiff, static drawings later on.
Pro Tip: Practice drawing many quick gesture lines without worrying about perfection. This builds fluidity in your hand.
Step 2: Add the Head and Rib Cage
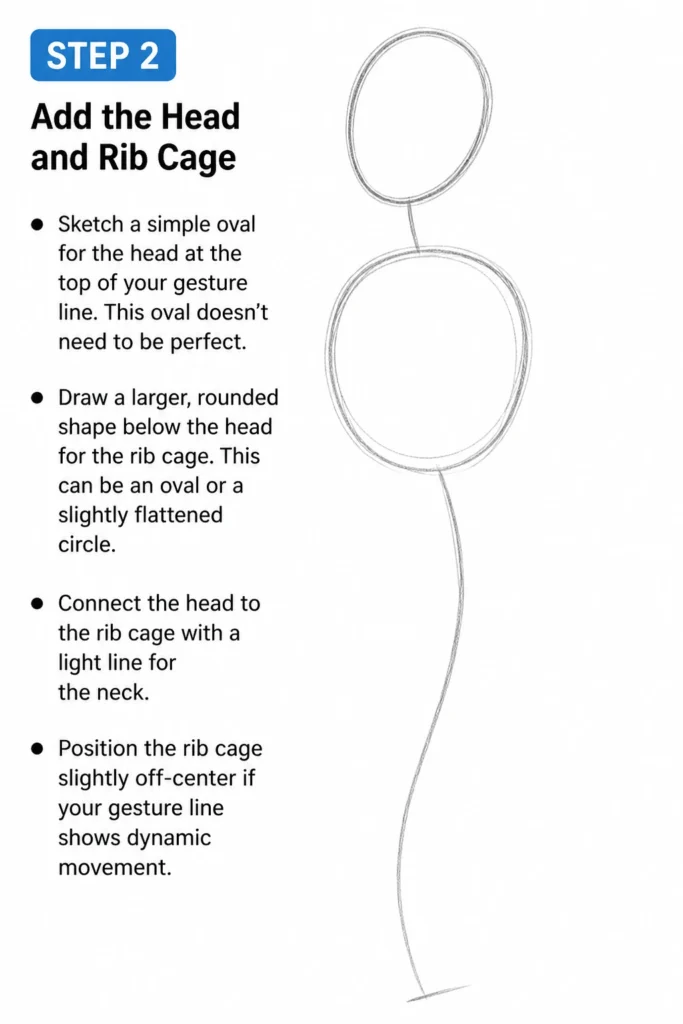
Sketch a simple oval for the head at the top of your gesture line. This oval doesn’t need to be perfect.
Draw a larger, rounded shape below the head for the rib cage. This can be an oval or a slightly flattened circle.
Connect the head to the rib cage with a light line for the neck. Position the rib cage slightly off-center if your gesture line shows dynamic movement.
Step 3: Define the Pelvis and Connect the Torso
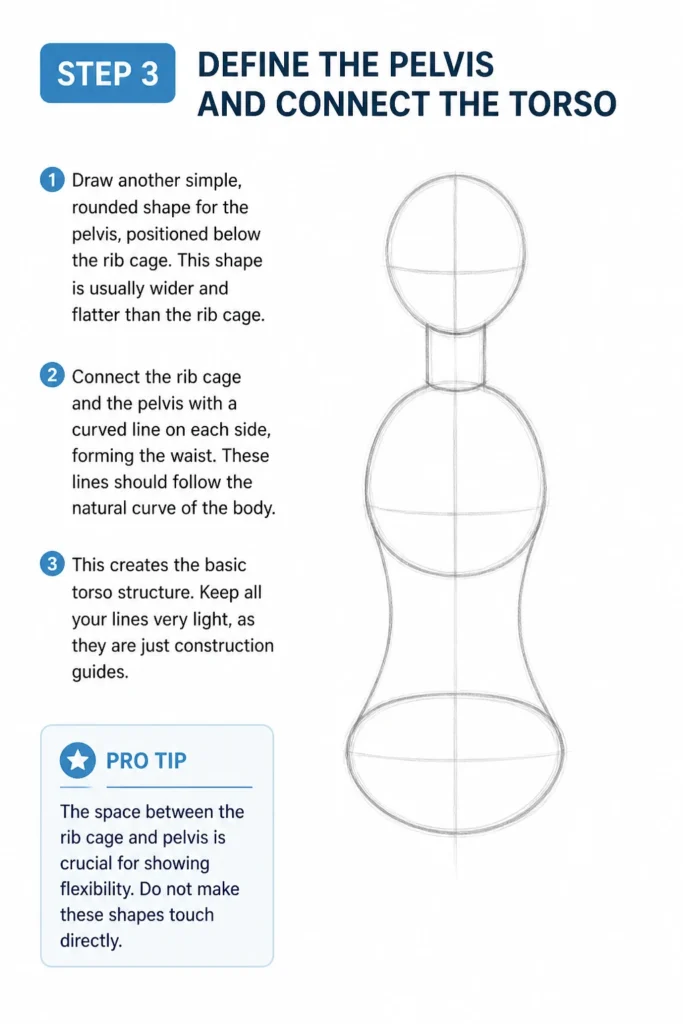
Draw another simple, rounded shape for the pelvis, positioned below the rib cage. This shape is usually wider and flatter than the rib cage.
Connect the rib cage and the pelvis with a curved line on each side, forming the waist. These lines should follow the natural curve of the body.
This creates the basic torso structure. Keep all your lines very light, as they are just construction guides.
Pro Tip: The space between the rib cage and pelvis is crucial for showing flexibility. Do not make these shapes touch directly.
Step 4: Outline the Limbs with Simple Lines
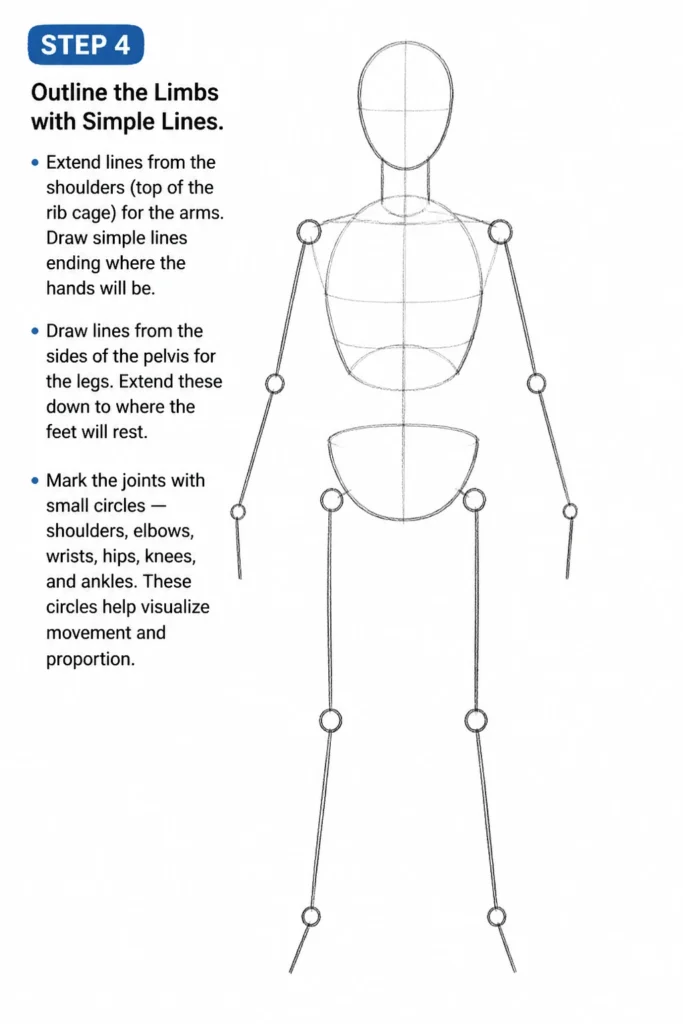
Extend lines from the shoulders (top of the rib cage) for the arms. Draw simple lines ending where the hands will be.
Draw lines from the sides of the pelvis for the legs. Extend these down to where the feet will rest.
Mark the joints with small circles: shoulders, elbows, wrists, hips, knees, and ankles. These circles help visualize movement and proportion.
Step 5: Establish Basic Proportions
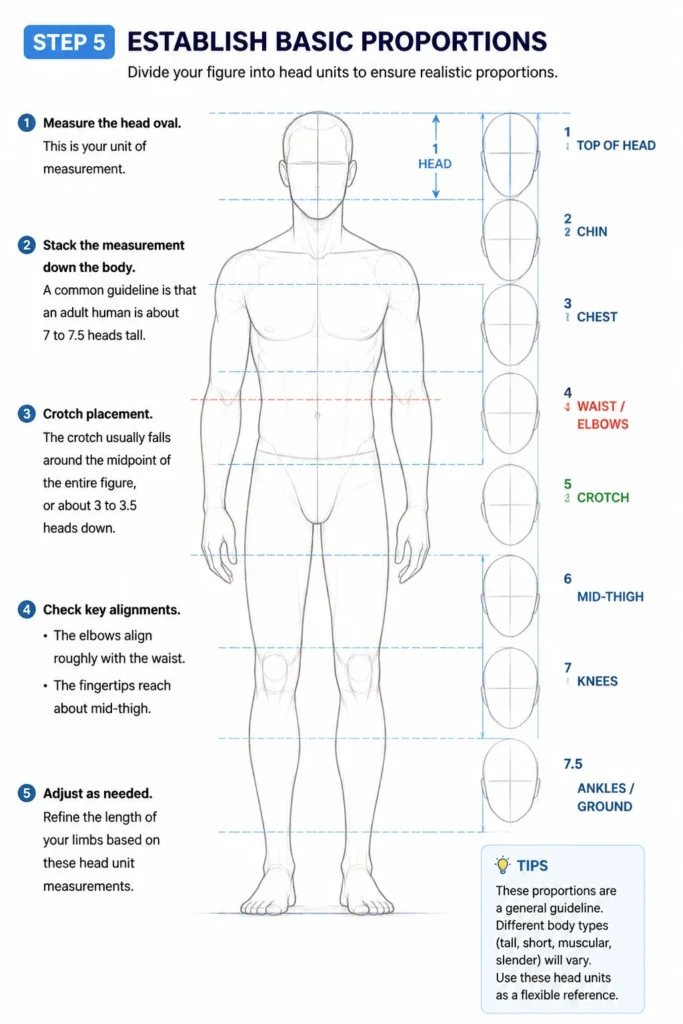
Divide your figure into head units to ensure realistic proportions. A common guideline is that an adult human is about 7 to 7.5 heads tall.
Measure the head oval. Then, mentally stack that measurement down the body. The crotch usually falls around the midpoint of the entire figure, or about 3 to 3.5 heads down.
Adjust the length of your limbs based on these head unit measurements. The elbows align roughly with the waist, and the fingertips reach about mid-thigh.
Step 6: Flesh Out the Form with Cylinders and Ovals
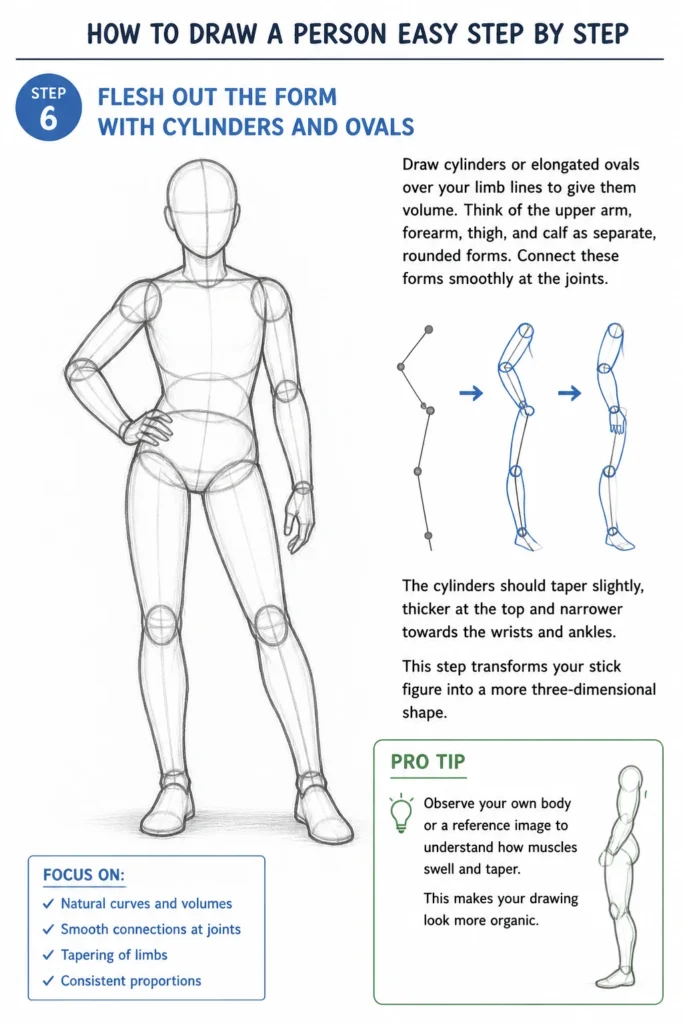
Draw cylinders or elongated ovals over your limb lines to give them volume. Think of the upper arm, forearm, thigh, and calf as separate, rounded forms.
Connect these forms smoothly at the joints. The cylinders should taper slightly, thicker at the top and narrower towards the wrists and ankles.
This step transforms your stick figure into a more three-dimensional shape. Focus on creating natural curves and volumes.
Pro Tip: Observe your own body or a reference image to understand how muscles swell and taper. This makes your drawing look more organic.
Step 7: Refine the Contours and Add Details
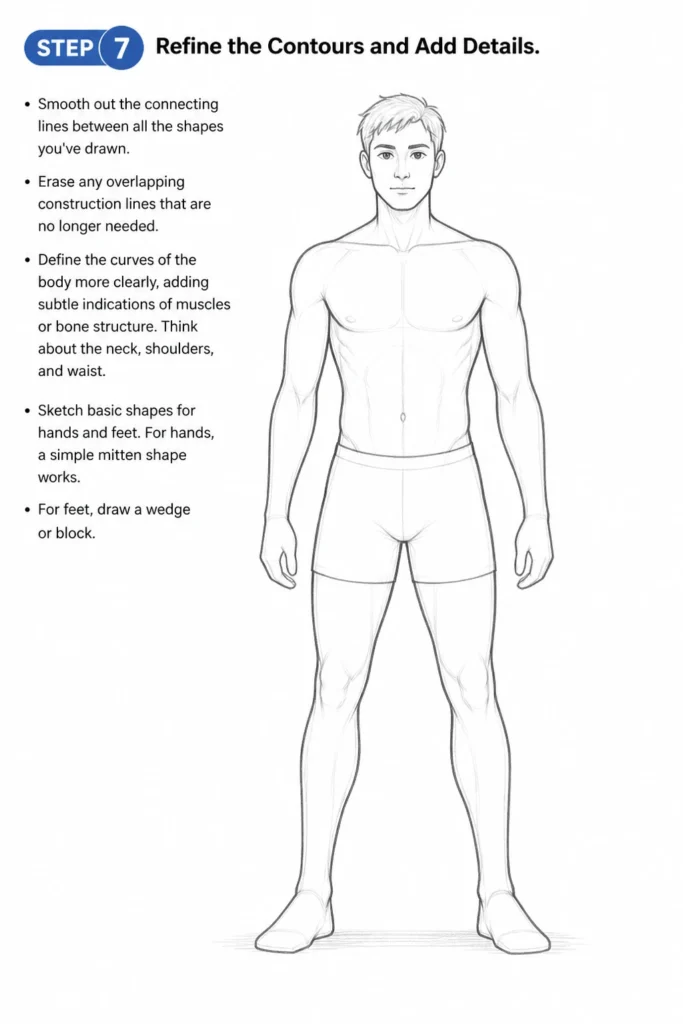
Smooth out the connecting lines between all the shapes you’ve drawn. Erase any overlapping construction lines that are no longer needed.
Define the curves of the body more clearly, adding subtle indications of muscles or bone structure. Think about the neck, shoulders, and waist.
Sketch basic shapes for hands and feet. For hands, a simple mitten shape works. For feet, draw a wedge or block.
Step 8: Place Facial Features and Hair
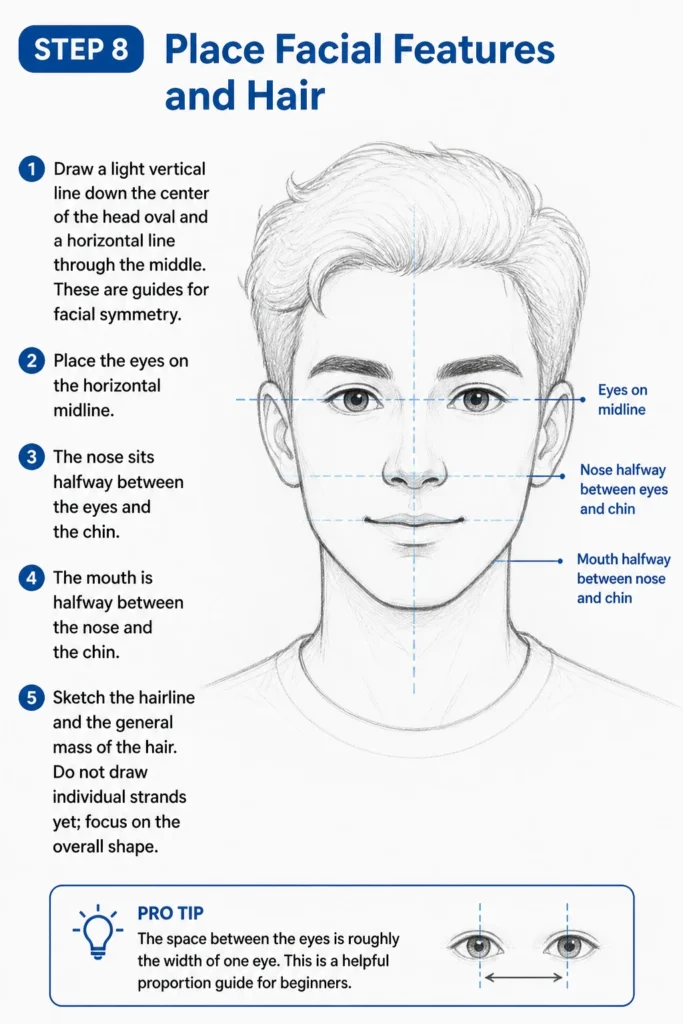
Draw a light vertical line down the center of the head oval and a horizontal line through the middle. These are guides for facial symmetry.
Place the eyes on the horizontal midline. The nose sits halfway between the eyes and the chin. The mouth is halfway between the nose and the chin.
Sketch the hairline and the general mass of the hair. Do not draw individual strands yet; focus on the overall shape.
Pro Tip: The space between the eyes is roughly the width of one eye. This is a helpful proportion guide for beginners.
Step 9: Add Clothing and Accessories
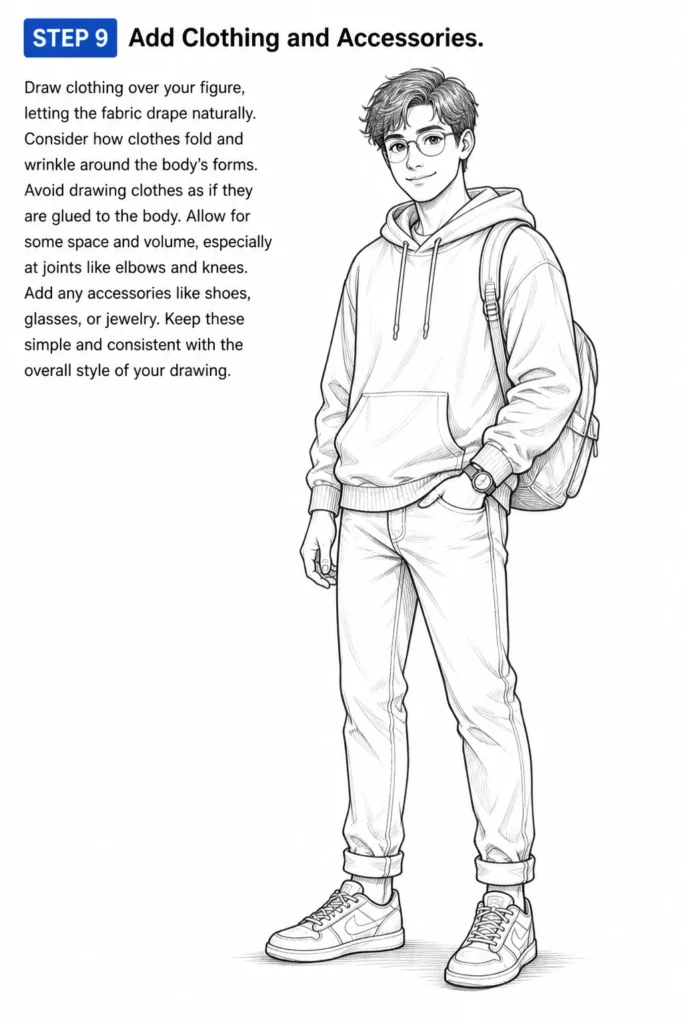
Draw clothing over your figure, letting the fabric drape naturally. Consider how clothes fold and wrinkle around the body’s forms.
Avoid drawing clothes as if they are glued to the body. Allow for some space and volume, especially at joints like elbows and knees.
Add any accessories like shoes, glasses, or jewelry. Keep these simple and consistent with the overall style of your drawing.
Step 10: Clean Up and Add Finishing Touches
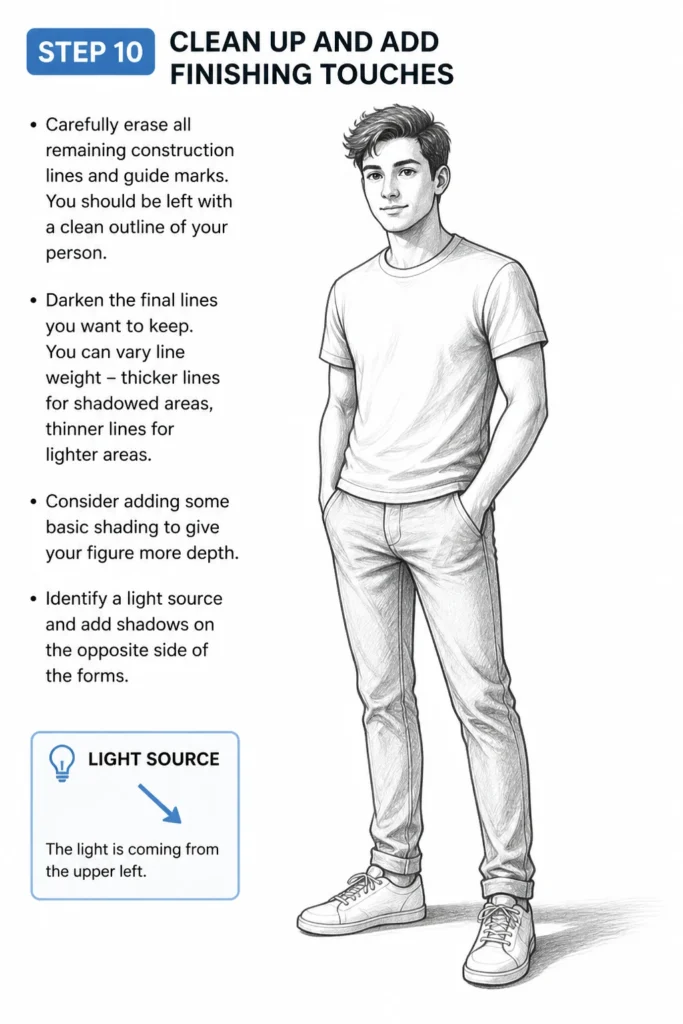
Carefully erase all remaining construction lines and guide marks. You should be left with a clean outline of your person.
Darken the final lines you want to keep. You can vary line weight – thicker lines for shadowed areas, thinner lines for lighter areas.
Consider adding some basic shading to give your figure more depth. Identify a light source and add shadows on the opposite side of the forms.
Common Mistakes to Avoid
Drawing Stiff Figures
Many beginners draw figures that look rigid and unnatural, as if made of wood. This often happens when focusing too much on individual body parts rather than the overall flow. Remember the initial gesture line. It’s there to establish movement and life. Always start with that loose, dynamic line to guide the entire pose, even for a standing figure.
Incorrect Proportions
Disproportionate limbs or a head too big/small are common pitfalls. This makes the figure look unrealistic. Always use a system like the “head units” method to measure and compare body parts. Regularly step back and visually check if everything looks balanced before adding details.
Neglecting Overlap and Depth
When drawing limbs or parts of the body, beginners sometimes draw them flat, as if on a single plane. This makes the figure lack depth. Use overlap to show which parts are in front and which are behind. Slightly angling limbs and using perspective, even subtly, creates a sense of three-dimensionality.
Rushing Details
It’s tempting to jump straight to drawing eyes, fingers, or intricate clothing. However, focusing on details too early can lead to a figure that is fundamentally flawed in its structure. Build your drawing from large shapes to small details. Ensure the underlying form and proportions are correct before adding any fine elements.
Troubleshooting
My Figure Looks Flat and Lifeless
If your drawing lacks dimension, you might be relying too heavily on outlines without considering volume. Go back to thinking about the body as a collection of cylinders, spheres, and boxes. Try redrawing limbs as overlapping cylinders to emphasize their rounded form.
Consider adding very light shading to suggest a light source. Even simple shadows under the chin or along the side of a limb can make a huge difference in creating depth. Focus on how forms turn in space.
The Limbs Are Too Short or Too Long
Proportion issues are very common and can be fixed by returning to your basic measuring techniques. Re-measure the head unit and use it to check the length of the torso and limbs. A common error is making the legs too short or the arms not reaching the mid-thigh.
Take a break and look at your drawing with fresh eyes. Compare it to a reference image or even your own body in a mirror. Don’t be afraid to erase and adjust the lengths of your construction lines before committing to the final outline.
My Drawing Looks Asymmetrical
If one side of your figure looks different from the other, it’s likely a symmetry issue. This is especially noticeable in the face or when the figure is in a relatively straight pose. Use a central vertical guideline on the head and torso to help align features and body parts.
Flip your drawing upside down or hold it up to a mirror. This simple trick can reveal imbalances you might not notice otherwise. Adjust any areas that appear off-kilter until the symmetry feels right for your intended pose.
Key Takeaways
- Always start with a light gesture line to capture movement and pose.
- Build the figure using simple geometric shapes like ovals, circles, and cylinders.
- Utilize head units and other proportional guidelines to ensure realistic body dimensions.
- Refine your drawing by gradually adding volume, details, and cleaning up construction lines.
- Prioritize overall form and proportions before adding intricate features or clothing.
- Practice regularly and use reference images to improve your understanding of anatomy and poses.
Frequently Asked Questions
Do I need to know anatomy to draw a person?
For beginners, a deep understanding of anatomy is not strictly necessary. This guide focuses on simplified shapes and basic proportions, which are more important for getting started. As you progress, learning some fundamental anatomy will definitely enhance your drawings, but you can achieve great results without it initially.
What if my drawing still looks stiff?
Stiffness often comes from drawing rigid, straight lines and focusing on static parts. Try exaggerating your initial gesture line more dramatically. Think about the “flow” of the body. Also, remember that even a standing person has a subtle curve to their spine and a slight shift in weight, which can be captured with a dynamic gesture.
How do I make my hands and feet look realistic?
Hands and feet are notoriously difficult. For an easy approach, start with very simplified shapes: a “mitten” for the hand and a “wedge” for the foot. As you gain confidence, you can gradually add more detail, breaking them down into smaller, simpler forms like blocks for fingers and toes. Practice observing your own hands and feet in different positions.
Should I use a reference image?
Absolutely! Using reference images is highly recommended, especially when you are learning. They provide accurate information about proportions, poses, and how clothing drapes. Don’t try to copy exactly, but use them as a guide to understand how the human body looks and moves.
Your Canvas Awaits
Drawing a person doesn’t have to be daunting. It’s a journey of breaking down something complex into simple, repeatable steps.
With practice and patience, you’ll see your skills grow with each attempt. Every line you draw is a step forward in your artistic development.
So grab your pencil and paper right now. Start with that first light gesture line and embark on your creative adventure today.