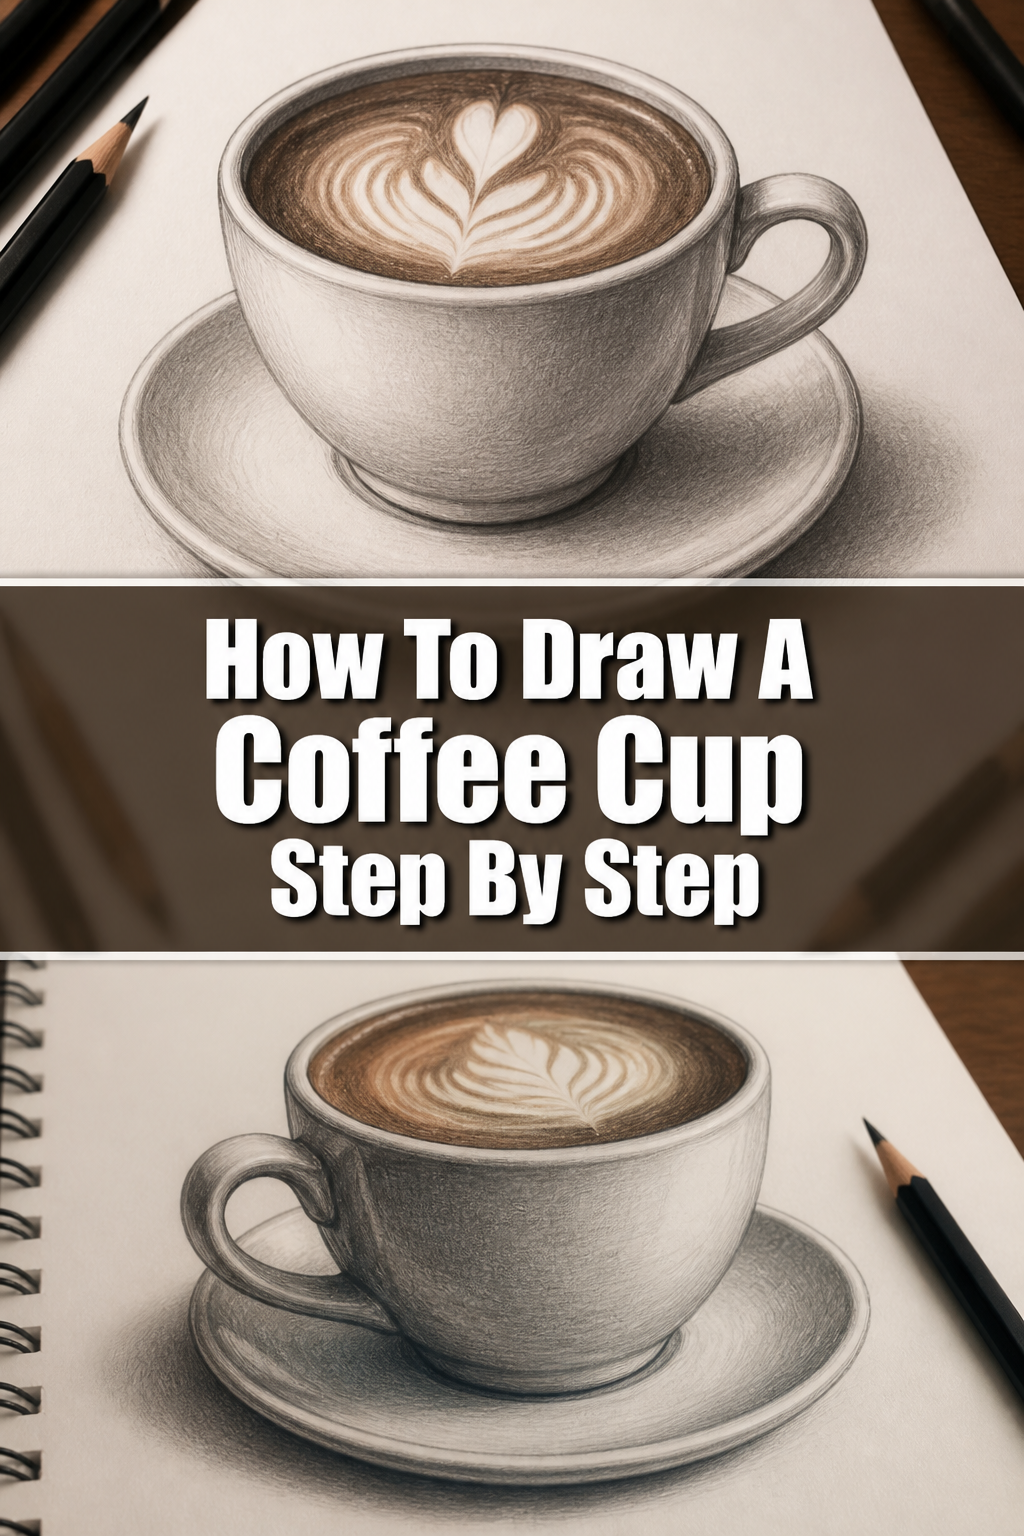
☕ How To Draw A Coffee Cup Step By Step

& Painting
No rigid rules or pretension. Just practical guides, medium comparisons, and encouraging tips to help you enjoy the drawing & painting process.
Drawing a coffee cup might seem simple, but mastering its curves and perspective can be a delightful challenge. I’ve spent countless hours sketching everyday objects, and the humble coffee cup is a fantastic subject for practicing foundational drawing skills. This guide will help you create a charming coffee cup drawing, even if you’re just starting out.
You’ll learn to see the basic shapes, understand simple perspective, and add those little details that bring your drawing to life. Get ready to transform a blank page into a cozy coffee scene.
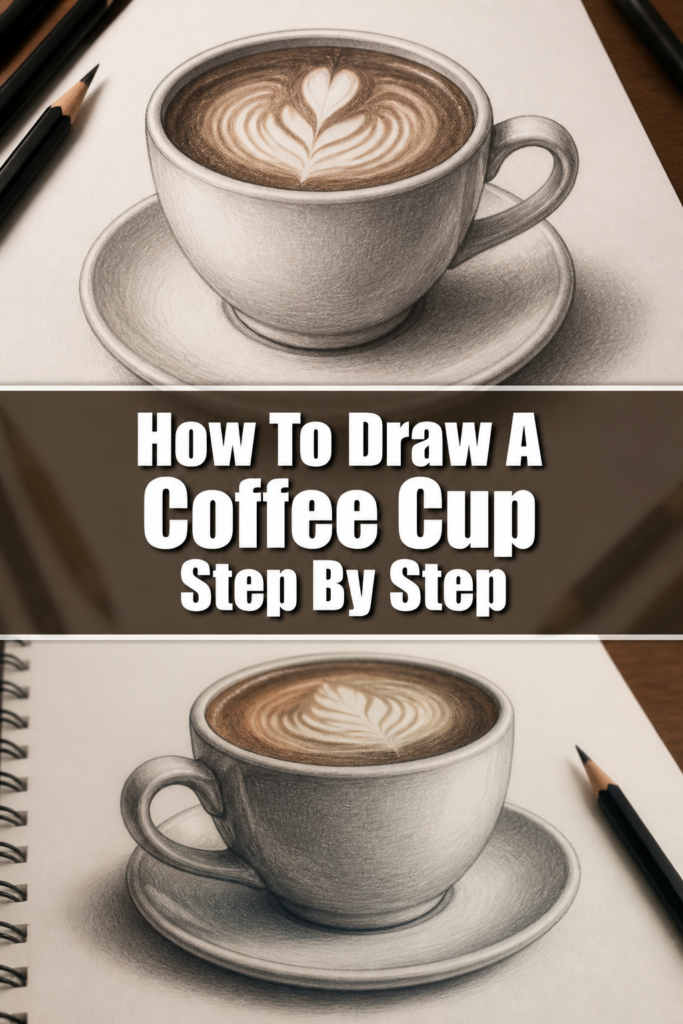
Quick Overview
Ready to create your own delightful coffee cup drawing? Here’s a quick look at what we’ll achieve together. You’ll finish with a complete, charming illustration ready to impress.
- Time needed: 30-45 minutes
- Difficulty: Beginner
- What you’ll need: Pencil (HB or 2B), eraser, paper, optional fine-liner pen
Step-by-Step Instructions
Step 1: Sketch the Basic Oval for the Top Opening
Every great drawing starts with fundamental shapes. Begin by lightly sketching a horizontal oval near the top of your page. This oval represents the opening of your coffee cup, so make it slightly wider than it is tall.
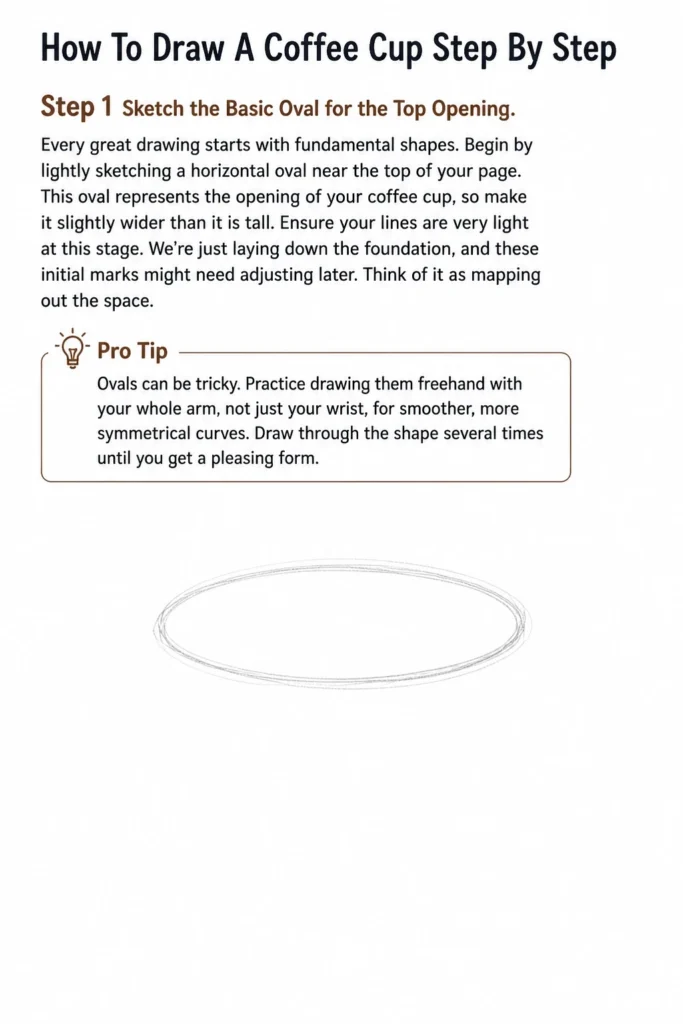
Ensure your lines are very light at this stage. We’re just laying down the foundation, and these initial marks might need adjusting later. Think of it as mapping out the space.
Pro Tip: Ovals can be tricky. Practice drawing them freehand with your whole arm, not just your wrist, for smoother, more symmetrical curves. Draw through the shape several times until you get a pleasing form.
Step 2: Define the Body of the Cup with Vertical Lines
From the ends of your top oval, draw two slightly curved vertical lines extending downwards. These lines will form the sides of your coffee cup. Make them angle slightly inwards as they descend, giving the cup a subtle taper.
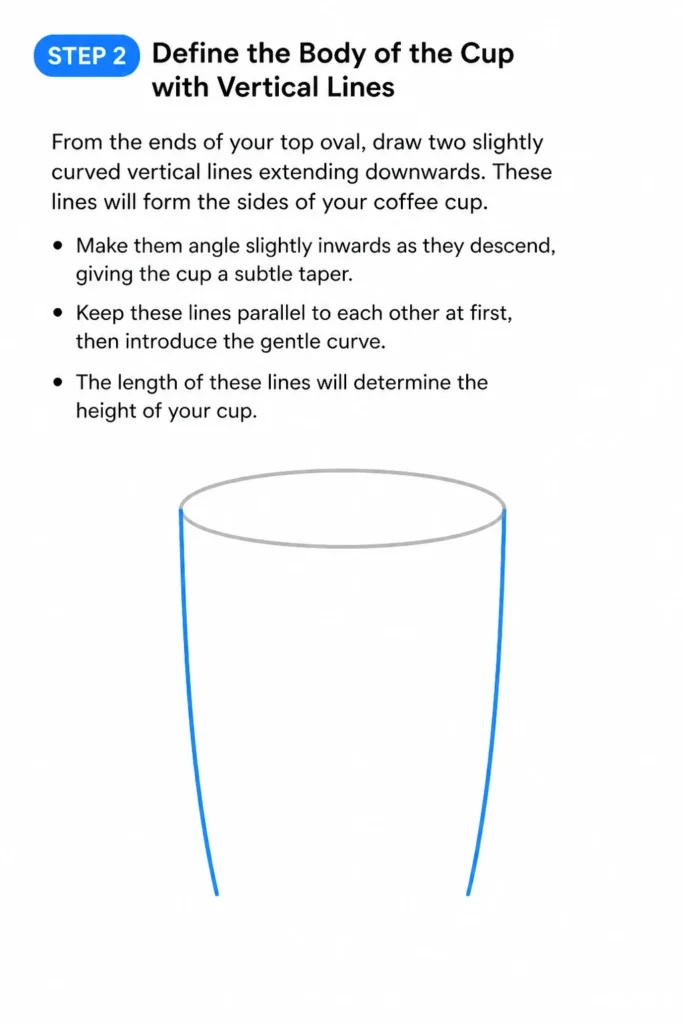
Keep these lines parallel to each other at first, then introduce the gentle curve. The length of these lines will determine the height of your cup.
Step 3: Close the Base with a Curved Line
Connect the bottom ends of the two vertical lines with another curved line. This curve should mirror the curve of your top oval, but it will be slightly flatter. This creates the bottom edge of the cup’s body.
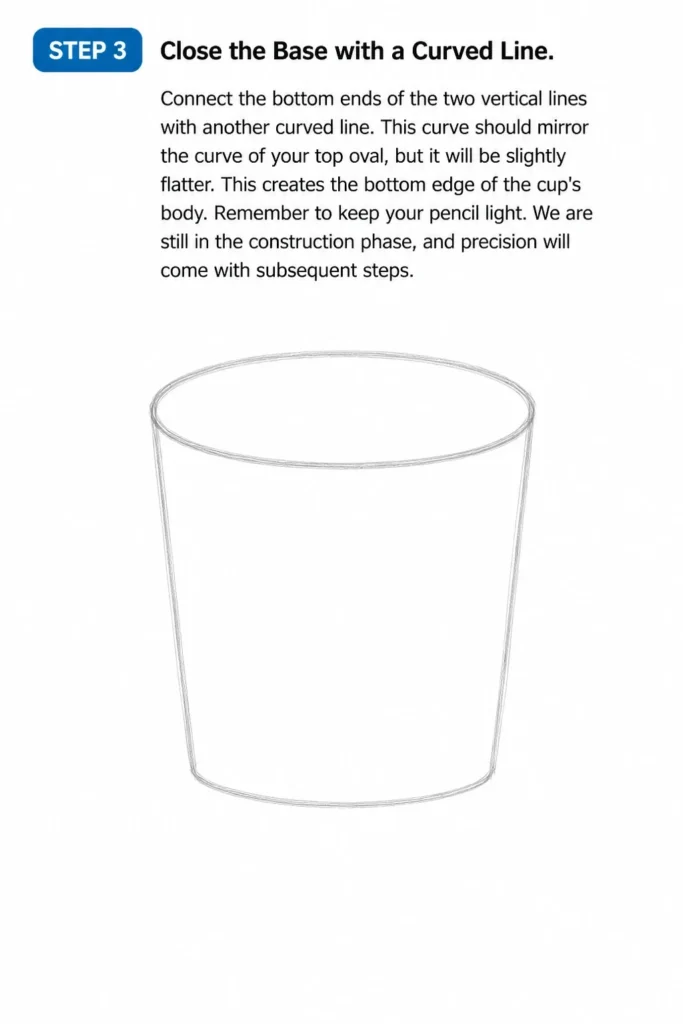
Remember to keep your pencil light. We are still in the construction phase, and precision will come with subsequent steps.
Step 4: Add the Handle’s Outer Shape
Now, let’s give our cup something to hold. On one side of the cup’s body, draw a large C-shaped curve for the outer edge of the handle. This curve should start roughly halfway down the cup and extend downwards, then loop back up.
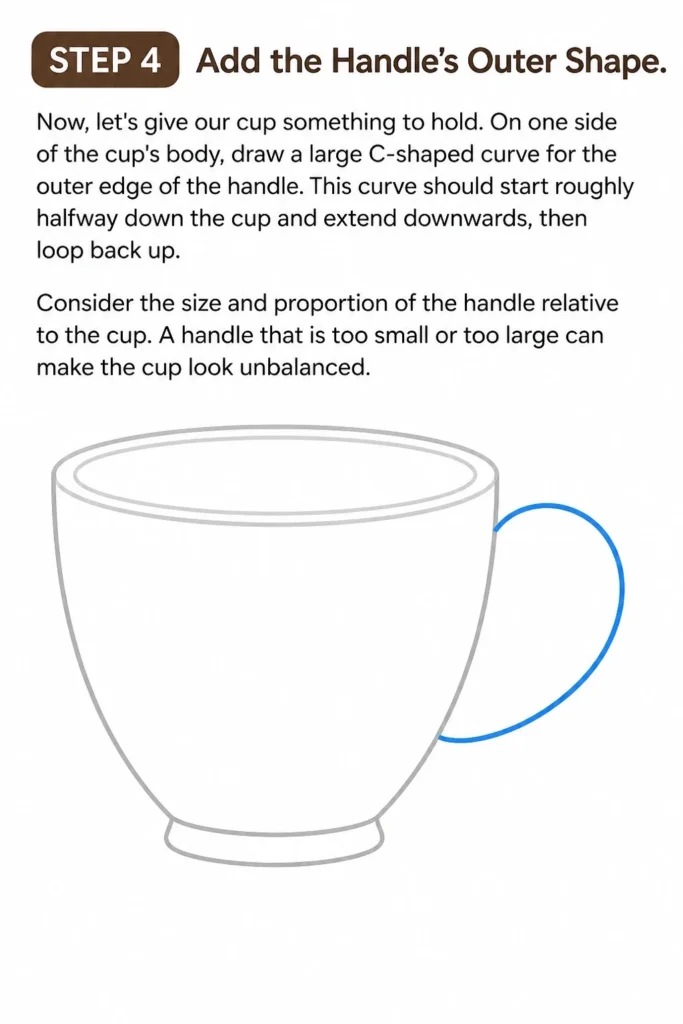
Consider the size and proportion of the handle relative to the cup. A handle that is too small or too large can make the cup look unbalanced.
Step 5: Draw the Handle’s Inner Shape
Inside the large C-shape you just drew, draw a smaller, parallel C-shaped curve. This second curve defines the inner edge of the handle, creating its thickness. Ensure there’s a consistent gap between the inner and outer lines.
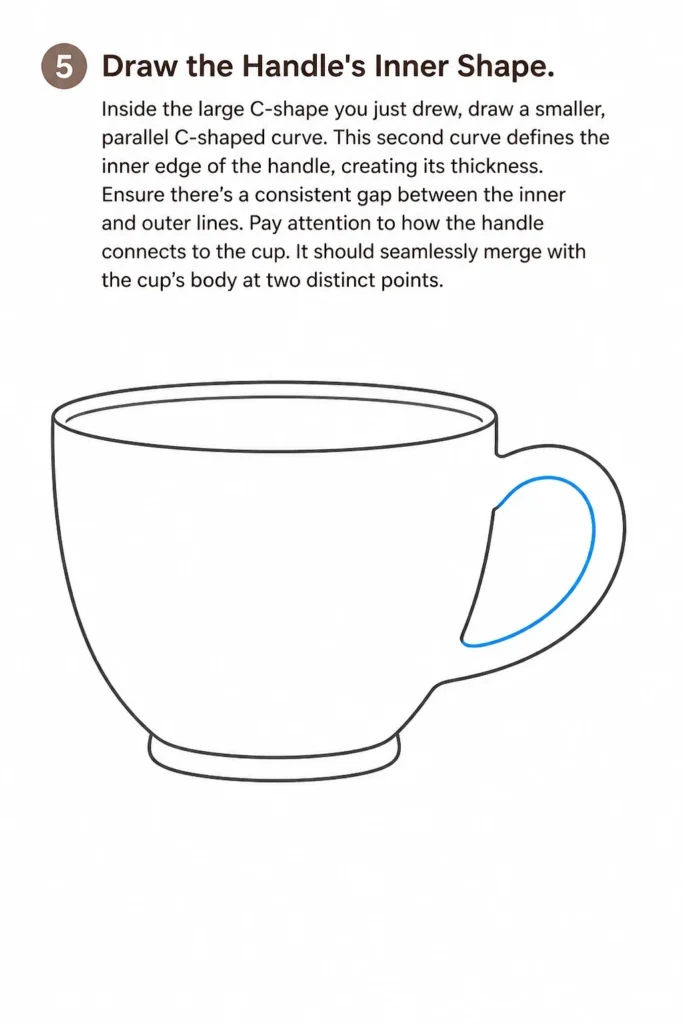
Pay attention to how the handle connects to the cup. It should seamlessly merge with the cup’s body at two distinct points.
Step 6: Introduce the Lip and Inner Rim
To give the cup a more realistic appearance, draw a second, slightly smaller oval just inside the top oval you drew in Step 1. This creates the thickness of the cup’s rim.
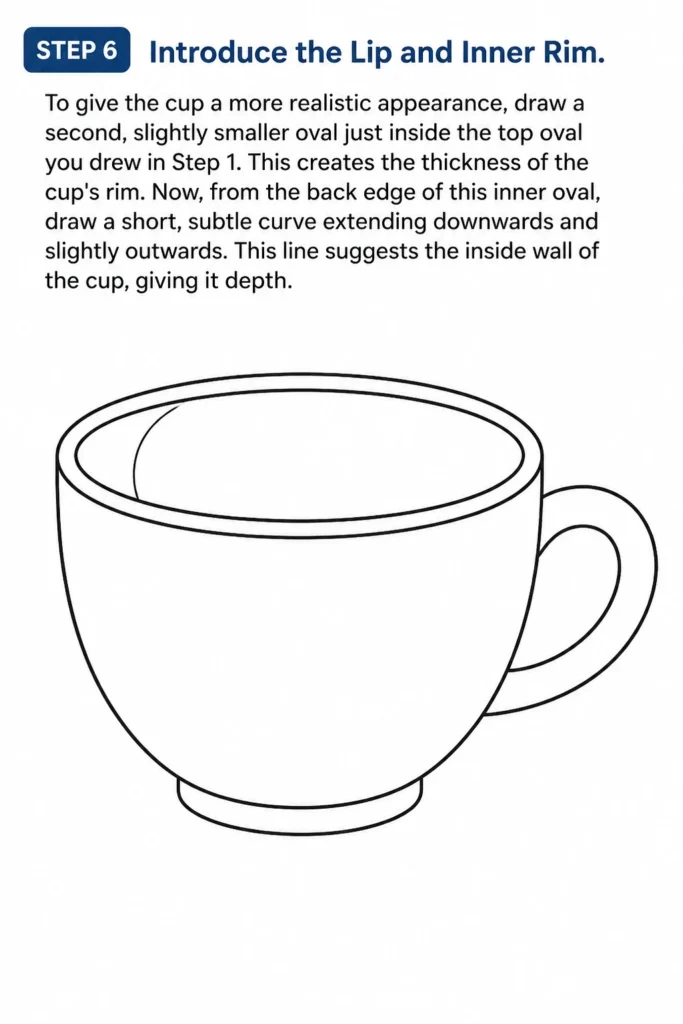
Now, from the back edge of this inner oval, draw a short, subtle curve extending downwards and slightly outwards. This line suggests the inside wall of the cup, giving it depth.
Step 7: Refine and Erase Unnecessary Lines
This is where your drawing starts to truly come together. Carefully go over your desired lines with a slightly firmer hand, making them more prominent. Pay attention to the smooth curves and the connection points.
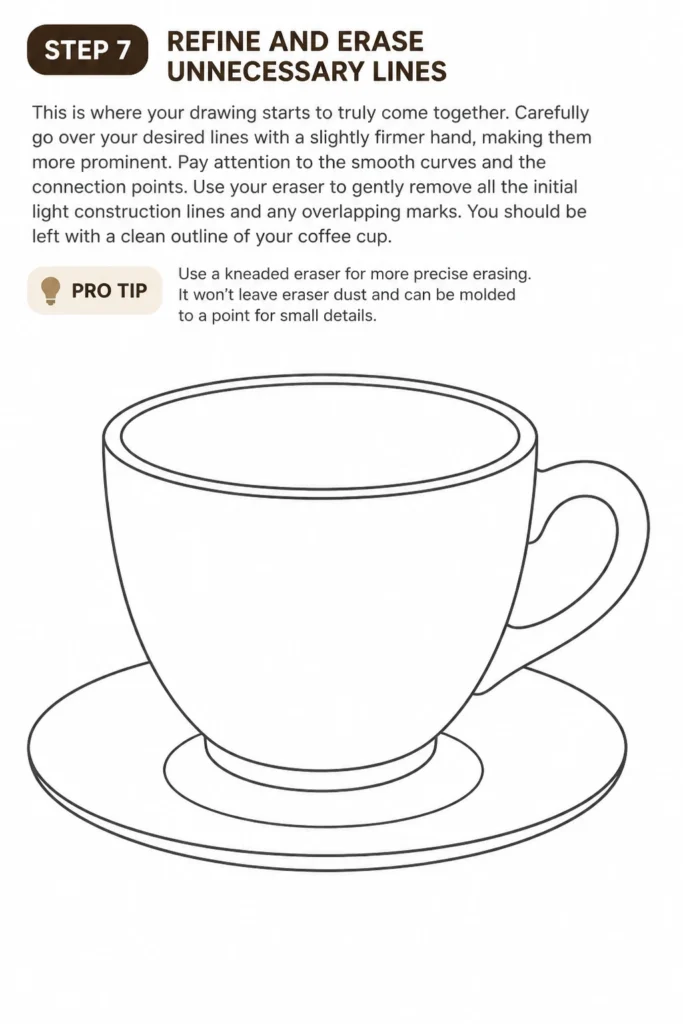
Use your eraser to gently remove all the initial light construction lines and any overlapping marks. You should be left with a clean outline of your coffee cup.
Pro Tip: Use a kneaded eraser for more precise erasing. It won’t leave eraser dust and can be molded to a point for small details.
Step 8: Add Details and Shading for Dimension
Bring your coffee cup to life with some final touches. Consider adding a subtle shadow under the cup to ground it on the page. You can also add a few lines to suggest steam rising from the opening if you’d like.
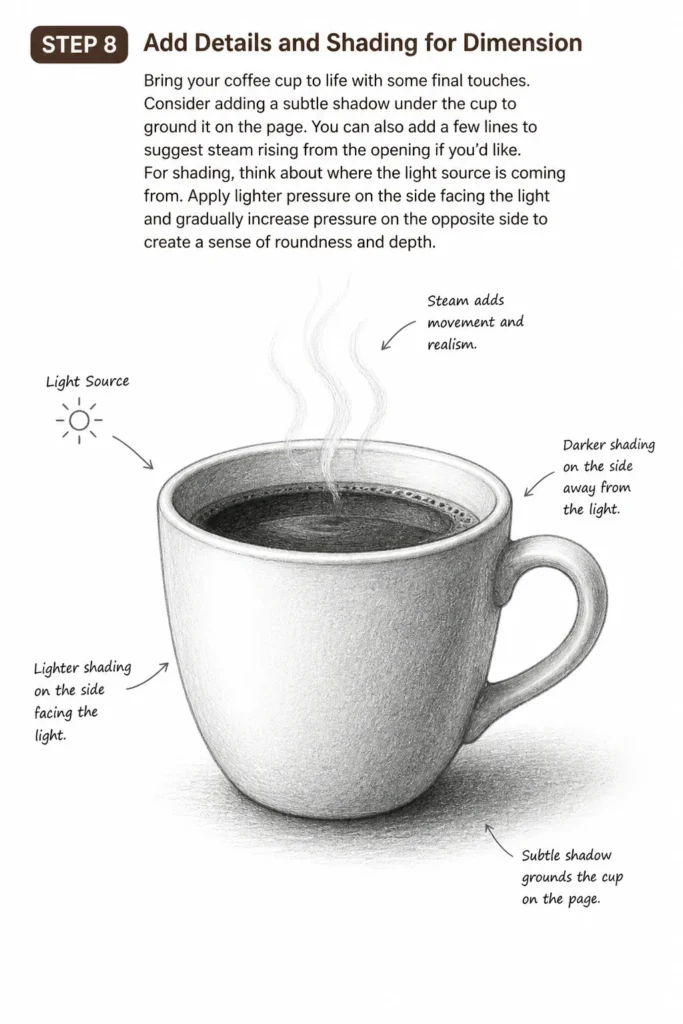
For shading, think about where the light source is coming from. Apply lighter pressure on the side facing the light and gradually increase pressure on the opposite side to create a sense of roundness and depth.
Common Mistakes to Avoid
Drawing a coffee cup is straightforward, but a few common pitfalls can make your drawing look less convincing. Being aware of these will significantly improve your results.
Distorted Ovals
One of the most frequent issues is drawing lopsided or pointy ovals for the top and bottom of the cup. If your ovals aren’t smooth and symmetrical, the cup will appear warped or unstable. Always strive for gentle, continuous curves, remembering that the bottom oval should be flatter than the top one due to perspective.
Flat Handles
A handle that looks like it’s pasted onto the side of the cup, rather than integrated, is another common mistake. Avoid drawing the handle as a simple outline that doesn’t connect naturally to the cup’s body. The handle should appear to curve away from the cup and then reattach, creating a sense of three-dimensionality.
Incorrect Perspective for the Base
Often, beginners draw the bottom of the cup as a straight line or an oval that is too curved, mimicking the top. However, as objects recede into the distance or are viewed from above, their bottom curves appear flatter. An overly curved bottom makes the cup look like it’s tipping over or has a strange, balloon-like base.
Lack of Depth
A drawing can look very flat if you don’t include the inner rim and a hint of the inside wall. Forgetting these details makes the cup appear like a solid, two-dimensional shape rather than a hollow vessel. Always remember to add that crucial inner oval and the subtle curve for the interior.
Troubleshooting
Even with a step-by-step guide, you might encounter a few hiccups. Here are some common issues and how to fix them.
My Ovals Look Uneven
If your ovals are wobbly or not symmetrical, don’t worry, this is very common. The best solution is practice. Try drawing many ovals on a separate sheet of paper without lifting your pencil, using your whole arm. You can also try lightly sketching a rectangle first, then fitting the oval perfectly within it, touching all four sides.
The Handle Doesn’t Look Attached
If your handle appears to float or doesn’t blend well with the cup, revisit the connection points. Ensure the handle lines smoothly merge with the cup’s body, almost like they’re growing out of it. Try drawing the handle as part of the cup’s overall form, rather than an afterthought. Sometimes, making the handle slightly thicker at the connection points helps.
My Cup Looks Flat and Lacks Dimension
This usually happens when you only draw outlines without considering light and shadow. To add dimension, identify a light source. The side of the cup facing the light will be brighter, and the opposite side will be darker. Use subtle shading, gradually building up tone with your pencil, to create a sense of roundness and depth. Also, make sure to include the inner rim.
Key Takeaways
Drawing a coffee cup is an excellent way to practice fundamental drawing skills. Here are the most important points to remember from this guide.
- Always start with basic shapes like ovals and straight lines to build your foundation.
- Use light pencil strokes for initial construction lines, making adjustments easy.
- Pay close attention to perspective for ovals; the bottom oval is flatter than the top.
- Ensure the handle integrates smoothly with the cup, appearing three-dimensional.
- Add details like the inner rim and subtle shading to create depth and realism.
- Practice regularly to improve your freehand curves and overall control.
Frequently Asked Questions
What kind of pencil is best for drawing outlines?
An HB or 2B pencil is ideal for outlining. HB offers a good balance of hardness and darkness, making it suitable for both initial sketches and final lines. A 2B pencil is slightly softer, providing darker lines for definition and shading without being too smudgy.
How do I make the steam look realistic?
To draw realistic steam, use very light, wavy, upward-flowing lines. Don’t make them too dark or defined. You can also add a few small, broken cloud-like shapes that dissipate as they rise. The key is to keep it subtle and ethereal, suggesting movement rather than a solid object.
Should I draw the coffee inside the cup?
Drawing the coffee inside the cup is a great way to add realism. You can do this by drawing a slightly darker, horizontal line just below the inner rim. For an extra touch, add a small, bright highlight on the surface of the coffee to suggest liquid reflection.
How can I make my cup look rounder?
To make your cup look rounder, focus on shading. Imagine a light source and apply darker tones on the side of the cup opposite the light. Use smooth, gradual transitions from light to dark, following the curve of the cup. This contrast will create the illusion of a three-dimensional, rounded surface.
Our Top Recommended Finds
Having the right tools can make your drawing experience even more enjoyable and effective. Here are a few essential items we recommend.
- Sketchbook with Quality Paper: A good sketchbook provides a consistent surface that handles erasing well and doesn’t bleed through.
- Set of Graphite Pencils: A basic set (e.g., HB, 2B, 4B, 6B) gives you a range of hardness for sketching, outlining, and shading.
- Kneaded Eraser: This type of eraser is fantastic for lifting graphite gently without damaging the paper, and it can be molded for precise erasing.
Your Next Creative Brew Awaits!
You’ve just drawn a fantastic coffee cup, a testament to your growing artistic skills. This wasn’t just about lines on paper; it was about understanding form, perspective, and adding life to everyday objects. Every stroke you made built confidence and refined your eye.
Now that you’ve mastered the coffee cup, why not explore other common kitchen items? Try drawing a teapot, a stack of plates, or even a detailed coffee maker. Each new challenge will further hone your abilities and expand your creative repertoire. Pick up your pencil again today and let your imagination brew new ideas!
& Painting
No rigid rules or pretension. Just practical guides, medium comparisons, and encouraging tips to help you enjoy the drawing & painting process.