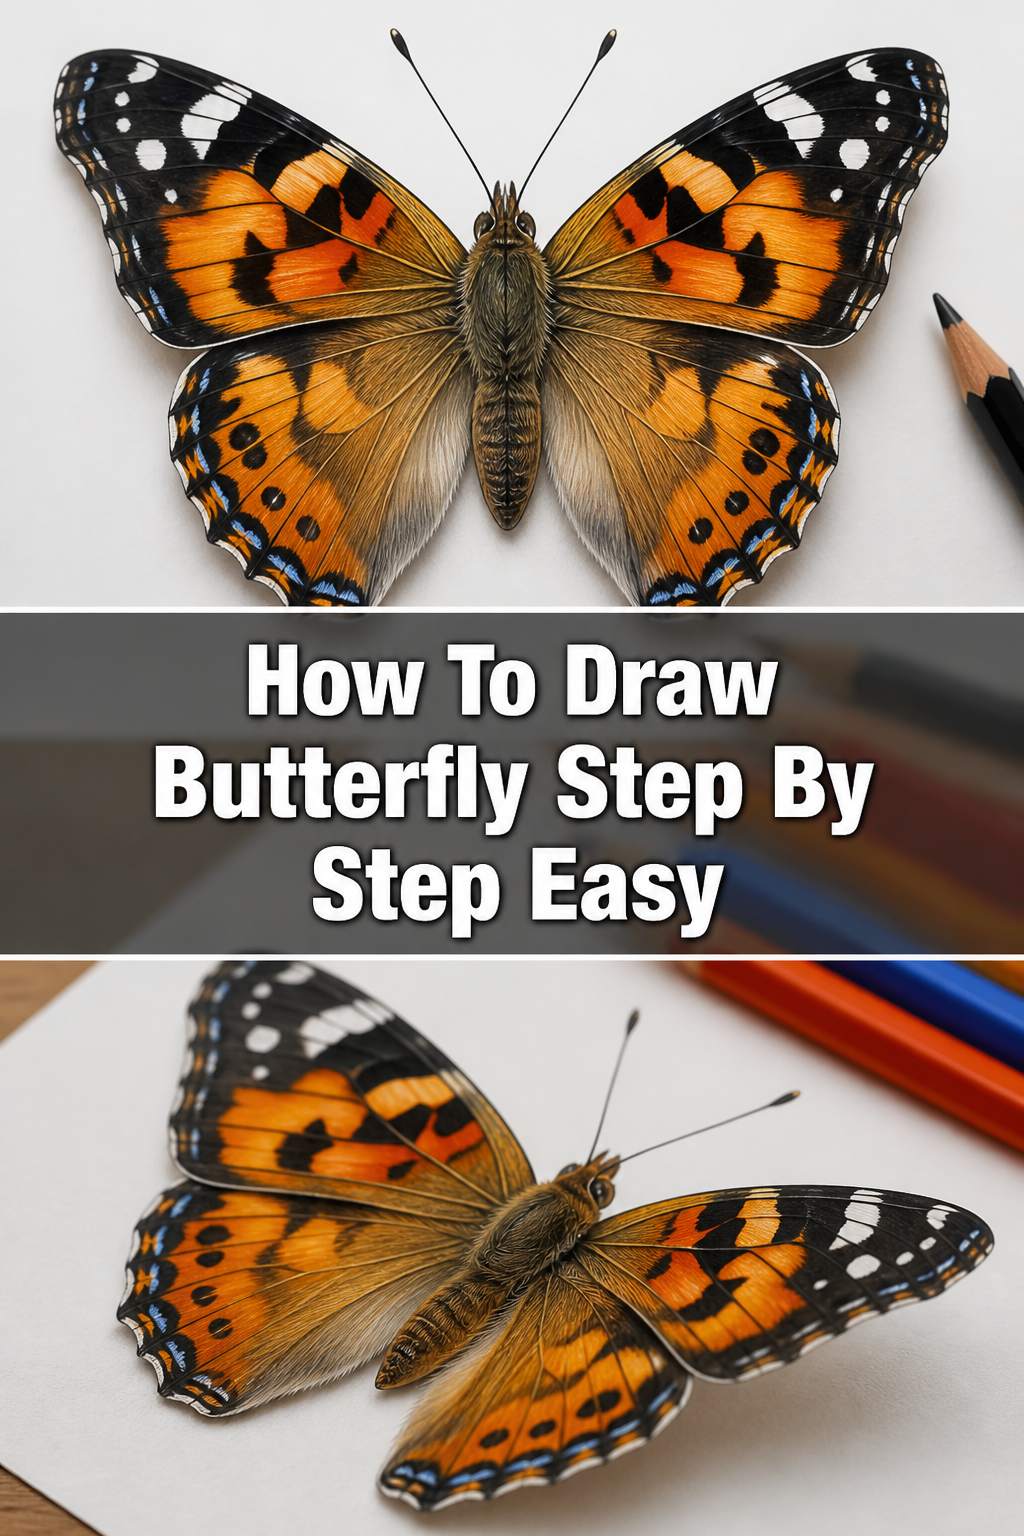
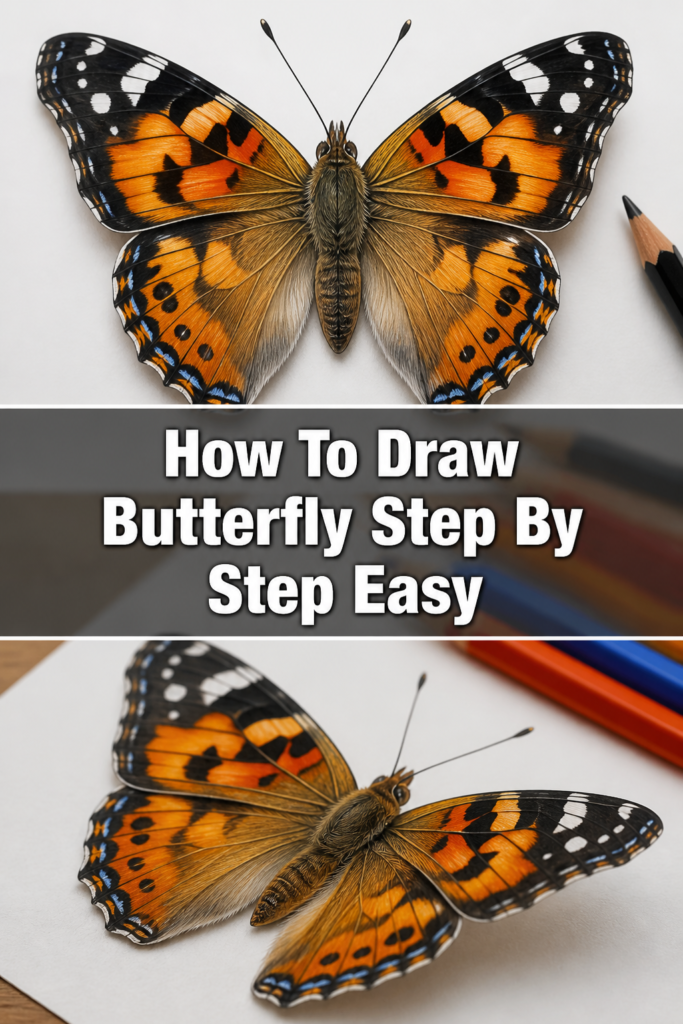
💡 How To Draw Butterfly Step By Step Easy

& Painting
No rigid rules or pretension. Just practical guides, medium comparisons, and encouraging tips to help you enjoy the drawing & painting process.
I remember sitting at my kitchen table as a child, frustrated because my butterfly wings looked like lopsided potatoes.
After years of teaching art classes to beginners, I realized that drawing a butterfly is actually about seeing simple geometric shapes first.
This guide uses those same proven methods to help you create a beautiful, symmetrical butterfly without any stress.
Quick Overview
Before you put pencil to paper, let’s look at what this project involves and what you will need to have ready.
- Time needed: 20 to 30 minutes
- Difficulty: Beginner
- What you’ll need: HB pencil, eraser, sketchbook or printer paper, a ruler, and colored pencils or markers.
Step-by-Step Instructions
Step 1: Create a Central Guide Line
Draw a straight vertical line down the center of your paper using a ruler and very light pressure.
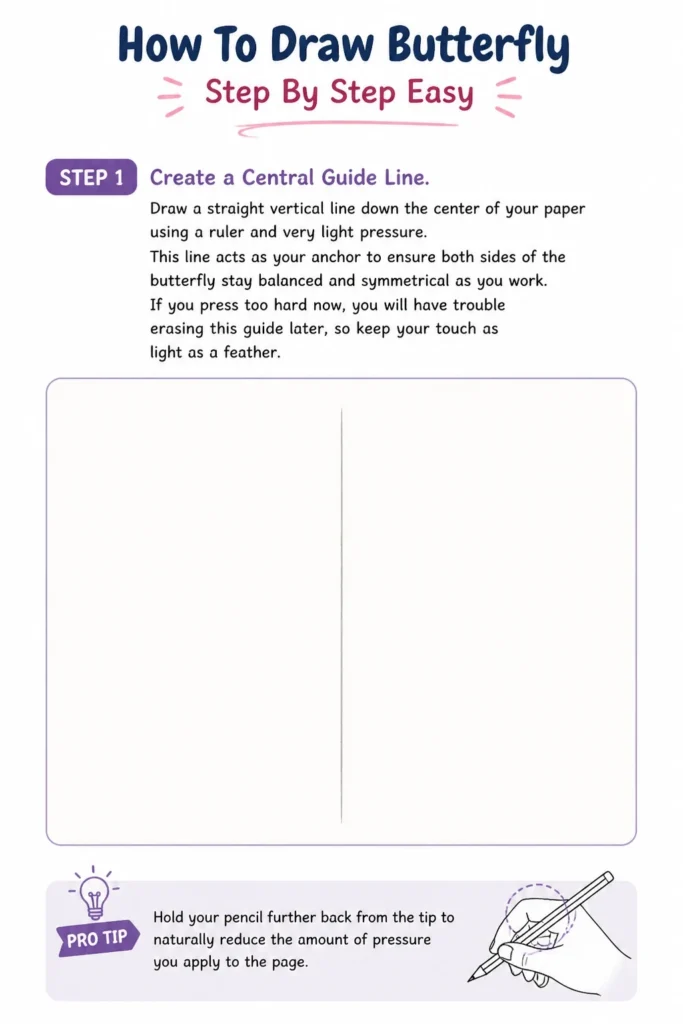
This line acts as your anchor to ensure both sides of the butterfly stay balanced and symmetrical as you work.
If you press too hard now, you will have trouble erasing this guide later, so keep your touch as light as a feather.
Pro Tip: Hold your pencil further back from the tip to naturally reduce the amount of pressure you apply to the page.
Step 2: Sketch the Body Segments
Outline three distinct shapes along your vertical center line to form the head, thorax, and abdomen.
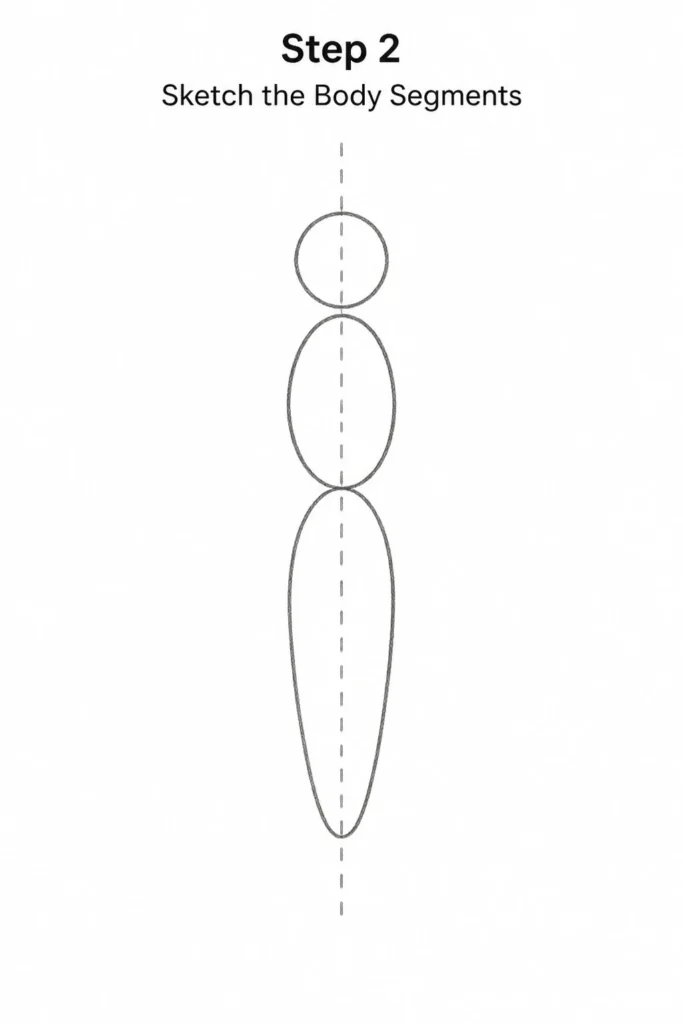
Start with a small circle for the head at the top, followed by a slightly larger oval for the thorax in the middle.
Finish the body by drawing a long, thin teardrop shape for the abdomen extending toward the bottom of the page.
Make sure the center line passes exactly through the middle of these three shapes to maintain perfect alignment.
Step 3: Map Out the Wing Spans
Mark four points on your paper to determine how wide and tall you want the wings to be.
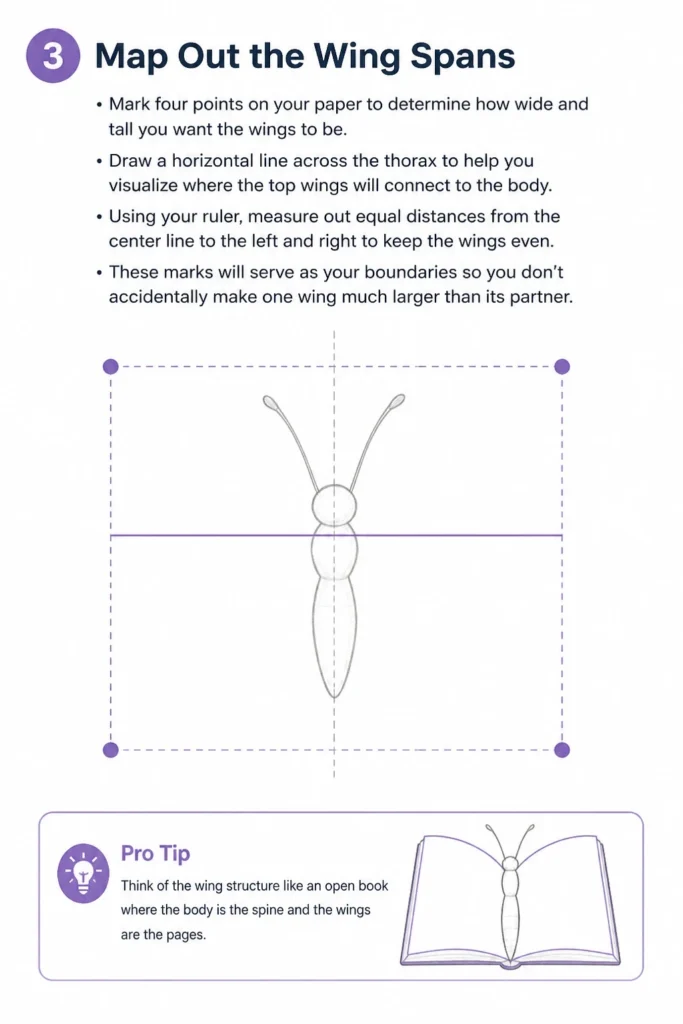
Draw a horizontal line across the thorax to help you visualize where the top wings will connect to the body.
Using your ruler, measure out equal distances from the center line to the left and right to keep the wings even.
These marks will serve as your boundaries so you don’t accidentally make one wing much larger than its partner.
Pro Tip: Think of the wing structure like an open book where the body is the spine and the wings are the pages.
Step 4: Draw the Upper Forewings
Construct a large, soft triangular shape starting from the top of the thorax and reaching out to your side markers.
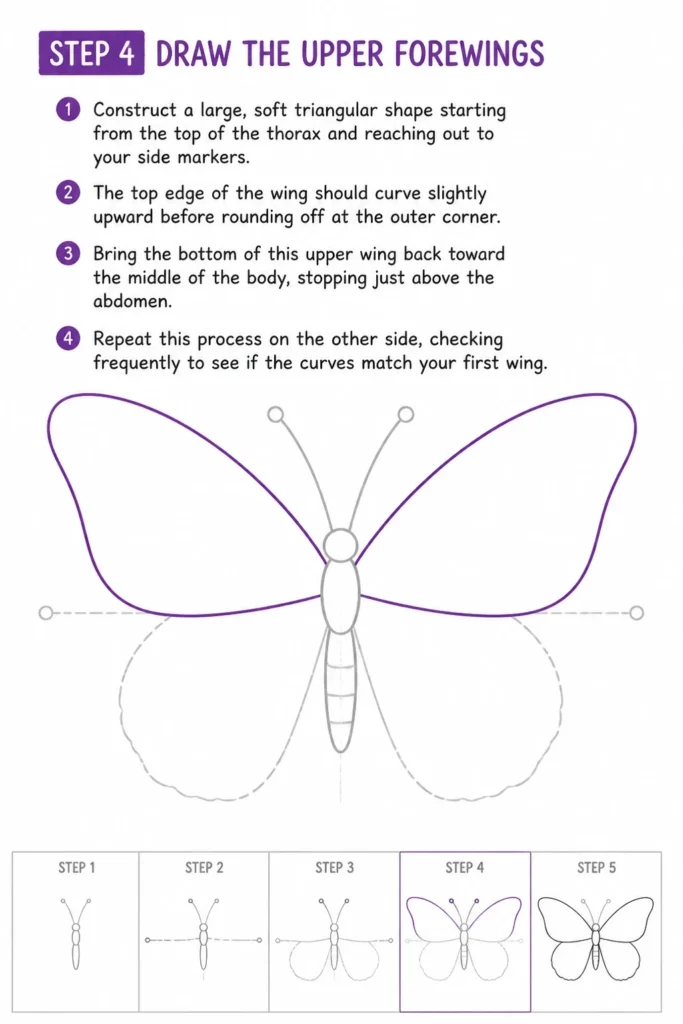
The top edge of the wing should curve slightly upward before rounding off at the outer corner.
Bring the bottom of this upper wing back toward the middle of the body, stopping just above the abdomen.
Repeat this process on the other side, checking frequently to see if the curves match your first wing.
Step 5: Add the Lower Hindwings
Sketch two smaller, more rounded shapes that sit directly beneath the upper wings you just finished.
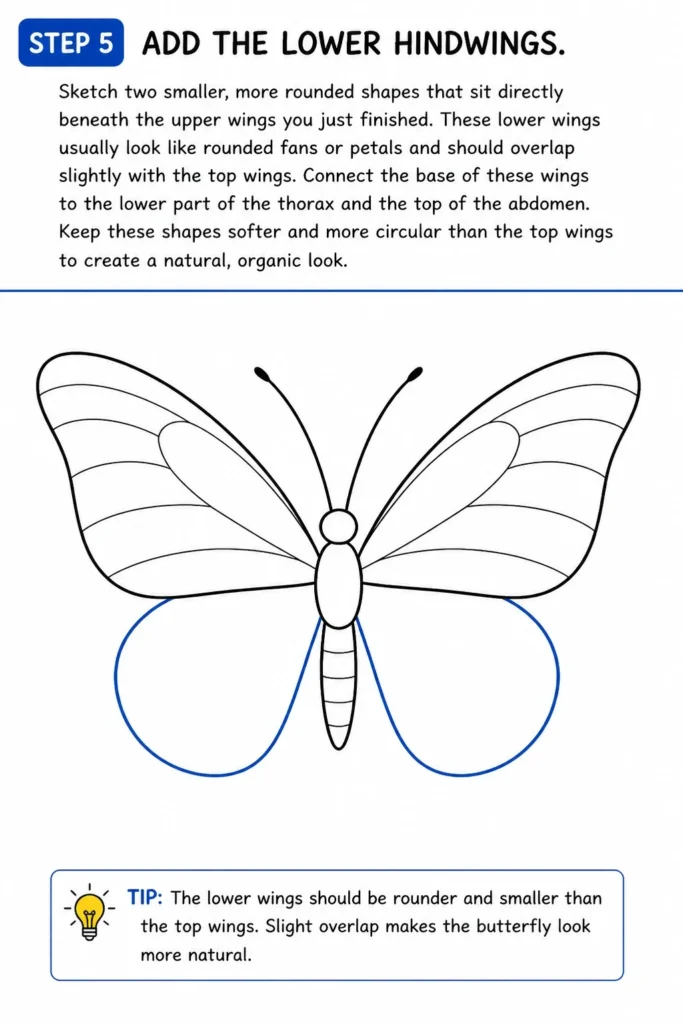
These lower wings usually look like rounded fans or petals and should overlap slightly with the top wings.
Connect the base of these wings to the lower part of the thorax and the top of the abdomen.
Keep these shapes softer and more circular than the top wings to create a natural, organic look.
Step 6: Refine the Wing Outlines
Trace over your basic wing shapes with a more confident line, adding small ripples or “scallops” to the edges.
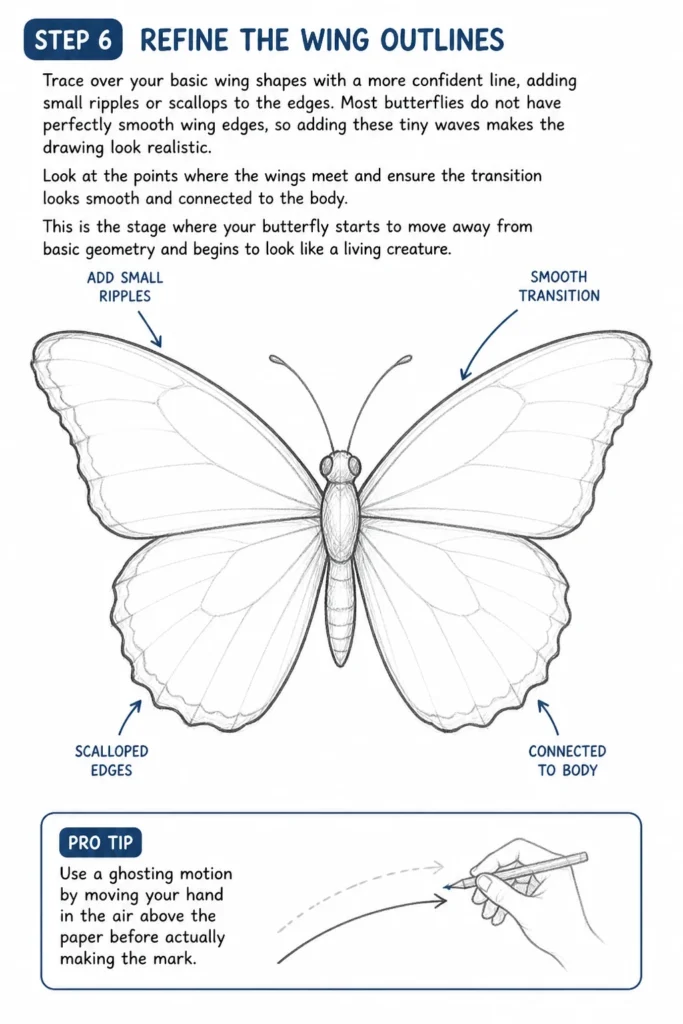
Most butterflies do not have perfectly smooth wing edges, so adding these tiny waves makes the drawing look realistic.
Look at the points where the wings meet and ensure the transition looks smooth and connected to the body.
This is the stage where your butterfly starts to move away from basic geometry and begins to look like a living creature.
Pro Tip: Use a “ghosting” motion by moving your hand in the air above the paper before actually making the mark.
Step 7: Design the Internal Patterns
Divide the interior of the wings into smaller sections by drawing thin lines that mimic the veins of a leaf.
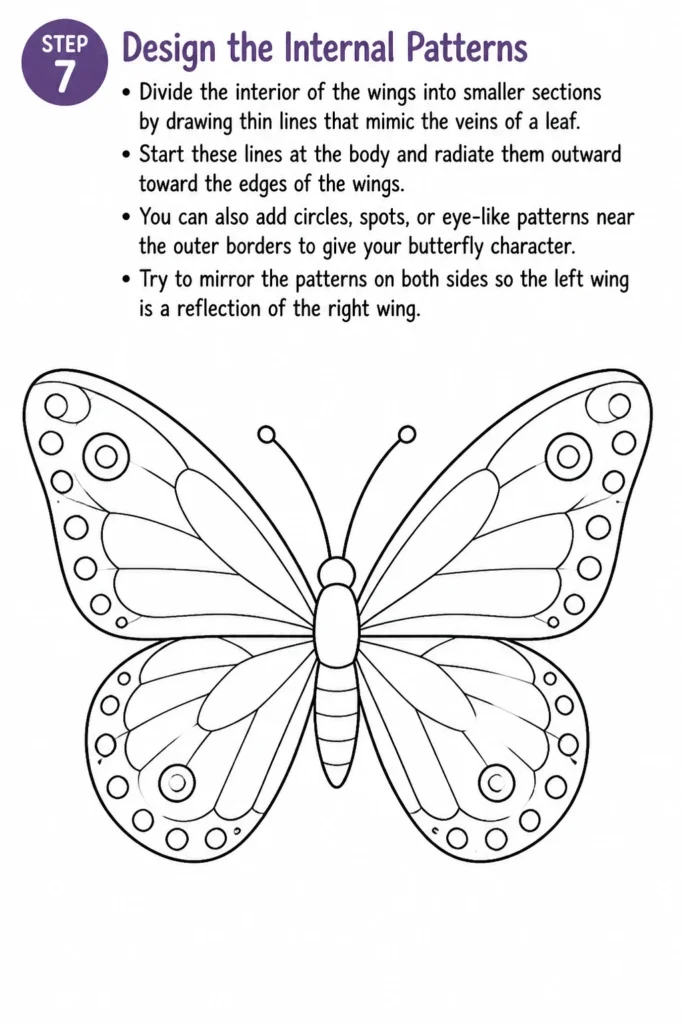
Start these lines at the body and radiate them outward toward the edges of the wings.
You can also add circles, spots, or eye-like patterns near the outer borders to give your butterfly character.
Try to mirror the patterns on both sides so the left wing is a reflection of the right wing.
Step 8: Draw the Antennae and Eyes
Place two small dots on the head for the eyes and draw two long, graceful curves extending from the top of the head.
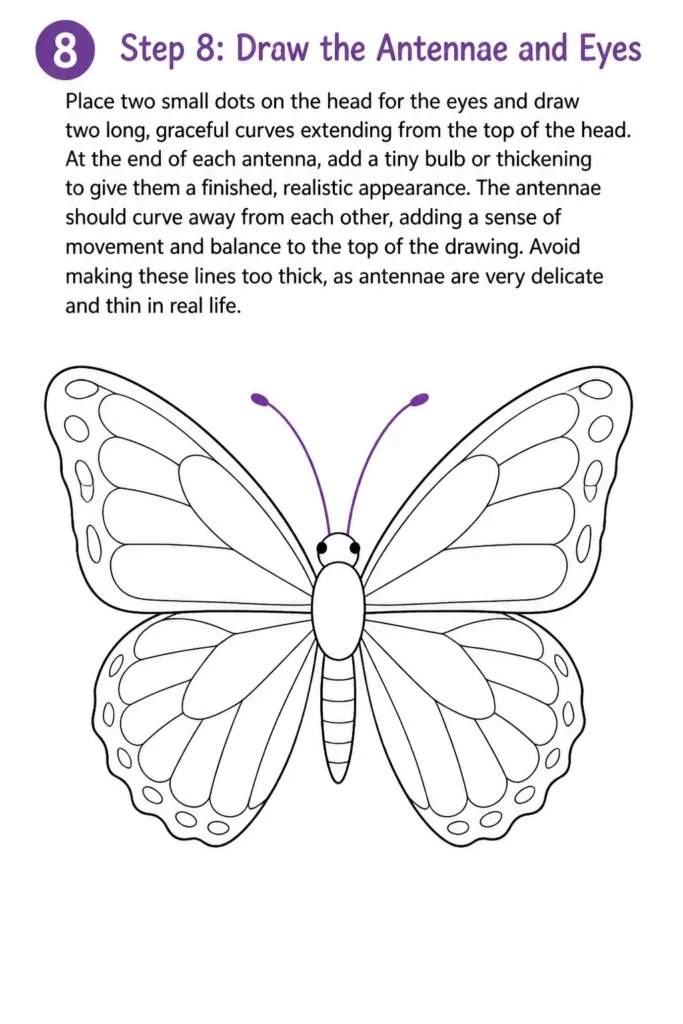
At the end of each antenna, add a tiny bulb or thickening to give them a finished, realistic appearance.
The antennae should curve away from each other, adding a sense of movement and balance to the top of the drawing.
Avoid making these lines too thick, as antennae are very delicate and thin in real life.
Step 9: Clean Up and Finalize
Erase the vertical guide line and any stray marks you made during the initial sketching phase.
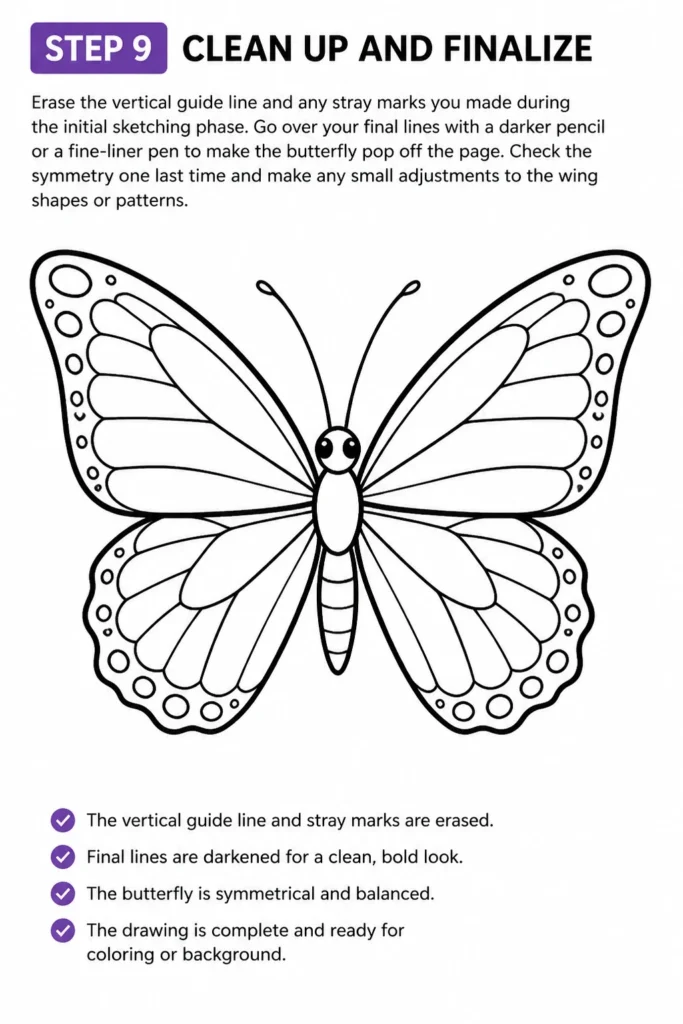
Go over your final lines with a darker pencil or a fine-liner pen to make the butterfly pop off the page.
Check the symmetry one last time and make any small adjustments to the wing shapes or patterns.
Once the pencil lines are gone, your drawing will look professional and ready for the final creative stage.
Step 10: Add Color and Shading
Apply your chosen colors starting with the lightest shades first and layering darker tones on top.
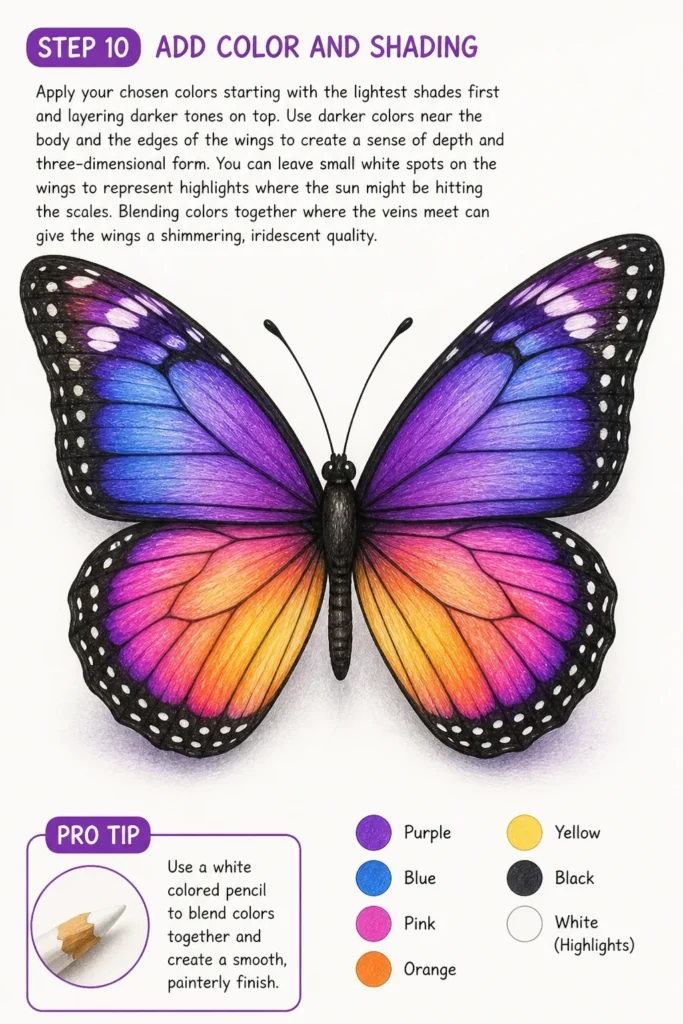
Use darker colors near the body and the edges of the wings to create a sense of depth and three-dimensional form.
You can leave small white spots on the wings to represent highlights where the sun might be hitting the scales.
Blending colors together where the “veins” meet can give the wings a shimmering, iridescent quality.
Pro Tip: Use a white colored pencil to blend colors together and create a smooth, painterly finish.
Common Mistakes to Avoid
The Lopsided Wing Syndrome
Many beginners start drawing the second wing without checking the proportions of the first one. This results in a butterfly that looks like it would fly in circles because one side is significantly larger or higher than the other. Always use your ruler or a spare piece of paper to measure the height and width of both wings periodically as you draw.
Ignoring the Body Segments
It is common to draw the body as one single “hot dog” shape, which makes the butterfly look flat and cartoonish. Real butterflies have three distinct body parts that serve different biological functions. By drawing the head, thorax, and abdomen separately, you provide a much more realistic base for the wings to attach to.
Pressing Too Hard with the Pencil
If you push the pencil into the paper during the early steps, you leave physical grooves in the fibers. Even if you erase the graphite, those indented lines will remain visible and catch your colored pencils later. Keep your initial sketches so light that they are almost invisible to anyone else standing in the room.
Stiff and Straight Wing Edges
Drawing wings with perfectly straight lines makes the butterfly look like a paper cutout rather than a living insect. Nature rarely uses perfectly straight lines, so try to incorporate soft curves and irregular edges. This adds a sense of organic life and makes the drawing feel much more dynamic and natural.
Troubleshooting
The Wings Look Too Small for the Body
If your butterfly looks “heavy,” your wings are likely too small in proportion to the abdomen and thorax. You can fix this by extending the outer edges of the wings further out. Don’t be afraid to let the wings take up most of your paper, as they are the most prominent feature of the insect.
Smudging Your Work
As you move your hand across the paper, you might accidentally smear the graphite you already laid down. To solve this, place a clean sheet of scrap paper under your drawing hand to act as a barrier. This keeps your palm off the sketch and ensures your lines stay crisp and clean throughout the entire process.
The Patterns Look Messy
If the internal wing patterns feel cluttered, you might be trying to add too much detail at once. Simplify your design by focusing on large “cells” or sections first, then adding smaller dots or lines inside them. Remember that sometimes less is more when it comes to creating a clean and striking visual design.
Key Takeaways
- Start with a vertical center line to ensure your drawing remains perfectly symmetrical.
- Break the body down into three distinct parts: the head, thorax, and abdomen.
- Use light, “ghosted” lines for the initial wing shapes to allow for easy corrections.
- Add ripples and scallops to the wing edges to give the butterfly a realistic, organic feel.
- Mirror every pattern and line from one side to the other to maintain visual balance.
- Layer your colors from light to dark to create depth and a professional finish.
Frequently Asked Questions
What is the best pencil to use for sketching the initial shapes?
An HB pencil is the best choice because it is right in the middle of the hardness scale. It provides a dark enough line to see but is soft enough to erase completely without leaving marks. Avoid using “H” pencils which can scratch the paper or “B” pencils which tend to smudge easily.
How do I make the wings look like they are shimmering?
To create a shimmering effect, use multiple shades of the same color and blend them together. Leave small areas of the paper white or use a very light yellow to represent reflected light. You can also use metallic markers or gel pens for the final highlights to give the wings a true metallic glow.
Can I draw a butterfly from a side view using these steps?
These steps are specifically for a top-down view, which is the easiest way for beginners to learn. For a side view, you would only draw one set of wings and the body would be seen from the profile. The principles of using basic shapes still apply, but you wouldn’t need the vertical symmetry line.
Why do my butterfly wings look like circles?
This usually happens if the top and bottom wings are the same size and shape. Remember that the top wings (forewings) are generally larger and more triangular. The bottom wings (hindwings) are usually smaller and more rounded, which creates the classic butterfly silhouette.
Our Top Recommended Finds
- Kneaded Eraser: This tool is essential because it picks up graphite without damaging the paper surface or leaving crumbs.
- Fine-Liner Pen Set: Using a waterproof black pen to outline your drawing makes the colors pop and prevents the ink from bleeding.
- Smooth Bristol Paper: This type of paper has a very flat surface that allows for incredibly smooth blending with colored pencils.
Master Your Butterfly Art Today
Now that you have the basic structure down, try experimenting with different wing shapes and patterns.
You could look up photos of a Monarch or a Blue Morpho to see how their specific markings differ from your sketch.
The more you practice these symmetrical shapes, the more natural your hand movements will become.
Grab your pencils and try drawing a second butterfly right now while these steps are still fresh in your mind.
& Painting
No rigid rules or pretension. Just practical guides, medium comparisons, and encouraging tips to help you enjoy the drawing & painting process.