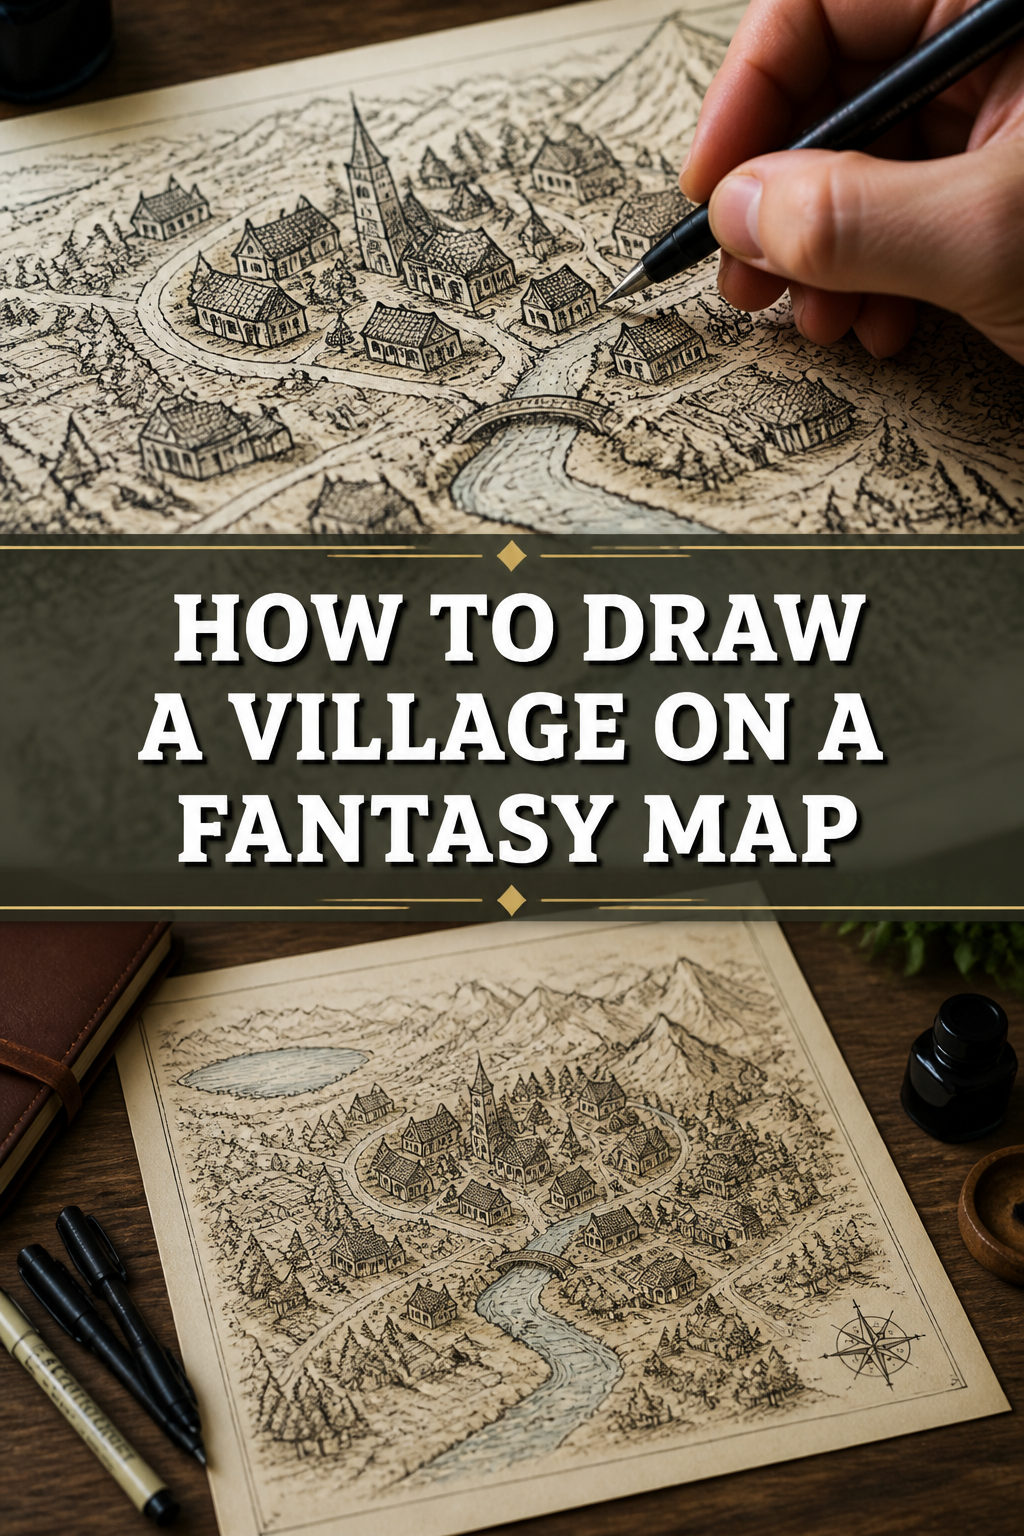
🗺️ How To Draw A Village On A Fantasy Map

& Painting
No rigid rules or pretension. Just practical guides, medium comparisons, and encouraging tips to help you enjoy the drawing & painting process.
Creating a vibrant world for your stories or games often begins with its geography. A well-placed village can truly bring your fantasy map to life, hinting at rich histories and bustling communities. I’ve spent countless hours sketching worlds for my own campaigns, and I know the power a thoughtfully designed settlement holds.
This guide will walk you through the process, helping you craft villages that feel ancient, isolated, or thriving. You’ll learn the practical steps to make your map compelling and immersive. Let’s start building your world, one village at a time.
Quick Overview
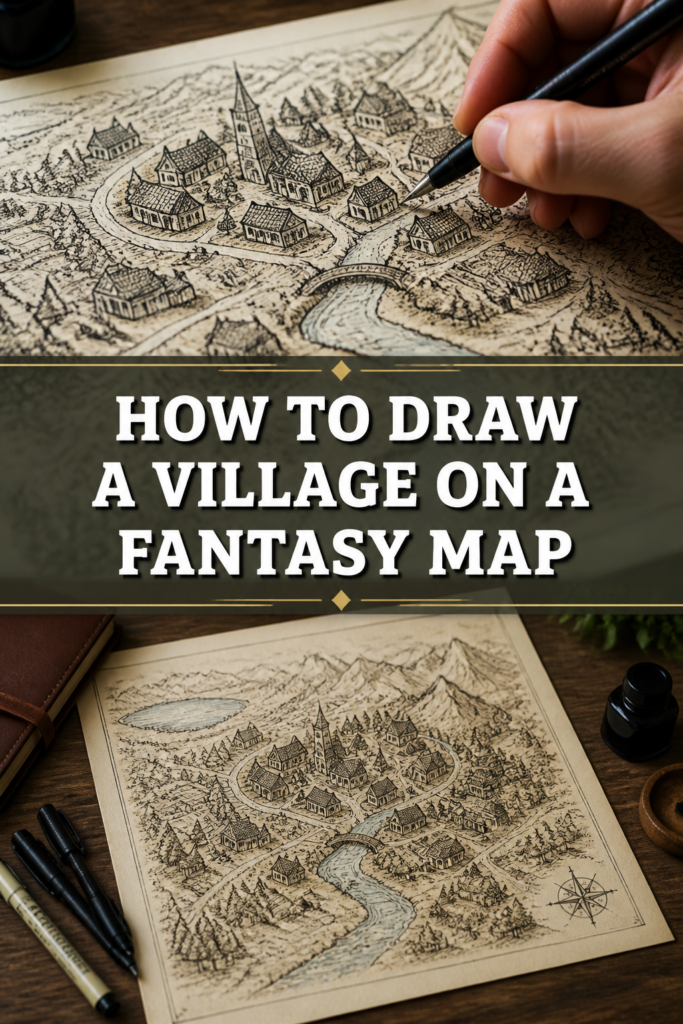
By the end of this guide, you will have a unique, visually appealing village drawn onto your fantasy map. This process will equip you with foundational techniques for map design.
- Time needed: 1-3 hours (depending on detail)
- Difficulty: Beginner
- What you’ll need: Paper, pencil, eraser, fine-tip pens (various sizes), optional watercolors or colored pencils.
Step-by-Step Instructions
Step 1: Define Your Village’s Purpose and Location
Every village has a reason for existing. Consider what makes this particular spot ideal for a settlement. Is it near a river for trade, a forest for resources, or mountains for defense?
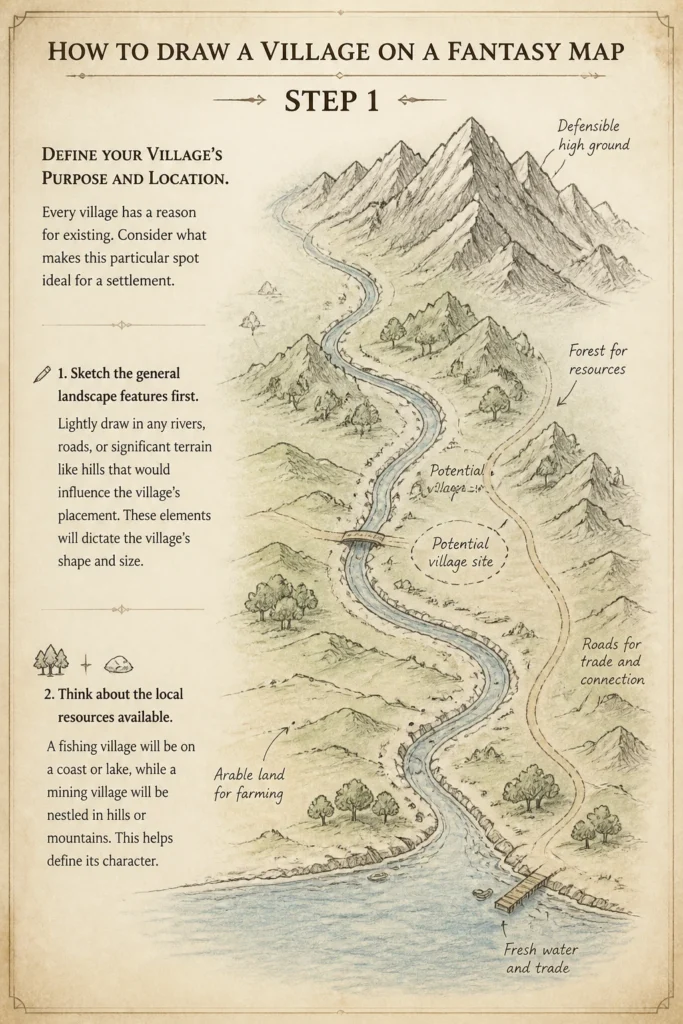
Sketch the general landscape features first. Lightly draw in any rivers, roads, or significant terrain like hills that would influence the village’s placement. These elements will dictate the village’s shape and size.
Think about the local resources available. A fishing village will be on a coast or lake, while a mining village will be nestled in hills or mountains. This helps define its character.
Step 2: Lightly Outline the Village Footprint
Use your pencil to draw a very faint, irregular shape where the main cluster of buildings will be. Villages rarely form perfect squares or circles. They often sprawl along a road, a riverbend, or around a central feature.
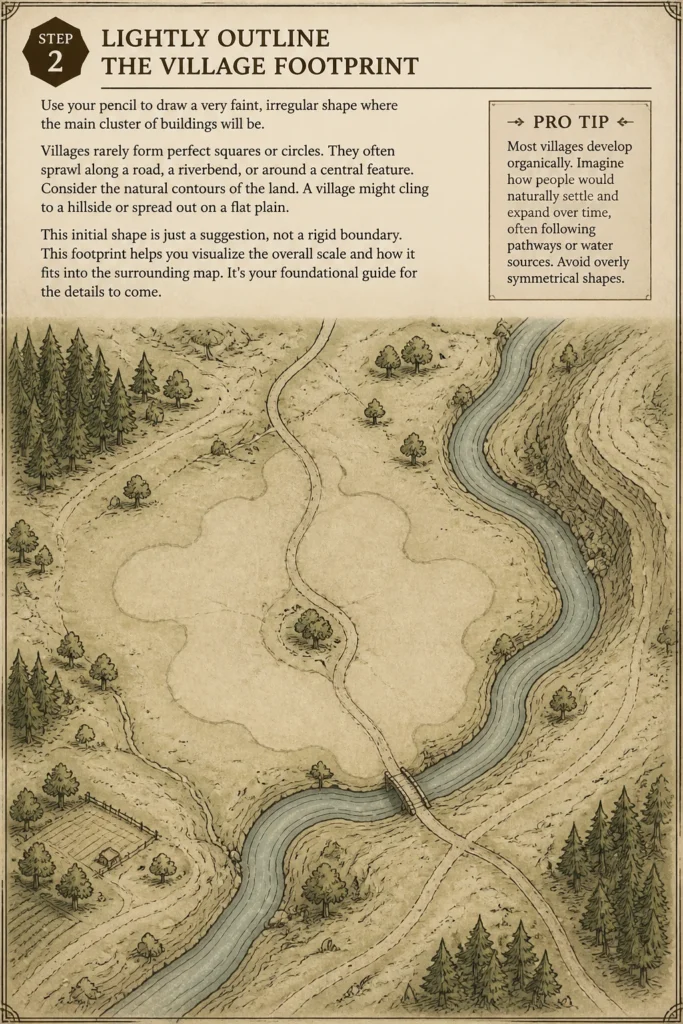
Consider the natural contours of the land. A village might cling to a hillside or spread out on a flat plain. This initial shape is just a suggestion, not a rigid boundary.
This footprint helps you visualize the overall scale and how it fits into the surrounding map. It’s your foundational guide for the details to come.
Pro Tip: Most villages develop organically. Imagine how people would naturally settle and expand over time, often following pathways or water sources. Avoid overly symmetrical shapes.
Step 3: Establish Key Structures and Central Features
Identify the most important buildings or landmarks. This might be a town hall, a temple, a market square, or a lord’s manor. These focal points often form the core of the settlement.
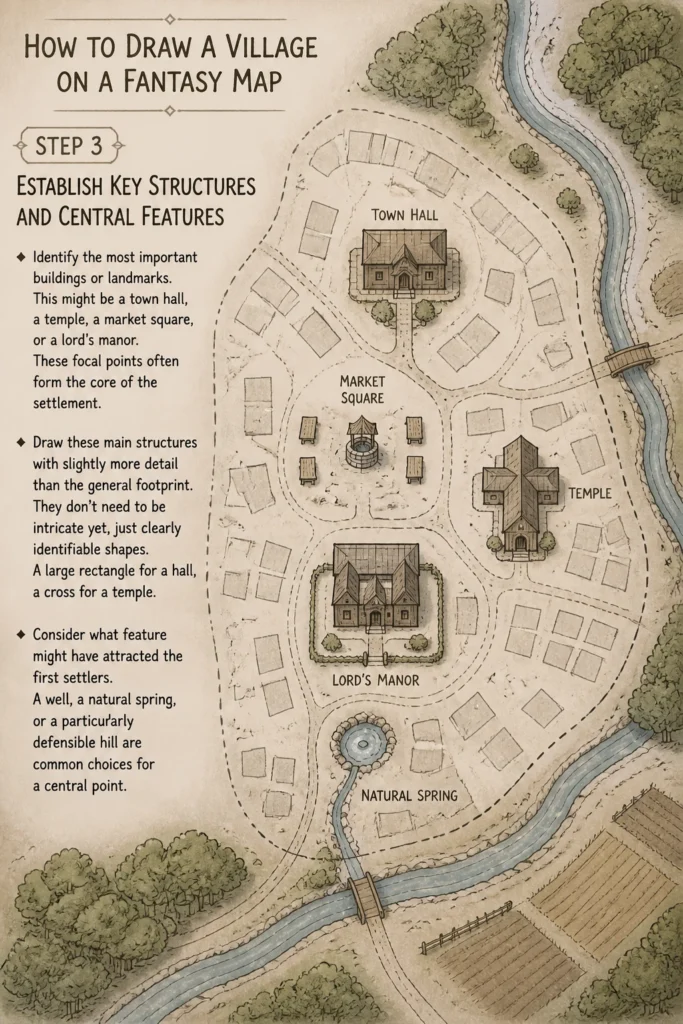
Draw these main structures with slightly more detail than the general footprint. They don’t need to be intricate yet, just clearly identifiable shapes. A large rectangle for a hall, a cross for a temple.
Consider what feature might have attracted the first settlers. A well, a natural spring, or a particularly defensible hill are common choices for a central point.
Step 4: Map Out Roads and Pathways
Villages are connected by roads, both internal and external. Draw the main road leading into and through the village. This road often follows the easiest terrain.
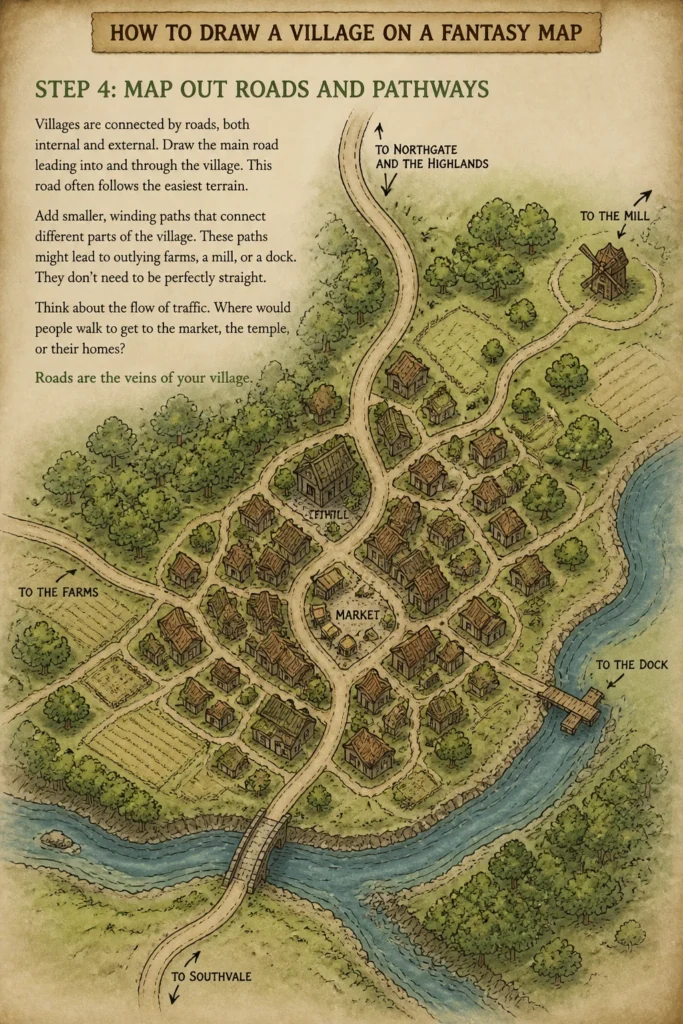
Add smaller, winding paths that connect different parts of the village. These paths might lead to outlying farms, a mill, or a dock. They don’t need to be perfectly straight.
Think about the flow of traffic. Where would people walk to get to the market, the temple, or their homes? Roads are the veins of your village.
Step 5: Indicate Individual Buildings
Now, start adding smaller building shapes within your outlined footprint. These can be simple squares, rectangles, or irregular polygons. Vary their sizes to suggest different types of dwellings or shops.
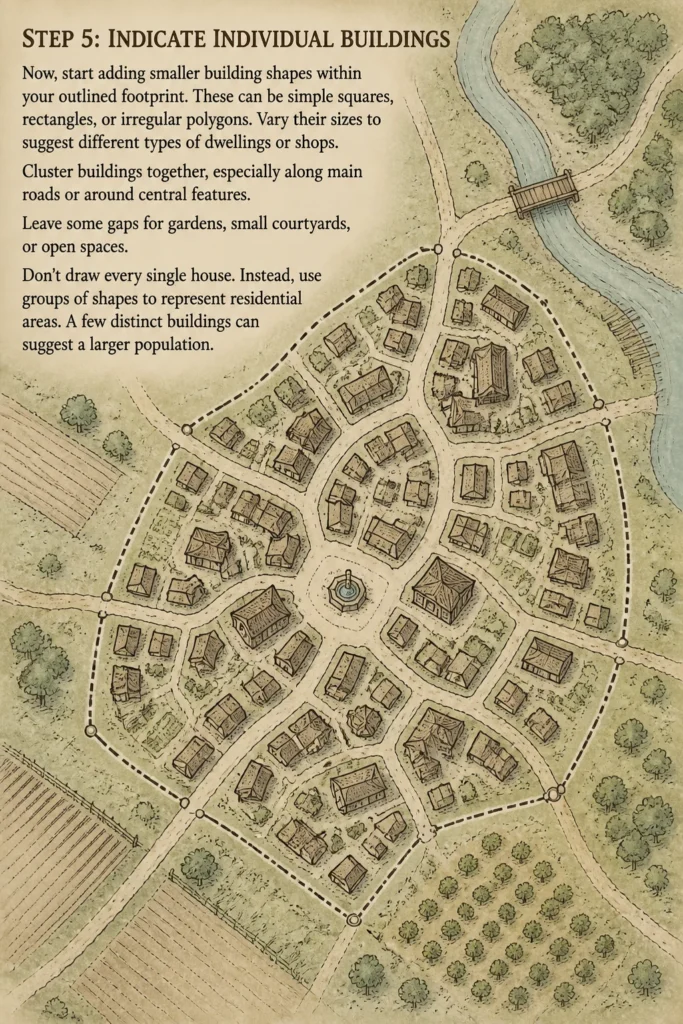
Cluster buildings together, especially along main roads or around central features. Leave some gaps for gardens, small courtyards, or open spaces.
Don’t draw every single house. Instead, use groups of shapes to represent residential areas. A few distinct buildings can suggest a larger population.
Step 6: Add Defensive Elements (If Applicable)
If your village is fortified, now is the time to add walls, palisades, or watchtowers. These elements should follow the contours of the village or take advantage of natural defenses.
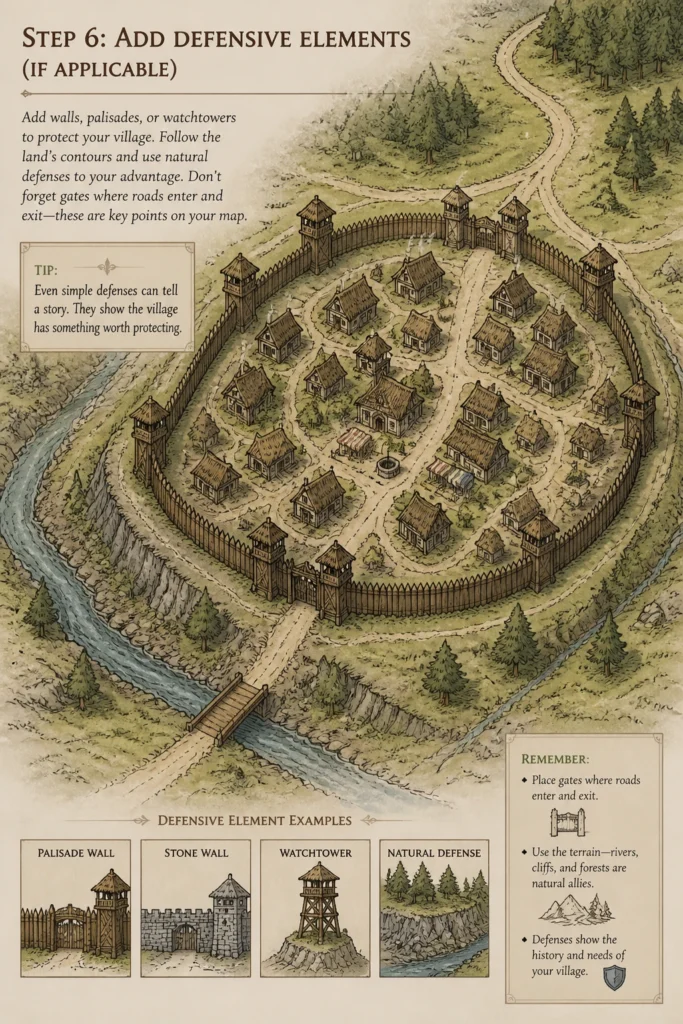
Draw gates where roads pass through any defensive structures. These are important entry and exit points for your map.
Even a simple palisade around a small hamlet can add a lot of character and history to your map. It suggests a need for protection.
Step 7: Introduce Natural and Man-Made Details
Enhance your village with small details that bring it to life. Add a few trees, patches of forest, or orchards around the edges. A small bridge over a stream can be a nice touch.
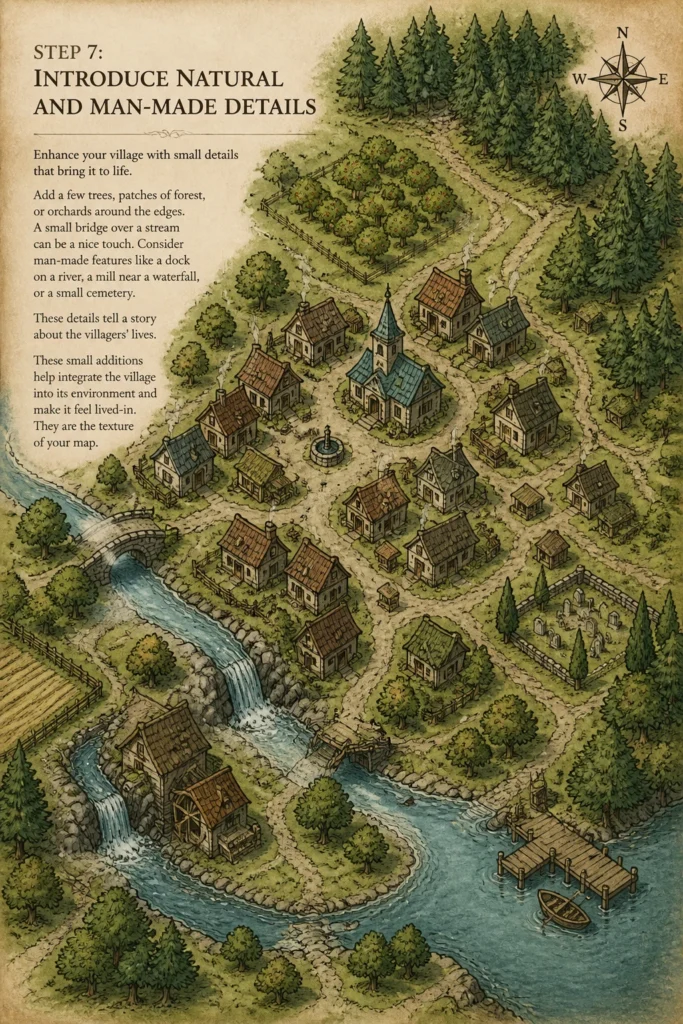
Consider man-made features like a dock on a river, a mill near a waterfall, or a small cemetery. These details tell a story about the villagers’ lives.
These small additions help integrate the village into its environment and make it feel lived-in. They are the texture of your map.
Step 8: Ink Your Village and Erase Pencil Marks
Carefully go over your pencil lines with a fine-tip pen. Use varying line weights to add interest – thicker lines for major roads or important buildings, thinner lines for smaller details.
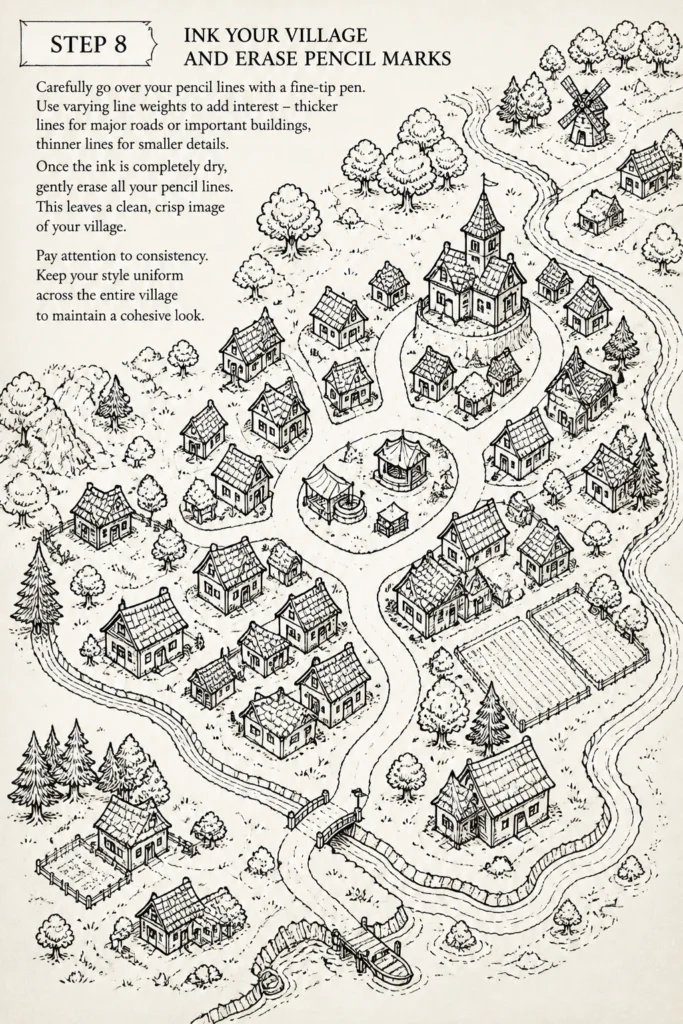
Once the ink is completely dry, gently erase all your pencil lines. This leaves a clean, crisp image of your village.
Pay attention to consistency. Keep your style uniform across the entire village to maintain a cohesive look.
Step 9: Add Shading and Texture (Optional)
If you wish to add more depth, use cross-hatching or stippling to create shadows on buildings or textures on roofs. This can make the village pop off the page.
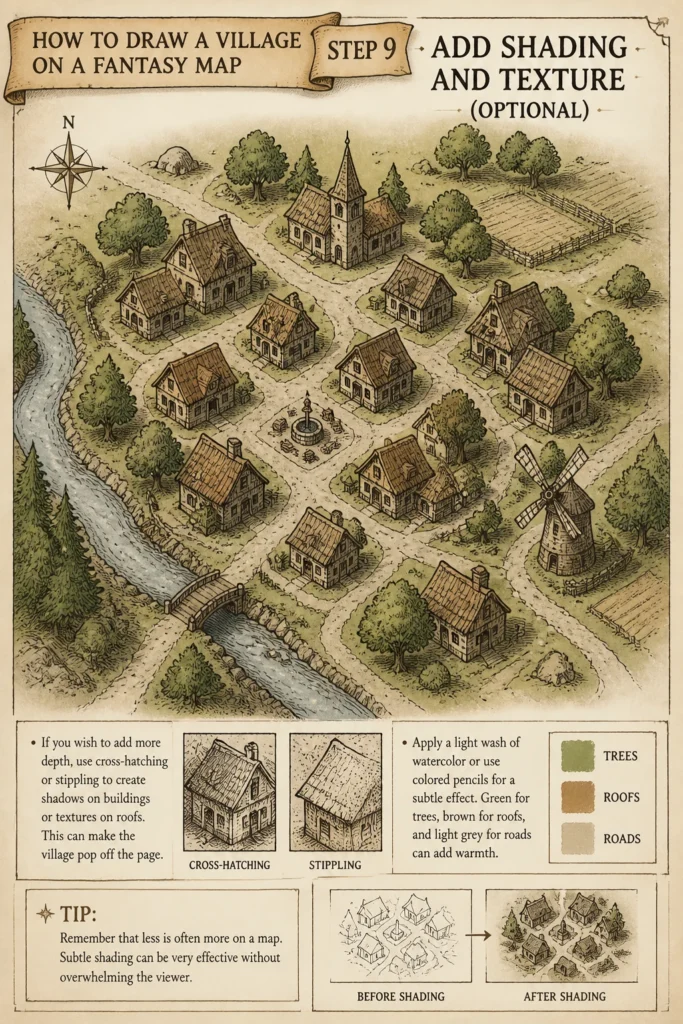
Apply a light wash of watercolor or use colored pencils for a subtle effect. Green for trees, brown for roofs, and light grey for roads can add warmth.
Remember that less is often more on a map. Subtle shading can be very effective without overwhelming the viewer.
Common Mistakes to Avoid
Overly Symmetrical Designs
Many new mapmakers tend to draw villages as perfect squares or circles. Real settlements rarely develop this way. They grow organically, influenced by geography and human activity.
Instead of a rigid shape, let your village sprawl along a river, hug a hillside, or radiate from a central well. Embrace irregularity for a more authentic feel. This makes your map more believable.
Lack of Context
Drawing a village in isolation without considering its surroundings makes it feel detached. Every settlement exists within a larger landscape. Its location is key to its identity.
Always start by sketching the surrounding terrain, roads, and water features. Let these elements dictate where and how your village forms. This creates a sense of purpose.
Too Much Detail for Scale
It’s tempting to draw every single house and window. However, on a regional or world map, this level of detail is unnecessary and can make the map look cluttered. Your goal is to represent, not replicate.
Focus on key structures and general clusters of buildings. Use abstract shapes to represent residential areas rather than individual houses. Save intricate details for local village maps.
Ignoring Natural Development
Villages don’t just appear fully formed. They grow over time, often starting small and expanding. Thinking about this growth helps you design more believable layouts.
Consider where the original settlement might have been and how it would have expanded. New roads might branch off, and new districts might emerge. This historical perspective adds depth.
Troubleshooting
My Village Looks Flat and Uninteresting
If your village lacks visual appeal, it might be missing variation in height or texture. Flat shapes can appear monotonous.
Try adding subtle shading to your buildings to suggest depth. Vary the size and shape of structures. Introduce natural elements like trees or fences to break up uniformity. A slight change in line weight for different features can also help.
I Can’t Get the Buildings to Look Right
Drawing individual buildings can be tricky, especially at a small scale. You don’t need architectural precision for a map.
Focus on basic geometric shapes. A simple square or rectangle with a triangle on top can represent a house. For more complex structures, use a slightly larger, more distinct shape. Remember, you’re conveying the idea of a building.
My Map Feels Cluttered with Too Many Details
If your village feels overwhelming, you might be adding too much information for the map’s scale. Clutter makes it hard to discern important features.
Step back and simplify. Remove unnecessary lines or tiny features. Group small buildings into larger, abstract clusters. Prioritize clarity over hyper-realism, especially on a regional map.
Key Takeaways
- Always begin by considering the village’s purpose and its interaction with the surrounding landscape.
- Use light pencil lines to establish the overall footprint and key features before committing to ink.
- Embrace organic, irregular shapes for a more natural and believable settlement design.
- Vary building sizes and cluster them strategically, rather than drawing every single structure.
- Integrate natural and man-made details like roads, rivers, and trees to ground your village in its environment.
- Focus on representation and clarity appropriate for your map’s scale, avoiding excessive detail.
Frequently Asked Questions
How do I make my village look distinct from others on the map?
Give each village a unique characteristic based on its location and purpose. A fishing village might have docks and nets, a mining village might have mine entrances and spoil heaps, and a farming village might have fields and barns. Vary building styles, even subtly, to reflect local resources or culture.
Should I name my village before or after drawing it?
You can do either! Sometimes a name inspires the design, like “Riverbend Hamlet” suggesting a specific shape. Other times, the design itself will spark a name, such as a village built around a prominent “Old Oak.” Try both approaches to see what works best for you.
What if my village needs defensive walls?
If your village is fortified, draw the walls as the outer boundary of your main settlement area. They should follow the terrain for defensibility, perhaps wrapping around a hill or along a river. Remember to include gates where roads pass through the walls.
How do I show different sizes of villages, from hamlets to towns?
The size of the village’s footprint and the density of its buildings are key. A hamlet will have a very small, loose cluster of buildings. A village will have a more defined, denser cluster with a few key structures. A town will be much larger, with more distinct districts and public buildings.
Our Top Recommended Finds
- Good Quality Sketchbook: Provides a dedicated space for your map ideas, preventing smudges and tears. Look for acid-free paper that holds ink well.
- Fineliner Pen Set: Offers various tip sizes (0.1mm to 0.8mm) for different levels of detail, helping you create clear and precise lines. Essential for inking your maps.
- Kneaded Eraser: Perfect for lifting pencil lines without damaging the paper or smudging your ink. It’s gentle and effective for detailed work.
Your Journey into Cartography Awaits
Drawing a village on your fantasy map is more than just putting shapes on paper. It’s about breathing life into your world, creating focal points for adventures, and hinting at untold stories. Each line you draw contributes to the rich tapestry of your imagined realm.
Take these steps, experiment with your own flair, and don’t be afraid to make mistakes. Every stroke is a lesson, every village a new discovery. Grab your tools today and start populating your map with settlements that beg to be explored. What stories will your villages tell?
& Painting
No rigid rules or pretension. Just practical guides, medium comparisons, and encouraging tips to help you enjoy the drawing & painting process.