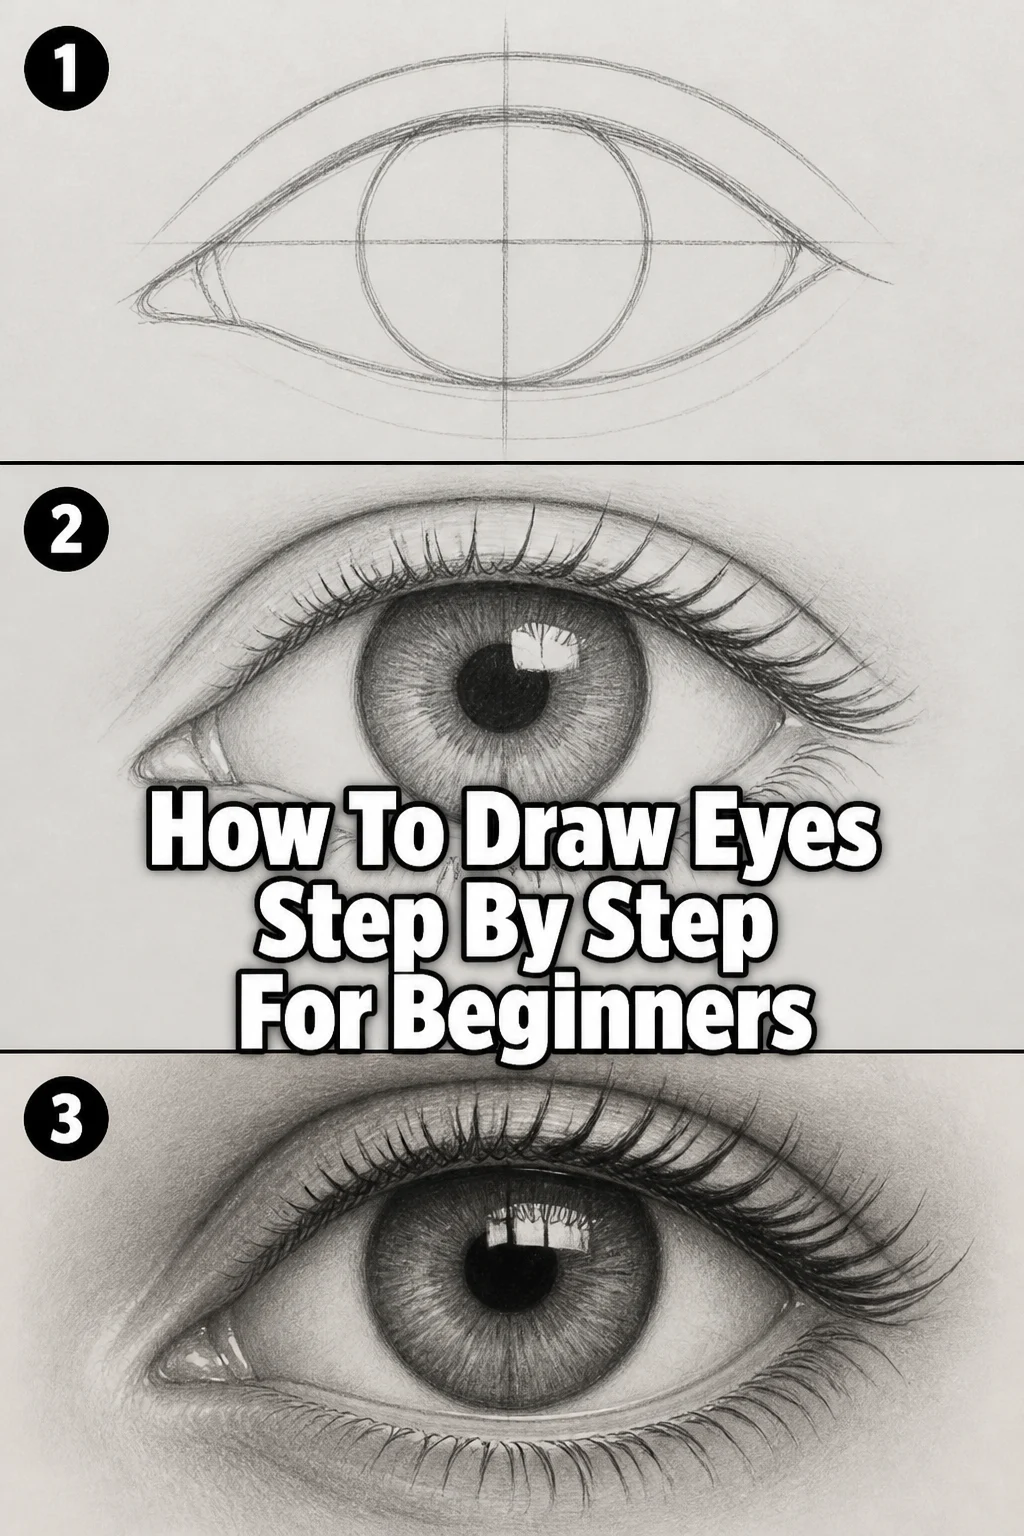
👁️ How To Draw Eyes Step By Step For Beginners
Learning to draw can feel overwhelming, especially when tackling intricate features like the human eye.
I remember my first attempts; they often looked flat or lifeless, which was quite frustrating.
This guide distills years of practice into simple, actionable steps, showing you exactly how to bring expressive eyes to life on paper.
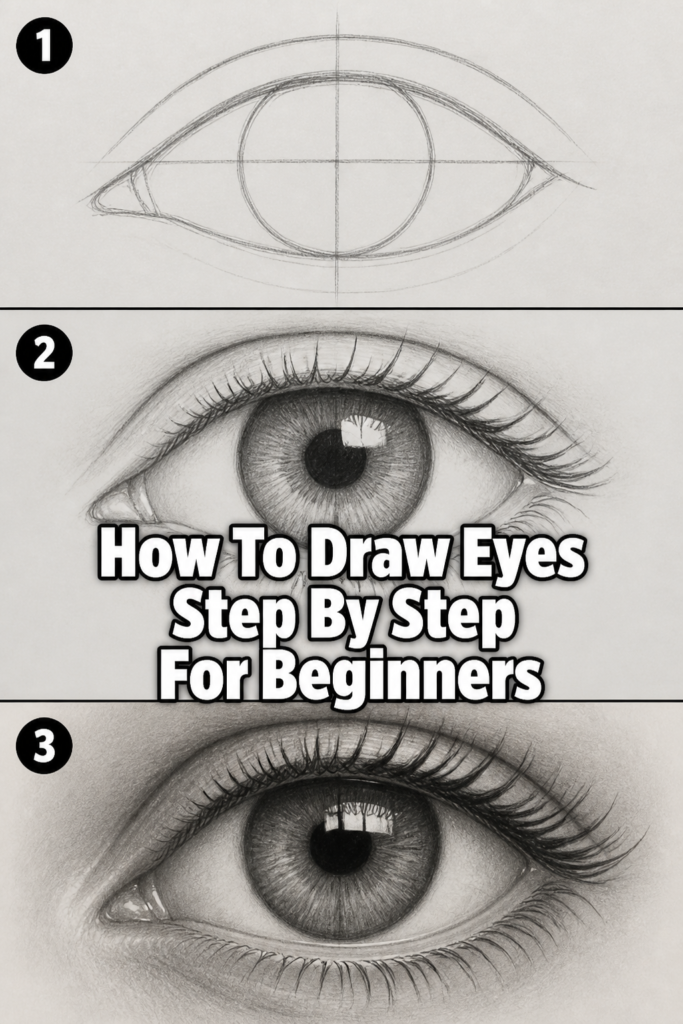
Quick Overview
This guide will walk you through creating a realistic eye drawing from scratch, focusing on fundamental shapes and shading.
You’ll learn how to build structure, add depth, and avoid common pitfalls, giving your artwork an immediate boost.
- Time needed: 45-60 minutes
- Difficulty: Beginner
- What you’ll need: Sketchbook or drawing paper, HB pencil, 2B pencil, 4B or 6B pencil, kneaded eraser, blending stump (optional)
Step-by-Step Instructions
Step 1: Map Out the Basic Shape
Begin by lightly sketching a simple almond or lemon shape.
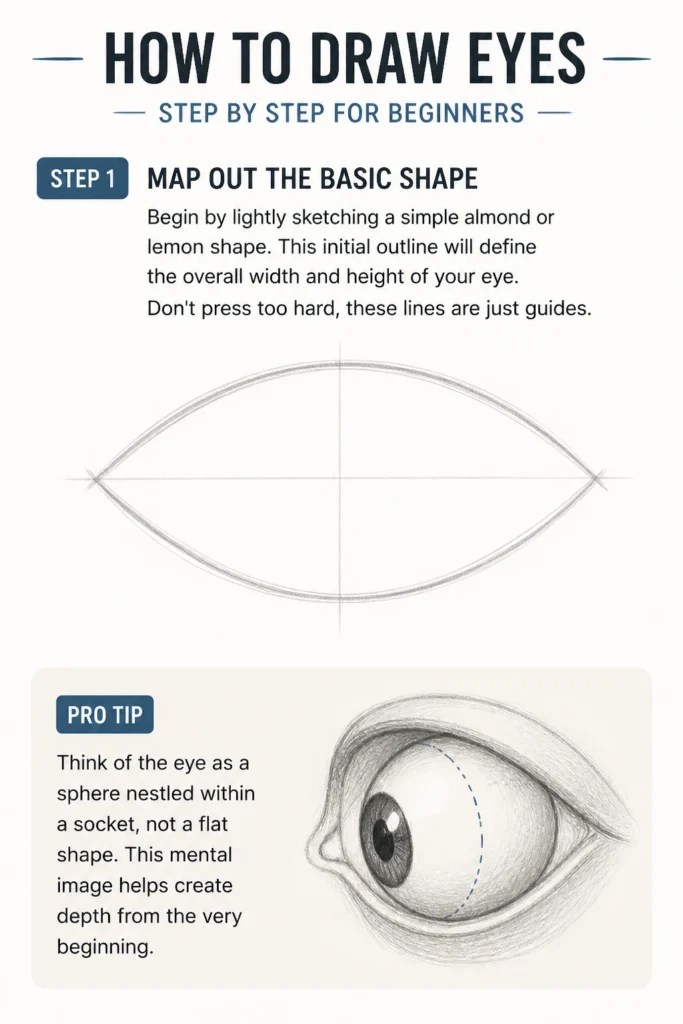
This initial outline will define the overall width and height of your eye.
Don’t press too hard; these lines are just guides.
Pro Tip: Think of the eye as a sphere nestled within a socket, not a flat shape. This mental image helps create depth from the very beginning.
Step 2: Draw the Eyeball Sphere
Inside your almond shape, lightly draw a full circle.
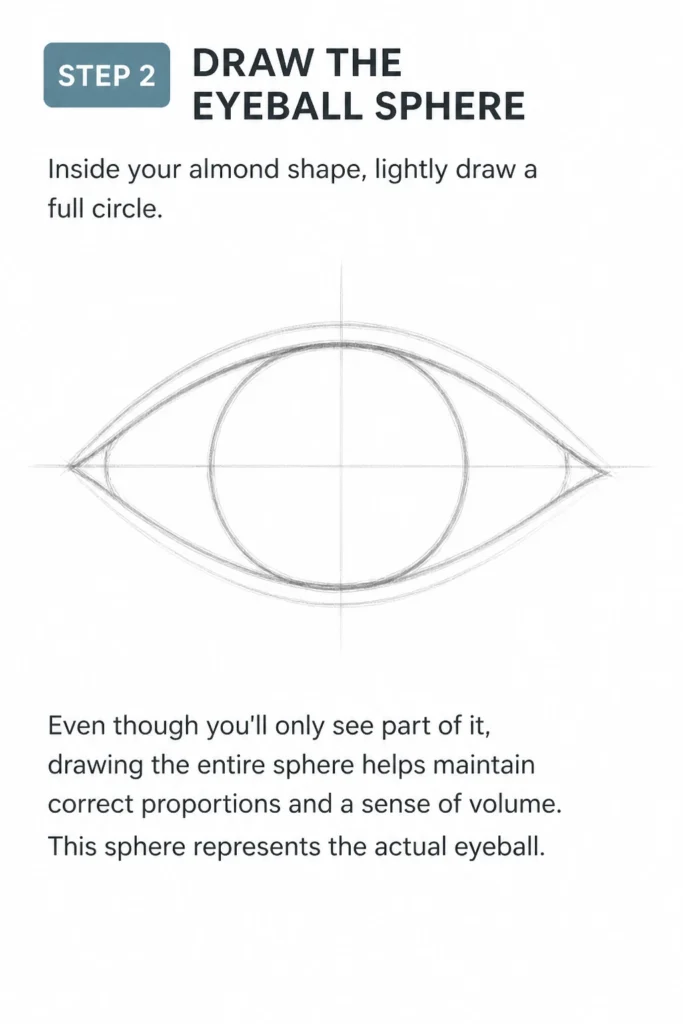
Even though you’ll only see part of it, drawing the entire sphere helps maintain correct proportions and a sense of volume.
This sphere represents the actual eyeball.
Step 3: Define the Iris and Pupil
Now, draw a smaller circle within the eyeball sphere for the iris.
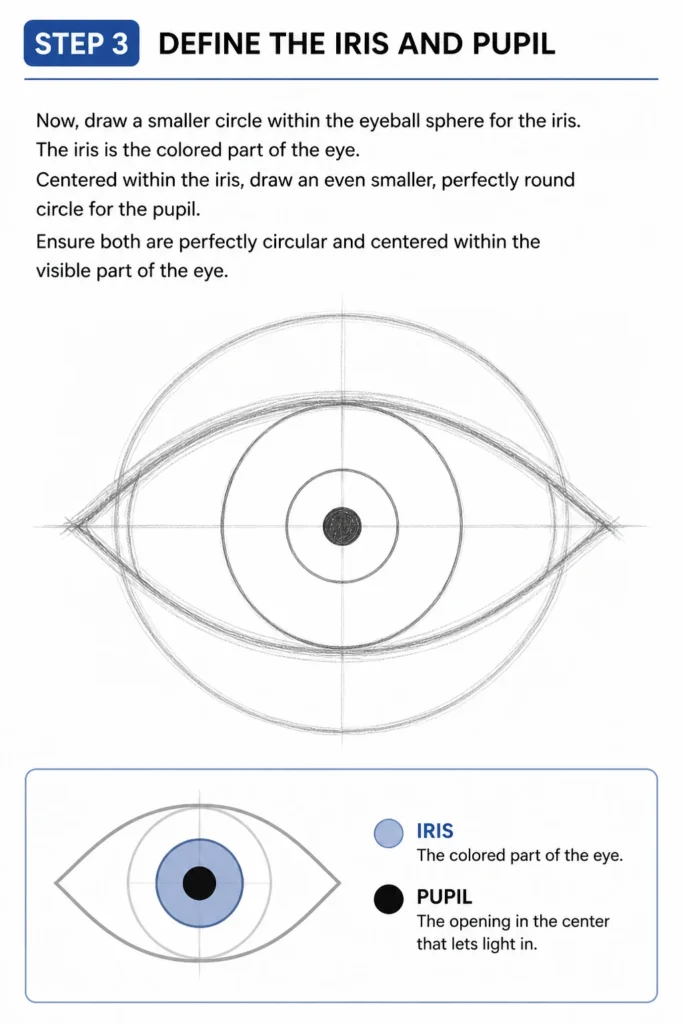
The iris is the colored part of the eye.
Centered within the iris, draw an even smaller, perfectly round circle for the pupil.
Ensure both are perfectly circular and centered within the visible part of the eye.
Step 4: Add the Eyelids and Tear Duct
Refine your almond shape by adding thickness to the eyelids.
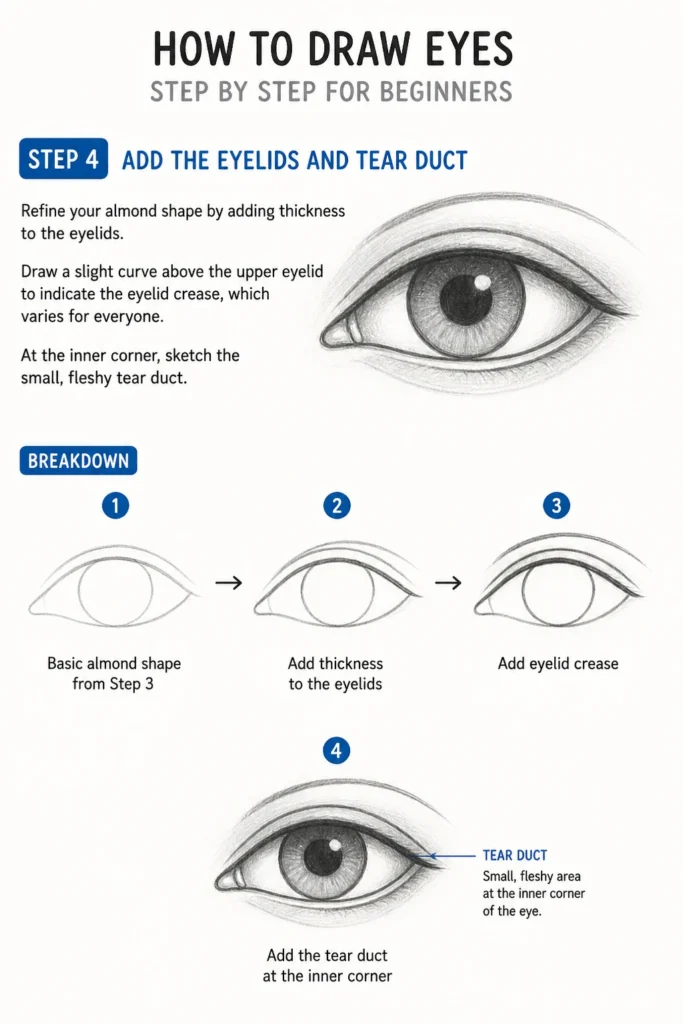
Draw a slight curve above the upper eyelid to indicate the eyelid crease, which varies for everyone.
At the inner corner, sketch the small, fleshy tear duct.
Step 5: Introduce Light and Shadow to the Eyeball
Using your HB or 2B pencil, lightly shade the white of the eye.
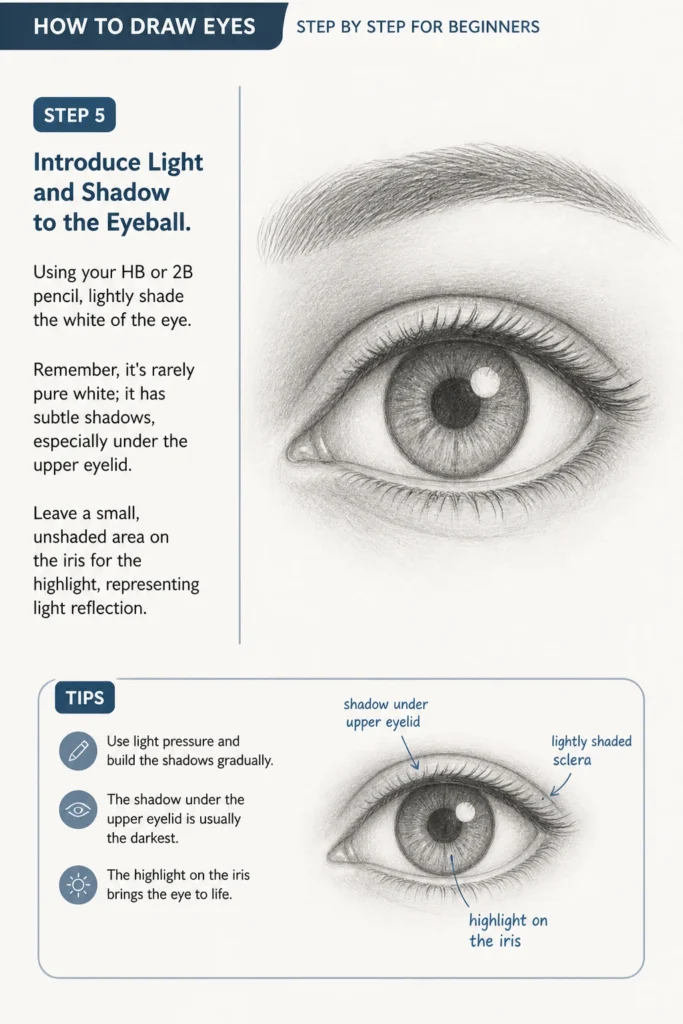
Remember, it’s rarely pure white; it has subtle shadows, especially under the upper eyelid.
Leave a small, unshaded area on the iris for the highlight, representing light reflection.
Step 6: Shade the Iris and Pupil
Fill in the pupil with your darkest pencil (4B or 6B), making it completely black.
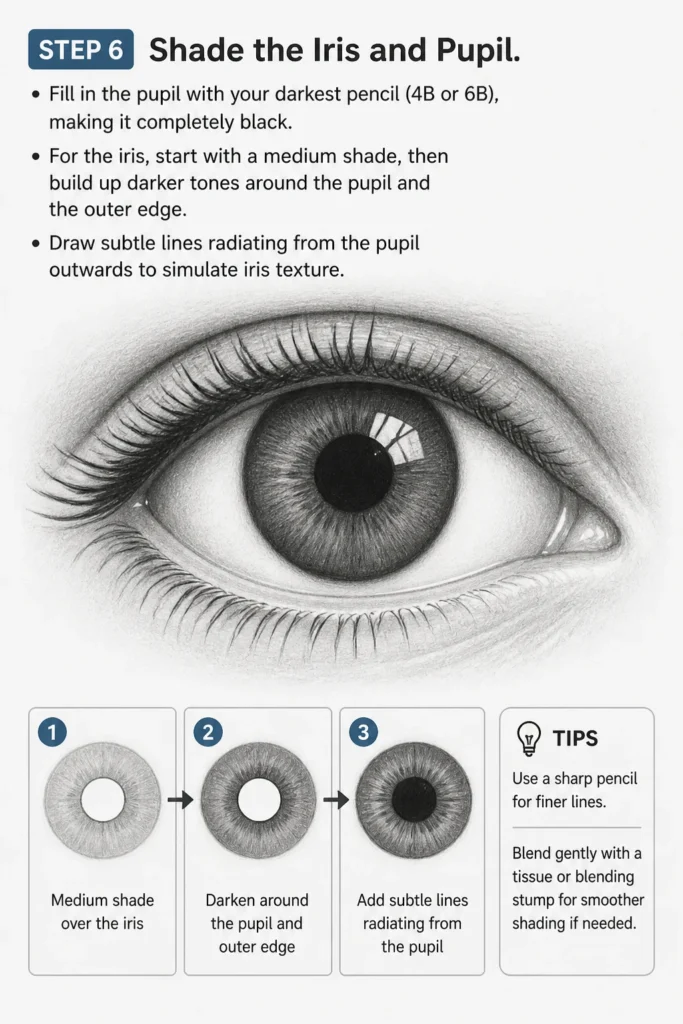
For the iris, start with a medium shade, then build up darker tones around the pupil and the outer edge.
Draw subtle lines radiating from the pupil outwards to simulate iris texture.
Step 7: Draw the Eyelashes
Eyelashes are crucial for realism. They grow from the eyelid’s edge, curving upwards for the top lid and downwards for the bottom.
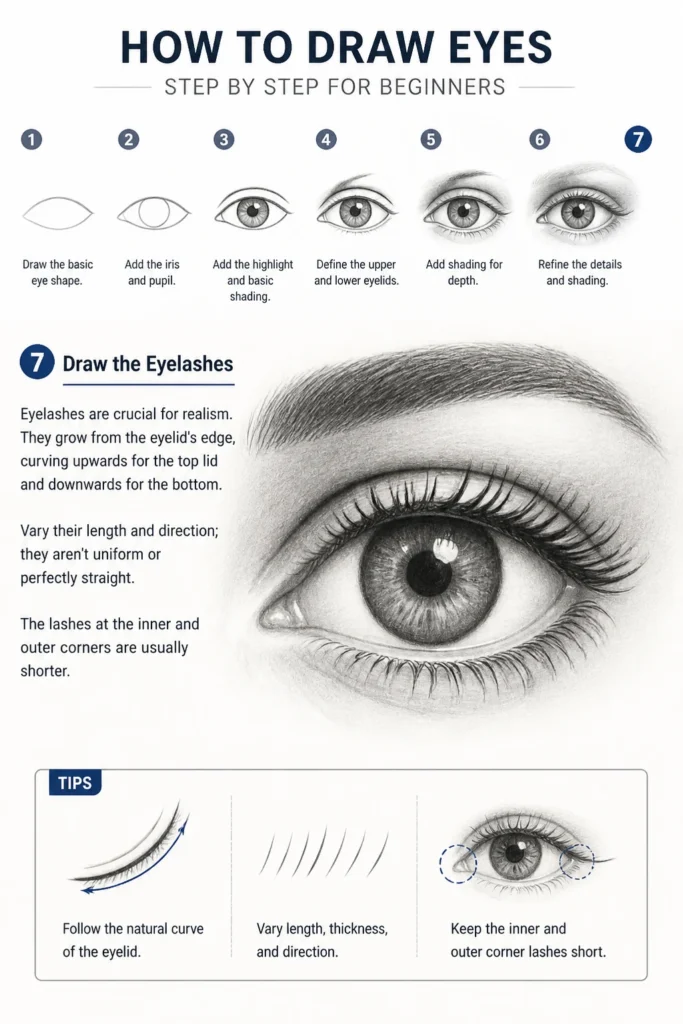
Vary their length and direction; they aren’t uniform or perfectly straight.
The lashes at the inner and outer corners are usually shorter.
Step 8: Develop Skin Tones and Creases
Lightly shade the skin around the eye, paying attention to the natural shadows and highlights.
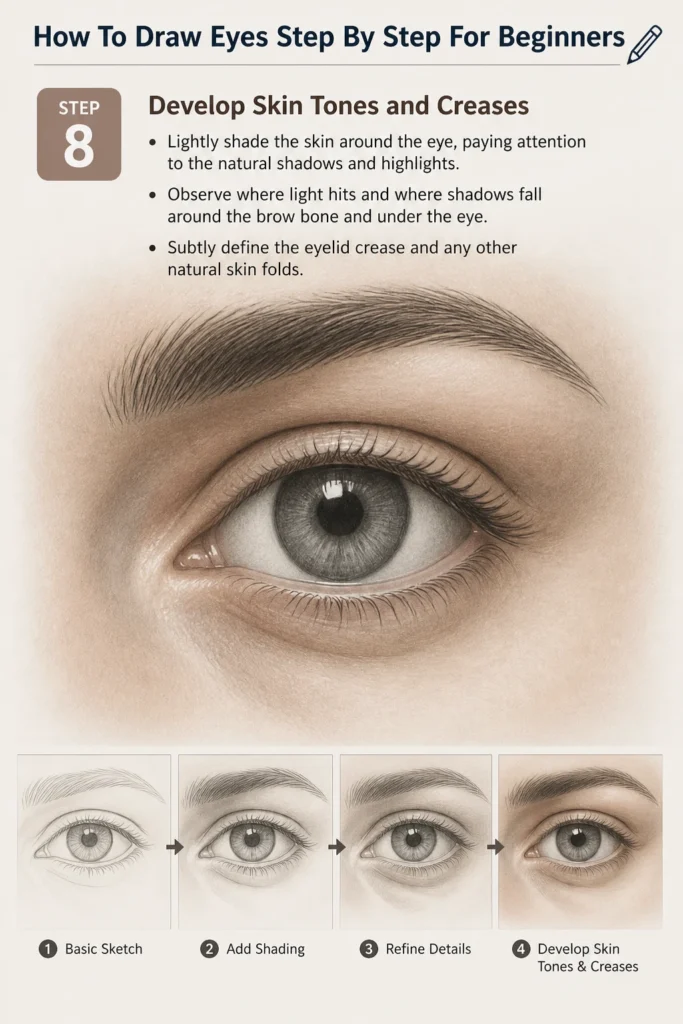
Observe where light hits and where shadows fall around the brow bone and under the eye.
Subtly define the eyelid crease and any other natural skin folds.
Step 9: Refine and Blend
Using a blending stump or even your finger (gently!), soften the transitions between shades.
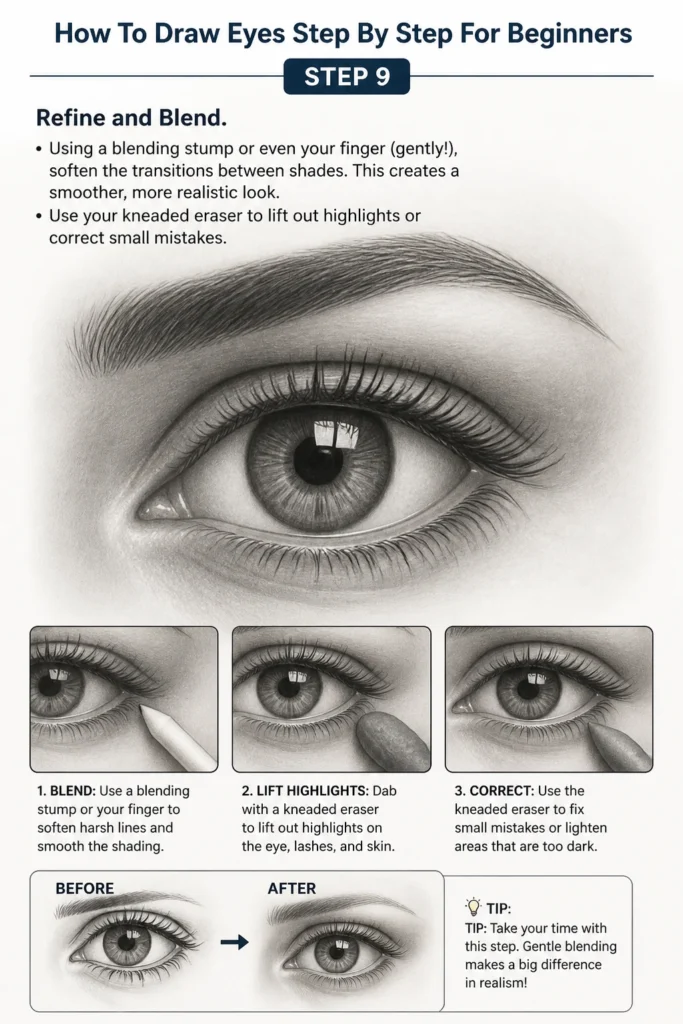
This creates a smoother, more realistic look.
Use your kneaded eraser to lift out highlights or correct small mistakes.
Step 10: Final Details and Highlights
Go back and intensify your darkest darks, especially in the pupil and along the lash line.
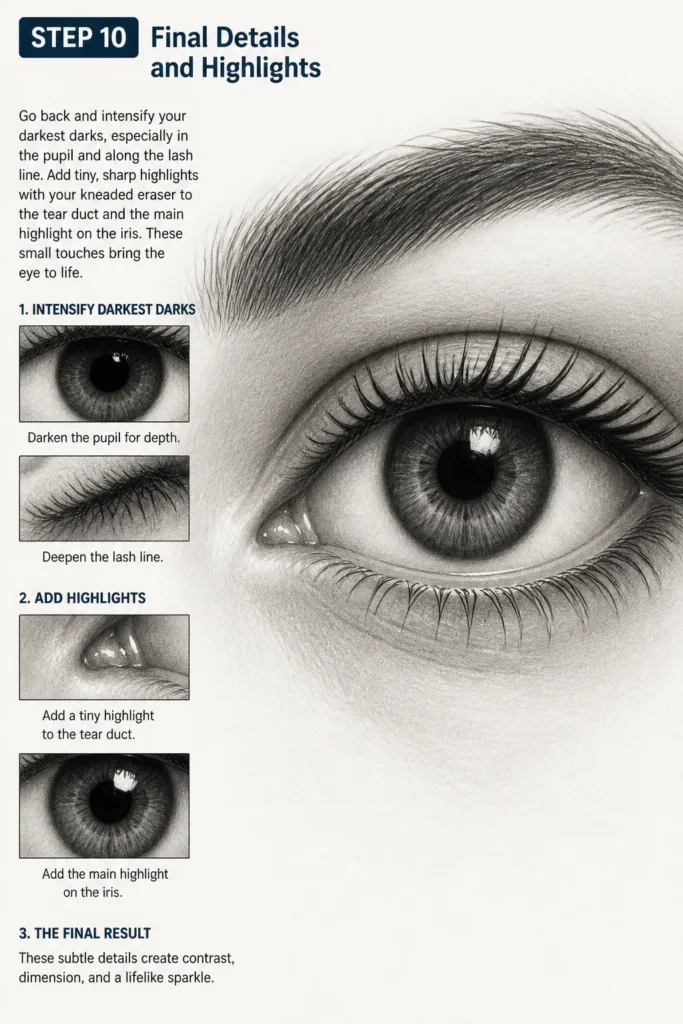
Add tiny, sharp highlights with your kneaded eraser to the tear duct and the main highlight on the iris.
These small touches bring the eye to life.
Common Mistakes to Avoid
Drawing a Flat Eyeball
Many beginners draw the eye as a flat shape on the paper, ignoring its spherical nature.
This makes the eye look unrealistic and disconnected from the face.
Always remember to conceptualize the eye as a ball in a socket, allowing your shading and line work to reflect this three-dimensional form.
Neglecting Eyelid Thickness
Just outlining the eye with a single line for the eyelids makes them appear paper-thin and unnatural.
Eyelids have thickness and volume.
Always add a slight second line to indicate this thickness, especially where the lashes emerge.
Uniform Eyelashes
Drawing eyelashes as perfectly spaced, identical lines instantly makes them look fake.
Real eyelashes are varied in length, thickness, and direction, often clumping slightly.
Practice drawing individual lashes that curve naturally and overlap.
Overly Dark “Whites” of the Eye
While the sclera (the “white” part of the eye) isn’t pure white, making it too dark can make the eye look bruised or tired.
It mostly contains subtle shadows from the eyelids or surrounding structures.
Use very light shading, focusing on soft gradients rather than heavy lines or dark fills.
Troubleshooting
My Eye Looks Flat and Lifeless
This usually happens when you haven’t fully embraced the eye’s spherical form.
Go back to Step 2 and reinforce the idea of the eyeball as a sphere.
Add more subtle shading to the “white” of the eye, darkening it slightly under the upper lid and towards the corners to suggest roundness.
The Iris and Pupil Don’t Look Round
Freehand circles can be tricky. If your iris or pupil looks lopsided, try practicing drawing perfect circles on a separate sheet.
You can also lightly sketch a square or crosshairs as a guide before drawing your circles, ensuring they stay perfectly round.
Eyelashes Look Stiff or Like Spikes
Stiff lashes often result from drawing straight lines or making them all the same length.
Remember that lashes curve outwards and often clump together, especially at the outer corners.
Practice drawing individual, slightly curved strokes that vary in length and angle, imagining them growing from the eyelid.
Key Takeaways
- Always start with basic shapes like almonds and spheres to build a strong foundation.
- Eyelids have thickness; don’t draw them as single, flat lines.
- Eyelashes are organic and varied; avoid uniformity for a natural look.
- The “white” of the eye is rarely pure white; use subtle shading to create depth.
- Shading and highlights are essential for giving the eye volume and making it appear wet and reflective.
- Practice observation; look at real eyes to understand their complex forms and textures.
Frequently Asked Questions
How do I make the eye look wet and reflective?
The key to a wet, reflective look lies in sharp, well-placed highlights.
Use your kneaded eraser to create crisp, bright spots on the iris and tear duct where light would directly hit.
A very slight, soft highlight on the lower lid can also enhance this effect.
What’s the best way to draw different eye shapes?
Start by adjusting your initial almond shape. For rounder eyes, make the almond wider and less pointed at the ends.
For hooded eyes, the upper eyelid crease will be lower or partially covered.
Observe various eye shapes in photos and practice adapting your initial outline.
Should I draw the eyebrow too?
While this guide focuses on the eye itself, drawing the eyebrow often completes the expression and frames the eye beautifully.
Start with its basic shape, then draw individual hairs in the direction they grow, varying their length and density.
It adds context and realism to your eye drawing.
How can I add emotion to the eyes I draw?
Emotion is often conveyed through subtle changes in the eyelids, eyebrows, and the direction of the gaze.
A slight raise of the inner eyebrow can suggest sadness, while lowered, slightly squinted lids can imply intensity or anger.
Practice observing how different emotions affect the muscles around the eye.
Our Top Recommended Finds
- Sketchbook with Quality Paper: A good sketchbook minimizes bleed-through and holds graphite well, making shading easier.
- Assorted Pencil Set (HB, 2B, 4B, 6B): Having a range of hardness allows for diverse shading, from light tones to deep shadows.
- Kneaded Eraser: This versatile tool can lift graphite gently, create highlights, and clean up without leaving crumbs.
Your Journey to Expressive Eyes Starts Now
You now have the foundational steps to draw captivating and realistic eyes.
Remember, drawing is a skill built on practice and observation, not magic.
Don’t be afraid to make mistakes; they are simply learning opportunities.
Pick up your pencil today and bring your first expressive eye to life.
Once you’ve mastered the basics, consider exploring different eye angles or adding more complex skin textures to push your skills further.