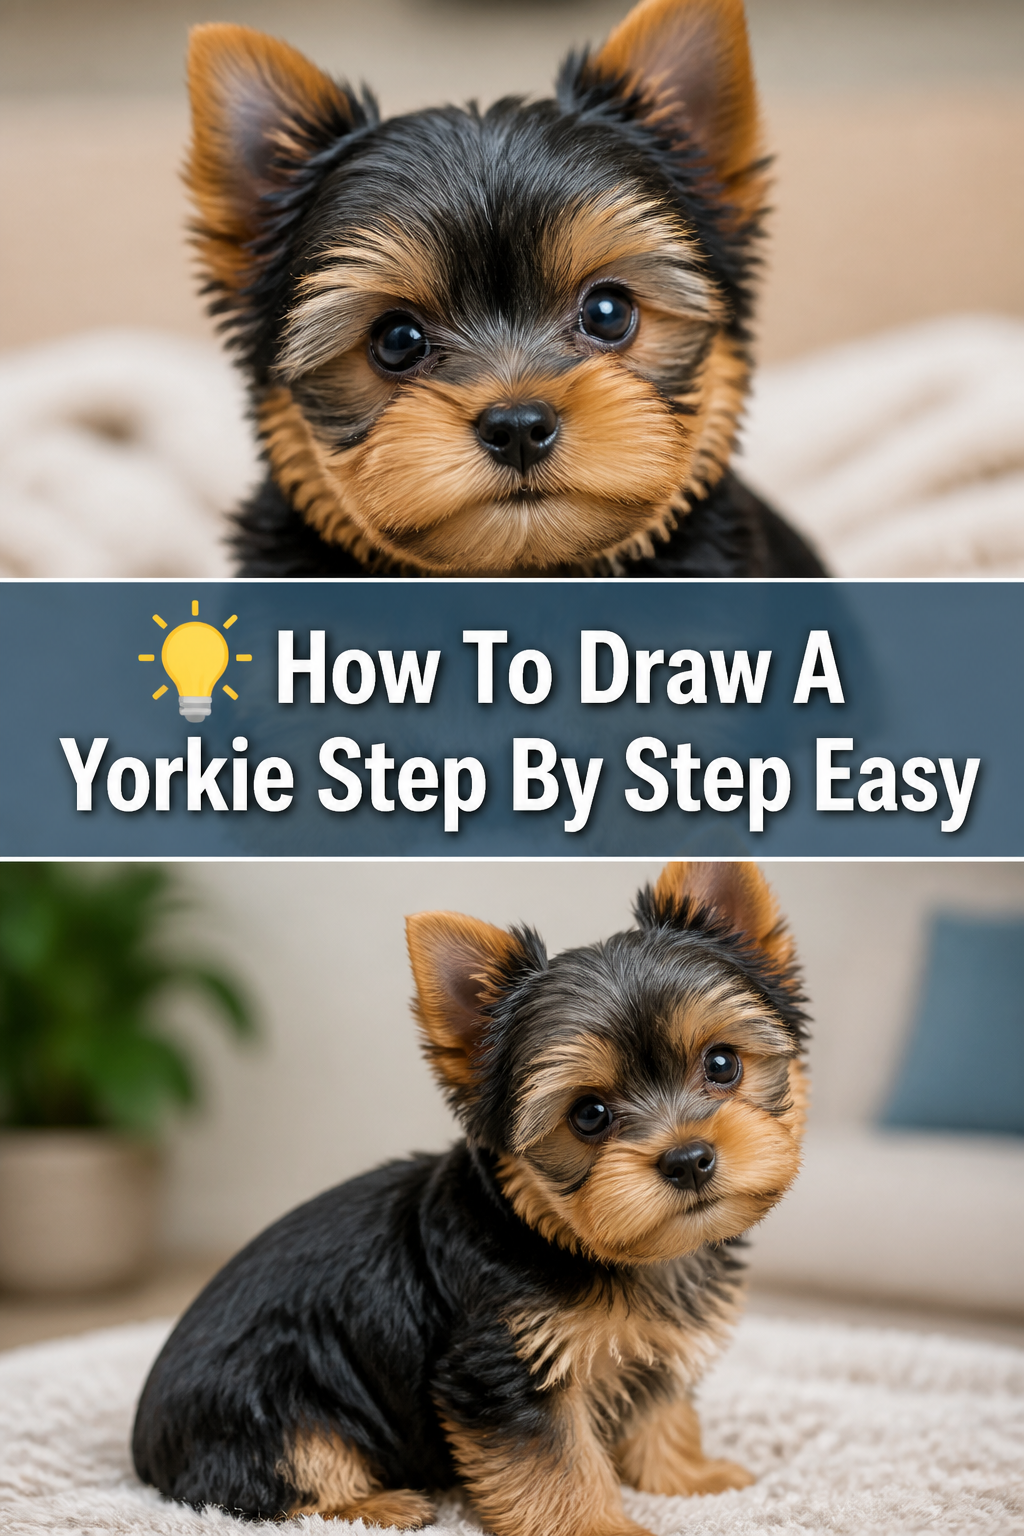
💡 How To Draw A Yorkie Step By Step Easy

& Painting
No rigid rules or pretension. Just practical guides, medium comparisons, and encouraging tips to help you enjoy the drawing & painting process.
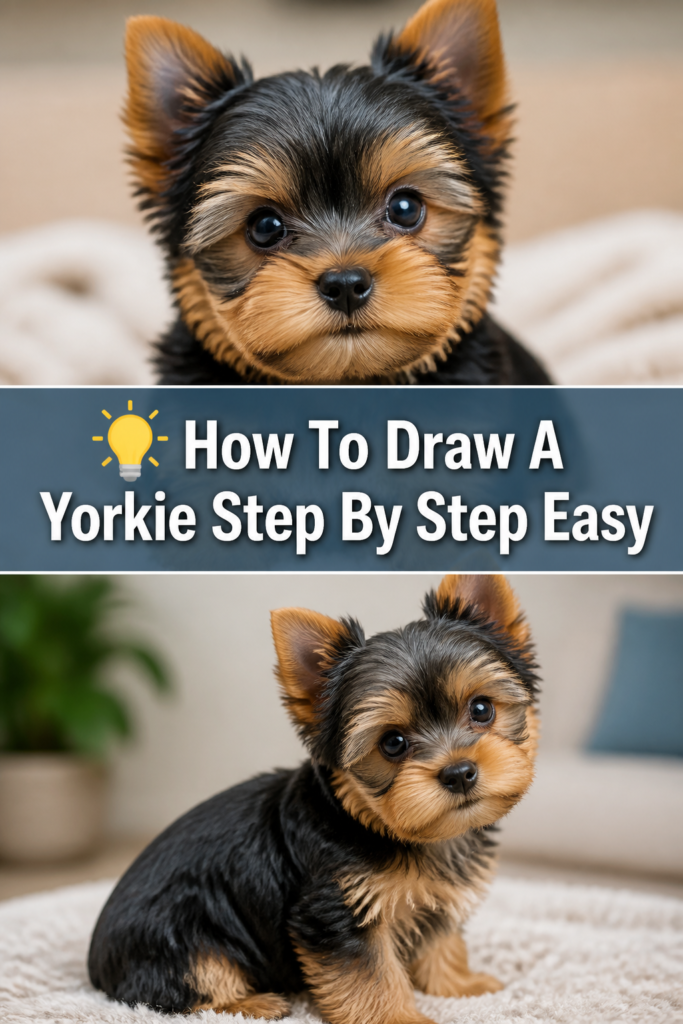
Drawing a Yorkie can seem tricky with all their fluffy hair and expressive faces. I remember my first attempt looked more like a fluffy potato than a dog! But with the right approach, it’s incredibly rewarding.
This guide comes from my own experience breaking down complex dog breeds into simple, manageable shapes. You’ll soon see how easy it is to bring these adorable pups to life on paper.
Quick Overview
Ready to create your very own furry masterpiece? This guide will walk you through each stroke, making the process enjoyable and straightforward. You’ll finish with a charming Yorkie drawing you can be proud of.
- Time needed: 45-60 minutes
- Difficulty: Beginner
- What you’ll need: Pencil (HB, 2B), eraser, drawing paper, optional: blending stump or tissue, colored pencils/crayons.
Step-by-Step Instructions
Step 1: Sketch the Basic Head and Body Shapes
Begin by lightly sketching the fundamental shapes that will form your Yorkie. Think of a large, slightly flattened oval for the head. This will be the main structure.
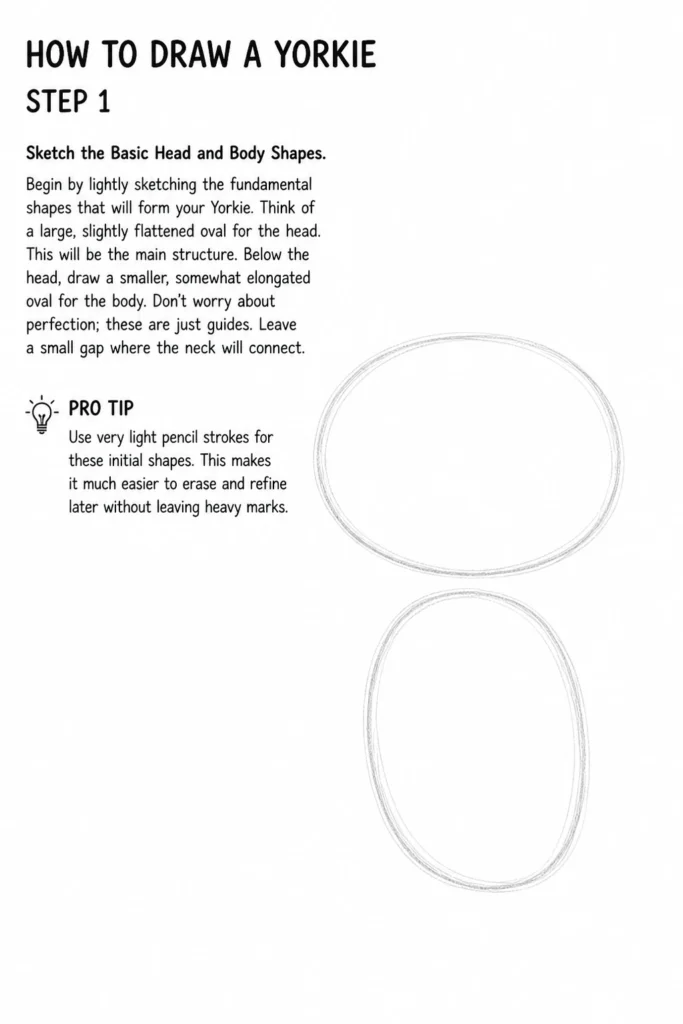
Below the head, draw a smaller, somewhat elongated oval for the body. Don’t worry about perfection; these are just guides. Leave a small gap where the neck will connect.
Pro Tip: Use very light pencil strokes for these initial shapes. This makes it much easier to erase and refine later without leaving heavy marks.
Step 2: Connect the Neck and Outline the Muzzle
Now, connect the head and body ovals with two gentle, curved lines to form the neck. Yorkies have relatively short necks, so keep these lines close.
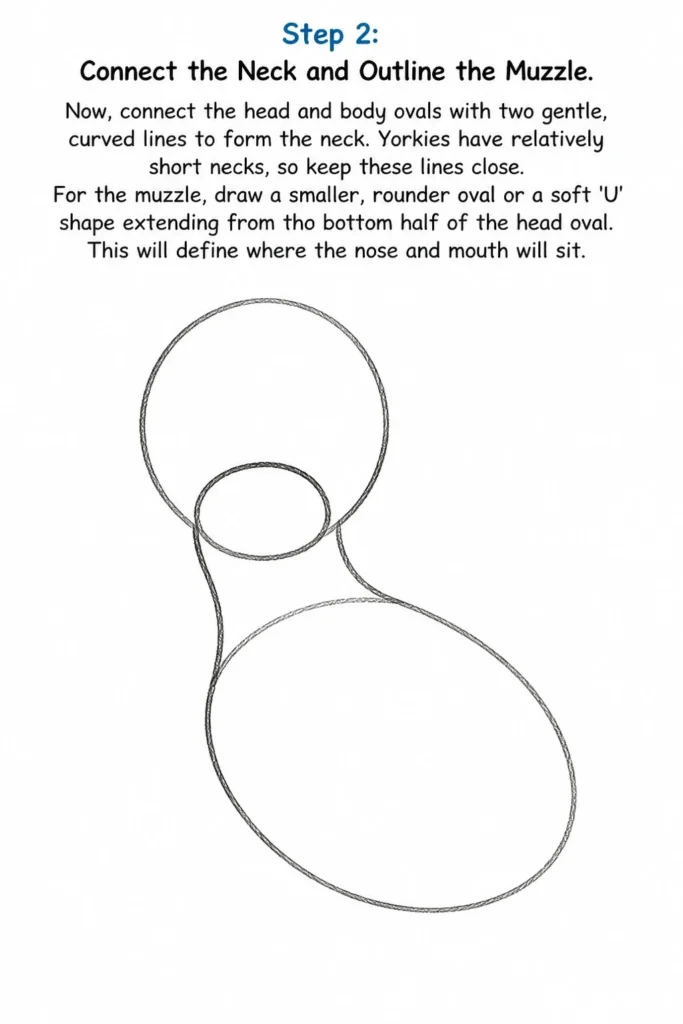
For the muzzle, draw a smaller, rounder oval or a soft ‘U’ shape extending from the bottom half of the head oval. This will define where the nose and mouth will sit.
Step 3: Add the Ears and Eye Placement
Yorkies typically have erect, V-shaped ears that are often trimmed. Draw two small ‘V’ shapes on top of the head, slightly angled outwards. Ensure they are roughly symmetrical.
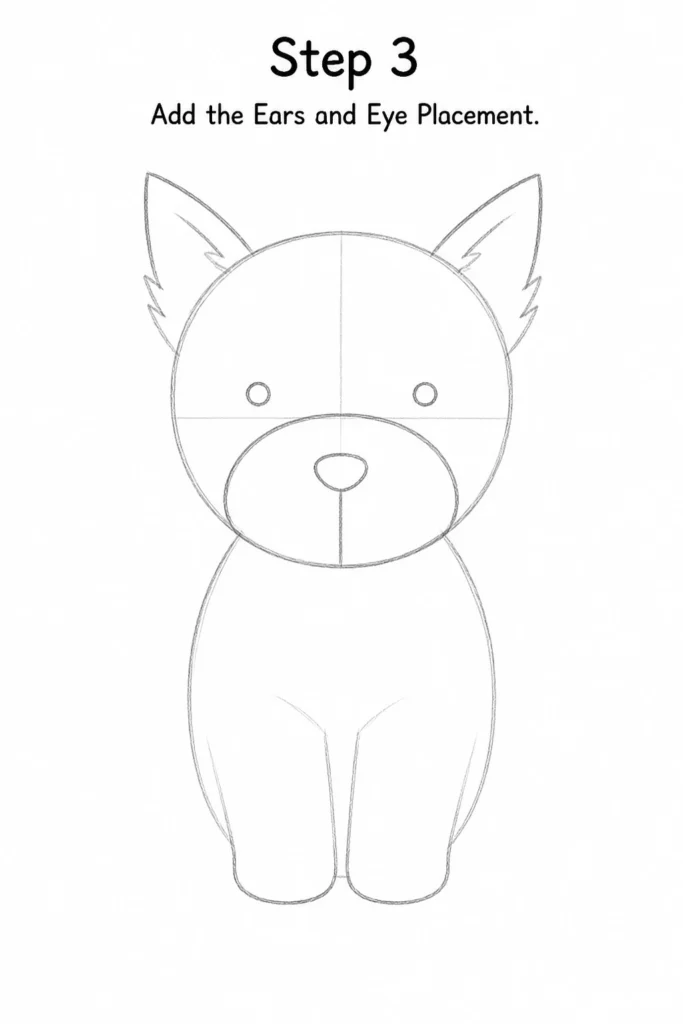
Mark the eye placement with two small, light circles or dots within the upper half of the main head oval. Place them slightly above and to the sides of where the muzzle meets the head.
Step 4: Refine the Face: Eyes, Nose, and Mouth
Let’s bring the face to life. For the eyes, darken the circles and add a smaller, darker dot in the center for the pupil. Leave a tiny white highlight to make them sparkle.
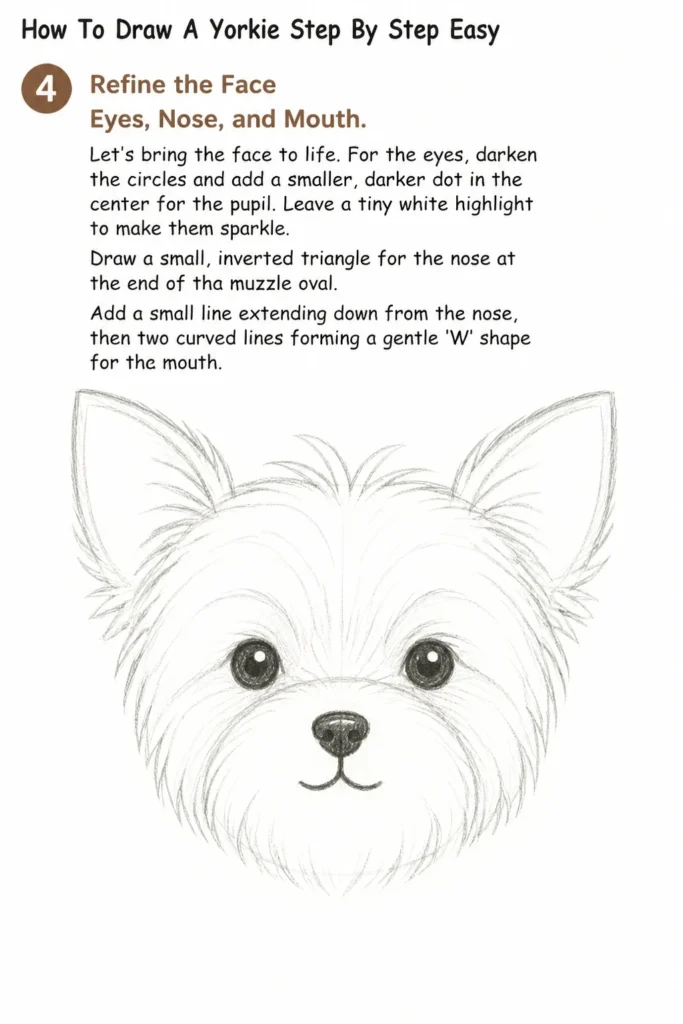
Draw a small, inverted triangle for the nose at the end of the muzzle oval. Add a small line extending down from the nose, then two curved lines forming a gentle ‘W’ shape for the mouth.
Step 5: Sketch the Legs and Paws
Yorkies have slender legs. Draw four simple, stick-like lines extending from the body for the legs. The front legs should be relatively straight, while the back legs might have a slight bend.
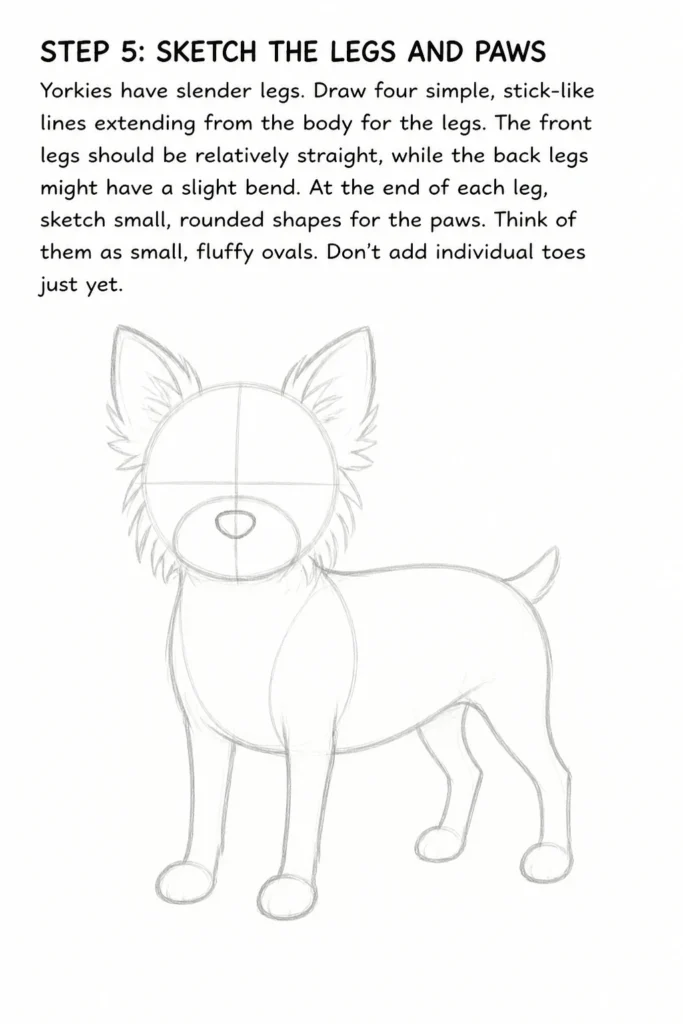
At the end of each leg, sketch small, rounded shapes for the paws. Think of them as small, fluffy ovals. Don’t add individual toes just yet.
Step 6: Outline the Fur and Tail
This is where the Yorkie’s characteristic long, silky fur comes in. Use choppy, wavy lines to outline the head, body, and legs, following your initial guide shapes. Make the lines slightly irregular to suggest fur texture.
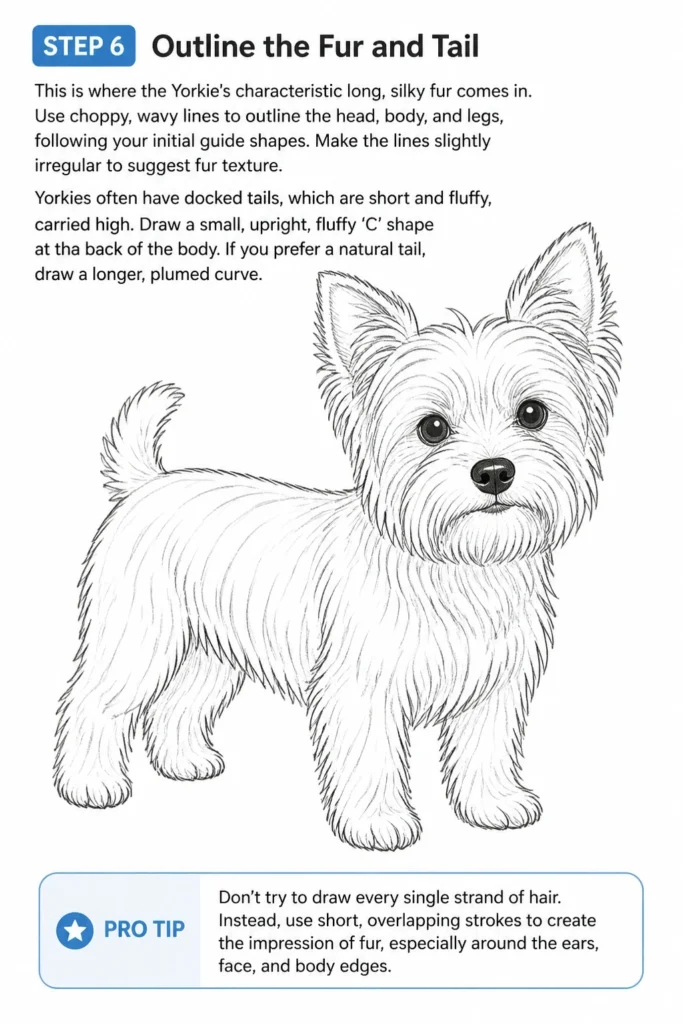
Yorkies often have docked tails, which are short and fluffy, carried high. Draw a small, upright, fluffy ‘C’ shape at the back of the body. If you prefer a natural tail, draw a longer, plumed curve.
Pro Tip: Don’t try to draw every single strand of hair. Instead, use short, overlapping strokes to create the impression of fur, especially around the ears, face, and body edges.
Step 7: Add Details and Erase Guide Lines
Now, go back and add more specific details. Give the ears some inner lines to show depth. Add a few more fur tufts around the face, especially under the chin and around the eyes.
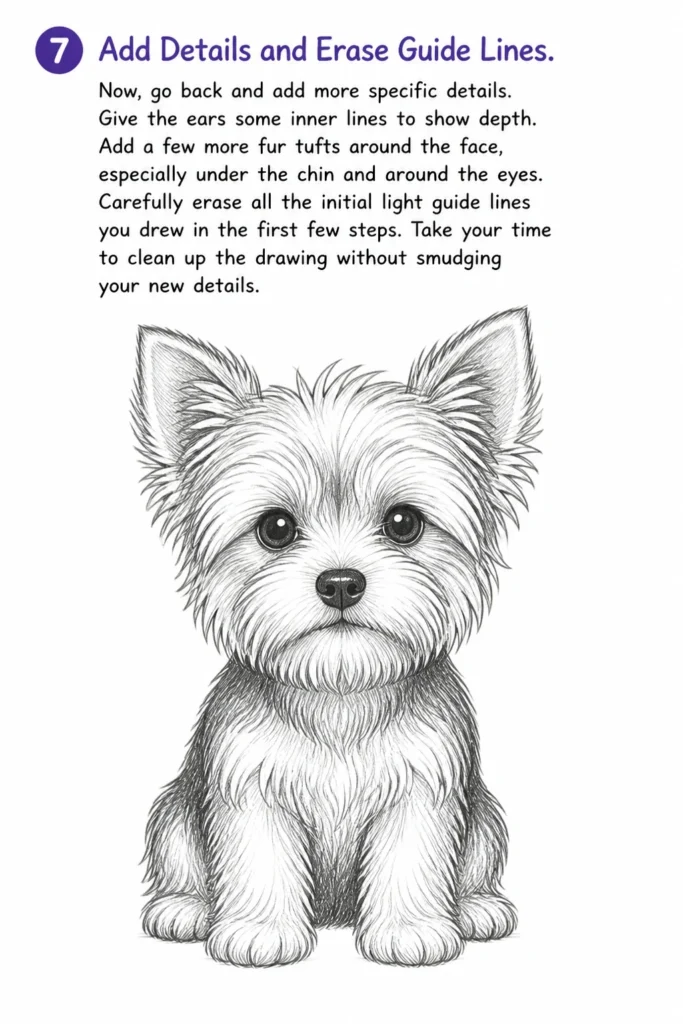
Carefully erase all the initial light guide lines you drew in the first few steps. Take your time to clean up the drawing without smudging your new details.
Step 8: Shade and Texture for Depth
Time to add some dimension. Use your pencil to lightly shade areas that would naturally be darker, like under the ears, beneath the chin, and along the belly.
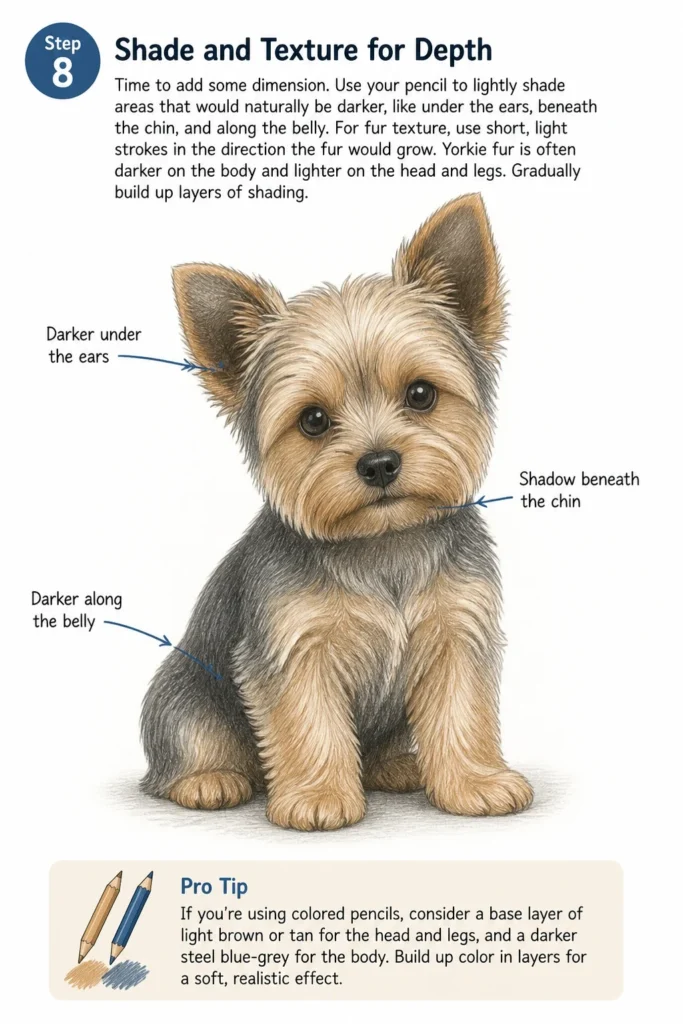
For fur texture, use short, light strokes in the direction the fur would grow. Yorkie fur is often darker on the body and lighter on the head and legs. Gradually build up layers of shading.
Pro Tip: If you’re using colored pencils, consider a base layer of light brown or tan for the head and legs, and a darker steel blue-grey for the body. Build up color in layers for a soft, realistic effect.
Step 9: Final Touches and Highlights
Review your drawing. Are there any areas that need more definition or darker shadows? Use a slightly darker pencil (like a 2B) to deepen key outlines or add stronger fur details.
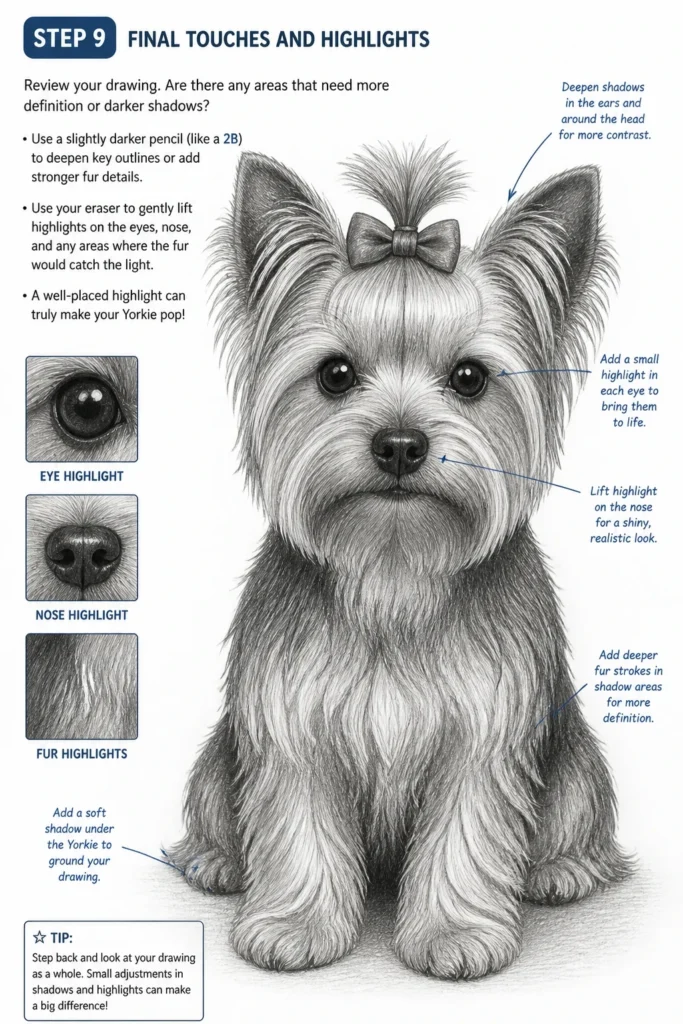
Use your eraser to gently lift highlights on the eyes, nose, and any areas where the fur would catch the light. A well-placed highlight can truly make your Yorkie pop!
Common Mistakes to Avoid
Making the Head Too Round or Square
Yorkies have a distinct head shape that’s more of a flattened oval, not perfectly round like a ball or sharply angled like a box. If your initial head shape is off, the whole face can look unnatural. Always aim for that soft, slightly squashed oval to capture their unique cranial structure.
Drawing Overly Symmetrical Features
While you want balance, perfect symmetry can make a drawing look stiff and lifeless. Real dogs have subtle imperfections. For instance, one ear might be slightly higher, or the fur around one eye might be a bit different. Embrace these small variations to give your Yorkie character.
Ignoring Fur Direction and Texture
Yorkies are famous for their long, silky coats. Simply outlining the body with a smooth line won’t convey this. Failing to use short, directional strokes for fur can make your dog look flat or bald. Always consider which way the fur grows and use varied line work to suggest that luxurious texture.
Pressing Too Hard Initially
Starting with heavy lines for your basic shapes makes it incredibly difficult to erase mistakes or refine your drawing later. This often leads to visible smudges or indentations on the paper. Always begin with the lightest possible touch, building up pressure only as you become confident in your lines.
Troubleshooting
My Yorkie Looks Stiff and Lifeless
If your drawing lacks dynamism, it might be due to rigid lines and symmetrical features. Try introducing more curves into your outlines, even for straight parts like legs. Experiment with slightly tilting the head or body. Small asymmetries in the eyes or ears can also add a touch of personality and make the dog feel more alive.
The Fur Texture Isn’t Looking Right
Achieving realistic fur takes practice. If your fur looks like scribbles or uniform lines, adjust your technique. Instead of drawing individual hairs, focus on drawing small clusters of fur. Use varying stroke lengths and pressures. Remember to follow the natural flow of the fur, generally downwards on the body and outwards on the face. Blending can also soften harsh lines.
My Drawing Looks Flat, Lacking Depth
A flat drawing usually means insufficient shading and contrast. Go back and identify areas that would naturally be in shadow, such as under the chin, beneath the ears, and where limbs meet the body. Use a darker pencil or add more layers of light shading in these spots. Conversely, use your eraser to create bright highlights on prominent features like the bridge of the nose or the top of the head.
Key Takeaways
- Start Simple: Always begin with basic geometric shapes as your foundation.
- Light Touches First: Use a very light hand for initial sketches to allow for easy correction.
- Embrace Fur Texture: Use short, directional strokes to mimic the Yorkie’s distinct coat.
- Focus on Expression: The eyes and muzzle are key to capturing a Yorkie’s personality.
- Layer Your Shading: Build up depth gradually with multiple layers of light pencil work.
- Practice Makes Perfect: Don’t get discouraged if your first attempt isn’t flawless; every drawing is a learning experience.
Frequently Asked Questions
What kind of pencil is best for drawing fur?
For drawing fur, a range of pencils is helpful. Start with an HB or 2H for light initial sketches. For adding texture and darker fur, B, 2B, or even 4B pencils are excellent as they produce softer, darker lines that blend well and can create depth.
How do I make the eyes look expressive?
Expressive eyes come from a combination of shape, shading, and highlights. Ensure the eyes are slightly rounded. Shade the upper part of the eye darker to give it depth, and always add a small, bright white highlight (a tiny dot) to simulate light reflecting off the eye. This instantly brings them to life.
Should I draw the Yorkie’s bow?
Drawing the Yorkie’s signature topknot bow is entirely optional and adds a charming touch! If you choose to include it, draw a simple ribbon shape just above the eyes, nestled in the fur. Keep it relatively small so it doesn’t overpower the face.
How can I make my Yorkie drawing look more unique?
To add uniqueness, consider subtle variations. Maybe one ear is slightly floppier, or the fur around the mouth has a distinctive curl. You could also experiment with different poses, like a playful head tilt or a relaxed sitting position, rather than just a standard front view.
Our Top Recommended Finds
- Sketching Pencil Set: A good set with a range of H and B pencils (e.g., HB, 2B, 4B, 6B) offers versatility for light sketching to deep shading.
- Kneaded Eraser: Essential for lifting graphite without smudging and for creating soft highlights, much better than a standard plastic eraser.
- Smooth Drawing Paper: Opt for a paper with a slightly smoother texture (like Bristol paper or a good cartridge paper) as it helps capture the fine detail and silky nature of Yorkie fur.
Unleash Your Inner Artist Today
You’ve just taken a fantastic step towards bringing adorable Yorkies to life on paper. Every line you draw, every shade you add, builds your confidence and skill. This isn’t just about drawing a dog; it’s about discovering your creative potential.
Why stop at one Yorkie? Try drawing them in different poses, perhaps with a cute toy or a playful expression. The more you practice, the more natural it becomes. Grab your pencil and paper right now, and let your artistic journey continue!
& Painting
No rigid rules or pretension. Just practical guides, medium comparisons, and encouraging tips to help you enjoy the drawing & painting process.