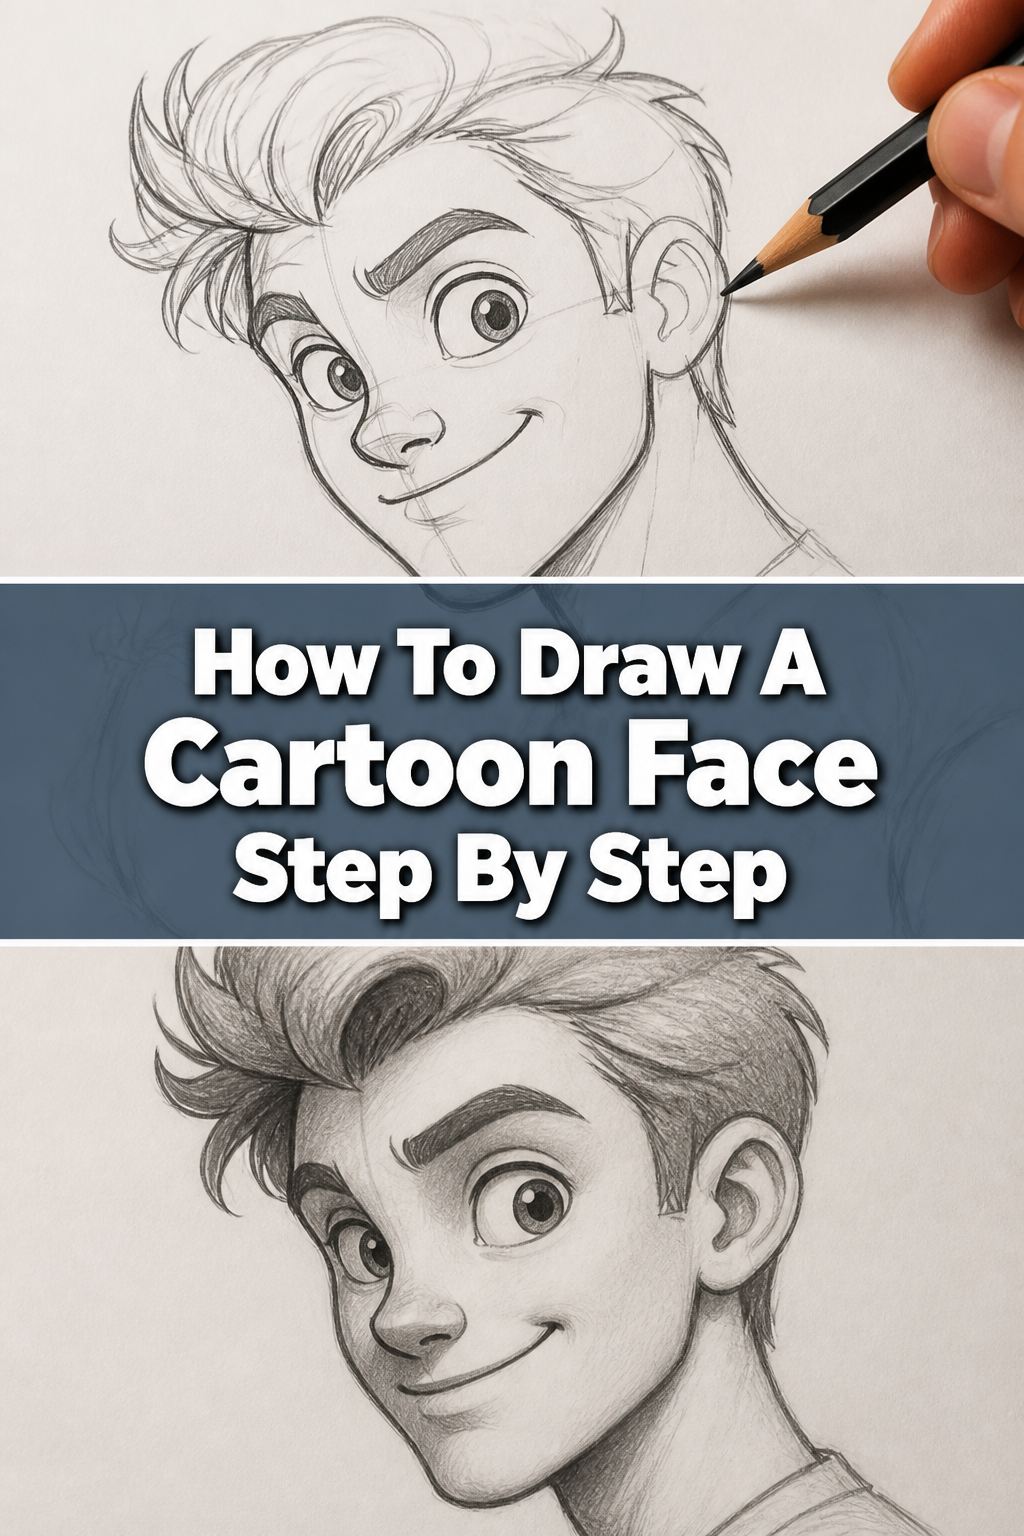
👤 How To Draw A Cartoon Face Step By Step

& Painting
No rigid rules or pretension. Just practical guides, medium comparisons, and encouraging tips to help you enjoy the drawing & painting process.
Ever wanted to bring your own silly characters to life on paper?
Drawing cartoon faces is a fantastic way to express creativity and share your unique vision with the world.
I’ve spent countless hours doodling and experimenting, finding the simplest ways to create expressive faces, and I’m excited to share those practical insights with you.
Quick Overview
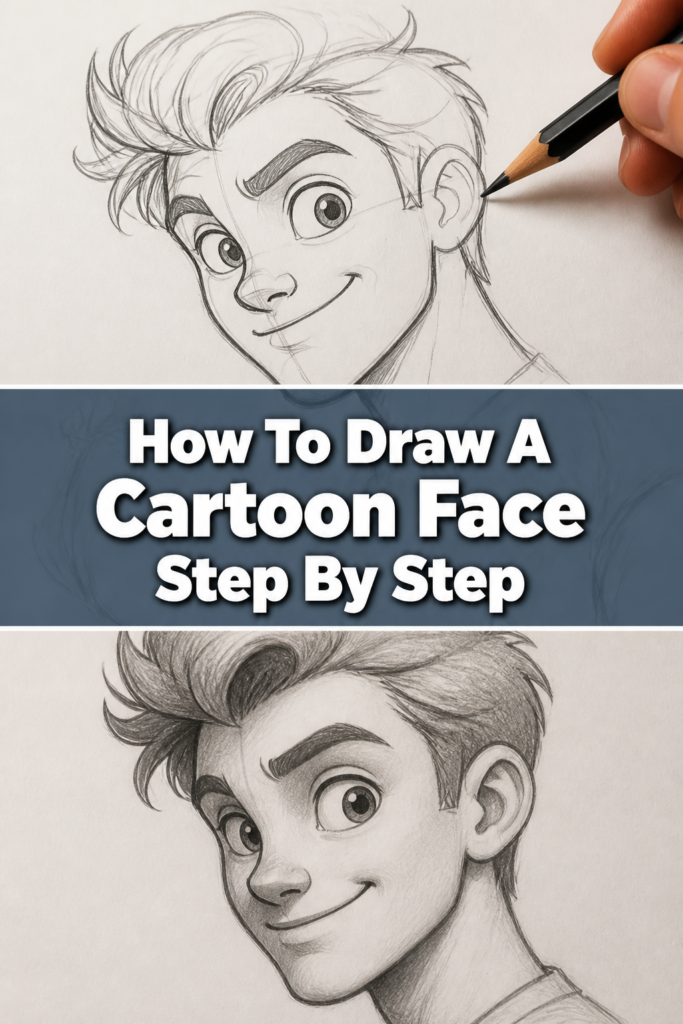
This guide will walk you through creating a charming cartoon face from scratch.
You’ll learn foundational shapes and how to add personality to your characters.
- Time needed: 30-60 minutes (depending on detail and practice)
- Difficulty: Beginner
- What you’ll need: Pencil, eraser, paper, optional inking pen and colored pencils
Step-by-Step Instructions
Step 1: Sketch the Basic Head Shape
Every cartoon face starts with a simple foundation.
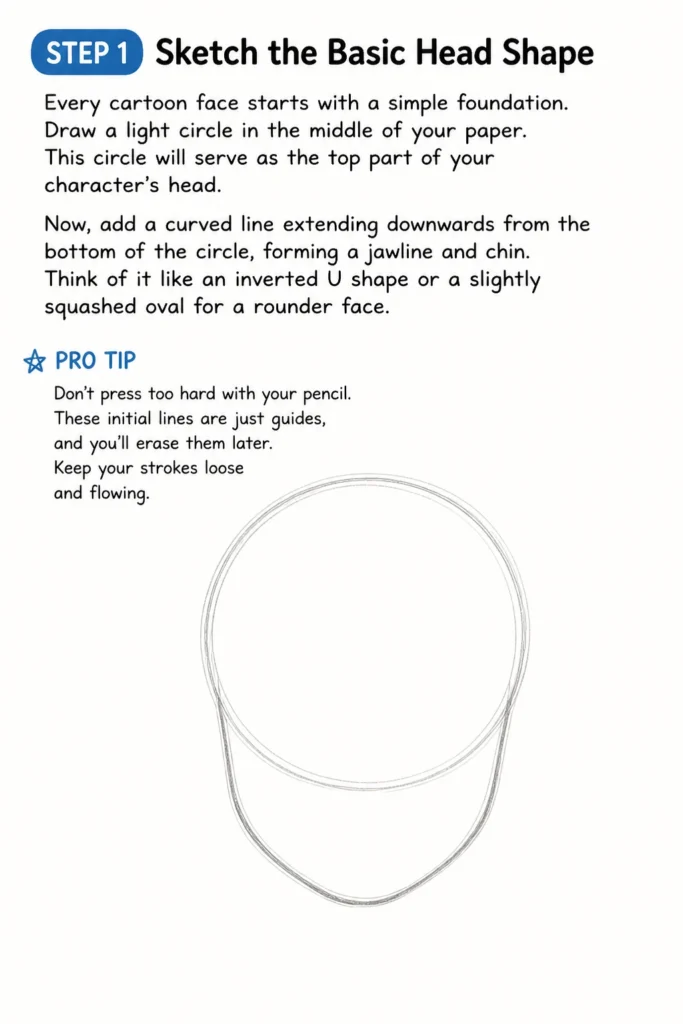
Draw a light circle in the middle of your paper.
This circle will serve as the top part of your character’s head.
Now, add a curved line extending downwards from the bottom of the circle, forming a jawline and chin.
Think of it like an inverted “U” shape or a slightly squashed oval for a rounder face.
Pro Tip: Don’t press too hard with your pencil. These initial lines are just guides, and you’ll erase them later. Keep your strokes loose and flowing.
Step 2: Add Guide Lines for Features
Guide lines are crucial for placing features correctly.
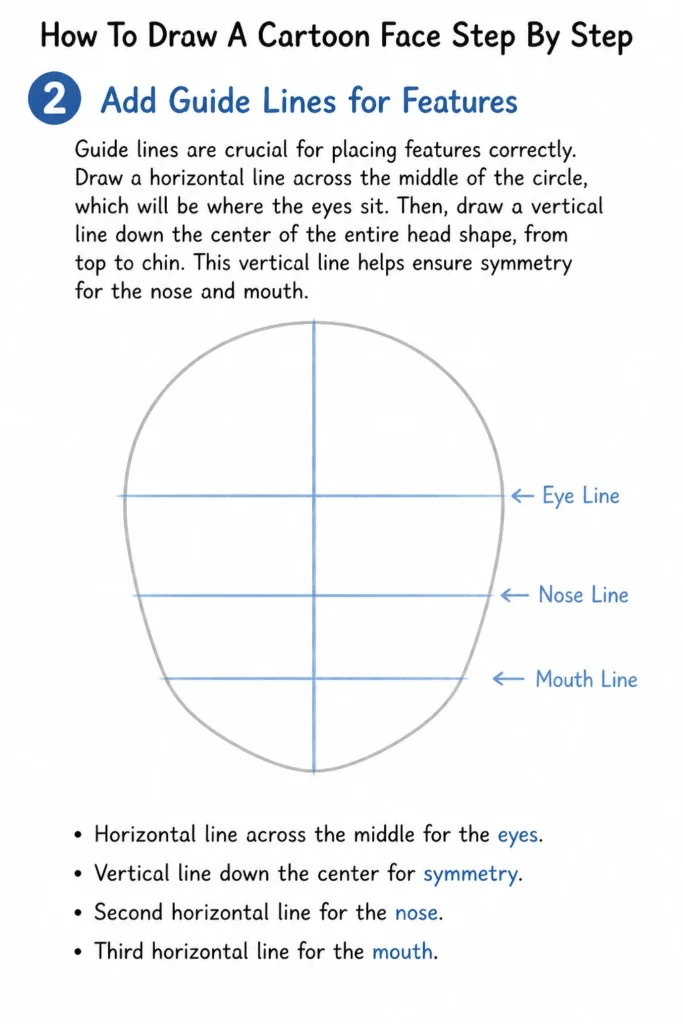
Draw a horizontal line across the middle of the circle, which will be where the eyes sit.
Then, draw a vertical line down the center of the entire head shape, from top to chin.
This vertical line helps ensure symmetry for the nose and mouth.
You can also add a second horizontal line below the eye line for the nose, and a third for the mouth area.
Step 3: Shape the Eyes and Eyebrows
Eyes are the windows to a cartoon’s soul, so they need expression.
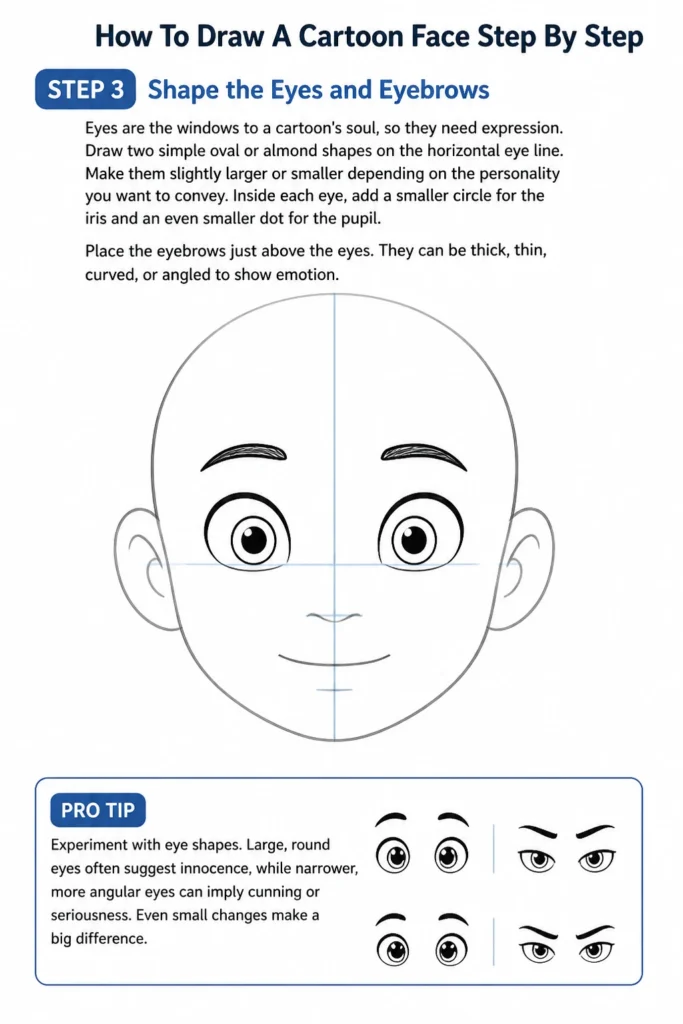
Draw two simple oval or almond shapes on the horizontal eye line.
Make them slightly larger or smaller depending on the personality you want to convey.
Inside each eye, add a smaller circle for the iris and an even smaller dot for the pupil.
Place the eyebrows just above the eyes.
They can be thick, thin, curved, or angled to show emotion.
Pro Tip: Experiment with eye shapes. Large, round eyes often suggest innocence, while narrower, more angular eyes can imply cunning or seriousness. Even small changes make a big difference.
Step 4: Design the Nose and Mouth
These features add character and emotion.
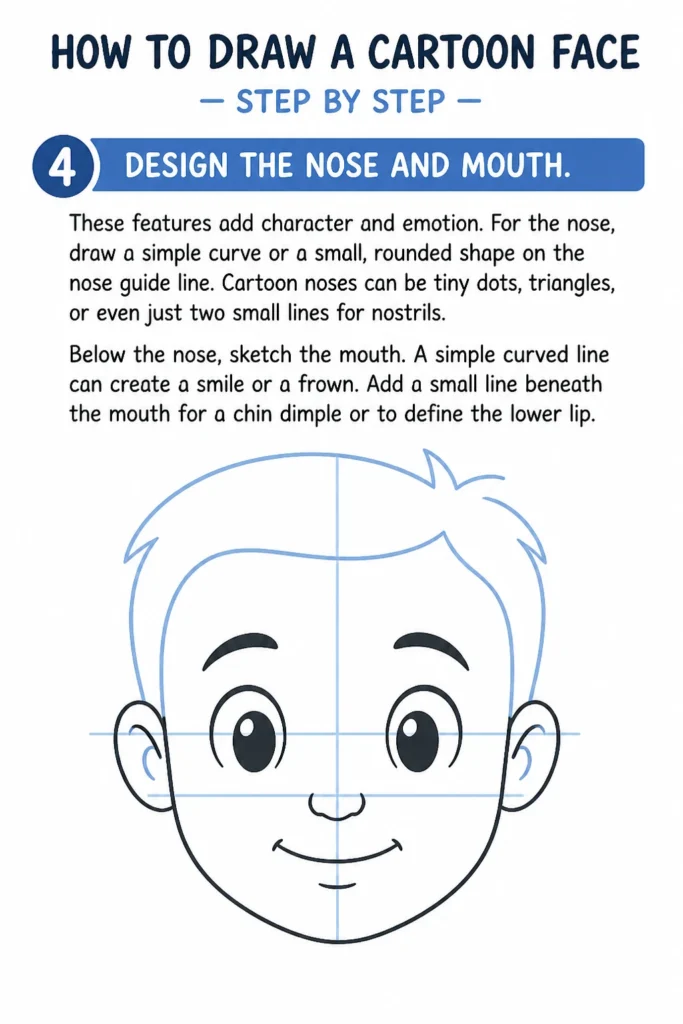
For the nose, draw a simple curve or a small, rounded shape on the nose guide line.
Cartoon noses can be tiny dots, triangles, or even just two small lines for nostrils.
Below the nose, sketch the mouth.
A simple curved line can create a smile or a frown.
Add a small line beneath the mouth for a chin dimple or to define the lower lip.
Step 5: Draw the Ears
Ears help ground the face and define its shape.
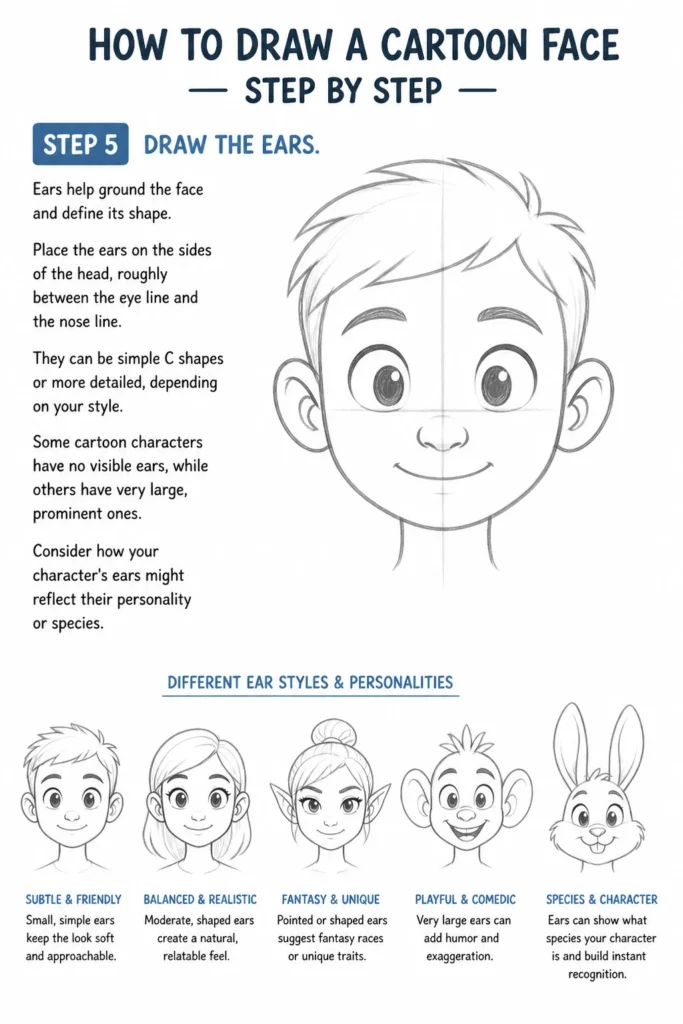
Place the ears on the sides of the head, roughly between the eye line and the nose line.
They can be simple “C” shapes or more detailed, depending on your style.
Some cartoon characters have no visible ears, while others have very large, prominent ones.
Consider how your character’s ears might reflect their personality or species.
Step 6: Add Hair and Accessories
Hair is fantastic for defining a character’s age, style, and attitude.
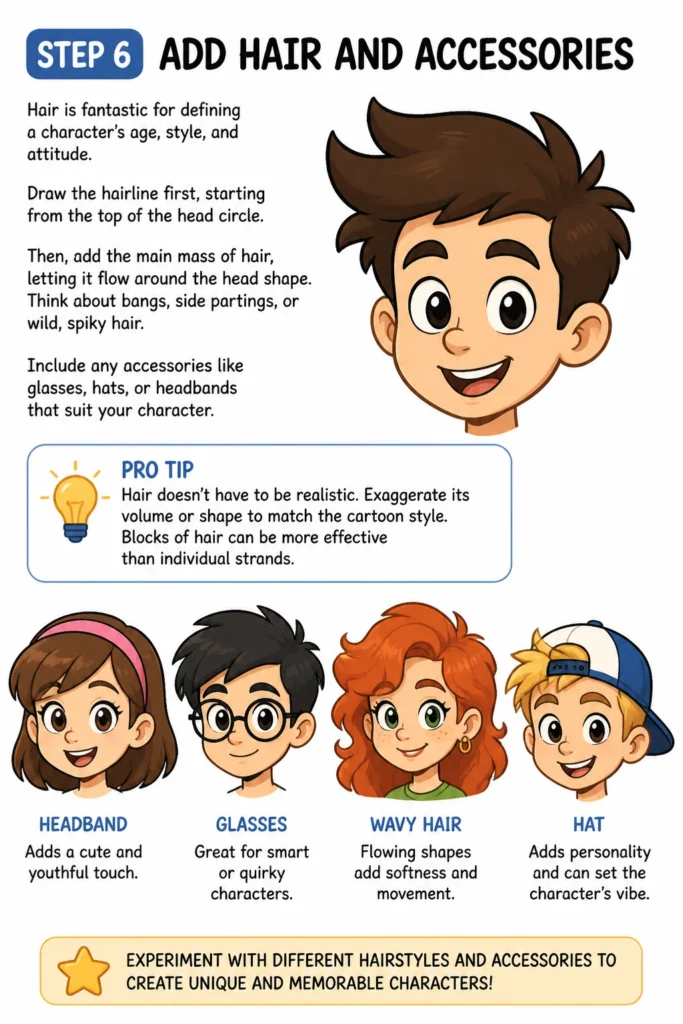
Draw the hairline first, starting from the top of the head circle.
Then, add the main mass of hair, letting it flow around the head shape.
Think about bangs, side partings, or wild, spiky hair.
Include any accessories like glasses, hats, or headbands that suit your character.
Pro Tip: Hair doesn’t have to be realistic. Exaggerate its volume or shape to match the cartoon style. Blocks of hair can be more effective than individual strands.
Step 7: Refine Lines and Erase Guides
Now it’s time to clean up your drawing.
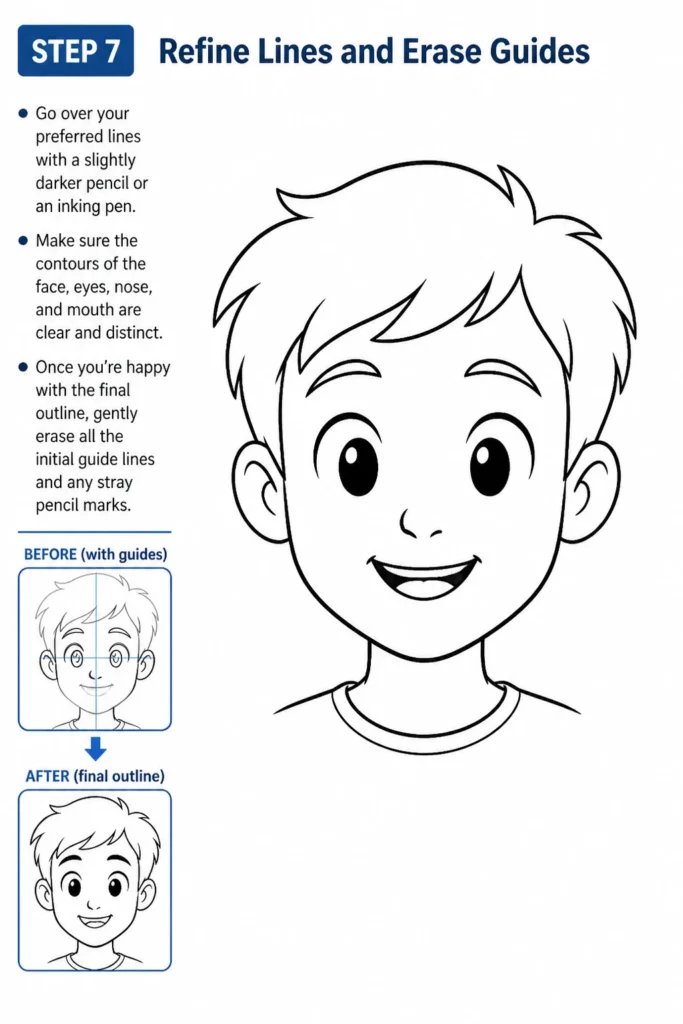
Go over your preferred lines with a slightly darker pencil or an inking pen.
Make sure the contours of the face, eyes, nose, and mouth are clear and distinct.
Once you’re happy with the final outline, gently erase all the initial guide lines and any stray pencil marks.
Your cartoon face should now stand out clearly on the page.
Step 8: Add Details and Shading (Optional)
Bring your character to life with final touches.
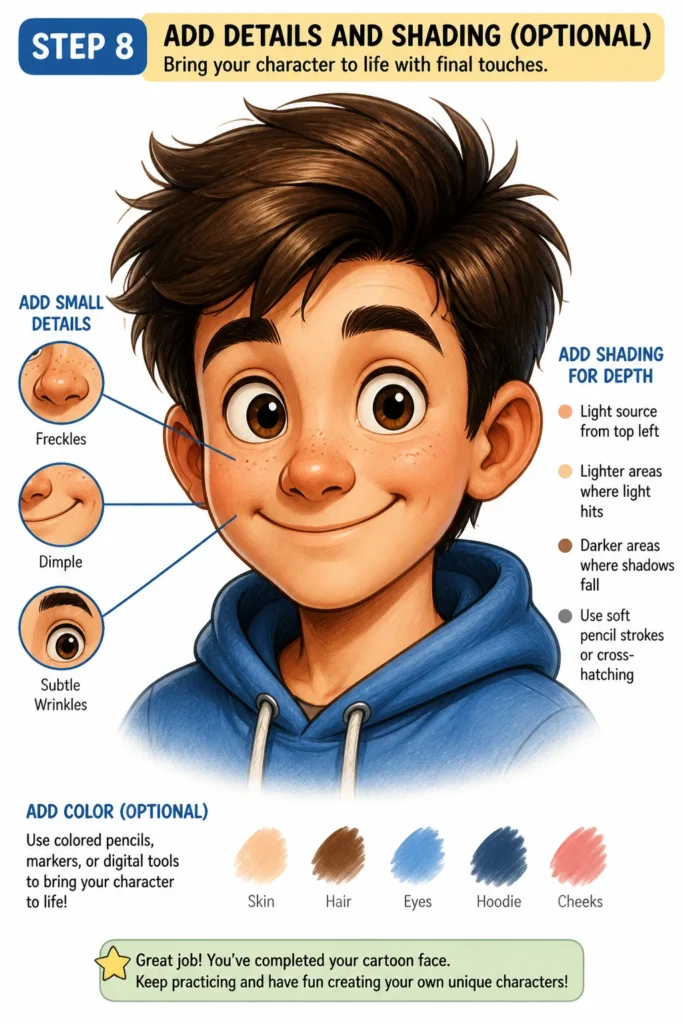
Add small details like freckles, wrinkles, or a dimple.
Consider where light might hit the face and add some light shading to give it depth.
You can use cross-hatching or soft pencil strokes for this.
Finally, color your cartoon face if you wish, using colored pencils, markers, or digital tools.
Common Mistakes to Avoid
Drawing Features Too Symmetrically
A common pitfall is making everything perfectly balanced.
While guide lines help, real faces (even cartoon ones) often have slight imperfections.
Trying to make everything identical can result in a stiff, lifeless drawing.
Instead, allow for subtle variations; one eye might be slightly higher, or a smile might be a little off-center, giving your character more personality.
Over-detailing Early On
It’s tempting to jump straight into intricate details for eyes or hair.
Beginning with too much detail can make it hard to adjust the overall proportions later.
Always start with simple shapes and broad strokes.
Build up your drawing from general forms to specific features, reserving fine details for the final stages.
Ignoring the Power of Expression
Sometimes, artists focus too much on getting the features “right” geometrically.
They forget that cartoon faces thrive on exaggerated emotion.
A slight change in an eyebrow angle or the curve of a mouth can completely alter a character’s mood.
Think about the emotion you want to convey and let that guide your feature placement and exaggeration.
Pressing Too Hard Initially
Many beginners press down firmly with their pencil from the start.
This makes erasing guide lines or correcting mistakes difficult.
You end up with indentations on the paper or smudged, messy lines.
Practice drawing very lightly for your initial sketches, almost as if you’re barely touching the paper.
Save heavier pressure for your final, confident lines.
Troubleshooting
My Face Looks Flat and Lifeless
If your cartoon face lacks dimension, it’s likely due to a lack of subtle variation.
Try slightly tilting the head or rotating the facial features just a bit.
Adding a hint of shading under the chin or around the eyes can also create depth.
Think about where shadows might naturally fall on a three-dimensional object.
The Features Don’t Seem to Fit Together
This often happens when guide lines aren’t used effectively or are ignored too early.
Go back to Step 2 and re-establish your horizontal and vertical guides.
Make sure your eyes sit on the same line and your nose and mouth align with the central vertical line.
Sometimes, simply adjusting the spacing between features can make a huge difference.
My Characters All Look the Same
If your faces lack individuality, you might be sticking to one “formula.”
Experiment with different head shapes; try a pear-shaped head, a square head, or a very narrow one.
Change eye sizes, nose types, and mouth expressions dramatically.
Draw inspiration from different cartoon styles and exaggerate specific features to create distinct personalities.
Key Takeaways
- Always begin with simple, light shapes for the head and guide lines.
- Eyes are incredibly important for conveying emotion and personality.
- Exaggeration is a key element of effective cartoon drawing.
- Don’t be afraid to make mistakes; they are part of the learning process.
- Practice regularly to develop your own unique cartooning style.
- Clean up your drawing by erasing guide lines and refining your final outlines.
Frequently Asked Questions
How can I make my cartoon faces more expressive?
Focus on the eyebrows and mouth. A slight change in their angle or curve can completely alter an emotion. Large, wide-open eyes suggest surprise, while squinted eyes show suspicion or happiness.
What if I can’t draw a perfect circle?
Don’t worry about perfection. Most artists don’t draw perfect circles freehand. Sketch several light, overlapping circles until you get a shape you like, then refine it. Practice helps, but a slightly imperfect circle often adds charm to a cartoon.
Should I use a ruler for the guide lines?
While a ruler can ensure straight lines, it’s generally better to practice drawing them freehand. This develops your control and confidence. The guide lines are just that – guides – so they don’t need to be perfectly straight, just helpful.
How do I develop my own cartoon style?
Start by copying styles you admire to understand different techniques. Then, mix and match elements you like, and experiment with exaggerating features in your own way. Consistent practice and fearless experimentation are key to finding your unique voice.
Our Top Recommended Finds
- Sketchbook with smooth paper: A good quality paper makes erasing easier and prevents pencil smudges.
- Variety pack of drawing pencils (HB, 2B, 4B): Different lead hardness allows for light sketching and darker, more defined lines.
- Kneaded eraser: This type of eraser lifts graphite without damaging the paper, perfect for cleaning up light guide lines.
Your Cartooning Journey Begins Now
You’ve taken the first exciting step into the world of cartooning.
Remember that every great artist started with simple lines and shapes.
Don’t let perfection be the enemy of progress; just keep drawing and having fun.
Try drawing faces for different emotions, ages, or even animals.
Grab your pencil, find some paper, and create your next amazing character today!
& Painting
No rigid rules or pretension. Just practical guides, medium comparisons, and encouraging tips to help you enjoy the drawing & painting process.