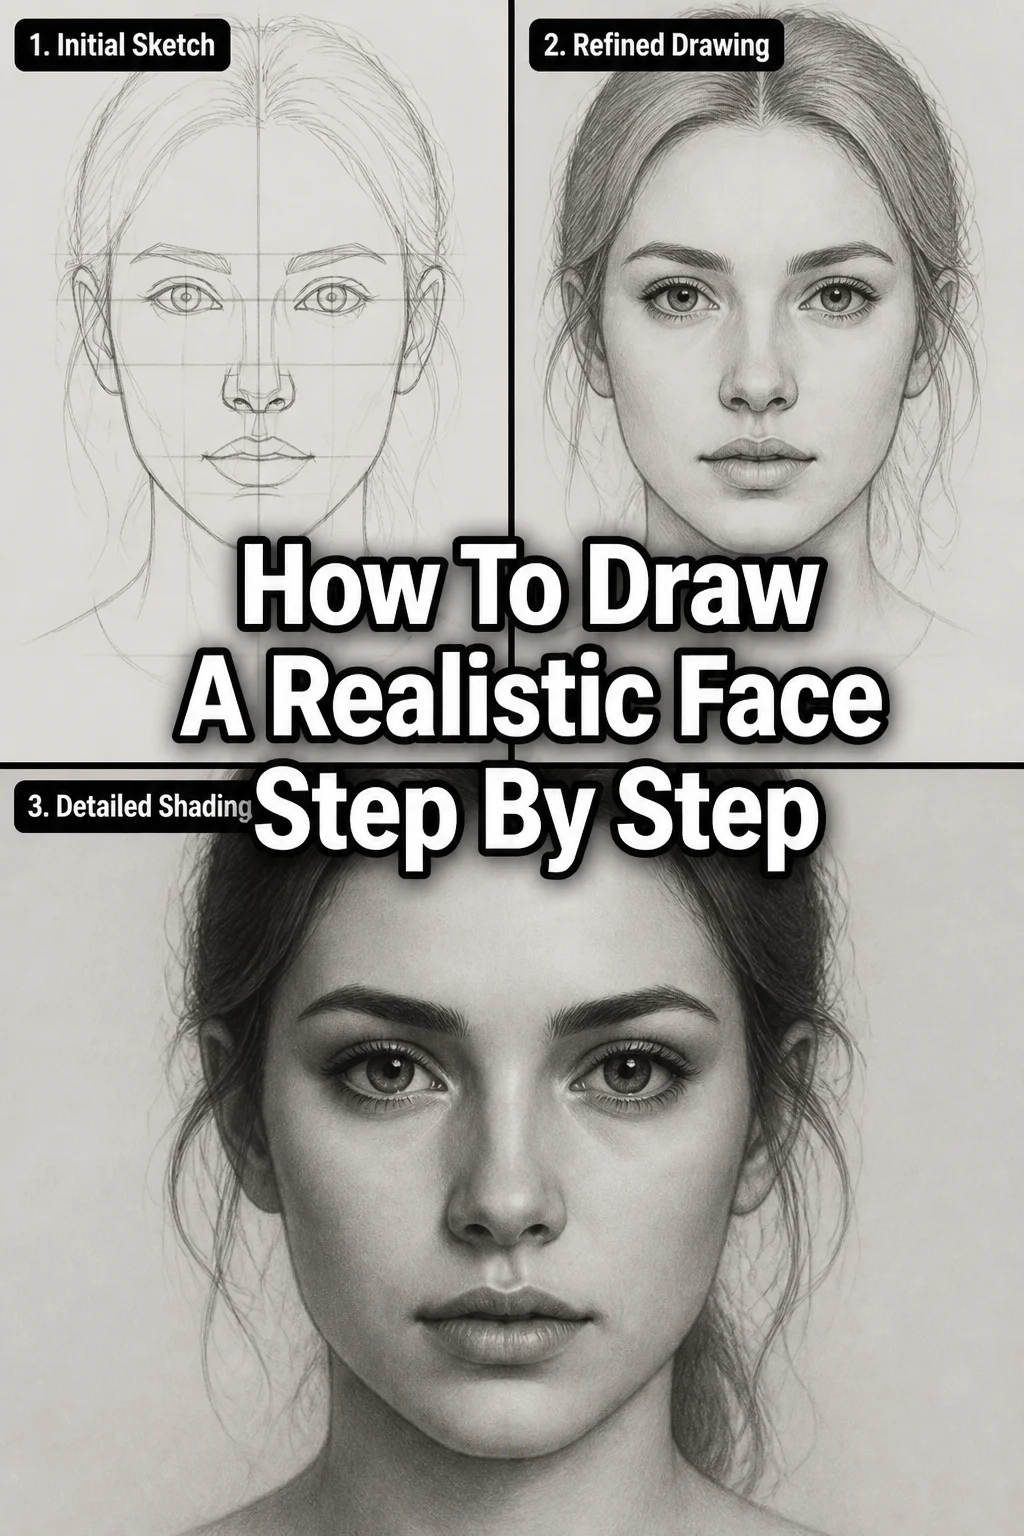
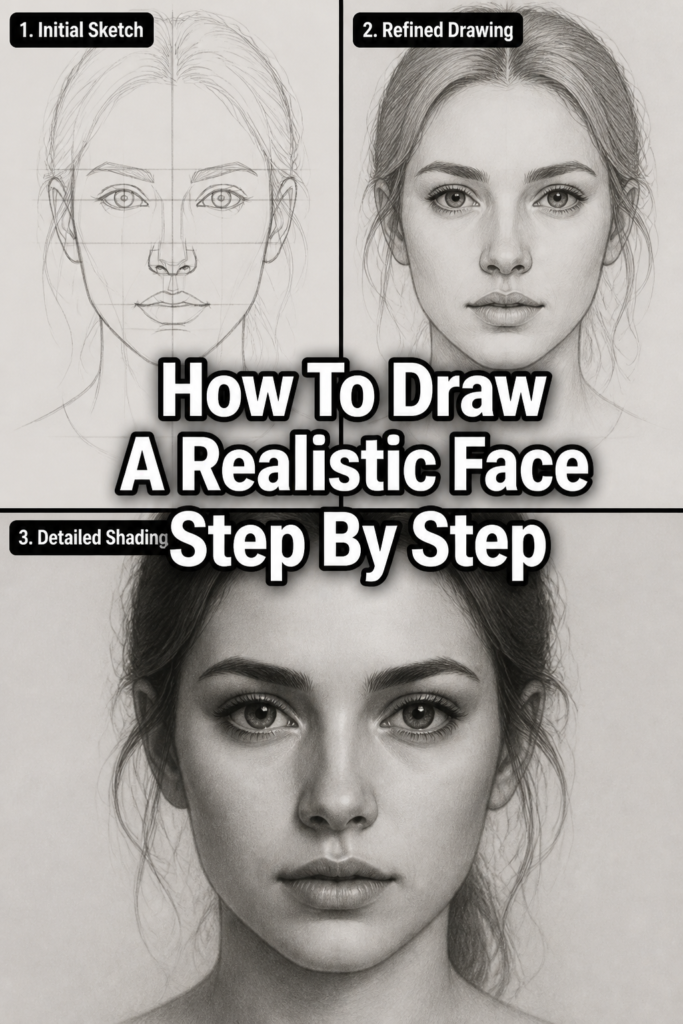
🎨 How To Draw A Realistic Face Step By Step
Learning to draw a realistic face can feel like a daunting task.
I remember struggling for years with lopsided features and flat expressions.
This guide distills years of practice into clear, actionable steps, helping you bring your portraits to life with confidence.
Quick Overview
This guide will equip you with the fundamental techniques to sketch and shade a realistic human face.
You’ll learn about proportions, feature placement, and how to create depth.
By the end, you’ll have a solid foundation for more advanced portraiture.
- Time needed: 2-4 hours (can be broken into multiple sessions)
- Difficulty: Intermediate
- What you’ll need: Drawing pencils (HB, 2B, 4B, 6B), kneaded eraser, regular eraser, blending stump/tortillon, good quality drawing paper (smooth to medium tooth).
Step-by-Step Instructions
Step 1: Gather Your Materials & Set Up
Organize your drawing space. Ensure you have good lighting, preferably natural light or a consistent lamp.
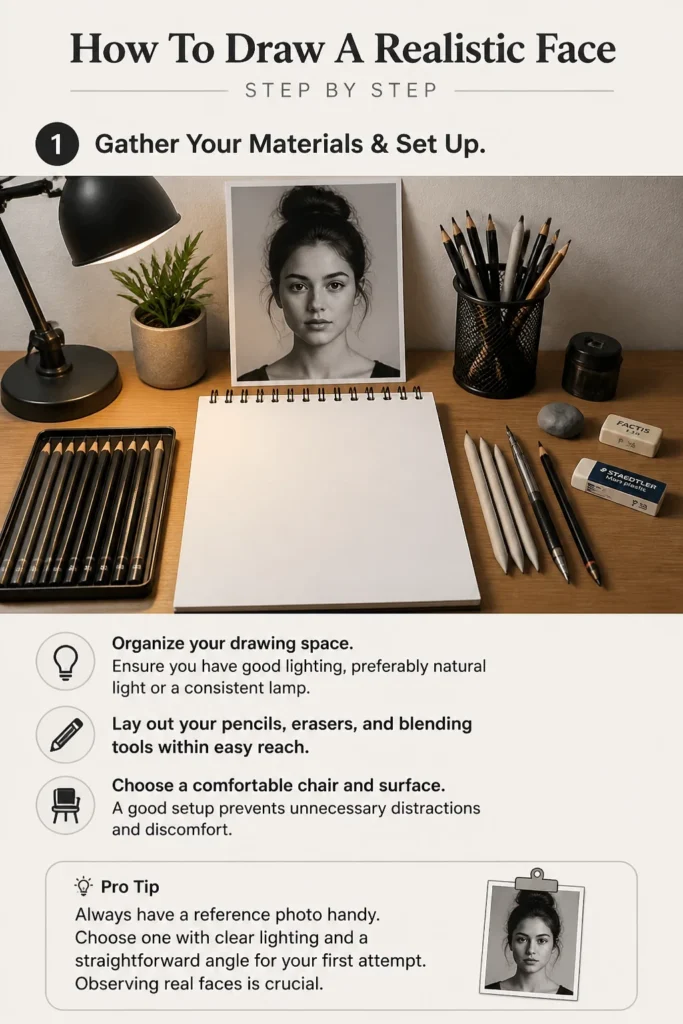
Lay out your pencils, erasers, and blending tools within easy reach.
Choose a comfortable chair and surface. A good setup prevents unnecessary distractions and discomfort.
Pro Tip: Always have a reference photo handy. Choose one with clear lighting and a straightforward angle for your first attempt. Observing real faces is crucial.
Step 2: Understand Proportions: The Loomis Method
Draw a light circle on your paper. This will represent the cranium.
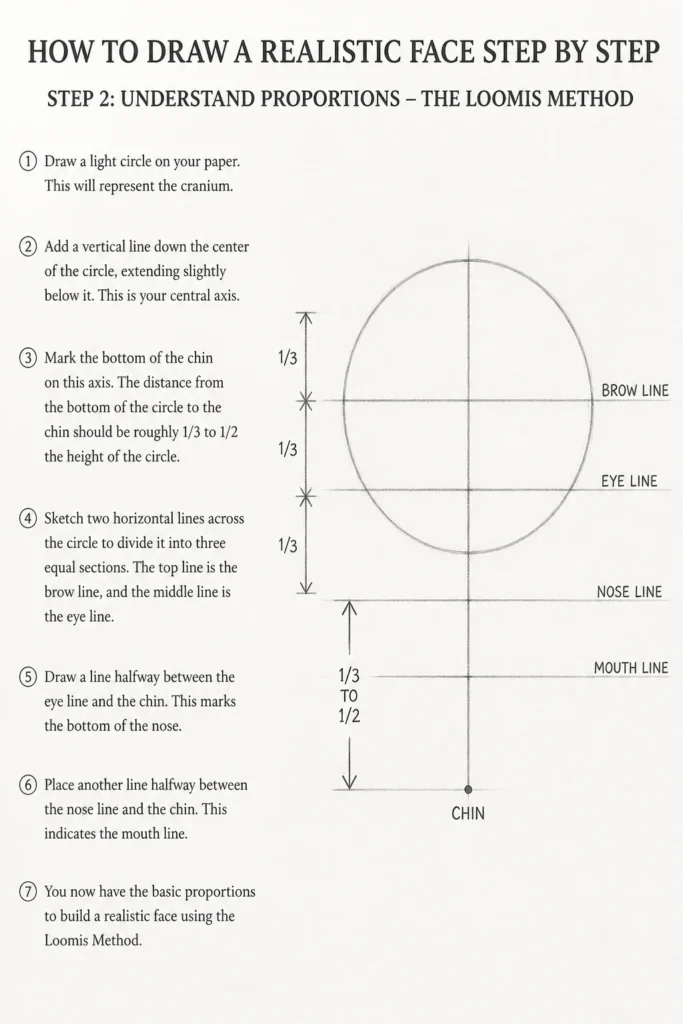
Add a vertical line down the center of the circle, extending slightly below it. This is your central axis.
Mark the bottom of the chin on this axis. The distance from the bottom of the circle to the chin should be roughly 1/3 to 1/2 the height of the circle.
Sketch two horizontal lines across the circle to divide it into three equal sections. The top line is the brow line, and the middle line is the eye line.
Draw a line halfway between the eye line and the chin. This marks the bottom of the nose.
Place another line halfway between the nose line and the chin. This indicates the mouth line.
Step 3: Map Out Basic Shapes & Guidelines
Connect the sides of your circle to the chin line, forming the jawline. Think of it as a rounded square or an egg shape.
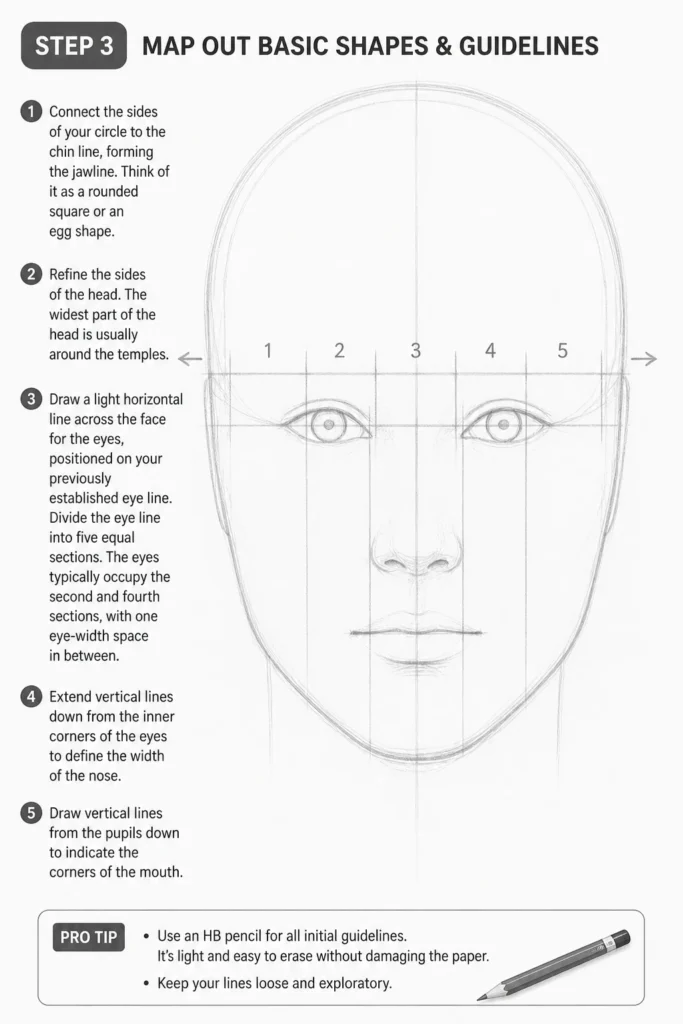
Refine the sides of the head. The widest part of the head is usually around the temples.
Draw a light horizontal line across the face for the eyes, positioned on your previously established eye line.
Divide the eye line into five equal sections. The eyes typically occupy the second and fourth sections, with one eye-width space in between.
Extend vertical lines down from the inner corners of the eyes to define the width of the nose.
Draw vertical lines from the pupils down to indicate the corners of the mouth.
Pro Tip: Use an HB pencil for all initial guidelines. It’s light and easy to erase without damaging the paper. Keep your lines loose and exploratory.
Step 4: Refine Facial Features: Eyes, Nose, Mouth
Sketch the basic almond shape for the eyes. Remember they are spheres set into sockets, not flat shapes.
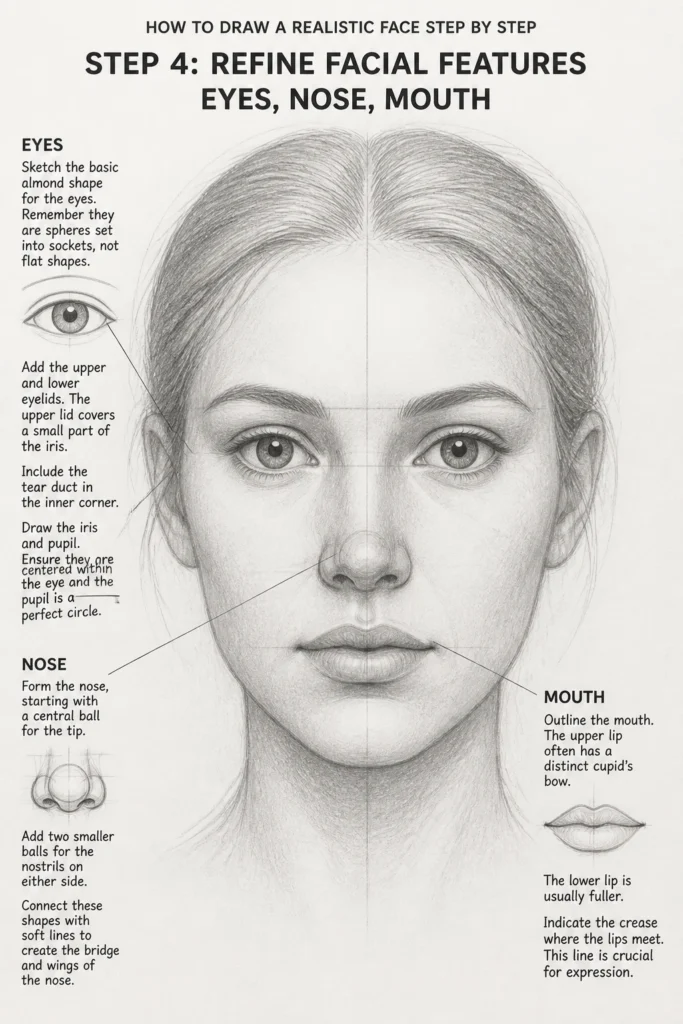
Add the upper and lower eyelids. The upper lid covers a small part of the iris. Include the tear duct in the inner corner.
Draw the iris and pupil. Ensure they are centered within the eye and the pupil is a perfect circle.
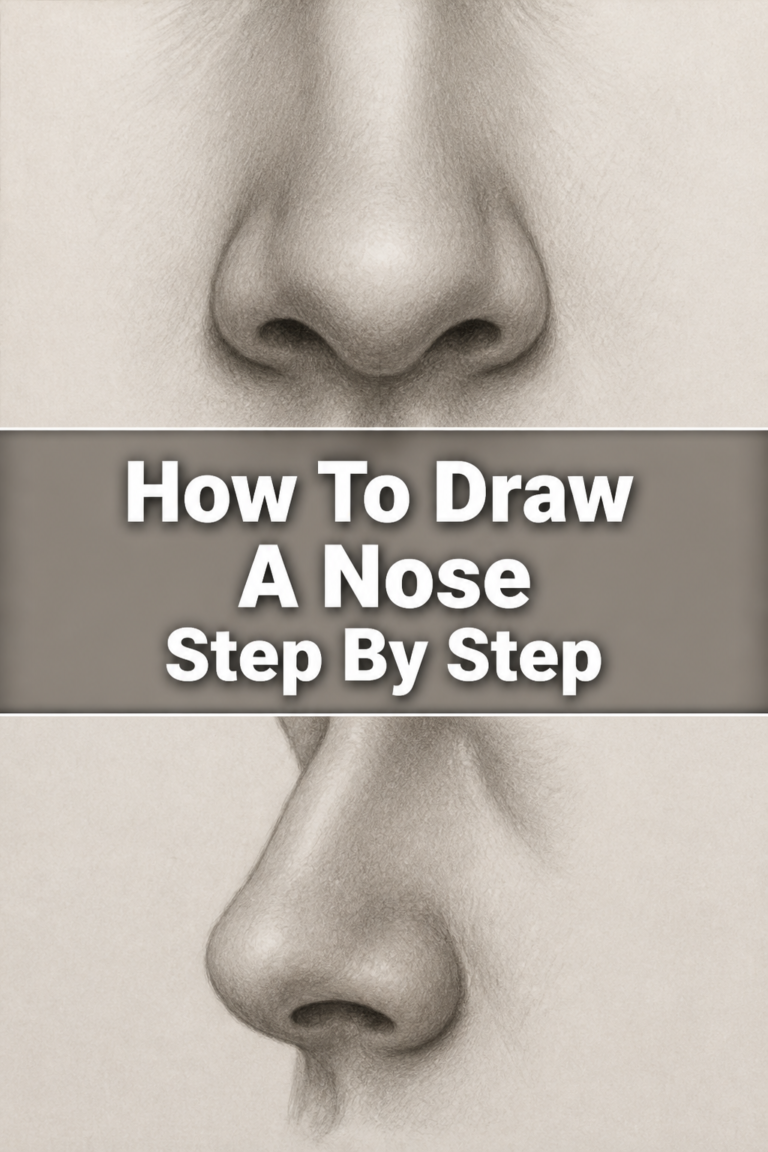
Form the nose, starting with a central ball for the tip. Add two smaller balls for the nostrils on either side.
Connect these shapes with soft lines to create the bridge and wings of the nose.
Outline the mouth. The upper lip often has a distinct “cupid’s bow.” The lower lip is usually fuller.
Indicate the crease where the lips meet. This line is crucial for expression.
Step 5: Shape the Ears and Hairline
Position the ears between the brow line and the nose line. Their exact angle and size vary, but this is a good general rule.
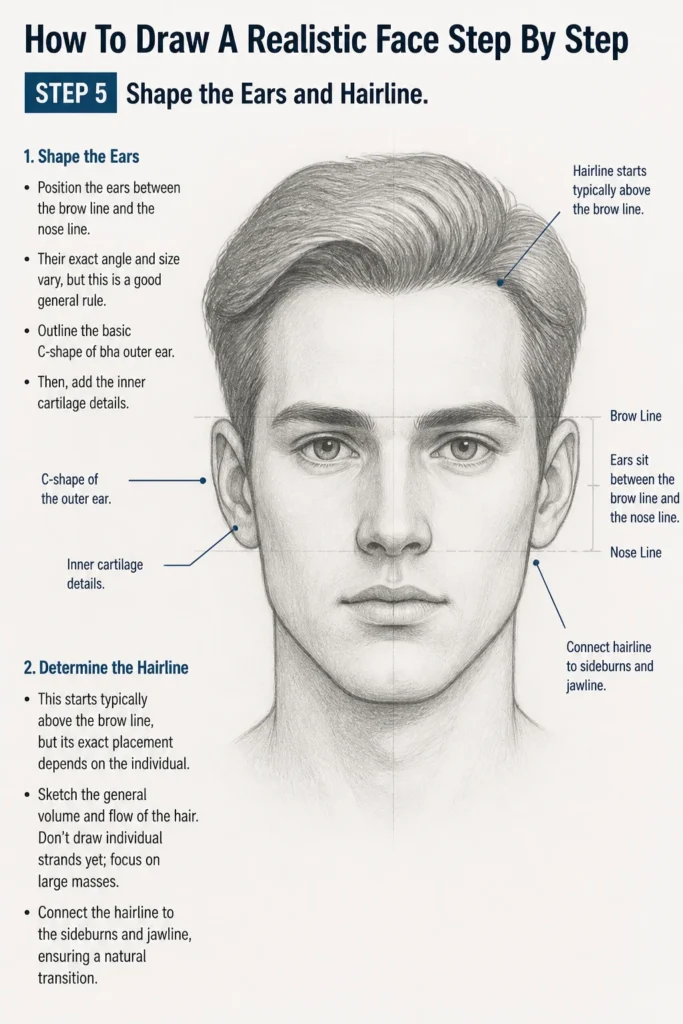
Outline the basic C-shape of the outer ear. Then, add the inner cartilage details.
Determine the hairline. This starts typically above the brow line, but its exact placement depends on the individual.
Sketch the general volume and flow of the hair. Don’t draw individual strands yet; focus on large masses.
Connect the hairline to the sideburns and jawline, ensuring a natural transition.
Step 6: Add Depth with Shading & Form
Identify your light source. This will dictate where shadows fall.
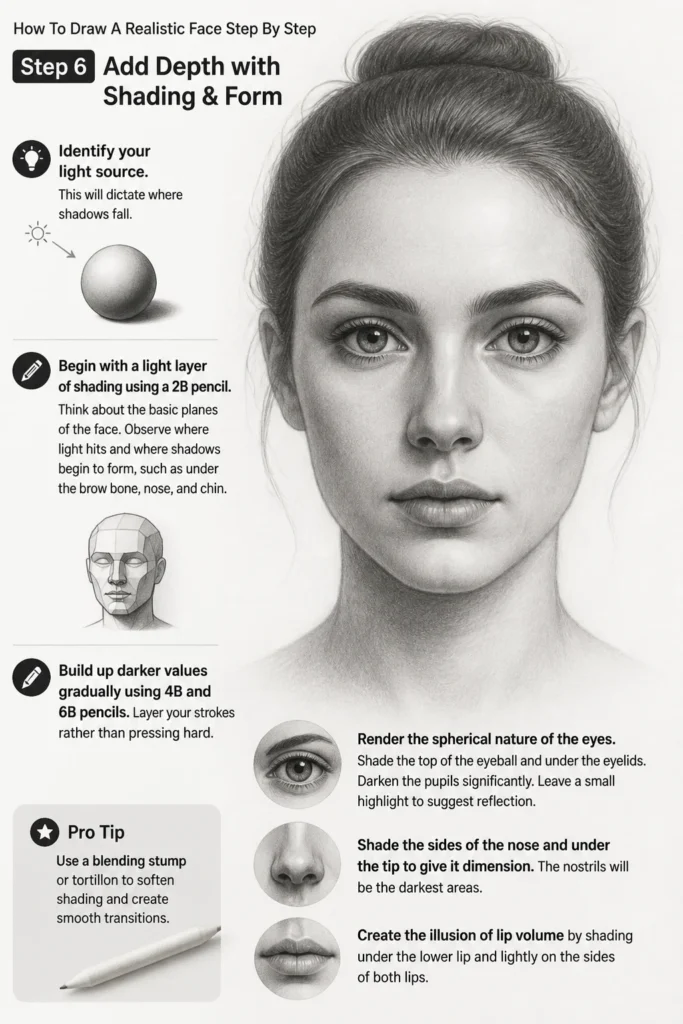
Begin with a light layer of shading using a 2B pencil. Think about the basic planes of the face.
Observe where light hits and where shadows begin to form, such as under the brow bone, nose, and chin.
Build up darker values gradually using 4B and 6B pencils. Layer your strokes rather than pressing hard.
Render the spherical nature of the eyes. Shade the top of the eyeball and under the eyelids.
Darken the pupils significantly. Leave a small highlight to suggest reflection.
Shade the sides of the nose and under the tip to give it dimension. The nostrils will be the darkest areas.
Create the illusion of lip volume by shading under the lower lip and lightly on the sides of both lips.
Pro Tip: Use a blending stump or tortillon to smooth out your graphite. Blend in the direction of the form, not just back and forth. This helps create soft transitions.
Step 7: Develop Texture & Detail
Add subtle textural details. For skin, avoid drawing individual pores; instead, create slight variations in tone.
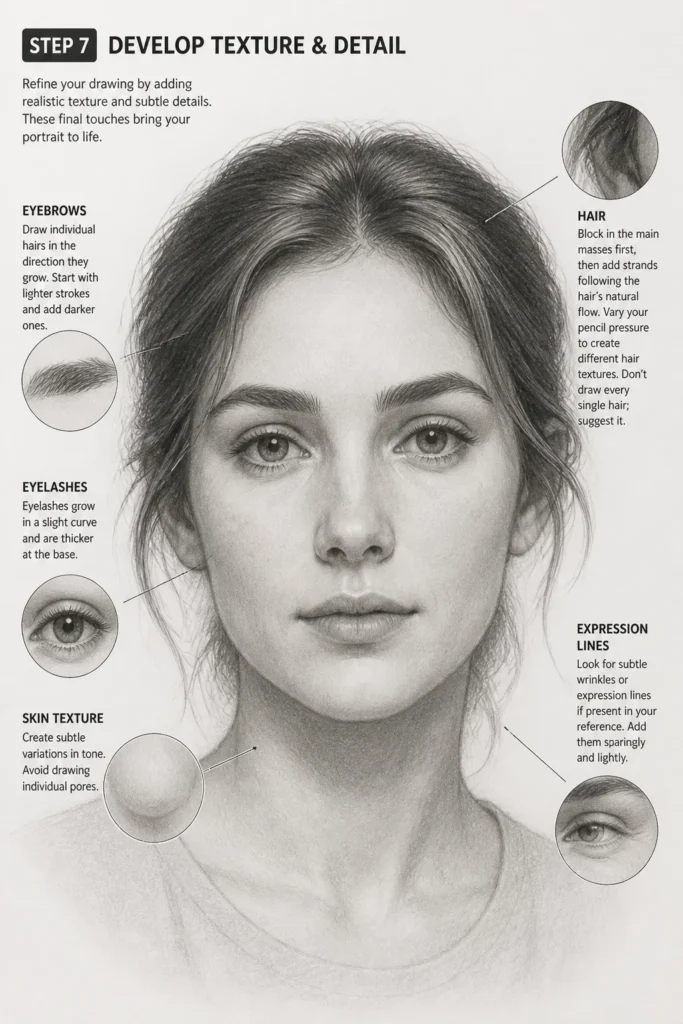
Render the eyebrows. Draw individual hairs in the direction they grow, starting with lighter strokes and adding darker ones.
Draw eyelashes. They grow in a slight curve and are thicker at the base.
Refine the hair. Block in the main masses first, then add strands following the hair’s natural flow.
Vary your pencil pressure to create different hair textures. Don’t draw every single hair; suggest it.
Look for subtle wrinkles or expression lines if present in your reference. Add them sparingly and lightly.
Step 8: Final Touches & Blending
Step back from your drawing periodically. This allows you to see it with fresh eyes and spot inconsistencies.
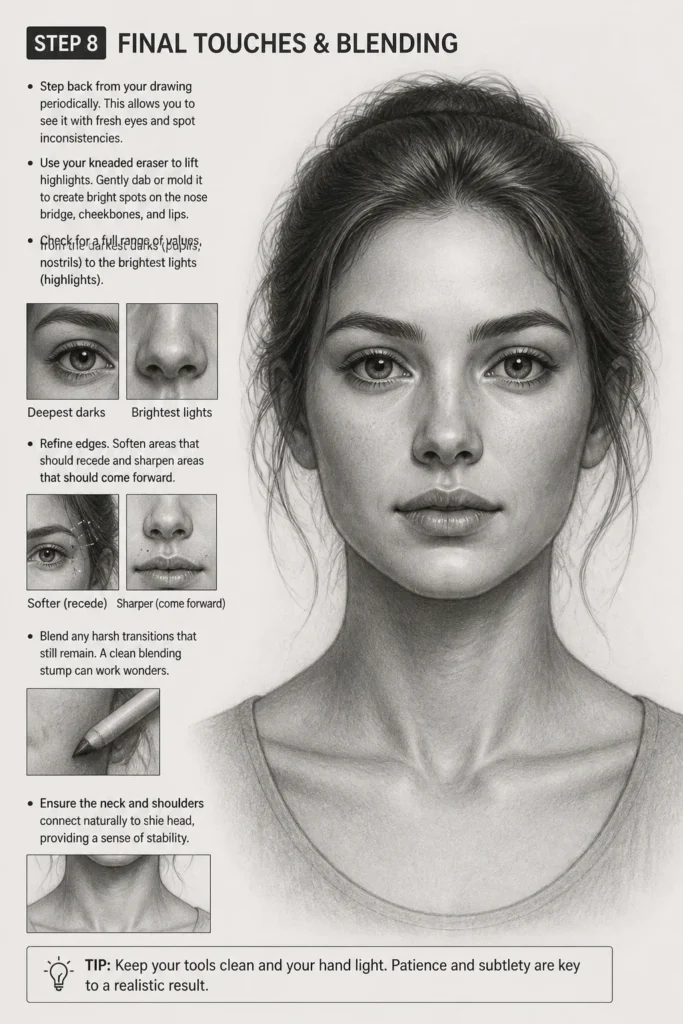
Use your kneaded eraser to lift highlights. Gently dab or mold it to create bright spots on the nose bridge, cheekbones, and lips.
Check for a full range of values, from the darkest darks (pupils, nostrils) to the brightest lights (highlights).
Refine edges. Soften areas that should recede and sharpen areas that should come forward.
Blend any harsh transitions that still remain. A clean blending stump can work wonders.
Ensure the neck and shoulders connect naturally to the head, providing a sense of stability.
Common Mistakes to Avoid
Flat Features
Many beginners draw features as flat shapes rather than three-dimensional forms. Remember that eyes are spheres, noses are pyramids or wedges, and lips have volume.
Always consider the underlying skull and muscle structure. Shading should wrap around these forms, creating a sense of depth and realism.
Misplaced Proportions
A common error is placing eyes too high or too low, or making the nose too long. Relying on accurate measuring and consistent guidelines from the start is crucial.
Continually check your proportions against your reference and the general rules (like the Loomis method). Small errors early on can compound into major issues later.
Muddy Shading
Shading that appears dirty or undefined often results from pressing too hard with dark pencils too early, or from over-blending without clear value transitions.
Build up your tones gradually, layering lighter pencils before moving to darker ones. Use blending sparingly and purposefully, focusing on smooth transitions rather than just smudging.
Stiff, Lifeless Expression
A face can look rigid if you focus too much on individual features without considering their interaction. The muscles around the eyes and mouth are key to expression.
Pay attention to the subtle curves and tensions in your reference photo. Even a neutral face has underlying character. Soften your lines and allow for natural variation.
Troubleshooting
My Features Look “Off” or Unbalanced
This usually points to a proportion or placement issue. Go back to your initial guidelines from Step 2 and 3.
Use a ruler or your pencil to measure distances on your reference photo and compare them to your drawing. For example, check the distance from the eye to the corner of the mouth.
Don’t be afraid to erase and redraw foundational lines. Correcting early mistakes is much easier than fixing them later.
My Drawing Feels Flat, Lacking Depth
A flat drawing often means you’re not using a full range of values. You might be staying mostly in the mid-tones.
Push your darkest darks, especially in areas like the pupils, nostrils, and deep shadows under the chin or hair. Also, ensure you have strong highlights to create contrast.
Re-evaluate your light source and ensure your shadows consistently reflect it. Think about the forms as spheres, cylinders, and cubes, and how light interacts with them.
The Shading Looks Messy or Splotchy
This can happen if you’re not layering your graphite smoothly or if your paper has too much tooth for fine blending.
Try using a lighter touch with your pencil, building up tone with many light strokes rather than a few heavy ones. Ensure your strokes follow the form of the face.
A blending stump can help smooth out splotches. If the paper is very textured, a smoother paper might be more suitable for realistic rendering.
Key Takeaways
- Always begin with light guidelines and accurate proportions.
- Think of the face as a series of three-dimensional forms, not flat shapes.
- Build up your shading gradually, from light to dark, using a range of pencils.
- Use blending tools purposefully to create smooth transitions and depth.
- Observe your reference photo closely for subtle details, textures, and expressions.
- Don’t be afraid to erase and refine; practice is key to improvement.
Frequently Asked Questions
How can I make my drawing look like a specific person?
Capturing a likeness requires extreme attention to subtle details and unique proportions. Focus on the individual characteristics of their eyes, nose, and mouth—are they wider, narrower, closer together?
Pay close attention to the angles of the jawline, the shape of the hairline, and any distinctive features like moles or wrinkles. It’s about seeing what makes that face unique, not just average.
What if my proportions are still off after using guidelines?
It takes practice to accurately translate proportions. Try measuring directly from your reference photo using your pencil as a guide. Hold your pencil up, mark a distance (like the width of an eye), and then compare it to other features.
Also, don’t just rely on individual features; look at the negative space around them. Sometimes seeing the empty shapes helps identify where a feature is misplaced.
How do I draw different facial expressions?
Expressions come from the movement of facial muscles. Focus on how the eyebrows arch or furrow, how the corners of the mouth turn up or down, and how these movements affect the surrounding skin (e.g., crow’s feet, laugh lines).
Study photos of people with various expressions. Notice how the eyes squint, the cheeks rise, or the forehead wrinkles. Practice drawing these specific muscle movements.
Is it okay to trace to learn?
Tracing can be a useful tool for understanding proportions and muscle memory, especially for beginners. It helps you feel the curves and angles without the pressure of getting proportions right.
However, don’t rely on it exclusively. Always combine tracing with freehand drawing. The goal is to train your eye and hand to work together, eventually drawing from observation alone.
Our Top Recommended Finds
- Derwent Graphic Drawing Pencils: A high-quality set offering a full range of hardness, perfect for building up tones smoothly.
- Faber-Castell Kneaded Eraser: Essential for lifting graphite gently and creating precise highlights without damaging your paper.
- Strathmore 400 Series Smooth Bristol Paper: Its smooth surface is ideal for detailed graphite work and blending, resulting in clean, crisp realism.
Your Artistic Journey Begins Now
Drawing a realistic face is a rewarding journey, not a single destination. Each attempt teaches you something new about observation, patience, and technique.
Don’t get discouraged by early results. Every line you draw, every shadow you blend, brings you closer to mastery.
Pick up your pencils today and start creating. The world is full of faces waiting to be drawn.