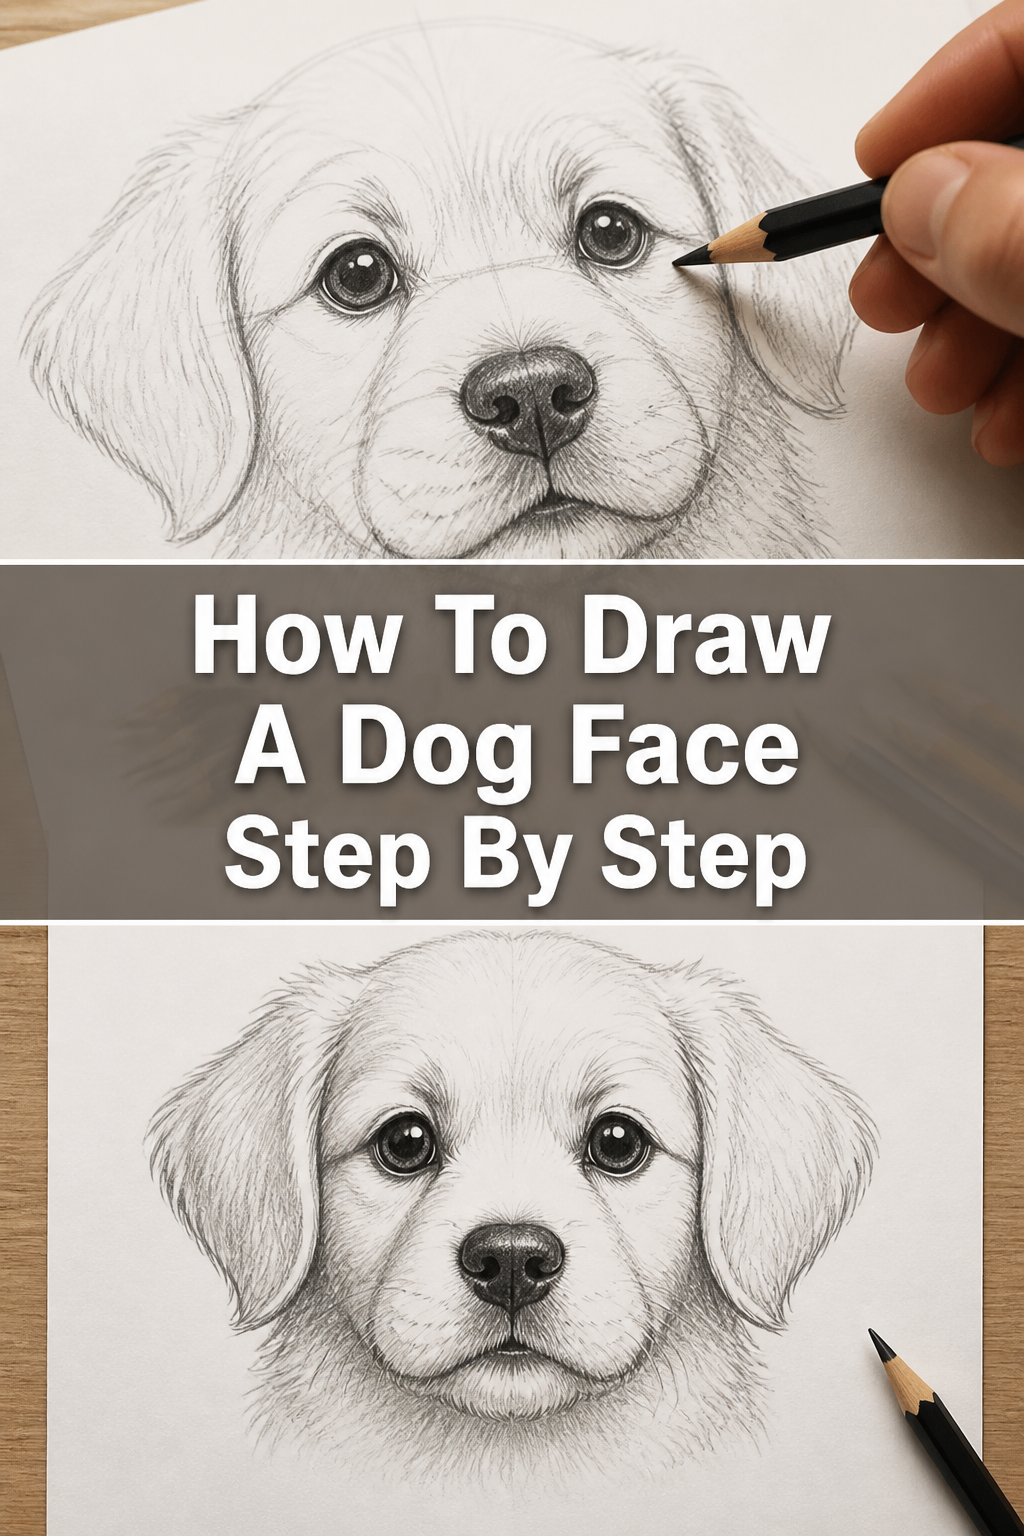
🔥 How To Draw A Dog Face Step By Step

& Painting
No rigid rules or pretension. Just practical guides, medium comparisons, and encouraging tips to help you enjoy the drawing & painting process.
Drawing a dog’s face can seem daunting at first, but it’s a rewarding skill to learn. Every artist starts somewhere, and with the right guidance, you can bring your furry friends to life on paper.
I’ve spent countless hours sketching various breeds, learning the nuances that make each dog unique. This guide distills that experience into clear, actionable steps, ensuring you build a strong foundation for your artistic journey.
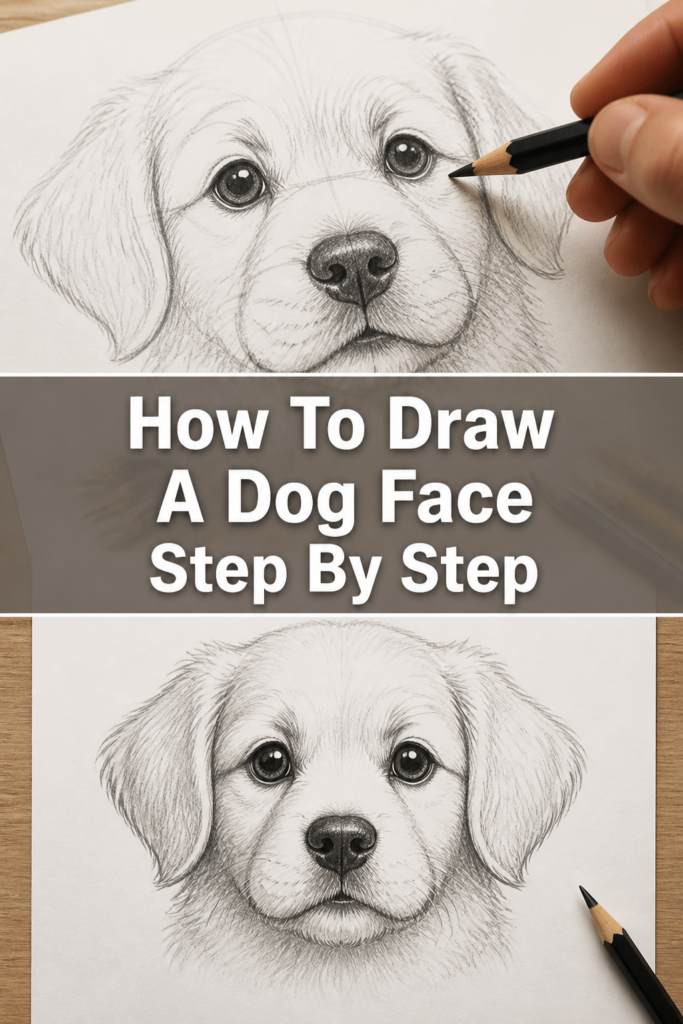
Quick Overview
This guide will walk you through creating a realistic and expressive dog face, focusing on fundamental shapes and details. You’ll learn to construct the face from basic forms and add personality with features and shading.
- Time needed: 45-90 minutes (depending on detail and practice)
- Difficulty: Beginner to Intermediate
- What you’ll need: Pencil (HB, 2B, 4B recommended), eraser, drawing paper, blending stump or tissue (optional)
Step-by-Step Instructions
Step 1: Map Out the Basic Head Shape
Begin by lightly sketching a large circle or oval on your paper. This will serve as the main structure for the dog’s skull. Don’t press too hard; these are just guide lines.
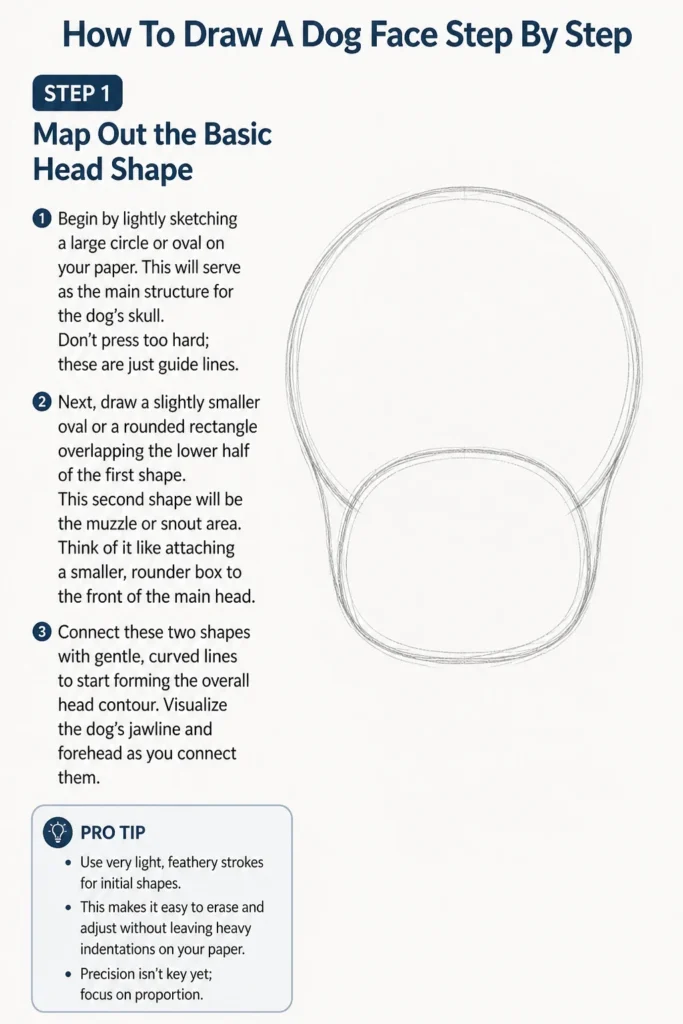
Next, draw a slightly smaller oval or a rounded rectangle overlapping the lower half of the first shape. This second shape will be the muzzle or snout area. Think of it like attaching a smaller, rounder box to the front of the main head.
Connect these two shapes with gentle, curved lines to start forming the overall head contour. Visualize the dog’s jawline and forehead as you connect them.
Pro Tip: Use very light, feathery strokes for initial shapes. This makes it easy to erase and adjust without leaving heavy indentations on your paper. Precision isn’t key yet; focus on proportion.
Step 2: Establish the Eye Line and Central Axis
Draw a horizontal line across the upper third of the main head circle. This is your eye line, indicating where the eyes will be placed. Angle it slightly downwards towards the nose for a more natural look.
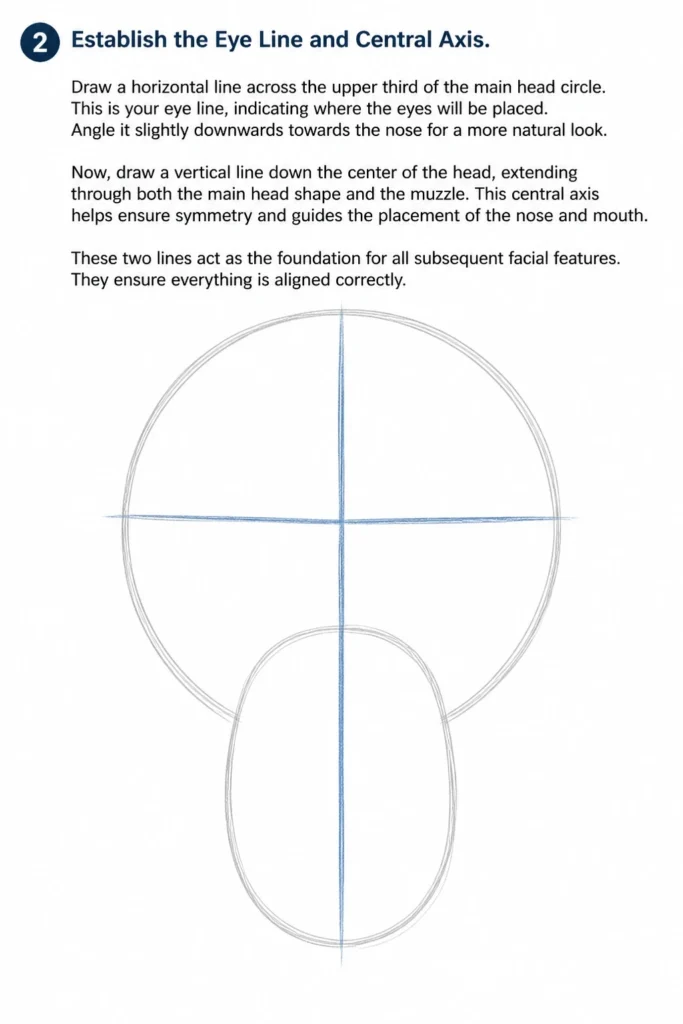
Now, draw a vertical line down the center of the head, extending through both the main head shape and the muzzle. This central axis helps ensure symmetry and guides the placement of the nose and mouth.
These two lines act as the foundation for all subsequent facial features. They ensure everything is aligned correctly.
Step 3: Position the Eyes
On the eye line you just drew, place two small ovals or almond shapes for the eyes. Remember that dogs’ eyes are typically set wider apart than human eyes. The space between the eyes is often roughly the width of one eye.
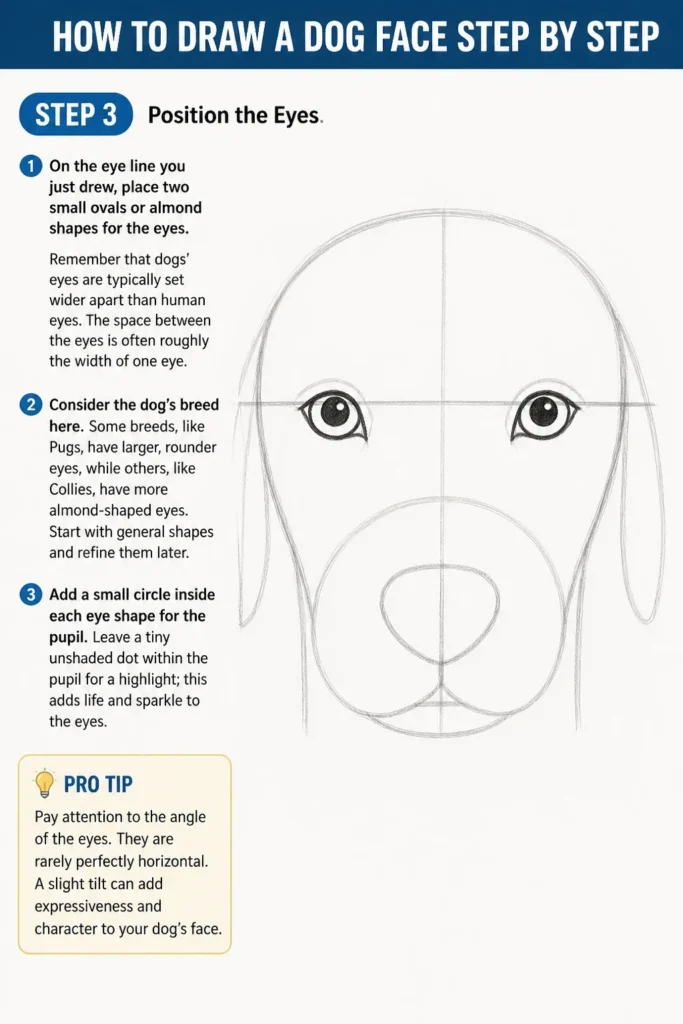
Consider the dog’s breed here. Some breeds, like Pugs, have larger, rounder eyes, while others, like Collies, have more almond-shaped eyes. Start with general shapes and refine them later.
Add a small circle inside each eye shape for the pupil. Leave a tiny unshaded dot within the pupil for a highlight; this adds life and sparkle to the eyes.
Pro Tip: Pay attention to the angle of the eyes. They are rarely perfectly horizontal. A slight tilt can add expressiveness and character to your dog’s face.
Step 4: Define the Muzzle and Nose
Focus on the muzzle shape you established in Step 1. Refine its contours, making it a bit more angular or rounded depending on the breed. This area varies greatly among dogs.
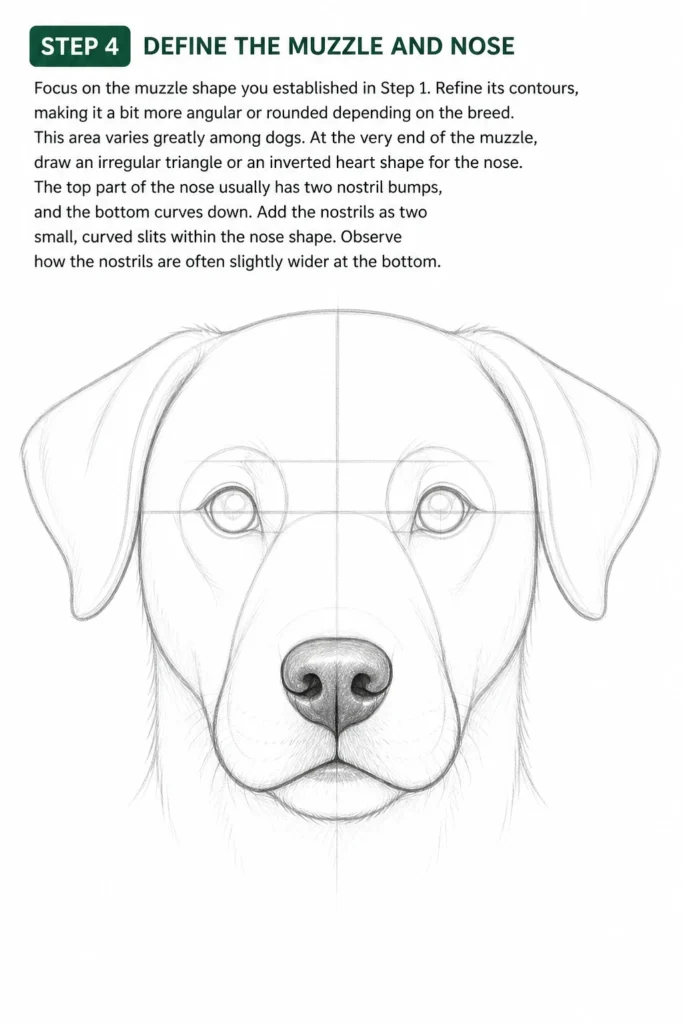
At the very end of the muzzle, draw an irregular triangle or an inverted heart shape for the nose. The top part of the nose usually has two nostril bumps, and the bottom curves down.
Add the nostrils as two small, curved slits within the nose shape. Observe how the nostrils are often slightly wider at the bottom.
Step 5: Sketch the Ears
The ears are crucial for defining the breed and personality of your dog. Lightly sketch the basic shape and placement of the ears.
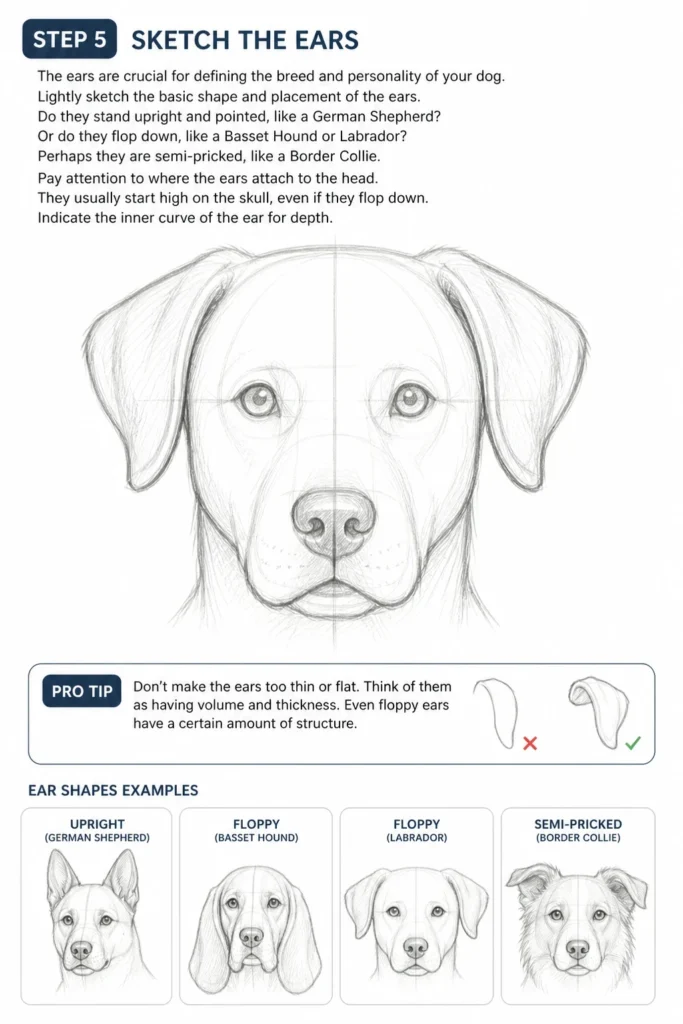
Do they stand upright and pointed, like a German Shepherd? Or do they flop down, like a Basset Hound or Labrador? Perhaps they are semi-pricked, like a Border Collie.
Pay attention to where the ears attach to the head. They usually start high on the skull, even if they flop down. Indicate the inner curve of the ear for depth.
Pro Tip: Don’t make the ears too thin or flat. Think of them as having volume and thickness. Even floppy ears have a certain amount of structure.
Step 6: Add the Mouth and Jawline
From the bottom of the nose, draw a short, curved line extending downwards. This forms the philtrum, the groove above the mouth. Then, draw a line curving outward from the bottom of the nose, defining the upper lip.
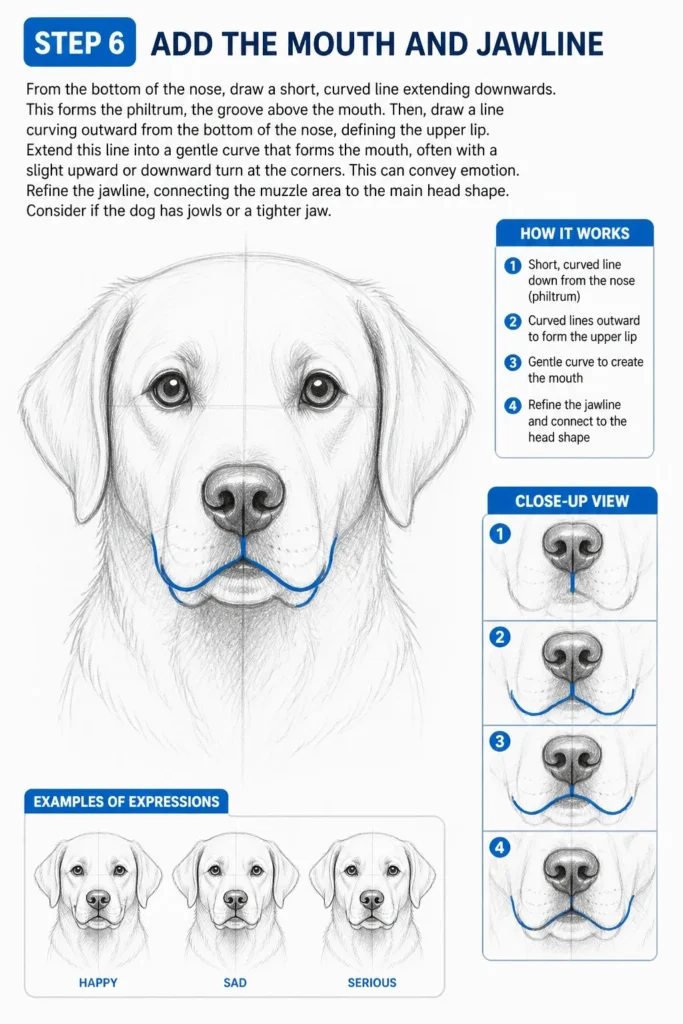
Extend this line into a gentle curve that forms the mouth, often with a slight upward or downward turn at the corners. This can convey emotion.
Refine the jawline, connecting the muzzle area to the main head shape. Consider if the dog has jowls or a tighter jaw.
Step 7: Refine Facial Details and Fur Lines
Now it’s time to add the smaller, yet impactful, details. Gently erase your initial guide lines, leaving faint impressions.
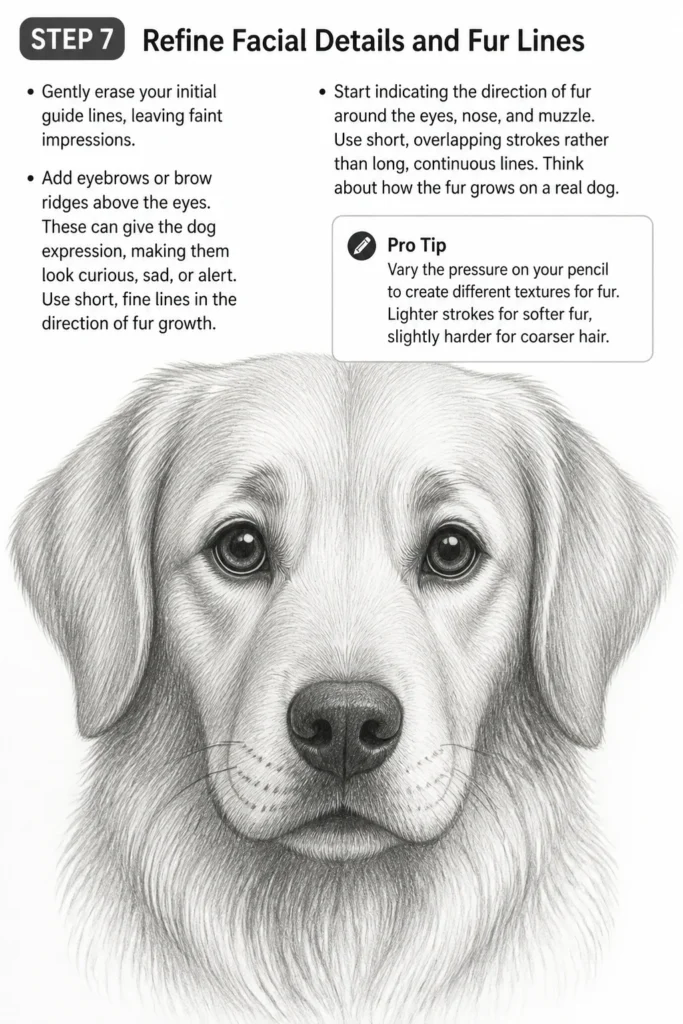
Add eyebrows or brow ridges above the eyes. These can give the dog expression, making them look curious, sad, or alert. Use short, fine lines in the direction of fur growth.
Start indicating the direction of fur around the eyes, nose, and muzzle. Use short, overlapping strokes rather than long, continuous lines. Think about how the fur grows on a real dog.
Pro Tip: Vary the pressure on your pencil to create different textures for fur. Lighter strokes for softer fur, slightly harder for coarser hair.
Step 8: Introduce Shading and Texture
Using a softer pencil (like 2B or 4B), begin adding shading to give your dog’s face depth and dimension. Identify your light source and shade the opposite areas.
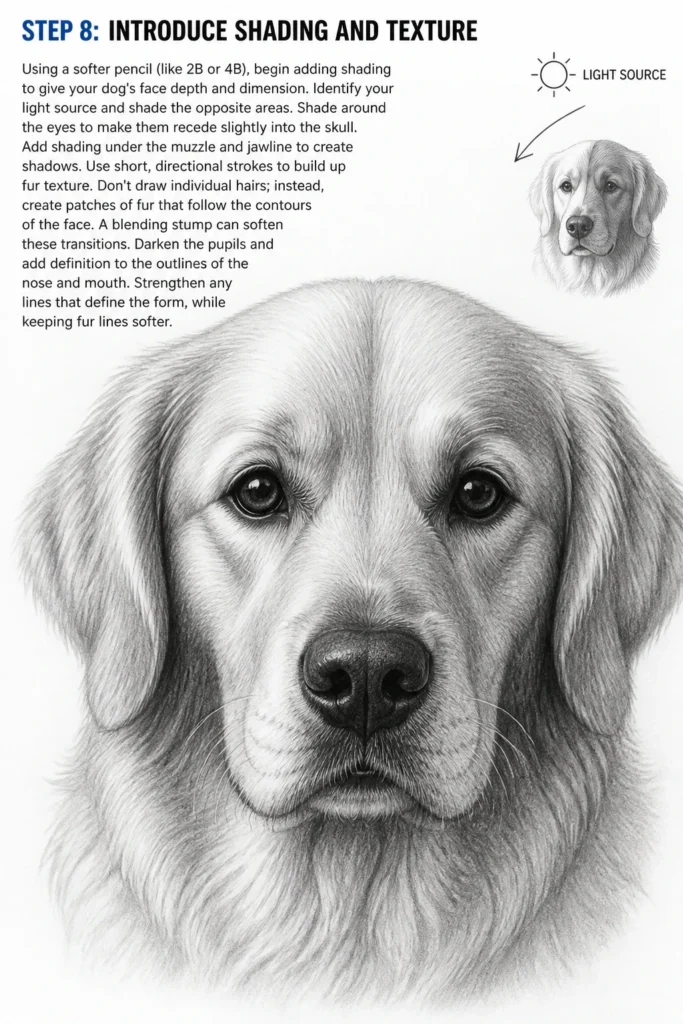
Shade around the eyes to make them recede slightly into the skull. Add shading under the muzzle and jawline to create shadows.
Use short, directional strokes to build up fur texture. Don’t draw individual hairs; instead, create patches of fur that follow the contours of the face. A blending stump can soften these transitions.
Darken the pupils and add definition to the outlines of the nose and mouth. Strengthen any lines that define the form, while keeping fur lines softer.
Common Mistakes to Avoid
Making the Eyes Too Flat or Symmetrical
Many beginners draw eyes as perfectly flat, symmetrical ovals. This makes the dog look lifeless and unnatural. Instead, remember eyes are spherical and set within sockets. Angle them slightly, vary their size if the head is turned, and always add a tiny highlight for sparkle. This adds depth and personality.
Ignoring the Breed-Specific Features
A common pitfall is drawing a generic “dog” face without considering specific breed characteristics. Every breed has unique ear shapes, muzzle lengths, eye placements, and head structures. Before you start, decide on a breed or general type of dog and look at reference photos. This ensures your drawing captures the essence of that particular canine.
Drawing Fur as Solid Outlines
Attempting to outline every strand of fur results in a stiff, cartoonish look. Fur is soft and textured, not a hard line. Instead, use short, overlapping strokes that follow the direction of growth. Build up layers of tone and texture, letting implied lines define the fur rather than strict outlines.
Poor Proportion and Placement
Often, artists place features incorrectly, making the eyes too high, the muzzle too long, or the ears disproportionate. This usually stems from skipping the initial guide lines. Always start with basic shapes and construction lines (eye line, central axis) to ensure all features are well-proportioned and correctly aligned before adding details.
Troubleshooting
My Dog’s Face Looks Flat
If your drawing lacks depth, it’s likely due to insufficient shading or a lack of understanding of form. Think of the dog’s head as a series of rounded forms, not a flat surface. Apply shading to create shadows where light wouldn’t hit, such as under the brow, beneath the muzzle, and around the ears. Use a range of pencil hardnesses to achieve varied tones, from light grays to deep blacks.
The Face Isn’t Symmetrical
Symmetry issues often arise from not using a central axis line or not checking proportions frequently. Go back to your initial construction lines. Lightly redraw a central vertical line down the face. Compare the distances of features from this line. Are the eyes equidistant? Is the nose centered? Use your pencil as a measuring tool against your drawing to check alignment and adjust as needed.
The Fur Looks Unrealistic
Unrealistic fur usually means you’re drawing individual strands too uniformly or ignoring the direction of growth. Focus on drawing clumps or patches of fur rather than single hairs. Observe reference images to see how fur lies on a dog’s face – it often radiates outwards from the nose and eyes. Use short, varied strokes with different pressure to mimic texture, and blend softly for areas of smooth fur.
Key Takeaways
- Always begin with light, basic geometric shapes to establish the overall head and muzzle structure.
- Utilize construction lines for the eye level and central axis to ensure proper proportion and symmetry.
- Observe specific breed characteristics for unique ear shapes, eye placement, and muzzle length.
- Use varying pencil pressure and directional strokes to create realistic fur texture and depth.
- Shading is essential for giving your dog’s face three-dimensional form and making it appear lifelike.
- Practice regularly and don’t be afraid to use reference photos to improve your observation skills.
Frequently Asked Questions
How do I make the eyes look more expressive?
Expression in a dog’s eyes comes from several factors. Focus on the shape of the eyelids, the size of the pupil, and the presence of a strong highlight. Slight wrinkles or brow lines above the eyes can convey emotion. Adding a tiny, bright highlight in the pupil is crucial for making the eyes seem alive and reflective.
What’s the best way to draw different fur types?
Drawing different fur types involves varying your stroke length, pressure, and blending. For short fur, use very short, tight strokes. For long, shaggy fur, use longer, more flowing strokes, allowing them to overlap. Smooth fur might require more blending and subtle transitions, while coarse fur benefits from sharper, more defined strokes.
Should I draw the entire dog’s head or just the face?
While this guide focuses on the face, it’s often helpful to lightly sketch the full head, including the skull and jaw, even if you only intend to finish the face. This provides a stronger structural foundation and helps ensure the face is proportionate to the rest of the head. You can then fade out the parts you don’t want to emphasize.
How do I choose the right reference photo?
Look for clear, well-lit reference photos where the dog’s face is at an angle you want to draw. Photos with good contrast help identify light and shadow areas. Avoid blurry images or those where the dog’s features are obscured. Multiple photos from slightly different angles can also be beneficial.
Our Top Recommended Finds
- Graphite Pencil Set: A good range of HB, 2B, 4B, and 6B pencils provides versatility for sketching and shading.
- Kneaded Eraser: Perfect for lifting graphite without smudging and shaping into fine points for highlights.
- Blending Stumps or Tortillions: Essential for smoothing out shading and creating soft transitions in fur.
Unleash Your Inner Artist
You’ve now got the tools and steps to start drawing captivating dog faces. Remember, every stroke is a step towards improving your skill. Don’t be discouraged by initial attempts; art is a journey of continuous learning and practice.
Why not try drawing your own beloved pet, or a favorite breed you admire? Experiment with different angles and expressions. The more you draw, the more confident and skilled you’ll become. Pick up your pencil today and bring those adorable canine faces to life!
& Painting
No rigid rules or pretension. Just practical guides, medium comparisons, and encouraging tips to help you enjoy the drawing & painting process.