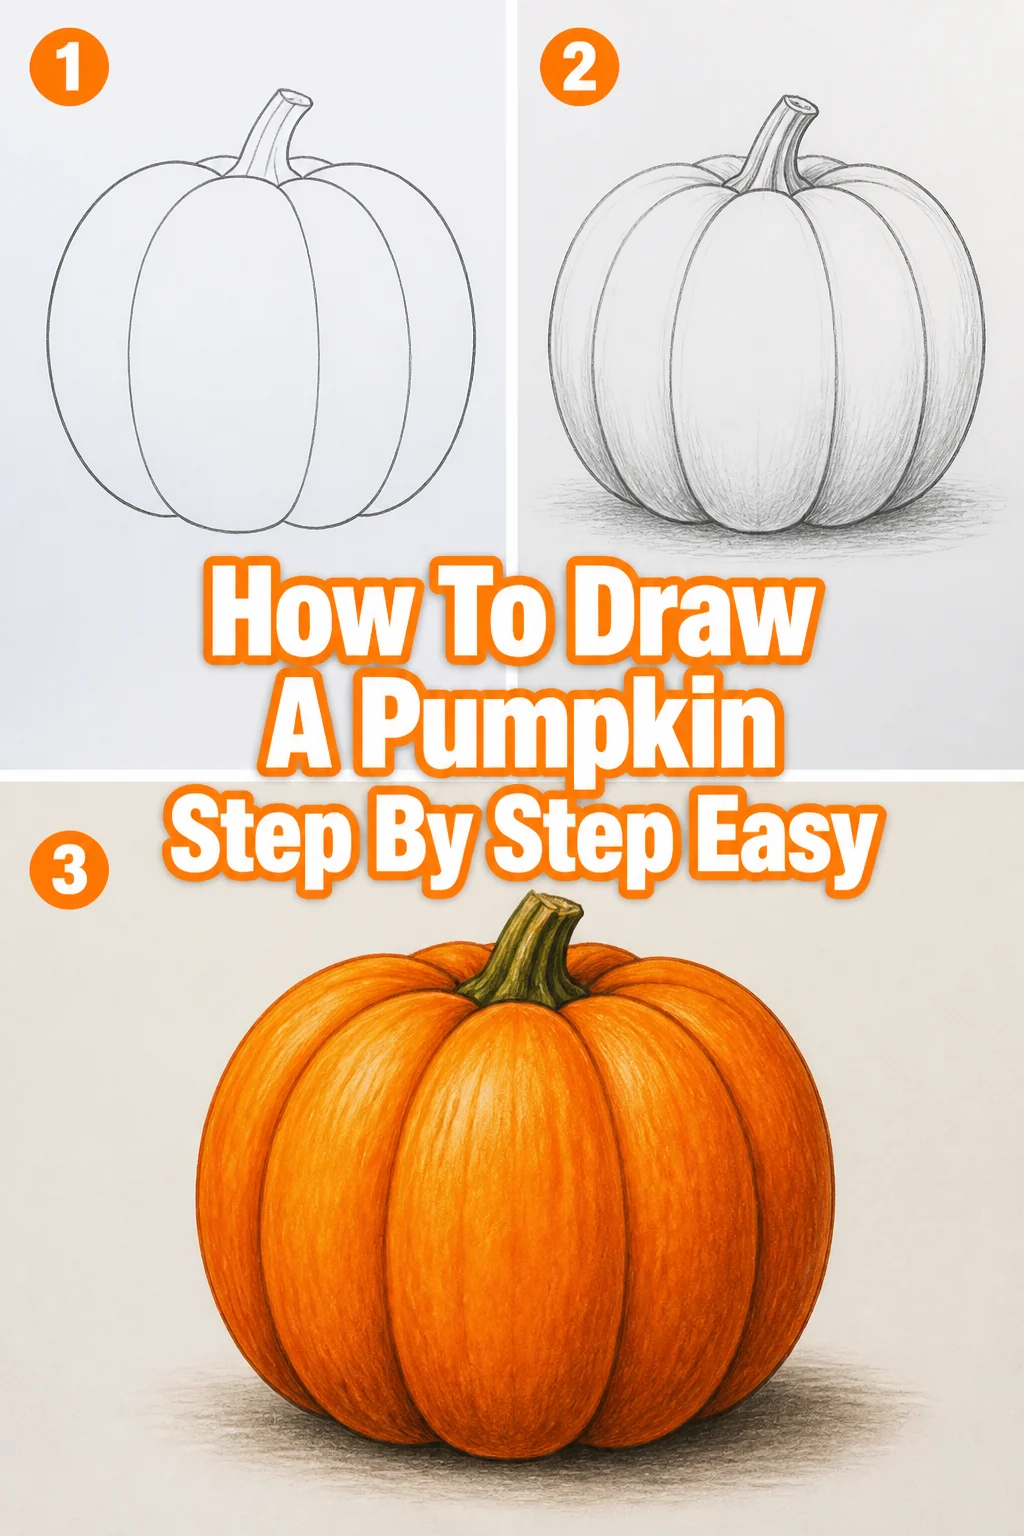
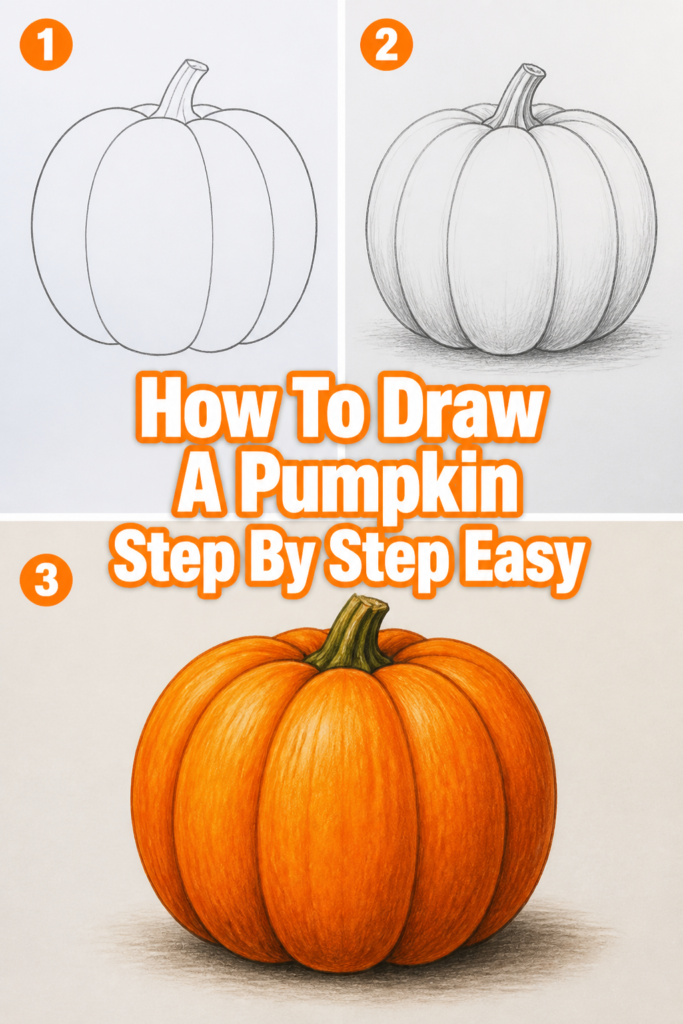
🎃 How To Draw A Pumpkin Step By Step Easy
Drawing a pumpkin can be a wonderfully relaxing and rewarding activity. It’s a fantastic way to celebrate autumn or just enjoy a simple creative break. I’ve spent countless hours sketching, and I truly believe anyone can master this with the right guidance.
This guide will break down the process into simple, manageable steps. You’ll learn the fundamental shapes and techniques to create a charming pumpkin on your page. Let’s get started and bring your pumpkin to life.
Quick Overview
This guide will walk you through creating a delightful pumpkin drawing from scratch. You’ll finish with a complete illustration, ready for coloring or display. It’s a perfect project for beginners.
Time needed: 20-40 minutes
Difficulty: Beginner
What you’ll need: Pencil, eraser, paper
Step-by-Step Instructions
Step 1: Sketch the Basic Foundation Oval
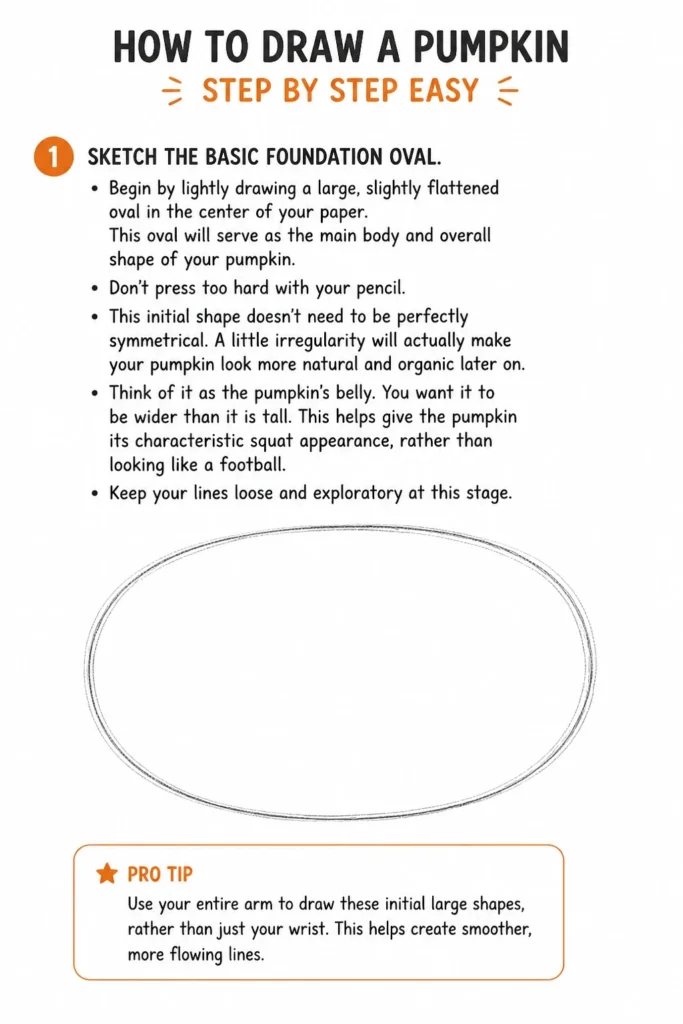
Begin by lightly drawing a large, slightly flattened oval in the center of your paper. This oval will serve as the main body and overall shape of your pumpkin. Don’t press too hard with your pencil.
This initial shape doesn’t need to be perfectly symmetrical. A little irregularity will actually make your pumpkin look more natural and organic later on. Think of it as the pumpkin’s belly.
You want it to be wider than it is tall. This helps give the pumpkin its characteristic squat appearance, rather than looking like a football. Keep your lines loose and exploratory at this stage.
Pro Tip: Use your entire arm to draw these initial large shapes, rather than just your wrist. This helps create smoother, more flowing lines.
Step 2: Add the Central Segment Guide
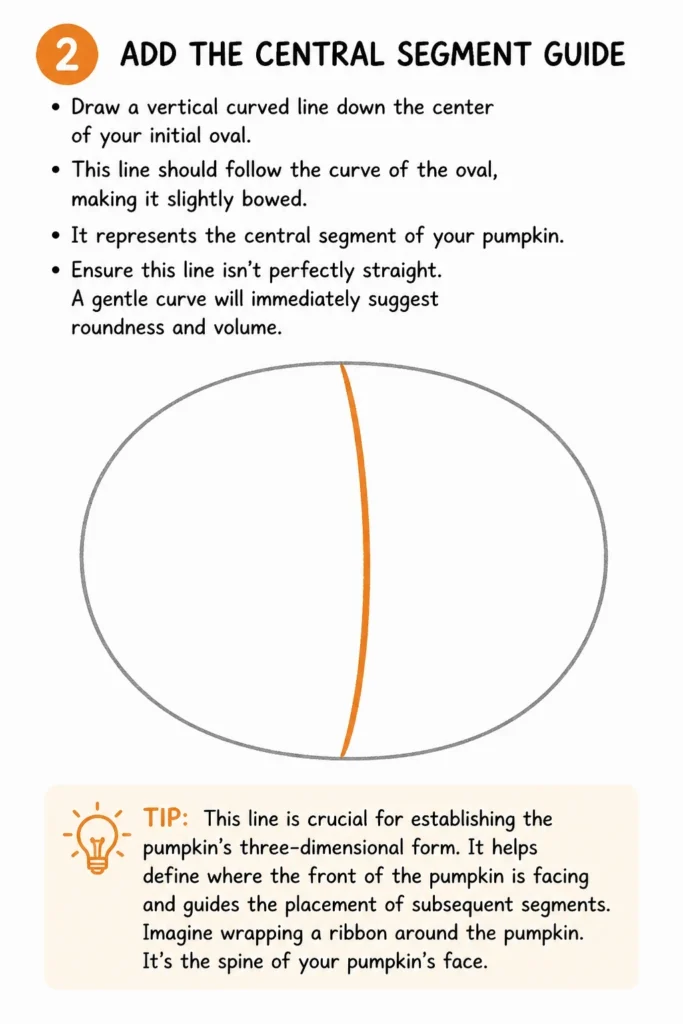
Draw a vertical curved line down the center of your initial oval. This line should follow the curve of the oval, making it slightly bowed. It represents the central segment of your pumpkin.
This line is crucial for establishing the pumpkin’s three-dimensional form. It helps define where the front of the pumpkin is facing and guides the placement of subsequent segments. Imagine wrapping a ribbon around the pumpkin.
Ensure this line isn’t perfectly straight. A gentle curve will immediately suggest roundness and volume. It’s the spine of your pumpkin’s face.
Step 3: Define the Main Pumpkin Segments
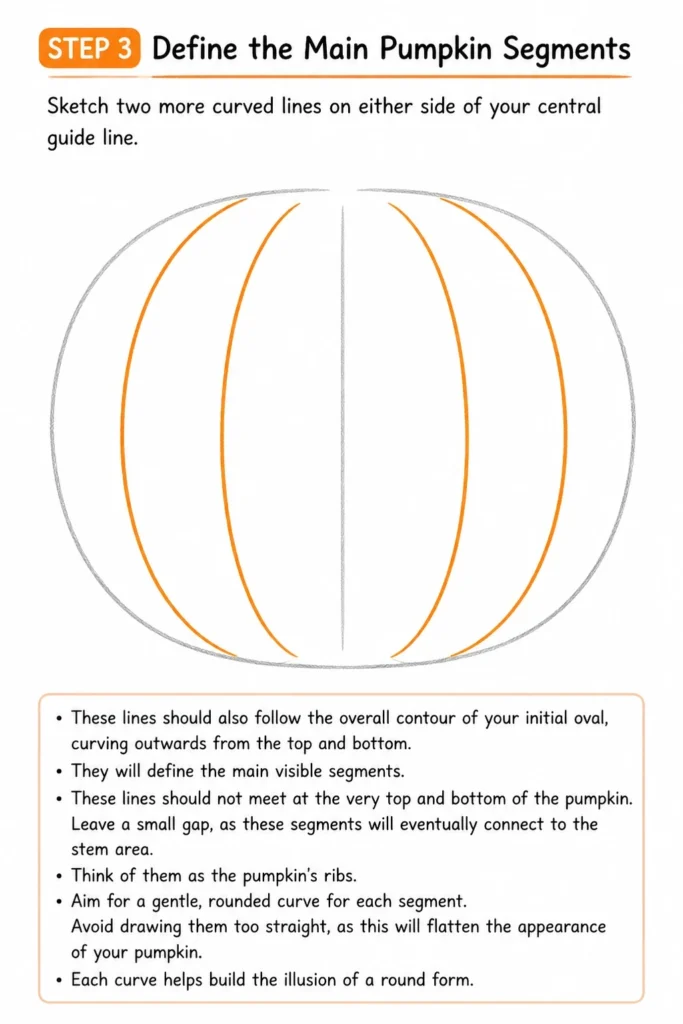
Sketch two more curved lines on either side of your central guide line. These lines should also follow the overall contour of your initial oval, curving outwards from the top and bottom. They will define the main visible segments.
These lines should not meet at the very top and bottom of the pumpkin. Leave a small gap, as these segments will eventually connect to the stem area. Think of them as the pumpkin’s ribs.
Aim for a gentle, rounded curve for each segment. Avoid drawing them too straight, as this will flatten the appearance of your pumpkin. Each curve helps build the illusion of a round form.
Step 4: Complete the Outer Segments
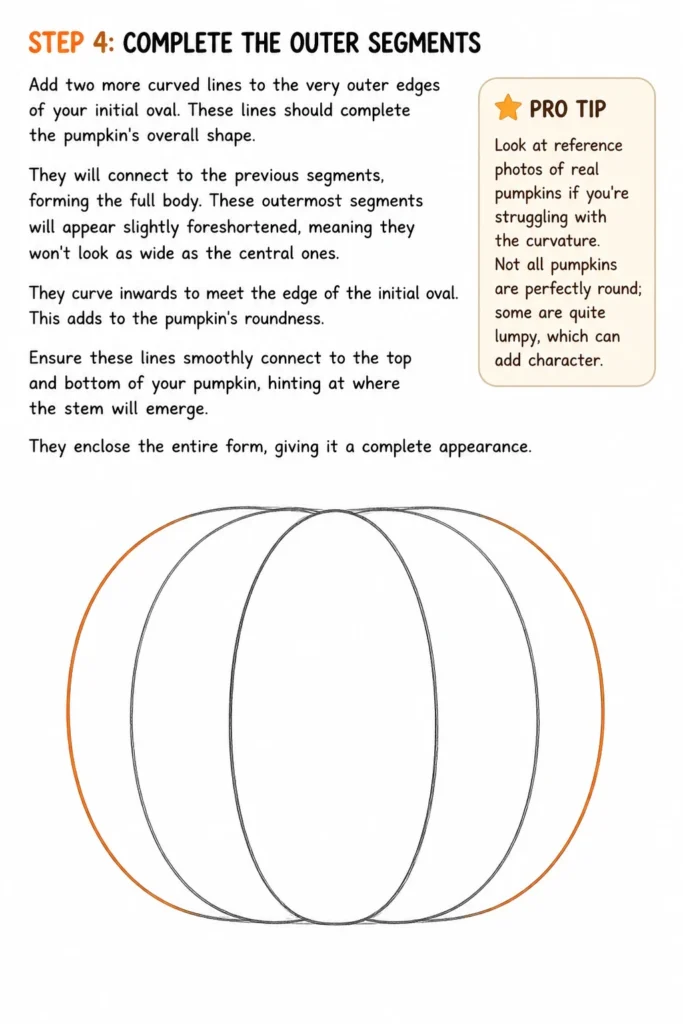
Add two more curved lines to the very outer edges of your initial oval. These lines should complete the pumpkin’s overall shape. They will connect to the previous segments, forming the full body.
These outermost segments will appear slightly foreshortened, meaning they won’t look as wide as the central ones. They curve inwards to meet the edge of the initial oval. This adds to the pumpkin’s roundness.
Ensure these lines smoothly connect to the top and bottom of your pumpkin, hinting at where the stem will emerge. They enclose the entire form, giving it a complete appearance.
Pro Tip: Look at reference photos of real pumpkins if you’re struggling with the curvature. Not all pumpkins are perfectly round; some are quite lumpy, which can add character.
Step 5: Draw the Stem and Top Area
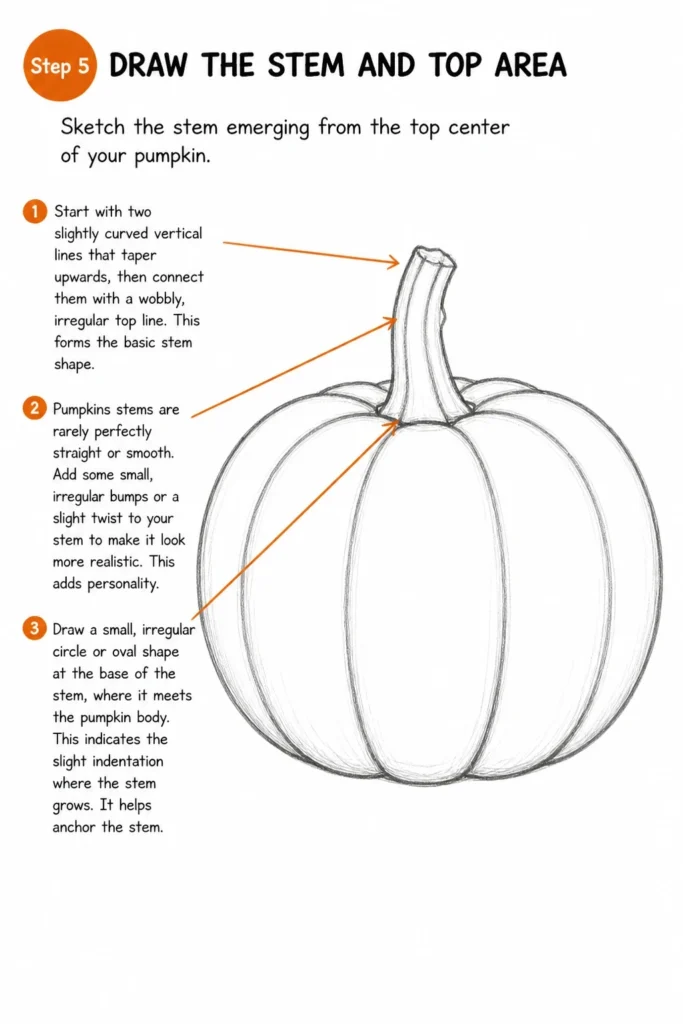
Sketch the stem emerging from the top center of your pumpkin. Start with two slightly curved vertical lines that taper upwards, then connect them with a wobbly, irregular top line. This forms the basic stem shape.
Pumpkins stems are rarely perfectly straight or smooth. Add some small, irregular bumps or a slight twist to your stem to make it look more realistic. This adds personality.
Draw a small, irregular circle or oval shape at the base of the stem, where it meets the pumpkin body. This indicates the slight indentation where the stem grows. It helps anchor the stem.
Step 6: Add Details to the Stem and Vine (Optional)
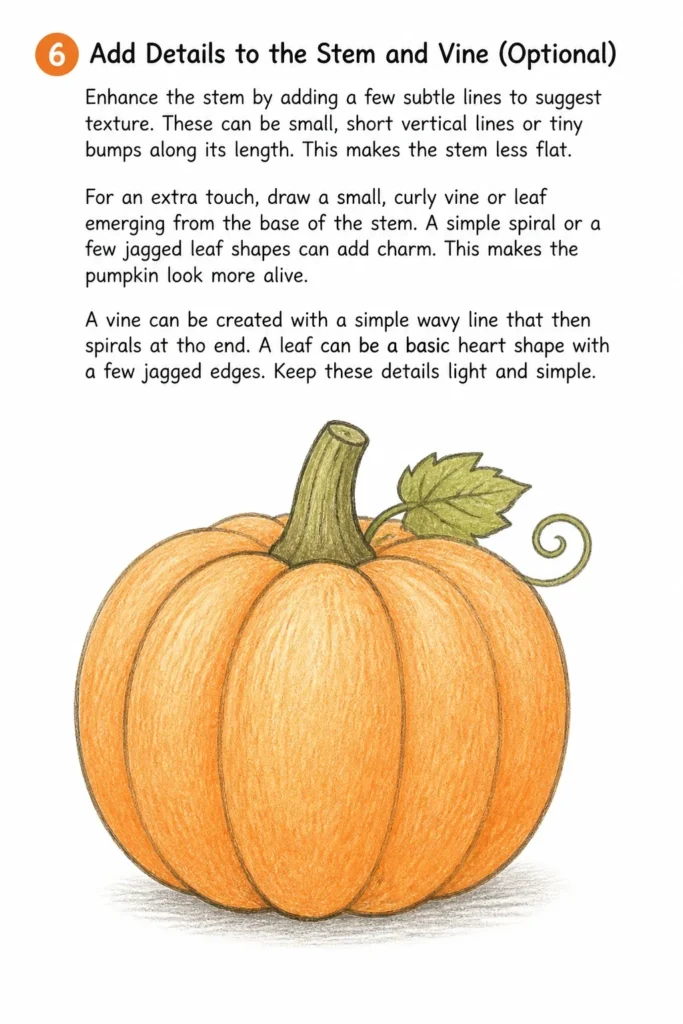
Enhance the stem by adding a few subtle lines to suggest texture. These can be small, short vertical lines or tiny bumps along its length. This makes the stem less flat.
For an extra touch, draw a small, curly vine or leaf emerging from the base of the stem. A simple spiral or a few jagged leaf shapes can add charm. This makes the pumpkin look more “alive.”
A vine can be created with a simple wavy line that then spirals at the end. A leaf can be a basic heart shape with a few jagged edges. Keep these details light and simple.
Step 7: Refine Lines and Erase Guides
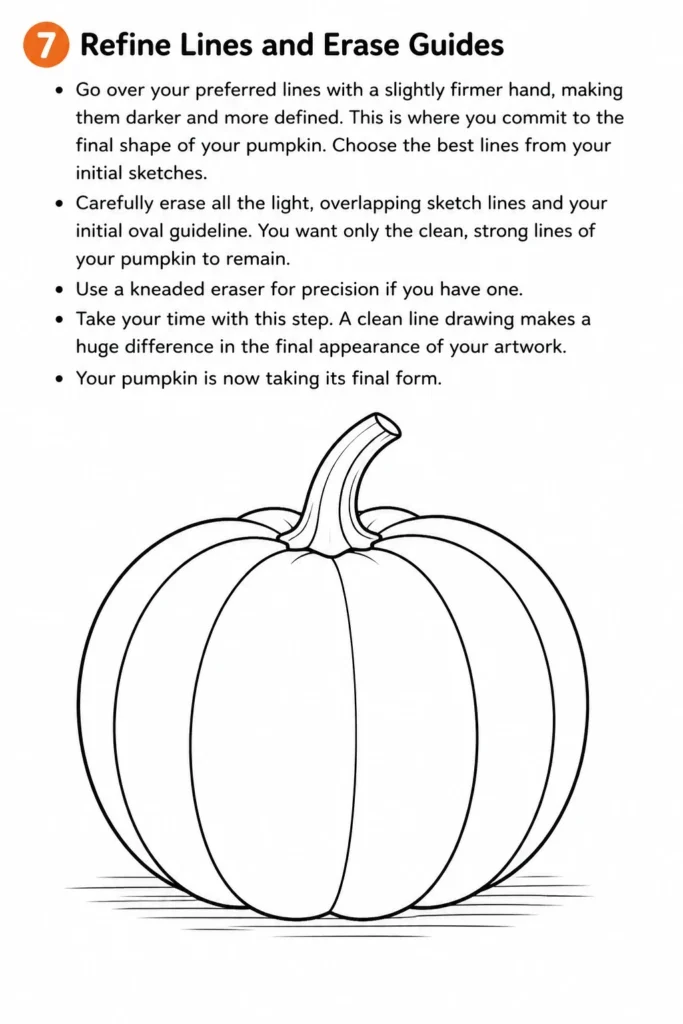
Go over your preferred lines with a slightly firmer hand, making them darker and more defined. This is where you commit to the final shape of your pumpkin. Choose the best lines from your initial sketches.
Carefully erase all the light, overlapping sketch lines and your initial oval guideline. You want only the clean, strong lines of your pumpkin to remain. Use a kneaded eraser for precision if you have one.
Take your time with this step. A clean line drawing makes a huge difference in the final appearance of your artwork. Your pumpkin is now taking its final form.
Step 8: Introduce Basic Shading (Optional but Recommended)
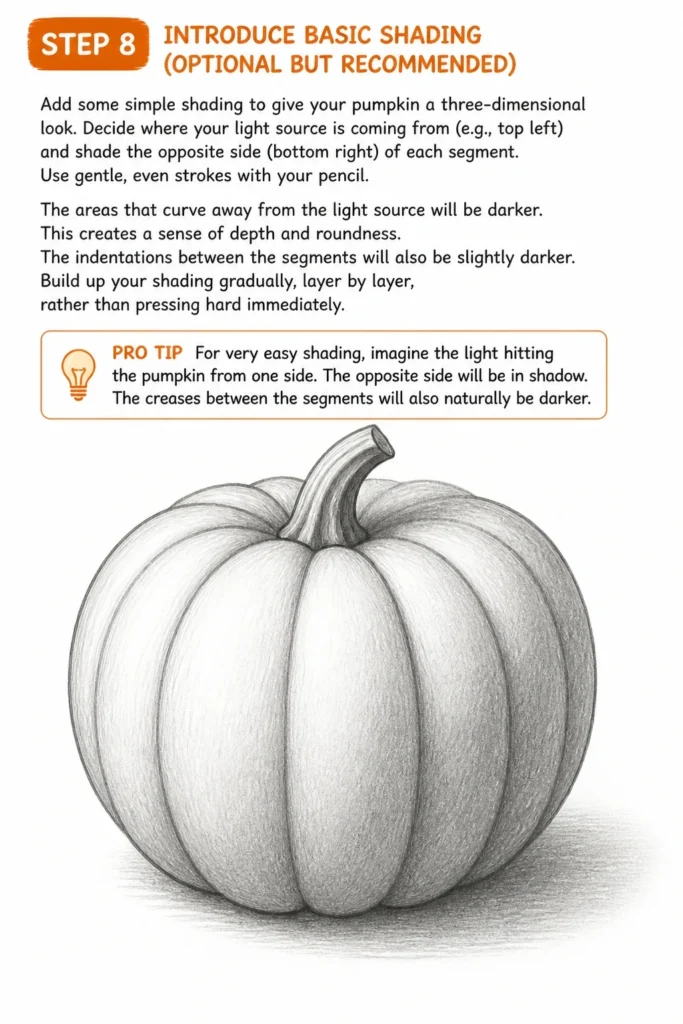
Add some simple shading to give your pumpkin a three-dimensional look. Decide where your light source is coming from (e.g., top left) and shade the opposite side (bottom right) of each segment.
Use gentle, even strokes with your pencil. The areas that curve away from the light source will be darker. This creates a sense of depth and roundness.
The indentations between the segments will also be slightly darker. Build up your shading gradually, layer by layer, rather than pressing hard immediately. This allows for smoother transitions.
Pro Tip: For very easy shading, imagine the light hitting the pumpkin from one side. The opposite side will be in shadow. The “creases” between the segments will also naturally be darker.
Common Mistakes to Avoid
Drawing Flat Segments
Many beginners draw the pumpkin segments with straight lines or lines that don’t curve enough. This makes the pumpkin look flat and two-dimensional, lacking its characteristic roundness. Remember that each segment wraps around a spherical form. Always ensure your segment lines have a noticeable curve, following the contour of the overall pumpkin shape, to convey depth.
Making the Stem Too Perfect
A common pitfall is drawing a perfectly straight and smooth stem. Real pumpkin stems are organic, often gnarled, bumpy, and slightly twisted. A stem that is too uniform detracts from the natural look of your pumpkin. Introduce small imperfections, a slight taper, or a few texture lines to give your stem character and make it appear more realistic.
Forgetting the Indentation at the Stem Base
The area where the stem meets the pumpkin is rarely a flat surface. There’s typically a slight indentation or a raised collar around the stem. Neglecting this detail can make the stem look like it’s just stuck on top, rather than growing organically from the pumpkin. Always include a small, irregular circle or oval at the stem’s base to show this natural connection point.
Not Erasing Guide Lines Thoroughly
Leaving faint sketch lines or the initial oval guideline visible can make your final drawing look messy and unfinished. These guide lines serve their purpose during the initial stages but should be completely removed once the final lines are established. Take your time to carefully erase all unnecessary marks to achieve a clean and polished appearance.
Troubleshooting
My Pumpkin Looks Too Flat
If your pumpkin appears flat despite adding curves, re-evaluate the degree of curvature in your segment lines. Often, the curves aren’t pronounced enough. Exaggerate the bend of each segment line slightly, making them more bowed, especially towards the outer edges of the pumpkin. Also, ensure your initial oval is wider than it is tall, giving it a squat, round foundation.
The Segments Don’t Look Even
Achieving even segments can be tricky. This often happens if you don’t use a central guide line effectively or if you rush the initial sketching. Start by drawing a clear central segment first, then add segments symmetrically on either side. Use very light pencil strokes initially, allowing you to easily adjust and refine each segment’s curve and width before committing. Practice drawing overlapping curves.
My Stem Doesn’t Look Natural
A stiff or unrealistic stem usually lacks the organic details found in nature. Avoid drawing straight lines for the stem. Instead, use slightly wobbly or curved lines that taper upwards. Add subtle texture marks like small bumps, ridges, or a slight twist. Remember to include the irregular “collar” or indentation where the stem meets the pumpkin body for a more believable connection.
Key Takeaways
Start with a light, flattened oval as your pumpkin’s foundation.
Use curved lines exclusively for segments to create a three-dimensional effect.
Embrace imperfections in the stem and overall shape for a natural look.
Refine your lines carefully and erase all initial sketch marks for a clean finish.
Experiment with basic shading to add depth and make your pumpkin pop.
Practice regularly to improve your line control and understanding of forms.
Frequently Asked Questions
Can I draw a pumpkin without shading?
Absolutely! Shading is entirely optional, especially when you’re just starting out. A clean line drawing of a pumpkin can be very charming and effective on its own. Focus on getting the shapes and lines right first, and then you can always add shading later if you feel more confident.
What if my lines are wobbly?
Wobbly lines are perfectly normal for beginners. The key is practice and learning to draw from your shoulder, not just your wrist. Try drawing long, continuous strokes rather than short, hesitant ones. Remember, even professional artists sketch lightly first and refine their lines. Don’t be afraid to erase and redraw.
How can I make my pumpkin look unique?
To make your pumpkin unique, experiment with different shapes for the initial oval – some can be taller, some wider, some more lumpy. Add varying numbers of segments, different stem lengths, or unique leaf and vine patterns. You can also give it a carved face or add patterns. Don’t be afraid to deviate from the “perfect” pumpkin.
What’s the best type of pencil to use?
For sketching, a standard HB pencil is excellent as it’s not too hard or too soft. For darker lines and shading, you might use a softer pencil like a 2B or 4B, which produces richer blacks. However, for an easy beginner guide, a single HB pencil is more than sufficient for all steps.
Our Top Recommended Finds
Sketch Pad: A simple, spiral-bound sketch pad with good quality paper. It’s portable and perfect for practicing without worrying about wasting expensive sheets.
Pencil Set: A basic set of drawing pencils with varying hardness (e.g., 2H, HB, 2B, 4B). This allows you to experiment with different line weights and shading effects.
Kneaded Eraser: Unlike a regular eraser, a kneaded eraser can be molded into various shapes for precise erasing and doesn’t leave behind eraser dust. It’s fantastic for cleaning up light sketch lines.
Your Pumpkin Adventure Starts Now
You’ve just walked through the steps to create your very own pumpkin drawing. It’s a wonderful achievement, and each attempt will build your confidence and skill. Drawing is a journey, not a destination, and every line you draw is a step forward.
Now that you’ve mastered the basic pumpkin, why not try adding a spooky face for Halloween, or perhaps draw a small cluster of pumpkins? You could even experiment with different coloring techniques to bring even more life to your creation. Grab your pencil and paper today, and keep exploring the joy of drawing!