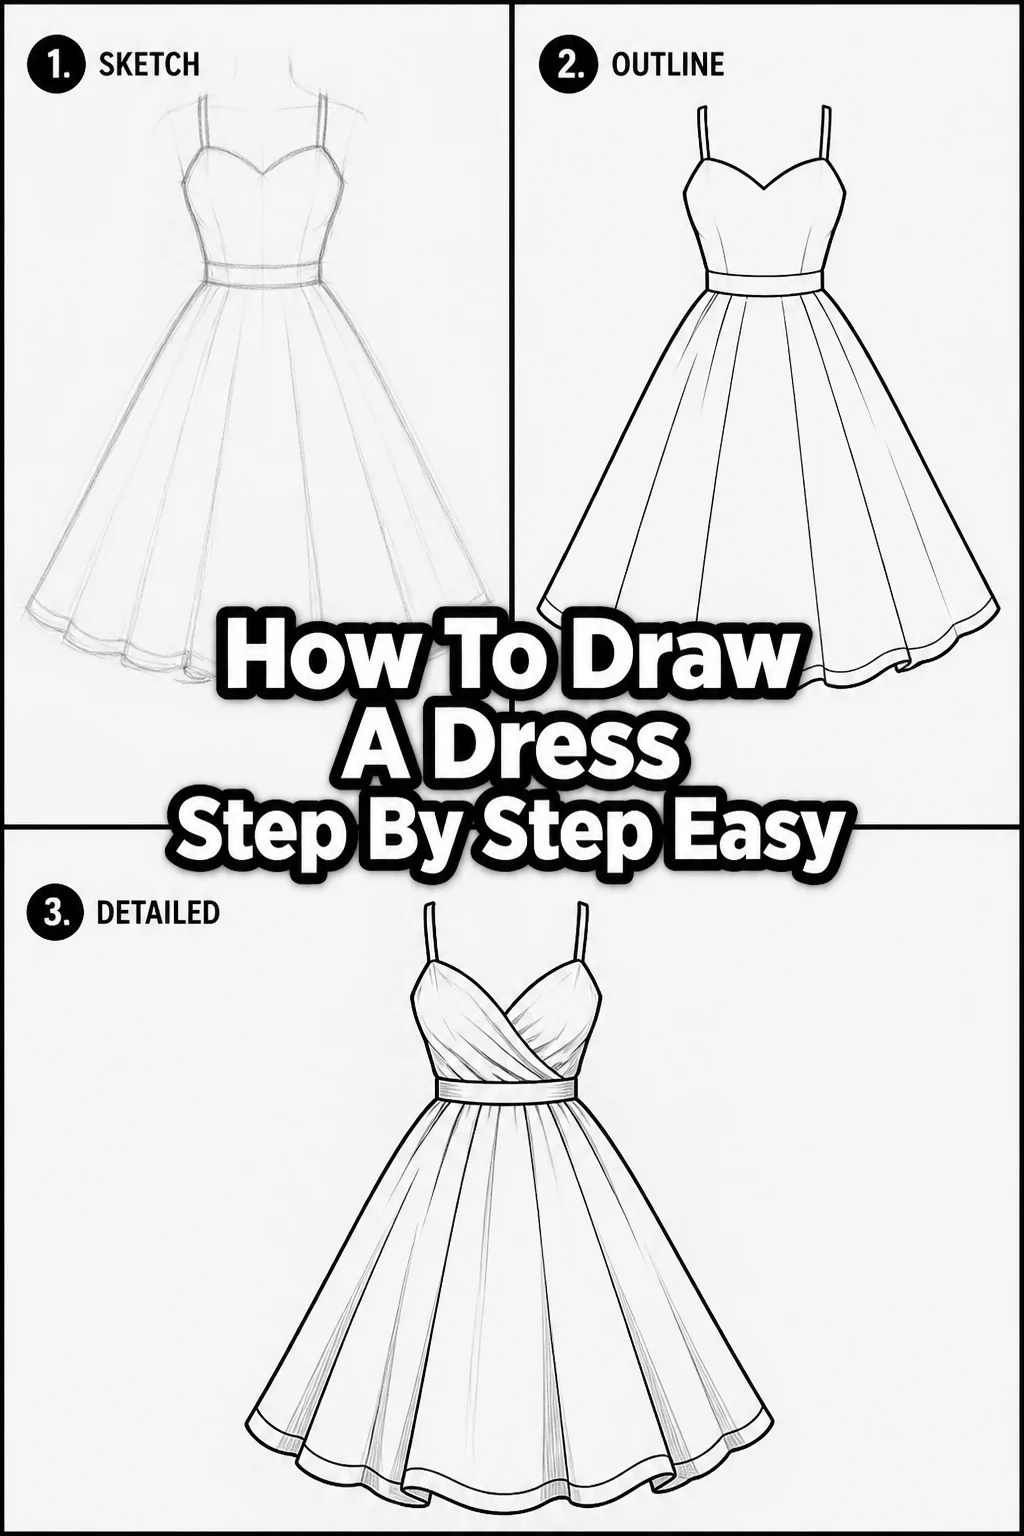
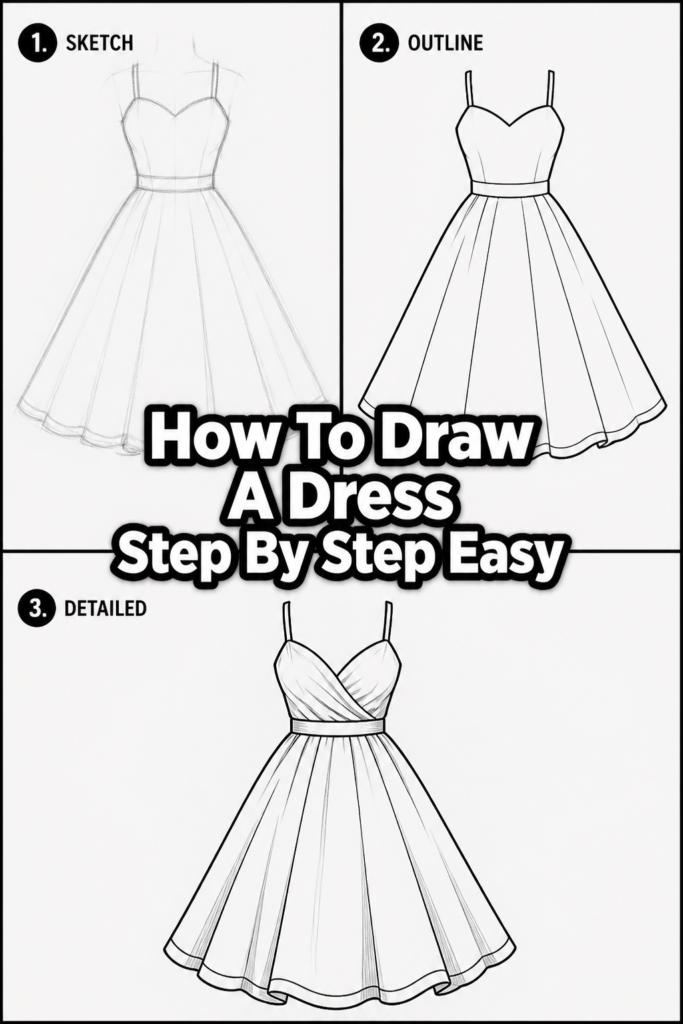
👗 How To Draw A Dress Step By Step Easy
Learning to draw a dress can seem tricky, especially with all the fabric and folds. I remember feeling overwhelmed when I first tried to capture the flow of a skirt on paper. This guide is designed to break it down into simple, manageable steps, just like I learned to do.
You’ll discover that with a few basic shapes and techniques, you can create beautiful dress designs with confidence. Let’s get started on your drawing journey today.
Quick Overview
This guide will walk you through creating a simple yet elegant dress drawing, focusing on fundamental techniques. You’ll learn to build your design from basic forms to detailed elements. By the end, you’ll have a solid foundation for drawing various dress styles.
- Time needed: 30-60 minutes
- Difficulty: Beginner
- What you’ll need: Pencil (HB or 2B recommended), eraser, paper
Step-by-Step Instructions
Step 1: Prepare Your Workspace and Lightly Sketch a Mannequin
Before you draw the dress, you need a basic form for it to hang on. Lightly sketch a simple mannequin or fashion croquis. You don’t need perfect anatomy here, just a general outline of a torso, hips, and perhaps the top of the legs.
This underlying structure ensures your dress will have a realistic shape and drape. Use very light lines, as most of this will be erased later. Think of it as a skeleton for your garment.
Pro Tip: Always start with the lightest possible lines. This makes corrections much easier and keeps your final drawing clean. A light touch is key for initial sketches.
Step 2: Define the Basic Dress Silhouette
Now, begin to sketch the overall shape of your dress over the mannequin. Think about the general outline – is it an A-line, a sheath, or something flowing? Use simple geometric shapes like rectangles, triangles, and soft curves.
Focus on the main form, from the neckline down to the hem. Don’t worry about details yet; just get the primary silhouette established. This stage is about capturing the dress’s volume and flow.
Step 3: Establish the Neckline and Shoulder Lines
Once the main silhouette is in place, move on to the top of the dress. Draw the neckline based on your desired style, whether it’s a simple scoop, a V-neck, or a boat neck. Connect the neckline to the shoulders of your underlying mannequin.
Consider how the fabric would sit around the collarbones and shoulders. Even a simple dress needs a defined top to look complete. This step brings the upper part of the garment to life.
Step 4: Sketch the Sleeves (If Applicable) and Waistline
If your dress has sleeves, now is the time to add them. Sketch their basic shape, considering if they are short, long, fitted, or puffy. Remember they should follow the arm’s general direction.
Next, define the waistline, even if it’s a loose-fitting dress. This helps establish the garment’s proportions. A natural waist, empire waist, or drop waist will significantly change the dress’s overall look.
Step 5: Refine the Dress Outline and Add Main Seams
With the basic shapes down, it’s time to refine the outer edges of your dress. Smooth out any jagged lines and adjust proportions as needed. Make sure the curves flow naturally.
Then, add major seams that would typically be present in a garment. These might include side seams, a central seam, or princess seams. These lines give the dress structure and help define its construction.
Pro Tip: Look at real dresses or photos for inspiration on how seams are placed. They often follow the body’s natural curves, adding form and fit.
Step 6: Introduce Folds and Drapery
This is where the dress starts to look realistic and dynamic. Observe where fabric would naturally gather, pull, or fold. Common areas include the waist, elbows (for long sleeves), under the bust, and around movement points.
Draw gentle, curved lines to represent these folds. Don’t overdo it; a few well-placed folds are more effective than many messy ones. Think about the direction and weight of the fabric.
Step 7: Erase Construction Lines and Clean Up
Now that you have your refined dress drawing, it’s time to clean up your work. Carefully erase all the initial mannequin lines and any unnecessary sketch lines from earlier steps. Be precise to avoid erasing parts of your dress.
Once the construction lines are gone, go over your dress outline and detail lines, making them darker and more confident. This step makes your drawing crisp and professional. Ensure your main lines are clear and defined.
Step 8: Add Basic Shading and Texture
To give your dress depth, apply some basic shading. Identify a light source and shade the areas that would be in shadow, such as under folds, along seams, and where the fabric recedes. Use a lighter touch for highlights and a darker touch for deeper shadows.
You can also hint at fabric texture with subtle marks. For example, a few tiny dots for tweed or light, parallel lines for satin. This final touch brings your dress drawing to life.
Common Mistakes to Avoid
Ignoring the Body Form
A common pitfall is drawing a dress as if it’s floating in space, without considering the body underneath. This makes the garment look flat and unrealistic. Always start with a basic mannequin or figure to ensure the dress has a foundation. The dress should drape on a form, not just exist as an outline.
Stiff or Unnatural Folds
Many beginners draw folds as rigid, angular lines, which makes the fabric look stiff. Fabric folds are usually soft, curved, and irregular. Observe how real fabric drapes, pulls, and bunches. Practice drawing various types of curves to represent natural movement and softness in your folds.
Over-detailing Too Soon
Jumping straight into intricate details like lace patterns or complex embroidery before establishing the main form can lead to a messy drawing. It’s crucial to work from general to specific. Build the overall silhouette and major forms first, then gradually add smaller details. This structured approach helps maintain proportion and clarity.
Inconsistent Proportions
Sometimes, a dress might have a bodice that’s too long or a skirt that’s disproportionately short. This often happens when artists don’t use their initial mannequin as a guide. Regularly step back and check your proportions against the underlying figure. Ensure the dress fits the body realistically and aesthetically.
Troubleshooting
My Dress Looks Flat and Lifeless
If your dress lacks dimension, you might be missing out on folds and shading. Folds create depth by indicating how fabric moves and catches light. Add more varied, curved lines to suggest fabric draping, especially around joints and the waist.
Also, consider adding basic shading. Identify a light source and darken areas that would naturally be in shadow, such as under arms or within deep folds. This contrast instantly adds volume.
The Proportions Seem Off
When proportions feel incorrect, it’s usually a sign that your initial mannequin sketch wasn’t strong enough or you deviated from it. Go back to your underlying figure. Use light construction lines to ensure the shoulders, waist, and hips are correctly placed relative to each other.
You can also use simple measuring techniques, like comparing the length of the bodice to the skirt, to real-life references. Don’t be afraid to erase and redraw sections until they look right.
My Lines Are Messy and Unsure
Messy lines often come from pressing too hard or trying to draw a perfect line in one go. Practice drawing with a lighter hand, using multiple short, overlapping strokes to build up a line. This allows for adjustments before committing to a darker line.
Also, ensure you’re using a sharp pencil, as dull pencils can lead to thicker, less precise lines. Confidence comes with practice, so keep sketching and refining your technique.
Key Takeaways
- Start with a Foundation: Always begin by lightly sketching a basic mannequin or figure to ensure your dress has a realistic form and drape.
- Build in Layers: Progress from broad shapes and general silhouettes to finer details like necklines, seams, and folds.
- Observe Real Fabric: Pay attention to how fabric behaves in real life – how it folds, wrinkles, and flows. This observation will greatly improve your drawings.
- Practice Lightly: Use a light hand for initial sketches to make corrections easier and keep your final drawing clean.
- Add Depth with Folds and Shading: Incorporate natural-looking folds and basic shading to give your dress dimension and make it appear more realistic.
Frequently Asked Questions
What kind of pencil is best for drawing dresses?
For initial sketches and light lines, an HB pencil is ideal. For darker lines and shading, a 2B or 4B pencil works well. Having a range allows you to create depth and contrast in your drawing.
How can I make the fabric look more realistic?
Focus on drawing varied folds and paying attention to the fabric’s weight. Heavy fabrics have fewer, larger folds, while light fabrics have many delicate wrinkles. Adding subtle shading under folds also enhances realism.
Can I draw different dress styles with these steps?
Absolutely! These foundational steps apply to virtually any dress style. Once you master the basic silhouette, folds, and shading, you can adapt them to create A-line, mermaid, sheath, or ball gown dresses by simply altering the initial shapes.
How do I draw patterns or textures on a dress?
Once your dress is fully drawn and shaded, lightly sketch the pattern onto the fabric, following the contours of the dress and its folds. For texture, use subtle marks like small dots for tweed or fine lines for silk, ensuring they conform to the dress’s shape.
Our Top Recommended Finds
- Sketchbook with Smooth Paper: A good sketchbook provides a consistent surface, allowing your pencil to glide smoothly for fluid lines.
- Set of Graphite Pencils (HB, 2B, 4B, 6B): This range offers versatility for sketching, outlining, and adding deep shadows to your dress drawings.
- Kneaded Eraser: Essential for lifting graphite without damaging the paper, perfect for cleaning up light construction lines or softening shadows.
Your Next Creative Stitch
You’ve just taken a fantastic step in your artistic journey, learning to draw a dress with ease. Don’t let your pencil rest now; keep that creative momentum going. Every line you draw builds your skill and confidence.
Why not try drawing the same dress in a different pose, or experiment with a completely new style like a flowing evening gown or a structured suit? The possibilities are endless. Pick up your pencil and create something beautiful today!