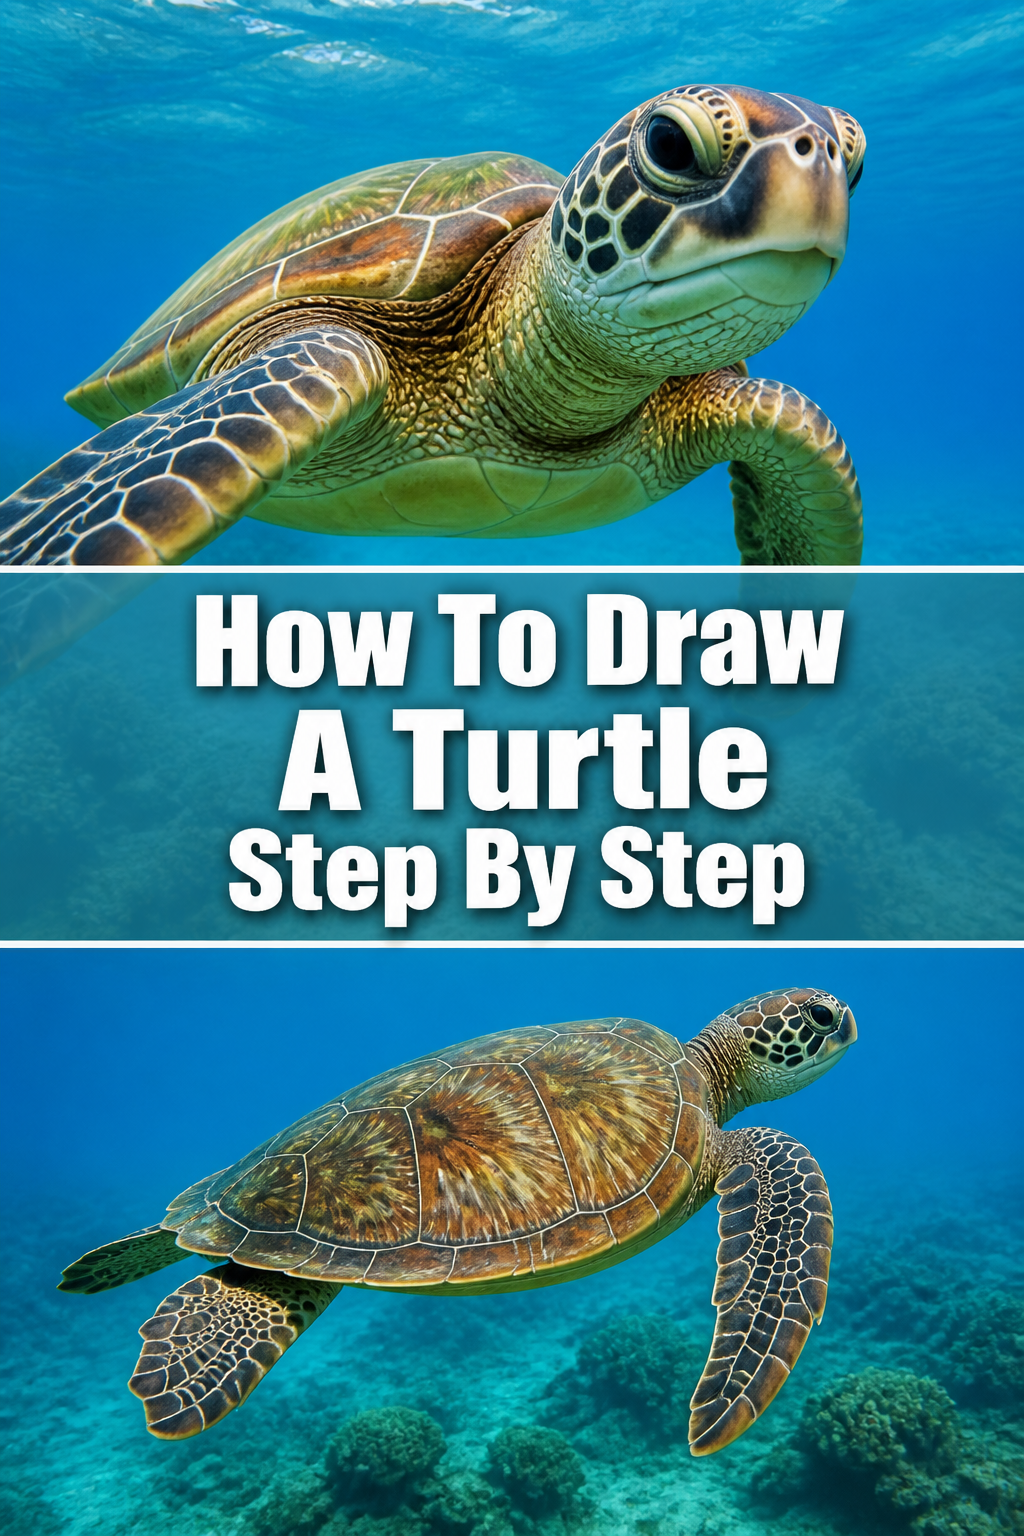
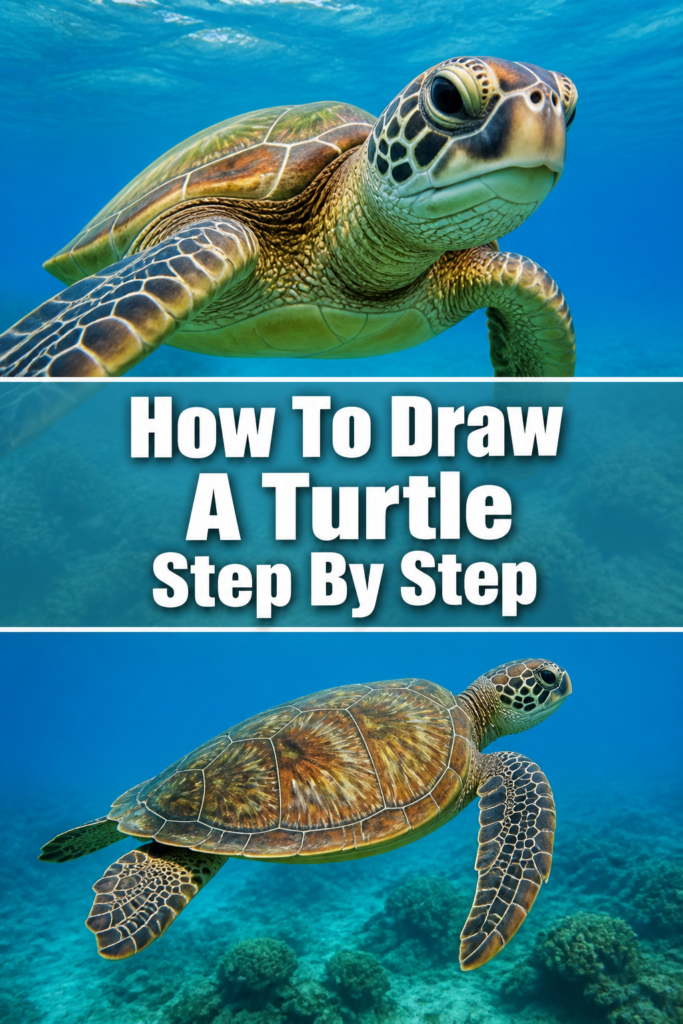
🐢 How To Draw A Turtle Step By Step

& Painting
No rigid rules or pretension. Just practical guides, medium comparisons, and encouraging tips to help you enjoy the drawing & painting process.
Have you ever wanted to sketch a charming turtle but felt unsure where to begin? Drawing can seem daunting at first glance.
I remember my own early attempts, often resulting in lopsided shells and wobbly fins. This guide comes from years of practice and teaching, breaking down complex shapes into simple, manageable lines.
You absolutely can create a delightful turtle drawing, even if you’re just starting out. Let’s make something wonderful together.
Quick Overview
This guide will walk you through creating a complete turtle drawing, from initial shapes to final details. You’ll learn to build your turtle layer by layer, understanding its basic anatomy and adding personality.
- Time needed: 20-40 minutes
- Difficulty: Beginner
- What you’ll need: Pencil, eraser, paper, optional: black fineliner, colored pencils
Step-by-Step Instructions
Step 1: Sketch the Basic Body Shapes
Every great drawing starts with simple forms. Think of your turtle as a collection of ovals and circles. This foundation is crucial for proper proportions.
Draw a large, horizontal oval in the center of your paper. This will be the turtle’s shell, or carapace. Make it light and airy; these are just guide lines.
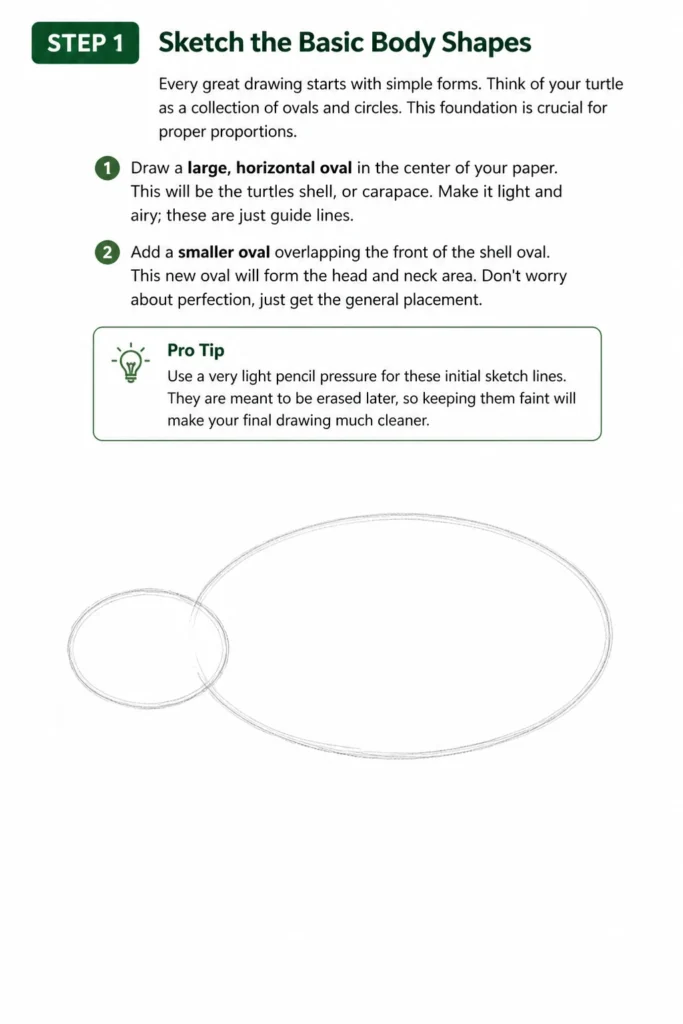
Add a smaller oval overlapping the front of the shell oval. This new oval will form the head and neck area. Don’t worry about perfection, just get the general placement.
Pro Tip: Use a very light pencil pressure for these initial sketch lines. They are meant to be erased later, so keeping them faint will make your final drawing much cleaner.
Step 2: Define the Head and Neck
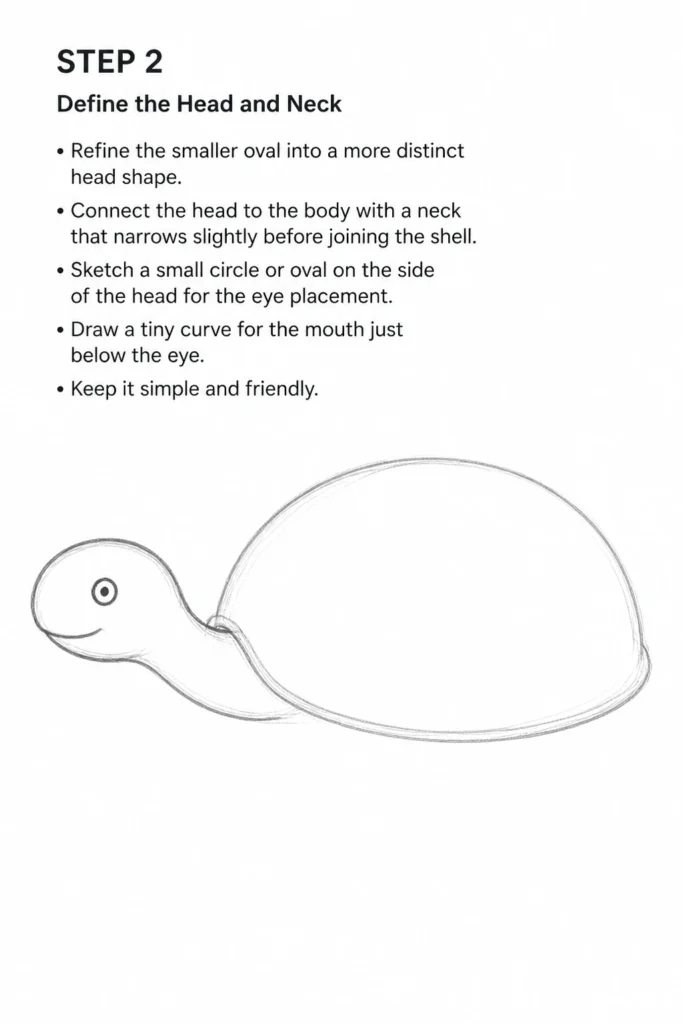
Now, let’s refine the head shape and connect it smoothly to the body. This step gives your turtle its distinct profile.
- Refine the smaller oval into a more distinct head shape. Think of it as a slightly flattened sphere for the head, connected by a neck that narrows slightly before joining the shell.
- Sketch a small circle or oval on the side of the head for the eye placement. This helps determine the turtle’s gaze.
- Draw a tiny curve for the mouth just below the eye. Keep it simple and friendly.
Step 3: Add the Legs and Tail
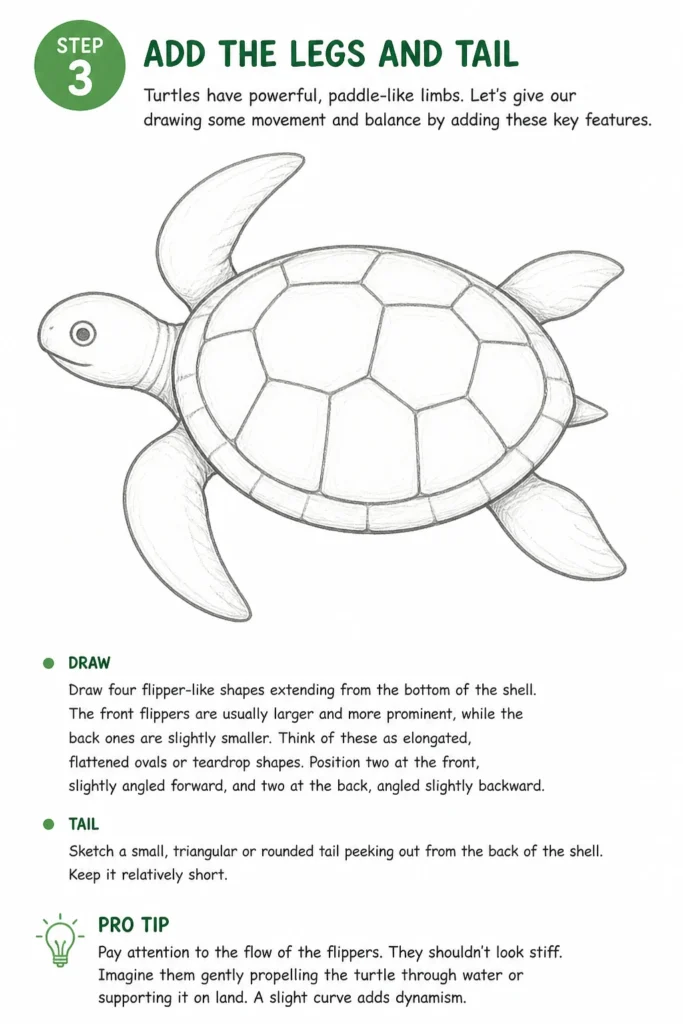
Turtles have powerful, paddle-like limbs. Let’s give our drawing some movement and balance by adding these key features.
- Draw four flipper-like shapes extending from the bottom of the shell. The front flippers are usually larger and more prominent, while the back ones are slightly smaller.
- Think of these as elongated, flattened ovals or teardrop shapes. Position two at the front, slightly angled forward, and two at the back, angled slightly backward.
- Sketch a small, triangular or rounded tail peeking out from the back of the shell. Keep it relatively short.
Pro Tip: Pay attention to the flow of the flippers. They shouldn’t look stiff. Imagine them gently propelling the turtle through water or supporting it on land. A slight curve adds dynamism.
Step 4: Shape the Shell and Details
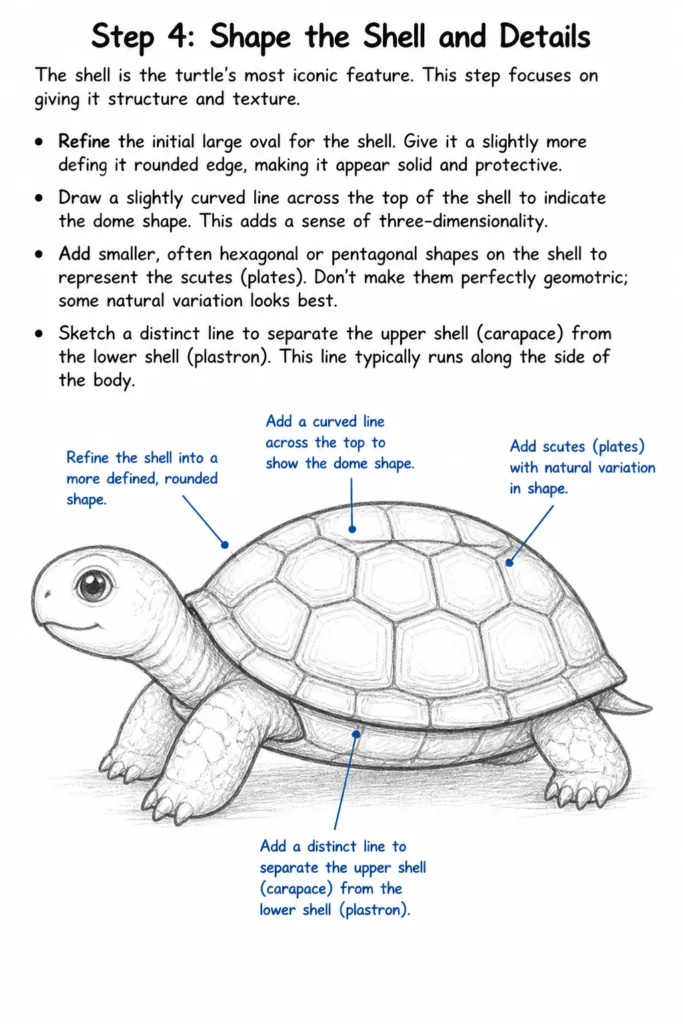
The shell is the turtle’s most iconic feature. This step focuses on giving it structure and texture.
- Refine the initial large oval for the shell. Give it a slightly more defined, rounded edge, making it appear solid and protective.
- Draw a slightly curved line across the top of the shell to indicate the dome shape. This adds a sense of three-dimensionality.
- Add smaller, often hexagonal or pentagonal shapes on the shell to represent the scutes (plates). Don’t make them perfectly geometric; some natural variation looks best.
- Sketch a distinct line to separate the upper shell (carapace) from the lower shell (plastron). This line typically runs along the side of the body.
Step 5: Clean Up and Outline
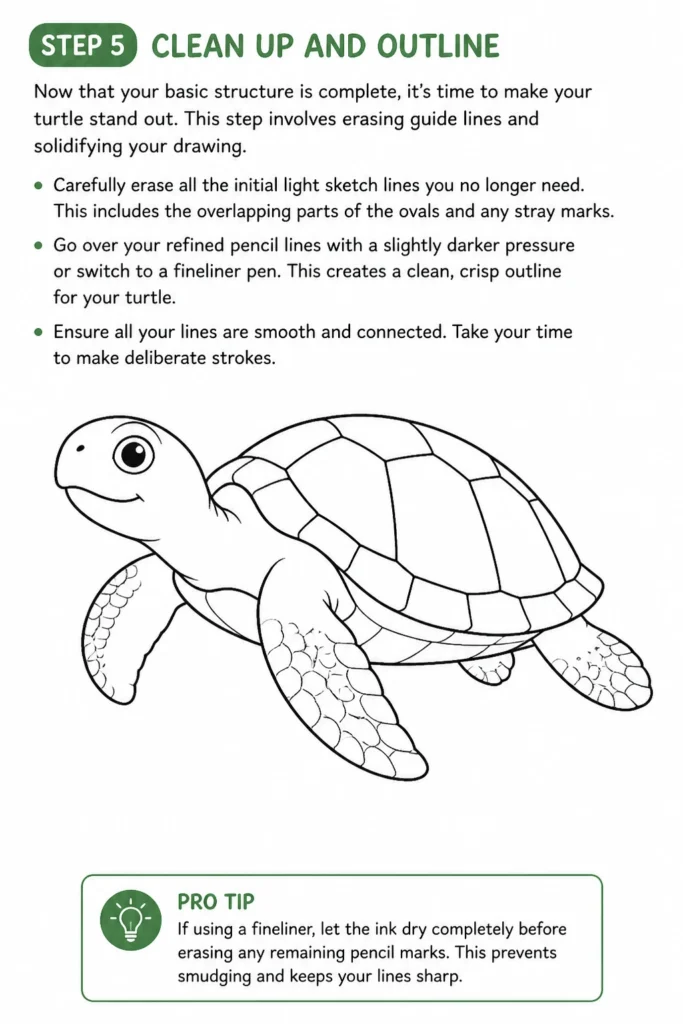
Now that your basic structure is complete, it’s time to make your turtle stand out. This step involves erasing guide lines and solidifying your drawing.
- Carefully erase all the initial light sketch lines you no longer need. This includes the overlapping parts of the ovals and any stray marks.
- Go over your refined pencil lines with a slightly darker pressure or switch to a fineliner pen. This creates a clean, crisp outline for your turtle.
- Ensure all your lines are smooth and connected. Take your time to make deliberate strokes.
Pro Tip: If using a fineliner, let the ink dry completely before erasing any remaining pencil marks. This prevents smudging and keeps your lines sharp.
Step 6: Add Facial Features and Texture
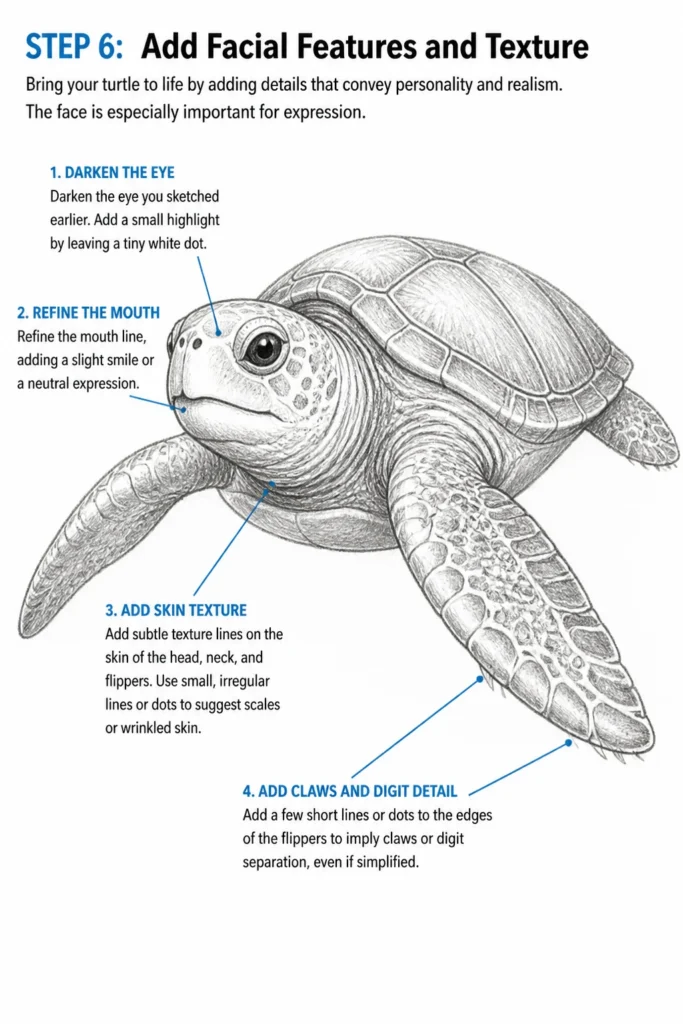
Bring your turtle to life by adding details that convey personality and realism. The face is especially important for expression.
- Darken the eye you sketched earlier. You can add a small highlight within the eye by leaving a tiny white dot.
- Refine the mouth line, maybe adding a slight smile or a neutral expression.
- Add subtle texture lines on the skin of the head, neck, and flippers. These can be small, irregular lines or dots to suggest scales or wrinkled skin.
- Consider adding a few short lines or dots to the edges of the flippers to imply claws or digit separation, even if simplified.
Step 7: Shading and Coloring (Optional)
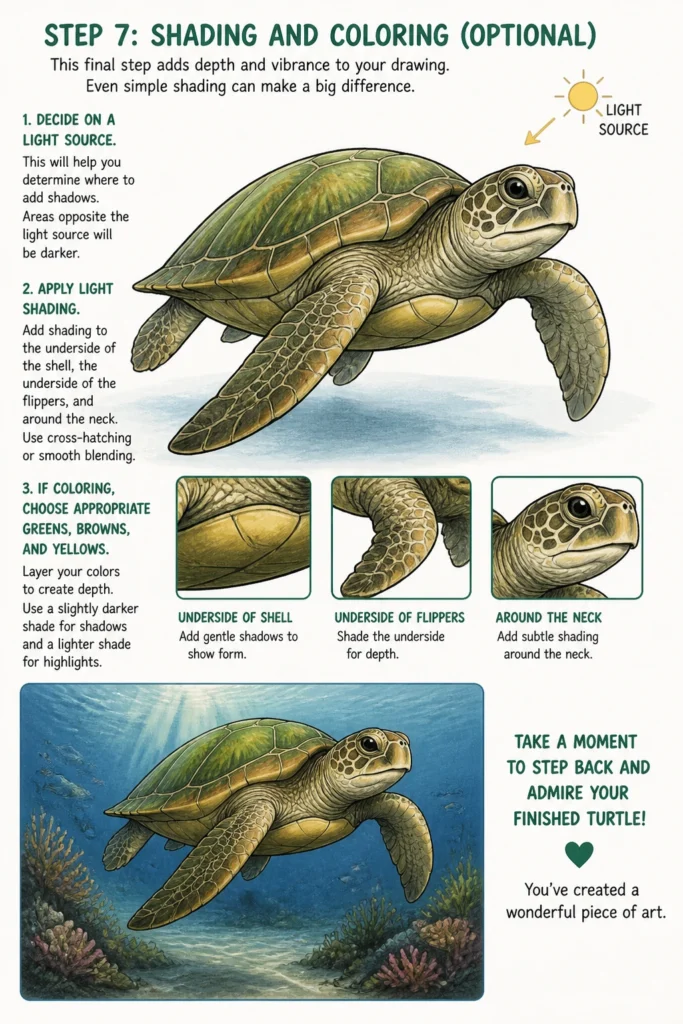
This final step adds depth and vibrance to your drawing. Even simple shading can make a big difference.
- Decide on a light source. This will help you determine where to add shadows. Areas opposite the light source will be darker.
- Apply light shading to the underside of the shell, the underside of the flippers, and perhaps around the neck. Use cross-hatching or smooth blending.
- If coloring, choose appropriate greens, browns, and yellows for the shell and skin. Layer your colors to create depth.
- Use a slightly darker shade of your base color for shadows and a lighter shade for highlights.
Take a moment to step back and admire your finished turtle! You’ve created a wonderful piece of art.
Common Mistakes to Avoid
Making the Shell Too Flat or Too Round
A common pitfall is drawing the turtle’s shell as a perfectly flat oval or a perfect circle. This makes the turtle look two-dimensional or unnatural. The shell needs a gentle dome or curve to give it volume.
Instead, remember to add that slight curved line across the top of the initial oval to suggest a rounded, three-dimensional form. This simple addition instantly adds depth and makes your turtle feel more grounded.
Stiff or Unnatural Flippers
Sometimes, beginners draw flippers as rigid, straight sticks or perfect rectangles. Turtles move fluidly, and their flippers reflect this motion. Stiff limbs can make your turtle look unnatural or inanimate.
Focus on drawing the flippers with gentle curves and a sense of tapering. Imagine them as paddles, broader near the body and narrowing slightly towards the ends. A slight bend at the “elbow” or “knee” area can add a lot of life.
Forgetting the Neck
It’s easy to jump straight from the head to the shell, neglecting the neck entirely. This creates an awkward, disconnected look, as if the turtle’s head is floating. The neck is a crucial connecting element.
Always remember to draw a distinct neck shape that smoothly transitions from the head into the body of the turtle. It can be short and thick or slightly elongated, depending on your turtle’s style, but it must be present.
Troubleshooting
My Turtle Looks Lopsided
If your turtle appears unbalanced or one side looks heavier than the other, it often stems from the initial sketch. The foundation shapes weren’t quite symmetrical or centered.
Go back to Step 1 and re-evaluate your initial large oval for the shell. Ensure it’s reasonably symmetrical and positioned centrally on your paper. Use very light lines and don’t be afraid to adjust until it feels right.
The Shell Scutes Look Too Uniform
If your shell patterns (scutes) look too much like a perfect geometric grid, they can appear rigid and less organic. Real turtle shells have natural variations and imperfections.
Try to vary the size and shape of your scutes slightly. Don’t worry about perfect symmetry or exact angles. A few irregular lines and a slightly uneven pattern will make your turtle’s shell look much more authentic and interesting.
My Drawing Looks Flat, Lacking Depth
A flat drawing often lacks dimension because it doesn’t account for light and shadow. Without shading, everything appears to be on the same plane.
Consider adding simple shading to areas that would naturally be in shadow, such as the underside of the shell, the parts of the flippers facing away from a light source, or beneath the head. Even basic cross-hatching can create a sense of depth and form.
Key Takeaways
- Start with basic shapes: Ovals and circles form the foundation for accurate proportions.
- Use light lines initially: Sketch guides gently for easy erasing and clean final lines.
- Focus on curves: Turtles are organic; avoid stiff, straight lines for a more natural look.
- Pay attention to detail: Small additions like eye highlights and shell scutes add personality.
- Don’t fear the eraser: It’s your best friend for refining shapes and correcting mistakes.
- Practice makes perfect: The more you draw, the more intuitive the process becomes.
Frequently Asked Questions
What kind of pencil should I use for sketching?
A standard HB pencil is excellent for initial sketches as it’s not too dark and erases easily. For darker lines and shading, you might use a 2B or 4B pencil, which are softer and produce richer tones.
How can I make my turtle look more realistic?
To enhance realism, study reference photos of real turtles. Pay attention to the textures of their skin and shell, the specific shapes of their flippers, and how light interacts with their forms. Adding more detailed shading and varied textures helps immensely.
Can I draw different types of turtles using this guide?
Absolutely! This guide provides a foundational turtle shape. You can adapt it by changing the head shape for a sea turtle versus a land tortoise, altering flipper sizes, or customizing shell patterns. The basic principles remain the same.
What if my lines aren’t perfectly smooth?
Don’t worry about perfectly smooth lines, especially when you’re starting. Practice helps, but sometimes a slightly wobbly line adds character. Focus on conveying the overall shape and form rather than achieving flawless strokes every time.
Our Top Recommended Finds
- Sketchbook with quality paper: A good paper surface makes a huge difference in how your pencil glides and erases.
- Set of drawing pencils: Having a range of hardness (HB, 2B, 4B, 6B) allows for greater control over line weight and shading.
- Kneaded eraser: This type of eraser is fantastic for lifting pencil marks without damaging the paper, perfect for cleaning up light sketch lines.
Your Creative Journey Continues
You’ve just completed a wonderful turtle drawing, and that’s a fantastic achievement! Every stroke you made built confidence and skill.
Remember, art is a journey, not a destination. Each drawing teaches you something new about observation and technique.
Why not try drawing your turtle again, perhaps from a different angle or with a new expression? Or maybe explore other creatures you admire. Pick up your pencil right now and let your creativity flow freely.
& Painting
No rigid rules or pretension. Just practical guides, medium comparisons, and encouraging tips to help you enjoy the drawing & painting process.