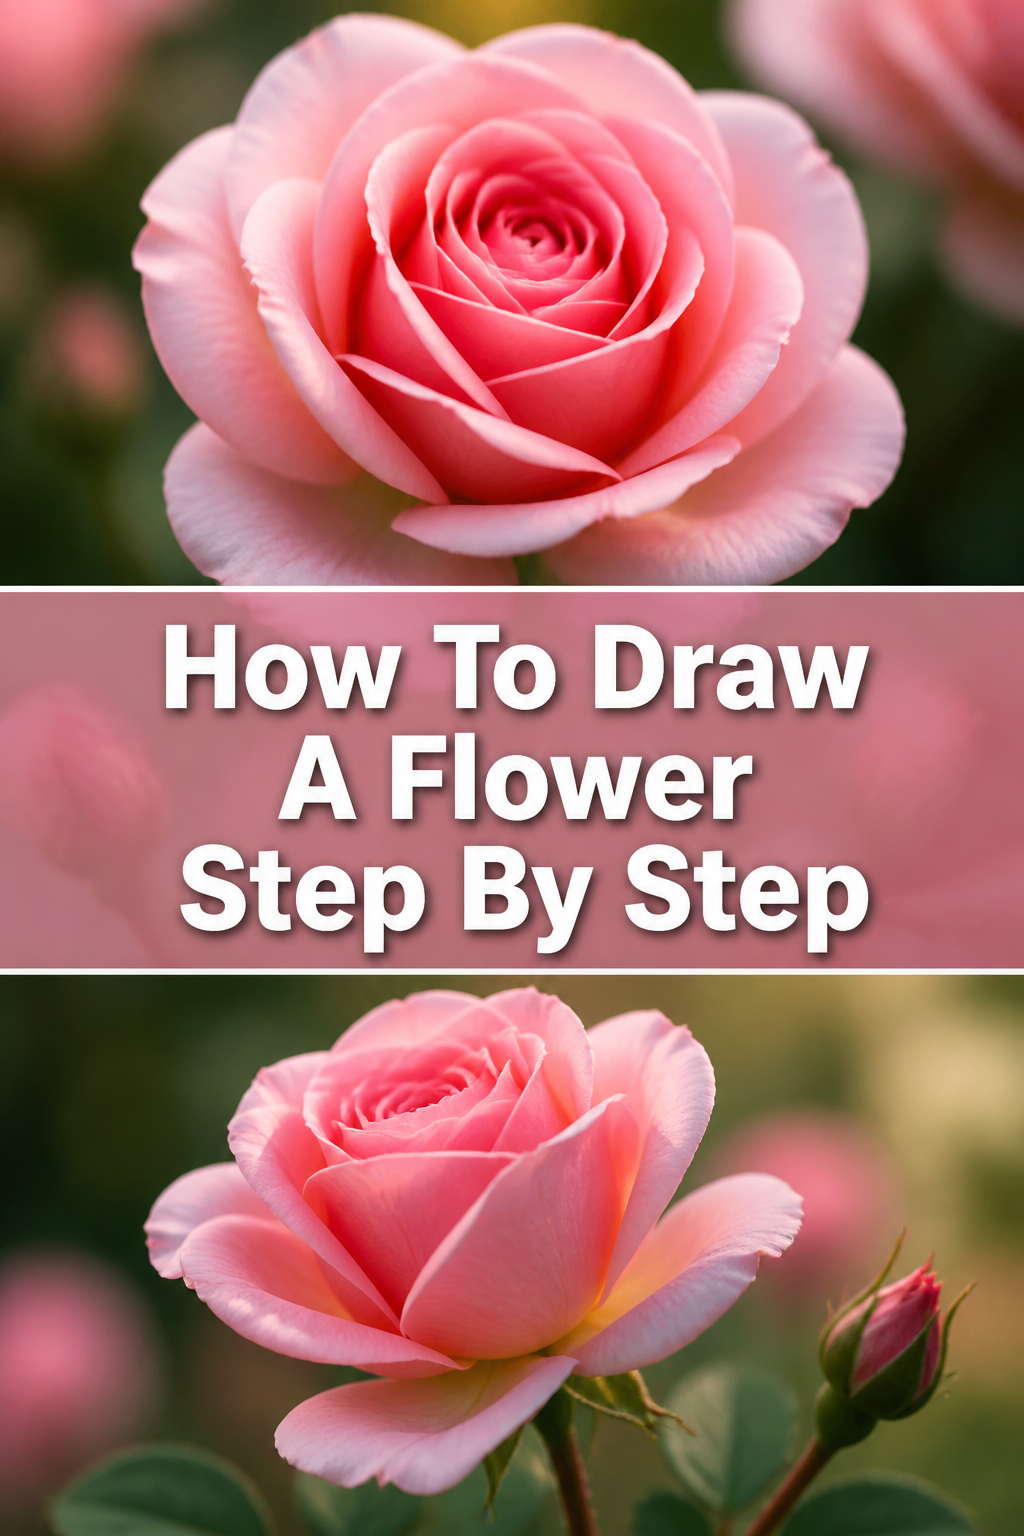
🌸 How To Draw A Flower Step By Step

& Painting
No rigid rules or pretension. Just practical guides, medium comparisons, and encouraging tips to help you enjoy the drawing & painting process.
Learning to draw a flower can feel intimidating at first, but it’s a wonderfully rewarding journey. I remember my first attempts, sketching clumsy petals that barely resembled anything floral.
With a little guidance and practice, you can transform simple shapes into beautiful blooms. This guide will walk you through each stage, building your confidence with every line.
You’ll soon be creating your own garden of art, one petal at a time.
Quick Overview
This guide will empower you to create a charming flower drawing from scratch, focusing on foundational techniques. You’ll learn to break down complex forms into simple shapes, making the process enjoyable and accessible. By the end, you’ll have a complete flower drawing and the skills to tackle many other subjects.
- Time needed: 30-60 minutes
- Difficulty: Beginner
- What you’ll need: Pencil (HB or 2B), Eraser, Paper, Optional: Fine-tip black pen, Colored pencils or markers
Step-by-Step Instructions
Step 1: Start with the Core Shapes
Begin by drawing a small circle near the center of your paper. This circle will serve as the very heart of your flower, guiding the placement of everything else. It doesn’t need to be perfectly round, just a light, loose guide.
Draw a slightly larger circle around the first one, leaving a good amount of space between them. This second circle defines the general boundary for your inner petals. Keep these lines very faint, as they are just construction guides.
Create a third, even larger circle that encompasses the previous two. This outermost circle will establish the overall width and size of your entire flower, helping you maintain good proportions. Remember, light strokes are key here.
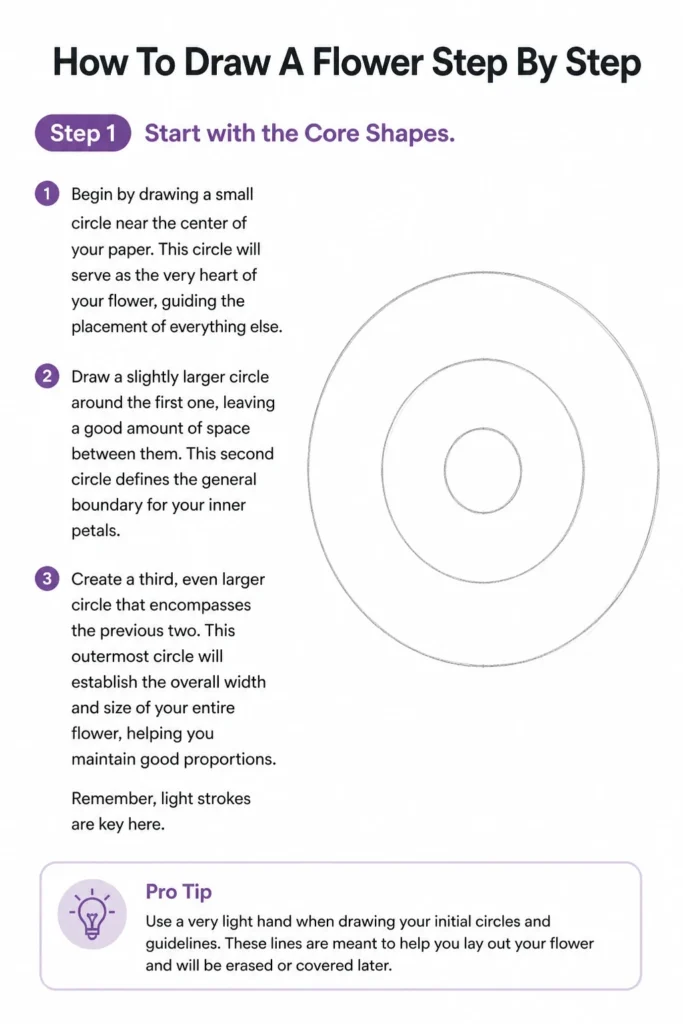
Pro Tip: Use a very light hand when drawing your initial circles and guidelines. These lines are meant to be erased later, so they should barely be visible. Pressing too hard will leave indentations on your paper.
Step 2: Define the Inner Petals
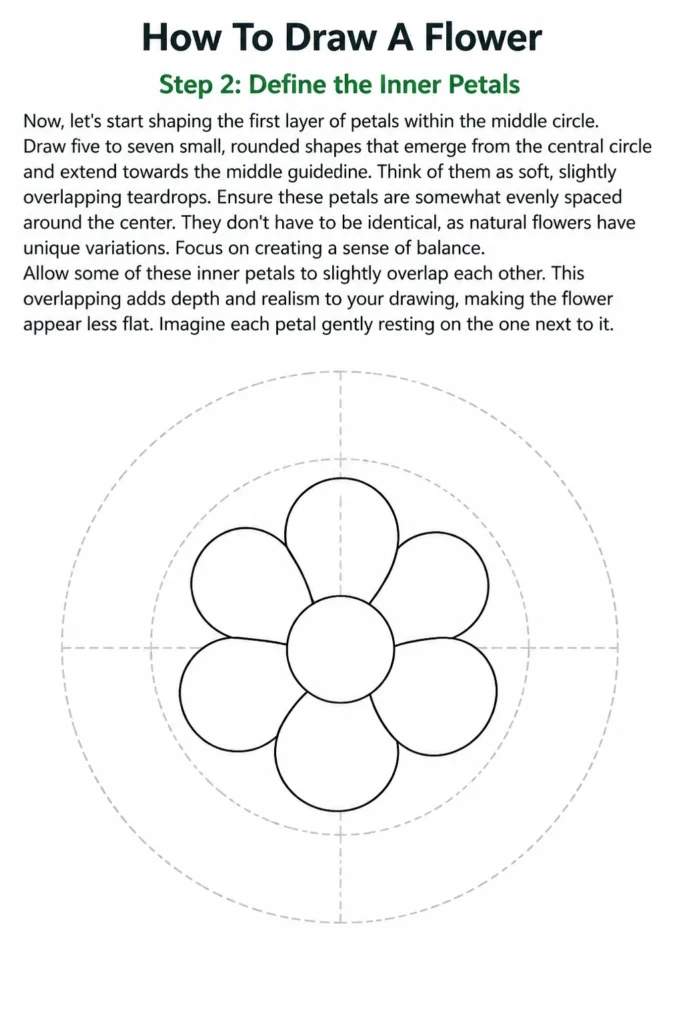
Now, let’s start shaping the first layer of petals within the middle circle. Draw five to seven small, rounded shapes that emerge from the central circle and extend towards the middle guideline. Think of them as soft, slightly overlapping teardrops.
Ensure these petals are somewhat evenly spaced around the center. They don’t have to be identical, as natural flowers have unique variations. Focus on creating a sense of balance.
Allow some of these inner petals to slightly overlap each other. This overlapping adds depth and realism to your drawing, making the flower appear less flat. Imagine each petal gently resting on the one next to it.
Step 3: Add the Outer Petals
Extend your flower by drawing a second layer of petals, reaching out to the largest guideline circle. These outer petals should appear behind and between the inner petals you just drew. This creates a fuller, more complex bloom.
Make these outer petals slightly larger and perhaps a bit more varied in shape. Some might be wider, others a little narrower, reflecting the organic nature of a real flower. Let them gently curve and flow.
Allow these outer petals to overlap both each other and the inner petals. This layering effect is crucial for giving your flower a three-dimensional quality. Don’t be afraid to let them extend slightly beyond your outermost guide circle.
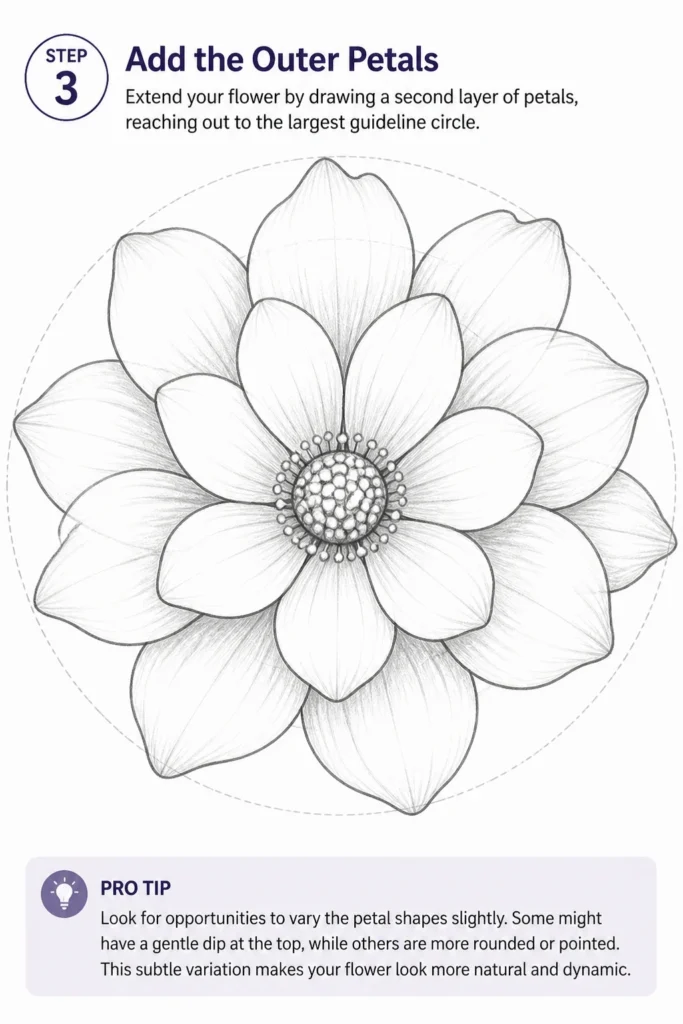
Pro Tip: Look for opportunities to vary the petal shapes slightly. Some might have a gentle dip at the top, while others are more rounded. This natural imperfection makes the drawing more engaging.
Step 4: Draw the Stem and Leaves
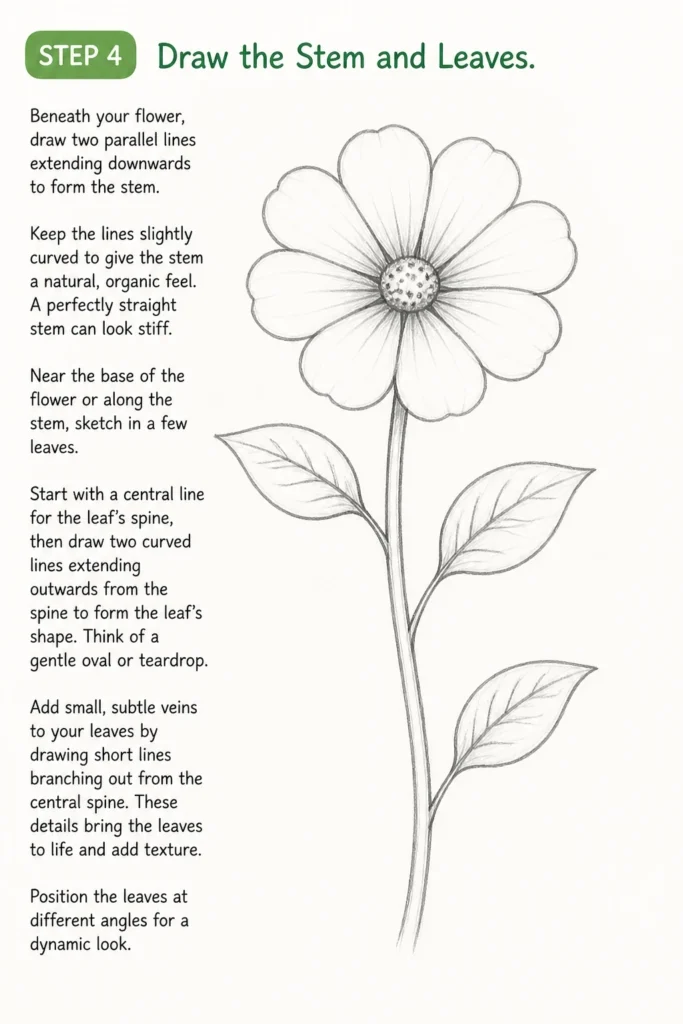
Beneath your flower, draw two parallel lines extending downwards to form the stem. Keep the lines slightly curved to give the stem a natural, organic feel. A perfectly straight stem can look stiff.
Near the base of the flower or along the stem, sketch in a few leaves. Start with a central line for the leaf’s spine, then draw two curved lines extending outwards from the spine to form the leaf’s shape. Think of a gentle oval or teardrop.
Add small, subtle veins to your leaves by drawing short lines branching out from the central spine. These details bring the leaves to life and add texture. Position the leaves at different angles for a dynamic look.
Step 5: Refine and Erase Guidelines
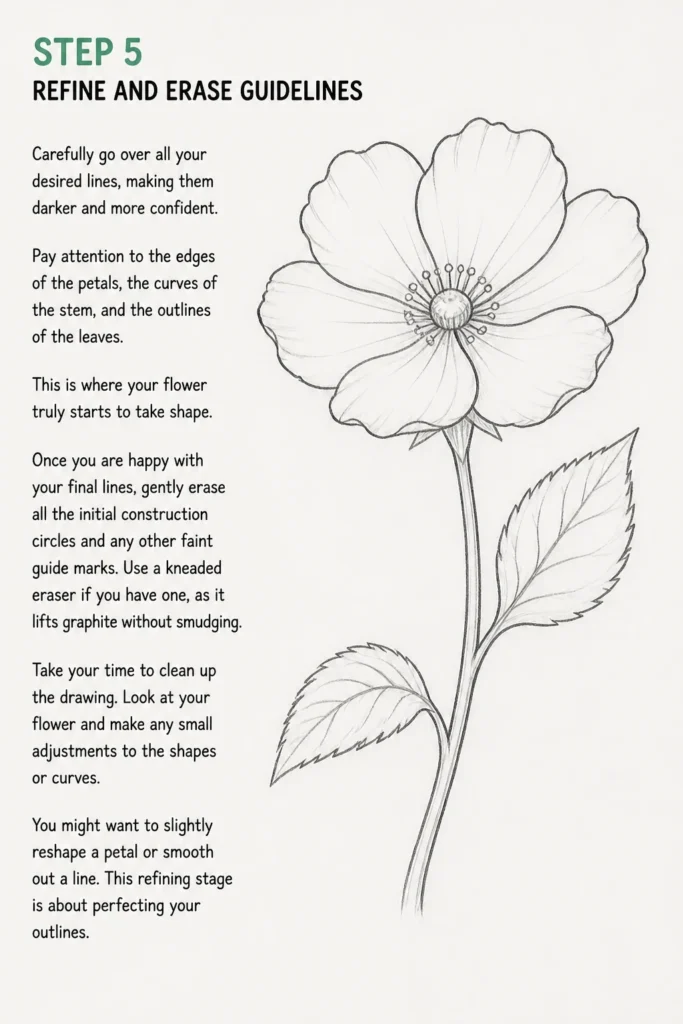
Carefully go over all your desired lines, making them darker and more confident. Pay attention to the edges of the petals, the curves of the stem, and the outlines of the leaves. This is where your flower truly starts to take shape.
Once you are happy with your final lines, gently erase all the initial construction circles and any other faint guide marks. Use a kneaded eraser if you have one, as it lifts graphite without smudging. Take your time to clean up the drawing.
Look at your flower and make any small adjustments to the shapes or curves. You might want to slightly reshape a petal or smooth out a line. This refining stage is about perfecting your outlines.
Step 6: Add Shading and Detail
Begin adding subtle shading to give your flower depth. Imagine a light source and shade the areas that would be in shadow, such as the base of the petals where they meet the center, and where one petal overlaps another. Use gentle, soft strokes with your pencil.
Consider adding small details like a textured center to the flower. You can use tiny dots or very short, feathery lines within the central circle to represent the stamen and pistil. This adds a realistic touch.
For the leaves, shade along the central vein and the edges to give them a rounded, dimensional look. You can also add some subtle texture to the leaves with light, feathery strokes. Remember to keep the shading consistent with your imagined light source.
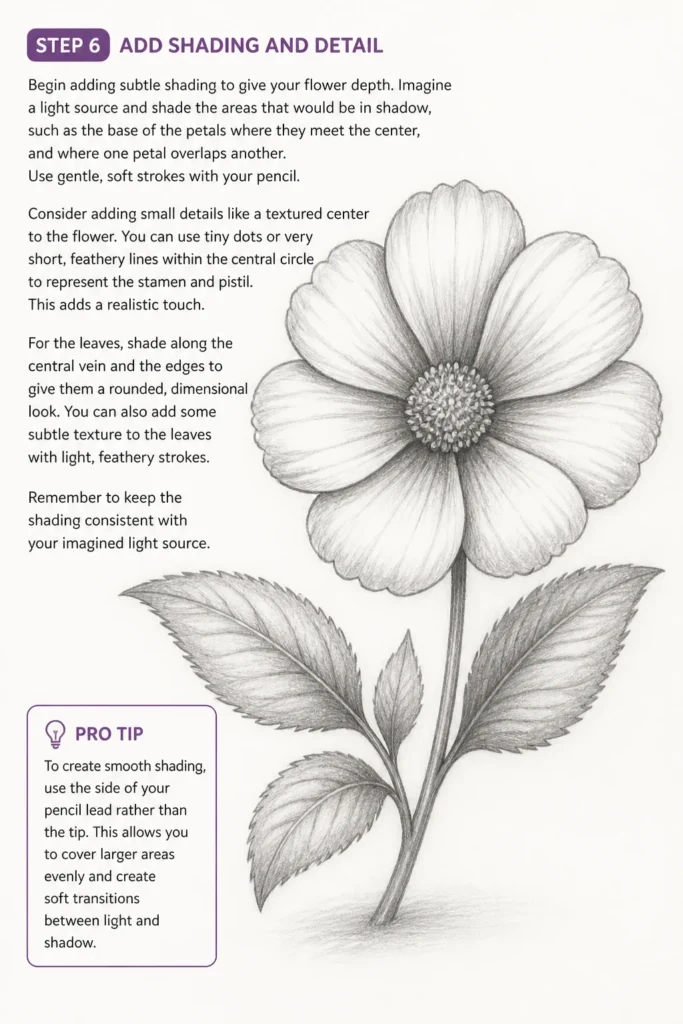
Pro Tip: To create smooth shading, use the side of your pencil lead rather than the tip. Build up layers of graphite gradually, applying more pressure for darker areas and less for lighter ones.
Step 7: Final Touches and Optional Color
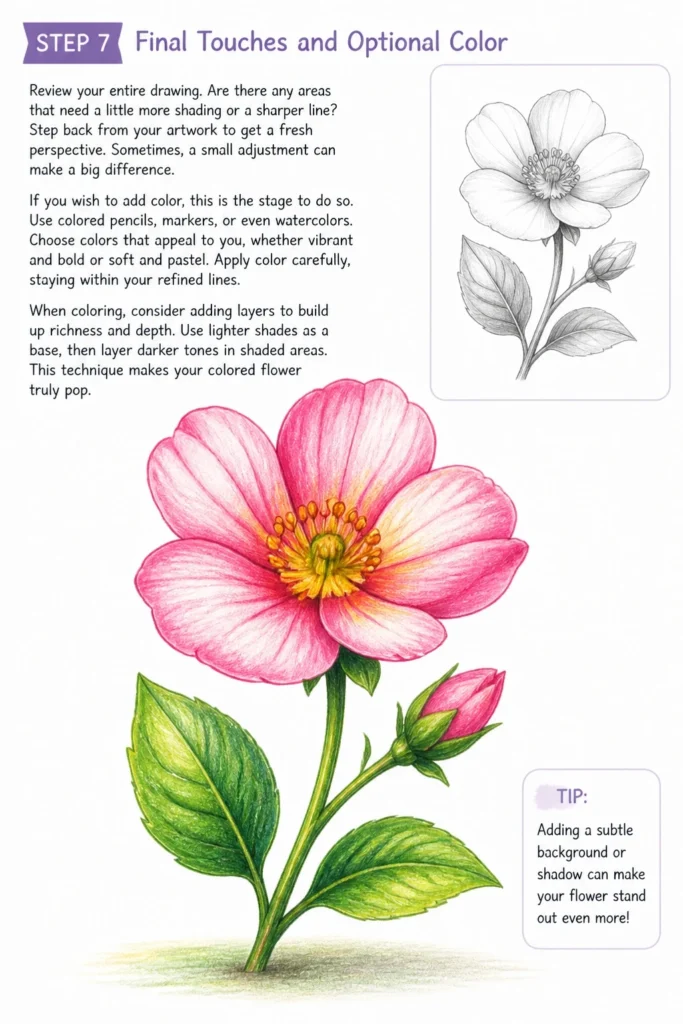
Review your entire drawing. Are there any areas that need a little more shading or a sharper line? Step back from your artwork to get a fresh perspective. Sometimes, a small adjustment can make a big difference.
If you wish to add color, this is the stage to do so. Use colored pencils, markers, or even watercolors. Choose colors that appeal to you, whether vibrant and bold or soft and pastel. Apply color carefully, staying within your refined lines.
When coloring, consider adding layers to build up richness and depth. Use lighter shades as a base, then layer darker tones in shaded areas. This technique makes your colored flower truly pop.
Common Mistakes to Avoid
Making Petals Too Symmetrical
One frequent mistake is trying to make every petal perfectly identical in size and shape. Real flowers are organic; their petals have natural variations and imperfections. Striving for perfect symmetry can make your drawing look stiff and unnatural.
Instead, embrace the slight differences. Allow some petals to be a bit wider or narrower, or have a slightly different curve. This approach lends authenticity and charm to your floral artwork, making it feel more alive.
Pressing Too Hard with Guidelines
Many beginners press down firmly when drawing initial circles and construction lines. When it comes time to erase these guides, heavy lines can leave noticeable indentations or smudges on your paper. This detracts from the clean final appearance of your drawing.
Always use the lightest touch possible for your initial sketches. Think of them as whispers on the page. This way, they can be easily erased without a trace, leaving only your strong, confident final lines.
Ignoring Overlapping Petals
Drawing all petals on a single plane, without any overlap, makes a flower look flat and two-dimensional. The natural world is full of depth, and petals often gently rest over or under each other. Failing to show this creates a less dynamic image.
Actively seek opportunities to overlap petals, especially in the inner and outer layers. This simple technique immediately adds dimension and a sense of realism, making your flower appear to pop off the page.
Rushing the Erasing Process
After drawing, it’s tempting to quickly erase all guidelines. Rushing this step often leads to smudged graphite or accidentally erasing parts of your final lines. A messy cleanup can spoil an otherwise well-drawn piece.
Take your time when erasing. Use a clean eraser and gently lift the unwanted lines. For intricate areas, use the corner of your eraser or a kneaded eraser to be precise. A clean finish enhances the overall quality of your work.
Troubleshooting
My Flower Looks Flat
If your flower appears to lack depth, it’s likely due to insufficient overlapping of petals or a lack of shading. A flat image usually means all elements are drawn on the same visual plane without indicating front or back.
To fix this, go back and intentionally draw some petals clearly overlapping others. Then, add subtle shading where petals meet the center, or where one petal casts a shadow on another. This immediately creates a sense of dimension and roundness.
The Petals Look Stiff and Unnatural
Stiff petals often result from drawing them with rigid, straight lines or making them too uniform. Flowers are organic, with gentle curves and natural imperfections. Overthinking each petal’s shape can lead to an unnatural appearance.
Try to loosen your wrist and draw petals with more fluid, curved strokes. Don’t aim for perfect symmetry; instead, allow for slight variations in size and shape. Practice drawing free-flowing ‘S’ curves to get a feel for natural lines.
My Lines Are Messy After Erasing
Messy lines or smudges after erasing typically happen when guidelines were drawn too darkly, or the eraser itself was dirty. Heavy graphite is harder to lift cleanly, and a dirty eraser can spread graphite around.
Before erasing, ensure your eraser is clean. If using a standard eraser, rub it on a scrap piece of paper first. For future drawings, remember to use a very light touch for all initial guidelines. If smudges occur, use a kneaded eraser to gently lift them.
Key Takeaways
- Always start with light, simple geometric shapes as your foundation.
- Embrace natural imperfections and variations in petal shapes for realism.
- Utilize overlapping petals to create depth and a three-dimensional effect.
- Shading is crucial for adding volume and making your flower look round.
- Practice light sketching for guidelines to ensure a clean final drawing.
- Don’t be afraid to experiment with different flower types and styles.
Frequently Asked Questions
What kind of pencil is best for drawing flowers?
For initial sketching and guidelines, an HB or 2H pencil is ideal because it’s light and easy to erase. For darker lines, shading, and definition, a 2B or 4B pencil works wonderfully, as it produces richer, softer tones.
How can I make my petals look more realistic?
Focus on subtle variations in shape, size, and angle. Add gentle curves rather than straight lines, and incorporate soft shading at the base of petals and where they overlap. Observing real flowers or reference photos helps immensely.
Should I draw the whole flower at once or in sections?
It’s much easier and more effective to draw in sections, starting with basic shapes, then adding layers of petals, and finally details like the stem and leaves. This step-by-step approach helps manage complexity and build confidence.
How do I choose the right colors for my flower?
You can either choose realistic colors based on specific flower types or experiment with imaginative color palettes. Consider the mood you want to convey. Using a color wheel can help you find harmonious or contrasting color combinations.
Our Top Recommended Finds
- Strathmore 400 Series Sketch Pad: A reliable, acid-free paper that holds up well to erasing and light shading, perfect for practice.
- Staedtler Mars Lumograph Pencil Set: Offers a range of graphite hardness (HB, 2B, 4B, 6B) for versatile sketching and shading.
- Kneaded Eraser: Essential for lifting graphite cleanly without smudging, preserving the integrity of your drawing surface.
Your Blooming Artistic Journey
You’ve just completed a beautiful flower drawing, a testament to your patience and creativity. This guide aimed to simplify the process, showing how complex beauty emerges from simple beginnings. Each line you drew was a step towards a more confident artistic self.
Now that you’ve mastered the basics, consider exploring different types of flowers, from delicate daisies to intricate roses. Experiment with varying angles, light sources, and even adding a background to your floral compositions. The world of botanical art is vast and inviting.
Don’t let your pencils rest for too long. Pick them up again today and draw another flower, perhaps a different kind, or try the same one with a new perspective. Consistent practice is the secret ingredient to growth. Keep drawing, keep creating, and watch your artistic garden flourish.
& Painting
No rigid rules or pretension. Just practical guides, medium comparisons, and encouraging tips to help you enjoy the drawing & painting process.