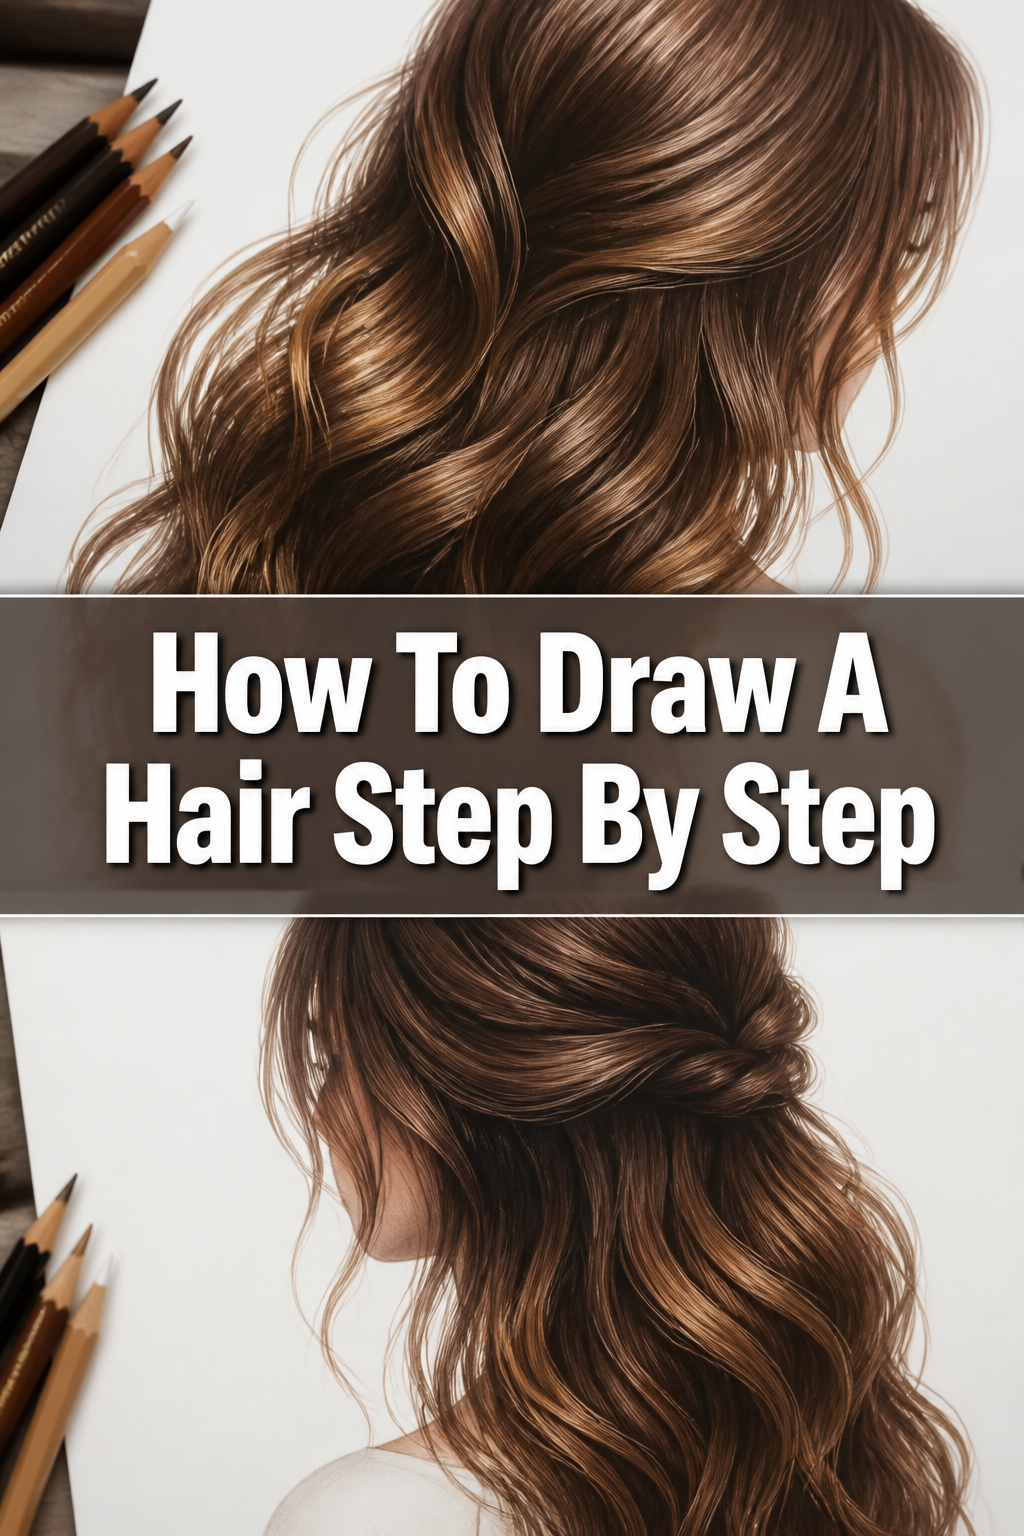
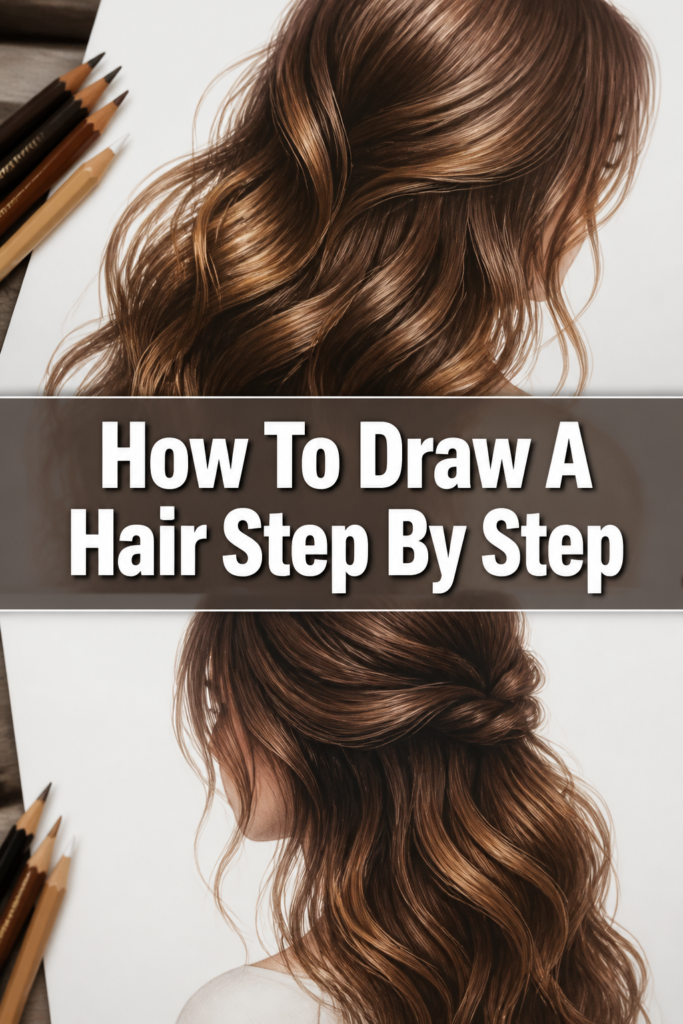
🎨 How To Draw A Hair Step By Step

& Painting
No rigid rules or pretension. Just practical guides, medium comparisons, and encouraging tips to help you enjoy the drawing & painting process.
Drawing hair used to be my biggest struggle, often ending up looking like a solid block of plastic or a messy bird’s nest.
I spent years studying the way light hits individual strands to develop a method that actually looks realistic and fluid.
This guide simplifies that process so you can create flowing, natural hair every single time you pick up a pencil.
Quick Overview
Before you start sketching, it helps to understand the basic roadmap of the drawing process.
- Time needed: 45 to 60 minutes
- Difficulty: Beginner/Intermediate
- What you’ll need: Graphite pencils (HB, 2B, 4B), a kneaded eraser, a blending stump, and smooth drawing paper.
Step-by-Step Instructions
Step 1: Sketch the Basic Head Shape
Start by drawing a simple oval or circle to represent the skull of your character.
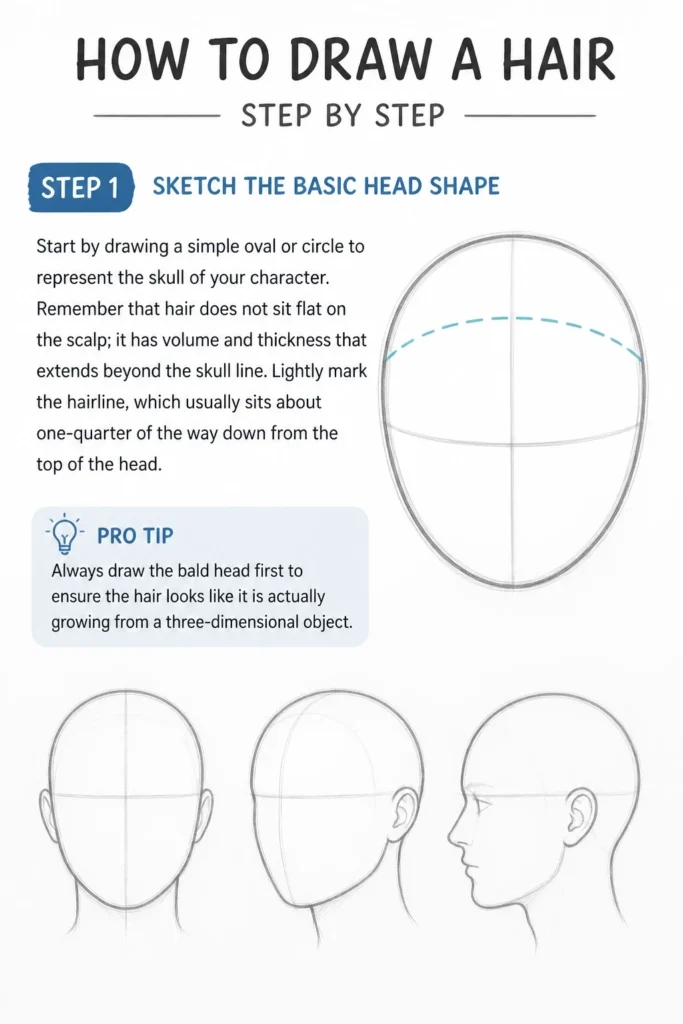
Remember that hair does not sit flat on the scalp; it has volume and thickness that extends beyond the skull line.
Lightly mark the hairline, which usually sits about one-quarter of the way down from the top of the head.
Pro Tip: Always draw the bald head first to ensure the hair looks like it is actually growing from a three-dimensional object.
Step 2: Map the Directional Flow
Determine the “origin point” or the part in the hair where the strands begin to grow and fall.
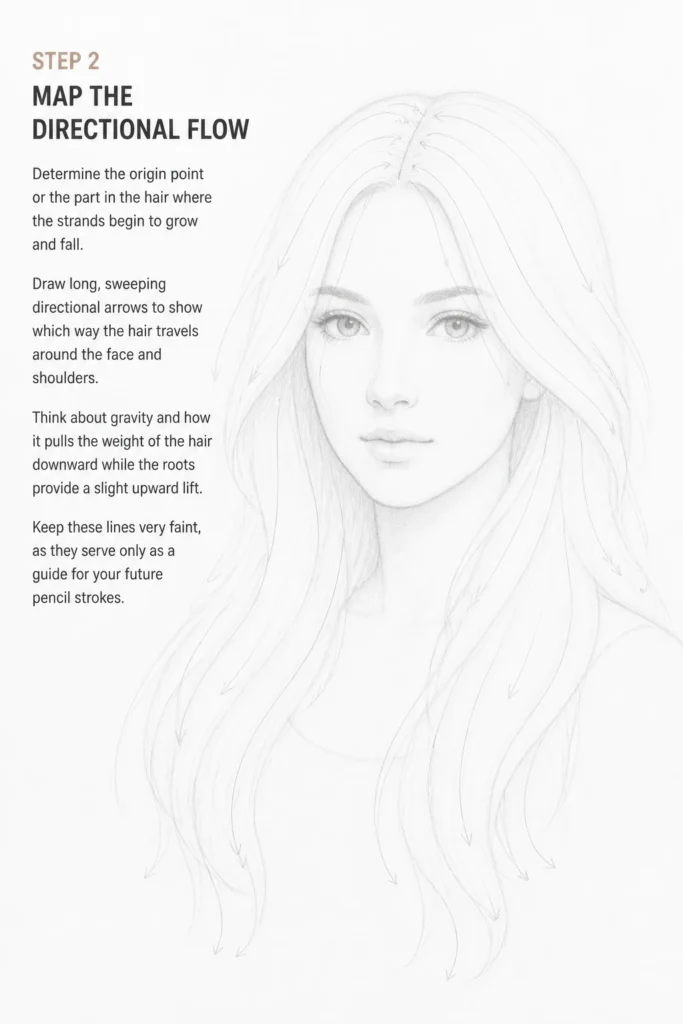
Draw long, sweeping directional arrows to show which way the hair travels around the face and shoulders.
Think about gravity and how it pulls the weight of the hair downward while the roots provide a slight upward lift.
Keep these lines very faint, as they serve only as a guide for your future pencil strokes.
Step 3: Group the Hair into Large Clumps
Avoid the temptation to draw individual hairs at this stage, as this leads to a messy and flat appearance.
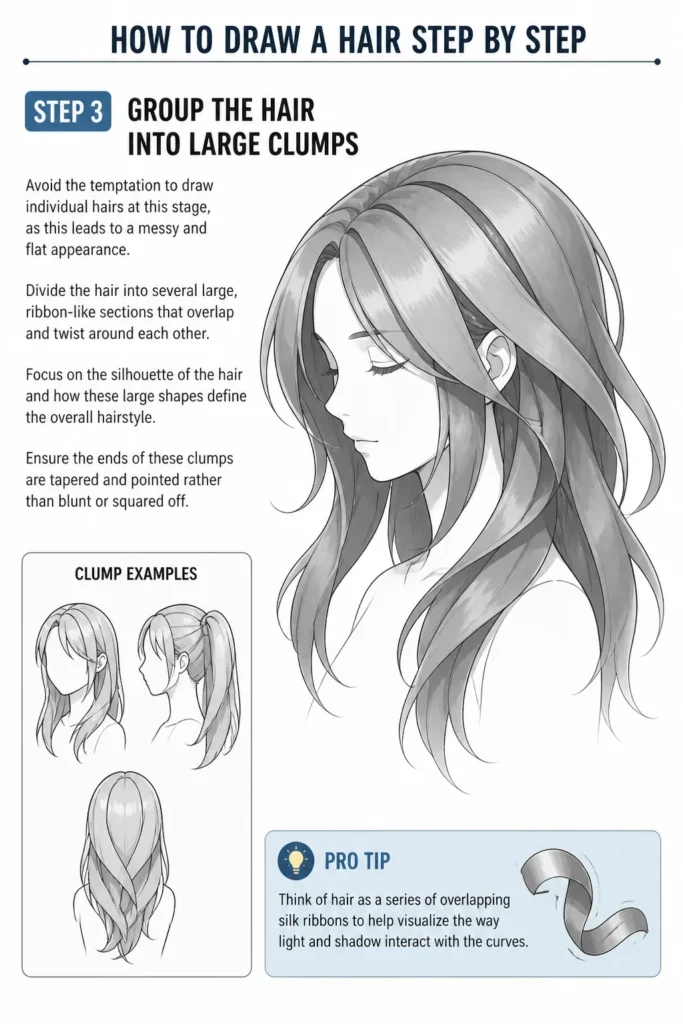
Divide the hair into several large, ribbon-like sections that overlap and twist around each other.
Focus on the silhouette of the hair and how these large shapes define the overall hairstyle.
Ensure the ends of these clumps are tapered and pointed rather than blunt or squared off.
Pro Tip: Think of hair as a series of overlapping silk ribbons to help visualize the way light and shadow interact with the curves.
Step 4: Establish the Light Source
Pick a specific direction from which the light is hitting the head, such as the top-right or directly in front.
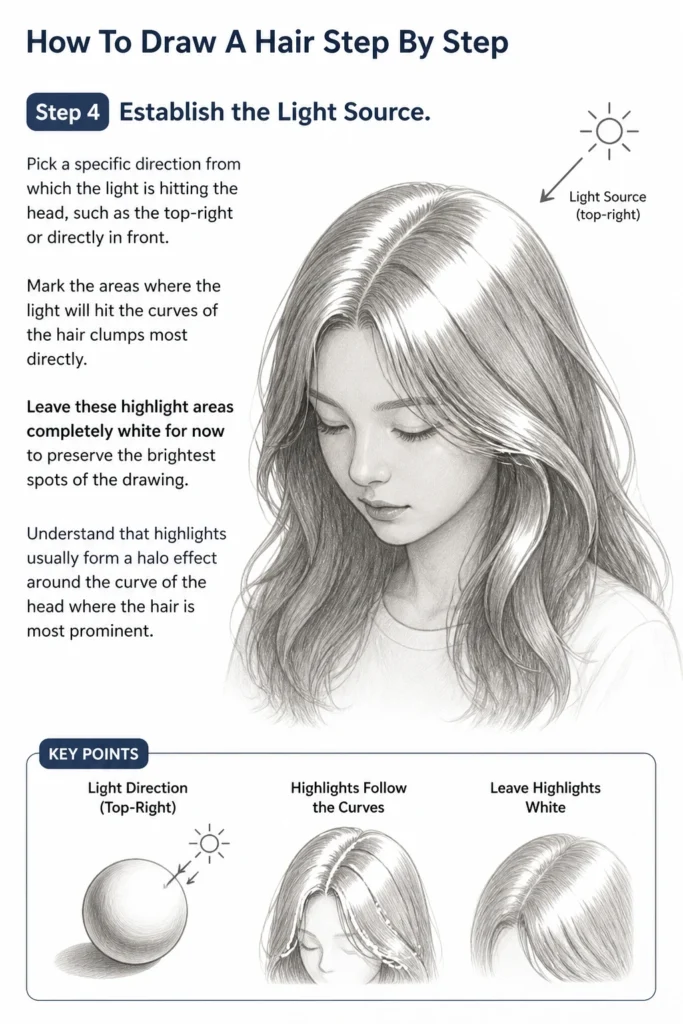
Mark the areas where the light will hit the curves of the hair clumps most directly.
Leave these highlight areas completely white for now to preserve the brightest spots of the drawing.
Understand that highlights usually form a “halo” effect around the curve of the head where the hair is most prominent.
Step 5: Lay Down the Base Mid-Tones
Use an HB or 2B pencil to fill in the hair clumps with a medium-light shade.
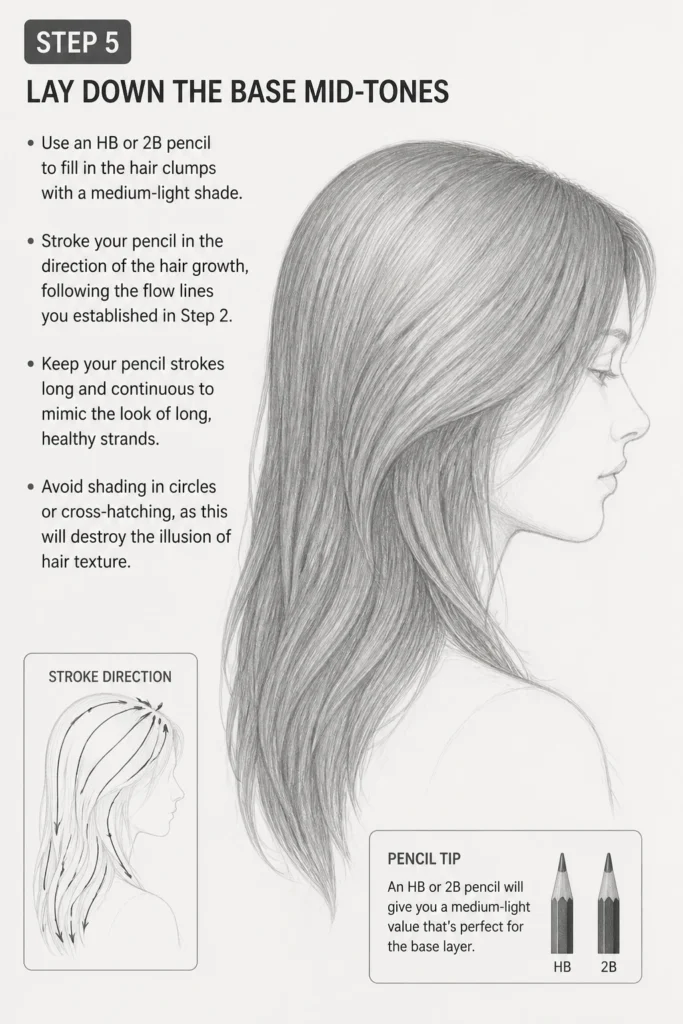
Stroke your pencil in the direction of the hair growth, following the flow lines you established in Step 2.
Keep your pencil strokes long and continuous to mimic the look of long, healthy strands.
Avoid shading in circles or cross-hatching, as this will destroy the illusion of hair texture.
Step 6: Define the Deepest Shadows
Switch to a 4B or 6B pencil to add depth to the areas where the hair clumps overlap or tuck behind the neck.
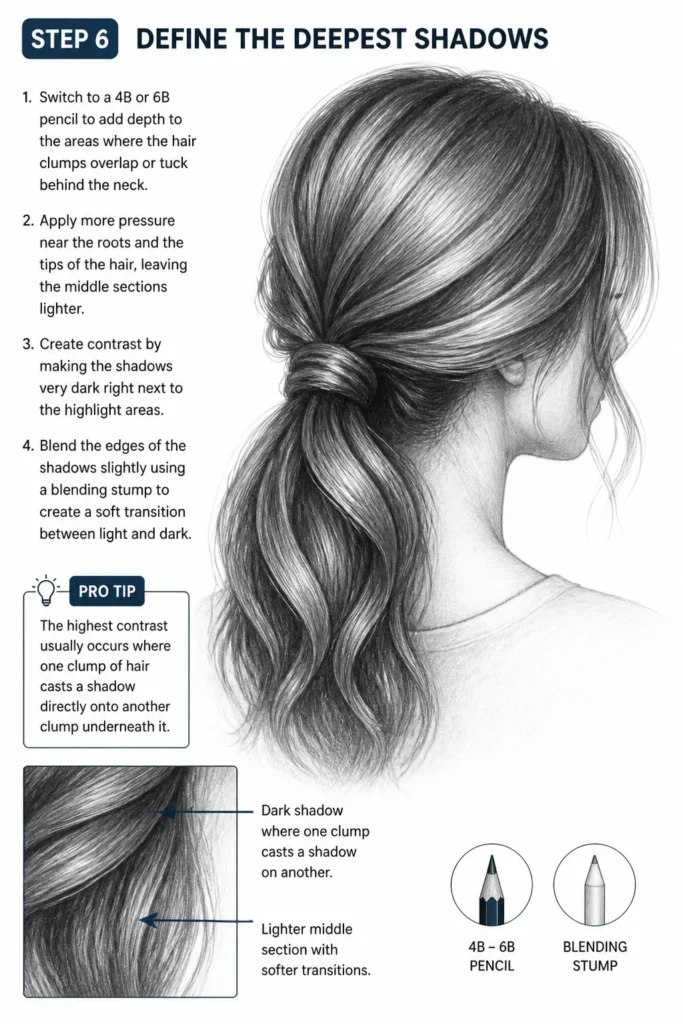
Apply more pressure near the roots and the tips of the hair, leaving the middle sections lighter.
Create contrast by making the shadows very dark right next to the highlight areas.
Blend the edges of the shadows slightly using a blending stump to create a soft transition between light and dark.
Pro Tip: The highest contrast usually occurs where one clump of hair casts a shadow directly onto another clump underneath it.
Step 7: Render Individual Strands
Sharpen your pencil to a very fine point to begin adding the fine details that suggest individual hairs.
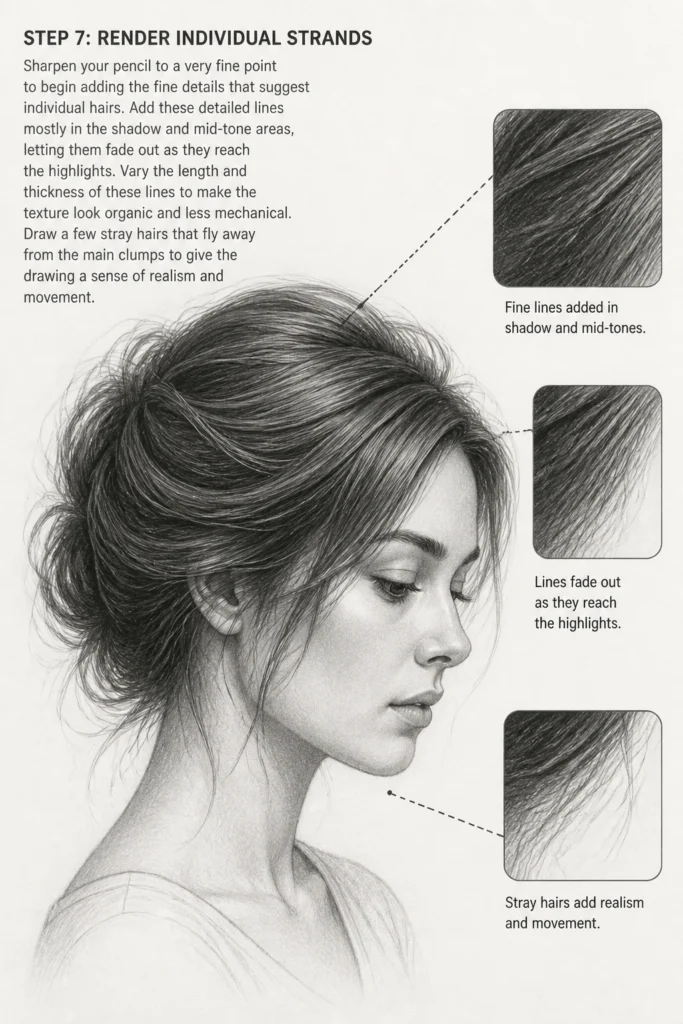
Add these detailed lines mostly in the shadow and mid-tone areas, letting them fade out as they reach the highlights.
Vary the length and thickness of these lines to make the texture look organic and less mechanical.
Draw a few “stray” hairs that fly away from the main clumps to give the drawing a sense of realism and movement.
Step 8: Refine the Highlights with an Eraser
Take your kneaded eraser and pinch it into a sharp, thin edge or a fine point.
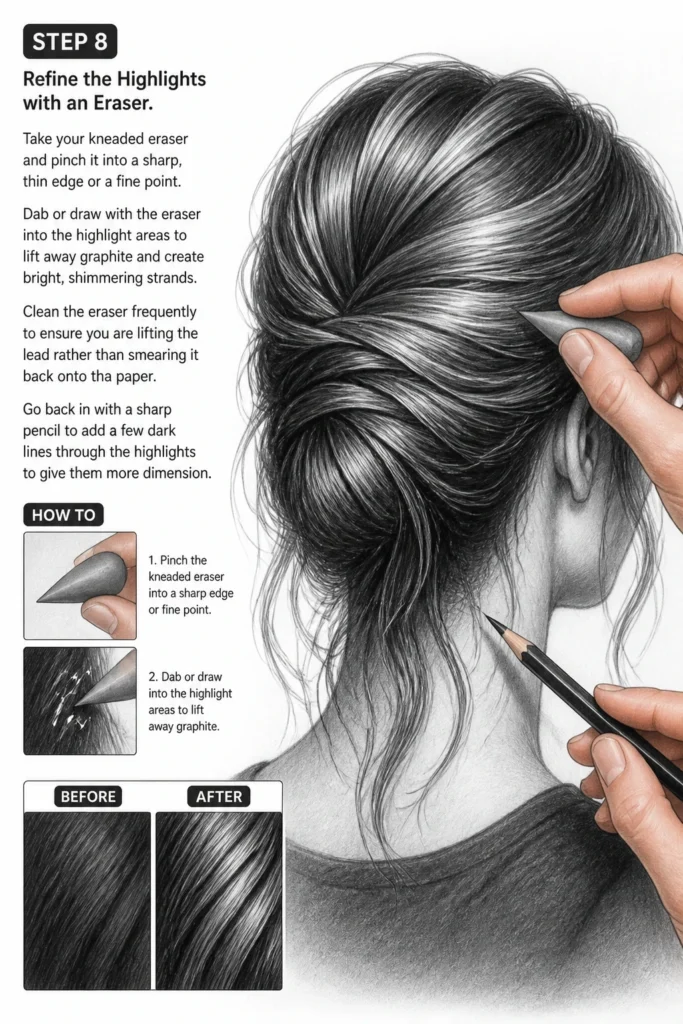
Dab or “draw” with the eraser into the highlight areas to lift away graphite and create bright, shimmering strands.
Clean the eraser frequently to ensure you are lifting the lead rather than smearing it back onto the paper.
Go back in with a sharp pencil to add a few dark lines through the highlights to give them more dimension.
Common Mistakes to Avoid
Drawing Every Single Hair
Beginners often try to draw every single strand of hair starting from the scalp all the way to the ends.
This creates a “spaghetti” effect that looks flat, busy, and visually exhausting for the viewer.
Instead, focus on the large shapes and use texture only to suggest the presence of individual hairs.
Ignoring the Shape of the Head
If you don’t account for the roundness of the skull, the hair will look like a flat sticker placed on top of the face.
Hair must follow the contour of the head, curving around the forehead and bulging slightly at the back of the cranium.
Always keep the underlying anatomy in mind when deciding where the hair should curve and bend.
Lack of Value Contrast
Many artists are afraid to use very dark values, resulting in hair that looks washed out or grey.
Without deep shadows, the highlights have nothing to pop against, and the hair loses its three-dimensional quality.
Don’t be afraid to use a 6B pencil to create those pitch-black crevices where the light cannot reach.
Troubleshooting
The Hair Looks Like Plastic
This usually happens when the highlights are too smooth or the edges of the hair clumps are too perfect.
To fix this, add small, thin “flyaway” hairs that break the clean silhouette of the hairstyle.
Varying the pressure of your pencil strokes will also help break up the uniform look and add a natural feel.
The Texture Looks Muddy or Smudged
Over-blending with a stump or using your fingers can make the hair look like a grey cloud rather than strands.
If this occurs, use a sharp eraser to carve back into the muddy areas and redefine the separation between clumps.
Always finish the drawing with crisp, sharp pencil lines over the top of any blended areas to restore the texture.
Key Takeaways
- Start with the skull to ensure the hair has the correct volume and placement on the head.
- Think in clumps rather than individual strands to maintain a sense of order and form.
- Follow the flow of the hair using directional strokes that mimic natural growth patterns.
- Use high contrast by placing your darkest shadows directly next to your brightest highlights.
- Add stray hairs at the very end to give the drawing a realistic, organic finish.
Frequently Asked Questions
How do I draw curly hair compared to straight hair?
Curly hair follows the same principles of light and shadow, but the clumps are shaped like cylinders or springs.
Instead of long, straight ribbons, draw “S” shapes and spirals, making sure to highlight the top of each curve.
The shadows will be deepest inside the loops where the hair turns away from the light source.
What pencil is best for drawing blonde hair?
For blonde hair, you should primarily use harder pencils like H, HB, and 2B to keep the overall value light.
Focus more on the shadows between the clumps rather than the strands themselves to suggest the lightness of the color.
Use your eraser more frequently to create wide, bright highlight sections that dominate the shape.
How do I make the hair look shiny?
Shininess is all about the “hardness” of the highlight edge and the intensity of the contrast.
To make hair look glossy, ensure the transition from the dark shadow to the bright highlight is very short and sharp.
Avoid blending the highlight too much; a crisp white line will read as a reflection on a smooth surface.
Our Top Recommended Finds
- Kneaded Eraser: This tool is essential because it can be molded into any shape to lift highlights without damaging the paper.
- Mechanical Pencil (0.5mm): A fine-point mechanical pencil is perfect for adding those final, tiny stray hairs that create realism.
- Toned Gray Paper: Drawing hair on toned paper allows you to use a white charcoal pencil for highlights, making the hair look incredibly vibrant.
Mastering Your Artistic Flow
The secret to drawing beautiful hair is a balance between structure and chaos.
Once you master the basic clump method, you can start experimenting with different textures like braids, dreadlocks, or wind-blown styles.
Try practicing different hair lengths today by sketching three different styles using the light-to-dark shading method.
The more you observe real hair in different lighting, the more intuitive these steps will become for your future portraits.
& Painting
No rigid rules or pretension. Just practical guides, medium comparisons, and encouraging tips to help you enjoy the drawing & painting process.