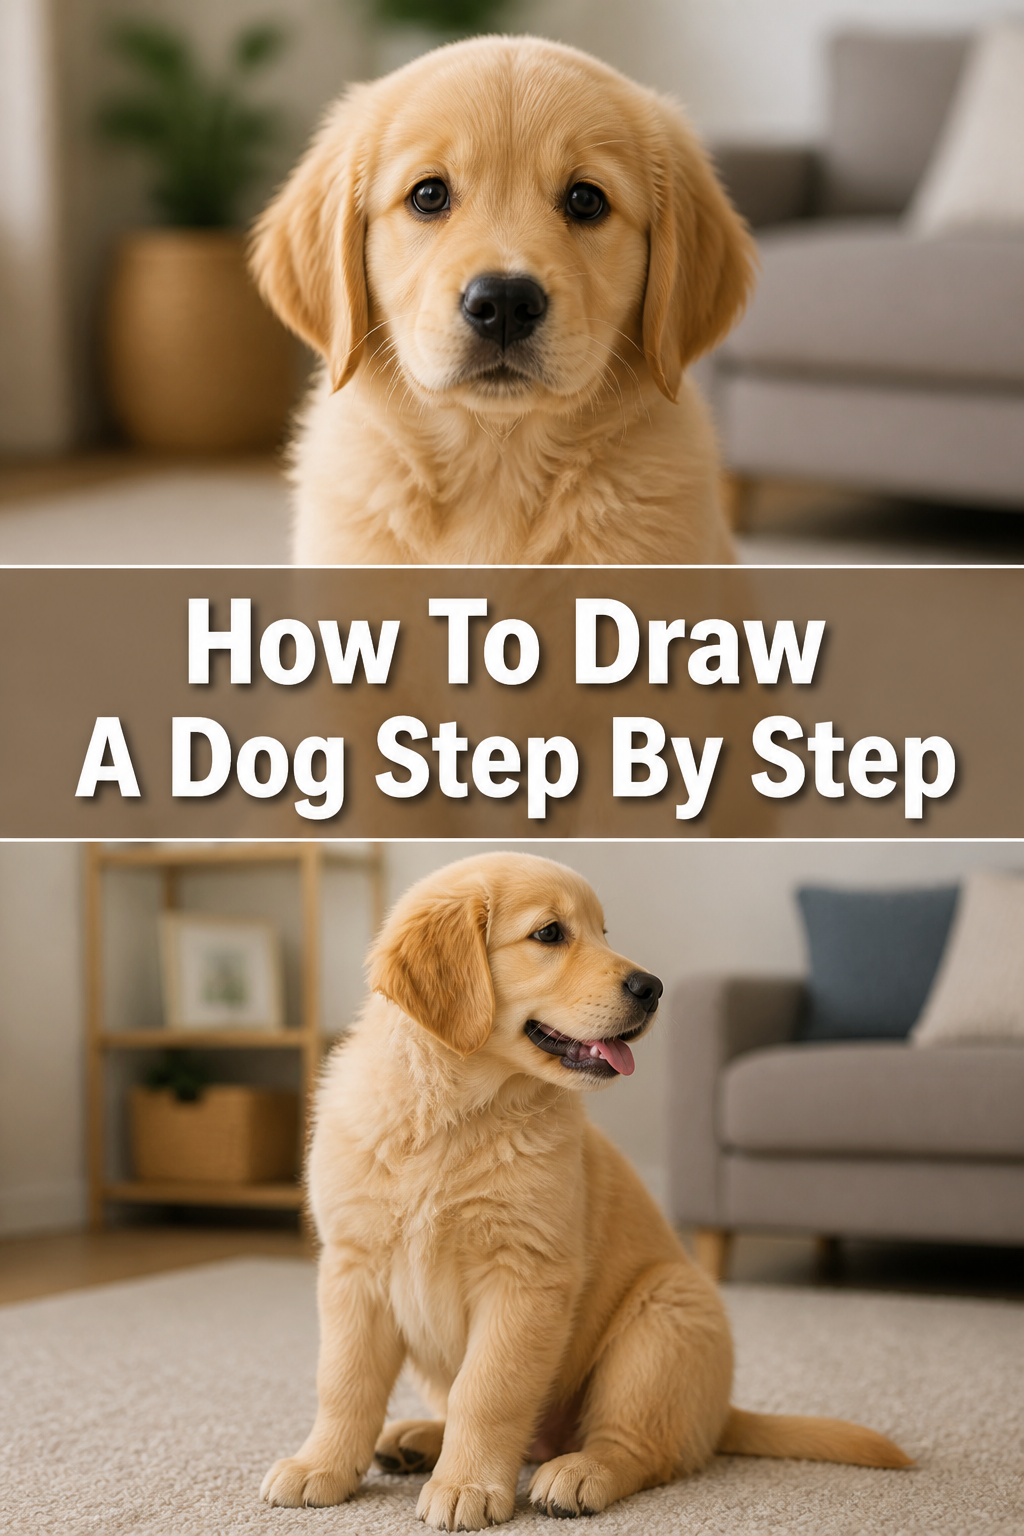
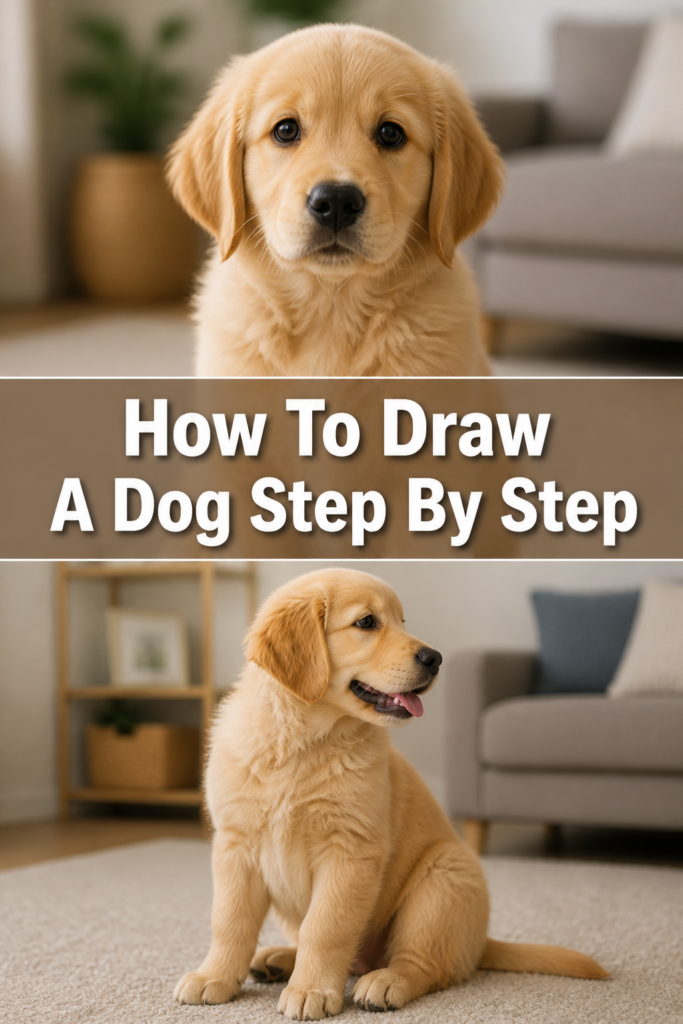
🐶 How To Draw A Dog Step By Step

& Painting
No rigid rules or pretension. Just practical guides, medium comparisons, and encouraging tips to help you enjoy the drawing & painting process.
Drawing used to frustrate me until I realized everything in nature is just a collection of simple, overlapping shapes.
I have spent over a decade sketching animals and teaching beginners how to see the world through an artist’s eyes rather than just looking at a subject.
This guide simplifies the process so you can create a realistic dog without feeling overwhelmed by complex anatomy or professional techniques.
Quick Overview
You are about to learn how to build a dog from the ground up using basic geometry and light pencil strokes. This method works for almost any breed because it focuses on the core structure shared by all canines.
- Time needed: 30 to 45 minutes
- Difficulty: Beginner
- What you’ll need: Drawing paper, a set of graphite pencils (HB and 2B), a kneaded eraser, and a pencil sharpener.
Step-by-Step Instructions
Step 1: Map Out The Core Shapes
Start by drawing two circles on your paper to represent the main mass of the dog’s body. The first circle should be slightly larger and placed toward the front, as this will become the chest and shoulder area.
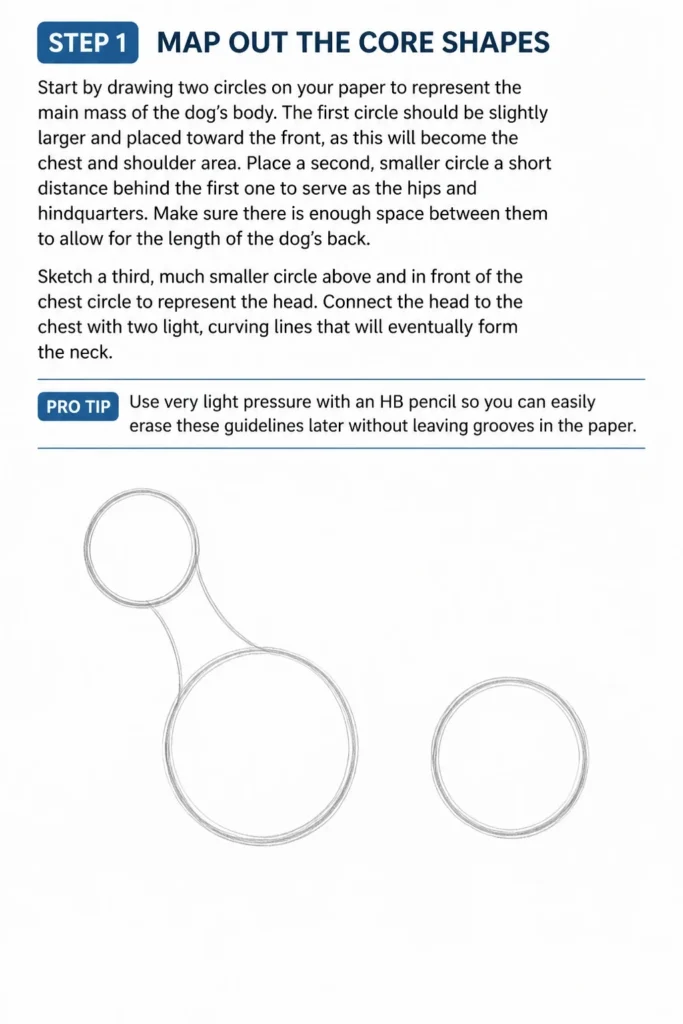
Place a second, smaller circle a short distance behind the first one to serve as the hips and hindquarters. Make sure there is enough space between them to allow for the length of the dog’s back.
Sketch a third, much smaller circle above and in front of the chest circle to represent the head. Connect the head to the chest with two light, curving lines that will eventually form the neck.
Pro Tip: Use very light pressure with an HB pencil so you can easily erase these guidelines later without leaving grooves in the paper.
Step 2: Define The Muzzle And Ears
Add a small rectangular or oval shape to the front of the head circle to create the snout. The length of this shape will determine the breed of your dog, with longer rectangles for Labradors and shorter ones for Pugs.
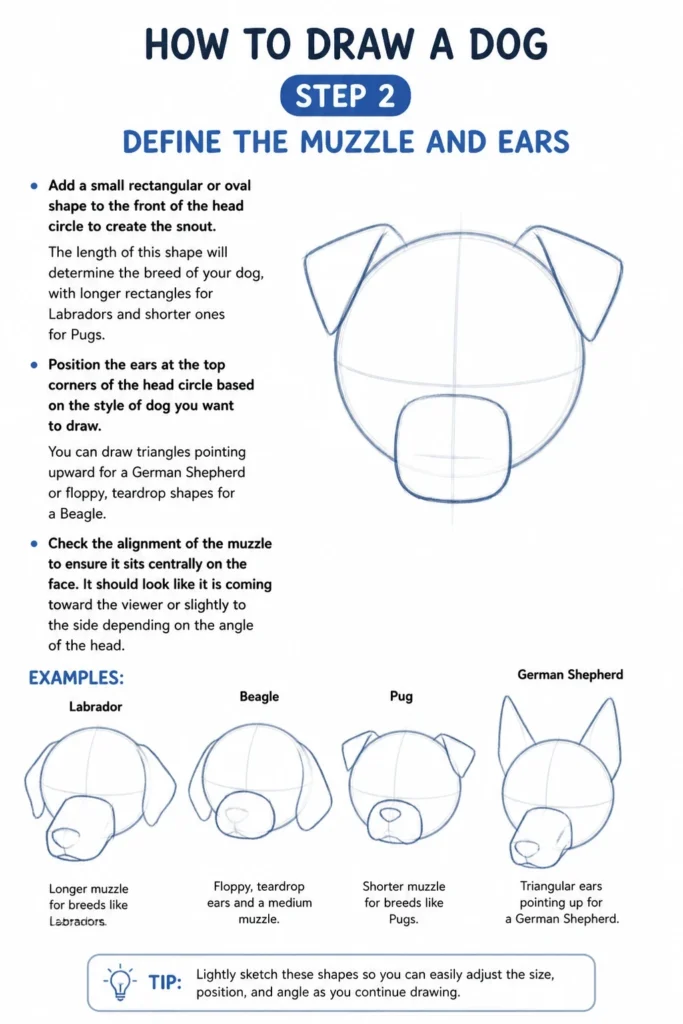
Position the ears at the top corners of the head circle based on the style of dog you want to draw. You can draw triangles pointing upward for a German Shepherd or floppy, teardrop shapes for a Beagle.
Check the alignment of the muzzle to ensure it sits centrally on the face. It should look like it is coming toward the viewer or slightly to the side depending on the angle of the head.
Step 3: Connect The Frame
Draw a smooth line across the top of the two body circles to create the spine. This line should dip slightly in the middle to give the dog a natural, athletic posture.
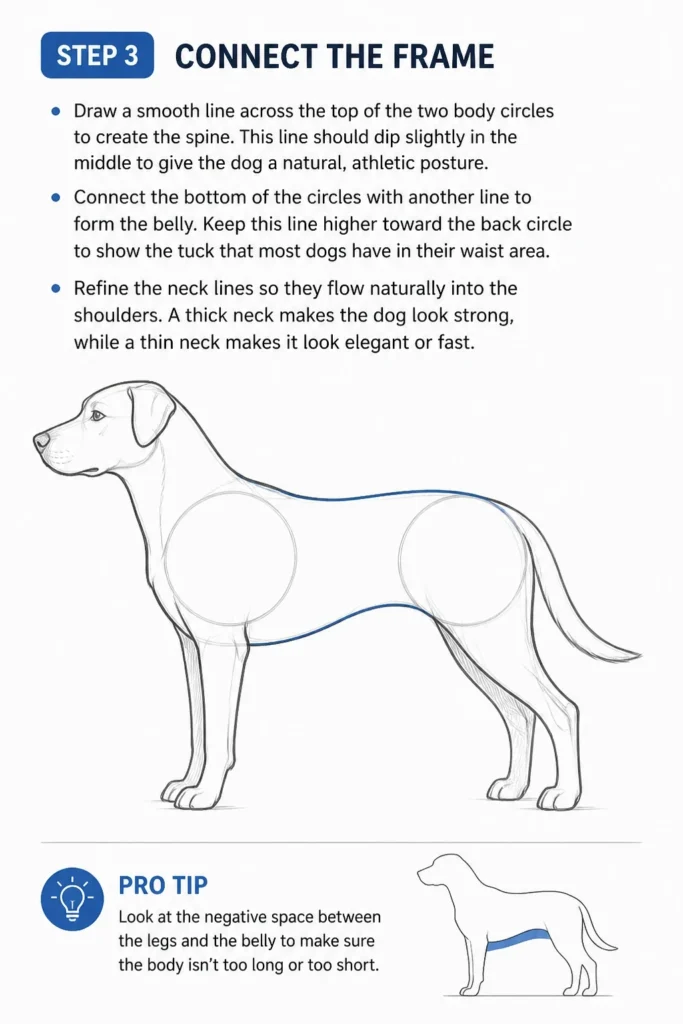
Connect the bottom of the circles with another line to form the belly. Keep this line higher toward the back circle to show the “tuck” that most dogs have in their waist area.
Refine the neck lines so they flow naturally into the shoulders. A thick neck makes the dog look strong, while a thin neck makes it look elegant or fast.
Pro Tip: Look at the negative space between the legs and the belly to make sure the body isn’t too long or too short.
Step 4: Sketch The Front Legs
Drop two straight lines down from the front chest circle to establish the position of the front legs. Remember that dogs stand on their toes, so leave space at the bottom for the paws.
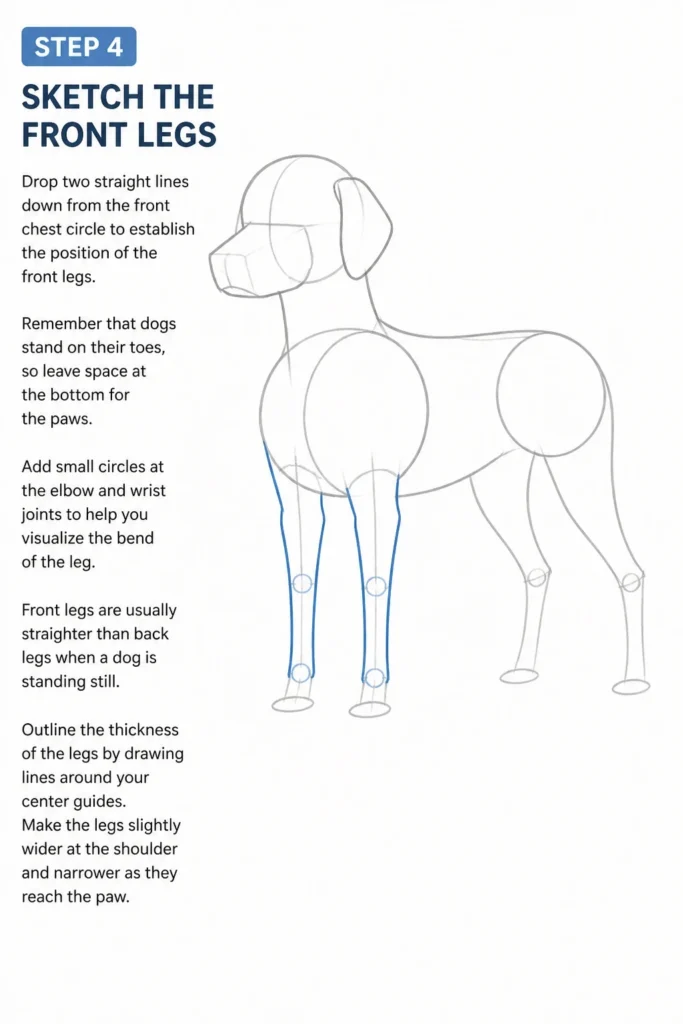
Add small circles at the “elbow” and “wrist” joints to help you visualize the bend of the leg. Front legs are usually straighter than back legs when a dog is standing still.
Outline the thickness of the legs by drawing lines around your center guides. Make the legs slightly wider at the shoulder and narrower as they reach the paw.
Step 5: Form The Back Legs
Create a large, sweeping “S” curve starting from the hip circle to represent the powerful back leg. The back leg has a very distinct angle at the hock, which functions similarly to a human ankle.
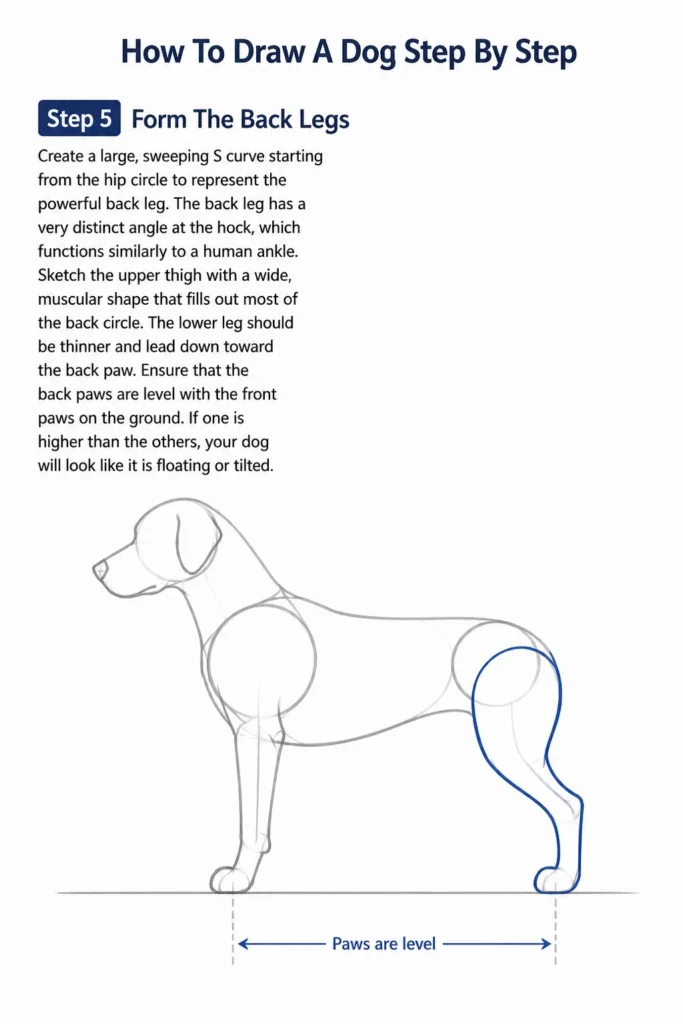
Sketch the upper thigh with a wide, muscular shape that fills out most of the back circle. The lower leg should be thinner and lead down toward the back paw.
Ensure that the back paws are level with the front paws on the ground. If one is higher than the others, your dog will look like it is floating or tilted.
Step 6: Detail The Facial Features
Place the nose at the very end of the muzzle shape. It usually looks like a soft triangle with two small curves for nostrils on the sides.
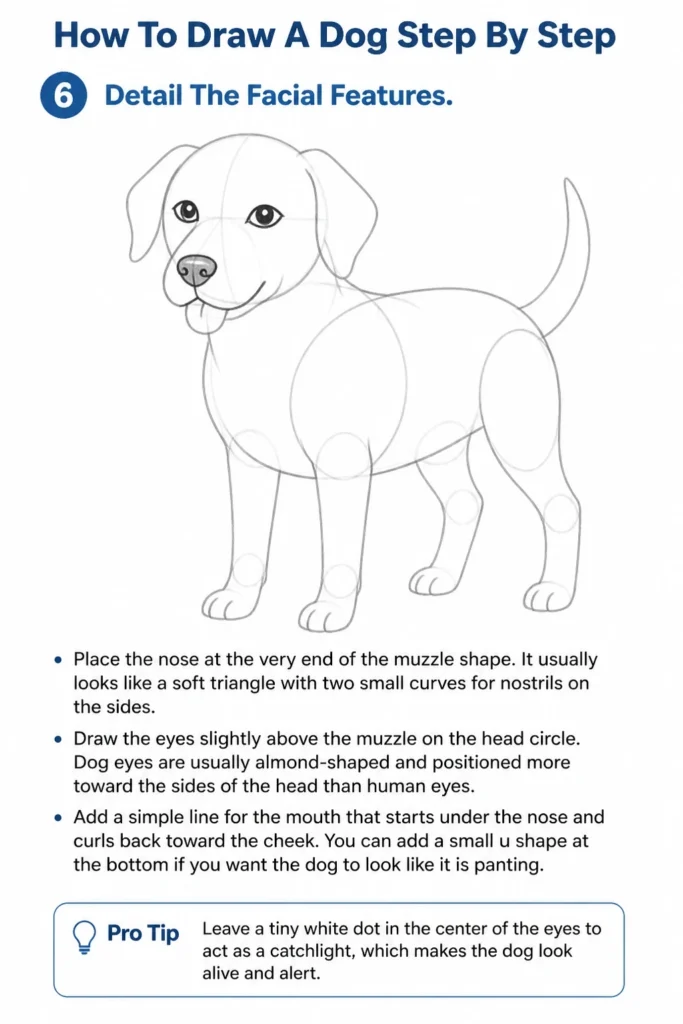
Draw the eyes slightly above the muzzle on the head circle. Dog eyes are usually almond-shaped and positioned more toward the sides of the head than human eyes.
Add a simple line for the mouth that starts under the nose and curls back toward the cheek. You can add a small “u” shape at the bottom if you want the dog to look like it is panting.
Pro Tip: Leave a tiny white dot in the center of the eyes to act as a “catchlight,” which makes the dog look alive and alert.
Step 7: Add Fur Texture And Tail
Attach the tail to the back of the hip circle. A high tail suggests excitement, while a low tail suggests a calm or submissive mood.
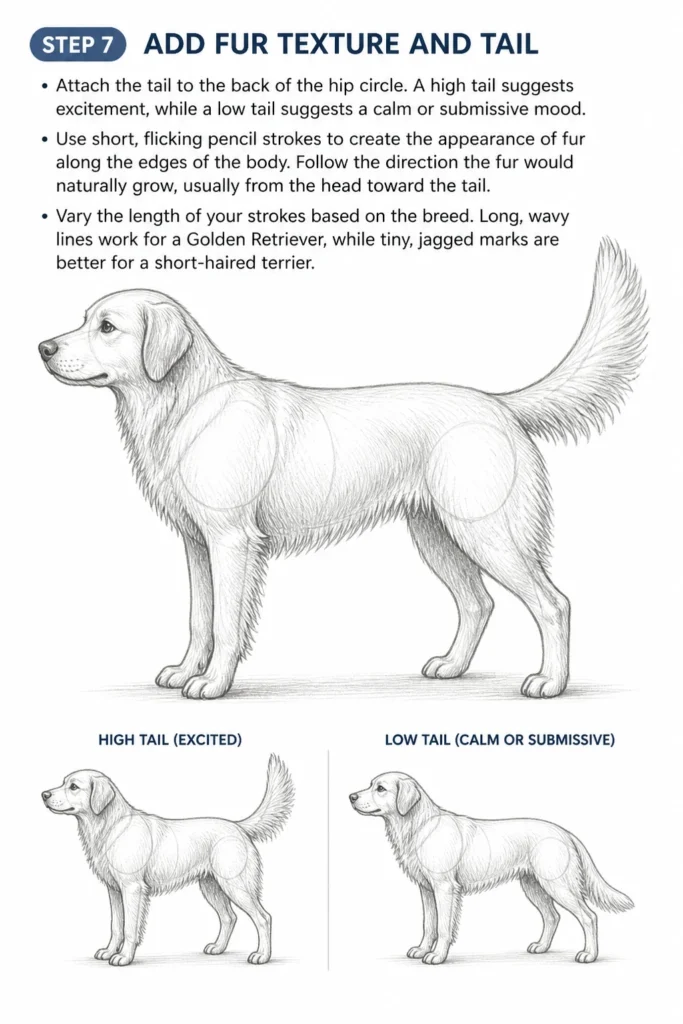
Use short, flicking pencil strokes to create the appearance of fur along the edges of the body. Follow the direction the fur would naturally grow, usually from the head toward the tail.
Vary the length of your strokes based on the breed. Long, wavy lines work for a Golden Retriever, while tiny, jagged marks are better for a short-haired terrier.
Step 8: Shading And Final Cleanup
Identify where your light source is coming from, such as the top left corner of the page. Add darker shading to the opposite side, like the underside of the belly and the back of the legs.
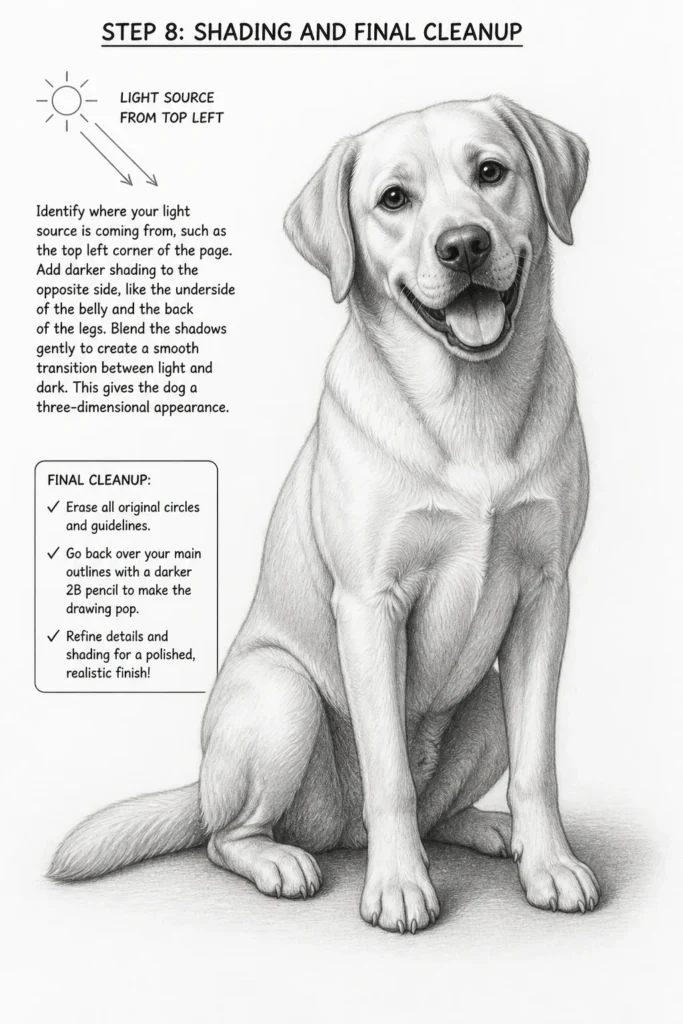
Blend the shadows gently with your finger or a blending stump to create a smooth transition between light and dark. This gives the dog a three-dimensional appearance.
Erase all the original circles and guidelines that are still visible. Go back over your main outlines with a darker 2B pencil to make the drawing pop off the page.
Common Mistakes to Avoid
Pressing Too Hard Initially
Many beginners push down firmly with their pencil during the first few steps. This creates deep indentations in the paper that are impossible to erase later.
If you make a mistake on a heavy line, you will be left with a “ghost” image of the old line. Keep your hand relaxed and your strokes barely visible until you are sure of the shape.
Ignoring The Joints
It is common to draw dog legs like straight sticks or “noodles” without any bends. Dogs have complex skeletal structures with elbows, knees, and hocks that create specific angles.
Study a photo of a dog standing and notice how the back leg zig-zags. Capturing these angles is the secret to making your drawing look realistic rather than like a cartoon.
Making The Head Too Large
We often focus so much on the face that we accidentally draw the head much larger than the body. This results in a puppy-like appearance, which might be cute but isn’t anatomically correct for an adult dog.
Compare the size of your head circle to the chest circle. For most breeds, the chest circle should be at least twice as large as the head to maintain proper proportions.
Troubleshooting
The Dog Looks Like A Cat
This usually happens when the muzzle is too short or the ears are placed too high and pointed. Cats have very flat faces and triangular ears that sit directly on top of the head.
To fix this, extend the length of the snout and broaden the base of the nose. Also, ensure the neck is thicker, as dogs generally have more muscle in the neck area than cats do.
The Drawing Looks Flat
If your dog looks like a cardboard cutout, you likely haven’t added enough contrast in your shading. Without shadows, there is nothing to tell the viewer’s eye that the body is round.
Add darker tones under the ears, beneath the chin, and where the legs meet the body. These “occlusion shadows” create depth and separate the different parts of the animal.
The Legs Look Uneven
It is easy to draw the legs on the “far side” of the dog the same length as the legs on the “near side.” This ruins the perspective and makes the dog look like it is leaning.
Always draw the legs that are further away slightly higher up on the paper and slightly shorter. This simple trick uses the rules of perspective to make the dog look like it is standing on flat ground.
Key Takeaways
- Start with circles to build a solid foundation before adding any details.
- Keep lines light during the construction phase to allow for easy corrections.
- Observe the joints to ensure the legs have realistic angles and movement.
- Use fur direction to describe the shape and volume of the dog’s muscles.
- Add a catchlight in the eyes to immediately bring character and life to the sketch.
- Finalize with shading to transform a flat outline into a three-dimensional form.
Frequently Asked Questions
What is the best pencil for drawing dogs?
A standard HB pencil is perfect for the initial sketching because it is light and easy to erase. For the final details and fur texture, a 2B or 4B pencil is better because it allows for darker, richer blacks and softer shading.
How do I draw different breeds using this method?
You can adapt this guide by changing the proportions of the initial circles. For a Dachshund, move the body circles further apart; for a Bulldog, make the chest circle much larger and the legs shorter. The basic framework remains the same regardless of the breed’s size.
How do I make the fur look soft?
Soft fur is achieved by using many light, overlapping strokes rather than a few heavy ones. Avoid drawing a solid outline around the dog; instead, let the “outline” be formed by the ends of the fur strokes to create a fuzzy, natural edge.
Why does my dog look stiff?
Stiffness often comes from perfectly straight lines and symmetrical poses. Try tilting the head slightly or drawing the tail at an angle to introduce a sense of motion and personality into the drawing.
Our Top Recommended Finds
- Kneaded Eraser: This tool is essential for drawing animals because you can mold it into a sharp point to “pick up” graphite and create individual white hairs or highlights in the fur.
- Blending Stumps: These paper tools help you smudge graphite smoothly, which is perfect for creating the soft transition of shadows on a dog’s short-haired coat.
- 9×12 Drawing Pad: A medium-textured paper provides enough “tooth” to hold onto your pencil lead while still being smooth enough for fine facial details.
Give Your New Skills A Run
Now that you have the basic structure down, the best thing you can do is practice with different poses. Try drawing a dog sitting or lying down using these same circular foundations to see how the shapes overlap differently.
You might also try looking at your own pet or photos of different breeds to see how their unique features fit into the circles you learned today. The more you draw, the more your hand will memorize these shapes until you don’t even need the guidelines anymore.
Pick up your pencil and try drawing a second dog right now while the steps are still fresh in your mind. Every sketch you finish makes the next one even better.
& Painting
No rigid rules or pretension. Just practical guides, medium comparisons, and encouraging tips to help you enjoy the drawing & painting process.