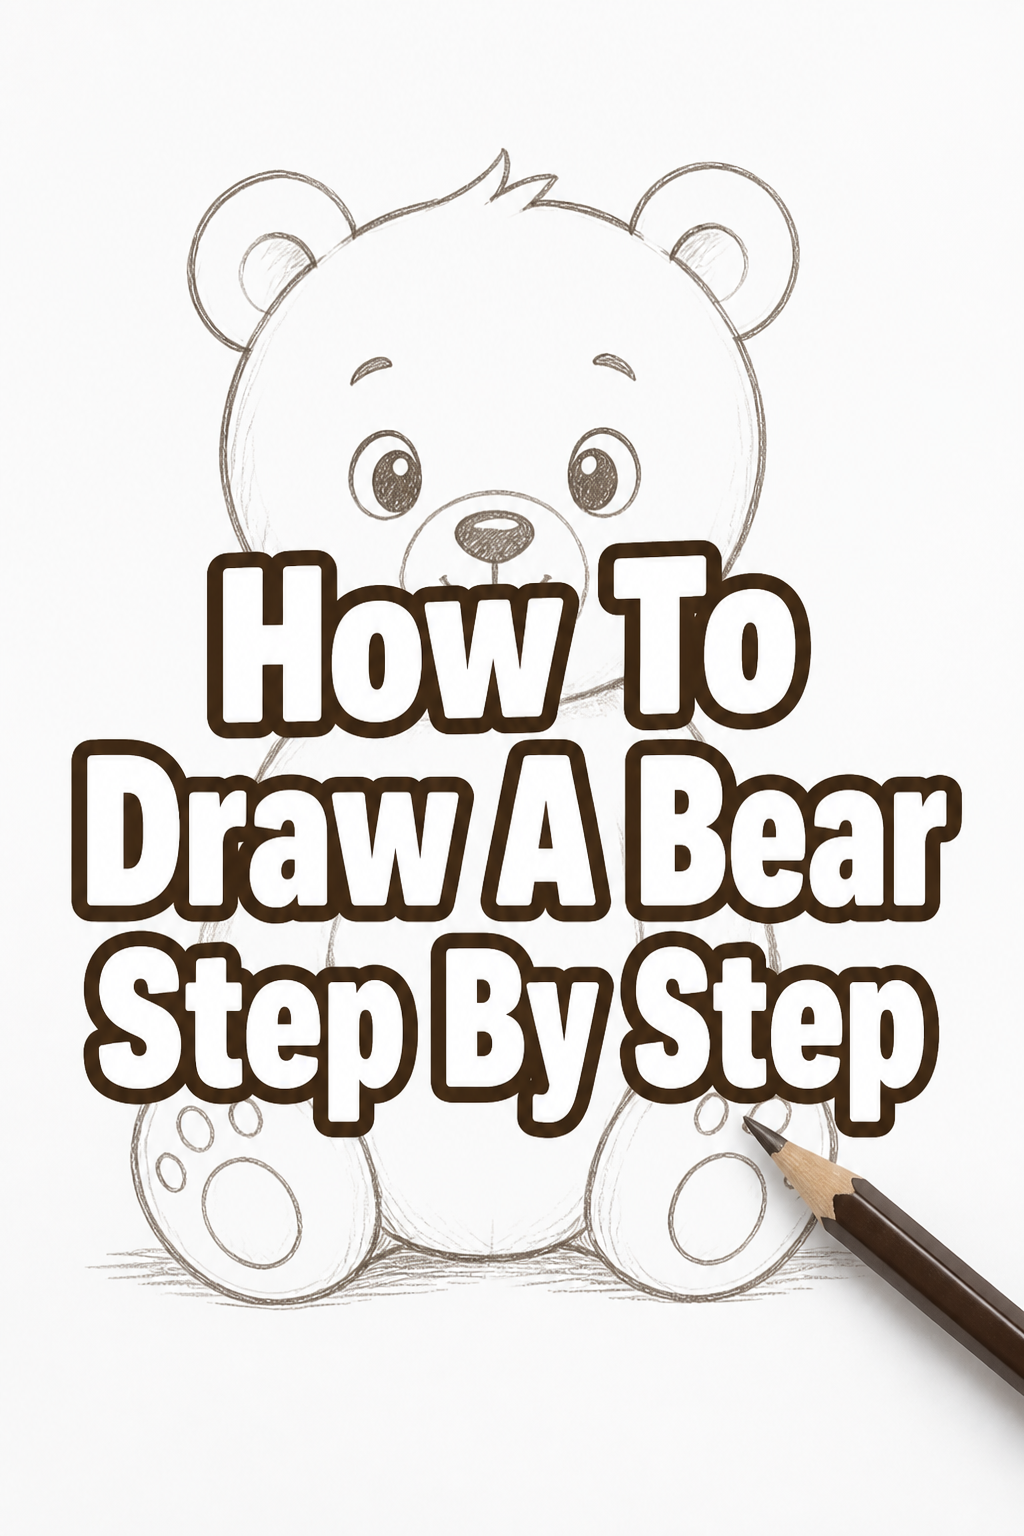
🐻 How To Draw A Bear Step By Step

& Painting
No rigid rules or pretension. Just practical guides, medium comparisons, and encouraging tips to help you enjoy the drawing & painting process.
Learning to draw can feel intimidating, but it’s a skill anyone can build with practice.
I remember my first attempts at drawing animals; they often looked more like amorphous blobs than anything recognizable.
With this guide, I’ll share the simple techniques I’ve learned to break down complex shapes into manageable steps, making bear drawing accessible and fun.
Quick Overview
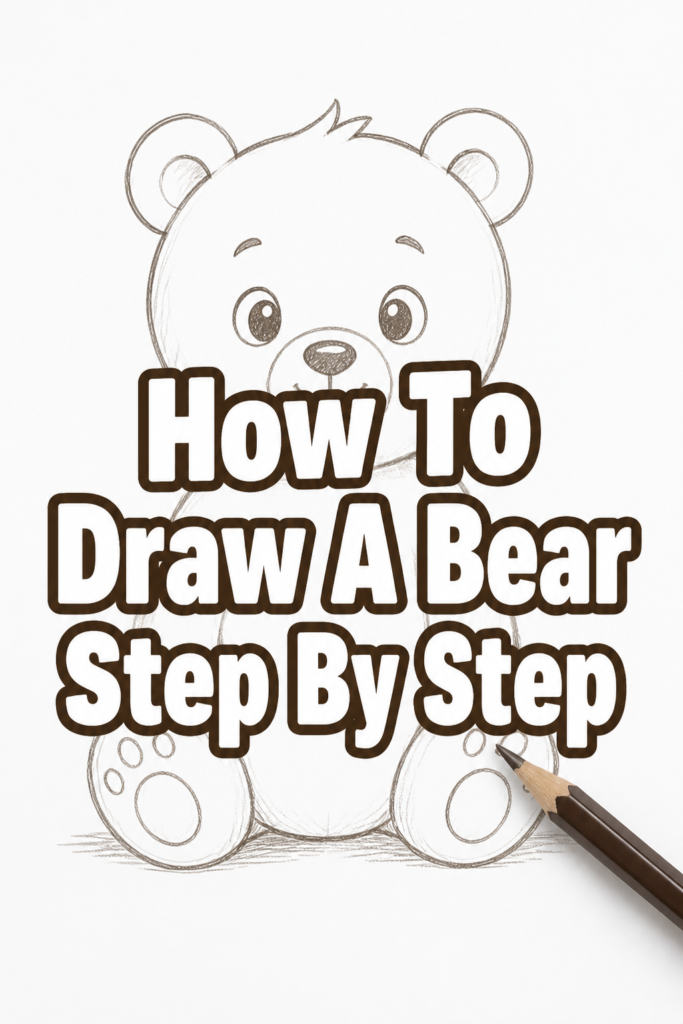
In this guide, you will learn how to create a charming bear drawing from scratch, using basic shapes as your foundation. We’ll cover everything from initial sketches to adding those final, detailed touches.
- Time needed: 45-75 minutes (depending on detail and pace)
- Difficulty: Beginner to Intermediate
- What you’ll need: Pencil (HB, 2B), eraser, paper, optional blending stump or cotton swab
Step-by-Step Instructions
Step 1: Lay Down Your Basic Shapes for the Body and Head
Begin by sketching two simple ovals on your paper. These will form the core of your bear’s body.
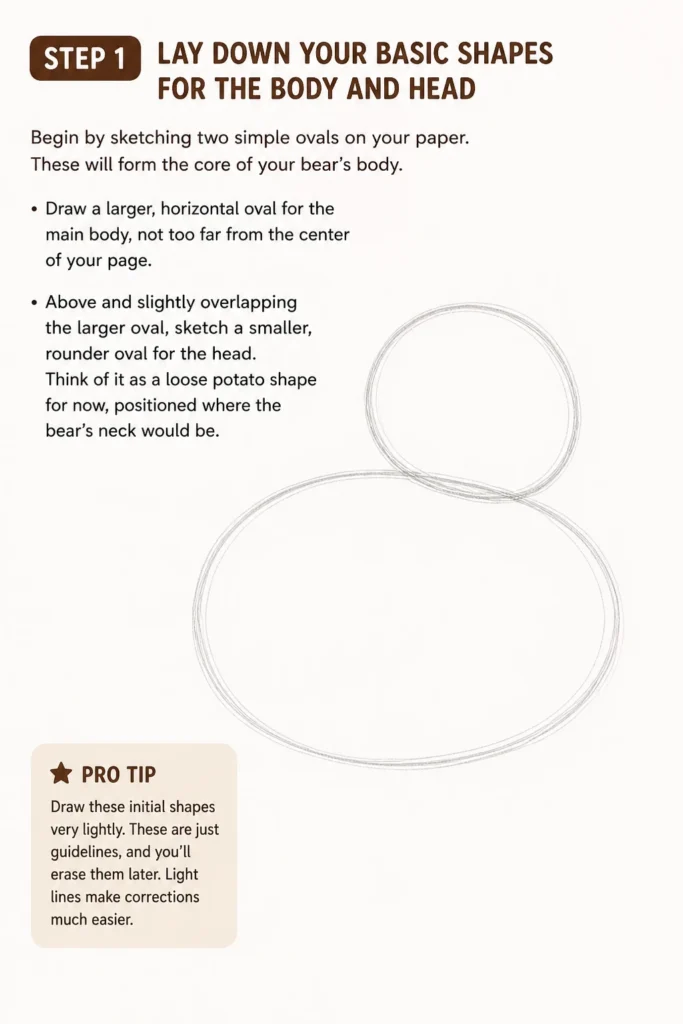
Draw a larger, horizontal oval for the main body, not too far from the center of your page.
Above and slightly overlapping the larger oval, sketch a smaller, rounder oval for the head. Think of it as a loose potato shape for now, positioned where the bear’s neck would be.
Pro Tip: Draw these initial shapes very lightly. These are just guidelines, and you’ll erase them later. Light lines make corrections much easier.
Step 2: Connect the Head and Body, and Form the Snout
Connect the head and body ovals with two gentle, curved lines. These lines will create the bear’s neck and shoulders, giving it a natural posture.
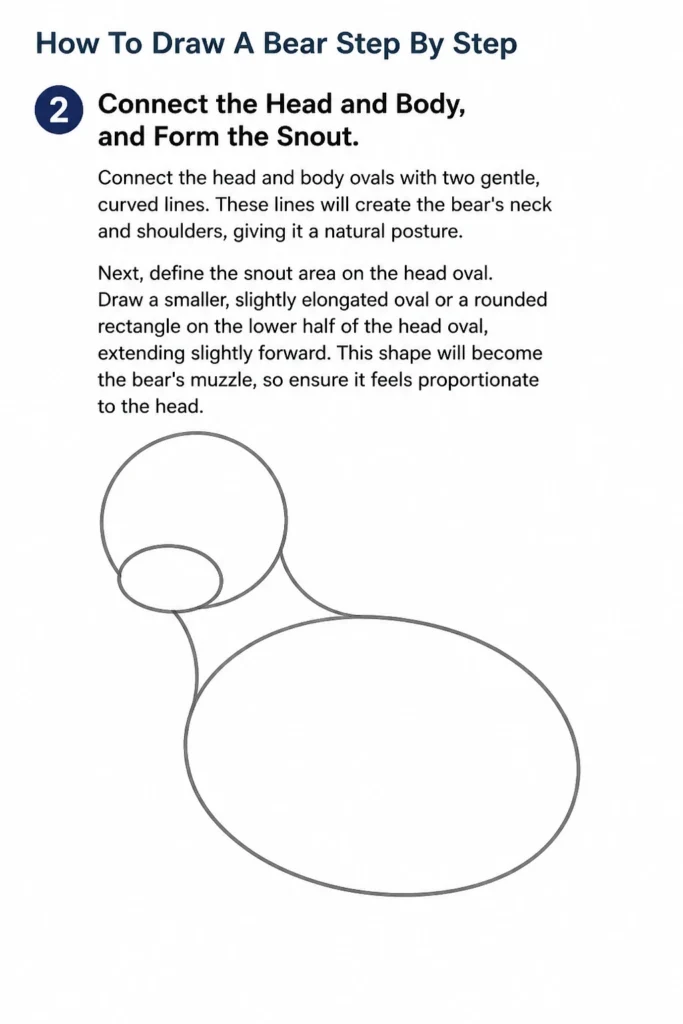
Next, define the snout area on the head oval. Draw a smaller, slightly elongated oval or a rounded rectangle on the lower half of the head oval, extending slightly forward.
This shape will become the bear’s muzzle, so ensure it feels proportionate to the head.
Step 3: Sketch the Limbs and Paws
Outline the bear’s legs and paws using more ovals and curved shapes. For the front legs, draw two elongated ovals extending downwards from the main body oval.
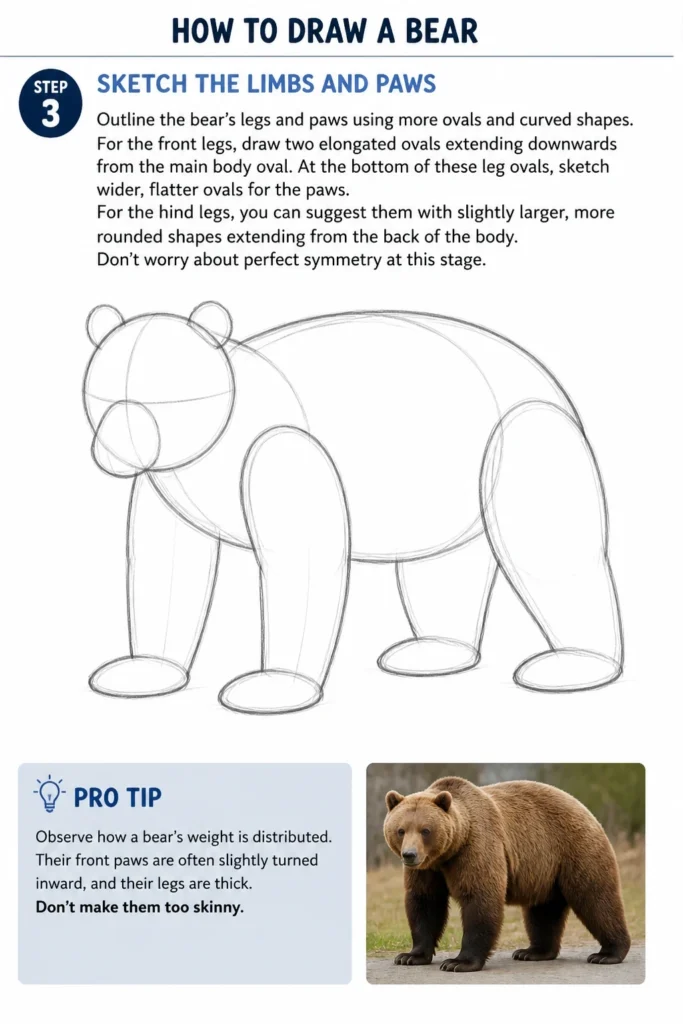
At the bottom of these leg ovals, sketch wider, flatter ovals for the paws. Remember that bears have sturdy, powerful legs.
For the hind legs, you can suggest them with slightly larger, more rounded shapes extending from the back of the body. Don’t worry about perfect symmetry at this stage.
Pro Tip: Observe how a bear’s weight is distributed. Their front paws are often slightly turned inward, and their legs are thick. Don’t make them too skinny.
Step 4: Add the Ears and Facial Feature Placement
Place the ears on top of the head oval. Draw two small, rounded ear shapes on either side of the top of the head.
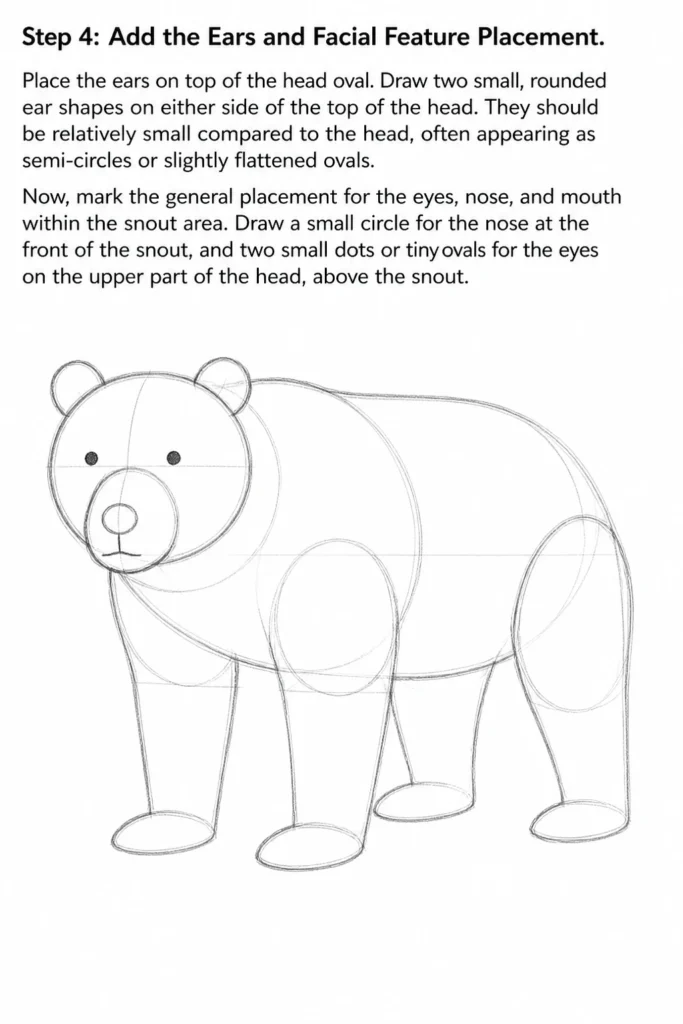
They should be relatively small compared to the head, often appearing as semi-circles or slightly flattened ovals.
Now, mark the general placement for the eyes, nose, and mouth within the snout area. Draw a small circle for the nose at the front of the snout, and two small dots or tiny ovals for the eyes on the upper part of the head, above the snout.
Step 5: Refine the Outline and Start Adding Fur Texture
Refine your bear’s overall outline by connecting all the basic shapes with smoother, more continuous lines. Start to think about the natural curves and contours of a bear’s body.
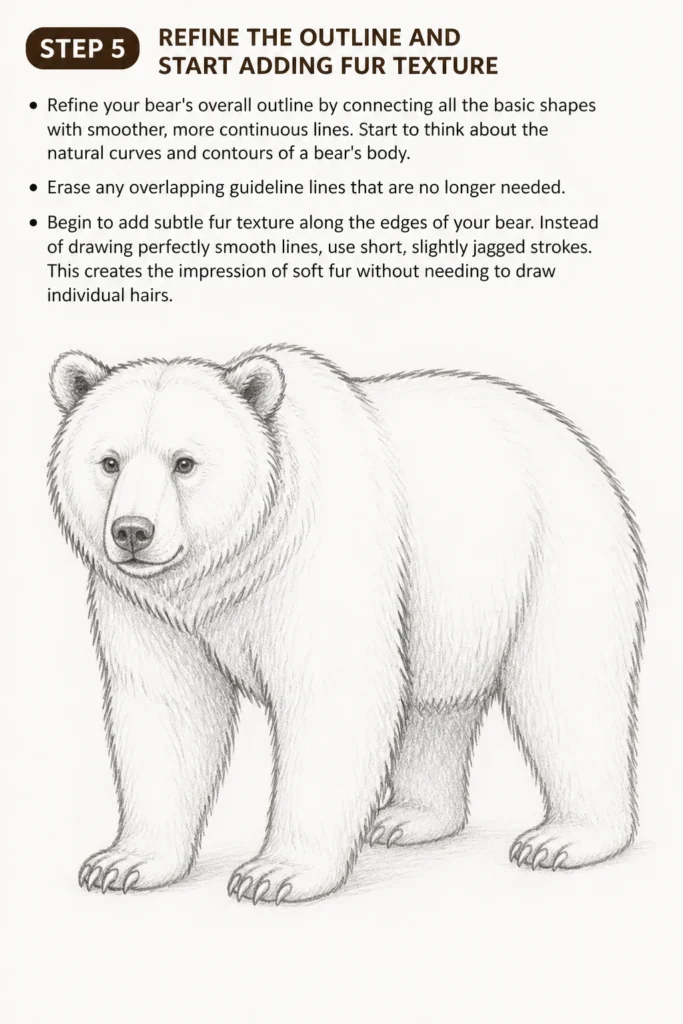
Erase any overlapping guideline lines that are no longer needed. Begin to add subtle fur texture along the edges of your bear.
Instead of drawing perfectly smooth lines, use short, slightly jagged strokes. This creates the impression of soft fur without needing to draw individual hairs.
Step 6: Detail the Face and Paws
Flesh out the facial features. For the nose, draw a rounded triangle shape with the point facing downwards, adding two small nostrils.
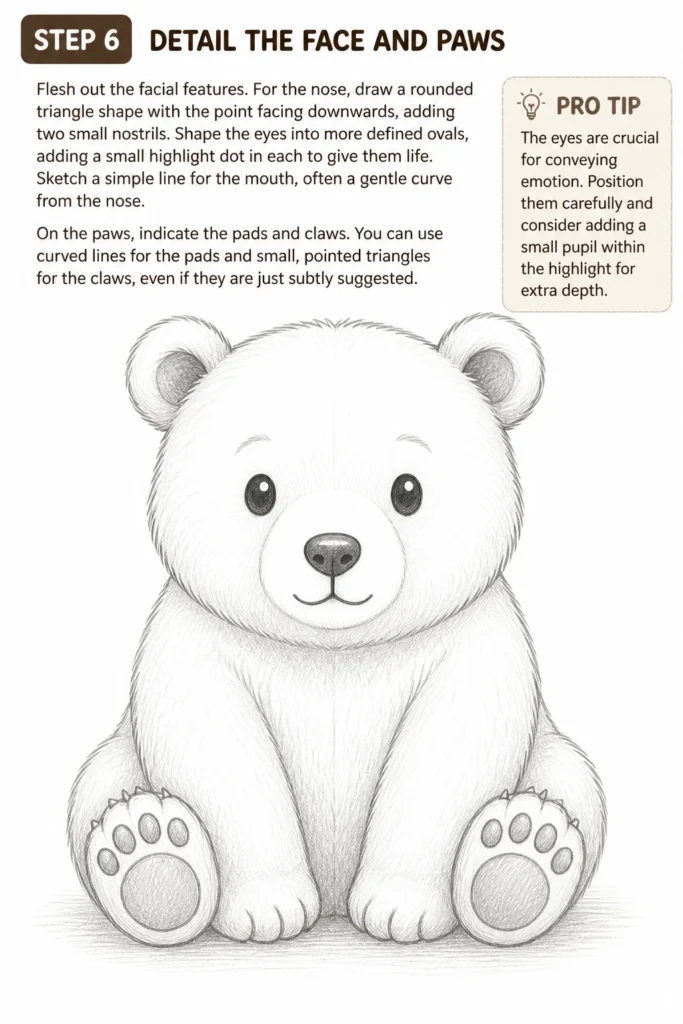
Shape the eyes into more defined ovals, adding a small highlight dot in each to give them life. Sketch a simple line for the mouth, often a gentle curve from the nose.
On the paws, indicate the pads and claws. You can use curved lines for the pads and small, pointed triangles for the claws, even if they are just subtly suggested.
Pro Tip: The eyes are crucial for conveying emotion. Position them carefully and consider adding a small pupil within the highlight for extra depth.
Step 7: Add Shading and Final Textures
Introduce shading to give your bear dimension. Think about where light would be hitting your bear and where shadows would naturally fall.
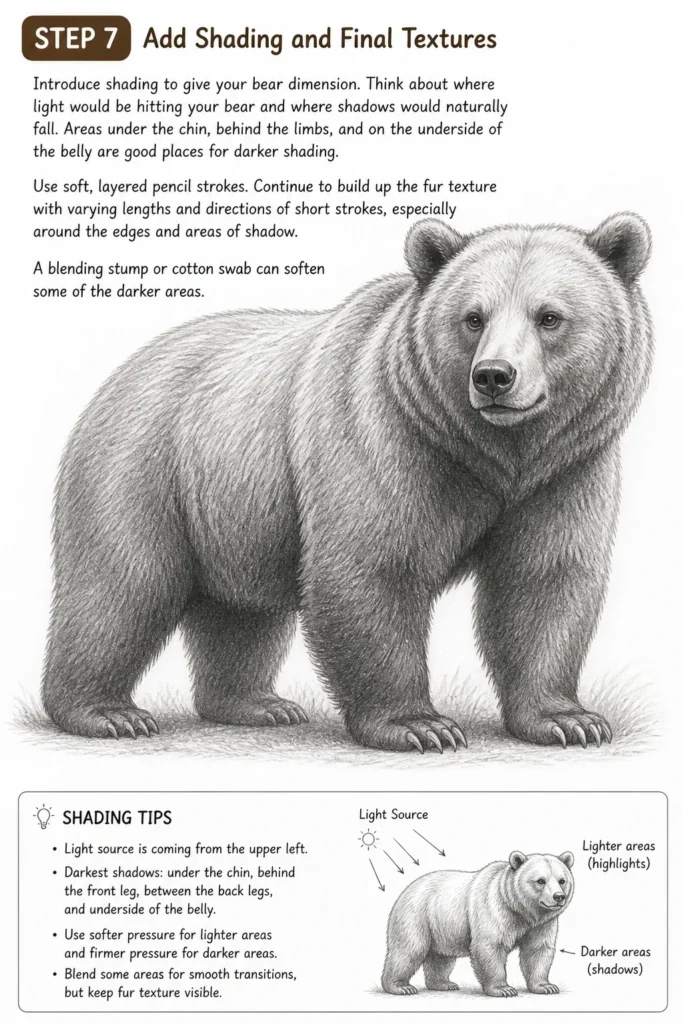
Areas under the chin, behind the limbs, and on the underside of the belly are good places for darker shading. Use soft, layered pencil strokes.
Continue to build up the fur texture with varying lengths and directions of short strokes, especially around the edges and areas of shadow. A blending stump or cotton swab can soften some of the darker areas.
Step 8: Erase Guidelines and Clean Up
Carefully erase any remaining light guideline marks that are still visible. Use a kneaded eraser for precision if you have one.
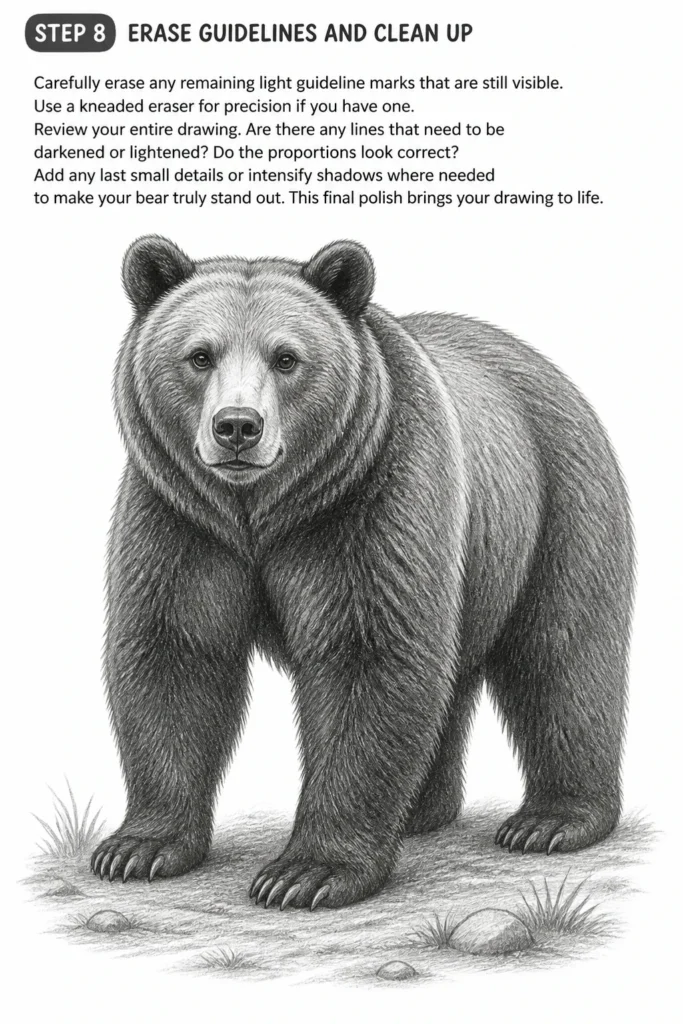
Review your entire drawing. Are there any lines that need to be darkened or lightened? Do the proportions look correct?
Add any last small details or intensify shadows where needed to make your bear truly stand out. This final polish brings your drawing to life.
Common Mistakes to Avoid
Making Limbs Too Thin or Stiff
A common pitfall is drawing a bear’s legs too slender or straight, making them look unnatural and weak. Bears have incredibly powerful, thick limbs that support their heavy bodies.
Always remember to give their legs ample width and a slight curve to suggest musculature and natural joints. Avoid stick-figure limbs; think about the volume and strength.
Overlooking Proportions
It’s easy to make a head too large or a body too small, throwing off the entire drawing. Bears have a relatively large head compared to many other animals, but it still needs to fit the body.
Constantly compare the size of one part to another throughout your drawing process. Use your initial light ovals as a guide to maintain consistent proportions.
Drawing Fur as Individual Hairs
Trying to draw every single strand of fur can be exhausting and often results in a messy, flat appearance. Instead, focus on suggesting fur texture.
Use short, varied pencil strokes along the contours of the bear’s body, especially in shaded areas. This creates the illusion of fur without getting bogged down in tiny details.
Not Using Reference Images
Even if you’re drawing from memory, not looking at reference images can lead to inaccuracies in anatomy or posture. Our minds can play tricks on us.
Take a moment to look at photos of real bears to understand their unique features, how their ears sit, the shape of their snout, and their overall stance. This will significantly improve your drawing’s realism.
Troubleshooting
My Bear Looks Flat and Lacks Depth
If your bear appears two-dimensional, it likely needs more shading and contrast. Flatness often comes from uniform line weight and a lack of light and shadow.
Focus on adding darker tones in areas that would naturally be in shadow, such as under the belly, behind limbs, and deep within fur. Use varying pressure with your pencil to create a range of values from light to dark, making your bear pop off the page.
The Facial Features Don’t Look Right
Facial feature placement can be tricky. If your bear’s face looks off, it might be due to incorrect spacing or size of the eyes, nose, or mouth relative to the head.
Try drawing light guidelines across the head to help with alignment. Ensure the eyes are not too close or too far apart, and the nose is centered on the snout. Small adjustments can make a big difference.
I Can’t Get the Fur to Look Realistic
Achieving realistic fur is about texture and layering, not individual hairs. If your fur looks stiff or unnatural, you might be using too much pressure or drawing strokes in the wrong direction.
Use lighter, shorter strokes that follow the bear’s form. Layer these strokes, building them up gradually. Remember, fur isn’t uniform; it has different directions and densities in various areas.
Key Takeaways
- Always start with light, basic geometric shapes to build your bear’s foundation.
- Proportions are vital; constantly compare parts of your drawing to maintain realism.
- Use varied line quality and short strokes to suggest fur texture, rather than drawing individual hairs.
- Shading and contrast are essential for giving your bear depth and making it appear three-dimensional.
- Don’t be afraid to use an eraser; drawing is a process of building up and refining.
- Practice is key; every drawing improves your skill and understanding.
Frequently Asked Questions
What type of pencil is best for drawing bears?
An HB pencil is great for initial sketching and lighter lines, while a 2B or 4B pencil is excellent for darker shading and adding depth. Having a range of hardness allows for more control over values.
How do I make my bear look less cartoonish?
To reduce a cartoonish look, focus on realistic proportions, subtle shading, and natural fur texture. Avoid exaggerated features unless that’s your specific style. Reference photos are invaluable for realism.
Should I draw the entire bear before adding details?
It’s generally best to establish the overall form and proportions of the bear first, from head to paw, before diving into fine details like eyes or claws. This ensures everything fits together correctly.
What if my lines aren’t perfectly smooth?
Don’t worry about perfectly smooth lines, especially when drawing animals with fur. Slightly imperfect or textured lines can actually enhance the organic, furry appearance of your bear.
Our Top Recommended Finds
- Sketchbook with Quality Paper: A good quality paper (at least 80gsm) prevents bleed-through and holds pencil marks well for layering.
- Set of Graphite Pencils (HB, 2B, 4B, 6B): Having a range of soft to hard pencils gives you versatility for sketching, shading, and adding deep shadows.
- Kneaded Eraser: This type of eraser is fantastic for lifting graphite gently without smudging, and you can mold it to a point for precise corrections.
Your Next Artistic Adventure Awaits
You’ve just completed your first step into the wild world of bear drawing! Take a moment to appreciate the journey you’ve made from simple shapes to a fully rendered creature.
Now that you have the fundamentals down, why not try drawing your bear in different poses, or explore various bear species?
Keep practicing, keep experimenting, and most importantly, keep enjoying the creative process. Your artistic journey is just beginning!
& Painting
No rigid rules or pretension. Just practical guides, medium comparisons, and encouraging tips to help you enjoy the drawing & painting process.