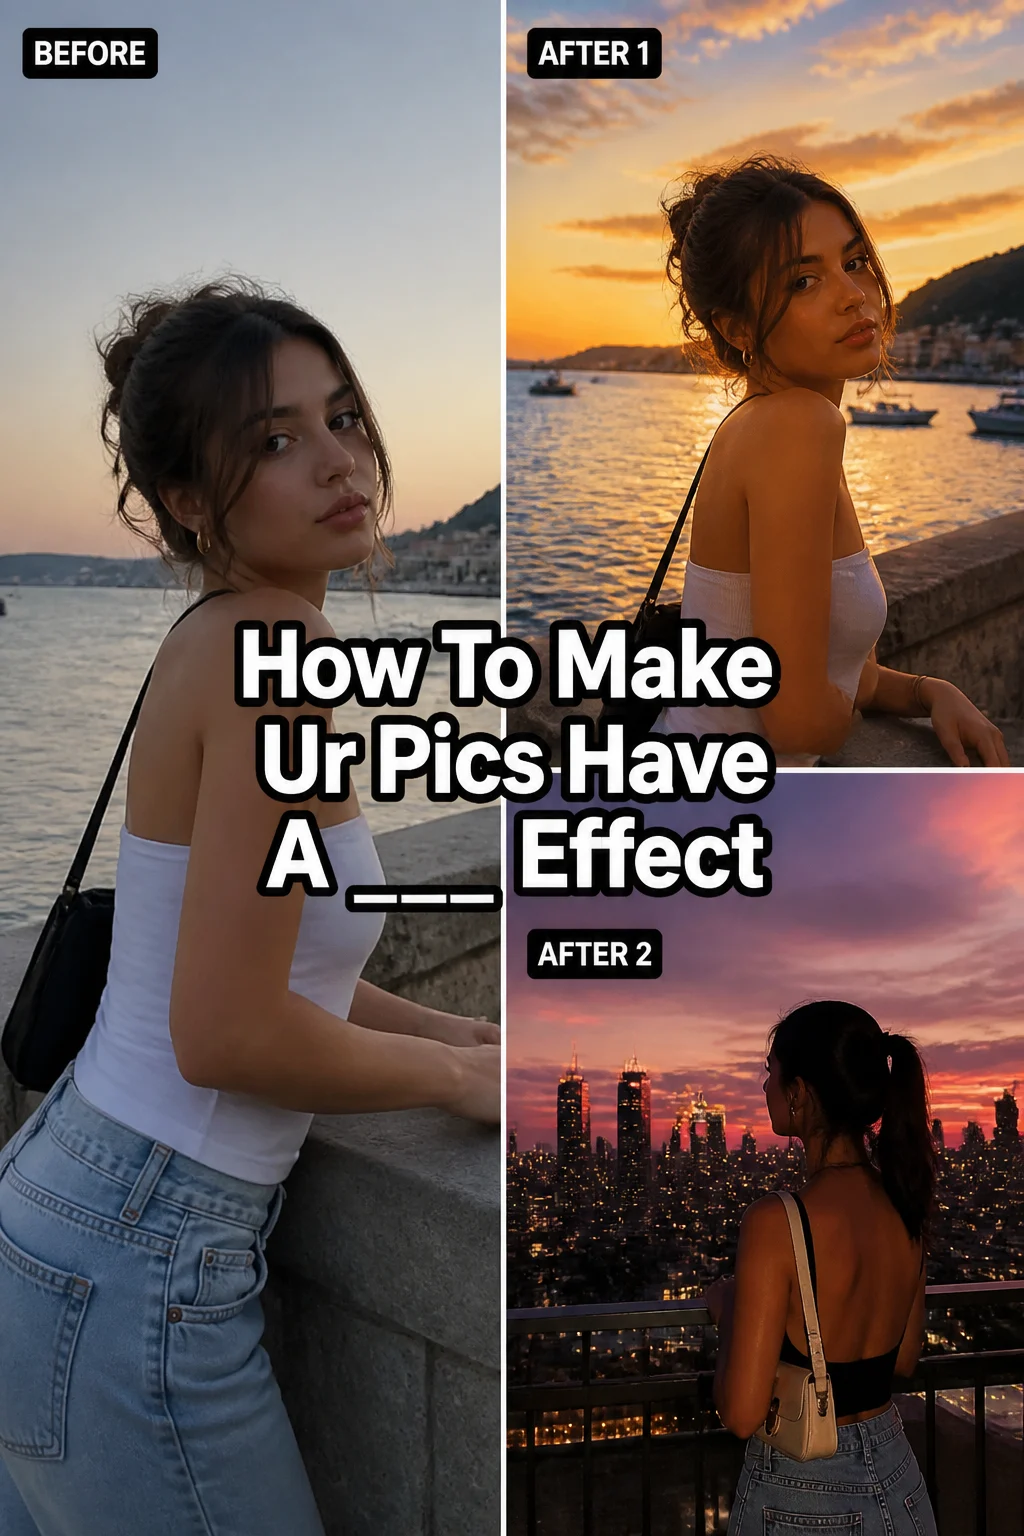
How To Make Ur Pics Have A ___ Effect
✨ How To Make Ur Pics Have A Dreamy Effect
Ever scrolled through your feed and stopped dead in your tracks, captivated by a photo that just feels… ethereal?
Those dreamy, soft-focus images aren’t magic; they’re the result of a few clever editing tricks.
I’ve spent countless hours tweaking photos on my phone and computer, discovering the secrets to that elusive, dreamy vibe, and I’m here to share exactly how you can do it too.
Quick Overview
This guide will walk you through transforming your everyday photos into captivating, dream-like visuals.
You’ll learn to manipulate light, color, and focus to create that soft, otherworldly aesthetic.
- Time needed: 10-20 minutes per photo
- Difficulty: Beginner
- What you’ll need: A smartphone or computer, a photo editing app (like Lightroom Mobile, Snapseed, or your phone’s built-in editor)
Step-by-Step Instructions
Step 1: Pick the Right Starting Shot
Choose a photo that already has decent lighting and a relatively clean background.
Images with natural light, soft textures, or a gentle color palette often work best as a foundation.
Avoid busy scenes or harsh shadows, as these can be harder to soften later on.
Pro Tip: Photos taken during “golden hour” (shortly after sunrise or before sunset) naturally lend themselves to a dreamy effect due to their warm, soft light.
Step 2: Adjust Overall Exposure and Contrast
Open your chosen photo in your editing app.
Slightly increase the exposure to brighten the image, giving it an airy feel.
Then, reduce the contrast to soften the harsh differences between light and shadow, which is key to a dreamy look.
Step 3: Soften Highlights and Lift Shadows
Pull down the highlights slider a bit to prevent bright areas from looking blown out.
Next, gently raise the shadows slider to reveal detail in darker areas, making the overall image less dramatic and more balanced.
This creates a flatter, softer dynamic range.
Step 4: Tweak White Balance for Mood
Experiment with the white balance settings, specifically ‘Temperature’ and ‘Tint’.
Increase the temperature for a warmer, golden glow, or decrease it slightly for a cooler, ethereal blue tone.
A touch of green or magenta tint can also subtly shift the mood.
Step 5: Reduce Clarity and Dehaze
This is where the magic really starts for softness. Decrease the ‘Clarity’ slider significantly.
This blurs fine details and edges, giving your photo a soft, almost painterly quality.
Lower the ‘Dehaze’ slider slightly to introduce a subtle misty or foggy atmosphere, enhancing the dream-like feel.
Step 6: Desaturate and Adjust Vibrance
Lower the overall ‘Saturation’ of your image to mute the colors.
Dreamy photos often have a slightly desaturated palette, making them feel less vibrant and more subdued.
If the colors become too flat, gently increase ‘Vibrance’ to bring back some life to the less saturated tones without making everything too bright.
Pro Tip: Use the HSL (Hue, Saturation, Luminance) tool to selectively desaturate specific colors, like vibrant greens or blues, while keeping skin tones natural.
Step 7: Add a Subtle Vignette or Radial Filter
Apply a subtle light vignette, often by darkening the edges just a tiny bit, to draw the eye towards the center.
Alternatively, use a radial filter to add a localized softness or a slight glow to a specific part of your image, like a subject’s face or a light source.
Keep these adjustments very minimal to maintain a natural look.
Step 8: Introduce Grain (Optional but Recommended)
To give your photo a vintage, film-like texture, add a small amount of ‘Grain’ or ‘Noise’.
This can enhance the dreamy aesthetic by breaking up perfect digital smoothness and adding character.
Start with a low amount and adjust until it looks natural, not overwhelming.
Step 9: Final Sharpening (Very Lightly)
After all the softening, your image might feel a little too blurry.
Apply a very minimal amount of ‘Sharpening’ to bring back just enough definition without losing the dreamy effect.
Focus on key areas like eyes or specific textures if your app allows for selective sharpening.
Common Mistakes to Avoid
Overdoing the Softness
It’s easy to get carried away with the clarity and dehaze sliders, making your photo look completely out of focus or blurry.
The goal is a soft, dream-like quality, not a lack of focus. Always check your image at 100% zoom to ensure details aren’t completely lost.
Excessive Desaturation
While dreamy photos often feature muted colors, completely draining all color can make your image look dull and lifeless.
Aim for a subtle desaturation that still allows some color to shine through, contributing to the mood rather than subtracting from it.
Ignoring the Original Photo’s Mood
Not every photo is meant to be dreamy. Trying to force a dreamy effect on a high-contrast, sharp image of a busy city street might yield odd results.
Consider if the subject and composition naturally align with a soft, ethereal vibe before you begin editing.
Harsh Vignettes
A heavy, dark vignette can make your photo look artificial and dated, distracting from the dreamy effect.
Keep vignettes very subtle and soft, allowing them to gently guide the eye rather than creating a tunnel vision effect.
Troubleshooting
My Photo Looks Too Flat and Lifeless
If your image feels dull after reducing contrast and saturation, try re-introducing a tiny bit more contrast or increasing the ‘Vibrance’ slider.
You can also use the ‘Curves’ tool to add a very gentle S-curve, which boosts contrast subtly without making it harsh.
Sometimes, a slight increase in ‘Blacks’ can add depth without losing the soft feel.
The Colors Look Strange or Unnatural
This often happens when white balance is pushed too far or selective color adjustments (HSL) are overdone.
Go back to your white balance sliders and try a more neutral setting, then make smaller adjustments.
If you used HSL, reset those specific color channels and re-adjust more gently.
My Image Still Looks Too Sharp
If your photo retains too much sharpness, double-check your ‘Clarity’ and ‘Texture’ sliders to ensure they are sufficiently reduced.
Also, look for any ‘Sharpening’ adjustments you might have made and reduce them further, or even set them to zero.
Some apps have a ‘Softness’ or ‘Diffusion’ filter that can be applied lightly.
Key Takeaways
- Choose photos with natural light and simple backgrounds for the best results.
- Reduce contrast and clarity significantly to achieve a soft, diffused look.
- Adjust white balance to set the overall mood, leaning warm or cool.
- Mute colors with desaturation, but use vibrance to prevent flatness.
- Use subtle vignettes or radial filters to guide the viewer’s eye.
- Add a touch of grain for a charming, film-like texture.
Frequently Asked Questions
Can I achieve this effect on any photo?
While you can apply these steps to most photos, the best results come from images that already have a good foundation, like soft lighting or an uncluttered background.
Trying to make a sharp, high-contrast photo of a busy street look dreamy will be much harder and might not yield the desired effect.
What’s the difference between Clarity and Dehaze?
Clarity affects the mid-tone contrast and definition of edges, making things look sharper or softer.
Dehaze primarily adds or removes atmospheric haze, which can make an image look clearer or more misty. Both contribute to the dreamy softness when reduced.
Which editing app is best for this effect?
Many apps work great! Lightroom Mobile offers precise controls, Snapseed has excellent selective adjustment tools, and VSCO provides beautiful film-inspired presets.
Even your phone’s built-in editor often has basic sliders for exposure, contrast, and saturation that you can use.
How do I make skin tones look natural after desaturating?
Use the HSL (Hue, Saturation, Luminance) tool to target specific colors.
You can desaturate greens and blues more heavily while keeping the saturation of orange and red (which affect skin tones) at a more natural level.
This prevents skin from looking grey or washed out.
Our Top Recommended Finds
- Smartphone Tripod: Essential for steady shots, especially in low light, giving you a cleaner base image to start with.
- Portable LED Light: Great for adding soft, diffused light to your subjects, mimicking natural light for a dreamy look.
- Lightroom Mobile Subscription: Offers powerful, professional-grade editing tools right on your phone, making these adjustments precise and easy.
Start Creating Your Dreamy Worlds Today
Now you have all the tools and knowledge to transform your ordinary pictures into extraordinary, dreamy masterpieces.
Don’t be afraid to experiment with these settings; a little tweak here and there can completely change the mood of your photo.
Go grab your favorite photo, open your editing app, and begin crafting your own ethereal visuals right now!