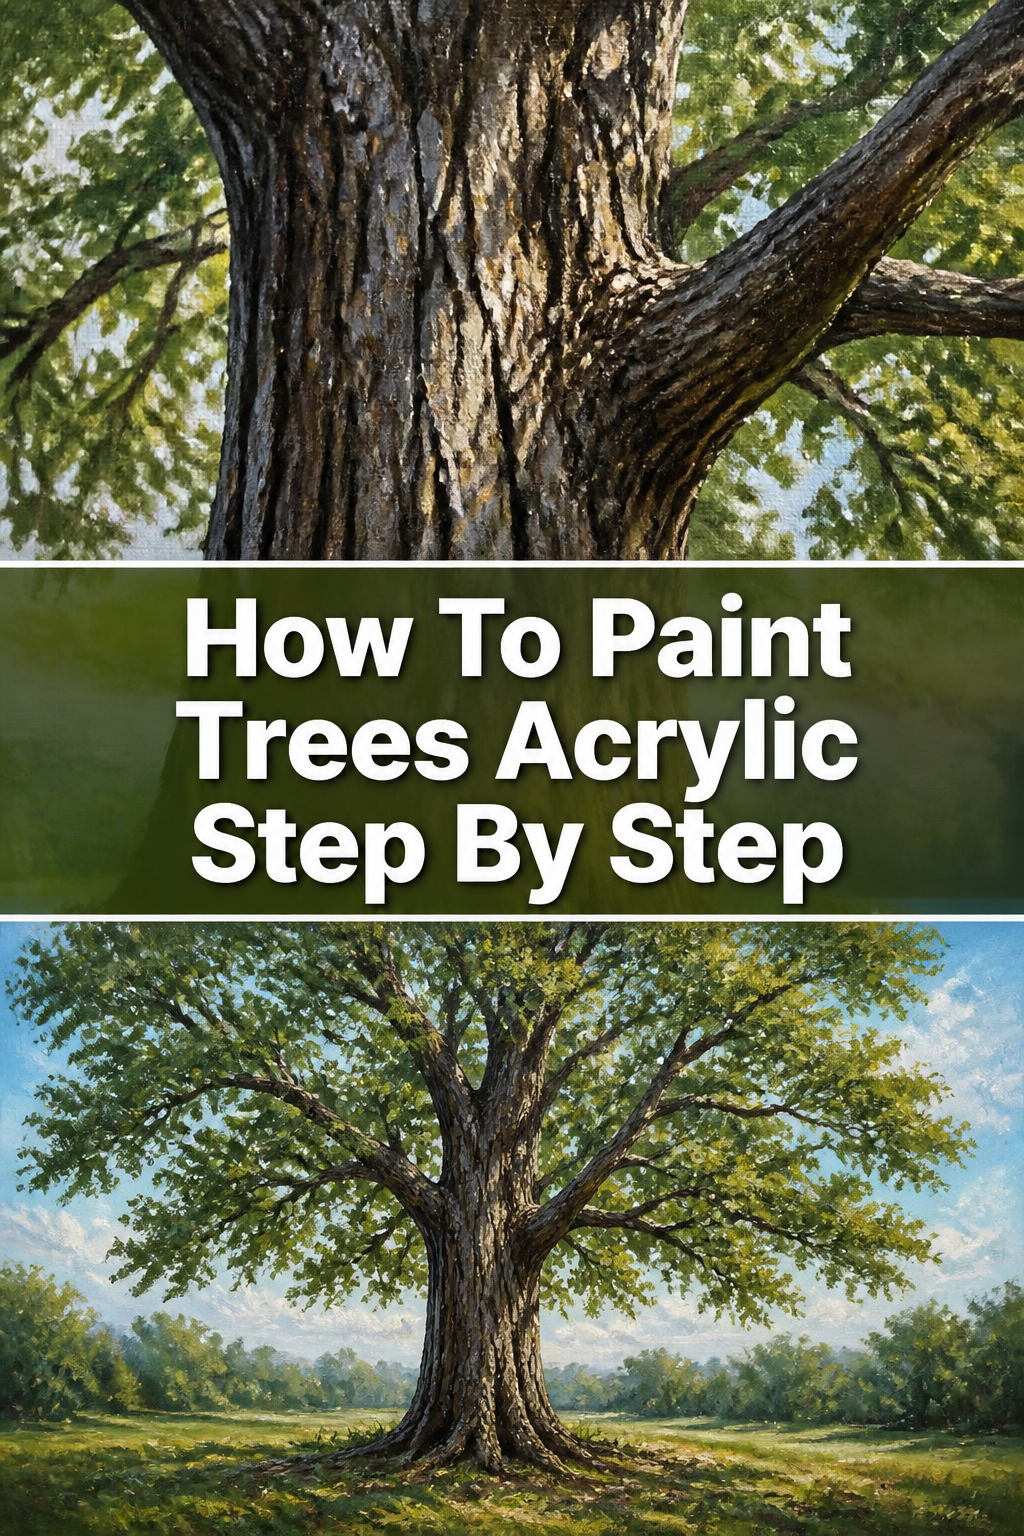
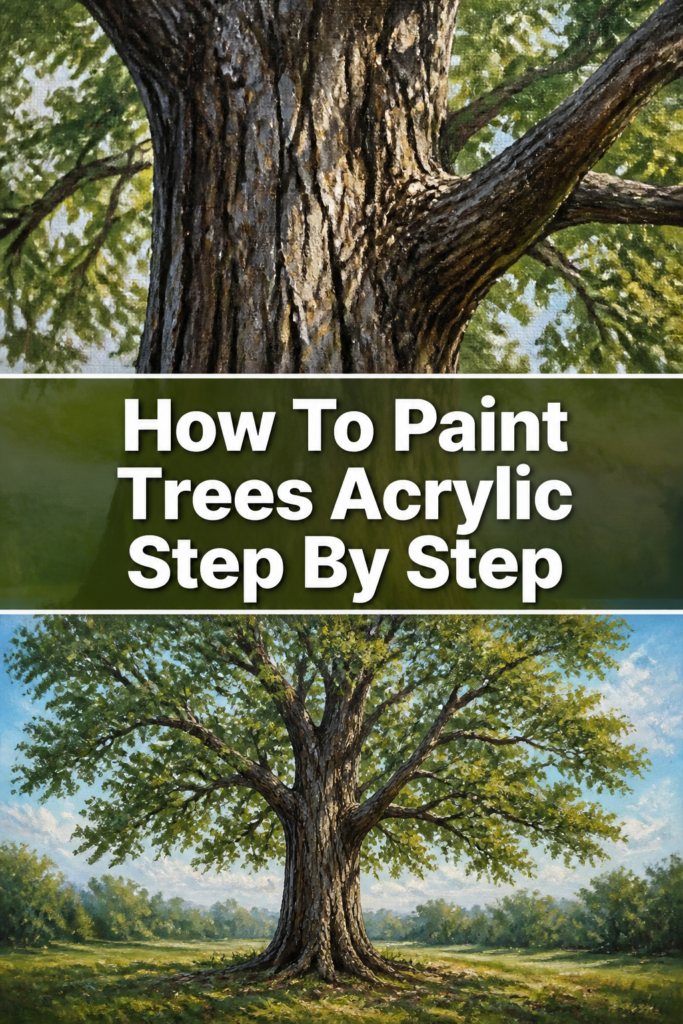
🌳 How To Paint Trees Acrylic Step By Step

& Painting
No rigid rules or pretension. Just practical guides, medium comparisons, and encouraging tips to help you enjoy the drawing & painting process.
I remember my first attempts at painting trees – they often looked more like lollipops than living foliage. Capturing their organic beauty with acrylics took practice and a few key techniques.
This guide distills years of painting experience into actionable steps. You will learn to create lifelike trees that add depth and character to your acrylic paintings.
Quick Overview
You are about to embark on a creative journey, learning to paint diverse, realistic trees using acrylic paints. This guide will walk you through foundational techniques, from basic structure to intricate leaf details. By the end, you will have the skills to bring natural beauty to your canvases.
- Time needed: 1-2 hours (per tree or small cluster)
- Difficulty: Beginner to Intermediate
- What you’ll need: Acrylic paints, various brushes, palette, water, canvas or paper
Step-by-Step Instructions
Step 1: Gather Your Tools and Prep Your Space
Before you begin, set up your painting area. Ensure you have good lighting and all your materials are within easy reach. This preparation helps maintain your creative flow.

You will need a selection of acrylic paints. Focus on earthy tones like browns, greens, yellows, and a touch of blue and white. A clean palette is also essential.
Organize your brushes. A flat brush, a round brush, and a fan brush are excellent starting points for trees. Keep two containers of water ready: one for rinsing dirty brushes and another for clean water.
Pro Tip: Lay down some newspaper or a drop cloth. Acrylics can dry quickly and permanently stain surfaces. Protecting your workspace prevents frustration later.
Step 2: Plan Your Tree’s Anatomy
Every tree begins with a vision. Before touching paint to canvas, take a moment to consider the type of tree you want to paint. Think about its overall shape, height, and how its branches might spread.
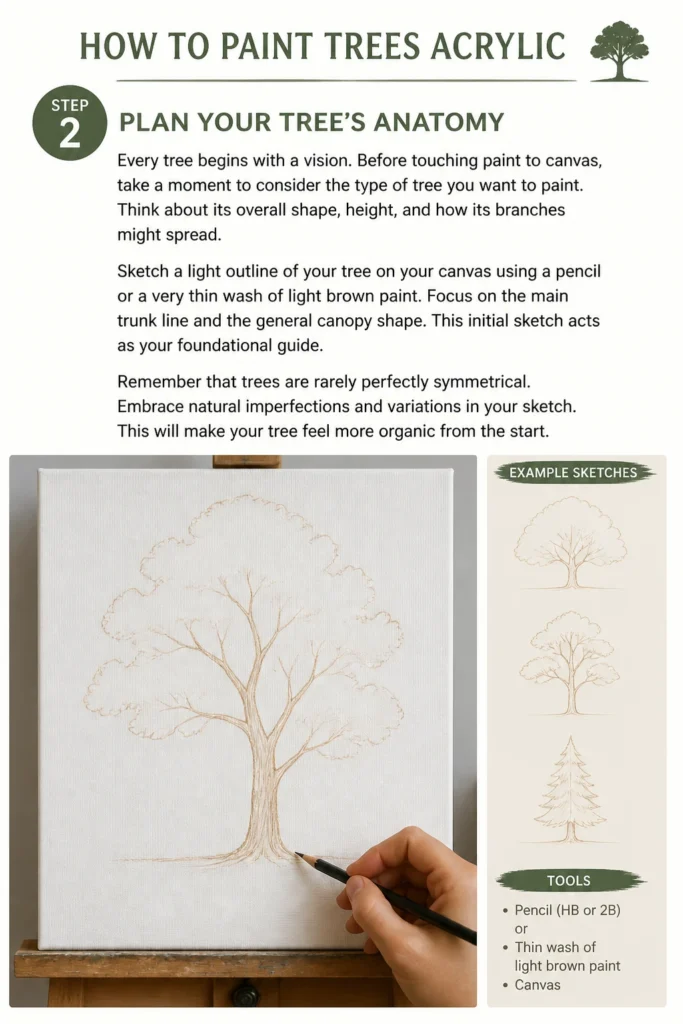
Sketch a light outline of your tree on your canvas using a pencil or a very thin wash of light brown paint. Focus on the main trunk line and the general canopy shape. This initial sketch acts as your foundational guide.
Remember that trees are rarely perfectly symmetrical. Embrace natural imperfections and variations in your sketch. This will make your tree feel more organic from the start.
Step 3: Lay Down the Trunk and Branches
Now it’s time to build the tree’s skeleton. Mix a dark brown or a mix of burnt umber and a touch of black for your trunk and main branches. Use a flat or round brush for this step.
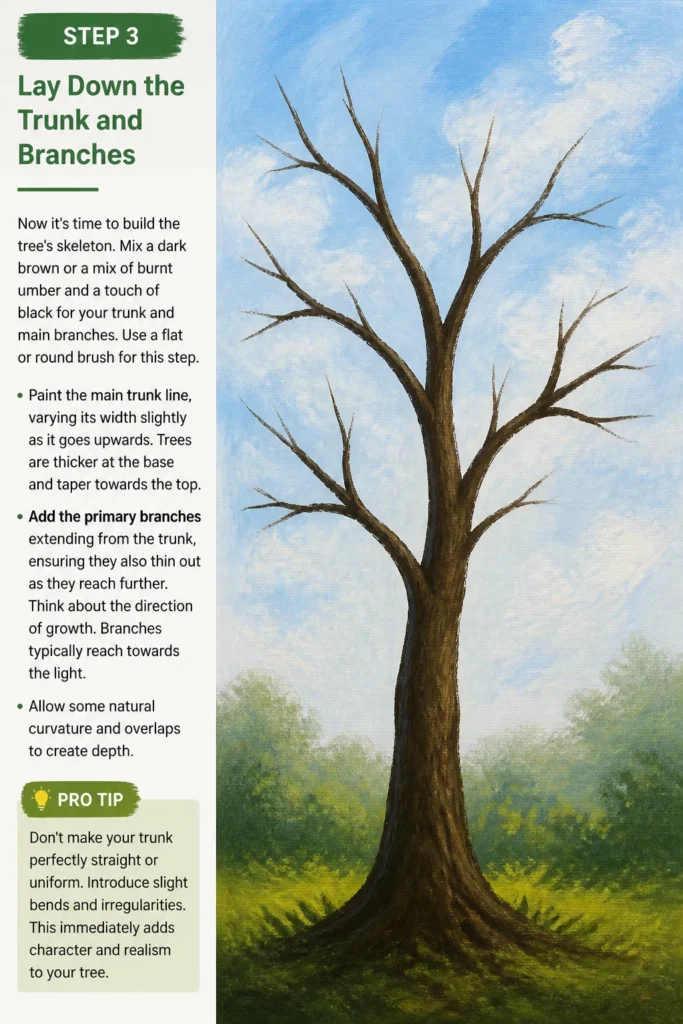
Paint the main trunk line, varying its width slightly as it goes upwards. Trees are thicker at the base and taper towards the top. Add the primary branches extending from the trunk, ensuring they also thin out as they reach further.
Think about the direction of growth. Branches typically reach towards the light. Allow some natural curvature and overlaps to create depth.
Pro Tip: Don’t make your trunk perfectly straight or uniform. Introduce slight bends and irregularities. This immediately adds character and realism to your tree.
Step 4: Build the Foliage Base
This step establishes the darkest shadows within your tree’s leafy canopy. Mix a dark green using sap green, a touch of burnt umber, or even a hint of blue. This will be your deep shadow color.
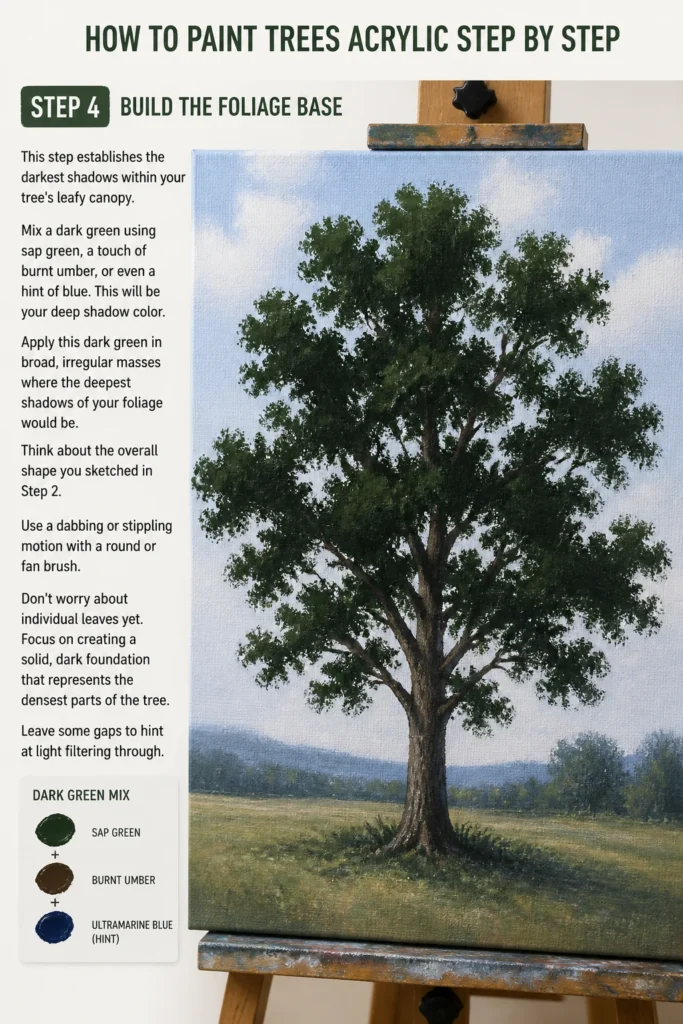
Apply this dark green in broad, irregular masses where the deepest shadows of your foliage would be. Think about the overall shape you sketched in Step 2. Use a dabbing or stippling motion with a round or fan brush.
Don’t worry about individual leaves yet. Focus on creating a solid, dark foundation that represents the densest parts of the tree. Leave some gaps to hint at light filtering through.
Step 5: Add Mid-Tones and Texture to Leaves
With the dark base in place, it’s time to introduce more varied greens and texture. Mix a mid-tone green by adding a bit of yellow or white to your base green. This will be your general foliage color.
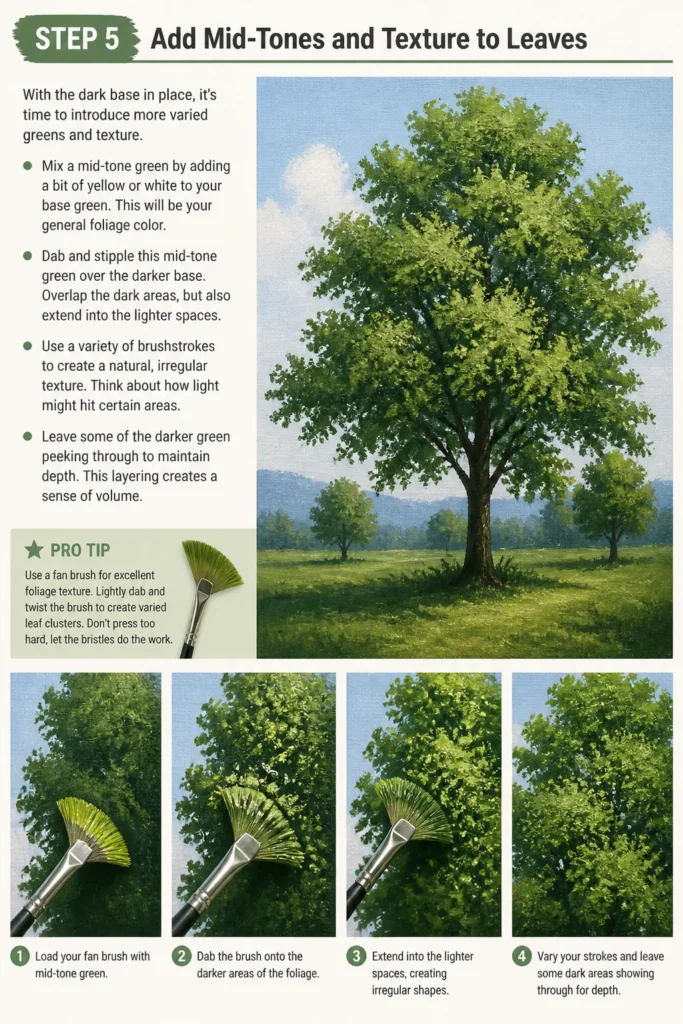
Dab and stipple this mid-tone green over the darker base. Overlap the dark areas, but also extend into the lighter spaces. Use a variety of brushstrokes to create a natural, irregular texture.
Think about how light might hit certain areas. Leave some of the darker green peeking through to maintain depth. This layering creates a sense of volume.
Pro Tip: Use a fan brush for excellent foliage texture. Lightly dab and twist the brush to create varied leaf clusters. Don’t press too hard; let the bristles do the work.
Step 6: Introduce Highlights and Light
This is where your tree truly comes to life. Mix a lighter green by adding more yellow or white to your mid-tone. This will represent the areas directly hit by sunlight.
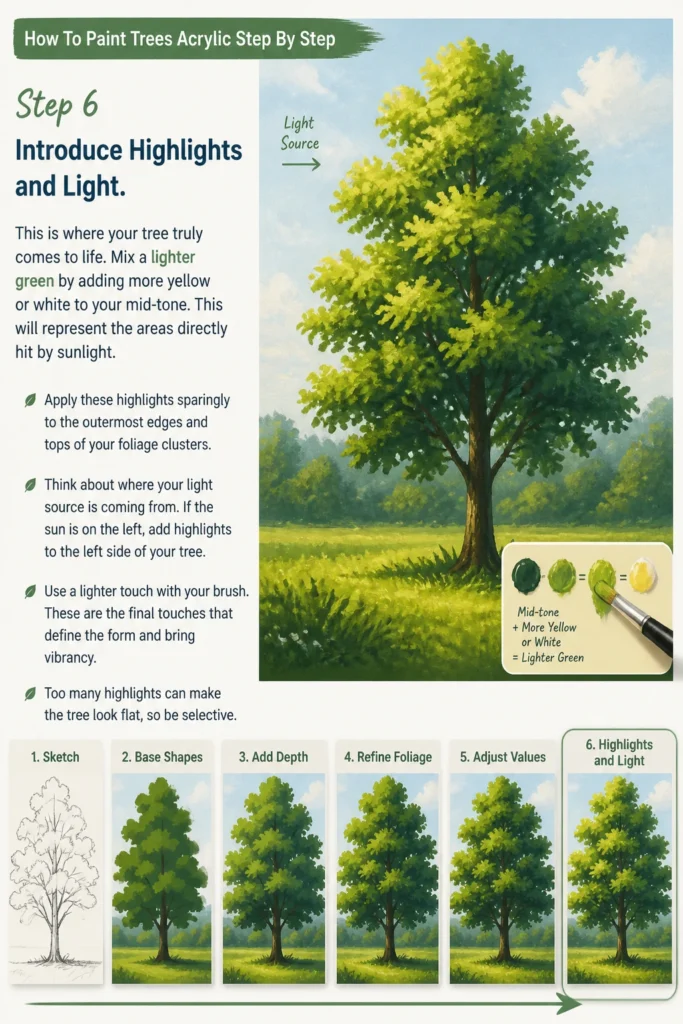
Apply these highlights sparingly to the outermost edges and tops of your foliage clusters. Think about where your light source is coming from. If the sun is on the left, add highlights to the left side of your tree.
Use a lighter touch with your brush. These are the final touches that define the form and bring vibrancy. Too many highlights can make the tree look flat, so be selective.
Step 7: Refine Details and Add Character
Your tree is almost complete, but small details make a big difference. Add small, thin branches that extend beyond the main canopy using a fine round brush and your dark brown mix. These peek through the foliage.
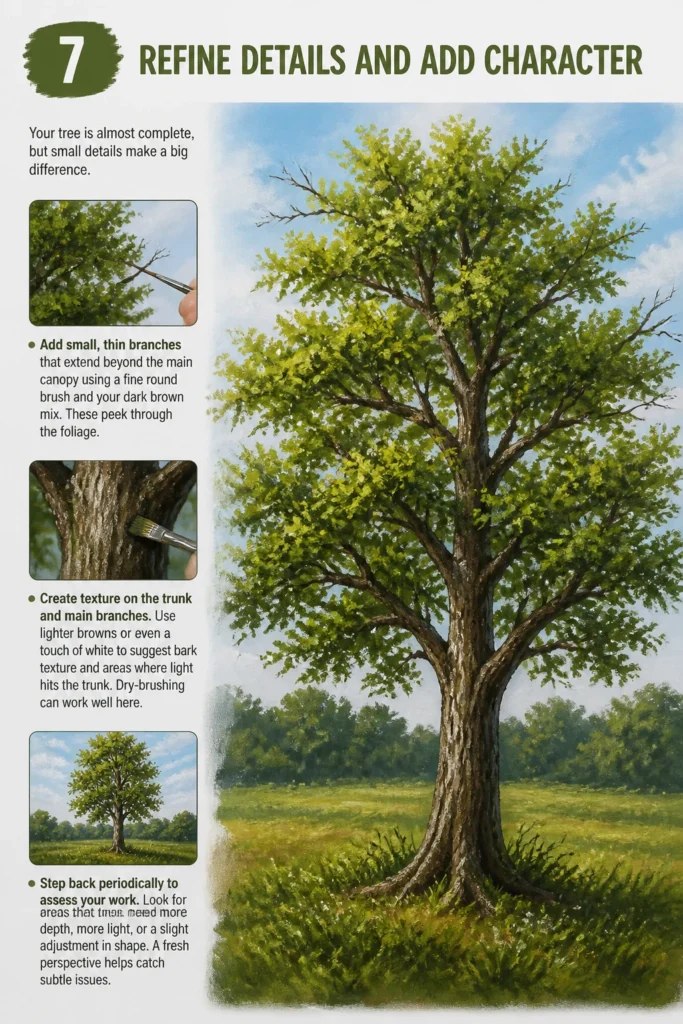
Create texture on the trunk and main branches. Use lighter browns or even a touch of white to suggest bark texture and areas where light hits the trunk. Dry-brushing can work well here.
Step back periodically to assess your work. Look for areas that need more depth, more light, or a slight adjustment in shape. A fresh perspective helps catch subtle issues.
Step 8: Consider the Environment
A tree rarely stands in isolation. Integrate your tree with its surroundings. Add a hint of ground beneath it using earthy tones and perhaps some shadows cast by the tree.
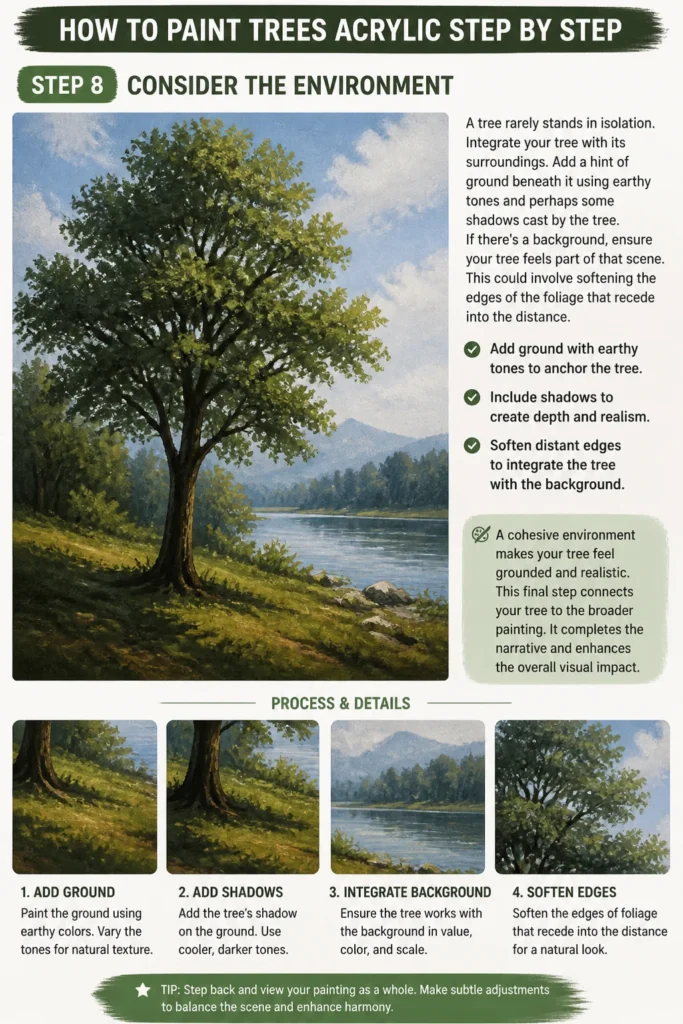
If there’s a background, ensure your tree feels part of that scene. This could involve softening the edges of the foliage that recede into the distance. A cohesive environment makes your tree feel grounded and realistic.
This final step connects your tree to the broader painting. It completes the narrative and enhances the overall visual impact.
Common Mistakes to Avoid
Flat, Unrealistic Shapes
Many beginners paint trees with overly uniform, symmetrical shapes, like perfect circles or ovals. This makes the tree look artificial and two-dimensional. Trees in nature are organic, with irregular outlines and varying densities.
To fix this, consciously break up your shapes. Use varied brushstrokes and allow for natural gaps and protrusions in your foliage. Observe real trees to see their diverse forms and replicate that asymmetry.
Overworking the Foliage
It’s easy to keep adding more and more paint to the foliage, trying to get every leaf just right. This often leads to muddy colors and a loss of freshness in your painting. Overworking can blend colors too much, losing the vibrant distinctions between light and shadow.
Learn to stop before you feel it’s “perfect.” Apply layers deliberately, letting each one contribute to the overall texture and form. Trust that the suggestion of leaves is often more effective than trying to paint every single one.
Ignoring Light Source
Failing to establish a consistent light source is a common pitfall. If highlights appear on all sides of the tree, or shadows are inconsistent, the tree loses its sense of form and reality. Light and shadow define three-dimensionality.
Before you start, decide where your light source is coming from. This will dictate where your highlights fall and where your deepest shadows lie. Maintain this consistency throughout your painting process.
Using Only One Shade of Green
A tree is never just one uniform green. Depending on light, shadow, and species, foliage displays a vast spectrum of greens, yellows, and even browns. Using only one green makes the tree look flat and uninteresting.
Mix a variety of greens. Incorporate warmer greens (with yellow) for sunlit areas and cooler greens (with blue or a touch of brown) for shadowed parts. Layering these different shades creates depth and visual interest.
Troubleshooting
My Tree Looks Flat
If your tree lacks depth and appears two-dimensional, it often means you haven’t used enough tonal variation. Flatness usually stems from a lack of strong darks and bright lights.
To fix this, go back and intensify your darkest shadows within the foliage and beneath the tree. Then, re-emphasize your brightest highlights on the areas facing the light source. This contrast will immediately create more dimension.
My Colors Are Muddy
Muddy colors occur when you overmix paints or apply wet paint over existing wet paint without allowing it to dry. This blends the distinct layers into an indistinct, dull hue.
To prevent this, clean your brushes frequently between color changes. Allow previous layers to dry completely before adding new ones, especially when transitioning between very different colors. Work in thin layers rather than thick, heavy applications.
The Leaves Look Too Uniform
If your foliage appears like a solid, undifferentiated mass or too symmetrical, you’ve likely used a consistent brushstroke and pressure. Real leaves and clusters are varied in shape and density.
Vary your brushstrokes. Use dabbing, stippling, and light sweeping motions. Experiment with different brushes (fan, round, even an old stiff brush for texture). Break up the outline of your foliage with irregular edges to create a more organic look.
Key Takeaways
- Layering different tones of green is crucial for creating depth and realism in your foliage.
- Observe real trees to understand their unique anatomy, from trunk texture to branch patterns.
- Establish a clear light source early on to guide your highlights and shadows consistently.
- Don’t be afraid to use a variety of brushstrokes and even different brushes to achieve natural texture.
- Practice is key; each tree you paint will teach you something new about form and color.
- Embrace imperfections; natural trees are rarely perfectly symmetrical or uniform.
Frequently Asked Questions
What kind of brushes are best for painting leaves?
A fan brush is excellent for creating a general foliage texture with a dabbing motion. Round brushes of various sizes are also versatile for dabbing leaf clusters and detailing. Sometimes an old, stiff brush can create unique, rugged textures.
How do I make my trees look more realistic?
Realism comes from observing nature closely. Pay attention to the structure of the trunk and branches, the way light hits the foliage, and the natural variations in color. Layering, tonal contrast, and varied textures contribute significantly to realism.
Can I use a palette knife for painting trees?
Absolutely! A palette knife can be fantastic for creating rough, textured bark on the trunk and branches. It can also be used to apply thick, impasto-style foliage, giving your leaves a chunky, three-dimensional quality.
How do I paint different types of trees?
Start by understanding the basic structure of the specific tree type. An oak tree has a different branch structure and foliage density than a willow or a pine. Adjust your initial sketch, the shape of your foliage clusters, and even your color palette to reflect the tree’s unique characteristics.
Our Top Recommended Finds
- Artist-Grade Acrylic Paint Set: Offers richer pigments and smoother application, making colors more vibrant and easier to blend.
- Variety Brush Set (including fan and fine detail brushes): Essential for tackling different aspects of tree painting, from broad foliage to delicate twigs.
- Stay-Wet Palette: Keeps your acrylic paints workable for longer, reducing waste and allowing for more extended painting sessions.
Embrace the Forest on Your Canvas
Painting trees with acrylics is a rewarding journey, transforming simple strokes into vibrant, living forms. Each tree you paint offers a chance to explore new textures, colors, and the interplay of light and shadow. You now have the foundational steps to begin creating your own arboreal masterpieces.
Don’t stop here. Experiment with different seasons, capturing the fiery reds of autumn or the stark beauty of winter branches. Explore diverse species, from towering oaks to delicate birches.
Grab your paints and start bringing the natural world to your canvas today. Your next artistic adventure awaits, rooted in the beauty of trees.
& Painting
No rigid rules or pretension. Just practical guides, medium comparisons, and encouraging tips to help you enjoy the drawing & painting process.