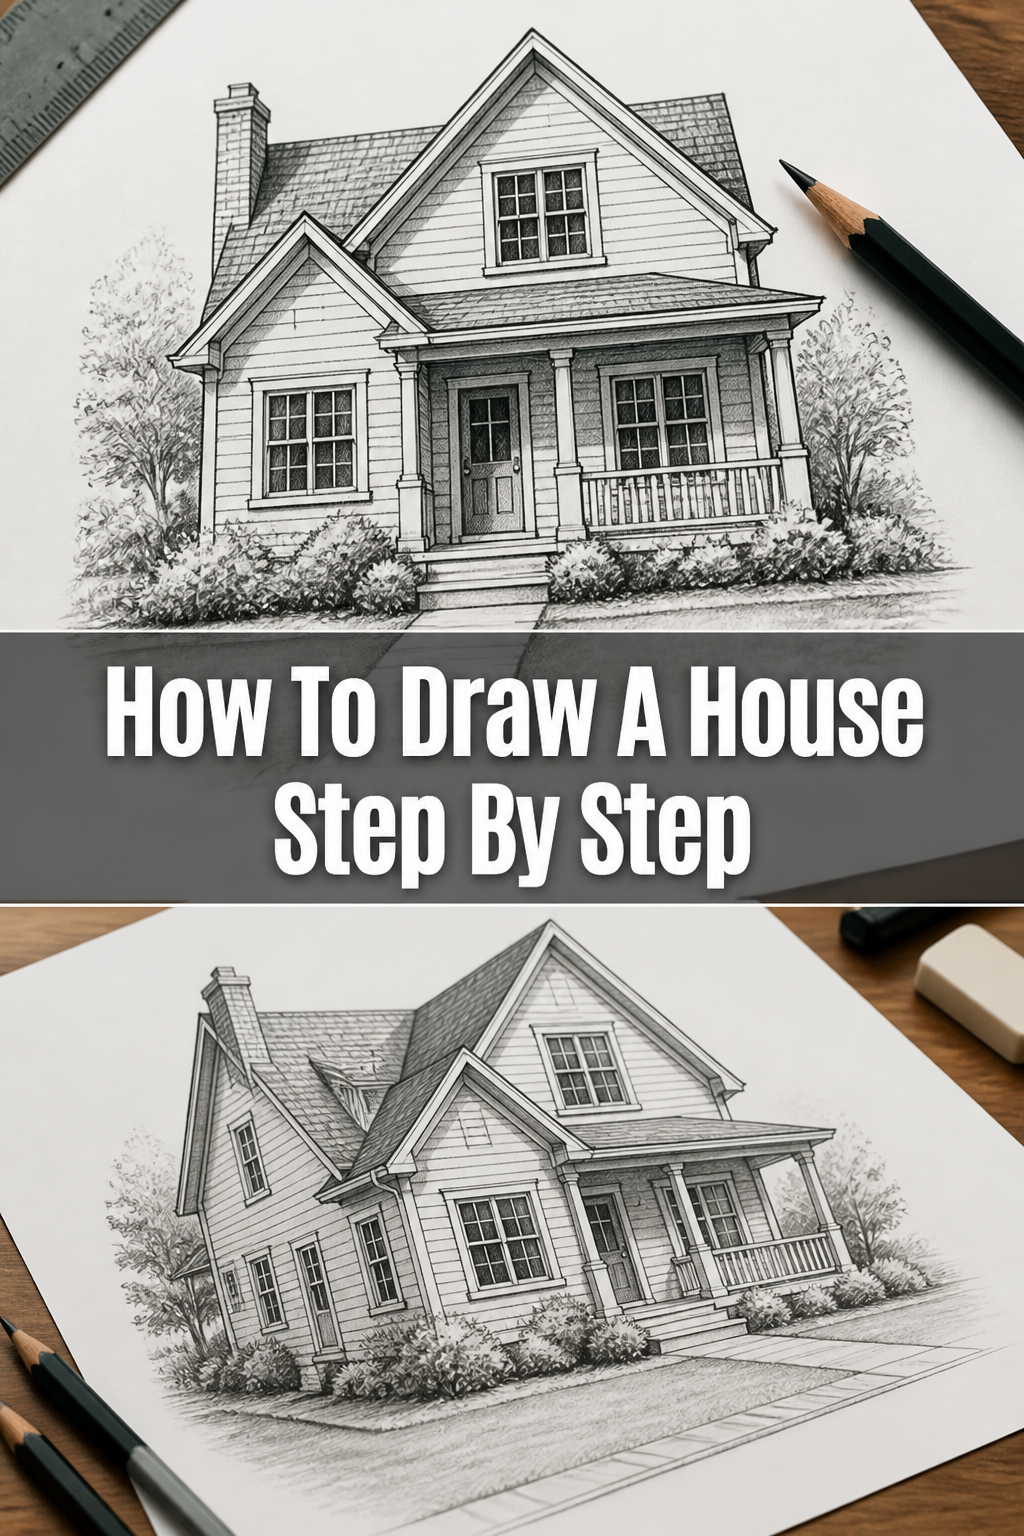
🏡 How To Draw A House Step By Step

& Painting
No rigid rules or pretension. Just practical guides, medium comparisons, and encouraging tips to help you enjoy the drawing & painting process.
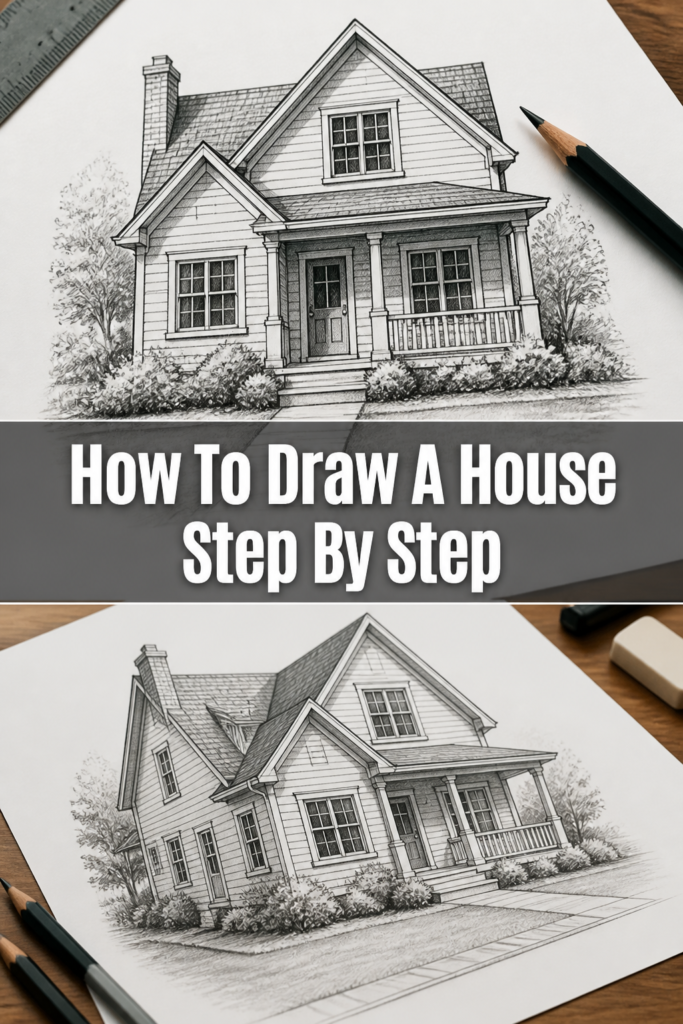
Quick Overview
This guide will walk you through creating a complete house drawing, from basic shapes to intricate details.
You’ll learn to build your drawing layer by layer, ensuring a solid foundation and a polished final look.
- Time needed: 30-60 minutes (depending on detail)
- Difficulty: Beginner
- What you’ll need: Pencil (HB or 2B), eraser, ruler (optional but helpful), paper
Step-by-Step Instructions
Step 1: Sketch the Basic Form
Begin by drawing a simple rectangle for the main body of the house. This shape will define the overall width and height of your structure.
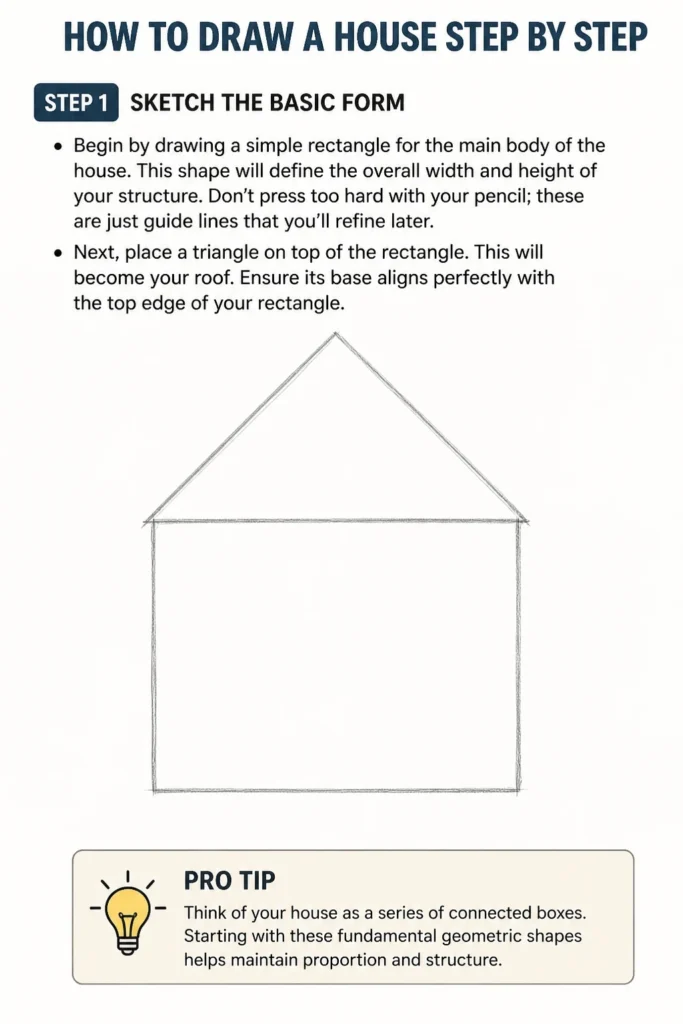
Don’t press too hard with your pencil; these are just guide lines that you’ll refine later.
Next, place a triangle on top of the rectangle. This will become your roof. Ensure its base aligns perfectly with the top edge of your rectangle.
Pro Tip: Think of your house as a series of connected boxes. Starting with these fundamental geometric shapes helps maintain proportion and structure.
Step 2: Define the Roofline
Now, let’s give that roof some dimension. Draw a parallel line inside the triangle, slightly offset from the top edges.
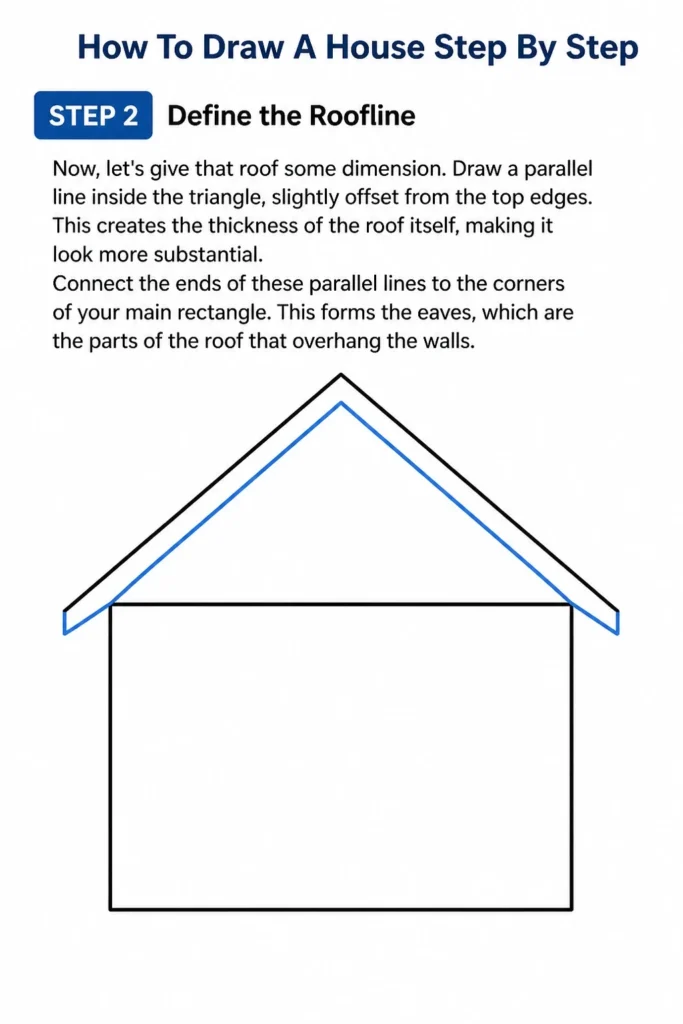
This creates the thickness of the roof itself, making it look more substantial.
Connect the ends of these parallel lines to the corners of your main rectangle. This forms the eaves, which are the parts of the roof that overhang the walls.
Step 3: Add Side Walls and Depth
To make your house look three-dimensional, we need to add a side wall. From one of the top corners of your main rectangle, draw a diagonal line extending slightly upwards and to the side.
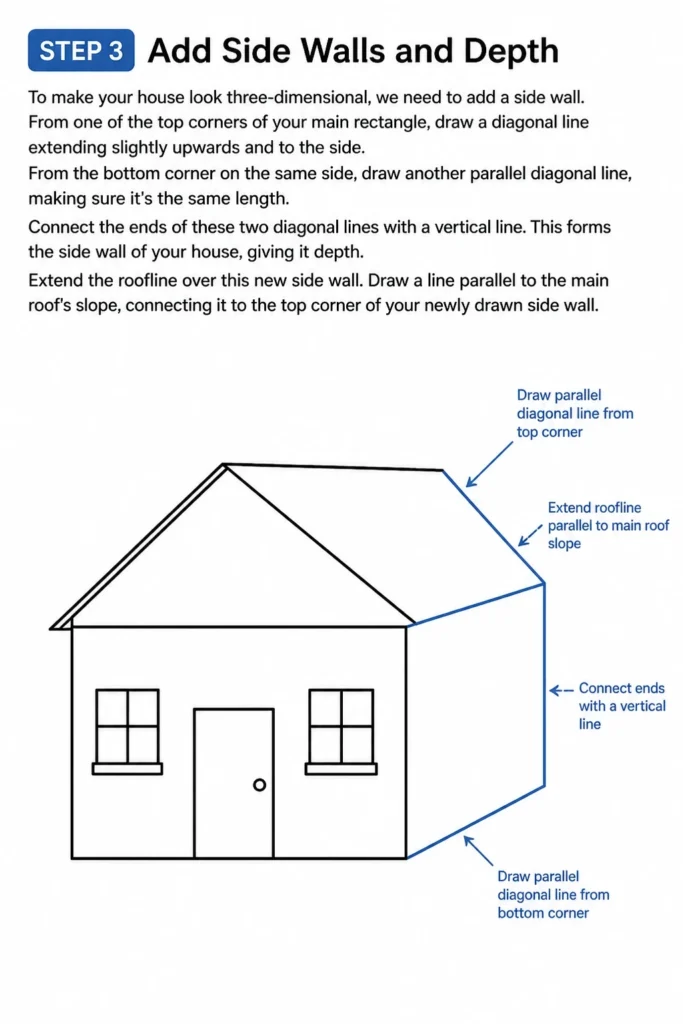
From the bottom corner on the same side, draw another parallel diagonal line, making sure it’s the same length.
Connect the ends of these two diagonal lines with a vertical line. This forms the side wall of your house, giving it depth.
Extend the roofline over this new side wall. Draw a line parallel to the main roof’s slope, connecting it to the top corner of your newly drawn side wall.
Step 4: Place Doors and Windows
Decide where your main door will be. Draw a rectangle for the door on the front of the house, keeping its proportions realistic to the overall size of the building.
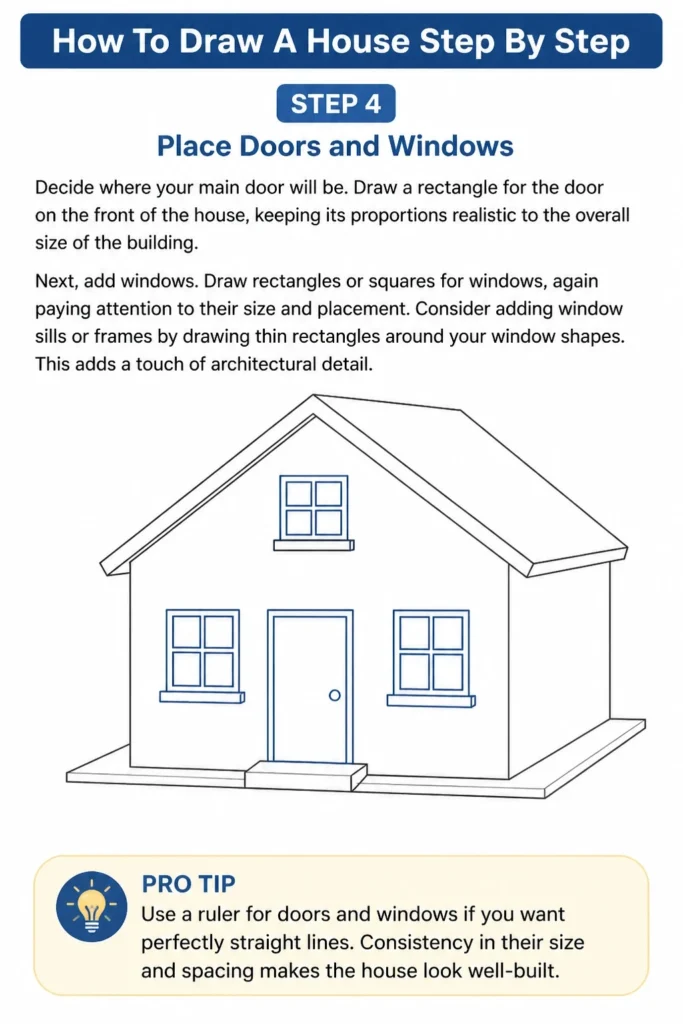
Next, add windows. Draw rectangles or squares for windows, again paying attention to their size and placement.
Consider adding window sills or frames by drawing thin rectangles around your window shapes. This adds a touch of architectural detail.
Pro Tip: Use a ruler for doors and windows if you want perfectly straight lines. Consistency in their size and spacing makes the house look well-built.
Step 5: Incorporate Architectural Details
This is where your house starts to gain character. Add a chimney by drawing a small rectangle on the roof, extending slightly above the peak.
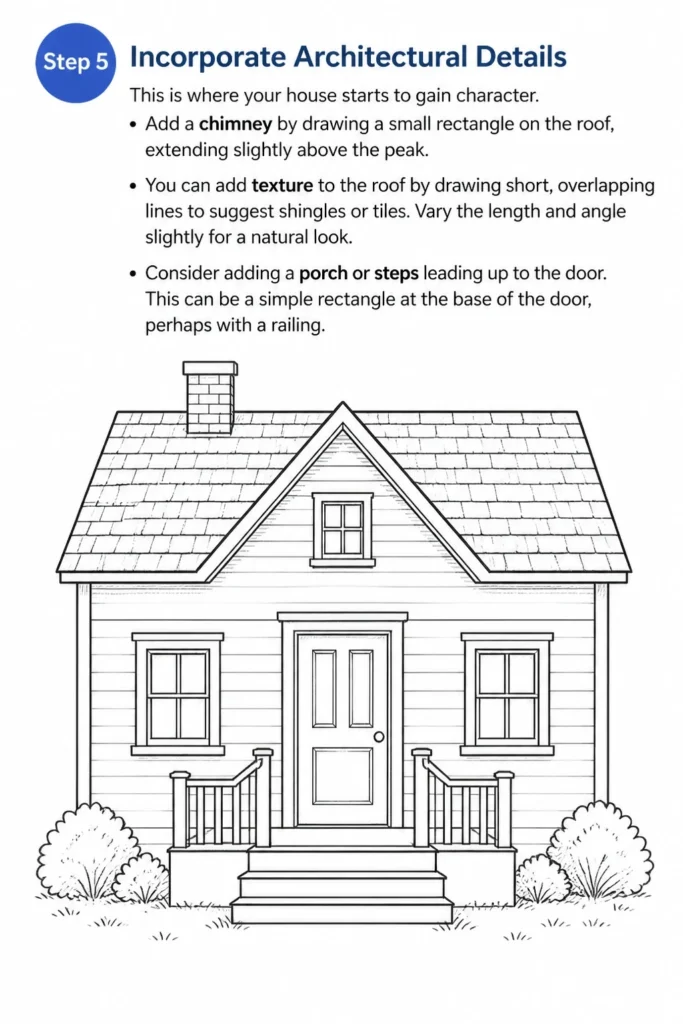
You can add texture to the roof by drawing short, overlapping lines to suggest shingles or tiles. Vary the length and angle slightly for a natural look.
Consider adding a porch or steps leading up to the door. This can be a simple rectangle at the base of the door, perhaps with a railing.
Step 6: Refine Lines and Erase Guides
Once all your main elements are in place, it’s time to clean up your drawing. Gently erase any unnecessary guide lines from your initial sketches.
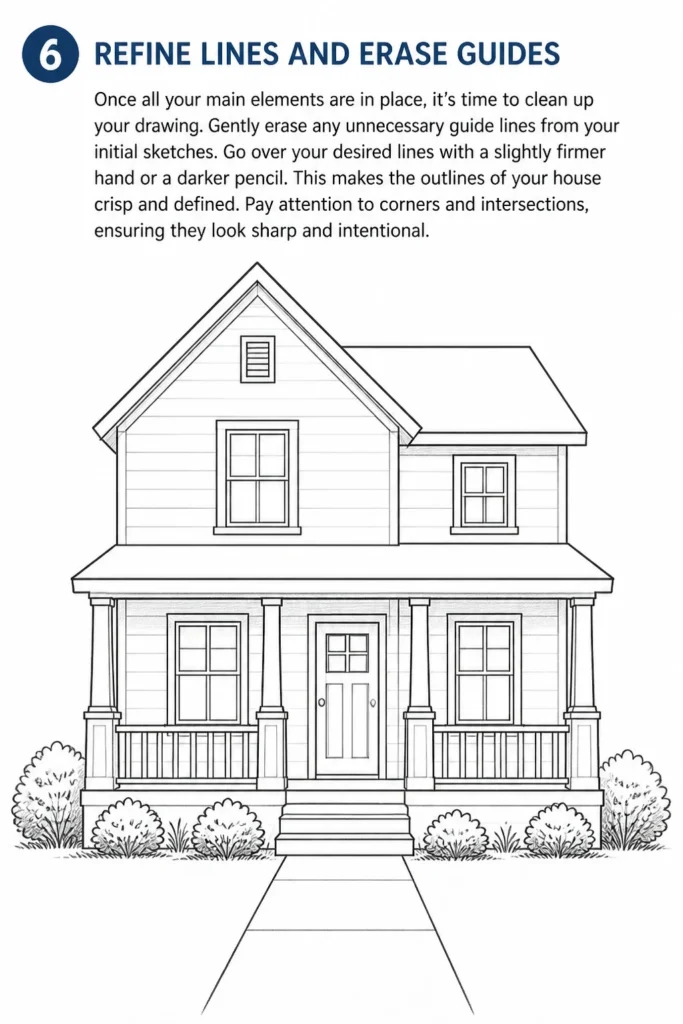
Go over your desired lines with a slightly firmer hand or a darker pencil. This makes the outlines of your house crisp and defined.
Pay attention to corners and intersections, ensuring they look sharp and intentional.
Step 7: Add Landscaping and Background Elements
A house rarely sits in a vacuum. Draw a simple ground line beneath your house to anchor it to the page.
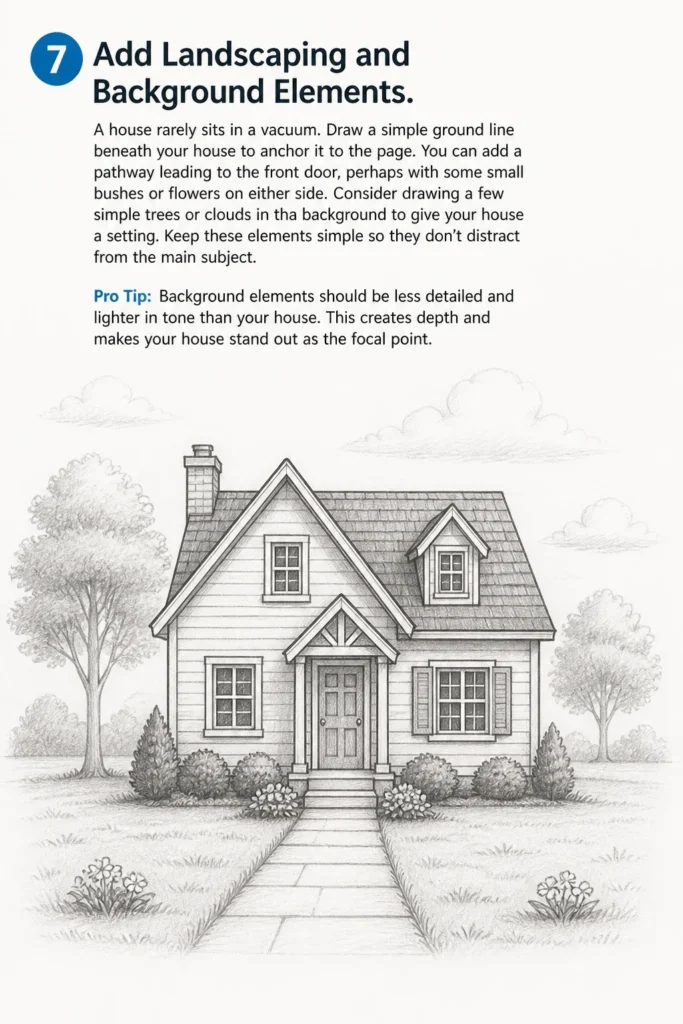
You can add a pathway leading to the front door, perhaps with some small bushes or flowers on either side.
Consider drawing a few simple trees or clouds in the background to give your house a setting. Keep these elements simple so they don’t distract from the main subject.
Pro Tip: Background elements should be less detailed and lighter in tone than your house. This creates depth and makes your house stand out as the focal point.
Step 8: Introduce Shading and Texture (Optional)
To give your drawing more life, add some basic shading. Decide where your light source is coming from.
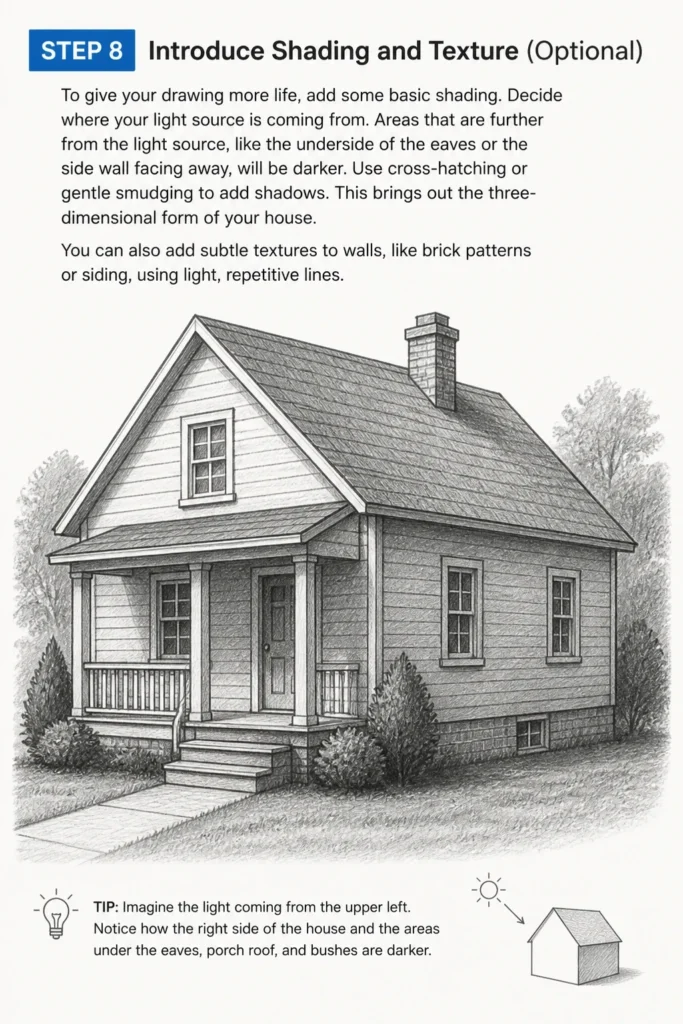
Areas that are further from the light source, like the underside of the eaves or the side wall facing away, will be darker.
Use cross-hatching or gentle smudging to add shadows. This brings out the three-dimensional form of your house.
You can also add subtle textures to walls, like brick patterns or siding, using light, repetitive lines.
Common Mistakes to Avoid
Ignoring Basic Proportions
One common pitfall is making elements of the house disproportionate to each other. A door that’s too tall or windows that are too small can make the house look unnatural.
Always compare the size of each new element you draw to the existing parts of your house. Step back and look at the overall balance frequently.
Using your initial guide shapes helps immensely in keeping everything scaled correctly. Think about how a real house is built.
Sketching Too Darkly at the Start
Beginning your drawing with heavy, dark lines is a mistake many beginners make. These lines are difficult to erase completely, leaving ghost marks on your paper.
Always start with very light, feathery strokes for your initial shapes and guidelines. This allows you to make adjustments and corrections easily without damaging your paper.
You can always darken your lines once you are confident in your placement and form.
Neglecting Overlapping Elements
A house is not a flat cutout; it has depth. Forgetting to show how elements overlap, such as the roof overhanging the walls or a porch in front of the door, flattens your drawing.
Pay attention to which parts of the house are closer to the viewer. These elements will partially obscure the parts behind them.
This layering is crucial for creating a sense of three-dimensionality and realism in your drawing.
Rushing the Details
It’s tempting to jump straight into drawing intricate window panes or brick patterns. However, adding details too early can lead to frustration if the underlying structure isn’t solid.
Build your drawing from general to specific. Establish the main forms, then add the larger features like doors and windows, and only then move to smaller details like textures or decorations.
This systematic approach ensures your details enhance a well-constructed drawing, rather than trying to fix a poor foundation.
Troubleshooting
My Lines Aren’t Straight
If your lines look wobbly or uneven, it’s a common issue. Often, this happens when you draw very slowly or try to draw long lines in short, jerky segments.
Try to draw lines with a single, confident stroke. Practice drawing straight lines on scrap paper from different angles without a ruler.
For architectural drawings like houses, don’t be afraid to use a ruler for key structural lines. It’s a tool, not a cheat, especially when learning.
My House Looks Flat, Not 3D
A flat-looking house usually means you’re missing perspective or not fully showing depth. Ensure you’ve added the side wall and roof overhangs.
Also, check that your parallel lines for the side wall are truly parallel, and that your rooflines extend over the side appropriately.
Subtle shading can also dramatically enhance the perception of depth. Think about where shadows would naturally fall on your house.
I Can’t Get the Proportions Right
If your house elements seem out of scale, it’s often because you’re not using light enough initial sketches or not stepping back to evaluate.
Start with very faint lines for all your major shapes. Before committing, compare the height of the door to the wall, or the width of a window to the overall house.
You can also use a “measuring” technique with your pencil: hold your pencil out, close one eye, and use your thumb to mark the relative height or width of one element. Then, compare that “measurement” to another part of your drawing.
Key Takeaways
- Always start with light, basic geometric shapes to establish the foundation of your house.
- Build your drawing in layers, moving from large forms to smaller, intricate details.
- Pay close attention to proportions and how different elements relate to each other in size.
- Don’t be afraid to use tools like a ruler for straight lines, especially when starting out.
- Clean up your guide lines with an eraser once your main structure is solid.
- Practice regularly; consistency is key to improving your drawing skills over time.
Frequently Asked Questions
How can I make my house drawing look more realistic?
Realism comes from paying attention to details and perspective. Add subtle textures like brick, siding, or roof tiles. Incorporate shadows to define form and depth, considering a consistent light source. Adding realistic landscaping and background elements also helps ground the house in its environment.
Should I use a ruler for drawing a house?
Absolutely, especially when you’re starting. A ruler helps you achieve perfectly straight lines for walls, windows, and doors, which are crucial for architectural drawings. As you gain confidence, you can gradually rely less on it, but it’s a valuable tool for precision.
How do I draw different styles of houses?
Once you master the basic structure, adapting to different styles is about modifying key features. For a cottage, think steeper roofs and smaller windows. For a modern house, focus on clean lines, flat roofs, and large windows. Research images of different architectural styles for inspiration and adapt their defining characteristics.
What if my drawing still looks flat?
A common reason for a flat appearance is a lack of depth perception. Ensure you are drawing both the front and at least one side of the house to show its three-dimensional form. Adding shadows and highlights, along with elements that overlap, will significantly enhance the sense of depth in your drawing.
Our Top Recommended Finds
- Sketchbook with quality paper: A good sketchbook prevents bleed-through and withstands erasing, making your drawing experience smoother.
- Set of drawing pencils (HB, 2B, 4B): Different lead hardness allows for varied line weight and shading, adding professional quality to your work.
- Kneaded eraser: This type of eraser is excellent for lifting graphite gently without smudging or damaging your paper.
Your Next Creative Project Awaits
You’ve just created a fantastic house drawing, a testament to your growing artistic skills.
This foundation opens up a world of possibilities for what you can draw next.
Why not try adding a garden, a fence, or even an entire neighborhood scene?
Keep practicing, keep experimenting, and most importantly, keep enjoying the creative journey today!
& Painting
No rigid rules or pretension. Just practical guides, medium comparisons, and encouraging tips to help you enjoy the drawing & painting process.