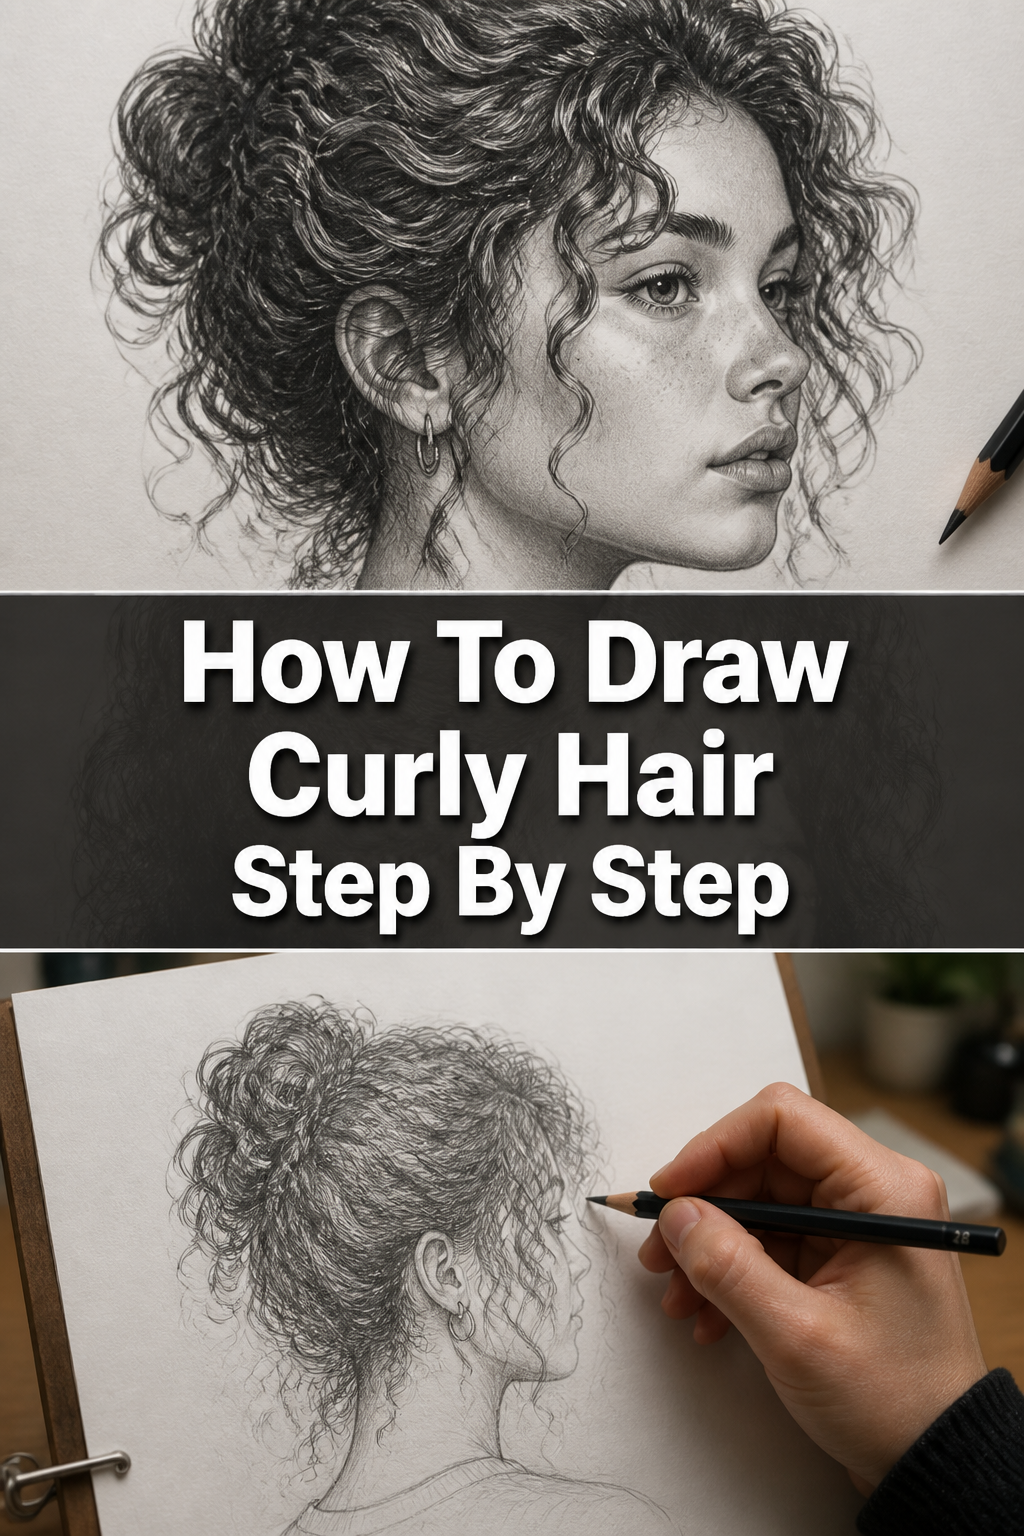
👩🏻🎨 How To Draw Curly Hair Step By Step

& Painting
No rigid rules or pretension. Just practical guides, medium comparisons, and encouraging tips to help you enjoy the drawing & painting process.
Drawing curly hair can often feel like a complex puzzle, full of twists and turns that are hard to capture.
I remember spending countless hours frustrated, trying to get that perfect bounce and natural flow.
This guide distills years of practice and observation into clear, manageable steps, helping you bring vibrant, realistic curls to life on your page.
Quick Overview
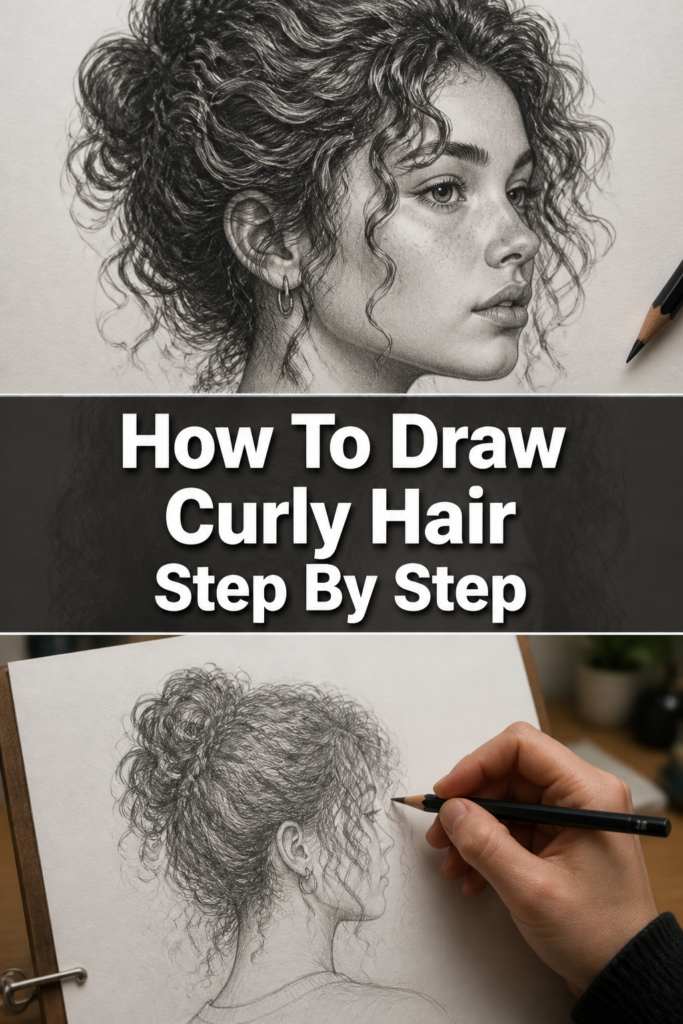
In this guide, you will learn the fundamental techniques to effectively draw various types of curly hair, building from basic shapes to intricate details.
You’ll gain confidence in rendering volume, texture, and movement that truly makes your drawings pop.
- Time needed: 1-2 hours for a complete drawing, less for practice sketches.
- Difficulty: Intermediate (Beginners can follow along, but some prior drawing experience is helpful).
- What you’ll need: Sketchbook or paper, pencils (HB, 2B, 4B, 6B recommended), eraser (kneaded and regular), blending stump or tissue.
Step-by-Step Instructions
Step 1: Understand the Hairline and Skull Shape
Begin by lightly sketching the basic shape of the head and face, if you haven’t already. This foundational structure is crucial for placing the hair correctly.
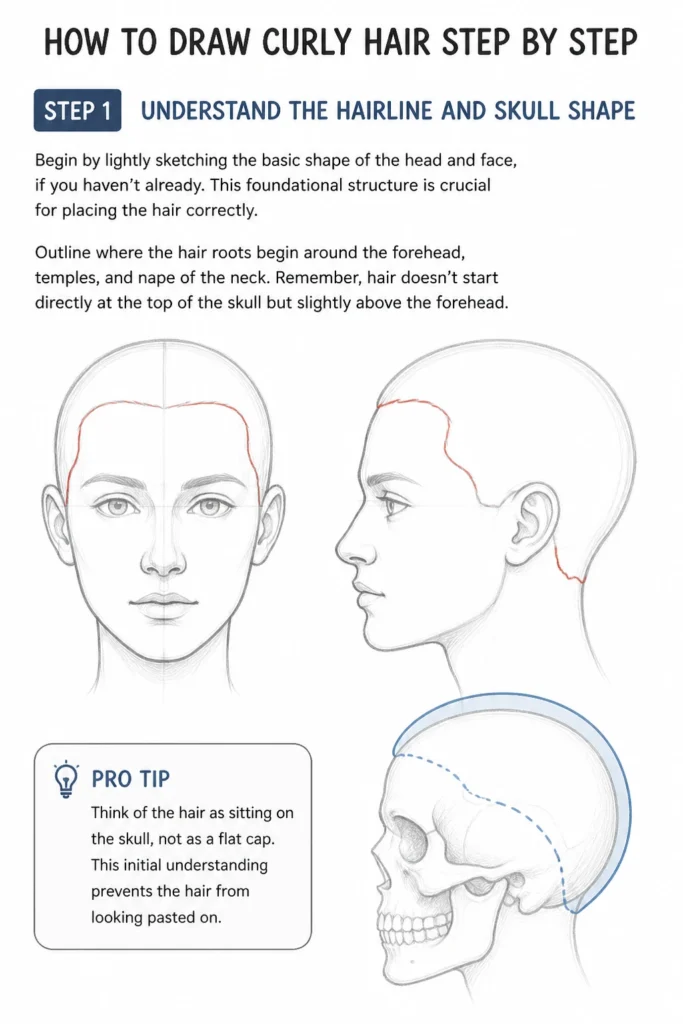
Outline where the hair roots begin around the forehead, temples, and nape of the neck. Remember, hair doesn’t start directly at the top of the skull but slightly above the forehead.
Pro Tip: Think of the hair as sitting on the skull, not as a flat cap. This initial understanding prevents the hair from looking pasted on.
Step 2: Establish the Overall Volume and Flow
Now, draw the general mass and silhouette of the curly hair. Don’t focus on individual curls yet.
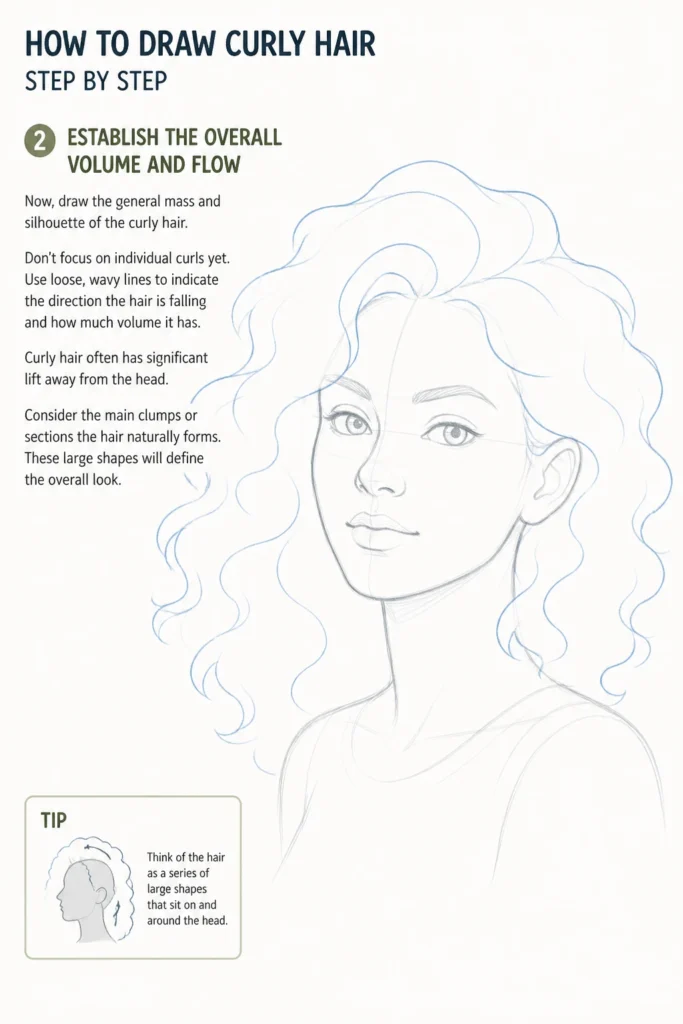
Use loose, wavy lines to indicate the direction the hair is falling and how much volume it has. Curly hair often has significant lift away from the head.
Consider the main “clumps” or sections the hair naturally forms. These large shapes will define the overall look.
Step 3: Block in the Major Curl Groups
Once you have the overall volume, start blocking in the larger, distinct groups of curls. Think of these as bigger, S-shaped or C-shaped forms.
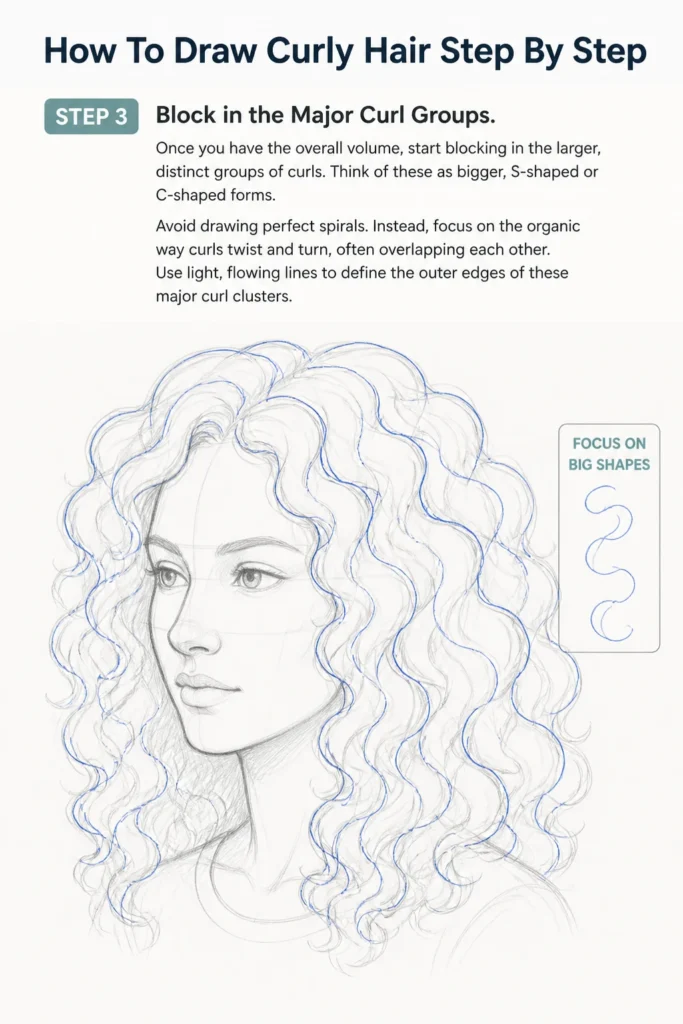
Avoid drawing perfect spirals. Instead, focus on the organic way curls twist and turn, often overlapping each other.
Use light, flowing lines to define the outer edges of these major curl clusters.
Step 4: Define Individual Curl Strands
Within those major groups, begin to define individual curl strands. This is where the characteristic “spring” of curly hair comes in.
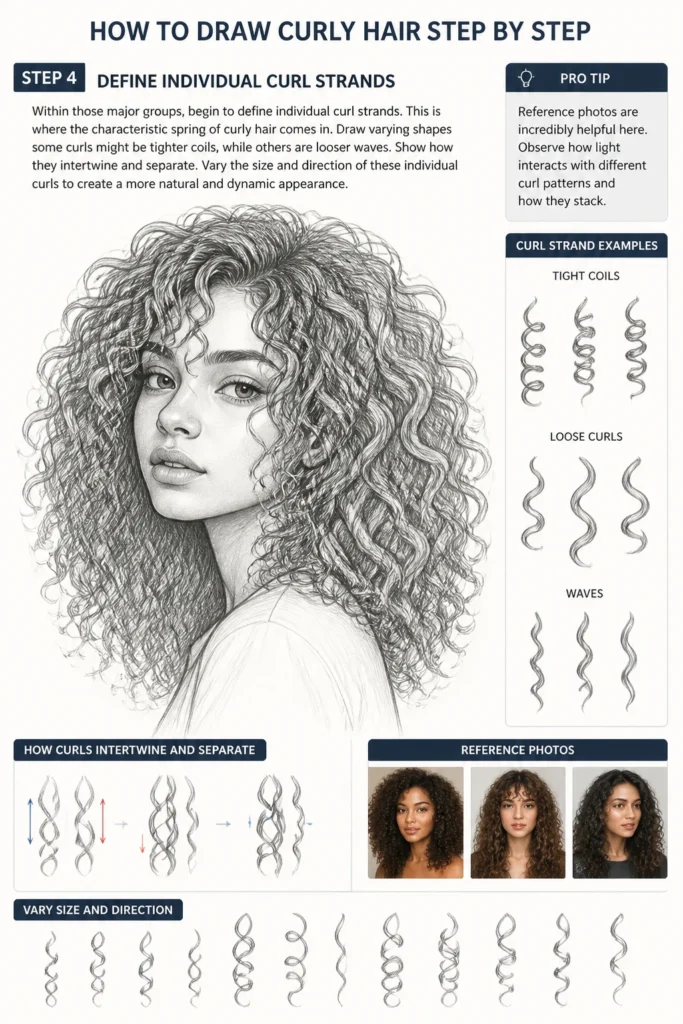
Draw varying shapes: some curls might be tighter coils, while others are looser waves. Show how they intertwine and separate.
Vary the size and direction of these individual curls to create a more natural and dynamic appearance.
Pro Tip: Reference photos are incredibly helpful here. Observe how light interacts with different curl patterns and how they stack.
Step 5: Add Depth with Shading and Overlap
Introduce shading to give your curls depth and dimension. Identify the light source and shade the areas that would be in shadow.
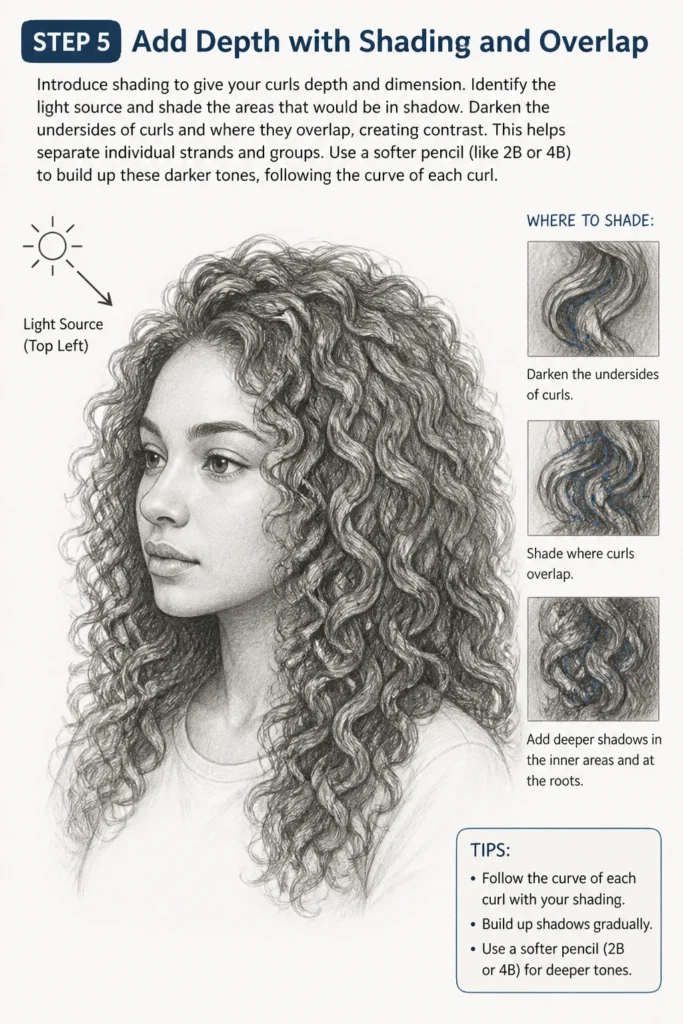
Darken the undersides of curls and where they overlap, creating contrast. This helps separate individual strands and groups.
Use a softer pencil (like 2B or 4B) to build up these darker tones, following the curve of each curl.
Step 6: Introduce Texture and Highlights
Work on adding texture to the curls. Use short, curved strokes that follow the direction of the hair to suggest individual strands within the larger forms.
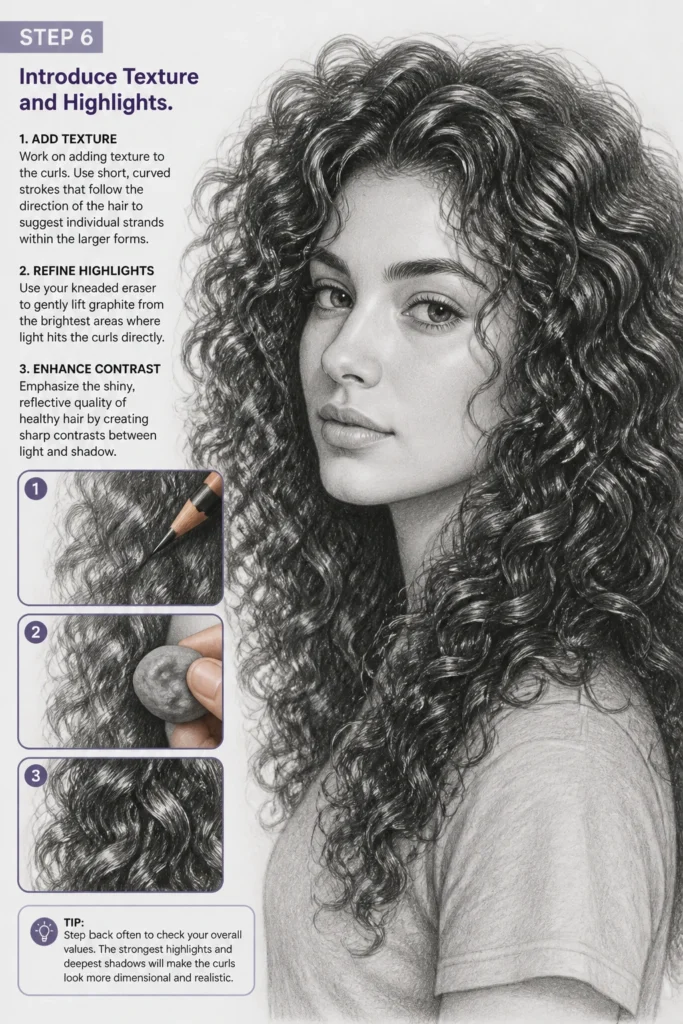
Refine the highlights. Use your kneaded eraser to gently lift graphite from the brightest areas where light hits the curls directly.
Emphasize the shiny, reflective quality of healthy hair by creating sharp contrasts between light and shadow.
Step 7: Refine and Detail
Review your entire drawing. Are there any areas that need more definition or softer transitions?
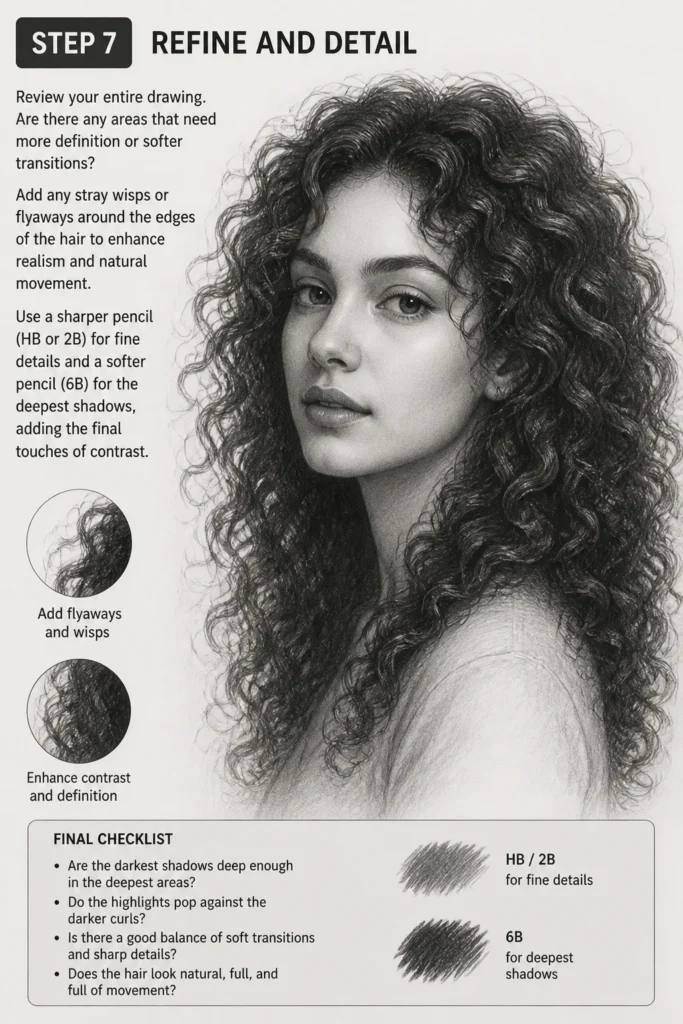
Add any stray wisps or flyaways around the edges of the hair to enhance realism and natural movement.
Use a sharper pencil (HB or 2B) for fine details and a softer pencil (6B) for the deepest shadows, adding the final touches of contrast.
Common Mistakes to Avoid
Drawing Each Strand Individually
Many artists try to draw every single hair, which quickly leads to a stiff, overwhelming, and unrealistic result. Curly hair is about masses and groups, not individual strands.
Instead, focus on depicting the larger curl formations and only suggest individual strands through careful shading and texture work within those groups.
Making Curls Too Uniform
If all your curls are the same size, shape, and direction, the hair will look artificial and stiff. Natural curly hair is wonderfully chaotic and diverse.
Vary the tightness, length, and direction of your curls. Introduce some looser waves alongside tighter coils to create a more organic and dynamic appearance.
Ignoring the Hair’s Volume
Curly hair naturally has a lot of volume and often stands away from the head. Forgetting this can make the hair look flat and lifeless.
Always start by establishing the overall silhouette and volume, drawing the hair as a distinct mass that sits around the head, not directly on it.
Over-Shading or Under-Shading
Lack of proper shading can make curly hair look flat, while too much dark shading without highlights can make it appear heavy and undefined. It’s a delicate balance.
Pay close attention to your light source. Use a range of pencil hardnesses to create deep shadows and bright highlights, emphasizing the three-dimensional form of each curl.
Troubleshooting
My Curls Look Flat and Lifeless
This often happens when there isn’t enough contrast or variety in your curl shapes. Flatness can also occur if you haven’t established sufficient volume around the head.
Go back to Step 2 and Step 5. Ensure you’ve created a clear silhouette with volume. Then, use a wider range of values in your shading, pushing the darks darker and enhancing the highlights with your eraser to create more depth.
The Hair Looks Stiff and Unnatural
Stiffness usually comes from drawing curls that are too symmetrical, uniform, or individually outlined without considering their flow. It can also be a result of ignoring the natural overlap.
Review Step 3 and Step 4. Focus on drawing organic, varied shapes for your curl groups and individual strands. Allow curls to overlap freely and show their natural movement, rather than drawing them as separate, distinct objects.
I Can’t Get the Texture Right
Achieving realistic texture requires a combination of suggestive lines and careful blending, not drawing every single hair. If your texture looks too messy or too smooth, you might be overdoing or underdoing the detail.
For texture, use short, curved strokes that follow the direction of the curl, especially on the outer edges and within the highlighted areas. Blend shadows smoothly, but leave some suggestive lines for the individual hair strands on the surface, as detailed in Step 6.
Key Takeaways
- Start with the Foundation: Always begin by understanding the skull shape and hairline before adding hair.
- Focus on Volume First: Establish the overall mass and silhouette of the hair before detailing individual curls.
- Group Your Curls: Think in terms of larger curl clusters and how they overlap, rather than drawing every single strand.
- Vary Curl Shapes: Introduce a mix of tight and loose curls, changing their direction and size for a natural look.
- Master Light and Shadow: Use a full range of values to create depth, dimension, and the illusion of texture.
- Refine with Details: Add highlights, flyaways, and subtle texture in the final stages to bring the drawing to life.
Frequently Asked Questions
How do I make the hair look shiny?
Achieving shine involves creating sharp contrasts between your darkest shadows and your brightest highlights. Use a very soft pencil (like 6B) for deep shadows and a kneaded eraser to lift graphite for crisp, clean highlights, especially on the top surfaces of the curls.
What’s the best way to draw different curl patterns?
The key is observation. Study reference photos of various curl patterns (wavy, loose, tight, coily). Notice how each pattern forms its unique S-shapes or spirals, and how they stack. Practice sketching these different basic forms before integrating them into a full drawing.
Should I use a blending stump for curly hair?
Yes, a blending stump or even a tissue can be very useful for creating smooth transitions in the shaded areas of the hair. This helps to soften the graphite and make the curls look more cohesive, especially in the deeper shadows and mid-tones, before adding finer texture details.
How do I show movement in curly hair?
Movement is conveyed through the overall flow and direction of your curl groups. Use dynamic, sweeping lines in your initial volume sketch. Show some curls escaping the main mass, and vary the angles at which they fall. Consider the wind or gravity’s effect on the hair.
Our Top Recommended Finds
- Staedtler Mars Lumograph Pencils: These pencils offer a fantastic range of hardness, from very light to very dark, essential for creating varied tones in hair.
- Faber-Castell Kneaded Eraser: Invaluable for lifting graphite precisely, creating soft transitions, and sharp highlights without damaging your paper.
- Canson XL Mix Media Pad: A versatile paper that handles various pencil pressures well, providing a good surface for both initial sketches and detailed rendering.
Embrace the Curl: Your Next Artistic Adventure
You now have the tools and knowledge to tackle the beautiful challenge of drawing curly hair. Don’t be afraid to experiment with different patterns and styles.
The true magic lies in practice and observation. Each curl you draw brings you closer to mastering this intricate art.
Pick up your pencil today and let your creativity flow, one beautiful curl at a time.
& Painting
No rigid rules or pretension. Just practical guides, medium comparisons, and encouraging tips to help you enjoy the drawing & painting process.