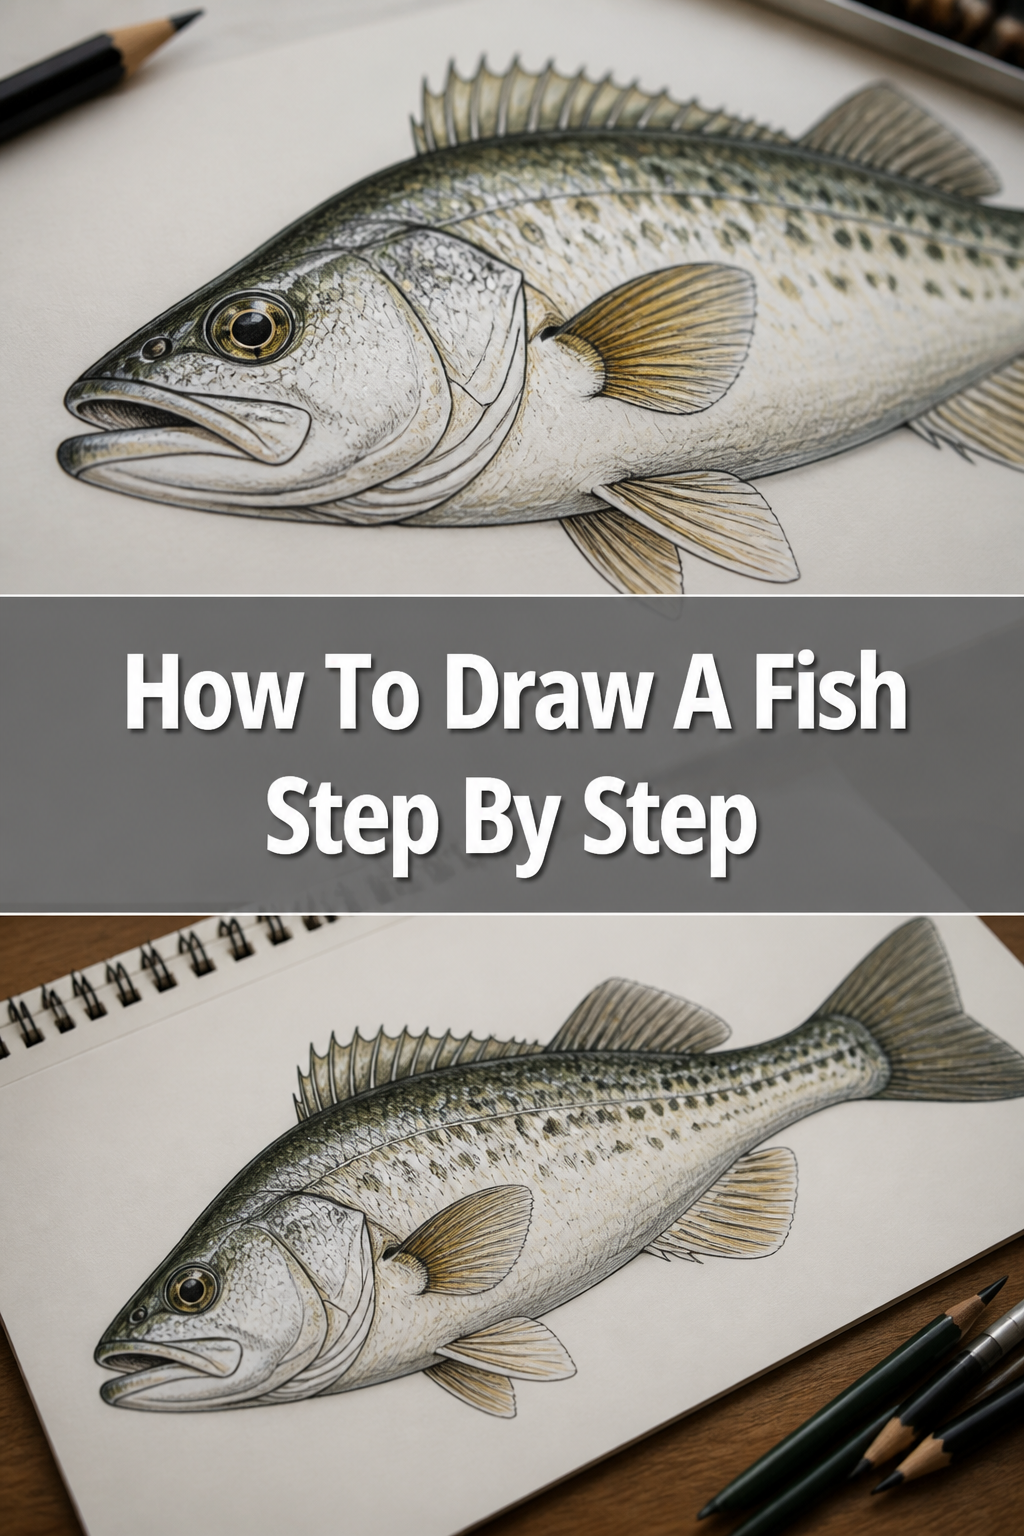
🐠 How To Draw A Fish Step By Step

& Painting
No rigid rules or pretension. Just practical guides, medium comparisons, and encouraging tips to help you enjoy the drawing & painting process.
Learning to draw can feel incredibly rewarding, especially when you bring a simple idea to life on paper. I remember the first time I sketched a fish that actually looked like one, and the pride it brought. This guide will help you experience that same joy, breaking down the process into easy, manageable steps.
You don’t need to be an expert artist; just a willingness to try is enough to get started here.
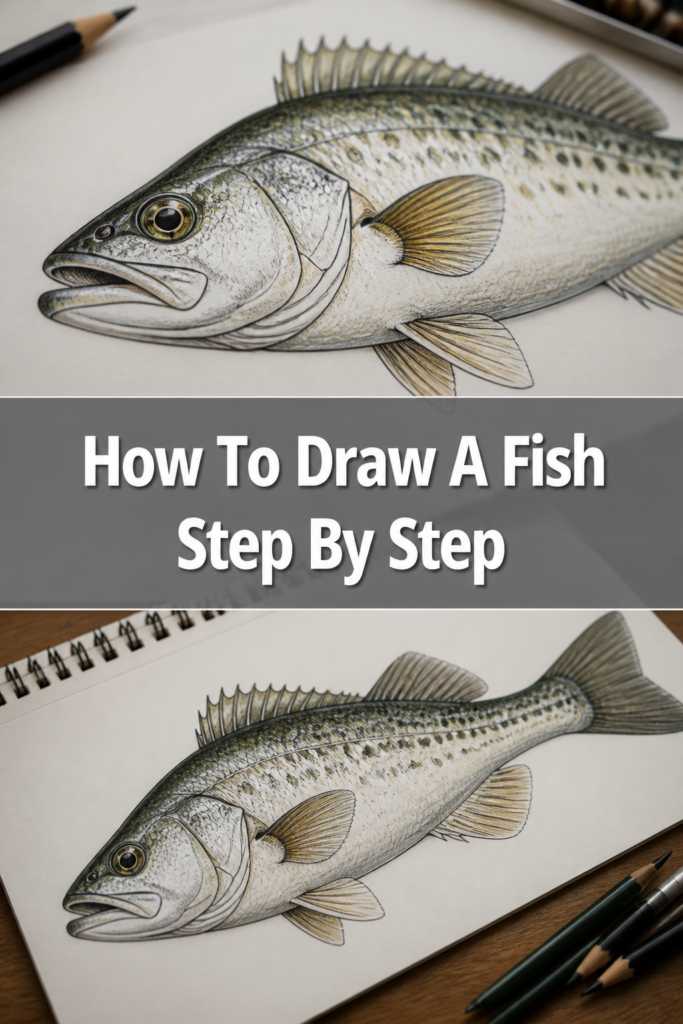
Quick Overview
This guide will walk you through creating a charming fish drawing from scratch. You’ll learn fundamental shapes and techniques, building confidence with every line. By the end, you’ll have a complete fish illustration ready to show off.
- Time needed: 20-40 minutes
- Difficulty: Beginner
- What you’ll need: Pencil (HB or 2B recommended), paper, eraser, optional coloring tools
Step-by-Step Instructions
Step 1: Lay the Foundation with a Basic Body Shape
Every great drawing begins with simple forms. For our fish, we will start by sketching a gentle oval or a slightly elongated lemon shape right in the center of your paper. This initial shape doesn’t need to be perfect, as it serves as a guideline for the fish’s main body.
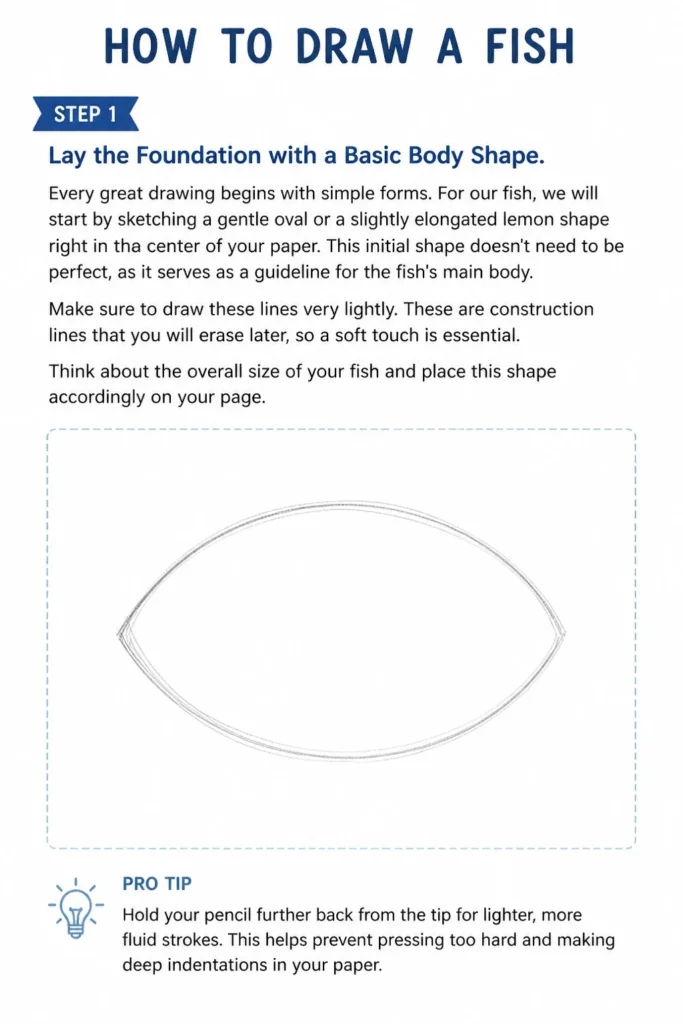
Make sure to draw these lines very lightly. These are construction lines that you will erase later, so a soft touch is essential. Think about the overall size of your fish and place this shape accordingly on your page.
Pro Tip: Hold your pencil further back from the tip for lighter, more fluid strokes. This helps prevent pressing too hard and making deep indentations in your paper.
Step 2: Define the Head and Tail Sections
Now that you have the main body, let’s divide it visually. On one end of your oval, gently curve the line inwards to suggest the beginning of the head. This slight indentation helps differentiate the body from where the mouth will eventually be.
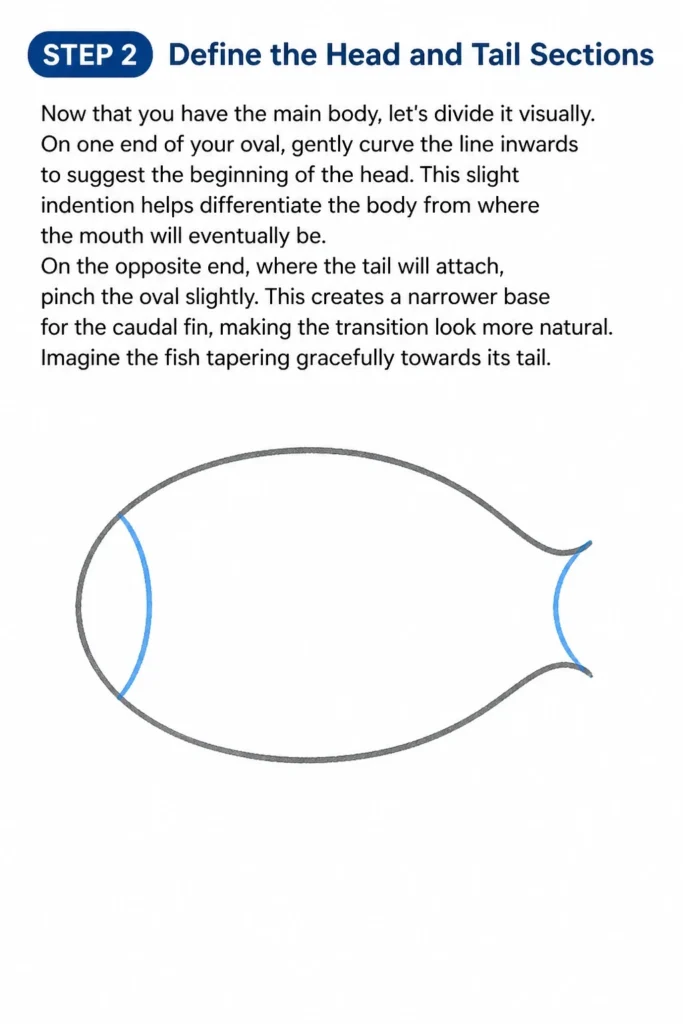
On the opposite end, where the tail will attach, pinch the oval slightly. This creates a narrower base for the caudal fin, making the transition look more natural. Imagine the fish tapering gracefully towards its tail.
Step 3: Sketch the Caudal Fin (Tail)
The caudal fin is a defining feature of any fish. Draw two curved lines extending outwards from the pinched end of the body. These lines should flare out and then curve back inwards to meet at a soft point or a gentle curve.
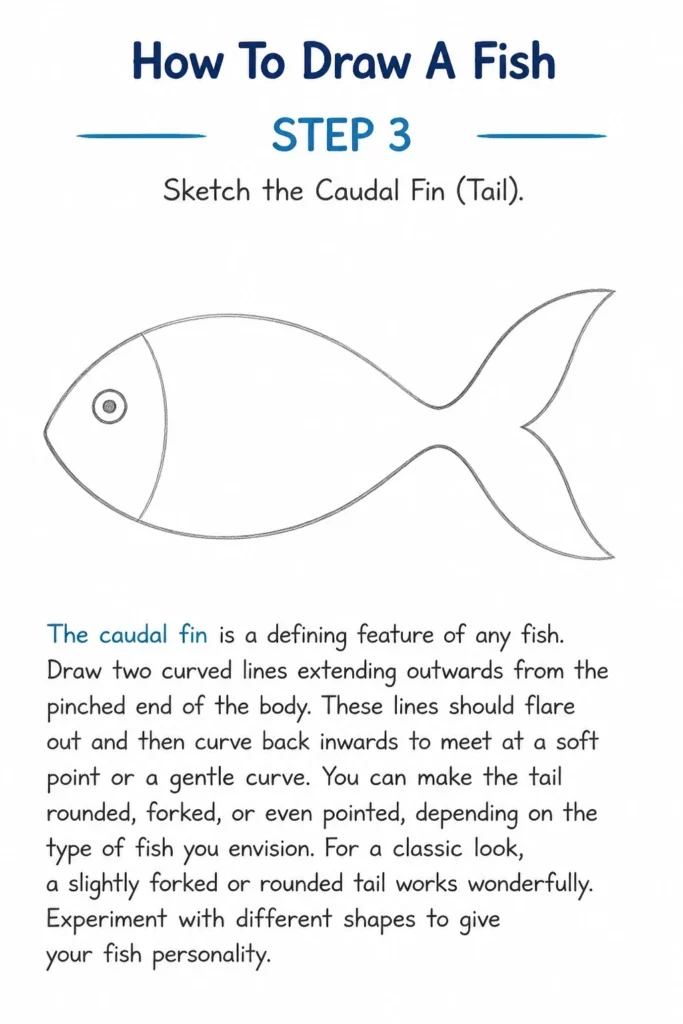
You can make the tail rounded, forked, or even pointed, depending on the type of fish you envision. For a classic look, a slightly forked or rounded tail works wonderfully. Experiment with different shapes to give your fish personality.
Step 4: Position the Eye and Mouth
Now let’s bring some life to our fish! Place a small circle for the eye on the upper part of the head section you defined earlier. Think about where a fish’s eye typically sits, usually a bit closer to the front.
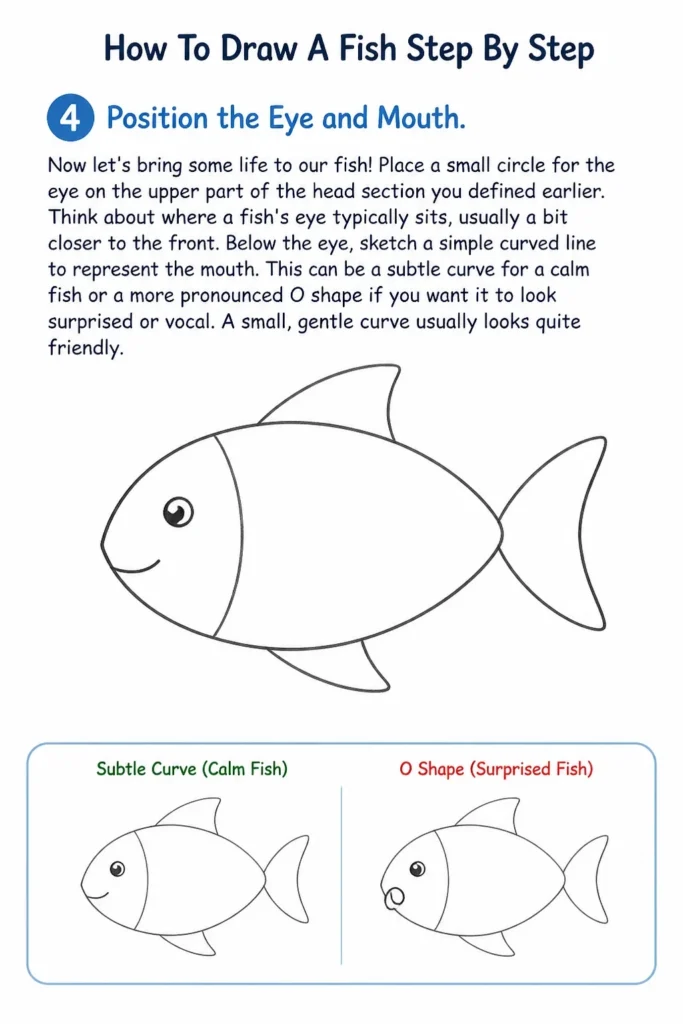
Below the eye, sketch a simple curved line to represent the mouth. This can be a subtle curve for a calm fish or a more pronounced “O” shape if you want it to look surprised or vocal. A small, gentle curve usually looks quite friendly.
Step 5: Add the Dorsal and Pectoral Fins
Fins help a fish swim and balance, and they add character to your drawing. Draw the dorsal fin along the top of the fish’s body. This often looks like a triangle or a soft, elongated curve that rises from the back.
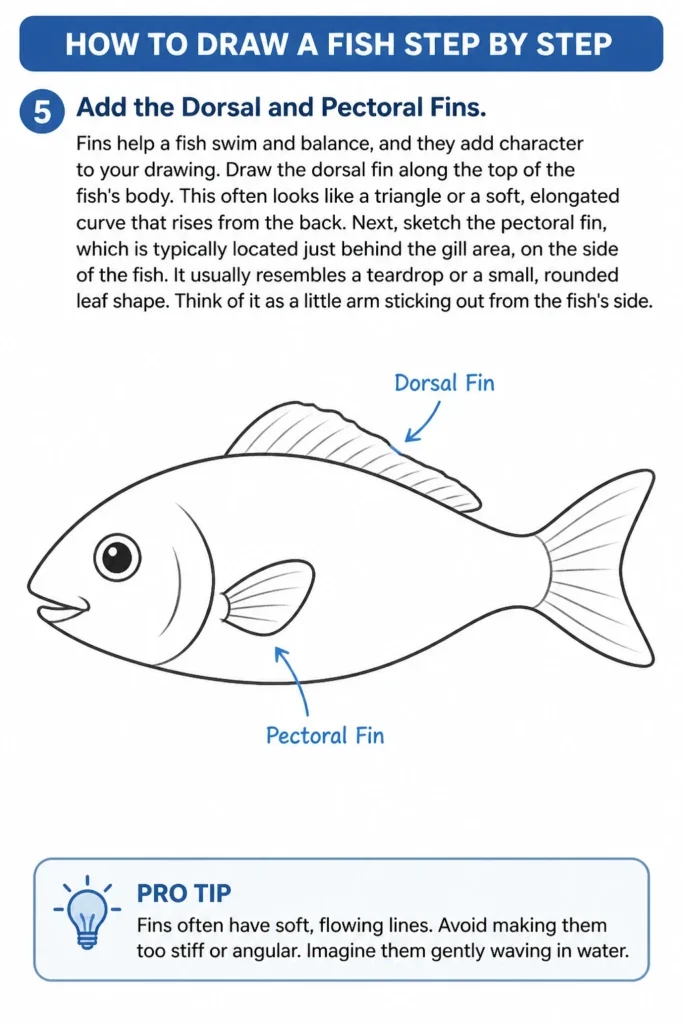
Next, sketch the pectoral fin, which is typically located just behind the gill area, on the side of the fish. It usually resembles a teardrop or a small, rounded leaf shape. Think of it as a little arm sticking out from the fish’s side.
Pro Tip: Fins often have soft, flowing lines. Avoid making them too stiff or angular. Imagine them gently waving in water.
Step 6: Incorporate the Pelvic and Anal Fins
Let’s complete the fin set. Draw the pelvic fin(s) underneath the fish’s belly, usually below or slightly behind the pectoral fin. These are often smaller and can be paired or appear as a single, rounded shape. They help with stability.
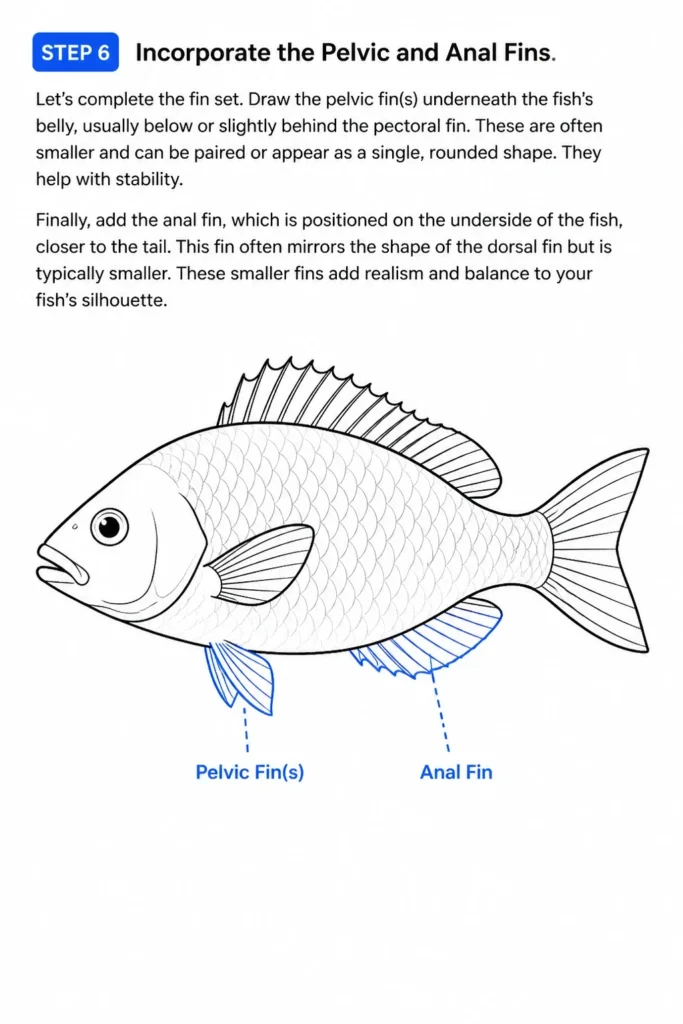
Finally, add the anal fin, which is positioned on the underside of the fish, closer to the tail. This fin often mirrors the shape of the dorsal fin but is typically smaller. These smaller fins add realism and balance to your fish’s silhouette.
Step 7: Refine Outlines and Add Details
With all the major components in place, it’s time to firm up your lines. Go over your preferred outlines with a slightly darker pencil pressure, making your fish’s form stand out. This is where your fish truly starts to take shape.
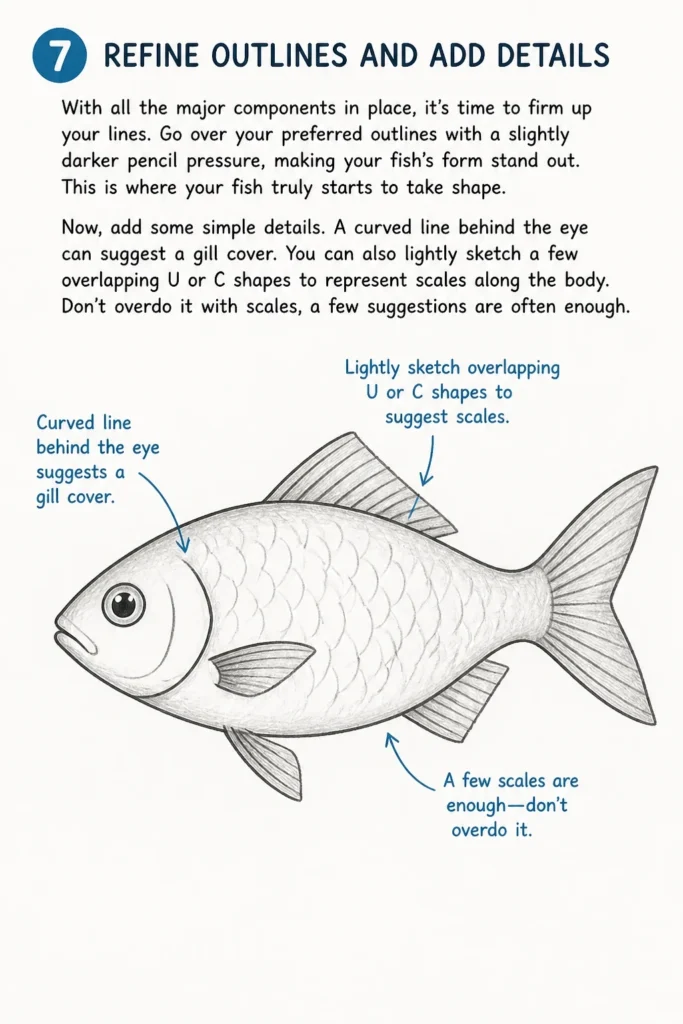
Now, add some simple details. A curved line behind the eye can suggest a gill cover. You can also lightly sketch a few overlapping “U” or “C” shapes to represent scales along the body. Don’t overdo it with scales; a few suggestions are often enough.
Step 8: Erase Guide Lines and Polish Your Drawing
This is the satisfying part! Carefully erase all the initial light construction lines you drew in the first few steps. Take your time to ensure only the final, strong lines of your fish remain. A good quality eraser will make this much easier.
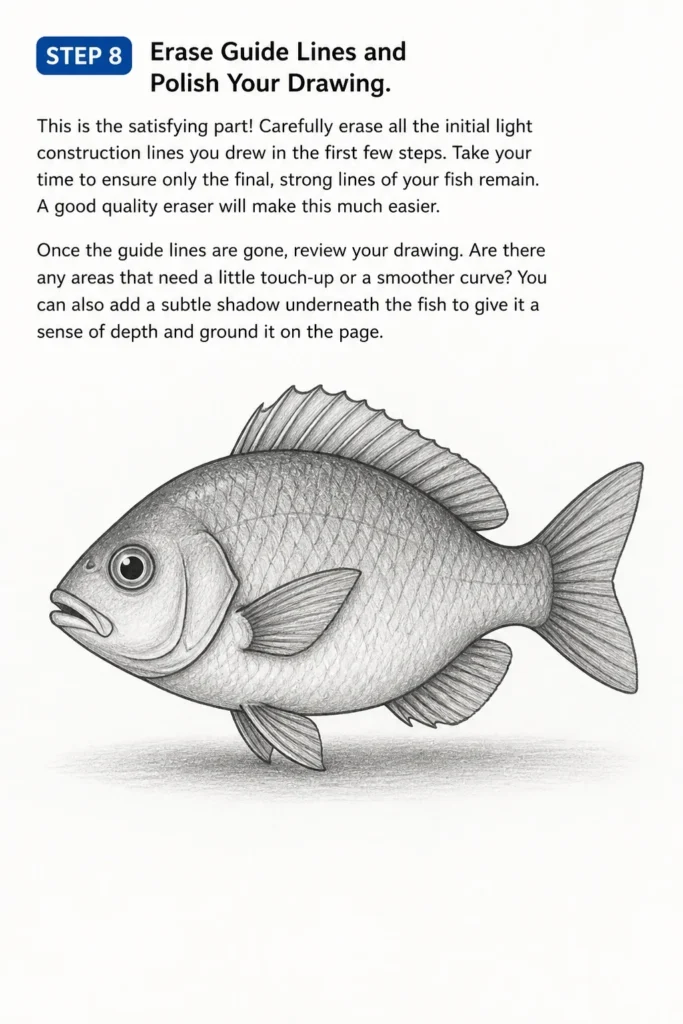
Once the guide lines are gone, review your drawing. Are there any areas that need a little touch-up or a smoother curve? You can also add a subtle shadow underneath the fish to give it a sense of depth and ground it on the page.
Common Mistakes to Avoid
Disproportionate Features
One common pitfall is making certain parts of the fish too big or too small compared to the rest of the body. An eye that’s too large can make the fish look cartoonish unless that’s your intention. Similarly, a tiny tail on a large body can look unbalanced.
Always step back and observe your drawing as a whole. Compare the size of the head to the body, and the fins to the overall length. A quick visual check helps you catch these imbalances early on.
Stiff, Lifeless Shapes
Many beginners tend to draw fish with very straight lines or overly geometric shapes. Fish are fluid creatures, and their bodies and fins have natural curves and flow. Drawing a fish that looks too rigid can make it seem unnatural.
Embrace organic curves and gentle arcs in your drawing. Think about how a fish moves through water and try to reflect that dynamism in your lines. Even simple shapes can have a subtle curvature to make them feel alive.
Over-detailing Too Early
It’s tempting to jump straight into drawing individual scales or intricate fin patterns. However, focusing on small details before the main structure is solid can lead to frustration and a messy drawing. You might find yourself erasing complex details if the underlying form is wrong.
Always build your drawing from general shapes to specific details. Establish the overall form, then add major features like fins, and only then move to finer elements like scales or textures. This systematic approach saves time and ensures a better result.
Ignoring Reference Images
Even for a simple fish, having a visual reference can be incredibly helpful. Relying solely on memory can sometimes lead to inaccuracies in fin placement or body shape. You might forget how a particular fin curves or where the gill plate typically sits.
Don’t be afraid to look at pictures of real fish, even if you’re aiming for a stylized drawing. Observing nature helps you understand the underlying anatomy and allows you to make more informed artistic choices. You can then simplify or exaggerate these elements purposefully.
Troubleshooting
My fish looks flat and lacks depth.
If your fish appears flat on the page, it likely needs more dimension. Drawing in 2D can make things look one-sided if you don’t imply volume. Consider how light might hit the fish.
To add depth, incorporate subtle shading. Lightly shade the underside of the fish or the areas where fins attach to the body. A simple cast shadow beneath the fish can also lift it off the page.
My lines are messy and inconsistent.
Messy lines often come from pressing too hard or from making many short, scratchy strokes. This can make the drawing look hesitant and unpolished. Clean lines are a hallmark of confident drawing.
Practice drawing long, smooth strokes from your shoulder, not just your wrist. Start with very light lines for construction, and only press harder when you are confident in your final outline. A good eraser is your best friend for tidying up.
I can’t get the fins to look natural.
Fins can be tricky because they need to look both structural and flowing. If your fins appear stiff or oddly shaped, you might be drawing them too rigidly or not understanding their basic form. They are not just flat triangles.
Break down fins into simpler shapes first, like triangles or stretched ovals, and then soften their edges. Observe how real fish fins attach to the body and how they might curve. Think of them as extensions of the body, not separate attachments.
Key Takeaways
- Start Simple: Always begin with basic geometric shapes to establish the overall form before adding details.
- Embrace Curves: Use soft, flowing lines to give your fish a natural, dynamic appearance.
- Build in Layers: Progress from light construction lines to firm outlines, then add details and shading.
- Observe and Adapt: Don’t hesitate to use reference images to inform your drawing, even for stylized art.
- Practice Patience: Drawing is a skill that improves with consistent effort and a willingness to learn from mistakes.
- Enjoy the Process: The most important part is to have fun and express your creativity.
Frequently Asked Questions
What kind of fish should I draw first?
For beginners, a simple goldfish or a generic freshwater fish is an excellent choice. Their body shapes are often straightforward ovals, and their fins are relatively simple. You can focus on mastering the basic form without getting bogged down in complex patterns.
As you gain confidence, you can then explore more intricate species like angelfish or even fantastical fish of your own design. Always start with what feels comfortable and gradually challenge yourself.
How do I make my fish look more realistic?
To enhance realism, pay closer attention to subtle details and anatomical accuracy. Study photographs of real fish to understand muscle structure, fin membranes, and scale patterns. Adding subtle variations in line weight can also make a big difference.
Consider incorporating more advanced shading techniques to suggest texture and form. Think about how light interacts with the fish’s body, creating highlights and shadows. Even small nuances can elevate your drawing.
Can I use pens instead of pencils for this guide?
While pencils are recommended for beginners due to their erasability, you can certainly use pens once you feel more confident. Start with a light, non-photo blue pencil for your initial sketch if you plan to ink over it. This allows you to lay down guidelines without them showing in the final ink.
When using pens, be mindful that every line is permanent. This encourages more deliberate and confident strokes. You might want to practice pen strokes on a separate sheet first.
How do I add texture like scales to my fish?
Adding scales can be done in several ways, from simple patterns to detailed individual scales. For a beginner, a good approach is to suggest scales rather than draw every single one. Lightly sketch overlapping “C” or “U” shapes along the body.
Vary the size and spacing of these shapes to create a natural look. You can also use stippling (dots) or cross-hatching to imply texture without drawing every scale explicitly. Remember, less is often more when it comes to subtle textures.
Our Top Recommended Finds
- Sketching Pencil Set: A good set with varying lead hardness (e.g., HB, 2B, 4B) offers versatility for light sketching and darker outlines.
- High-Quality Eraser: A kneaded eraser is excellent for lifting pencil marks without smudging, while a vinyl eraser is great for precise clean-ups.
- Artist’s Sketchbook: Investing in a sketchbook with decent paper weight prevents bleed-through and offers a dedicated space for your artistic journey.
Dive Deeper into Drawing!
You’ve just completed your first fish, and that’s a fantastic achievement! This is just the beginning of your artistic exploration. Every stroke you make builds your skill and confidence.
Why not try drawing your fish from a different angle next time, or adding a simple bubble trail? Experiment with colors to bring your aquatic friend to vibrant life. Keep practicing, keep observing, and most importantly, keep enjoying the wonderful process of creating art.
& Painting
No rigid rules or pretension. Just practical guides, medium comparisons, and encouraging tips to help you enjoy the drawing & painting process.