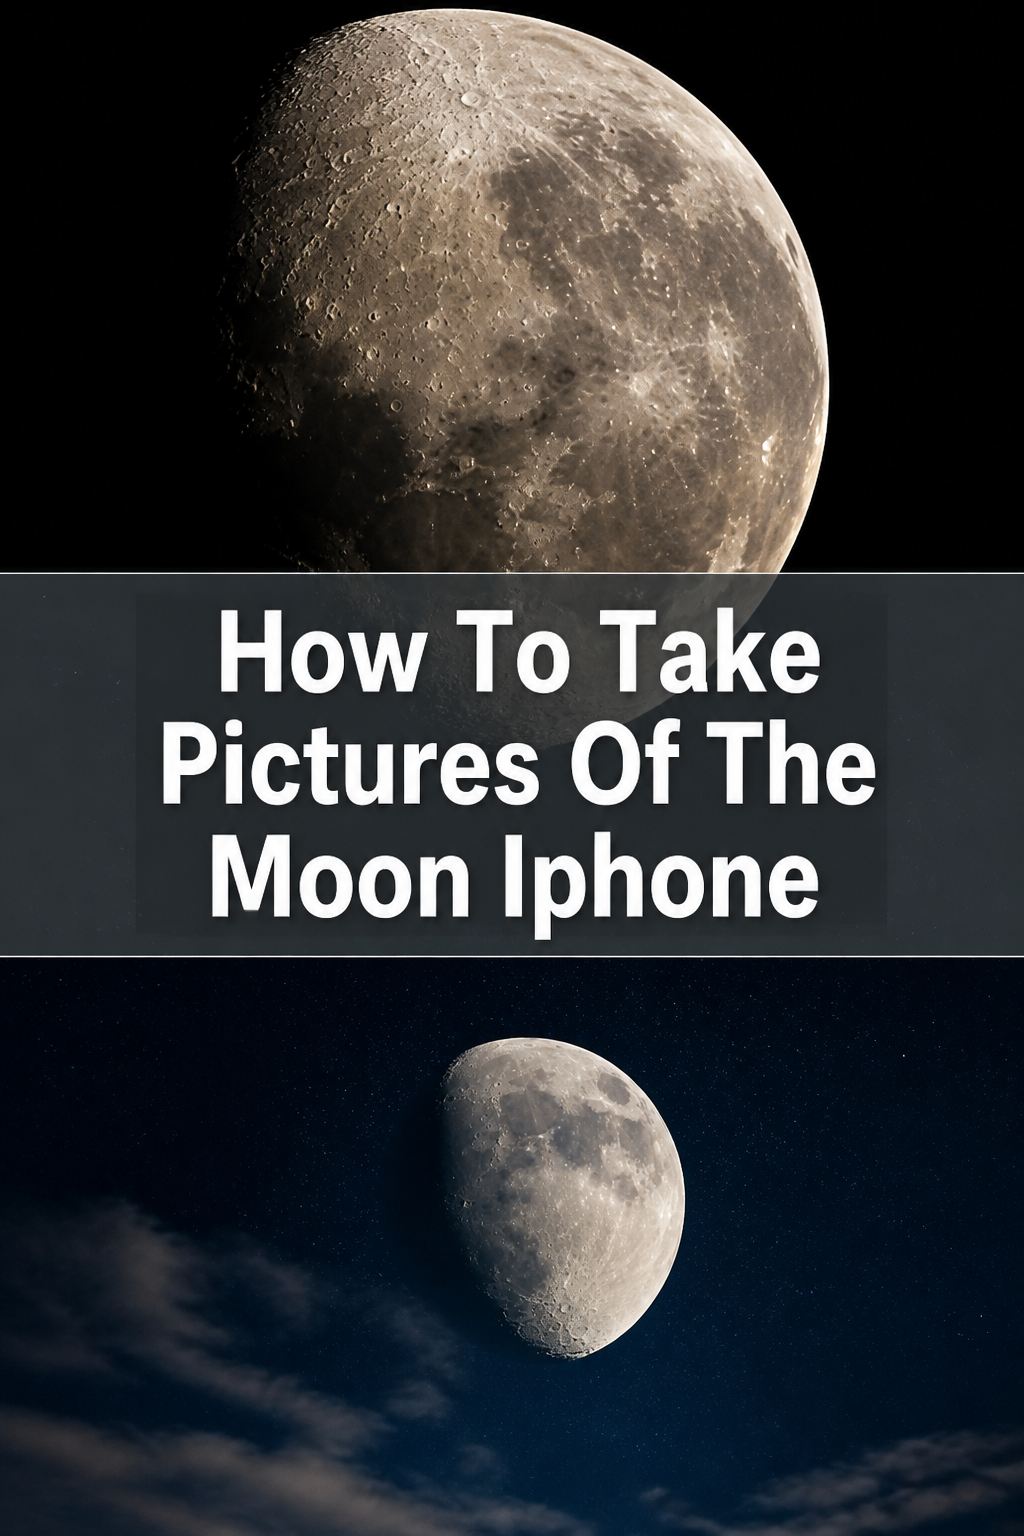
📸 How To Take Pictures Of The Moon Iphone

& Painting
No rigid rules or pretension. Just practical guides, medium comparisons, and encouraging tips to help you enjoy the drawing & painting process.
Capturing the moon with your iPhone might seem like a daunting task, resulting often in a tiny, bright dot. I remember my own early attempts, yielding nothing more than a blurry glow. This guide will help you transform those distant white dots into breathtaking celestial portraits.
You absolutely can achieve impressive moon photos right from your pocket. With the right settings and a few simple accessories, your iPhone becomes a powerful tool. Let’s get started on making those lunar dreams a reality.
Quick Overview
Get ready to master your iPhone camera for stunning moon shots. This guide covers everything from setup to advanced techniques. You’ll learn how to overcome common challenges and capture impressive detail.
- Time needed: 30-60 minutes (initial setup & practice)
- Difficulty: Intermediate
- What you’ll need: iPhone, Tripod, Telephoto Lens (optional but recommended), Remote Shutter (optional)
Step-by-Step Instructions
Step 1: Prepare Your iPhone and Environment
Before you even open the camera app, ensure your iPhone is ready for the task. A stable setup is the most crucial element for sharp moon photos. Any slight movement will blur your shot.
Charge your iPhone fully. Cold nights can drain batteries quickly. Clean your camera lenses thoroughly with a microfiber cloth to remove smudges and dust.
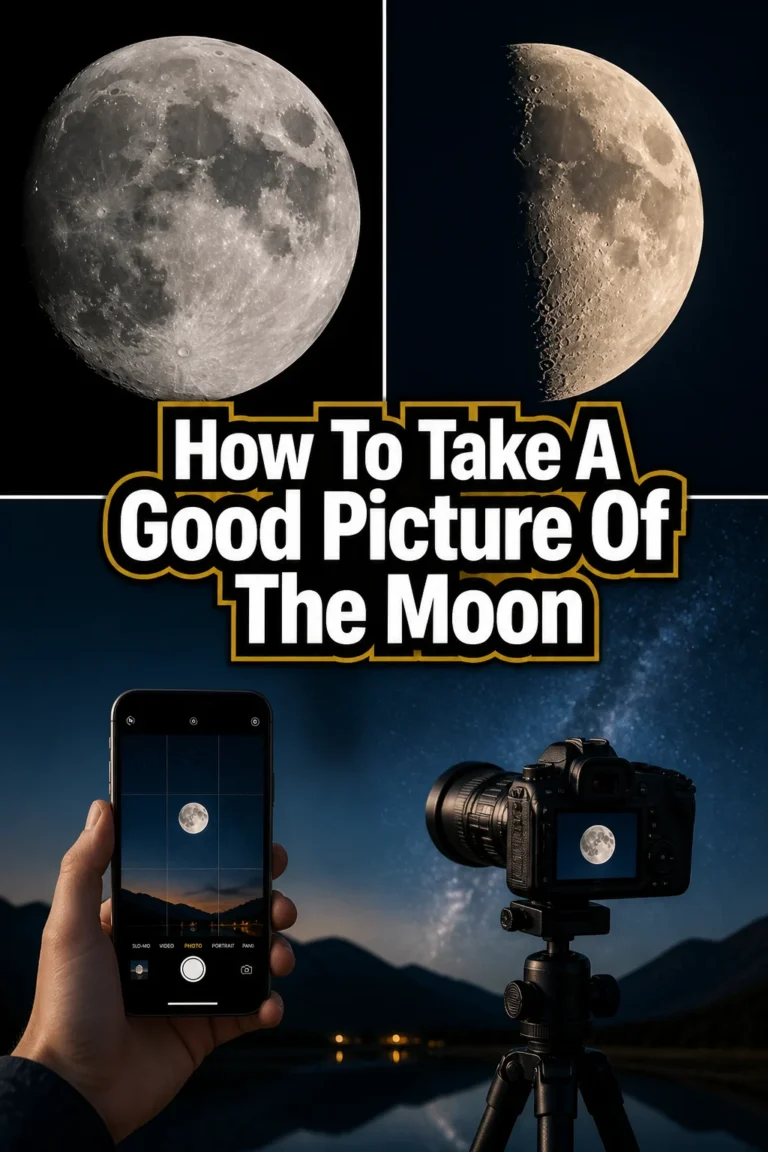
Mount your iPhone onto a sturdy tripod. This eliminates camera shake, which is critical for capturing distant subjects. A smartphone tripod mount adapter will be necessary.
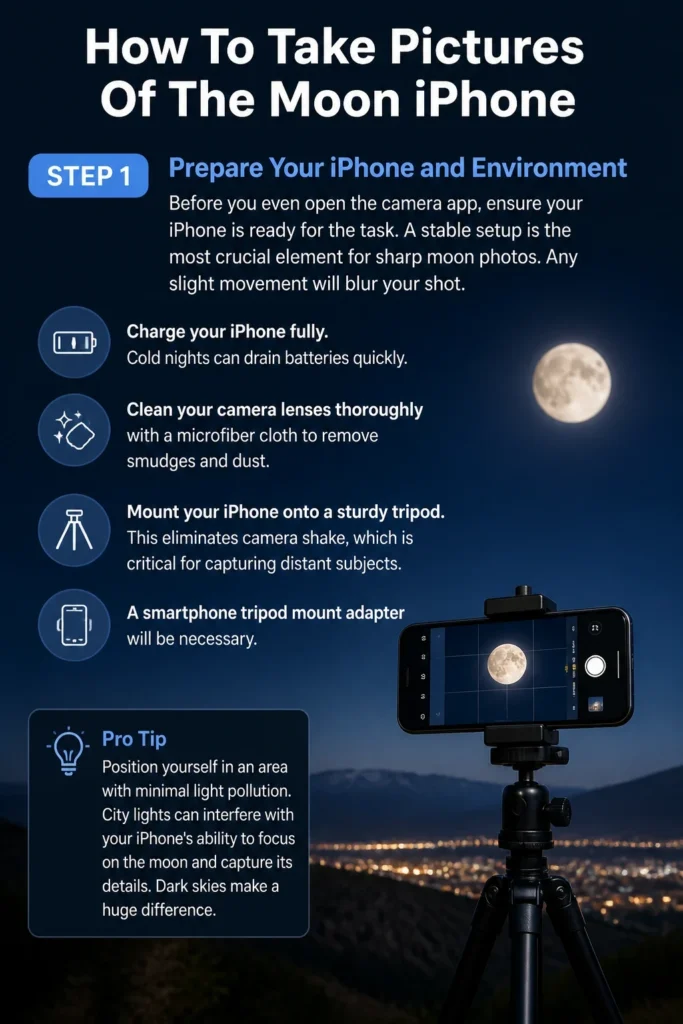
Pro Tip: Position yourself in an area with minimal light pollution. City lights can interfere with your iPhone’s ability to focus on the moon and capture its details. Dark skies make a huge difference.
Step 2: Attach an External Telephoto Lens (Recommended)
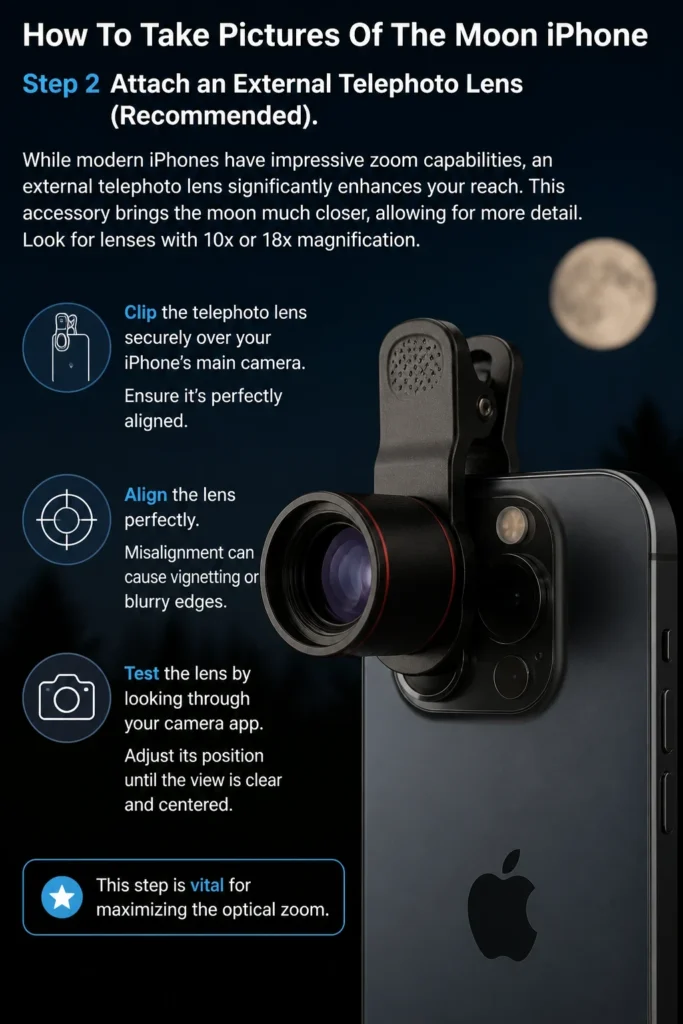
While modern iPhones have impressive zoom capabilities, an external telephoto lens significantly enhances your reach. This accessory brings the moon much closer, allowing for more detail. Look for lenses with 10x or 18x magnification.
Clip the telephoto lens securely over your iPhone’s main camera. Ensure it’s perfectly aligned. Misalignment can cause vignetting or blurry edges.
Test the lens by looking through your camera app. Adjust its position until the view is clear and centered. This step is vital for maximizing the optical zoom.
Step 3: Open Your Camera App and Switch to Video Mode (Initial Zoom)
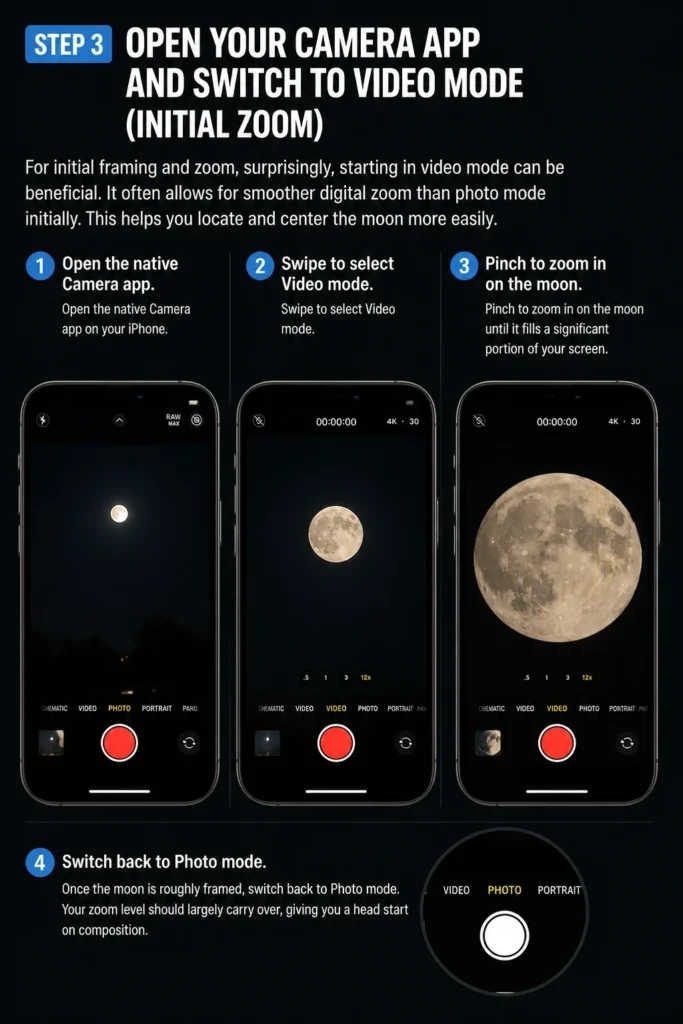
For initial framing and zoom, surprisingly, starting in video mode can be beneficial. It often allows for smoother digital zoom than photo mode initially. This helps you locate and center the moon more easily.
Open the native Camera app. Swipe to select “Video” mode. Pinch to zoom in on the moon until it fills a significant portion of your screen.
Once the moon is roughly framed, switch back to “Photo” mode. Your zoom level should largely carry over, giving you a head start on composition.
Step 4: Use the Native Camera App’s Zoom and Focus
Now in Photo mode, fine-tune your zoom and focus. Digital zoom on iPhones can degrade image quality, but it’s a necessary step here. You want the moon to be as large as possible without becoming pixelated.
Pinch to zoom further, but be mindful of the quality drop. Stop before the image appears overly blocky. Modern iPhones (13 Pro, 14 Pro, 15 Pro) have better optical and digital zoom.
Tap and hold on the moon on your screen to lock the focus and exposure (AE/AF Lock). A yellow square will appear. This prevents the camera from constantly refocusing.
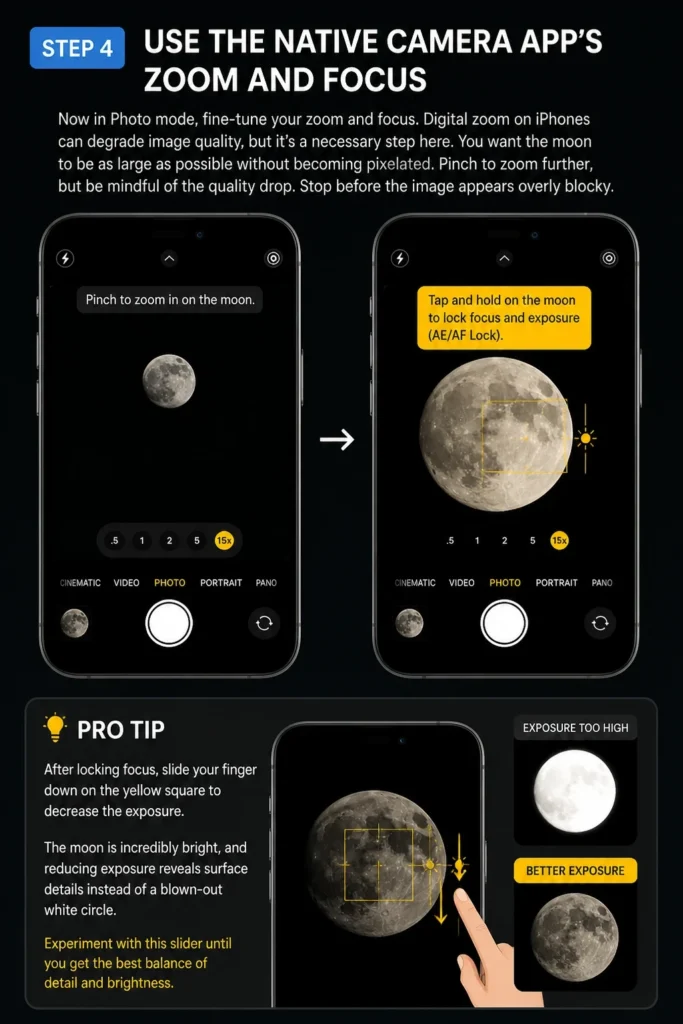
Pro Tip: After locking focus, slide your finger down on the yellow square to decrease the exposure. The moon is incredibly bright, and reducing exposure reveals surface details instead of a blown-out white circle. Experiment with this slider until details become visible.
Step 5: Utilize Burst Mode for Sharpness
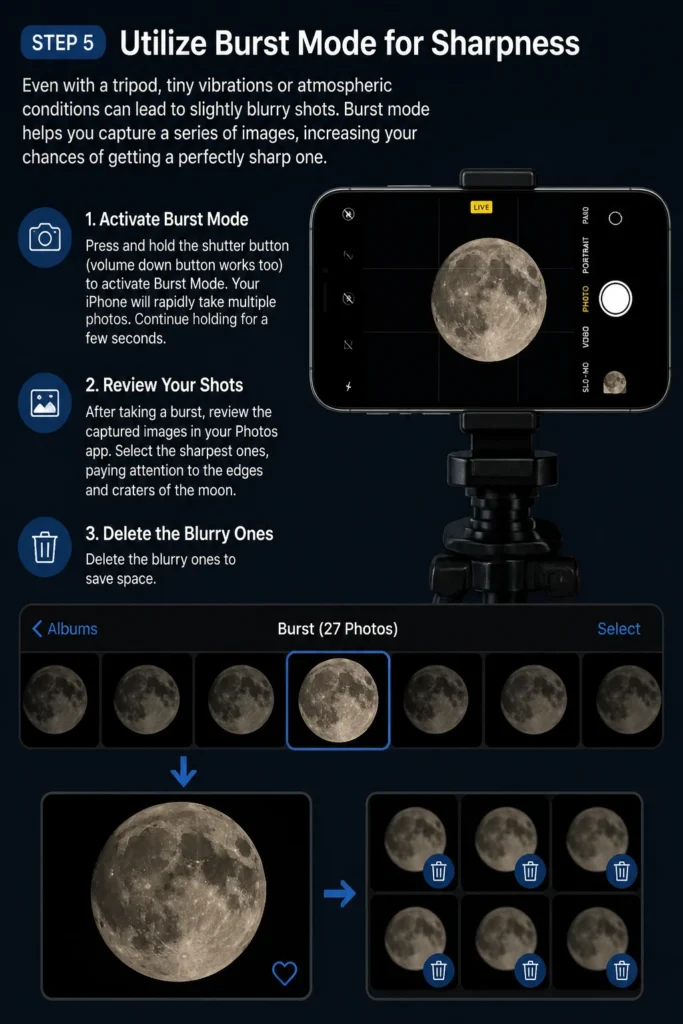
Even with a tripod, tiny vibrations or atmospheric conditions can lead to slightly blurry shots. Burst mode helps you capture a series of images, increasing your chances of getting a perfectly sharp one.
Press and hold the shutter button (volume down button works too) to activate Burst Mode. Your iPhone will rapidly take multiple photos. Continue holding for a few seconds.
After taking a burst, review the captured images in your Photos app. Select the sharpest ones, paying attention to the edges and craters of the moon. Delete the blurry ones to save space.
Step 6: Experiment with Third-Party Camera Apps
While the native camera app is good, third-party apps offer more manual control, which is invaluable for moon photography. These apps often allow you to adjust ISO, shutter speed, and white balance directly.
Download a dedicated manual camera app like Halide, ProCamera, or Moment. These apps give you DSLR-like controls. Many offer trial periods to test them out.
Within the app, manually adjust the ISO to its lowest setting (e.g., ISO 25 or 50) to minimize noise. Set the shutter speed to a fast setting (e.g., 1/1000s or faster) to freeze any motion.
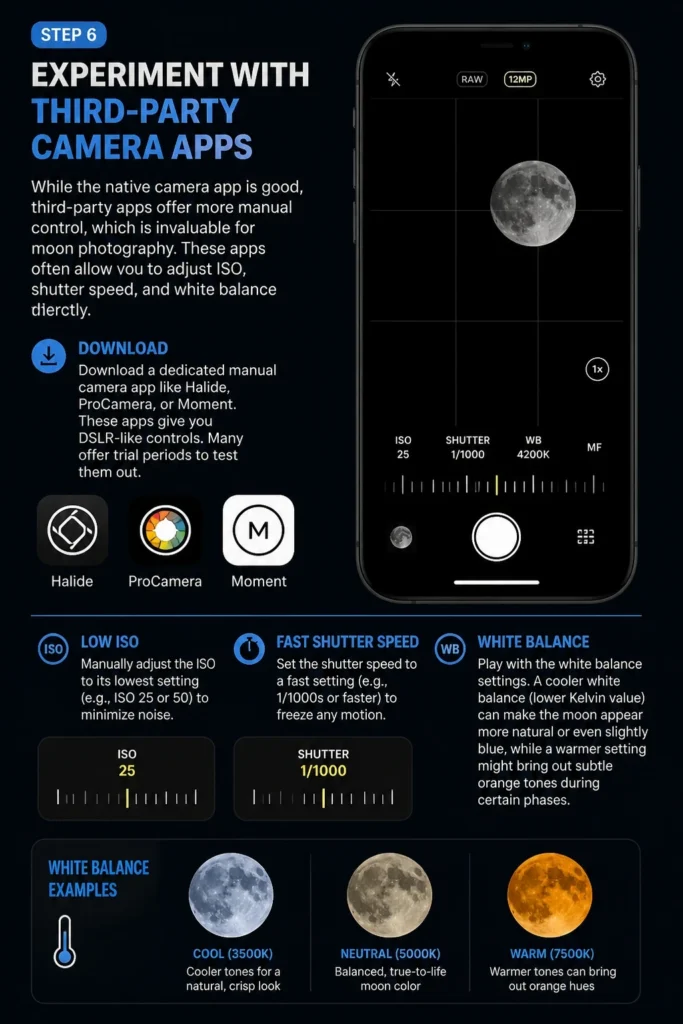
Pro Tip: Play with the white balance settings. A cooler white balance (lower Kelvin value) can make the moon appear more natural or even slightly blue, while a warmer setting might bring out subtle orange tones during certain phases.
Step 7: Post-Processing in Photos App or Other Editors
The raw image from your iPhone will likely need some enhancement to truly shine. Post-processing can bring out hidden details and correct minor imperfections.
Open your best moon photo in the native Photos app. Tap “Edit.” Adjust the “Exposure” slightly to brighten or darken as needed.
Increase “Contrast” to make bright areas brighter and dark areas darker, enhancing definition. Boost “Highlights” and “Shadows” carefully to reveal more texture.
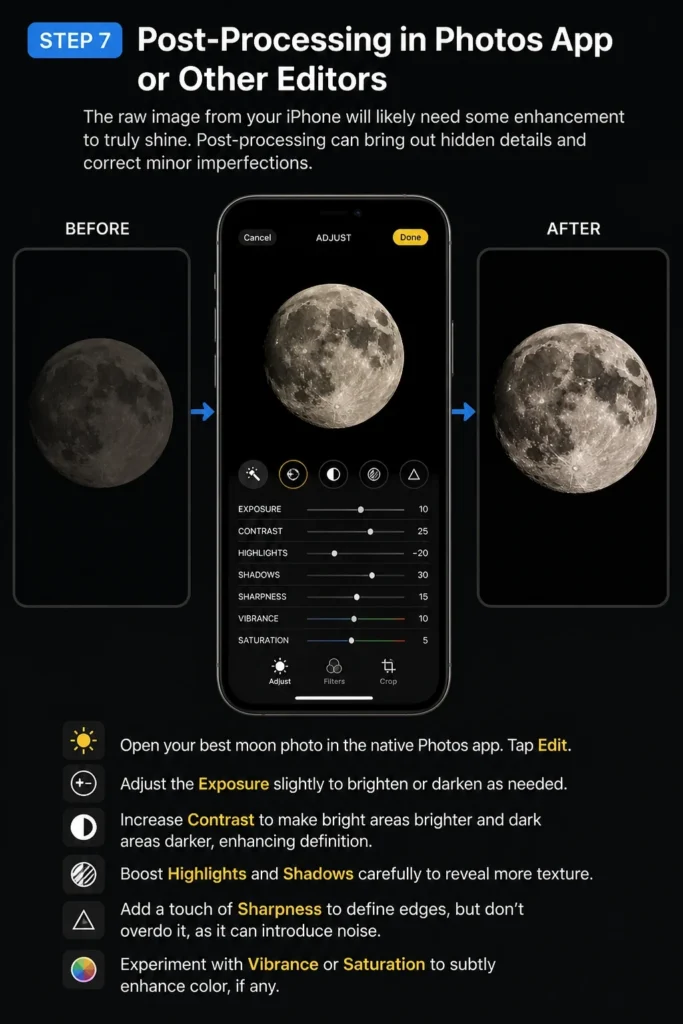
Add a touch of “Sharpness” to define edges, but don’t overdo it, as it can introduce noise. Experiment with “Vibrance” or “Saturation” to subtly enhance color, if any.
Step 8: Consider Focus Stacking for Ultimate Detail (Advanced)
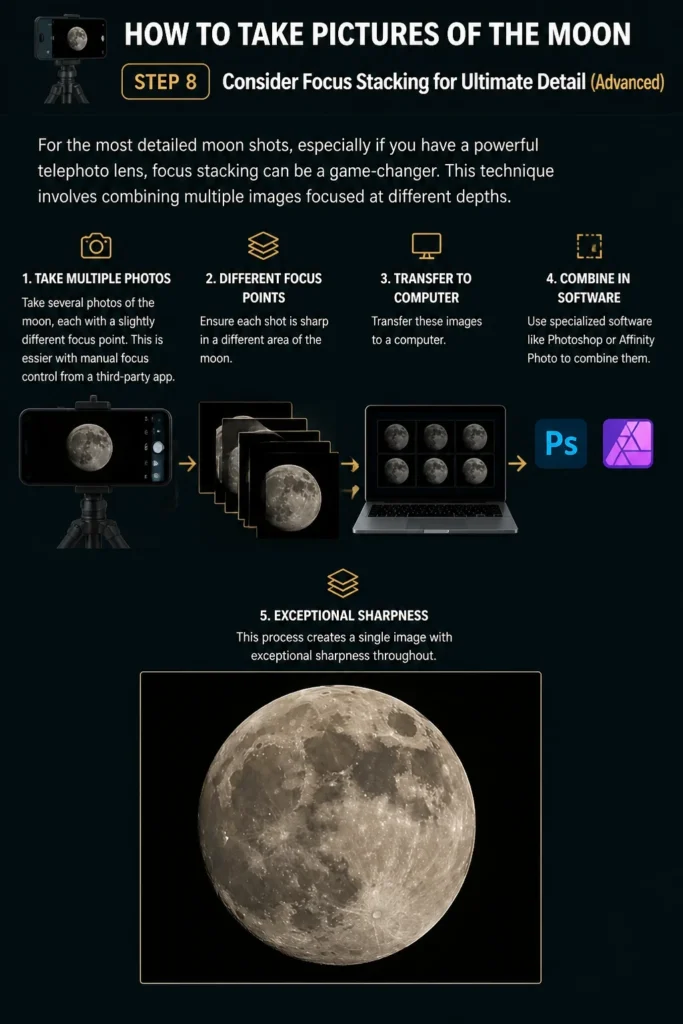
For the most detailed moon shots, especially if you have a powerful telephoto lens, focus stacking can be a game-changer. This technique involves combining multiple images focused at different depths.
Take several photos of the moon, each with a slightly different focus point. This is easier with manual focus control from a third-party app. Ensure each shot is sharp in a different area of the moon.
Transfer these images to a computer. Use specialized software like Photoshop or Affinity Photo to combine them. This process creates a single image with exceptional sharpness throughout.
Common Mistakes to Avoid
Not Using a Tripod
Many beginners try to handhold their iPhone for moon shots. The slightest tremor, even from pressing the shutter, will result in a blurry image. The moon is far away, so any movement is magnified.
Always use a sturdy tripod. This stabilizes your device completely. If you don’t have a remote shutter, use your headphones’ volume button or the self-timer to trigger the shot without touching the phone.
Overexposing the Moon
The moon is incredibly bright, especially when full. Your iPhone’s auto-exposure often tries to brighten the dark sky around it, leading to a completely white, blown-out moon without any detail. It looks like a bright circle.
Manually reduce the exposure after locking focus. Dragging your finger down on the yellow AE/AF lock square will dim the moon, allowing its craters and textures to become visible. This is perhaps the most important single adjustment.
Relying Solely on Digital Zoom
While digital zoom is convenient, it works by cropping and enlarging pixels. This leads to a significant loss of quality and detail, making your moon look pixelated and soft. It sacrifices resolution.
Use an external telephoto lens whenever possible. If you must use digital zoom, do so sparingly and stop before the image starts to visibly degrade. Optical zoom, available on some iPhone models, is always superior.
Ignoring Post-Processing
Thinking the photo is finished right out of the camera is a missed opportunity. Raw moon photos often lack contrast and sharpness, appearing flat. They need a little help to pop.
Always take your photos into an editing app. Even minor adjustments to contrast, sharpness, and highlights can dramatically improve the final image. Don’t be afraid to experiment with the sliders.
Troubleshooting
Moon Appears as a Blurry White Dot
This is the most common issue when starting out. It indicates either overexposure or insufficient focus. Your camera is struggling to isolate the moon from the dark sky.
Ensure you have locked focus (AE/AF Lock) on the moon by tapping and holding it. Immediately after, slide your finger down on the screen to drastically reduce the exposure. This will bring out the details. Also, confirm your tripod is stable and the lens is clean.
Photo is Grainy or Noisy
Grainy photos usually result from high ISO settings, especially in low light conditions. The iPhone tries to compensate for darkness by boosting sensitivity.
If using a third-party app, manually set your ISO to the lowest possible value (e.g., ISO 25 or 50). This minimizes digital noise. Ensure your shutter speed is fast enough to avoid motion blur, but don’t compromise ISO for it. Good light and a stable setup reduce the need for high ISO.
Cannot Get Enough Zoom
If the moon still looks too small, even with maximum digital zoom, your iPhone’s optical capabilities are limited. This is a hardware constraint.
Invest in an external telephoto lens for your iPhone. These lenses attach to your phone and provide true optical magnification, bringing the moon much closer without pixelation. Look for 10x or 18x options.
Key Takeaways
- Stability is paramount: Always use a tripod to eliminate camera shake and ensure sharp images.
- Control exposure manually: Reduce exposure drastically after locking focus to prevent the moon from being overexposed.
- Enhance zoom with external lenses: A telephoto lens greatly improves your ability to capture detailed moon shots.
- Utilize manual camera apps: Third-party apps offer crucial control over ISO, shutter speed, and white balance.
- Don’t skip post-processing: Editing can significantly improve the contrast, sharpness, and overall appeal of your moon photos.
- Practice and experiment: Moon photography requires patience. Try different settings and techniques to find what works best.
Frequently Asked Questions
Can I really take good moon pictures with just my iPhone?
Yes, absolutely! While professional cameras offer more flexibility, modern iPhones, especially the Pro models, have excellent camera systems. With the right techniques, a tripod, and possibly an external lens, you can capture surprisingly detailed and beautiful moon photographs. It’s all about technique and patience.
What is the best moon phase to photograph?
The full moon is often the brightest and most dramatic, but it can also be the hardest to capture detail on due to its brightness. Crescent or gibbous phases, where the moon is not fully illuminated, can offer stunning shadows and texture along the terminator (the line between light and dark), revealing more surface features.
Do I need a special app, or can I use the default camera app?
You can start with the default camera app, especially for initial framing and exposure control. However, for truly detailed and customizable shots, a third-party manual camera app (like Halide, ProCamera, or Moment) is highly recommended. These apps give you precise control over settings like ISO and shutter speed, which are crucial for moon photography.
How do I prevent my moon photos from being blurry?
Blurriness is almost always due to camera shake or incorrect focus. Use a sturdy tripod to stabilize your iPhone. Lock the focus on the moon by tapping and holding it on the screen. Consider using a remote shutter or the self-timer to trigger the shot without touching the phone, further reducing shake.
Our Top Recommended Finds
- Phone Tripod Mount: Essential for attaching your iPhone to any standard tripod, ensuring stability.
- Smartphone Telephoto Lens Kit: Provides optical zoom beyond your iPhone’s native capabilities, bringing the moon much closer.
- Bluetooth Remote Shutter: Allows you to trigger your iPhone’s camera wirelessly, completely eliminating touch-induced camera shake.
Your Lunar Masterpiece Awaits
You now have the knowledge and steps to elevate your iPhone moon photography. It’s a rewarding pursuit that combines technology with a touch of celestial wonder. Don’t be discouraged by initial attempts; practice is key.
Start by setting up your tripod tonight. Experiment with those exposure settings. Share your successes with friends and family. The moon is waiting for its close-up, and your iPhone is ready to deliver.
& Painting
No rigid rules or pretension. Just practical guides, medium comparisons, and encouraging tips to help you enjoy the drawing & painting process.