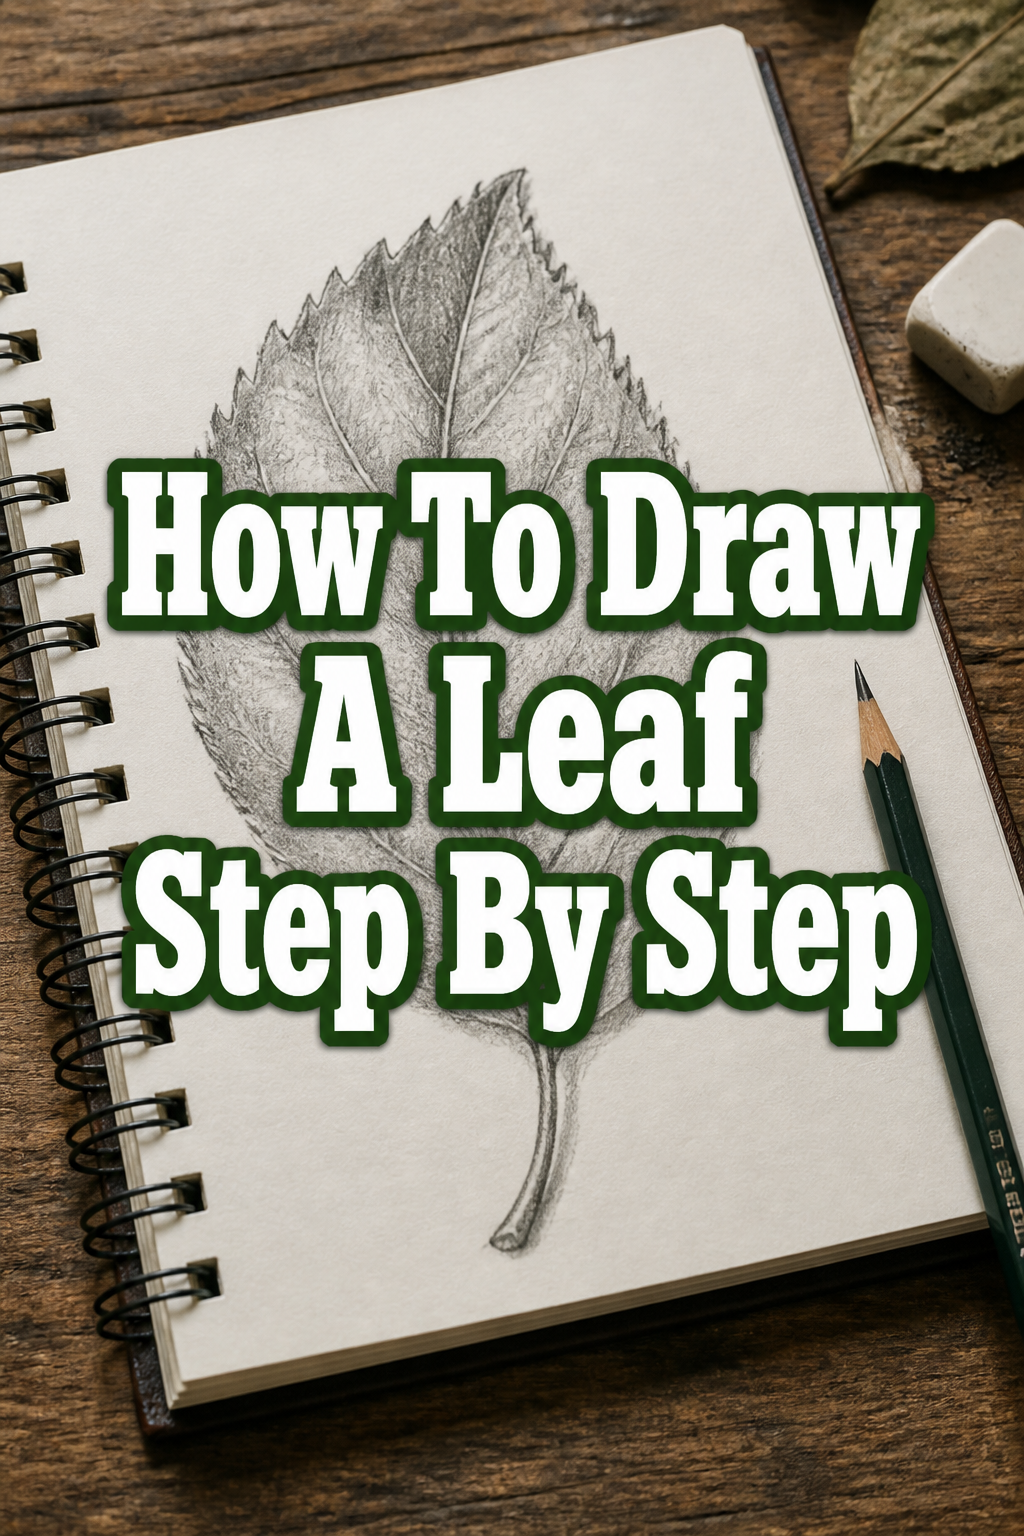
🌿 How To Draw A Leaf Step By Step

& Painting
No rigid rules or pretension. Just practical guides, medium comparisons, and encouraging tips to help you enjoy the drawing & painting process.
Learning to draw a leaf is a fantastic starting point for any aspiring artist.
Nature offers endless inspiration, and leaves, with their diverse shapes and textures, provide excellent practice for fundamental drawing skills.
I’ve spent countless hours sketching outdoors, and I can tell you that mastering a simple leaf builds confidence for more complex subjects.
Quick Overview
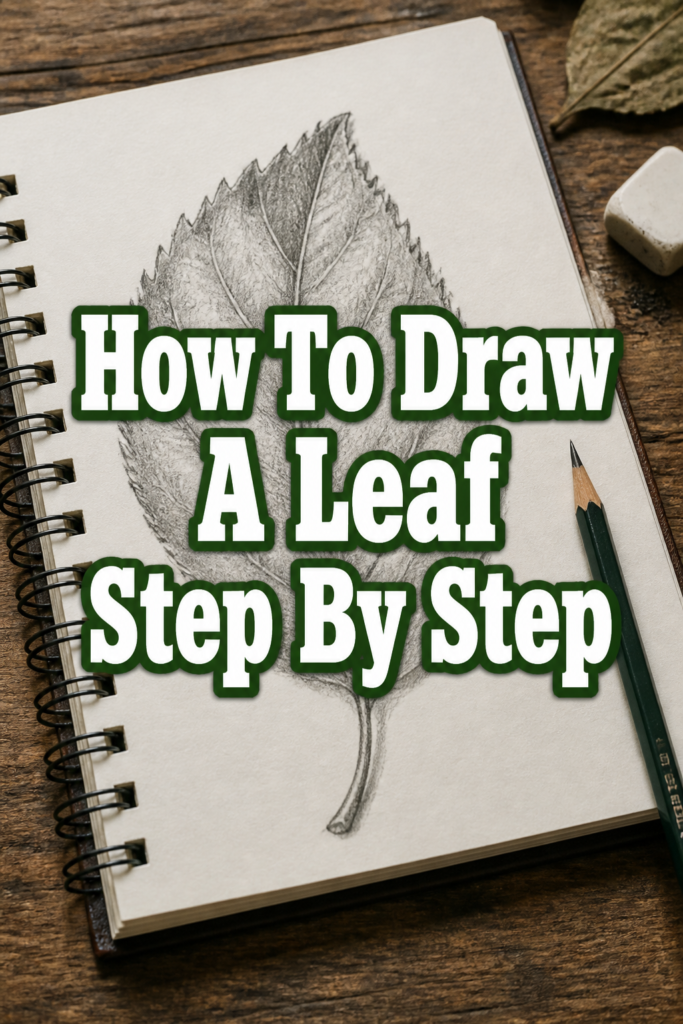
This guide will walk you through creating a realistic leaf drawing, focusing on observation and layering techniques.
You’ll learn to capture the organic flow and subtle details that make each leaf unique.
- Time needed: 45-75 minutes (depending on detail)
- Difficulty: Beginner
- What you’ll need: Pencil (HB or 2B recommended), eraser (kneaded or stick), drawing paper
Step-by-Step Instructions
Step 1: Observe Your Subject Carefully
Before you even touch your pencil to paper, take a moment to truly look at the leaf you want to draw.
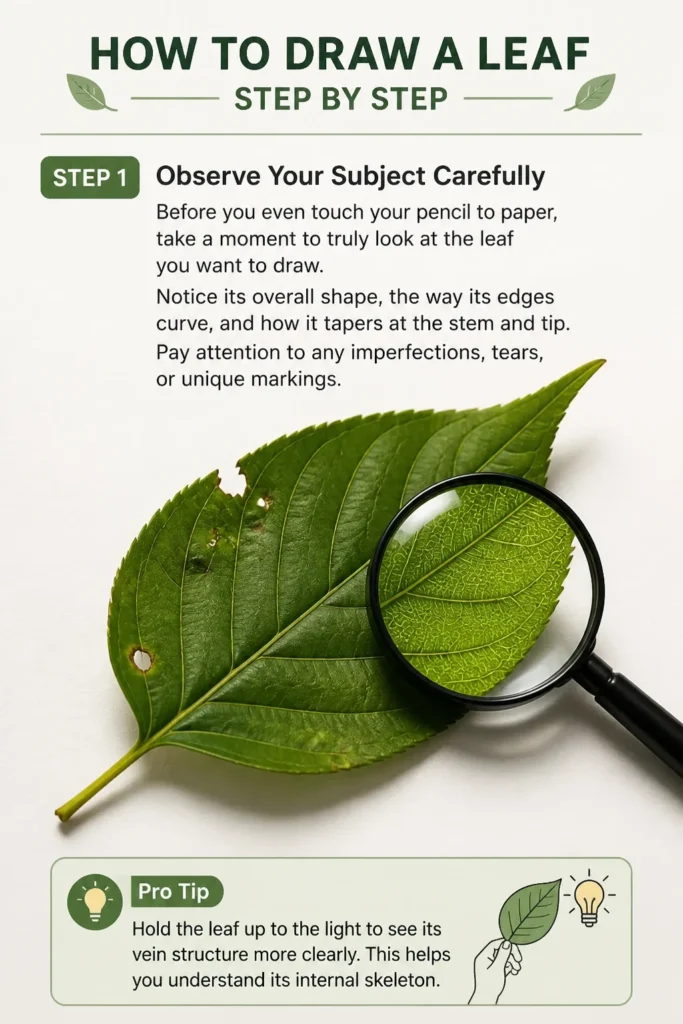
Notice its overall shape, the way its edges curve, and how it tapers at the stem and tip.
Pay attention to any imperfections, tears, or unique markings.
Pro Tip: Hold the leaf up to the light to see its vein structure more clearly. This helps you understand its internal skeleton.
Step 2: Lightly Sketch the Basic Silhouette
Start by very lightly sketching the general outline of your leaf.
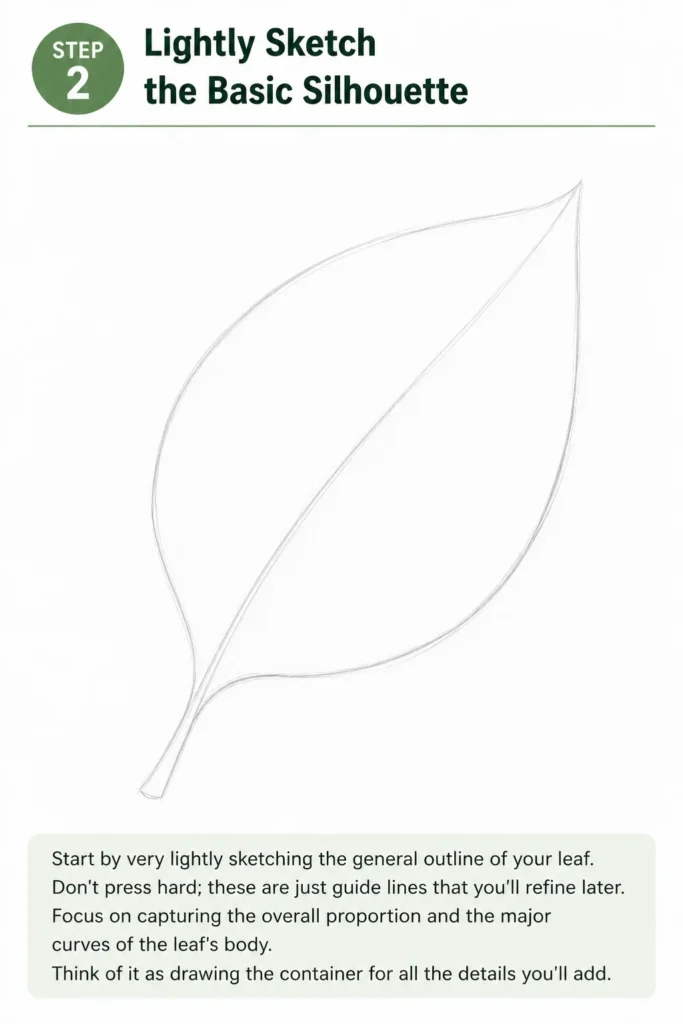
Don’t press hard; these are just guide lines that you’ll refine later.
Focus on capturing the overall proportion and the major curves of the leaf’s body.
Think of it as drawing the “container” for all the details you’ll add.
Step 3: Establish the Midrib (Central Vein)
The midrib is the main “spine” of the leaf, running from the stem to the tip.
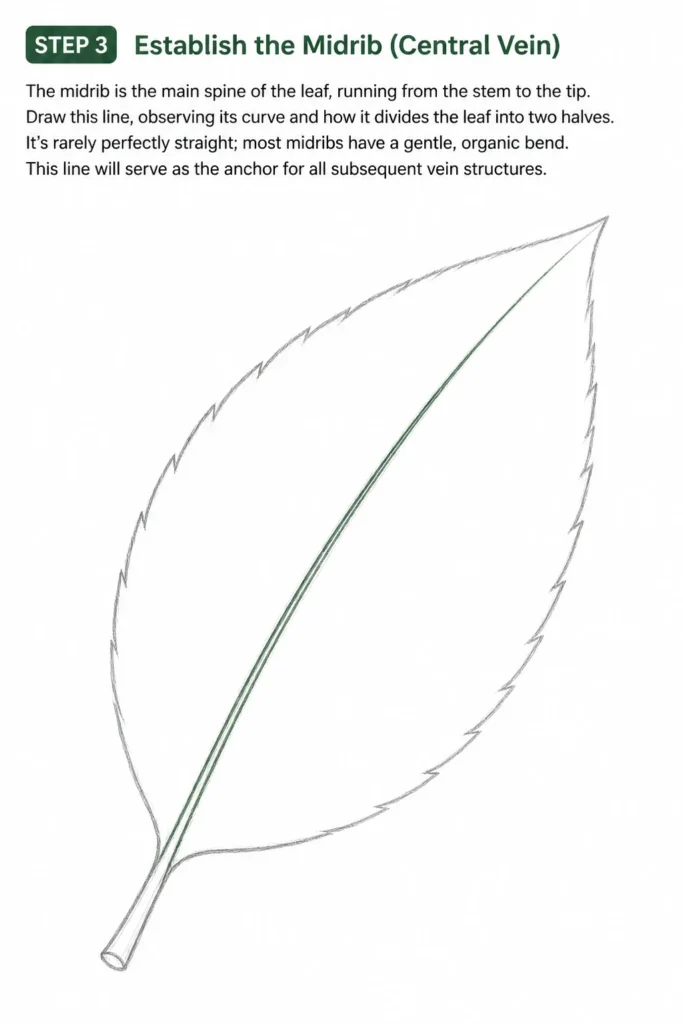
Draw this line, observing its curve and how it divides the leaf into two halves.
It’s rarely perfectly straight; most midribs have a gentle, organic bend.
This line will serve as the anchor for all subsequent vein structures.
Step 4: Refine the Outer Edges and Shape
Now, go back to your initial silhouette and start to refine the outer edges.
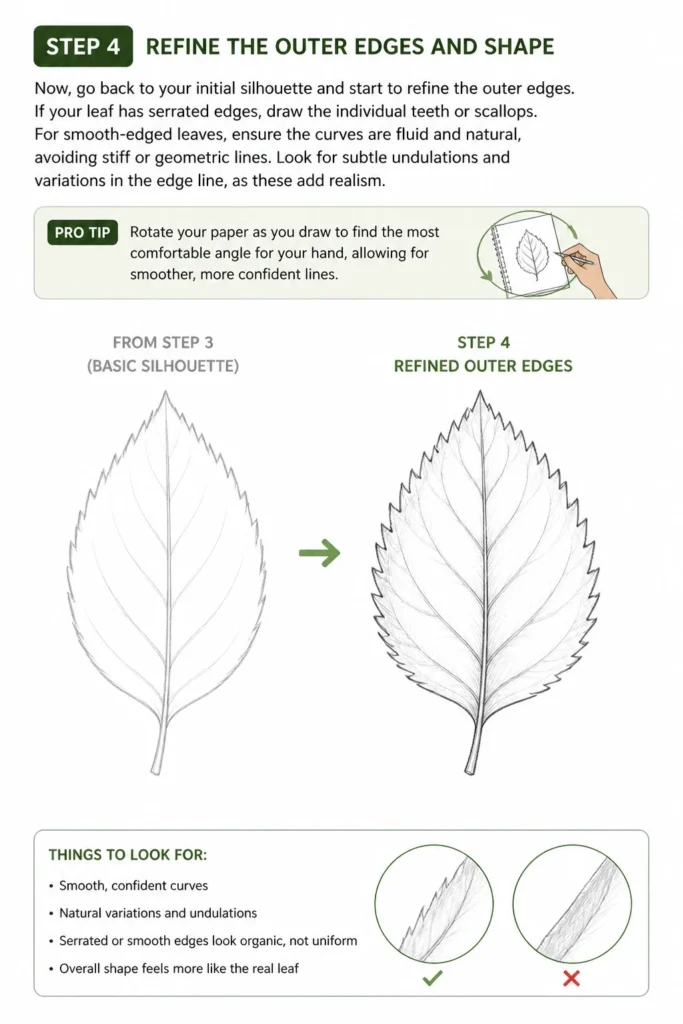
If your leaf has serrated edges, draw the individual teeth or scallops.
For smooth-edged leaves, ensure the curves are fluid and natural, avoiding stiff or geometric lines.
Look for subtle undulations and variations in the edge line, as these add realism.
Pro Tip: Rotate your paper as you draw to find the most comfortable angle for your hand, allowing for smoother, more confident lines.
Step 5: Add the Secondary Veins
Observe where the larger secondary veins branch off from the midrib.
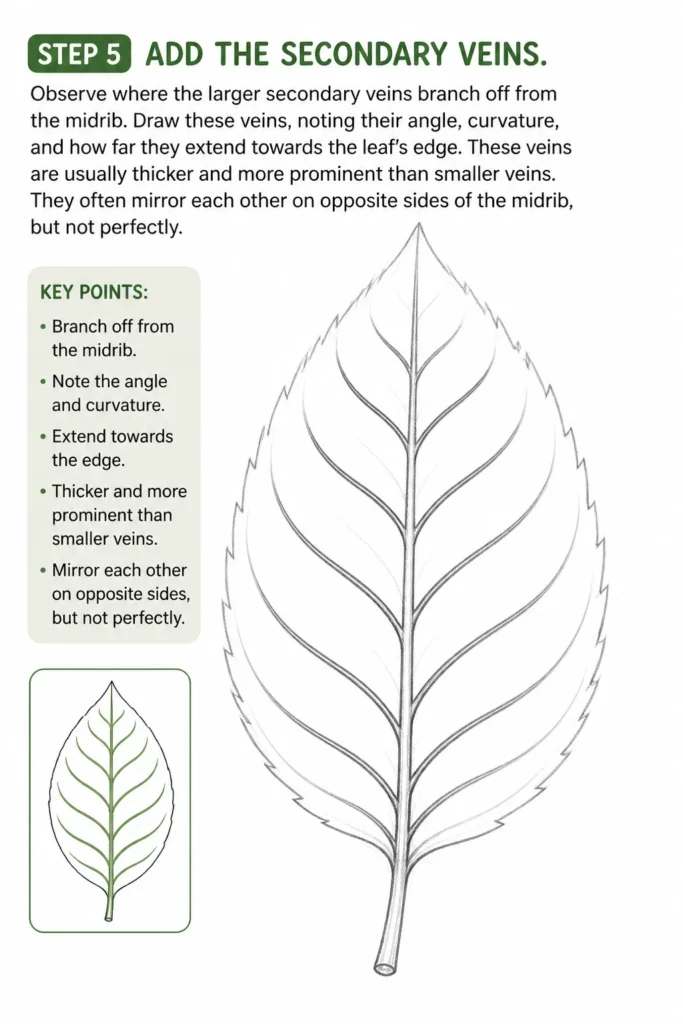
Draw these veins, noting their angle, curvature, and how far they extend towards the leaf’s edge.
These veins are usually thicker and more prominent than smaller veins.
They often mirror each other on opposite sides of the midrib, but not perfectly.
Step 6: Introduce Tertiary Veins and Subtle Texture
Once the main and secondary veins are in place, begin adding the smaller, tertiary veins.
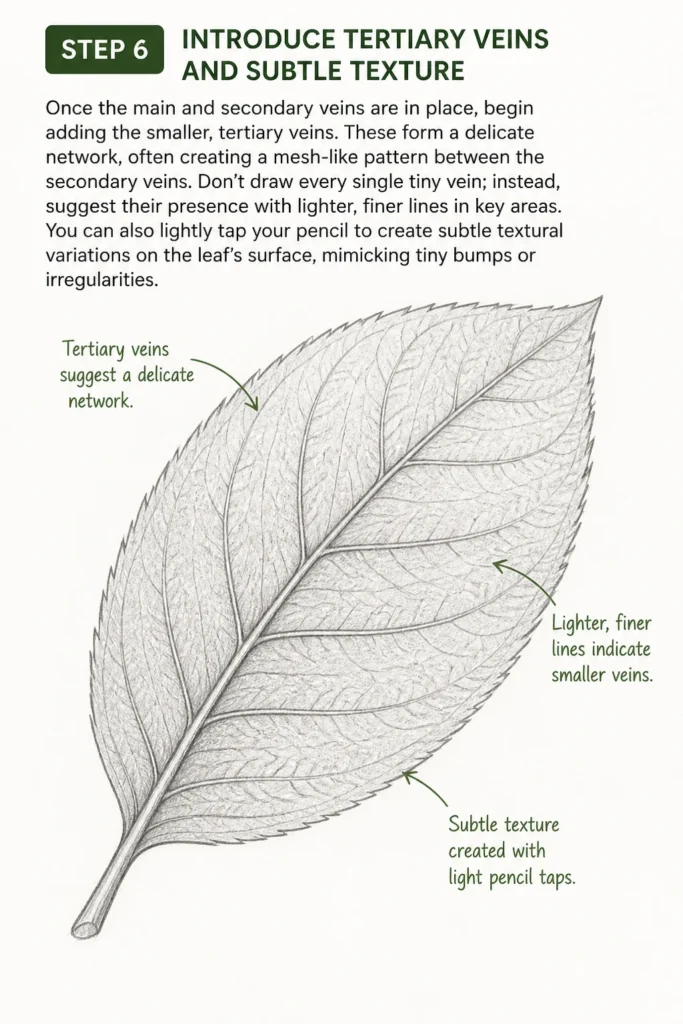
These form a delicate network, often creating a mesh-like pattern between the secondary veins.
Don’t draw every single tiny vein; instead, suggest their presence with lighter, finer lines in key areas.
You can also lightly tap your pencil to create subtle textural variations on the leaf’s surface, mimicking tiny bumps or irregularities.
Step 7: Begin Shading and Establishing Form
Now it’s time to give your leaf dimension. Imagine a light source hitting the leaf.
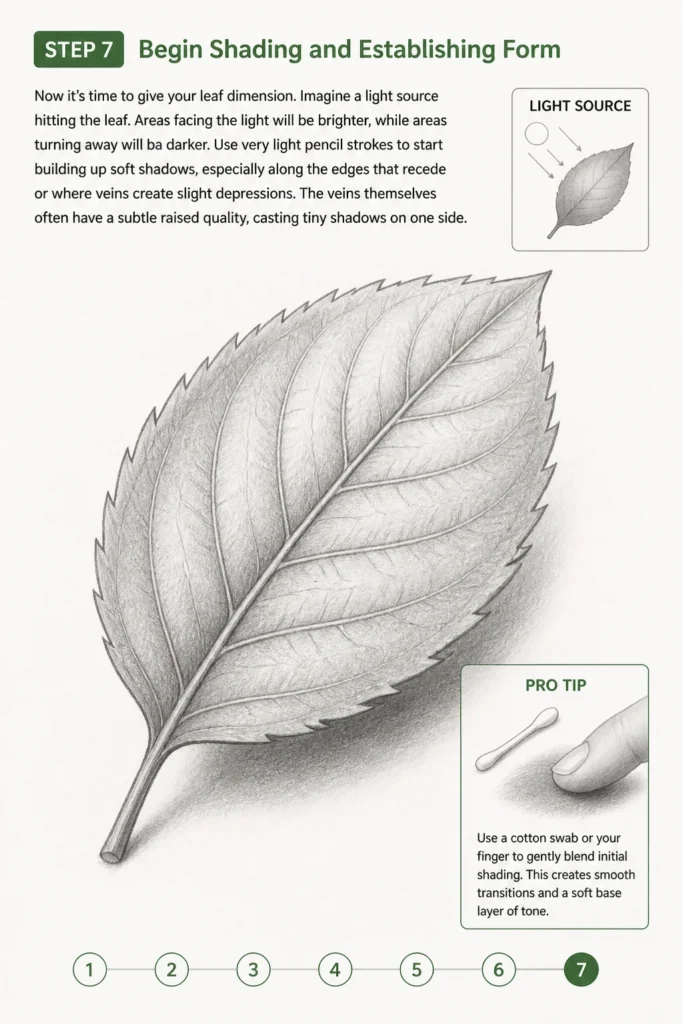
Areas facing the light will be brighter, while areas turning away will be darker.
Use very light pencil strokes to start building up soft shadows, especially along the edges that recede or where veins create slight depressions.
The veins themselves often have a subtle raised quality, casting tiny shadows on one side.
Pro Tip: Use a cotton swab or your finger to gently blend initial shading. This creates smooth transitions and a soft base layer of tone.
Step 8: Layer Details and Values
Continue building up your shading, gradually increasing the pressure for darker areas.
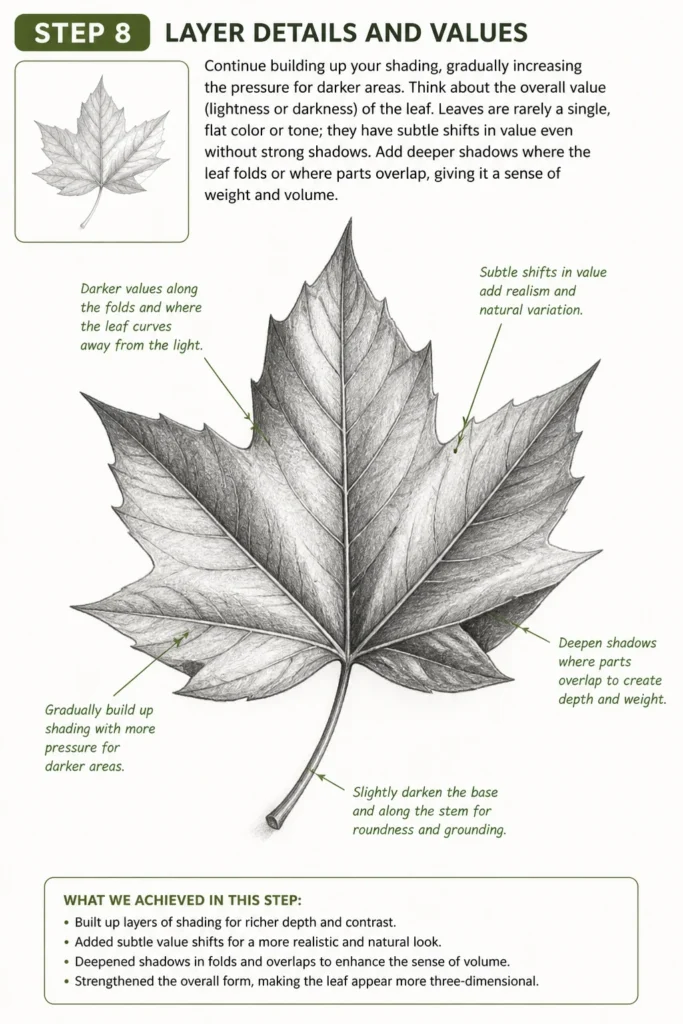
Think about the overall value (lightness or darkness) of the leaf.
Leaves are rarely a single, flat color or tone; they have subtle shifts in value even without strong shadows.
Add deeper shadows where the leaf folds or where parts overlap, giving it a sense of weight and volume.
Step 9: Draw the Petiole (Leaf Stem)
The petiole is the small stem that connects the leaf blade to the branch or main plant.
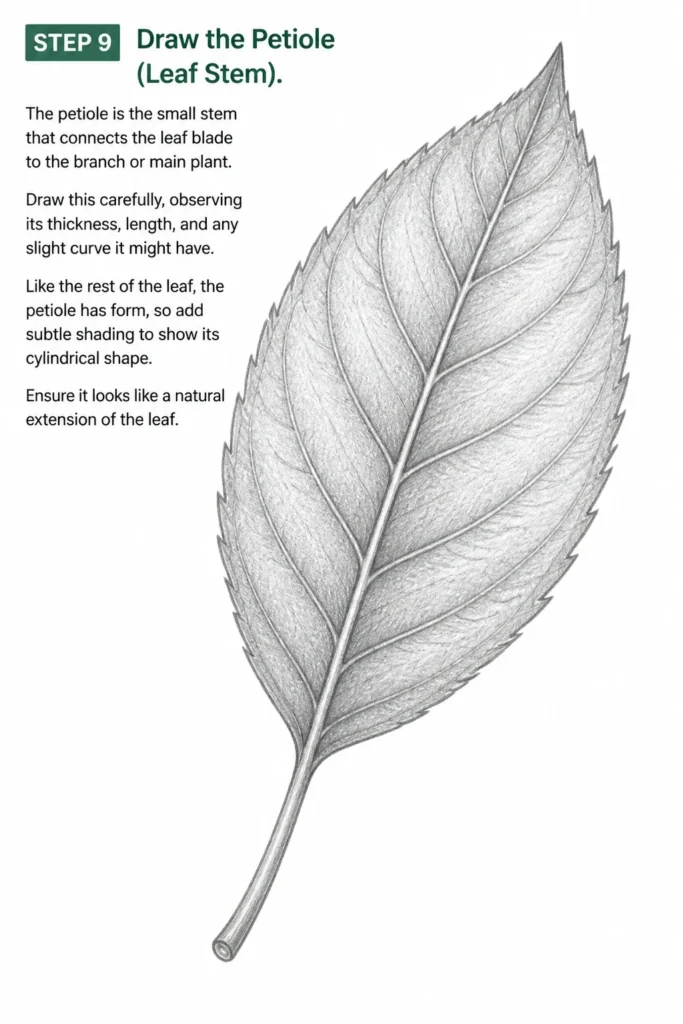
Draw this carefully, observing its thickness, length, and any slight curve it might have.
Like the rest of the leaf, the petiole has form, so add subtle shading to show its cylindrical shape.
Ensure it looks like a natural extension of the leaf.
Step 10: Final Touches and Cleanup
Step back and look at your entire drawing.
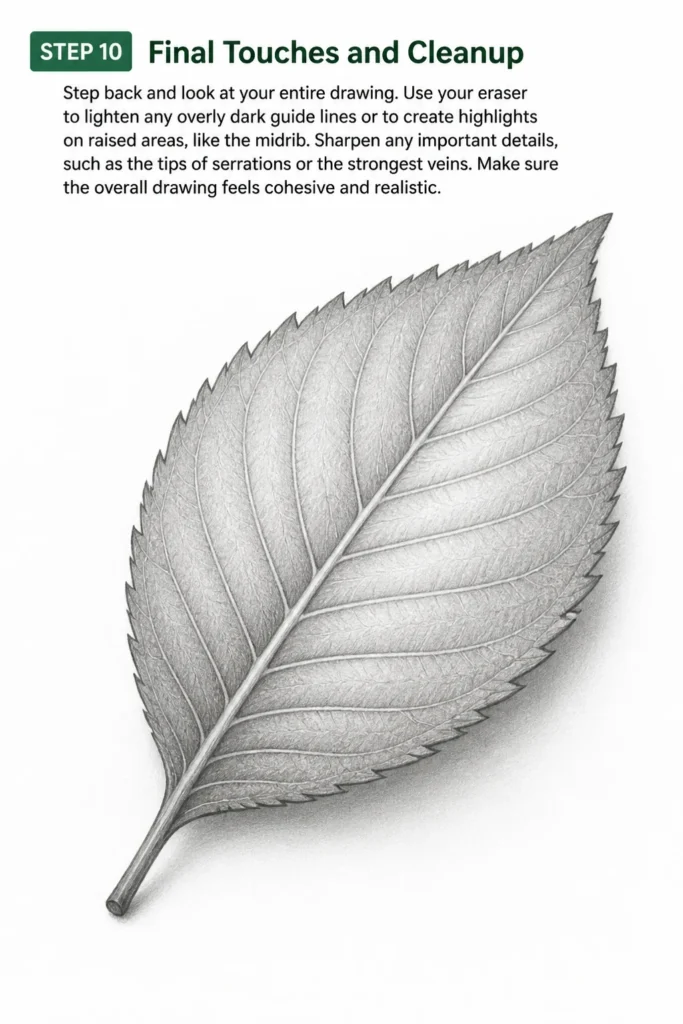
Use your eraser to lighten any overly dark guide lines or to create highlights on raised areas, like the midrib.
Sharpen any important details, such as the tips of serrations or the strongest veins.
Make sure the overall drawing feels cohesive and realistic.
Common Mistakes to Avoid
Making it Too Symmetrical
Nature is rarely perfectly symmetrical, and leaves are no exception. Drawing both sides of the leaf as exact mirror images can make your drawing look stiff and unnatural.
Instead, allow for slight variations in the curves, serrations, and vein patterns on each side of the midrib. Embrace these small differences to make your leaf feel more organic and alive.
Drawing Flat Veins
Many beginners draw veins as simple lines on the surface of the leaf. However, veins are actually slightly raised structures.
To show this, add very subtle shading along one side of the veins, indicating a tiny shadow cast by their raised form. This small detail adds significant dimension to your drawing.
Ignoring the Light Source
A drawing without a clear light source will appear flat and two-dimensional. Forgetting where the light is coming from means you won’t have consistent shadows and highlights.
Always decide on a light source at the beginning of your shading process. This consistency will help you apply shadows and highlights accurately, giving your leaf realistic form and depth.
Rushing the Details
It’s tempting to jump straight to the tiny veins and intricate textures. However, building your drawing up too quickly can lead to a messy or disproportionate result.
Work from general shapes to specific details, using light lines initially. This layered approach allows you to correct mistakes easily and ensures your overall structure is sound before you commit to finer elements.
Troubleshooting
My leaf looks stiff or unnatural.
This often happens when you draw with overly straight or rigid lines. Leaves in nature have subtle curves and imperfections.
Try using a looser grip on your pencil and practicing long, flowing strokes. Focus on capturing the organic flow of the leaf’s edges and veins, rather than aiming for geometric precision. Don’t be afraid to add small nicks or bends.
My veins look messy or disorganized.
Veins can be tricky because there are so many of them. Messiness often comes from drawing them too fast or without observing their branching patterns.
Slow down and carefully trace the path of the main veins first. Then, add secondary and tertiary veins, paying close attention to how they connect and taper. Use lighter pressure for smaller veins to make them appear finer.
My shading is muddy or inconsistent.
Muddy shading usually results from pressing too hard too soon, or from over-blending. Inconsistent shading means your light source might not be clear.
Start with the lightest possible pressure and build up your values in thin layers. Use a clean eraser to lift excess graphite and define highlights. Always refer back to your chosen light source to ensure your shadows and highlights are logical.
Key Takeaways
- Observe carefully: Spend time looking at your subject before you draw.
- Start light and build layers: Begin with faint guidelines and gradually add detail and tone.
- Embrace organic forms: Avoid perfect symmetry; leaves have natural imperfections.
- Understand the light source: Consistent lighting creates realistic form and dimension.
- Practice regularly: Drawing is a skill that improves with consistent effort and observation.
- Focus on the structure: Establish the midrib and main veins before adding tiny details.
Frequently Asked Questions
What kind of pencil is best for drawing a leaf?
An HB pencil is a great all-around choice for initial sketching and mid-tones. For deeper shadows and richer values, a 2B or 4B pencil works well. For very fine details and light lines, an H or 2H pencil can be useful.
How can I make my leaf drawing look more realistic?
Realism comes from close observation, accurate proportions, and effective use of shading. Pay attention to the subtle variations in value, the texture of the leaf surface, and how light interacts with its form. Don’t forget small imperfections like tears or insect bites.
Should I always use a reference photo or a real leaf?
Absolutely. Drawing from a real leaf or a high-quality reference photo is crucial for accuracy. It helps you understand the complex forms, vein patterns, and light interactions that you might otherwise simplify or overlook from imagination alone.
How do I draw different types of leaves, like oak or maple?
The core steps remain the same: start with the basic silhouette, establish the midrib, then refine the edges and add veins. The key is to carefully observe the unique characteristics of each leaf type—their distinct lobe shapes, serration patterns, and vein structures. Practice drawing various leaves to build your visual library.
Our Top Recommended Finds
- Quality Sketchbook: A sketchbook with good quality, acid-free paper prevents yellowing over time and handles erasing well, making your drawings last.
- Drawing Pencil Set: A set offering a range of hardness (e.g., 2H to 6B) allows you to achieve a wider variety of tones and line weights, from light sketches to deep shadows.
- Kneaded Eraser: Unlike traditional erasers, a kneaded eraser lifts graphite without damaging the paper surface and can be shaped to erase small areas or lighten tones subtly.
Embrace the Art of Nature
You’ve just completed a detailed guide to drawing a leaf, a journey that hones your observation and artistic skills.
Now it’s your turn to put pencil to paper and bring your own leafy creations to life.
Keep exploring the natural world around you for endless inspiration, perhaps by trying a different type of leaf or even a full branch next.
& Painting
No rigid rules or pretension. Just practical guides, medium comparisons, and encouraging tips to help you enjoy the drawing & painting process.