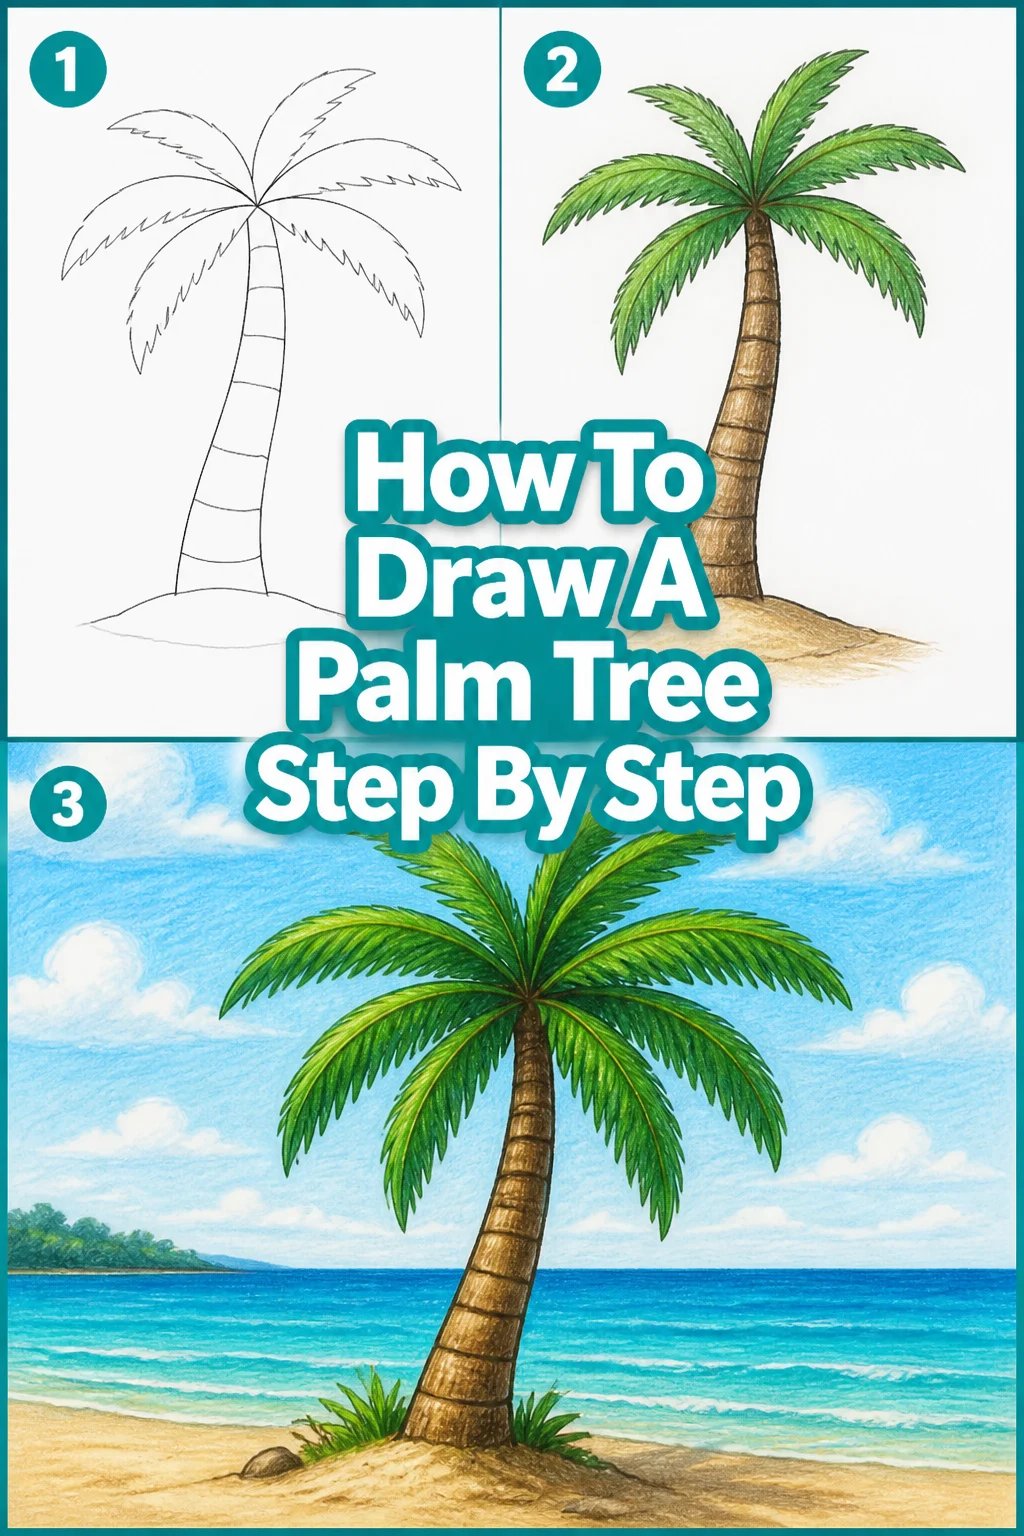
🌴 How To Draw A Palm Tree Step By Step
Learning to draw a palm tree can transport you to a sunny beach, even from your drawing desk.
I’ve spent countless hours sketching these iconic symbols of paradise, perfecting the curves and textures.
This guide shares my practical approach, ensuring you create a beautiful palm tree every time.
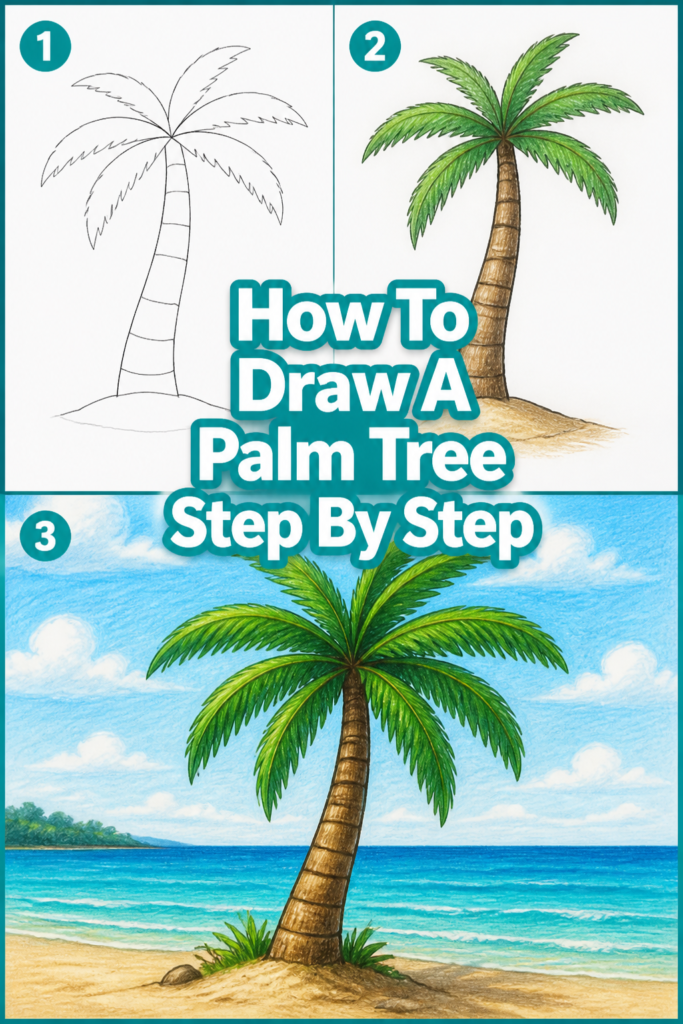
Quick Overview
By following these steps, you’ll create a realistic and vibrant palm tree drawing.
You’ll learn to capture its distinctive shape, texture, and natural movement.
- Time needed: 30-60 minutes
- Difficulty: Beginner
- What you’ll need: Pencil (HB, 2B), eraser, sketchbook or paper
Step-by-Step Instructions
Step 1: Sketch the Basic Trunk Shape
Begin by lightly drawing two curved, parallel lines for the trunk.
Palm tree trunks are rarely perfectly straight; they often have a gentle S-curve or lean.
Make the base slightly wider than the top to give it a natural taper.
Pro Tip: Use very light pencil strokes for this initial sketch. This allows for easy adjustments later without leaving heavy marks.
Step 2: Add Trunk Segments and Texture
Draw a series of horizontal, slightly curved lines across the trunk.
These lines represent the growth rings or scars from fallen fronds, giving the trunk its characteristic segmented look.
Vary the spacing and curve of these lines to make it appear more organic and less uniform.
Step 3: Establish the Frond Stem Base
Sketch a crown of short, curved lines at the top of the trunk.
These lines will serve as the starting points for the main frond stems.
Imagine them radiating outwards in a somewhat circular pattern, but not perfectly symmetrical.
Step 4: Draw the Main Frond Stems
Extend graceful, arcing lines from the frond stem bases you just drew.
These are the central ribs of the palm fronds.
Some fronds will arc upwards, others will droop downwards, creating a dynamic silhouette.
Pro Tip: Observe real palm trees or reference photos. Notice how some fronds appear shorter or are partially obscured by others, adding to the tree’s depth.
Step 5: Add the Frond Leaflets
Draw numerous short, angled lines extending from both sides of each main frond stem.
These are the individual leaflets that give the palm frond its feathery appearance.
Ensure the leaflets are slightly curved and point generally towards the tip of the frond.
Vary their length and angle slightly to avoid a stiff, unnatural look.
Step 6: Refine the Frond Outlines
Connect the tips of the leaflets on each frond with a smooth, slightly wavy line.
This creates the overall shape and definition of each frond.
Erase any unnecessary guide lines or overlapping pencil marks within the fronds.
Step 7: Introduce Coconuts (Optional)
Sketch small, oval or circular shapes clustered near the top of the trunk, beneath the fronds.
Coconuts often hang in groups, partially hidden by the lower fronds.
Vary their size and position for a more realistic cluster.
Step 8: Add Ground and Horizon Line
Draw a simple curved line at the base of the trunk to indicate the ground.
You can add a distant horizon line behind the tree to suggest a landscape.
This helps ground the tree in its environment.
Step 9: Apply Basic Shading
Choose a light source and apply shading accordingly.
Lightly shade one side of the trunk and the underside of the fronds.
Use cross-hatching or gentle strokes to build up depth and form.
Pro Tip: Shading helps separate overlapping fronds and makes the trunk appear cylindrical rather than flat. Don’t overdo it; subtle shading is often more effective.
Step 10: Final Details and Cleanup
Darken your main lines where appropriate, adding emphasis.
Add subtle textures to the trunk or small imperfections to the fronds.
Use your eraser to clean up any stray marks and refine edges.
Common Mistakes to Avoid
Drawing a Perfectly Straight Trunk
Many beginners draw palm trunks as perfectly vertical and rigid.
This makes the tree look artificial and stiff.
Always introduce a gentle curve or slight lean to the trunk, reflecting the natural growth of palm trees.
Symmetrical Frond Placement
Creating fronds that are perfectly symmetrical and evenly spaced around the crown can make your palm tree look cartoony.
In nature, fronds grow organically, overlapping and varying in length and angle.
Strive for an asymmetrical, natural arrangement to add realism.
Lack of Trunk Texture
Leaving the trunk as a smooth, featureless cylinder removes a key characteristic of palm trees.
The distinctive growth rings or fibrous texture are crucial for realism.
Remember to add those horizontal lines or vertical striations to give the trunk its unique appearance.
Over-Complicating Leaflets
Some artists try to draw every single leaflet with extreme detail, which can be time-consuming and often looks cluttered.
Focus on the overall shape and flow of the leaflets on each frond.
Suggest the individual leaves with simple, angled lines rather than drawing each one perfectly.
Troubleshooting
My Tree Looks Stiff and Unnatural
If your palm tree lacks fluidity, re-examine the curves of your trunk and fronds.
Ensure the trunk has a gentle S-curve or lean, and the fronds arc gracefully, some up, some down.
Avoid straight lines wherever possible; natural forms are rarely perfectly linear.
The Fronds Look Flat and Lack Volume
Flat fronds often result from not considering their three-dimensional form.
Think of them as having a slight curve or fold, not just a flat plane.
Adding subtle shading on the underside of fronds and where they overlap will help create a sense of volume and depth.
My Drawing Lacks Depth and Looks One-Dimensional
A lack of depth usually comes from insufficient contrast and shading.
Identify your light source and shade the areas opposite to it more darkly.
Use varying line weights – darker lines for foreground elements or areas in shadow, lighter lines for distant or illuminated parts.
Key Takeaways
- Always start with light pencil strokes for easy corrections.
- Embrace curves and asymmetry to achieve a natural look.
- Add trunk texture to enhance realism and detail.
- Vary frond length and angle for a dynamic composition.
- Use simple shading to create depth and dimension.
- Practice regularly to improve your observation and drawing skills.
Frequently Asked Questions
What type of pencil is best for drawing palm trees?
An HB pencil is excellent for initial sketches and general lines, offering a good balance of hardness and darkness.
For darker lines and shading, a 2B or 4B pencil can add richer tones and depth to your drawing.
How can I make my palm tree look more realistic?
Focus on observing real palm trees or high-quality reference photos.
Pay attention to the unique curvature of the trunk, the varied angles of the fronds, and the specific textures.
Adding subtle shading and highlighting will also greatly enhance realism.
Should I draw every single leaf on the fronds?
No, drawing every single leaf is usually unnecessary and can make the drawing look too busy.
Instead, suggest the presence of numerous leaflets with a series of short, angled lines along the frond’s main stem.
Focus on the overall shape and flow of the frond rather than individual perfect leaves.
How do I make the trunk look textured and not smooth?
To create trunk texture, draw irregular horizontal lines across the trunk to represent growth rings or scars.
You can also add light vertical striations or small, irregular marks to mimic the fibrous surface of some palm species.
Varying the pressure of your pencil can also help create a sense of rough texture.
Our Top Recommended Finds
- Staedtler Mars Lumograph Pencils (Assorted Set): A versatile set of graphite pencils for sketching, outlining, and shading.
- Canson XL Mix Media Pad: A sturdy paper pad that handles both dry media like pencil and light washes, perfect for practice.
- Kneaded Eraser: Essential for lifting graphite without damaging the paper, allowing for gentle corrections and highlights.
Unleash Your Inner Artist Today
Drawing a palm tree is a rewarding experience that combines simple shapes with organic forms.
You now have all the steps to create your own tropical masterpiece.
Grab your pencil and paper right now, and let your creativity flourish!