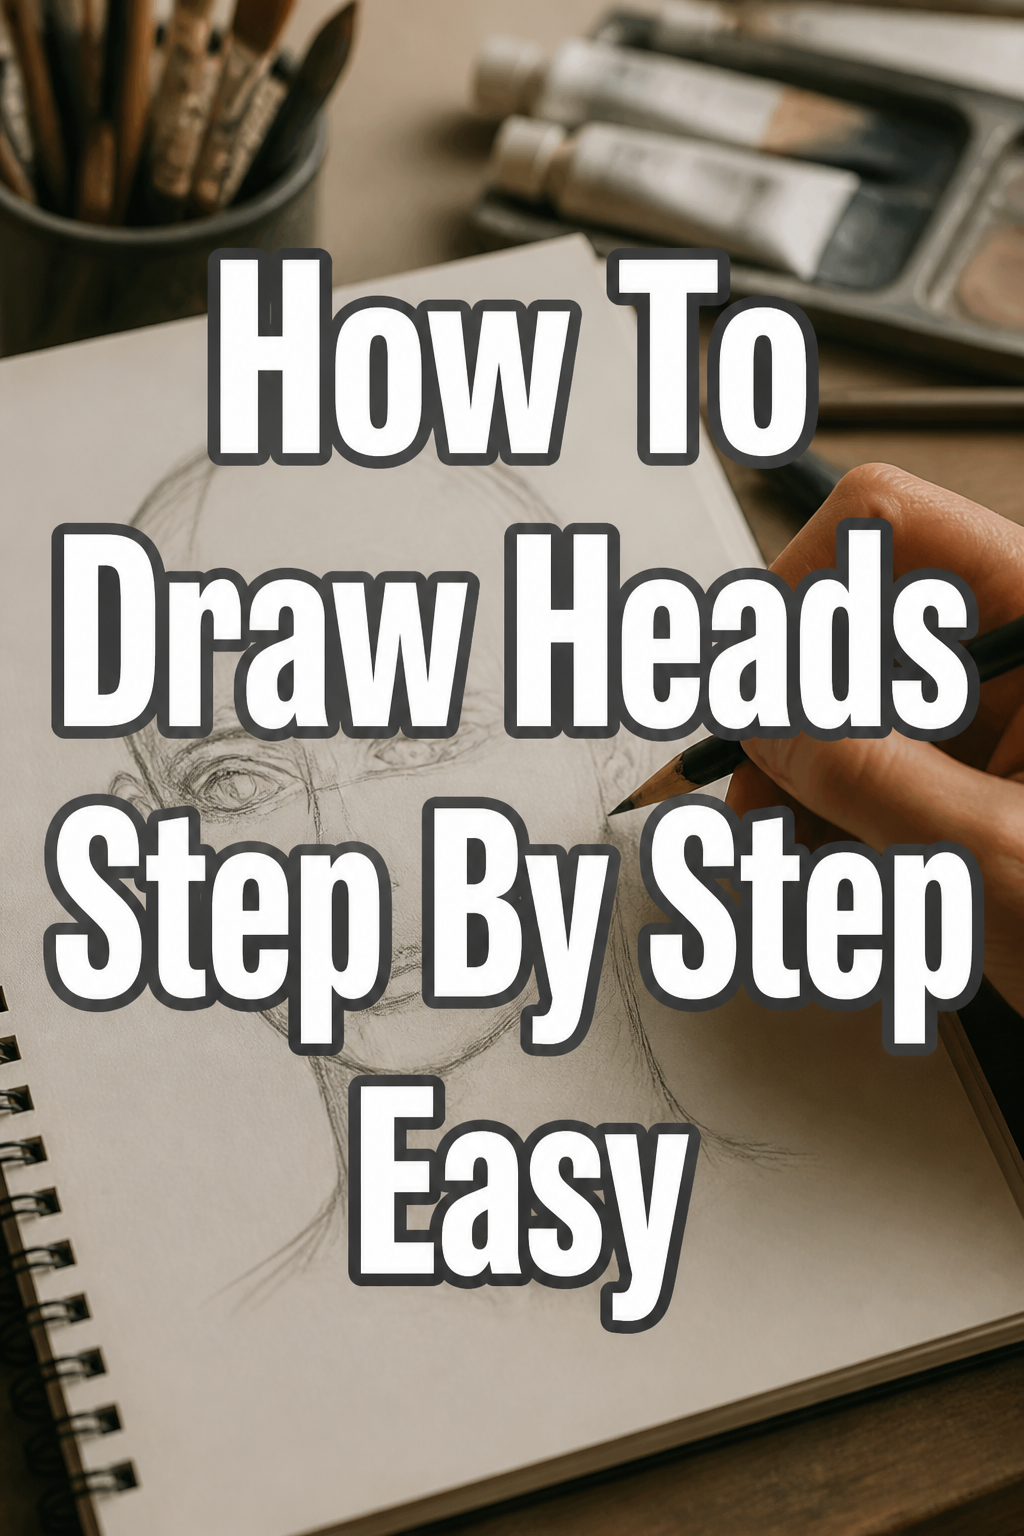
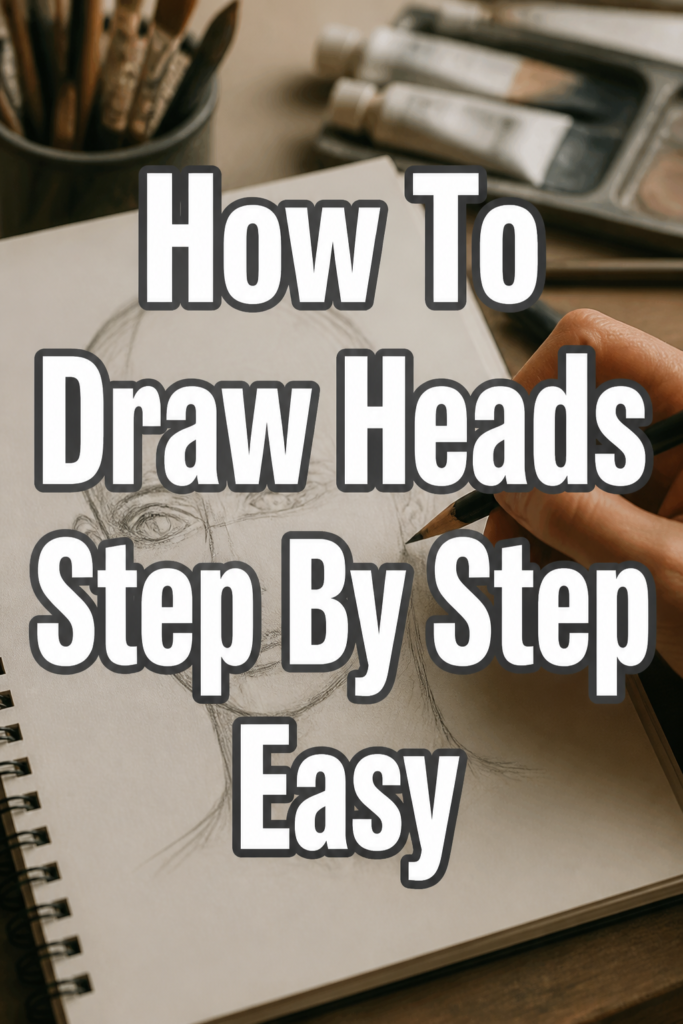
✏️ How To Draw Heads Step By Step Easy

& Painting
No rigid rules or pretension. Just practical guides, medium comparisons, and encouraging tips to help you enjoy the drawing & painting process.
Learning to draw heads can feel overwhelming. Many artists struggle with proportions and making faces look natural. I certainly did when I first started out.
But what if I told you there’s a straightforward path? This guide cuts through the complexity, sharing the methods I learned that truly make a difference. You can absolutely draw compelling heads with a little practice and the right approach.
Quick Overview
This guide will walk you through building a head from basic shapes to refined features. You’ll learn the fundamental proportions that make a face believable. By the end, you’ll have a solid foundation for drawing various head types.
- Time needed: 30-60 minutes per practice session
- Difficulty: Beginner
- What you’ll need: Pencil (HB or 2B recommended), paper, eraser
Step-by-Step Instructions
Step 1: Start with a Simple Circle
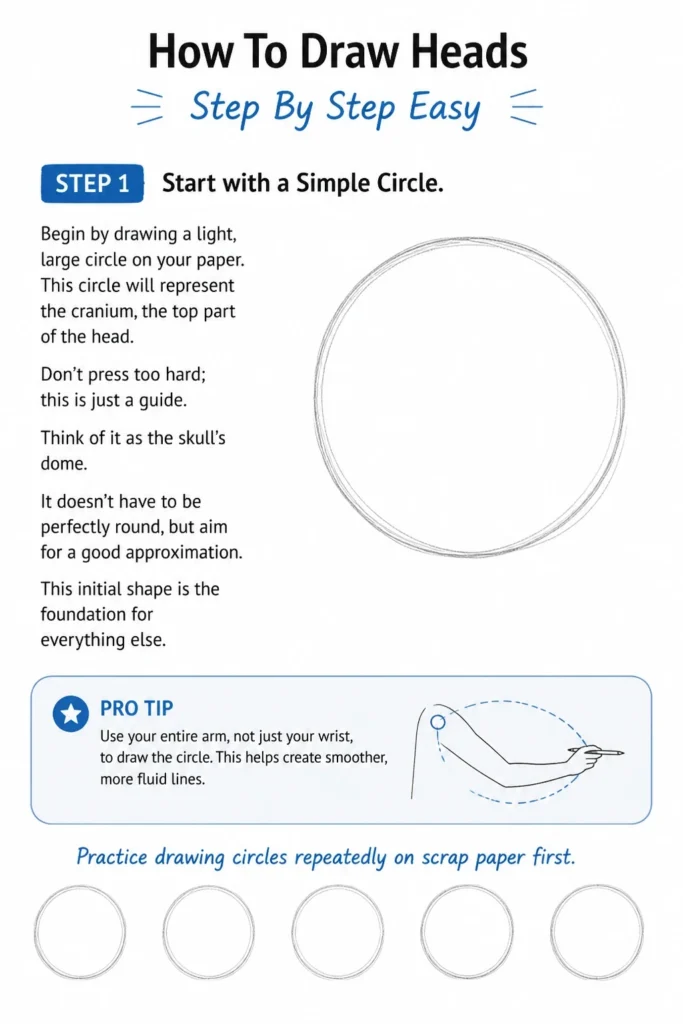
Begin by drawing a light, large circle on your paper. This circle will represent the cranium, the top part of the head. Don’t press too hard; this is just a guide.
Think of it as the skull’s dome. It doesn’t have to be perfectly round, but aim for a good approximation. This initial shape is the foundation for everything else.
Pro Tip: Use your entire arm, not just your wrist, to draw the circle. This helps create smoother, more fluid lines. Practice drawing circles repeatedly on scrap paper first.
Step 2: Add the Jawline and Chin
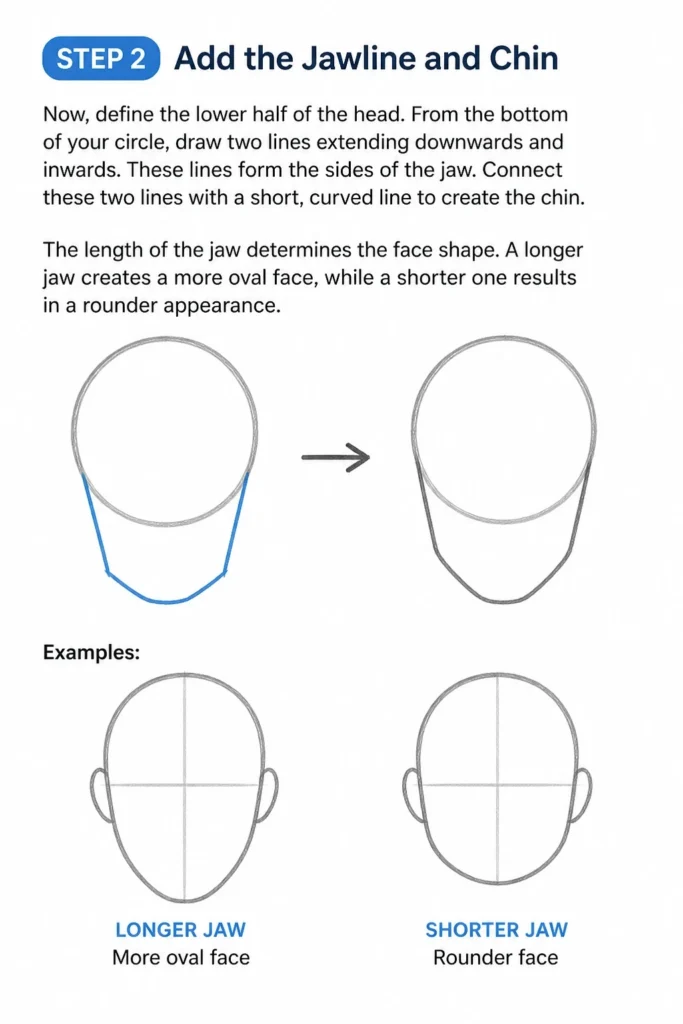
Now, define the lower half of the head. From the bottom of your circle, draw two lines extending downwards and inwards. These lines form the sides of the jaw.
Connect these two lines with a short, curved line to create the chin. The length of the jaw determines the face shape. A longer jaw creates a more oval face, while a shorter one results in a rounder appearance.
Step 3: Establish the Center Lines
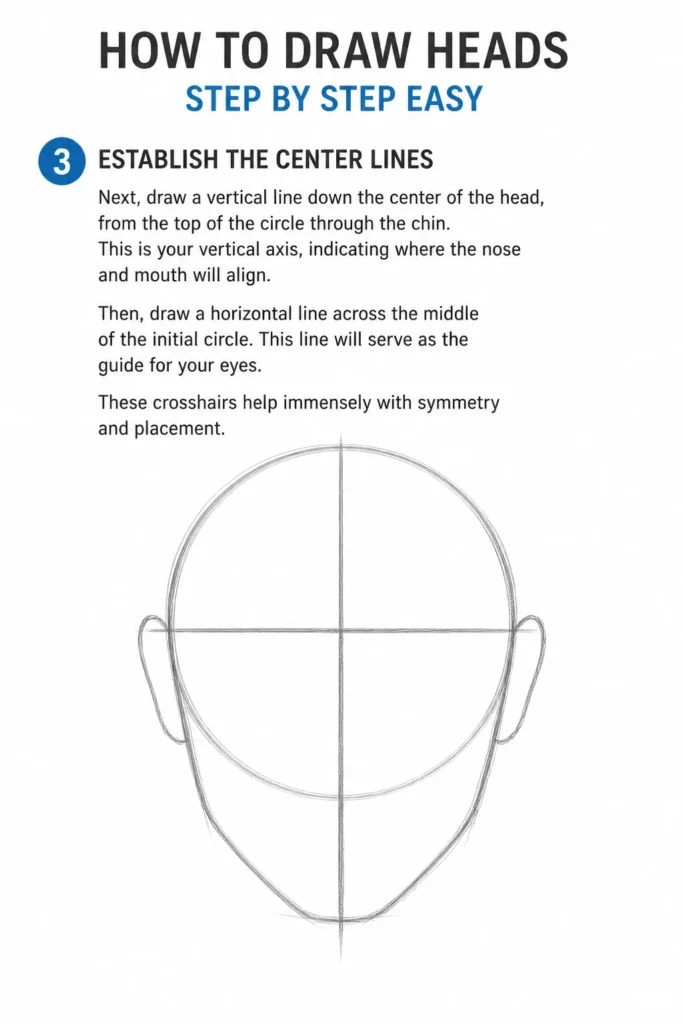
Next, draw a vertical line down the center of the head, from the top of the circle through the chin. This is your vertical axis, indicating where the nose and mouth will align.
Then, draw a horizontal line across the middle of the initial circle. This line will serve as the guide for your eyes. These crosshairs help immensely with symmetry and placement.
Step 4: Place the Eye Line and Eyebrows
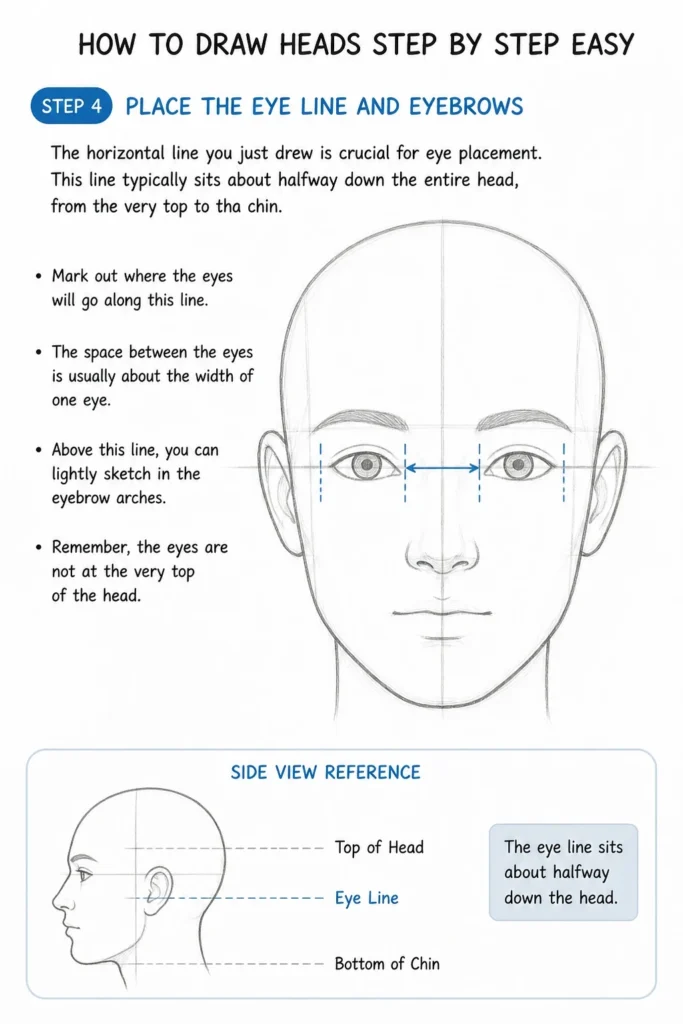
The horizontal line you just drew is crucial for eye placement. This line typically sits about halfway down the entire head, from the very top to the chin. Mark out where the eyes will go along this line.
The space between the eyes is usually about the width of one eye. Above this line, you can lightly sketch in the eyebrow arches. Remember, the eyes are not at the very top of the head.
Step 5: Position the Nose
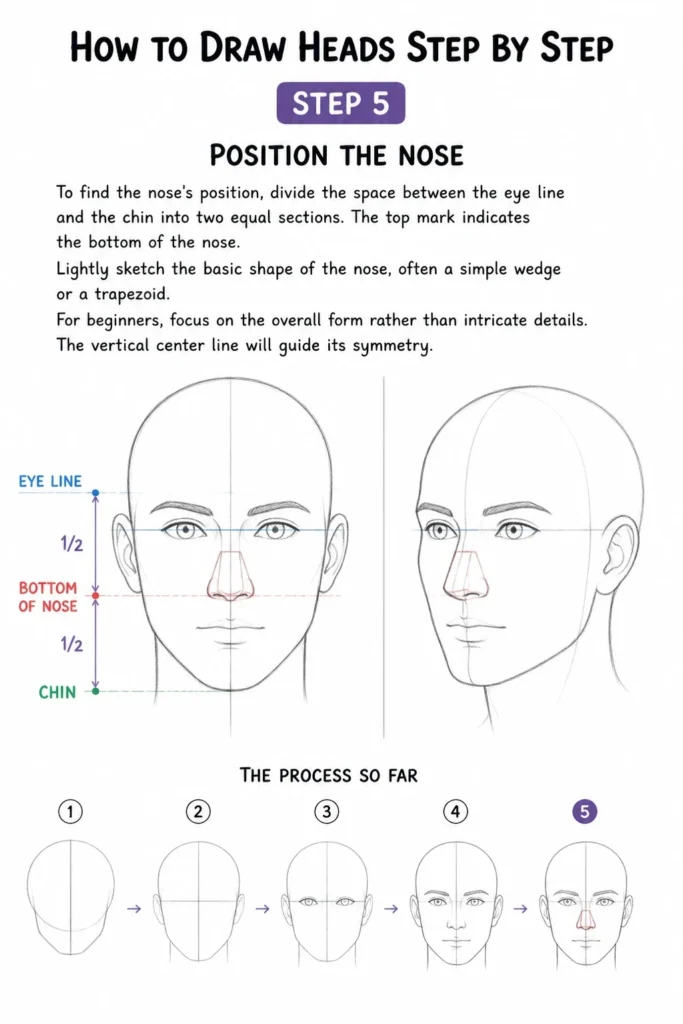
To find the nose’s position, divide the space between the eye line and the chin into two equal sections. The top mark indicates the bottom of the nose.
Lightly sketch the basic shape of the nose, often a simple wedge or a trapezoid. For beginners, focus on the overall form rather than intricate details. The vertical center line will guide its symmetry.
Step 6: Determine the Mouth Location
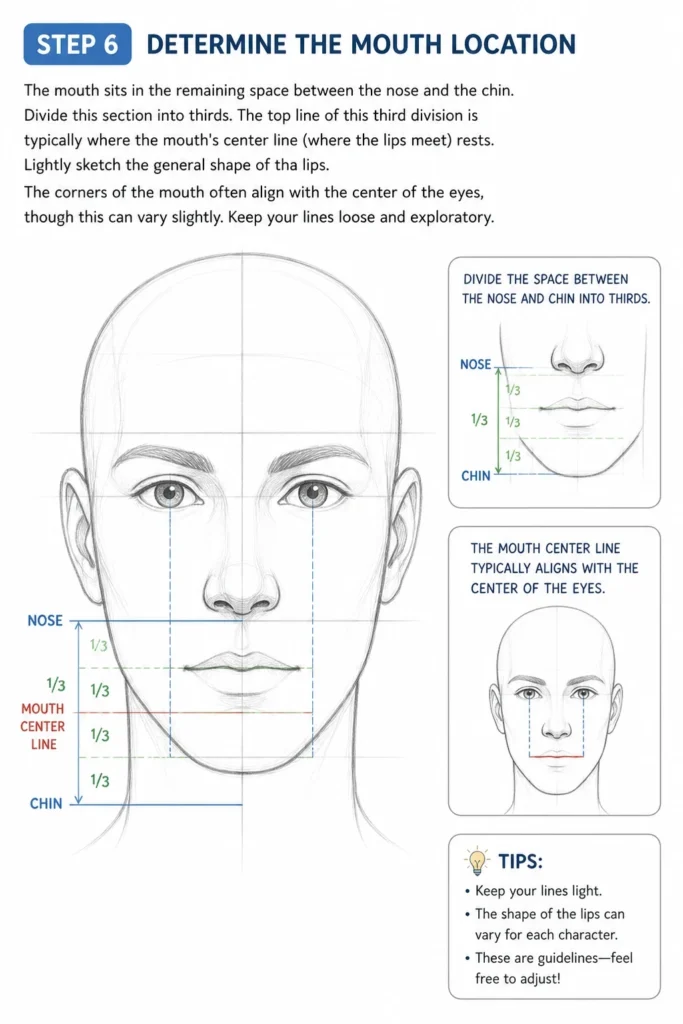
The mouth sits in the remaining space between the nose and the chin. Divide this section into thirds. The top line of this third division is typically where the mouth’s center line (where the lips meet) rests.
Lightly sketch the general shape of the lips. The corners of the mouth often align with the center of the eyes, though this can vary slightly. Keep your lines loose and exploratory.
Step 7: Place the Ears
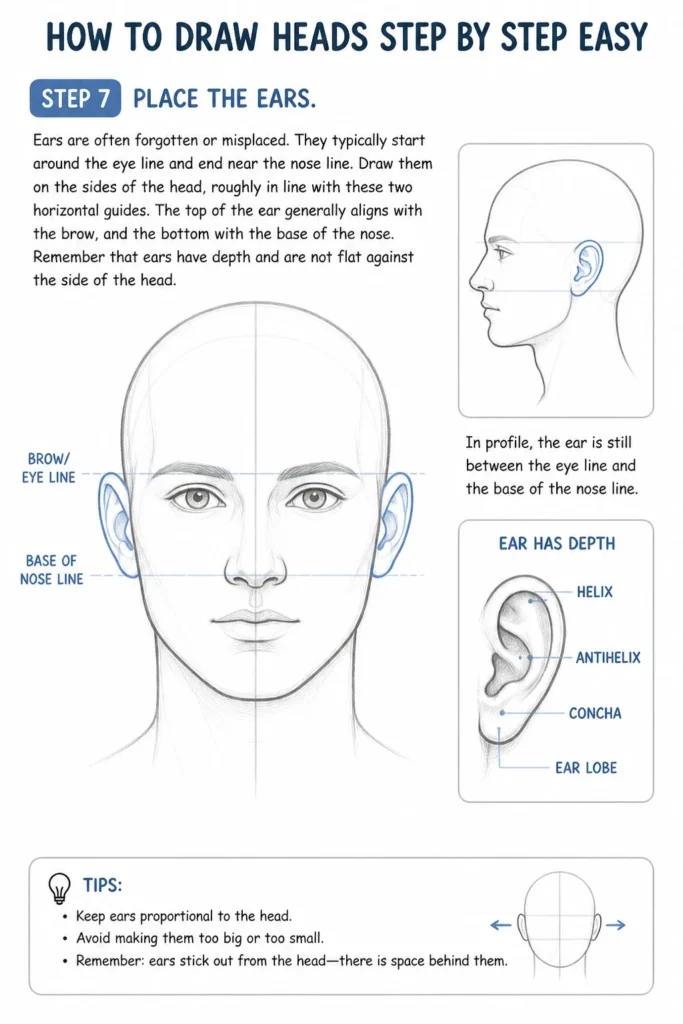
Ears are often forgotten or misplaced. They typically start around the eye line and end near the nose line. Draw them on the sides of the head, roughly in line with these two horizontal guides.
The top of the ear generally aligns with the brow, and the bottom with the base of the nose. Remember that ears have depth and are not flat against the side of the head.
Step 8: Add Hairline and Volume
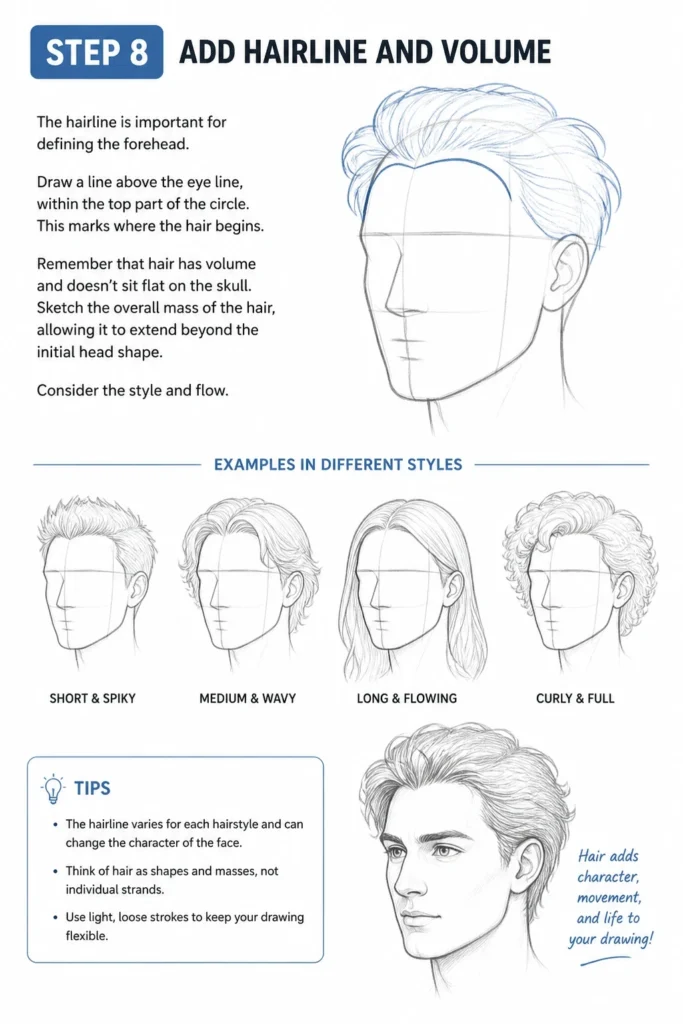
The hairline is important for defining the forehead. Draw a line above the eye line, within the top part of the circle. This marks where the hair begins.
Remember that hair has volume and doesn’t sit flat on the skull. Sketch the overall mass of the hair, allowing it to extend beyond the initial head shape. Consider the style and flow.
Step 9: Refine Features and Add Neck
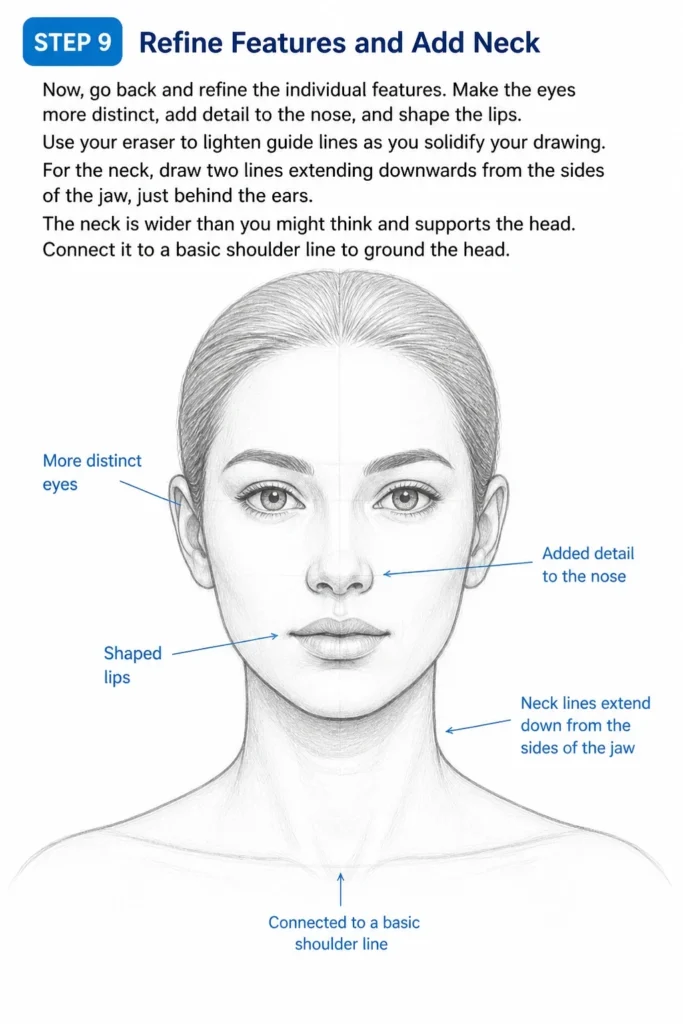
Now, go back and refine the individual features. Make the eyes more distinct, add detail to the nose, and shape the lips. Use your eraser to lighten guide lines as you solidify your drawing.
For the neck, draw two lines extending downwards from the sides of the jaw, just behind the ears. The neck is wider than you might think and supports the head. Connect it to a basic shoulder line to ground the head.
Step 10: Erase Guide Lines and Clean Up
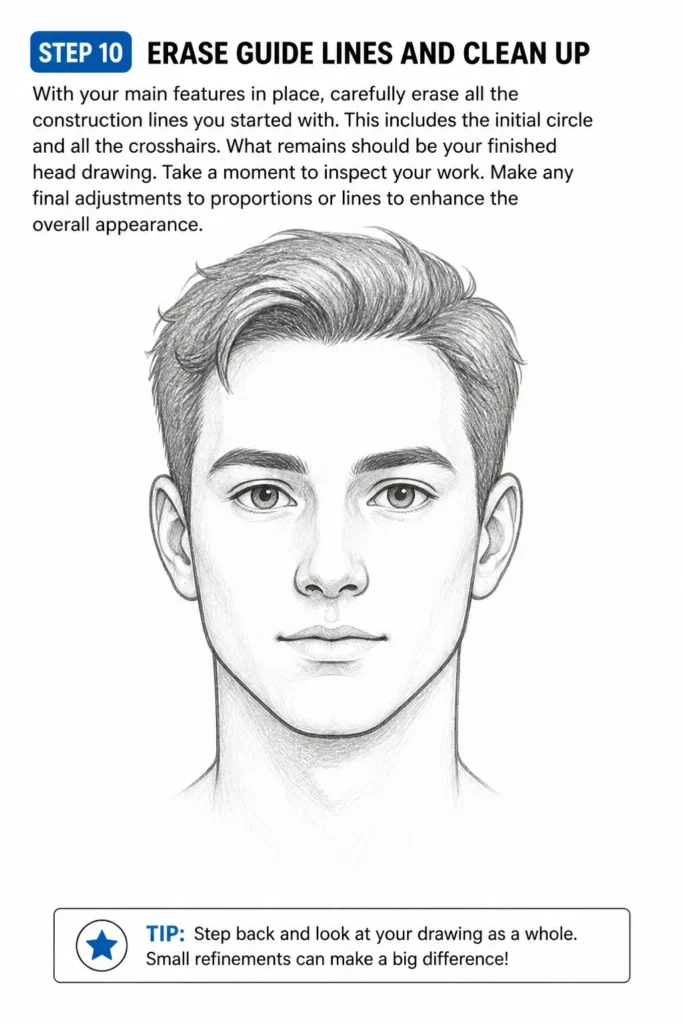
With your main features in place, carefully erase all the construction lines you started with. This includes the initial circle and all the crosshairs.
What remains should be your finished head drawing. Take a moment to inspect your work. Make any final adjustments to proportions or lines to enhance the overall appearance.
Common Mistakes to Avoid
Symmetry Issues
Many beginners struggle with making both sides of the face look even. Often, one eye might be higher or one side of the jaw wider. This creates an unbalanced, unnatural look.
Always use your center lines as a strict guide. Flip your drawing upside down or look at it in a mirror to spot imbalances you might miss otherwise. Practice drawing symmetrical shapes repeatedly.
Flat Faces
A common error is drawing features as if they are completely flat on the face. The face is a three-dimensional object with curves and contours. Eyes are set into sockets, and the nose projects outwards.
Think about the skull underneath the skin. Use curved lines and subtle shading to suggest depth, even in a line drawing. Avoid drawing eyes as simple ovals on a flat plane.
Wrong Proportions
Placing features too high, too low, or too large can make a head look distorted. For example, eyes might be too close to the top of the head, or the mouth might be too wide. This is a very common mistake.
Consistently use the measuring techniques outlined in the steps. Divide the head into thirds for the hairline, brow, nose, and chin. Always double-check your initial placement before adding detail.
Floating Ears
Ears are often drawn too small, too large, or detached from the head. They might appear to float in space rather than being integrated. This breaks the illusion of a solid form.
Remember that ears are connected to the skull and have a specific range of placement. They generally align with the eye line at the top and the nose line at the bottom. Draw them with some thickness, not as flat cutouts.
Troubleshooting
Head Looks Lopsided or Crooked
If your head drawing appears uneven or tilted, your initial circle or center lines might be off. A slight slant in these early guides can throw off the entire drawing.
Go back to Step 1 and 3. Re-evaluate your initial circle for roundness and your vertical line for straightness. Use a ruler if needed for the center lines during practice. Also, try flipping your drawing or viewing it in a mirror; this often reveals hidden asymmetries.
Features Don’t Align Correctly
When eyes, nose, or mouth seem out of place, it’s usually a proportion issue. The horizontal guide lines for the eyes, nose, and mouth are critical for correct alignment.
Review Steps 4, 5, and 6. Ensure you’ve accurately divided the head into sections. Use light construction lines to measure and verify the placement of each feature relative to the others. Don’t eyeball proportions until you have more experience.
Head Feels Stiff and Unnatural
A stiff head drawing often results from overly rigid lines and a lack of understanding of underlying forms. The head isn’t a box; it has subtle curves and organic shapes.
Practice drawing with lighter, more fluid strokes in the initial stages. Think about the roundness of the skull and the gentle curves of the face. Avoid drawing every line as a hard, dark edge until you are confident in the form. Consider the slight tilt or turn a head might have, rather than always drawing it straight on.
Key Takeaways
- Always start with basic shapes like a circle and jawline to build your foundation.
- Use clear center lines and horizontal guides for accurate feature placement.
- Understand that the eyes are typically halfway down the entire head, not near the top.
- Proportions are key; divide the face into sections to guide the nose and mouth.
- Remember that ears align with the eye and nose lines and have depth.
- Hair adds volume and extends beyond the skull, not sitting flat.
- Practice light, loose lines initially, and refine them as you build confidence.
- Regularly check for symmetry by flipping your drawing or using a mirror.
Frequently Asked Questions
How can I make my heads look less generic?
To make heads less generic, focus on subtle variations in the basic proportions. Change the jaw length, the width of the eyes, or the angle of the eyebrows. Observe real faces and notice their unique characteristics. Practice drawing different ages and genders.
What if my lines are too messy?
Messy lines are common for beginners. Start by drawing very lightly. Use an HB or 2H pencil, which produces lighter marks. As you become more confident in your shapes, you can press harder or switch to a darker pencil. Your early lines are guides, meant to be erased.
Should I draw the skull first?
While this guide focuses on a simplified approach, understanding the skull’s anatomy can be incredibly helpful. You don’t need to draw a full skull every time, but knowing where the eye sockets, cheekbones, and jaw hinge are will improve your sense of form. It adds depth to your understanding.
How do I add expression to a face?
Expression comes from subtle changes in the features. The position of the eyebrows, the shape of the mouth, and the crinkling around the eyes all contribute. Practice drawing different emotions by observing references. Start with simple expressions like happy, sad, or surprised.
Our Top Recommended Finds
- Sketchbook (9×12 inches): A good quality sketchbook provides a dedicated space for practice. Look for paper that can handle multiple erasures.
- Graphite Pencil Set (HB, 2B, 4B): Having a range of pencil hardness allows you to make light construction lines and darker, more defined final lines.
- Kneaded Eraser: This type of eraser is excellent for lifting pencil marks without damaging the paper. It’s also moldable, great for precise corrections.
Your Journey into Drawing Heads Begins Now
Congratulations on taking the first step towards mastering head drawing. You now have a practical framework to build upon. This process might seem detailed at first, but with each attempt, it will become more intuitive.
Don’t be afraid to experiment with different face shapes and features. The more you draw, the more you’ll develop your eye and hand coordination. Pick up your pencil right now and start sketching. The path to confident head drawing is paved with practice.
& Painting
No rigid rules or pretension. Just practical guides, medium comparisons, and encouraging tips to help you enjoy the drawing & painting process.