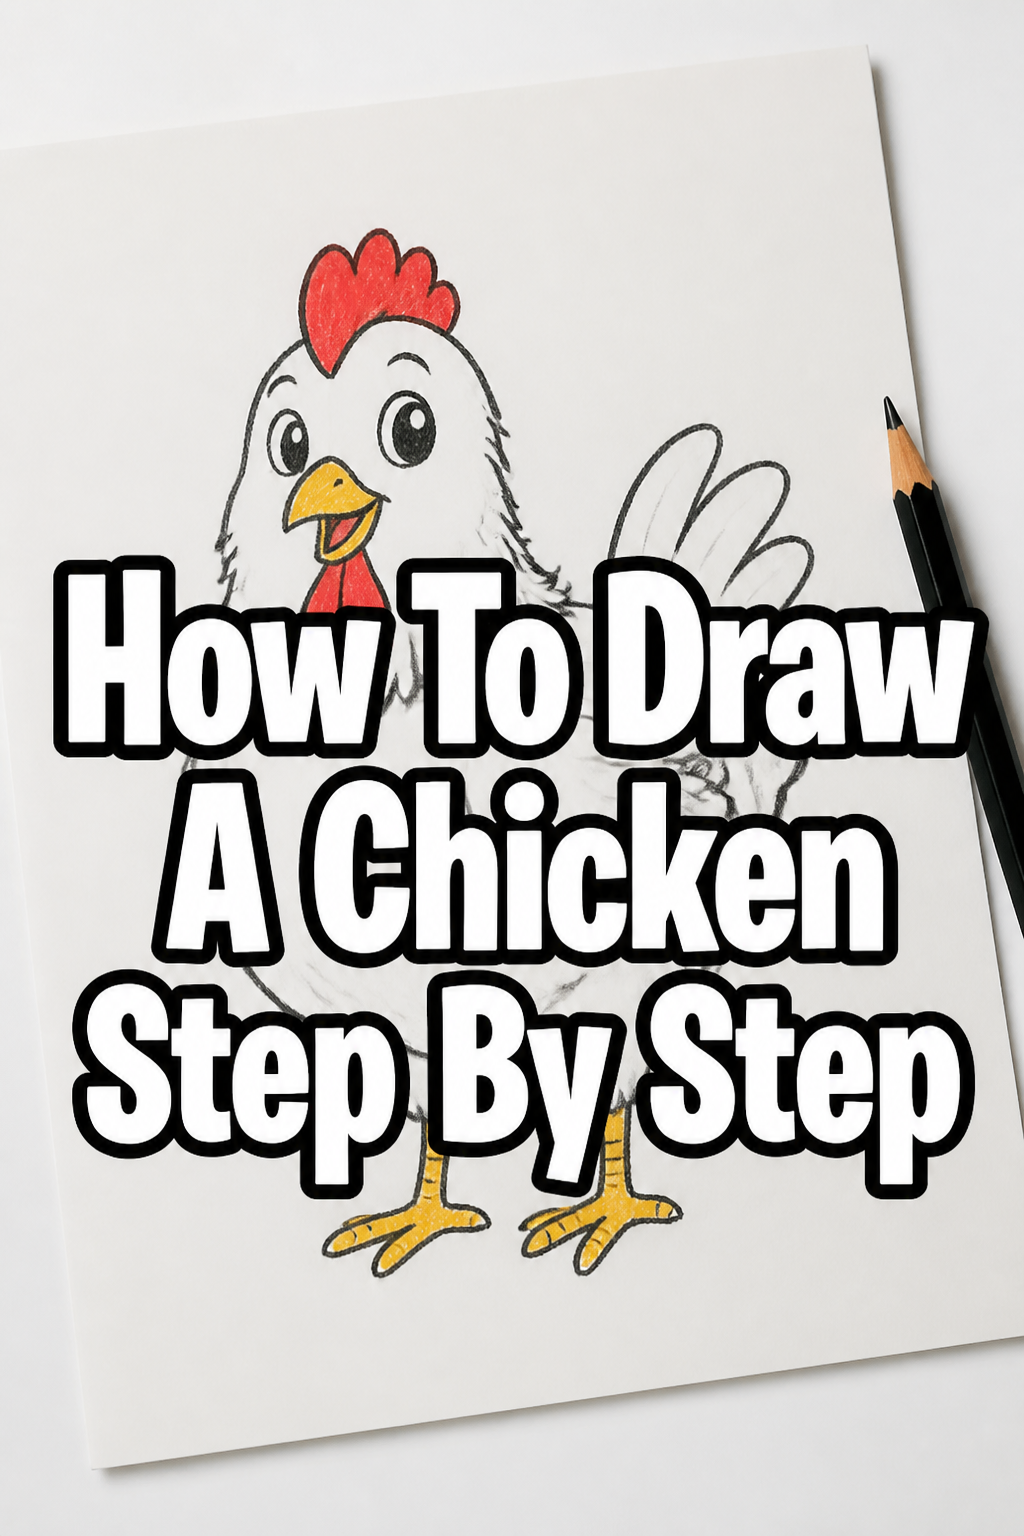
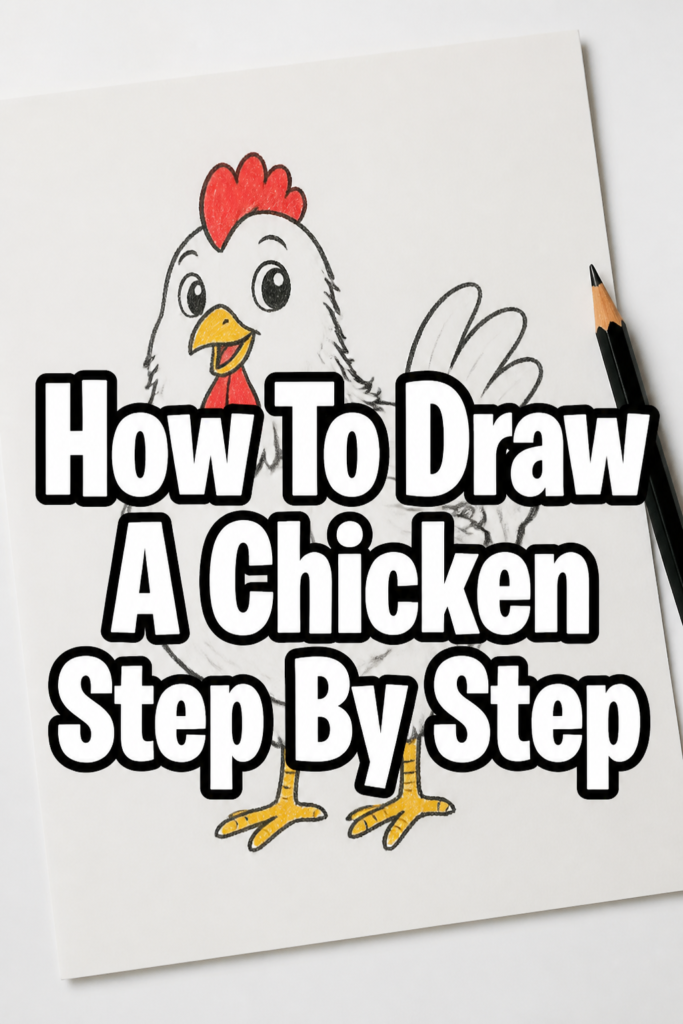
🐔 How To Draw A Chicken Step By Step

& Painting
No rigid rules or pretension. Just practical guides, medium comparisons, and encouraging tips to help you enjoy the drawing & painting process.
Ever wanted to sketch a charming farm animal but felt a bit intimidated?
Drawing a chicken might seem like a challenge, but I’ve spent countless hours breaking down complex subjects into simple shapes.
This guide will walk you through each line, making it easy for anyone to create their own feathered friend on paper.
Quick Overview
You’re about to embark on a fun drawing journey!
By the end of this guide, you’ll have a complete chicken drawing, ready to add to your sketchbook or share with friends.
It’s a wonderful way to build confidence in your artistic skills.
- Time needed: 20-30 minutes
- Difficulty: Beginner
- What you’ll need: Pencil, paper, eraser
Step-by-Step Instructions
Step 1: Sketch the Basic Shapes for the Body
Begin by drawing two overlapping ovals for the chicken’s main body.
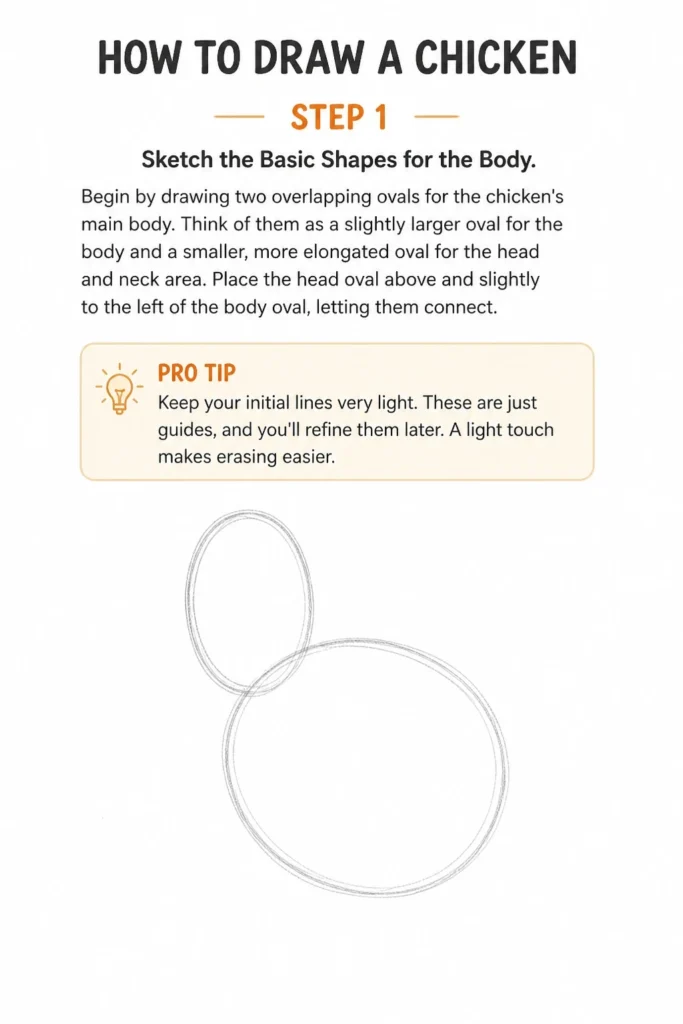
Think of them as a slightly larger oval for the body and a smaller, more elongated oval for the head and neck area.
Place the head oval above and slightly to the left of the body oval, letting them connect.
Pro Tip: Keep your initial lines very light. These are just guides, and you’ll refine them later. A light touch makes erasing easier.
Step 2: Connect the Head and Body, Add the Tail
Connect the head oval to the body oval with two gentle, curved lines.
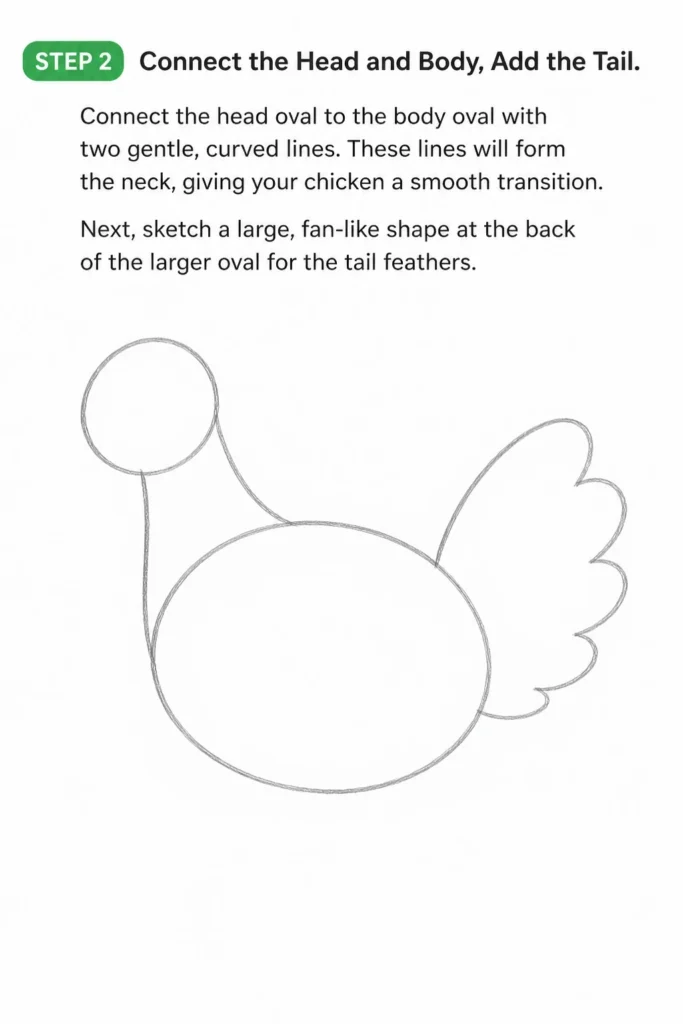
These lines will form the neck, giving your chicken a smooth transition.
Next, sketch a large, fan-like shape at the back of the larger oval for the tail feathers.
Step 3: Define the Head Features – Beak and Comb
Draw a small, triangular beak on the front of the head oval.
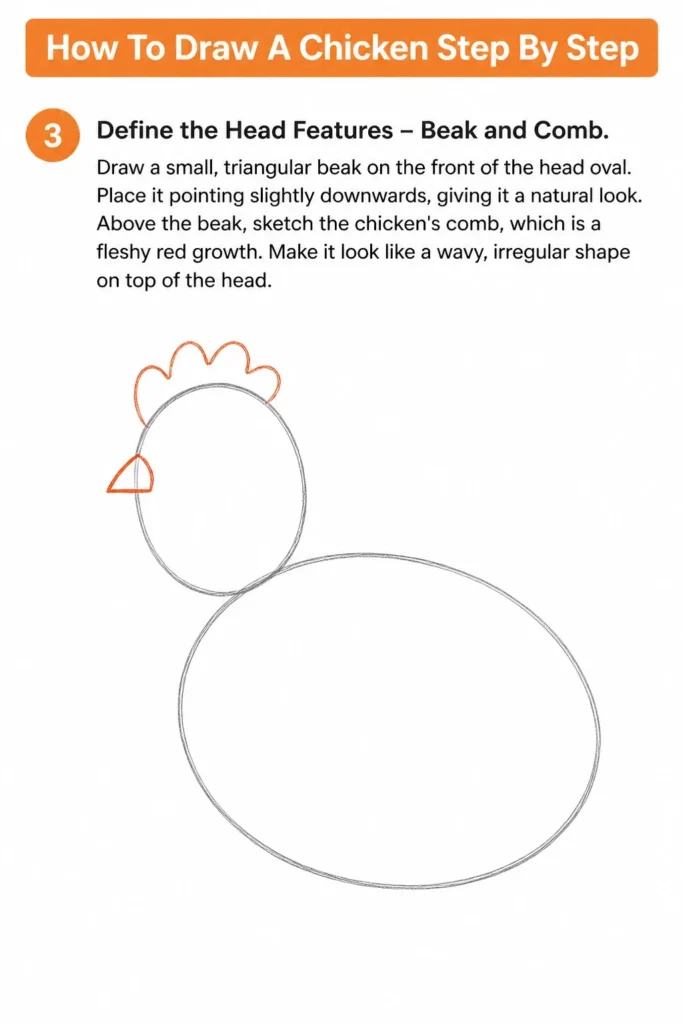
Place it pointing slightly downwards, giving it a natural look.
Above the beak, sketch the chicken’s comb, which is a fleshy red growth.
Make it look like a wavy, irregular shape on top of the head.
Step 4: Add the Wattles and Eye
Introduce the wattles, which are the two fleshy lobes hanging below the chicken’s beak.
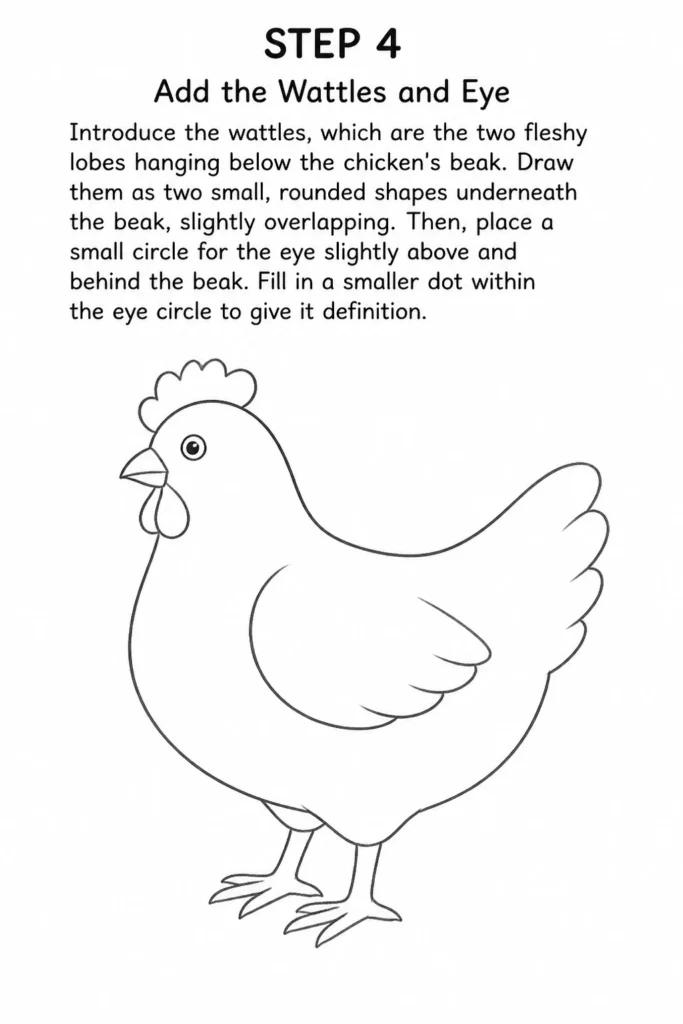
Draw them as two small, rounded shapes underneath the beak, slightly overlapping.
Then, place a small circle for the eye slightly above and behind the beak.
Fill in a smaller dot within the eye circle to give it definition.
Step 5: Draw the Legs and Feet
Sketch two thin lines extending downwards from the bottom of the body oval for the legs.
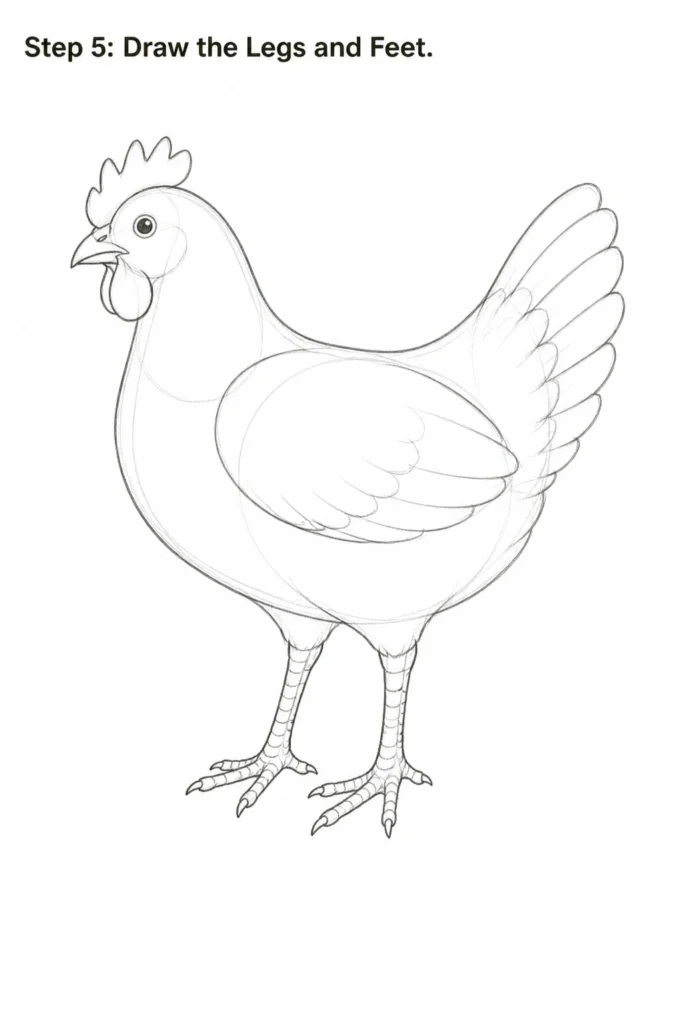
Chickens have distinct, scaly legs, so make them slightly thicker at the top and tapering towards the feet.
At the end of each leg, draw three forward-pointing toes and one backward-pointing toe.
Add small lines for the joints and scales on the legs.
Step 6: Outline the Feathers and Wings
Refine the outline of the chicken’s body, blending the initial ovals into a single, smooth shape.
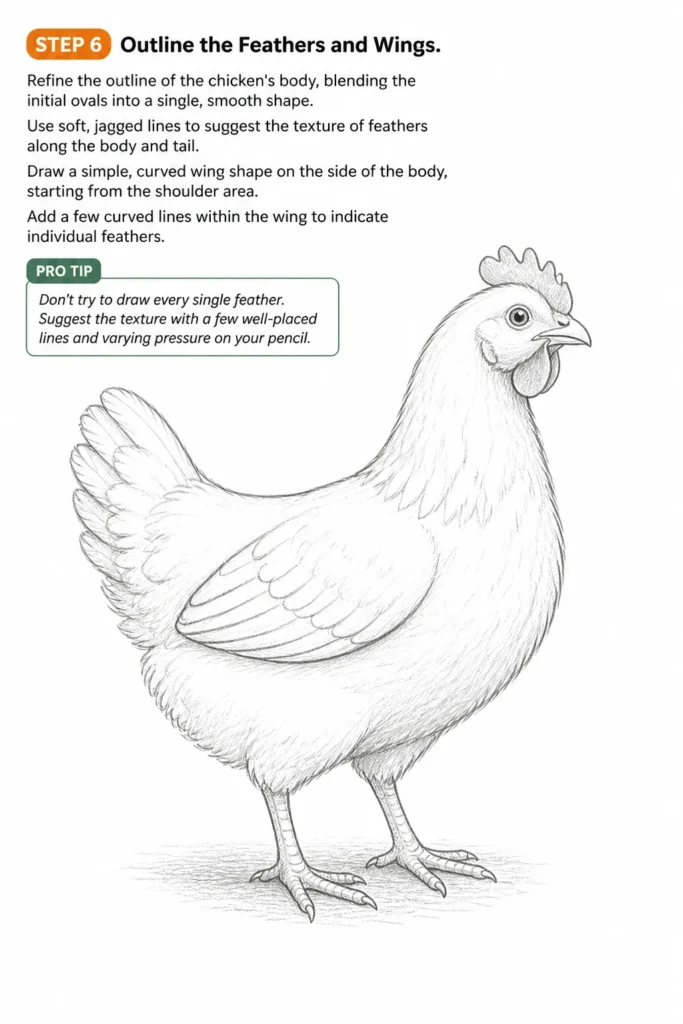
Use soft, jagged lines to suggest the texture of feathers along the body and tail.
Draw a simple, curved wing shape on the side of the body, starting from the shoulder area.
Add a few curved lines within the wing to indicate individual feathers.
Pro Tip: Don’t try to draw every single feather. Suggest the texture with a few well-placed lines and varying pressure on your pencil.
Step 7: Erase Guide Lines and Add Details
Carefully erase all the initial light guide lines from your ovals and connecting shapes.
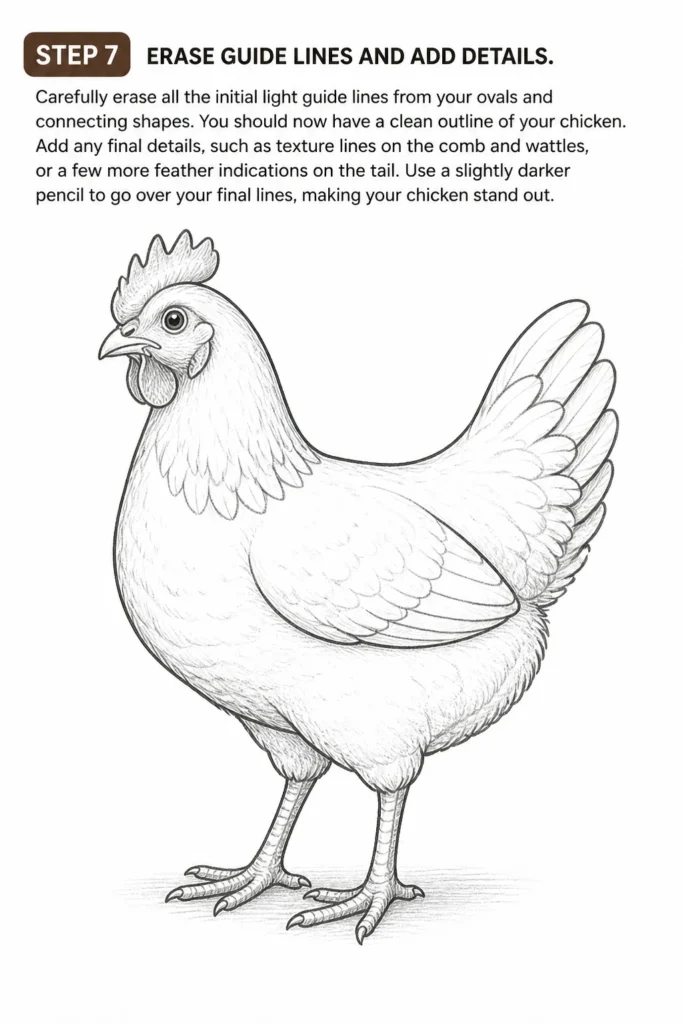
You should now have a clean outline of your chicken.
Add any final details, such as texture lines on the comb and wattles, or a few more feather indications on the tail.
Use a slightly darker pencil to go over your final lines, making your chicken stand out.
Common Mistakes to Avoid
Making the Head Too Large or Small
A common pitfall is misjudging the proportions of the head relative to the body.
If the head is too big, the chicken looks cartoonish; too small, and it appears unbalanced.
Always start with simple ovals and compare their sizes to ensure a natural look.
Stiff or Straight Legs
Many beginners draw legs as perfectly straight lines, which makes the chicken look unnatural.
Remember that chickens have joints in their legs, allowing for movement and a slightly bent posture.
Introduce subtle curves and angles to give the legs a more organic and dynamic feel.
Over-detailing Feathers
Trying to draw every single feather can lead to a cluttered and overwhelming drawing.
Instead of individual feathers, focus on suggesting feather texture with groups of soft, curved lines.
This technique creates a more artistic and less laborious result, enhancing the overall appearance.
Ignoring the Wattle and Comb
These features are crucial for identifying a chicken and adding character.
Leaving them out, or drawing them incorrectly, can make your chicken look generic or unfinished.
Pay attention to their size, shape, and placement to ensure your chicken is instantly recognizable.
Troubleshooting
My Chicken Looks Flat
If your chicken drawing lacks depth, it’s likely due to a lack of dimension in the initial shapes.
When drawing the ovals, visualize them as three-dimensional forms, not just flat circles.
Slightly overlap the shapes, and imagine how light would hit them to suggest volume.
The Beak and Eye Don’t Look Right
Incorrect placement or proportion of the beak and eye can throw off the entire head.
Ensure the beak is positioned at the front of the head, and the eye is slightly above and behind it, not too close to the beak or too far back.
Practice drawing these features separately until you get a feel for their typical appearance.
Legs and Feet Are Disproportionate
Legs that are too long, too short, or feet that are too big or small can make the chicken look awkward.
Observe real chicken anatomy or reference images to understand the typical length of legs relative to the body.
The feet should be proportionate to the legs, providing a stable base for the bird.
Key Takeaways
- Start with simple geometric shapes like ovals to establish the chicken’s basic form.
- Gradually refine your drawing by adding details like the comb, wattles, beak, and eye.
- Use light lines for initial sketches, making it easy to correct mistakes.
- Focus on suggesting feather texture rather than drawing every individual feather.
- Pay attention to proportions for a balanced and realistic-looking chicken.
- Practice regularly to improve your observation skills and line control.
Frequently Asked Questions
Can I draw different types of chickens using this guide?
Absolutely! This guide provides a fundamental structure that you can adapt for various chicken breeds.
Once you master the basic shape, you can adjust feather patterns, comb shapes, and body proportions to depict specific breeds like a Leghorn or a Silkie.
What if my initial ovals aren’t perfect?
Don’t worry about perfect ovals in the beginning; they are just guides.
The beauty of starting light is that you can always refine and reshape as you add more details and connect the forms.
Focus on getting the general placement and size correct.
How can I make my chicken drawing more dynamic?
To add dynamism, consider drawing your chicken in different poses.
Experiment with tilting the head, lifting a leg, or showing it pecking at the ground.
Slight changes in posture can bring a lot of life to your drawing.
Should I use color in my chicken drawing?
Once you’re happy with your line drawing, adding color is a fantastic next step.
You can use colored pencils, markers, or watercolors to bring your chicken to life.
Reference images of real chickens can help you choose realistic color palettes for feathers, combs, and wattles.
Our Top Recommended Finds
- Sketchbook: A good quality sketchbook offers a smooth surface for your pencil and keeps all your drawings in one place.
- Graphite Pencils Set: A set with varying hardness (e.g., 2H, HB, 2B, 4B) allows for light sketching, dark outlines, and shading.
- Kneaded Eraser: This type of eraser is excellent for lifting pencil marks gently without smudging or damaging the paper.
Your Feathered Friend Awaits
You’ve just completed a wonderful journey into drawing a chicken, step by simple step.
Each line you drew built confidence and skill, bringing your feathered friend to life on paper.
Remember, practice makes perfect, and every drawing is a step forward in your artistic development.
Now that you’ve mastered the chicken, why not try drawing other farm animals or even adding a background to your scene?
Grab your pencil again today and let your creativity take flight!
& Painting
No rigid rules or pretension. Just practical guides, medium comparisons, and encouraging tips to help you enjoy the drawing & painting process.