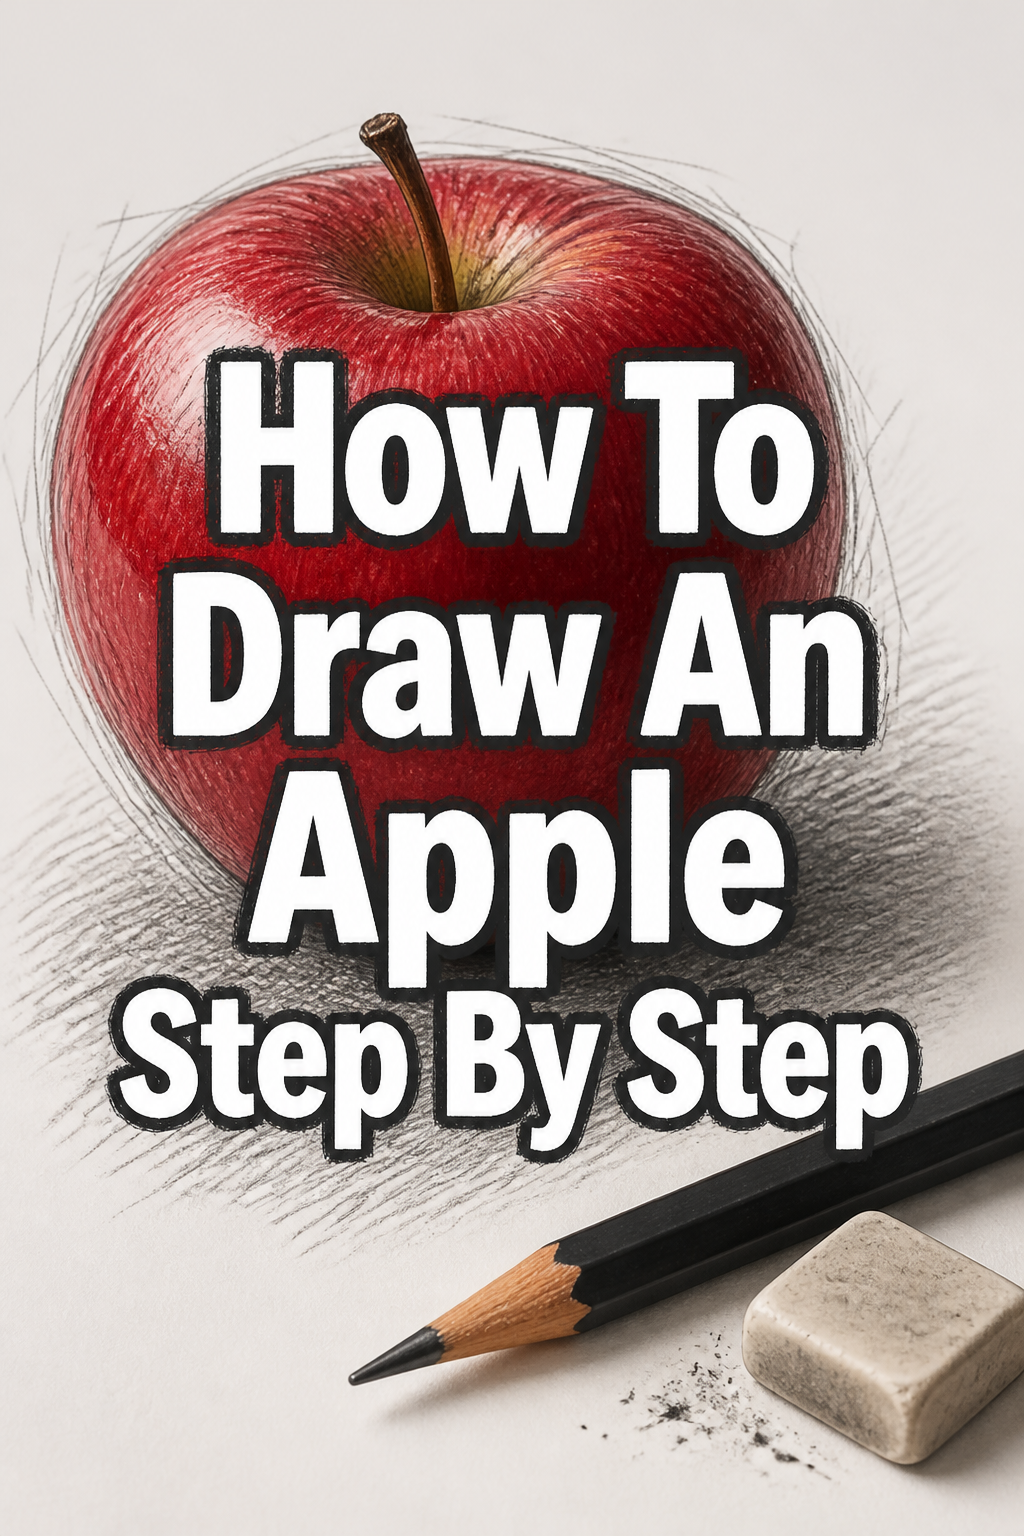
🍎 How To Draw An Apple Step By Step

& Painting
No rigid rules or pretension. Just practical guides, medium comparisons, and encouraging tips to help you enjoy the drawing & painting process.
Learning to draw can feel intimidating, but it’s often about breaking things down into simple shapes.
I remember my first attempts at drawing fruit; apples seemed easy until I tried to make them look real.
This guide will walk you through each stage, making it simple to create a beautiful apple drawing of your own.
Quick Overview
You’re about to embark on a fun, creative journey that will leave you with a charming apple drawing.
We’ll cover everything from initial sketches to adding depth and detail, boosting your artistic confidence.
- Time needed: 20-40 minutes
- Difficulty: Beginner
- What you’ll need: Pencil, eraser, paper (and optional shading tools)
Step-by-Step Instructions
Step 1: Sketch the Basic Shape
Begin by lightly sketching a large, slightly irregular circle or oval in the center of your paper.
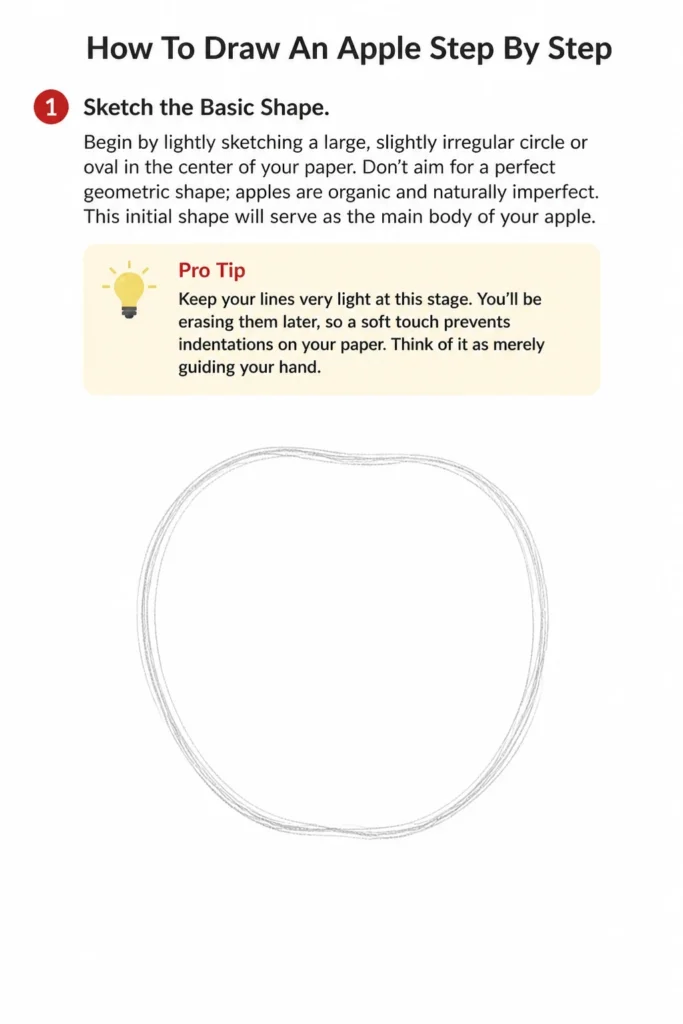
Don’t aim for a perfect geometric shape; apples are organic and naturally imperfect.
This initial shape will serve as the main body of your apple.
Pro Tip: Keep your lines very light at this stage. You’ll be erasing them later, so a soft touch prevents indentations on your paper. Think of it as merely guiding your hand.
Step 2: Define the Top Indentation
Next, focus on the top of your apple where the stem will emerge.
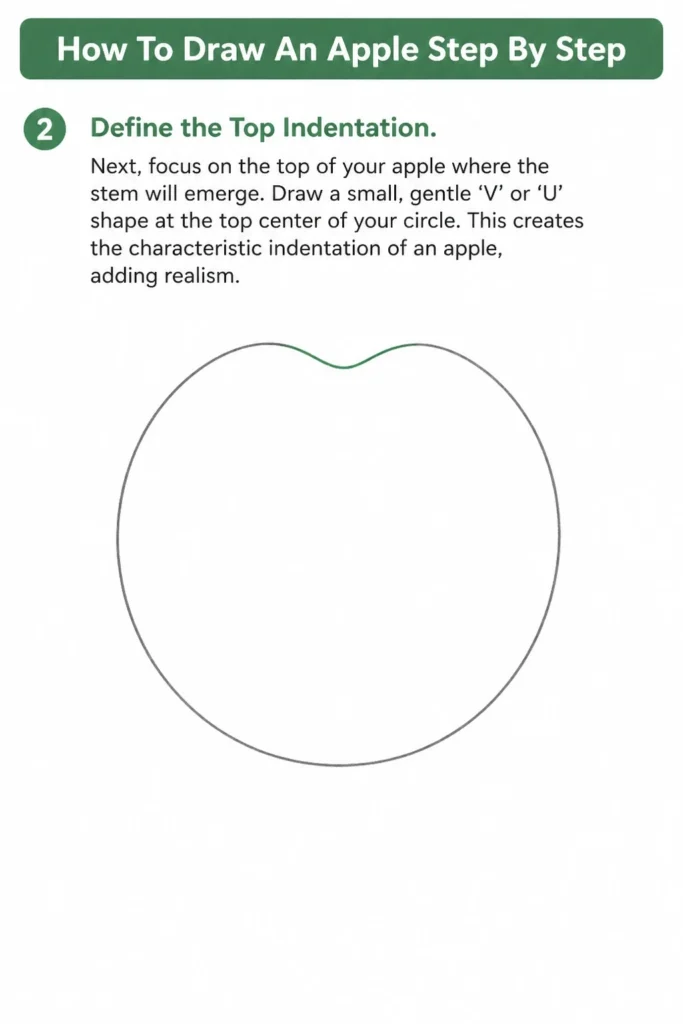
Draw a small, gentle ‘V’ or ‘U’ shape at the top center of your circle.
This creates the characteristic indentation of an apple, adding realism.
Step 3: Refine the Apple’s Body Curves
Apples aren’t perfectly round; they have subtle bumps and curves.
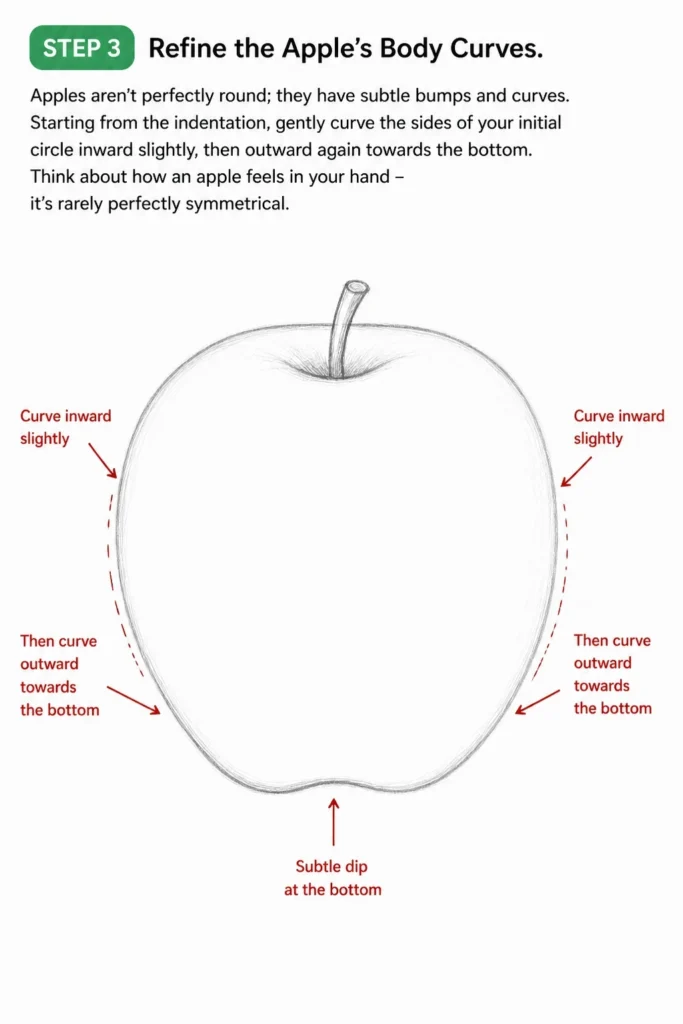
Starting from the indentation, gently curve the sides of your initial circle inward slightly, then outward again towards the bottom.
Think about how an apple feels in your hand – it’s rarely perfectly symmetrical.
Step 4: Add the Bottom Indentation
Just like the top, most apples have a slight indentation at the bottom.
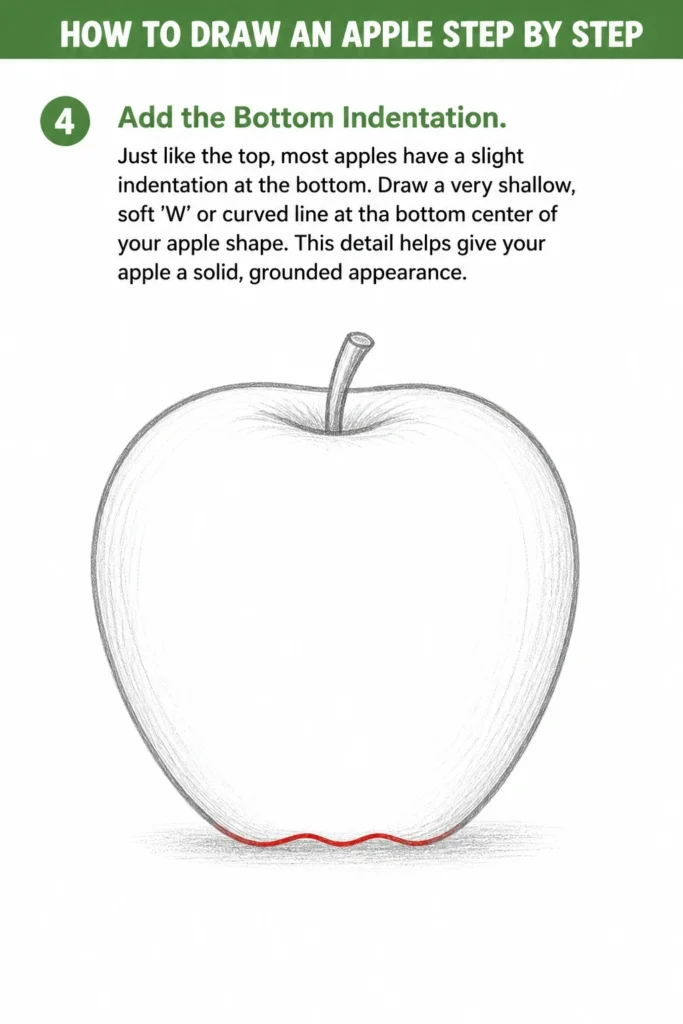
Draw a very shallow, soft ‘W’ or curved line at the bottom center of your apple shape.
This detail helps give your apple a solid, grounded appearance.
Step 5: Draw the Stem
Now, let’s add the stem within the top indentation you created.
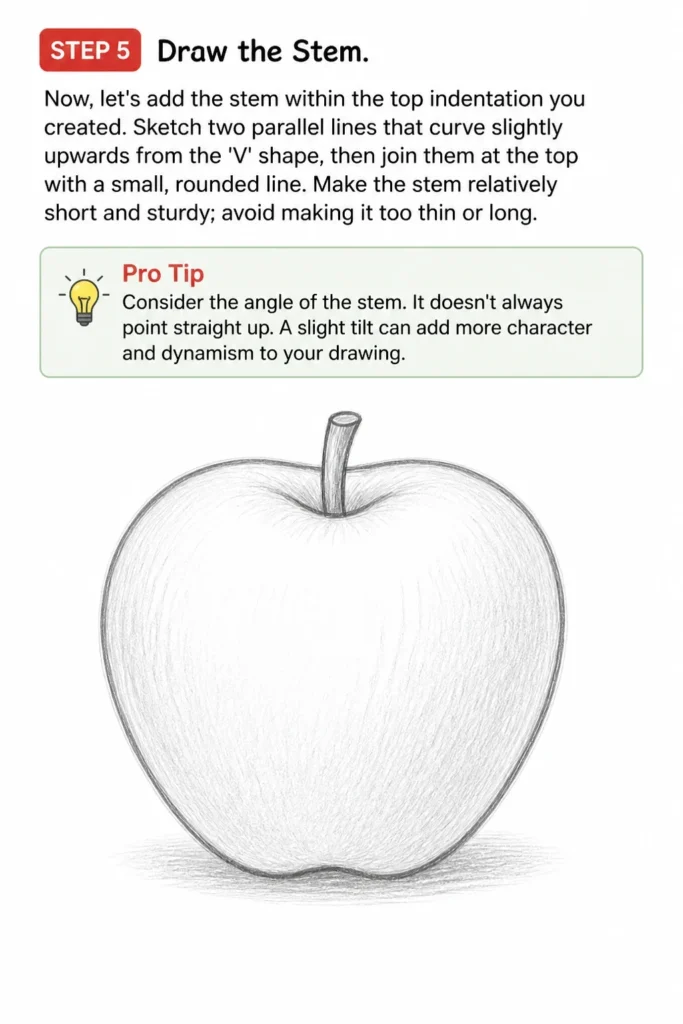
Sketch two parallel lines that curve slightly upwards from the ‘V’ shape, then join them at the top with a small, rounded line.
Make the stem relatively short and sturdy; avoid making it too thin or long.
Pro Tip: Consider the angle of the stem. It doesn’t always point straight up. A slight tilt can add more character and dynamism to your drawing.
Step 6: Integrate a Leaf (Optional)
A leaf can add a fresh touch to your apple, but it’s entirely optional.
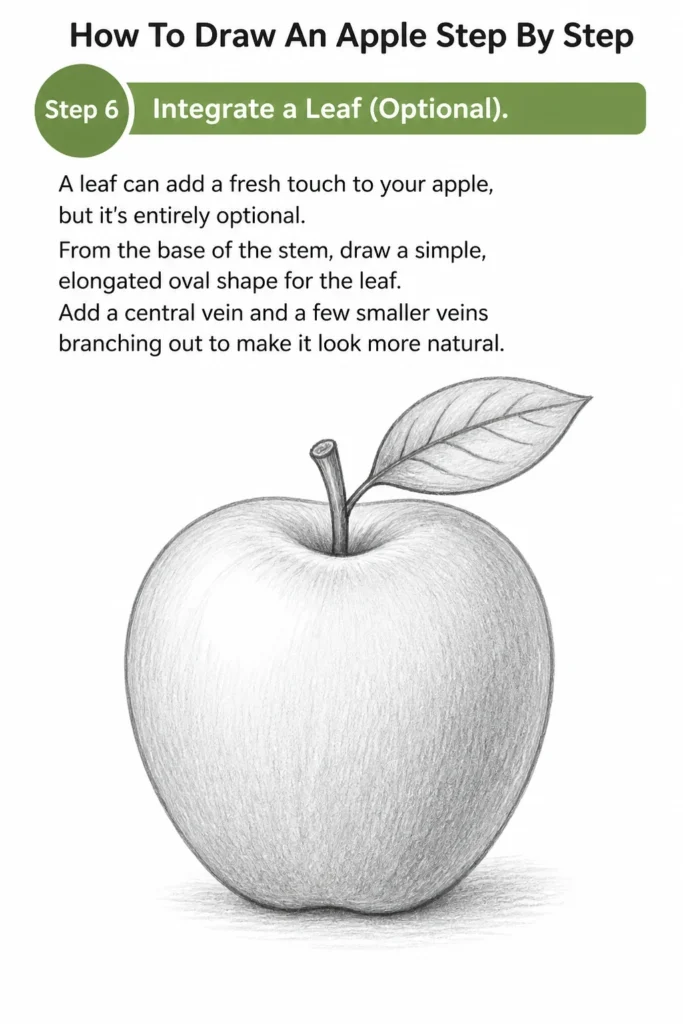
From the base of the stem, draw a simple, elongated oval shape for the leaf.
Add a central vein and a few smaller veins branching out to make it look more natural.
Step 7: Erase Guide Lines and Darken Outlines
With all your main elements in place, it’s time to clean up your drawing.
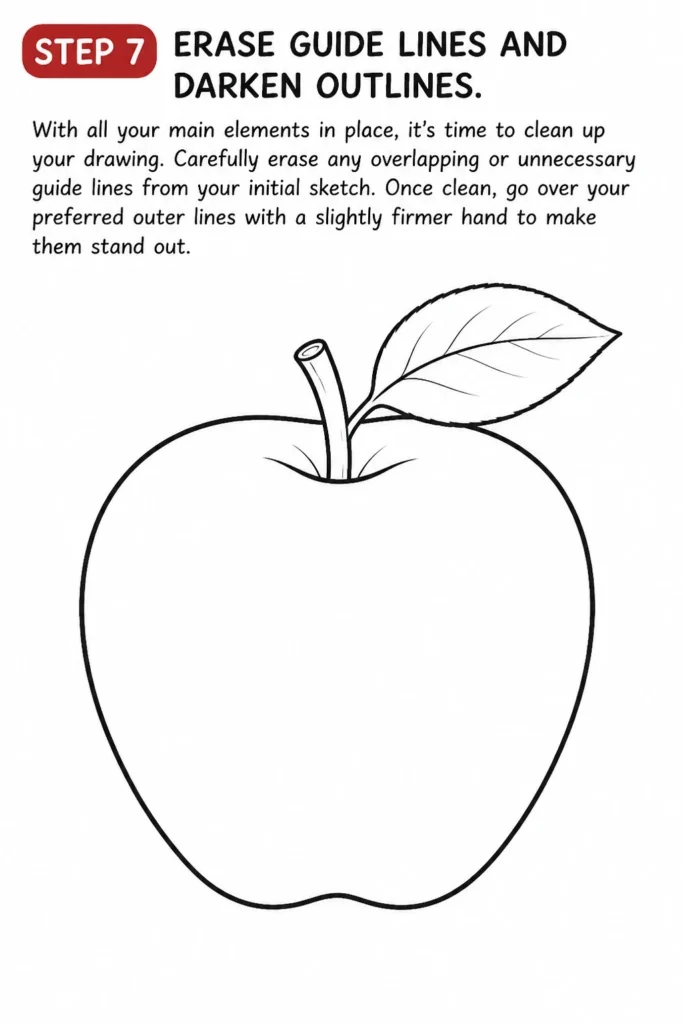
Carefully erase any overlapping or unnecessary guide lines from your initial sketch.
Once clean, go over your preferred outer lines with a slightly firmer hand to make them stand out.
Step 8: Begin Basic Shading and Highlights
Shading gives your apple volume and makes it look three-dimensional.
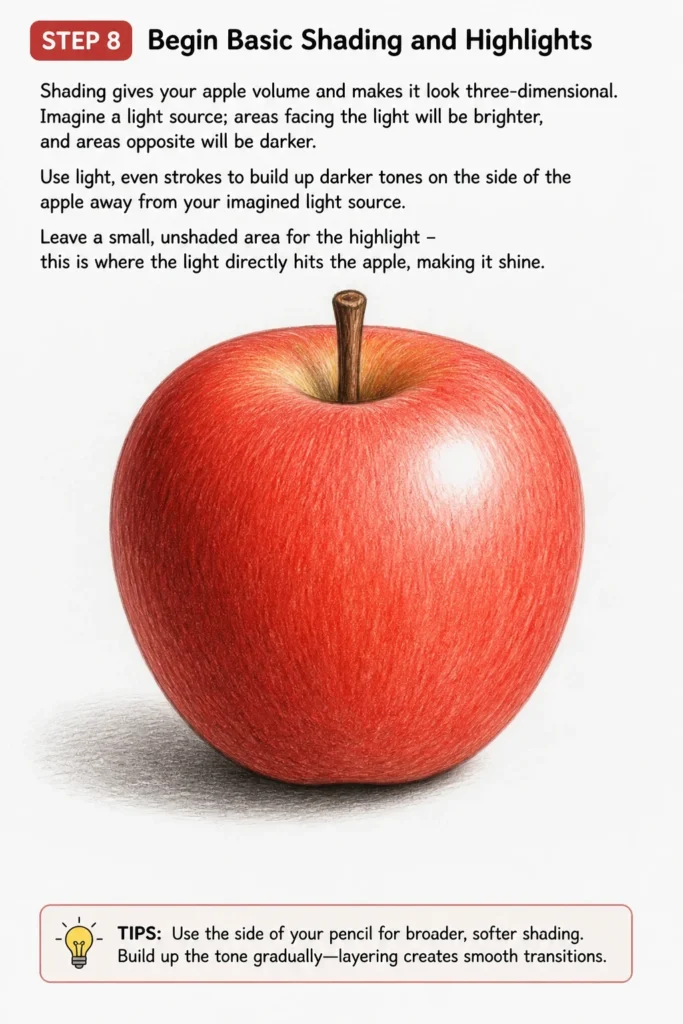
Imagine a light source; areas facing the light will be brighter, and areas opposite will be darker.
Use light, even strokes to build up darker tones on the side of the apple away from your imagined light source.
Leave a small, unshaded area for the highlight – this is where the light directly hits the apple, making it shine.
Step 9: Add Texture and Refine Details
Apples often have subtle texture, not perfectly smooth.
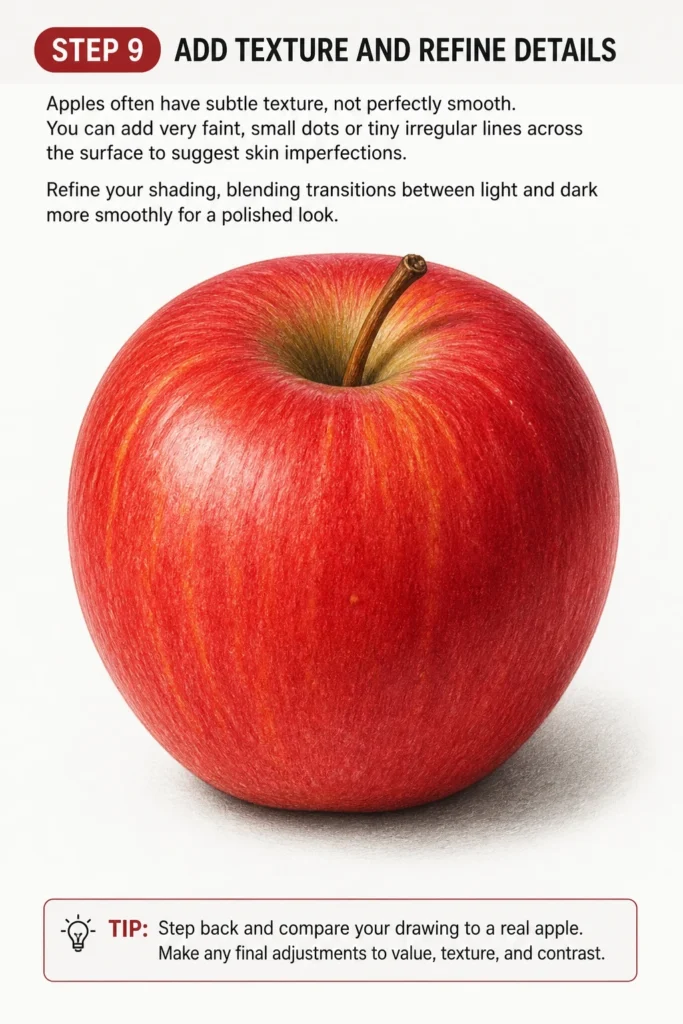
You can add very faint, small dots or tiny irregular lines across the surface to suggest skin imperfections.
Refine your shading, blending transitions between light and dark more smoothly for a polished look.
Common Mistakes to Avoid
Making It Too Symmetrical
Many beginners try to draw a perfectly symmetrical apple, which often makes it look unnatural or cartoonish.
Real apples have slight irregularities, bumps, and unique curves that give them character.
Embrace these imperfections in your sketch to achieve a more organic and realistic appearance.
Ignoring the Indentations
Forgetting the top and bottom indentations can make your apple look like a simple sphere rather than actual fruit.
These subtle dips are crucial for defining the apple’s structure and where the stem properly sits.
Always include these small details to give your apple proper form and depth.
Over-Shading or Under-Shading
Applying too much uniform dark shading can make your apple look flat or muddy, while too little shading leaves it looking like a simple outline.
The key is to build up layers of tone gradually, paying attention to where light hits and where shadows fall.
Remember to leave a distinct highlight area to suggest reflectivity and gloss.
Drawing a Stick-Like Stem
A stem that is too thin or looks like a straight line can detract from an otherwise good apple drawing.
Apple stems are typically thicker at the base where they join the apple and taper slightly, often with a gentle curve.
Pay attention to its thickness and natural curve to make it appear more convincing.
Troubleshooting
My Apple Looks Flat
If your apple lacks dimension, it’s likely due to insufficient shading or a lack of clear light and shadow areas.
Revisit your light source and ensure there’s a clear gradient from light to dark across the apple’s surface.
Adding a distinct highlight and a cast shadow beneath the apple will significantly improve its perceived depth.
The Shape Isn’t Quite Right
Sometimes the initial sketch can be misleading, leading to an apple that doesn’t quite resemble the fruit.
Try drawing from a reference photo of an apple, or even a real apple, to better understand its unique contours.
Don’t be afraid to use your eraser to adjust lines and curves until you’re happy with the overall form.
My Shading Looks Messy
Messy shading often comes from inconsistent pencil pressure or scribbling rather than controlled strokes.
Practice applying even pressure with your pencil, using small, overlapping strokes to build up tone smoothly.
Consider blending with a blending stump or even a clean finger to soften harsh lines and create smoother transitions.
Key Takeaways
- Start with light, basic shapes to establish your foundation.
- Embrace imperfections; real apples are rarely perfectly symmetrical.
- Crucial details like the top and bottom indentations add realism.
- Shading creates volume and makes your apple appear three-dimensional.
- Always consider your light source to place highlights and shadows accurately.
- Practice makes perfect; don’t be afraid to experiment and try again.
Frequently Asked Questions
What kind of pencil is best for drawing an apple?
For initial sketching, a lighter pencil like an HB or 2H is ideal because it’s easy to erase.
For darker lines and shading, a softer pencil like a 2B or 4B will give you richer tones.
Many artists start with one pencil and switch as they refine their work.
How do I make the apple look shiny?
Shininess comes from a strong contrast between light and dark, especially a well-defined highlight.
Leave a small, untouched white area where the light source directly hits the apple’s surface.
Surround this highlight with slightly darker tones to make it pop, creating a reflective effect.
Should I draw the apple with a background?
For a beginner, focusing solely on the apple is a great way to master its form and shading.
Once you’re comfortable, adding a simple background like a tabletop or a subtle gradient can enhance your drawing.
Always ensure the background doesn’t distract from your main subject.
How can I add more advanced texture?
To add advanced texture, observe real apples closely for their subtle speckles, pores, or slight variations in skin.
Use very fine, light dots or tiny, irregular lines with a sharp pencil to mimic these details.
Vary the pressure and density of these marks for a more natural, nuanced texture.
Our Top Recommended Finds
- Sketch Pencils Set: A good set of graphite pencils (HB, 2B, 4B, 6B) offers versatility for sketching and shading.
- Kneaded Eraser: Perfect for lifting graphite gently without smudging and shaping into fine points for highlights.
- Blending Stumps: These paper tools help you smoothly blend pencil lines, creating seamless transitions in your shading.
Your Next Artistic Adventure Awaits
You’ve successfully drawn an apple, mastering basic shapes, shading, and attention to detail.
This process builds foundational skills that apply to countless other subjects.
Why not try drawing other fruits, like a pear or a banana, applying the same principles you’ve learned today?
Grab your pencil and paper right now and see what beautiful creations you can bring to life!
& Painting
No rigid rules or pretension. Just practical guides, medium comparisons, and encouraging tips to help you enjoy the drawing & painting process.