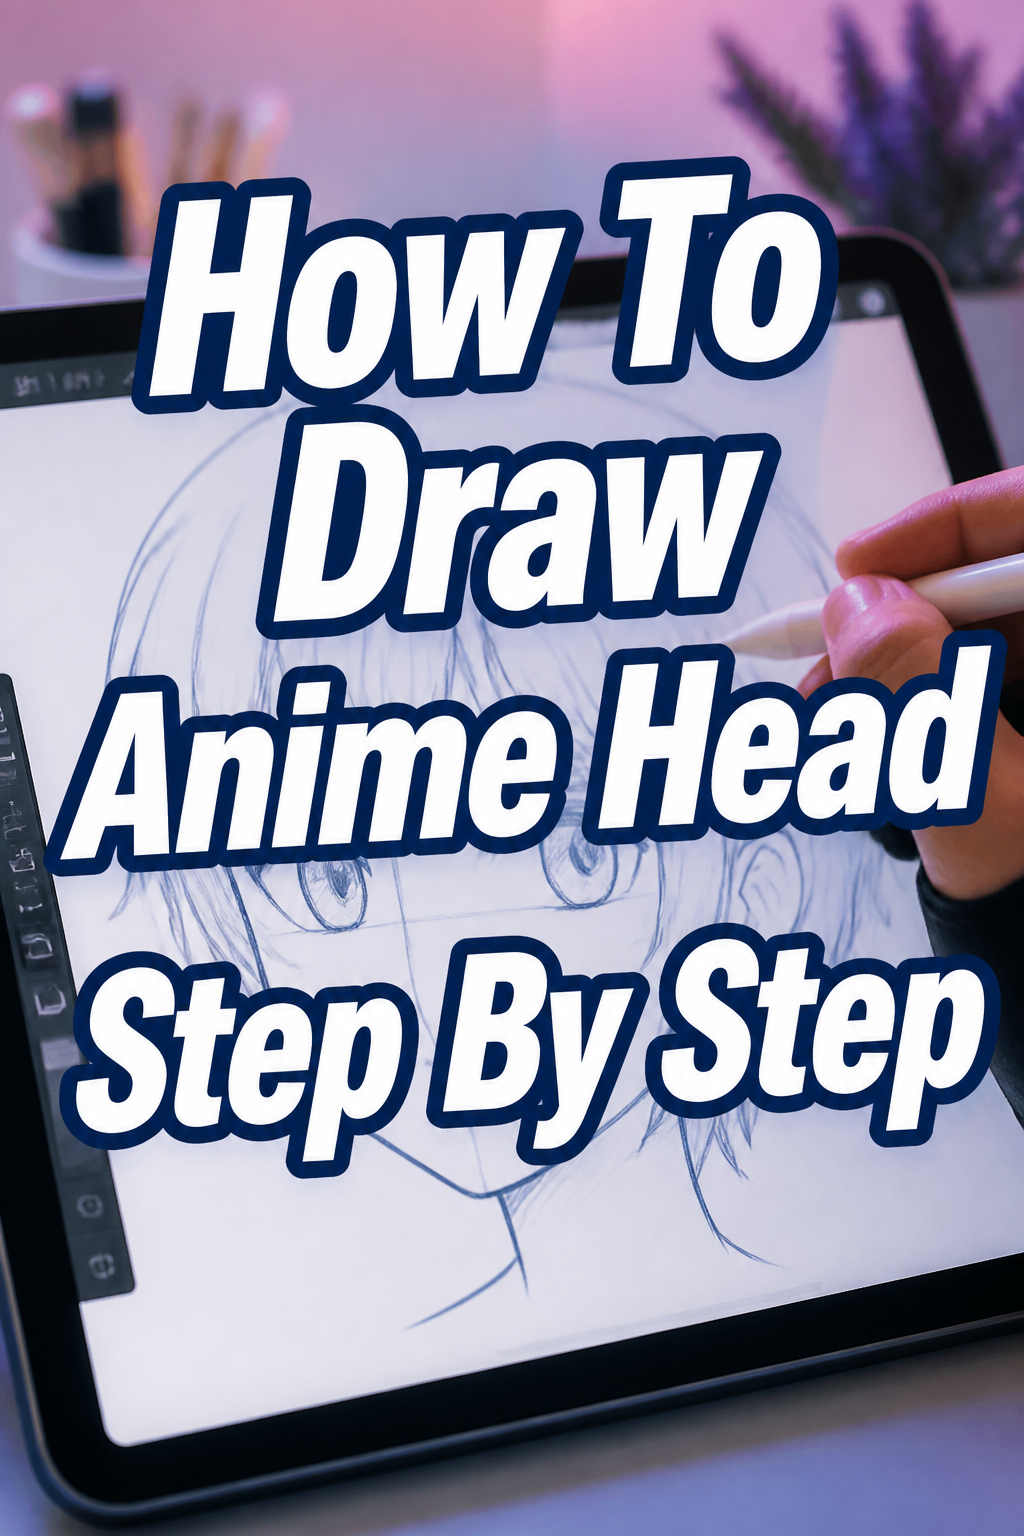
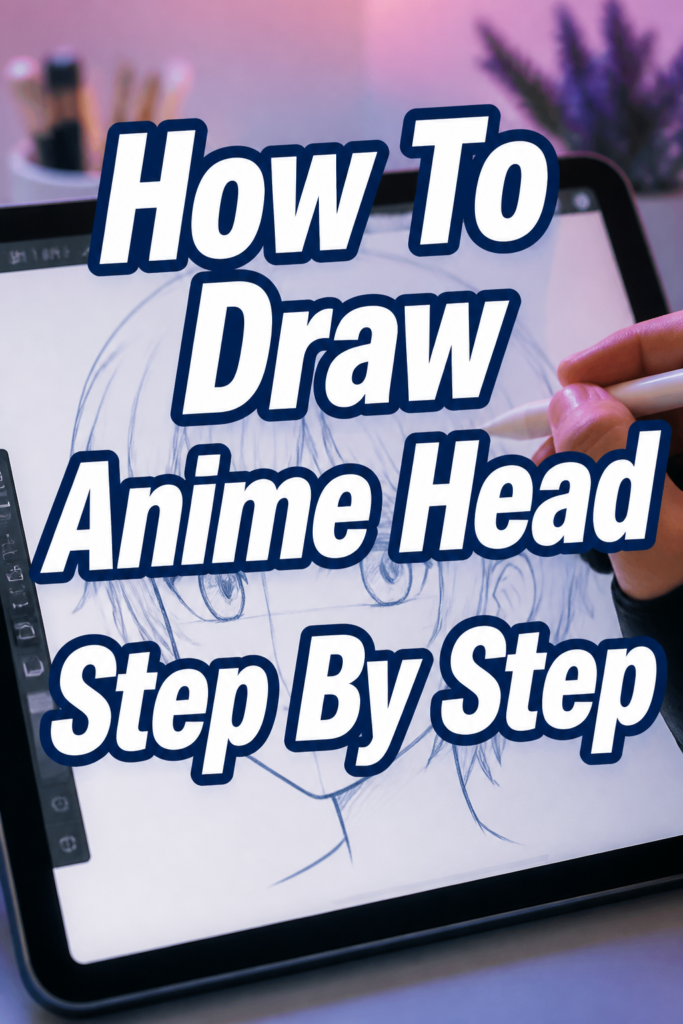
🎨 How To Draw Anime Head Step By Step

& Painting
No rigid rules or pretension. Just practical guides, medium comparisons, and encouraging tips to help you enjoy the drawing & painting process.
Learning to draw anime heads felt impossible at first.
I struggled with proportions and angles for months until I found a method that clicked.
This guide shares that exact, simplified process I used to finally get it right, helping you draw compelling anime characters with confidence.
Quick Overview
This guide will walk you through creating a foundational anime head from scratch. You’ll learn essential construction techniques that apply to various styles and angles. By the end, you’ll have a solid understanding of basic anime head anatomy.
- Time needed: 30-60 minutes (practice time may vary)
- Difficulty: Beginner
- What you’ll need: Pencil (HB or 2B recommended), eraser, paper (sketchbook), optional: fine-liner, digital drawing tablet.
Step-by-Step Instructions
Step 1: Sketch the Basic Head Shape
Begin by lightly drawing a circle. This circle will form the top part of your character’s skull. Don’t press too hard; these are just guidelines.
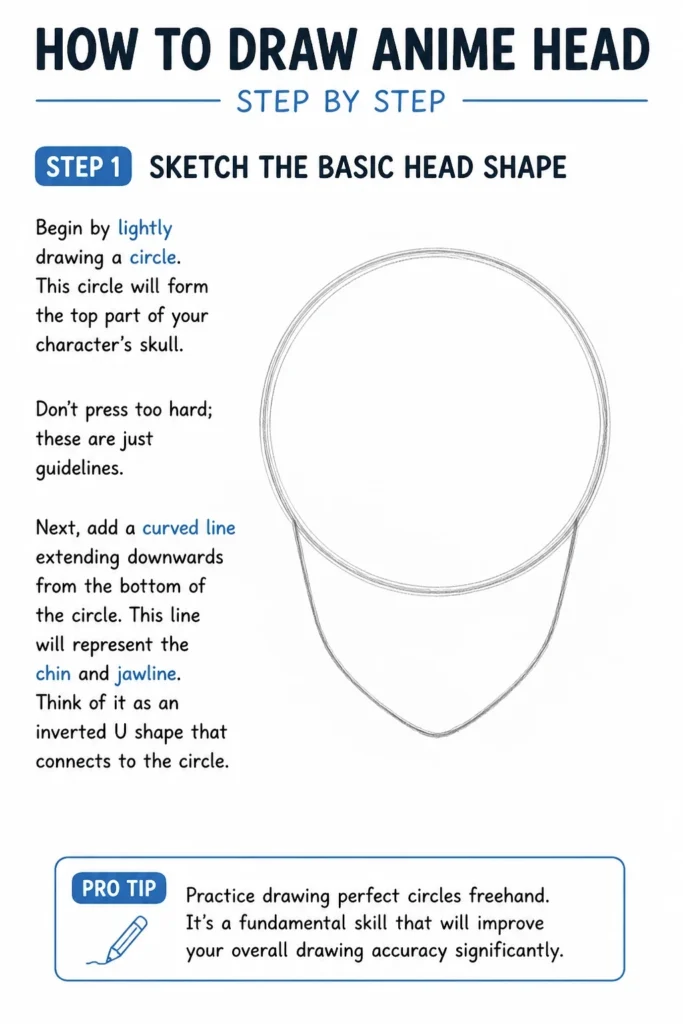
Next, add a curved line extending downwards from the bottom of the circle. This line will represent the chin and jawline. Think of it as an inverted “U” shape that connects to the circle.
Pro Tip: Practice drawing perfect circles freehand. It’s a fundamental skill that will improve your overall drawing accuracy significantly.
Step 2: Establish the Center and Eye Lines
Draw a vertical line down the center of the circle and the chin extension. This is your center line, indicating the direction the head is facing. It helps ensure symmetry.
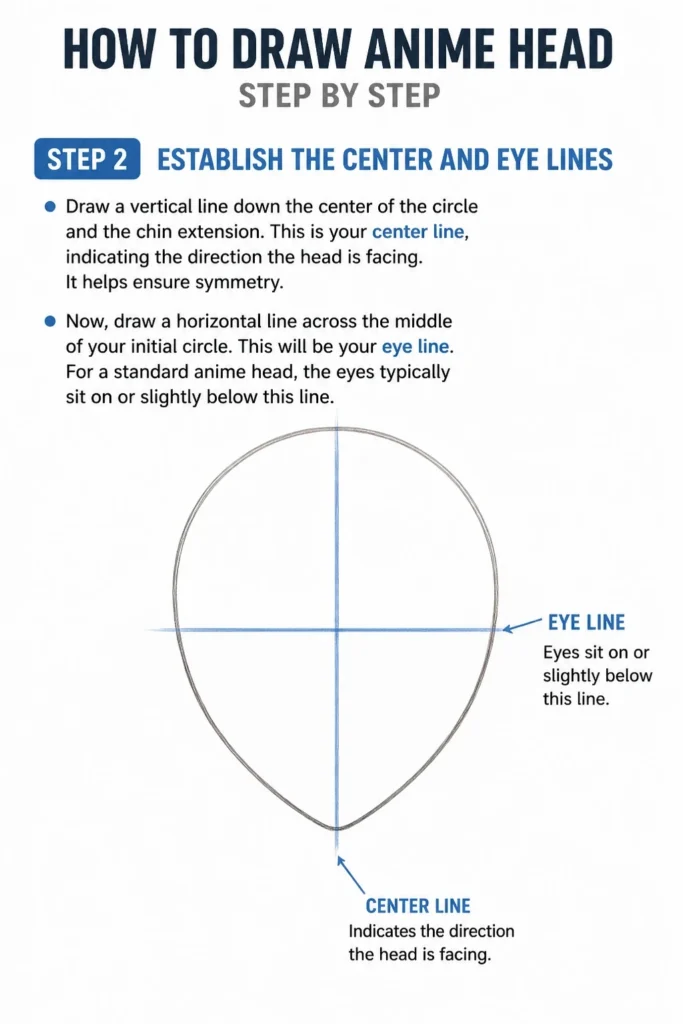
Now, draw a horizontal line across the middle of your initial circle. This will be your eye line. For a standard anime head, the eyes typically sit on or slightly below this line.
Step 3: Define the Jawline and Cheeks
From the sides of the circle, where the eye line intersects, draw two diagonal lines sloping inwards. These lines will connect down to the chin point you established earlier. This forms the basic structure of the jaw.
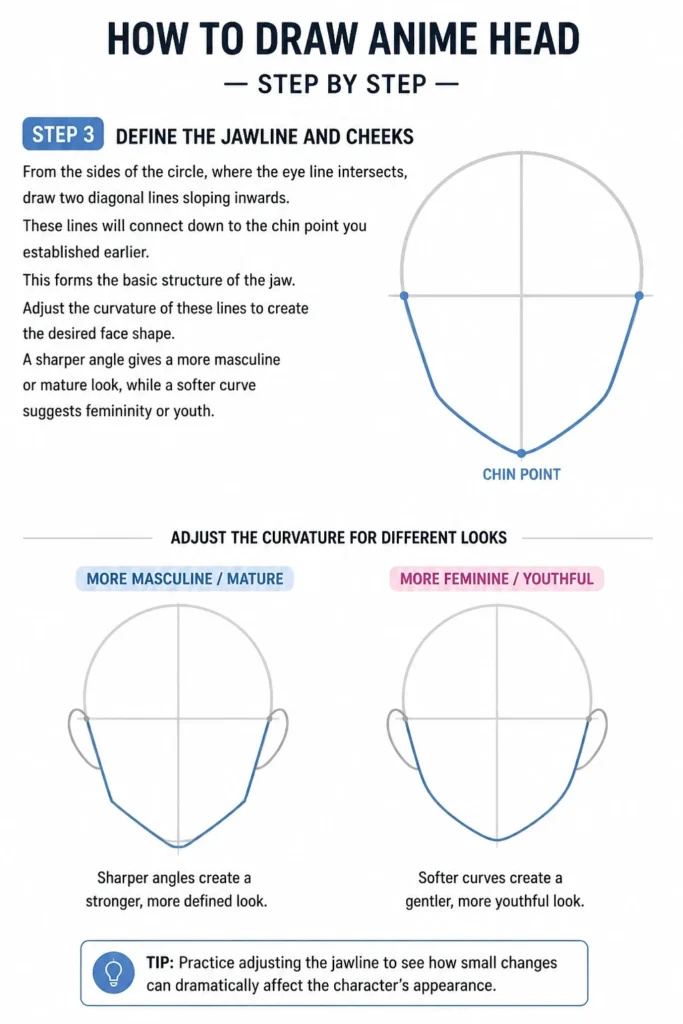
Adjust the curvature of these lines to create the desired face shape. A sharper angle gives a more masculine or mature look, while a softer curve suggests femininity or youth.
Step 4: Place the Ears and Hairline
The ears generally sit between the eye line and the nose line (which is usually halfway between the eye line and the chin). Sketch simple ear shapes on either side of the head, aligning them with these guides.
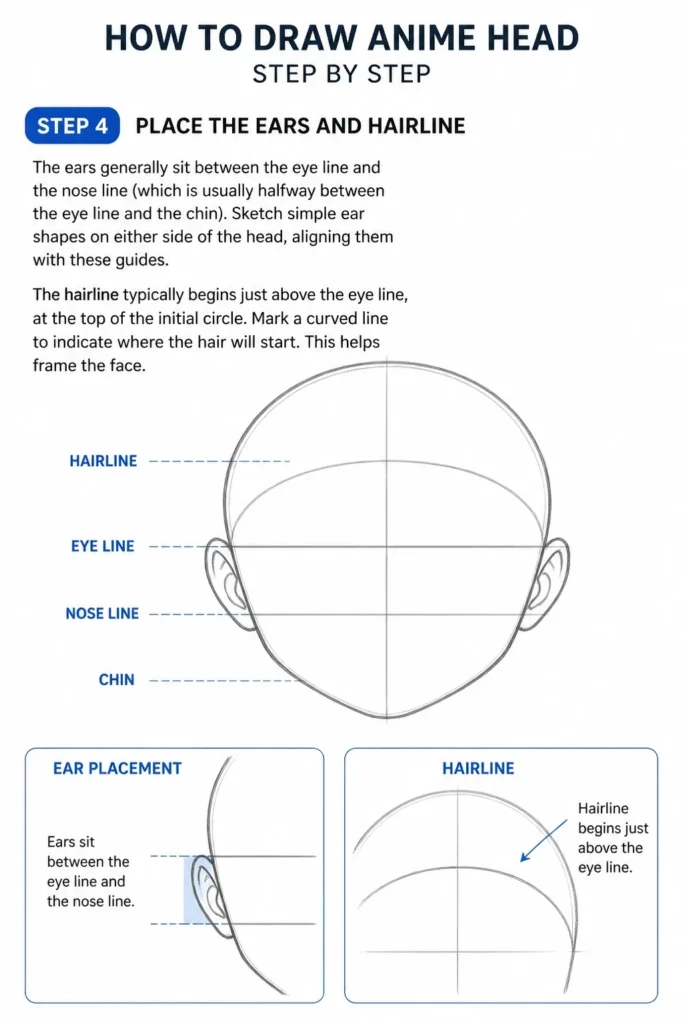
The hairline typically begins just above the eye line, at the top of the initial circle. Mark a curved line to indicate where the hair will start. This helps frame the face.
Step 5: Position the Eyes, Nose, and Mouth
The eyes are often the most expressive feature in anime. Draw two almond-shaped ovals on the eye line, spaced apart by roughly one eye-width.
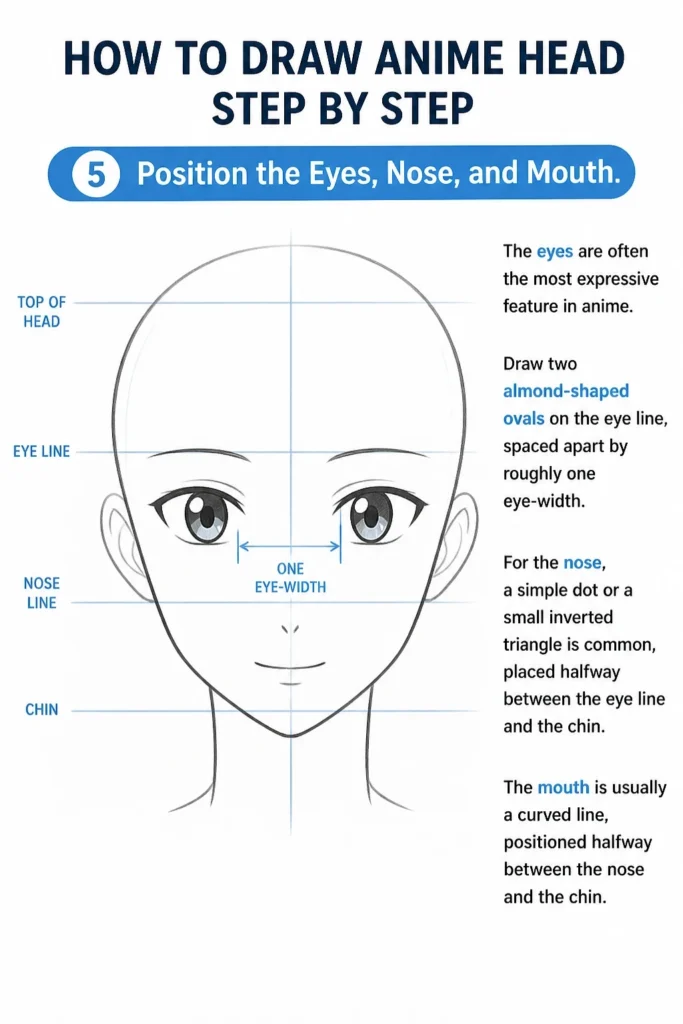
For the nose, a simple dot or a small inverted triangle is common, placed halfway between the eye line and the chin. The mouth is usually a curved line, positioned halfway between the nose and the chin.
Step 6: Add the Neck and Shoulders
Draw two lines extending downwards from just below the ears or jawline to form the neck. Anime necks are often slender but connect firmly to the head.
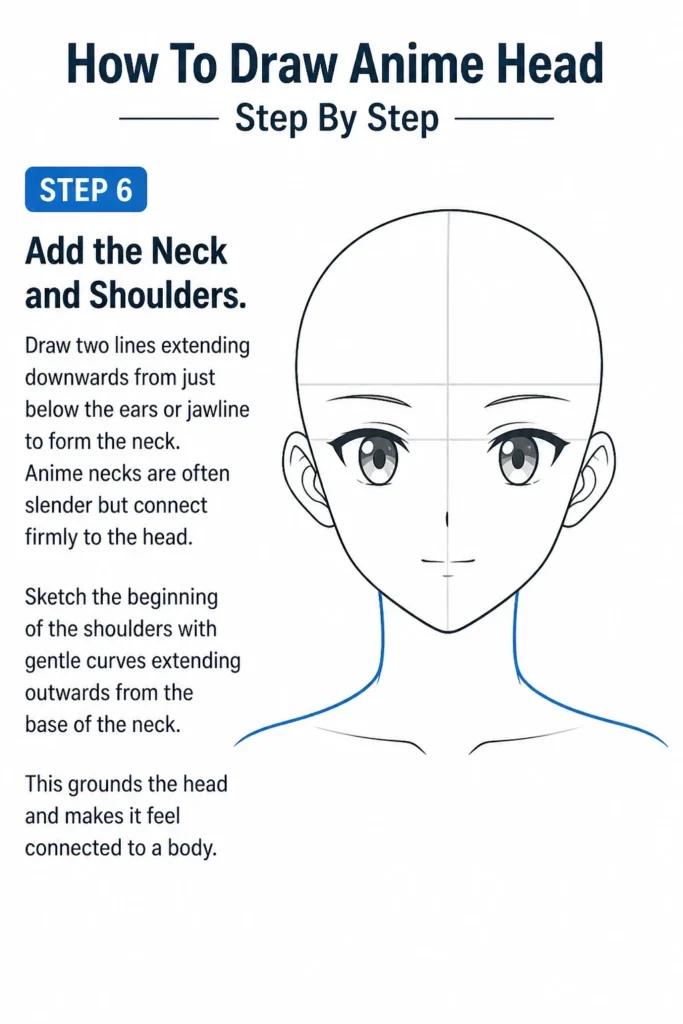
Sketch the beginning of the shoulders with gentle curves extending outwards from the base of the neck. This grounds the head and makes it feel connected to a body.
Step 7: Refine the Features and Hair
Now, focus on details. Draw the irises and pupils within the eyes, adding highlights for sparkle. Define the eyelids and eyebrows.
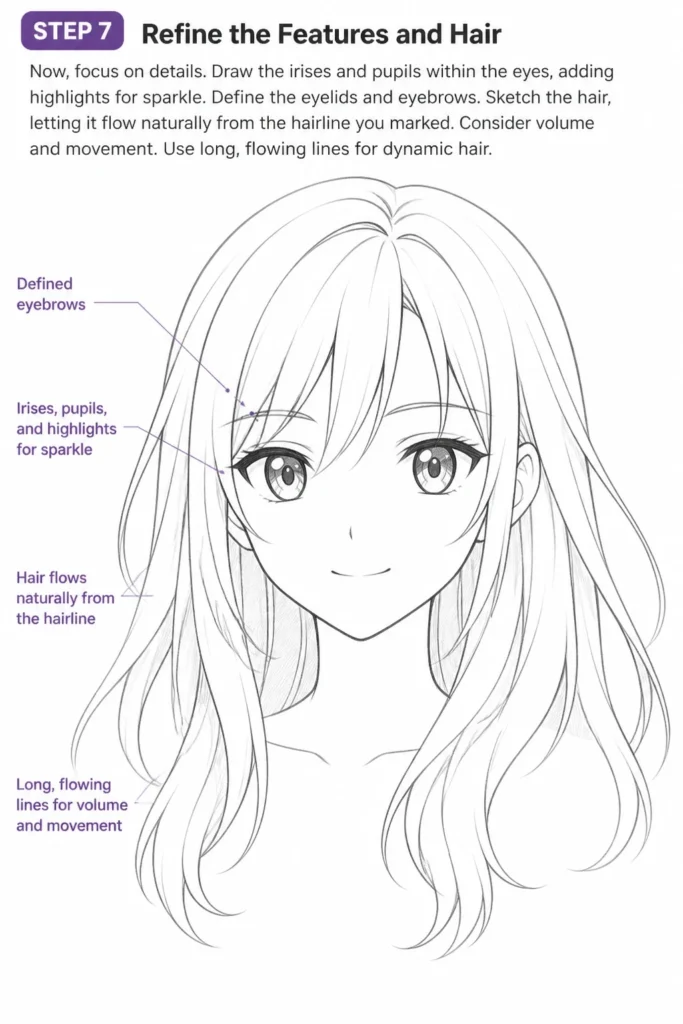
Sketch the hair, letting it flow naturally from the hairline you marked. Consider volume and movement. Use long, flowing lines for dynamic hair.
Step 8: Clean Up Your Sketch
Carefully erase all the initial construction lines, leaving only your refined drawing. Use a kneaded eraser for gentle lifting without smudging.
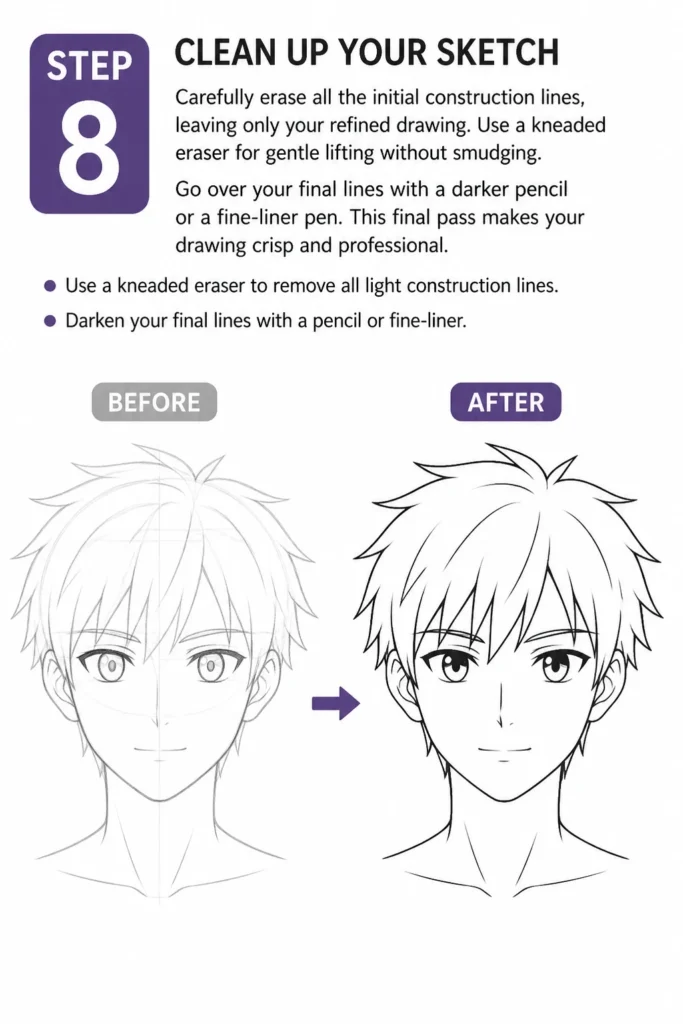
Go over your final lines with a darker pencil or a fine-liner pen. This final pass makes your drawing crisp and professional.
Common Mistakes to Avoid
Incorrect Proportions
Many beginners struggle with making eyes too large or the head too wide. Always use your initial circle and guide lines to maintain consistent proportions. Regularly step back and look at your drawing to spot imbalances.
Flat Faces
Drawing heads straight on can make them appear flat. Even a subtle tilt or turning of the center line can add depth. Think of the head as a 3D sphere, not a flat plane.
Symmetry Issues
One eye might be larger, or the jawline might be uneven. Use your central guide line as a constant reference. You can also flip your drawing or view it in a mirror to highlight asymmetry.
Stiff Hair
Hair that looks like a helmet lacks life. Remember that hair has volume and flows with gravity. Avoid drawing individual strands; instead, draw it in large, flowing sections and clumps.
Troubleshooting
My Head Looks Too Boxy
This often happens if your initial circle is too square or your jawlines are too straight. Soften the angles and ensure your initial circle is round. Curve the jawline more gently from the sides of the head down to the chin.
Features Are Not Aligned
If eyes are at different heights or the mouth is off-center, your guide lines might be inaccurate. Redraw your horizontal eye line and vertical center line with extra care. Ensure they are perfectly perpendicular and centered.
The Neck Looks Too Thin/Thick
The neck should appear strong enough to support the head. If it’s too thin, connect it slightly wider to the head, starting from just behind the jaw. If too thick, slim down the lines and ensure they curve smoothly into the shoulders.
Key Takeaways
- Start with basic shapes like circles and lines to build a strong foundation.
- Guide lines for the center, eyes, and nose are crucial for consistent proportions.
- Practice drawing symmetrical features using your central guide line.
- Think of the head as a 3D object to add depth and avoid flatness.
- Hair should be drawn in flowing sections, not as individual strands.
- Regularly erase and refine your lines for a cleaner, more polished look.
Frequently Asked Questions
How do I make my anime heads look more unique?
Experiment with different jawline angles, eye shapes, and hair styles. Slight variations in eye spacing, nose size, or chin sharpness can create distinct character looks. Don’t be afraid to deviate slightly from the basic template once you understand it.
What’s the best way to draw different emotions?
Focus on the eyebrows and mouth. Raised eyebrows and a wide smile show happiness, while furrowed brows and a downturned mouth suggest sadness or anger. The eyes also play a huge role; wide eyes for surprise, narrowed for suspicion.
Should I draw the head from different angles?
Absolutely! Once you’re comfortable with a front view, try drawing the head from a 3/4 view or profile. The same construction principles apply, but your guide lines will curve around the sphere of the head, adding complexity and realism.
Our Top Recommended Finds
- Sketchbook with Smooth Paper: A good quality sketchbook prevents pencil lead from smudging easily and provides a pleasant drawing surface.
- Kneaded Eraser: Unlike traditional erasers, a kneaded eraser lifts graphite without damaging the paper or creating eraser dust, perfect for cleaning guide lines.
- Variety of Pencils (HB, 2B, 4B): Using different lead hardness allows for lighter sketch lines (HB) and darker, more defined final lines (2B, 4B).
Your Anime Art Journey Starts Now
You’ve just taken a significant step toward mastering anime head drawing. With these foundational techniques, you’re ready to bring countless characters to life. Don’t stop here; the world of anime art is vast and exciting.
Keep practicing these steps regularly to build muscle memory and confidence. Try drawing heads from different reference images, then challenge yourself to create your own unique characters. The more you draw, the faster you’ll improve.
& Painting
No rigid rules or pretension. Just practical guides, medium comparisons, and encouraging tips to help you enjoy the drawing & painting process.