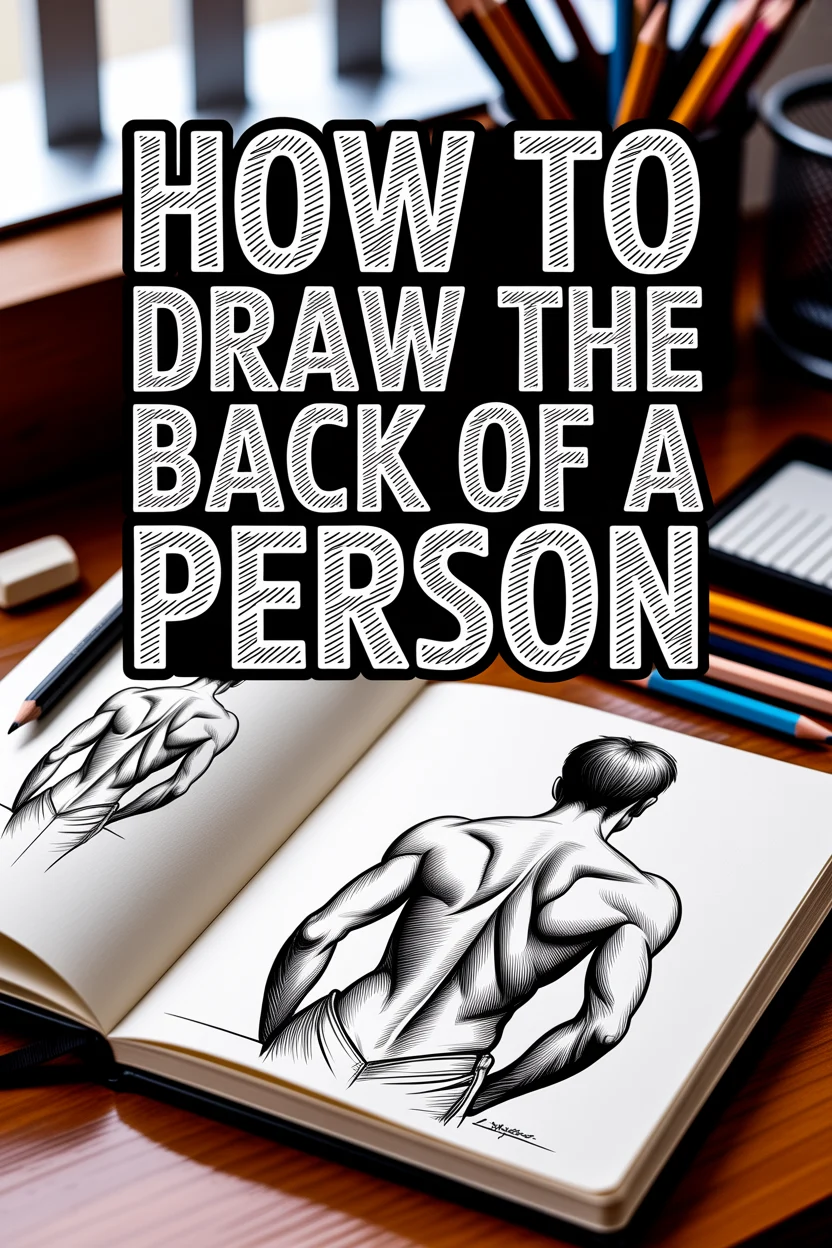
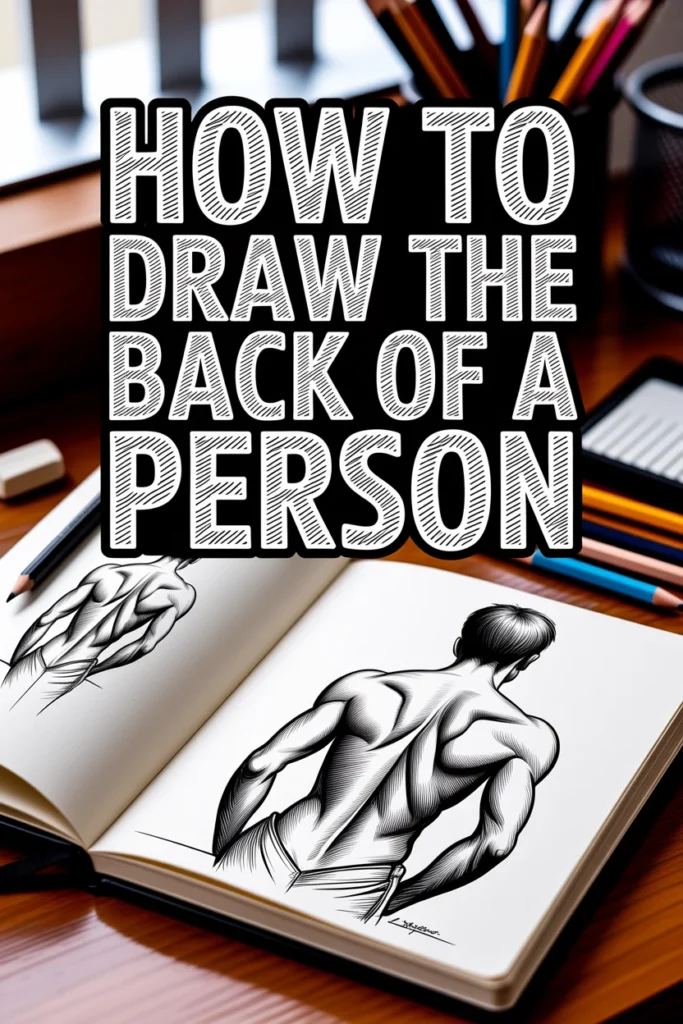
🧍♂️ How To Draw The Back Of A Person

& Painting
No rigid rules or pretension. Just practical guides, medium comparisons, and encouraging tips to help you enjoy the drawing & painting process.
Drawing the human form can feel daunting. I remember early struggles trying to capture the complex curves and muscles of a back. This guide offers a clear path to understanding and drawing this challenging, yet rewarding, part of the anatomy.
You’ll gain practical skills and confidence, building a solid foundation for your figure drawing. Trust this guide to break down the back into manageable, understandable components.
Quick Overview
This guide will walk you through the process of sketching the human back, from initial construction to detailed shading. You’ll learn to identify key anatomical landmarks and translate them onto paper. Mastering this will greatly enhance your overall figure drawing abilities.
- Time needed: 45-60 minutes (for a focused drawing session)
- Difficulty: Intermediate
- What you’ll need: Pencil (HB, 2B), paper, eraser, reference images
Step-by-Step Instructions
Step 1: Gather Your References and Materials
Before you begin, collect several reference images. Look for diverse body types and poses, showing the back from different angles. This helps you understand variation.
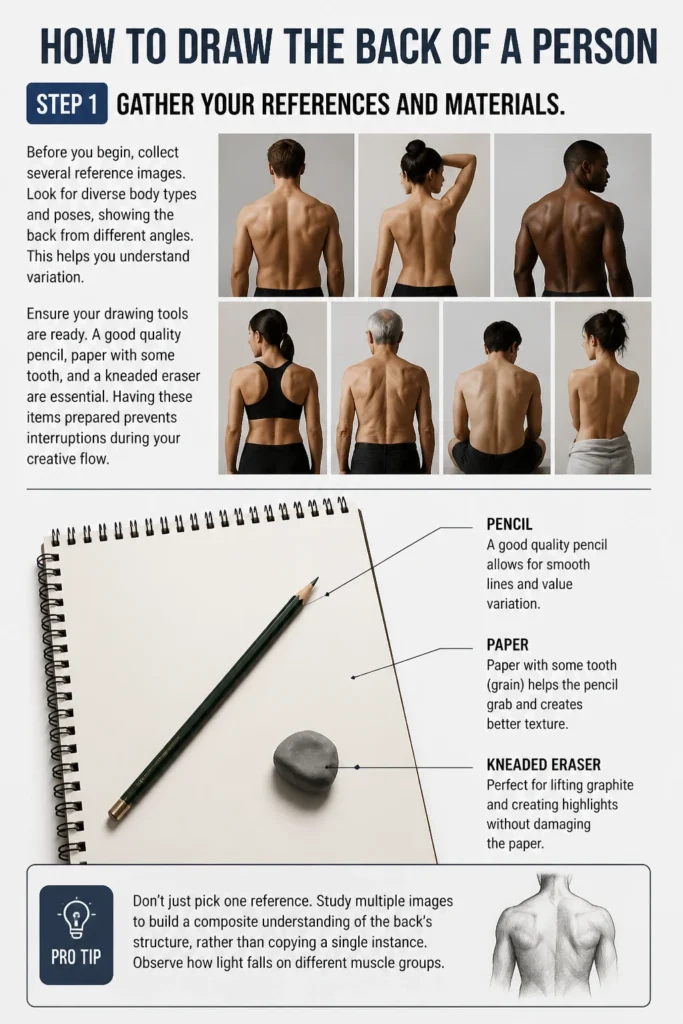
Ensure your drawing tools are ready. A good quality pencil, paper with some tooth, and a kneaded eraser are essential. Having these items prepared prevents interruptions during your creative flow.
Pro Tip: Don’t just pick one reference. Study multiple images to build a composite understanding of the back’s structure, rather than copying a single instance. Observe how light falls on different muscle groups.
Step 2: Establish Basic Forms and Proportions
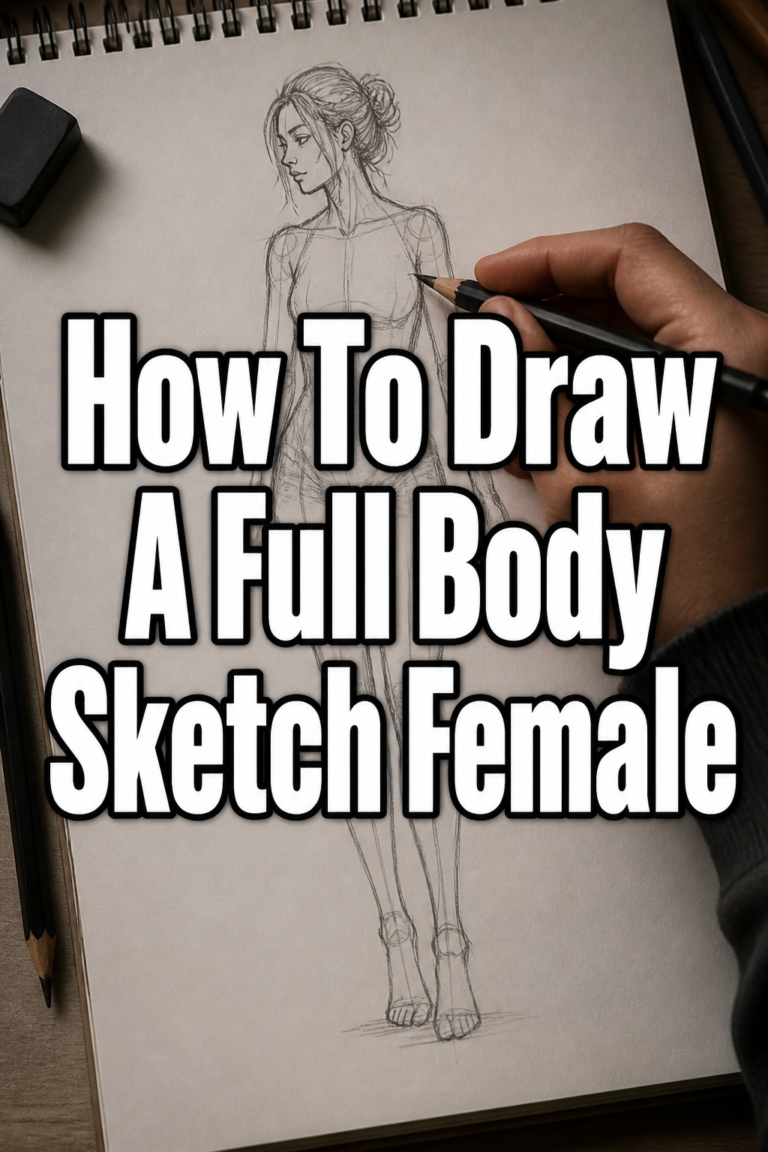
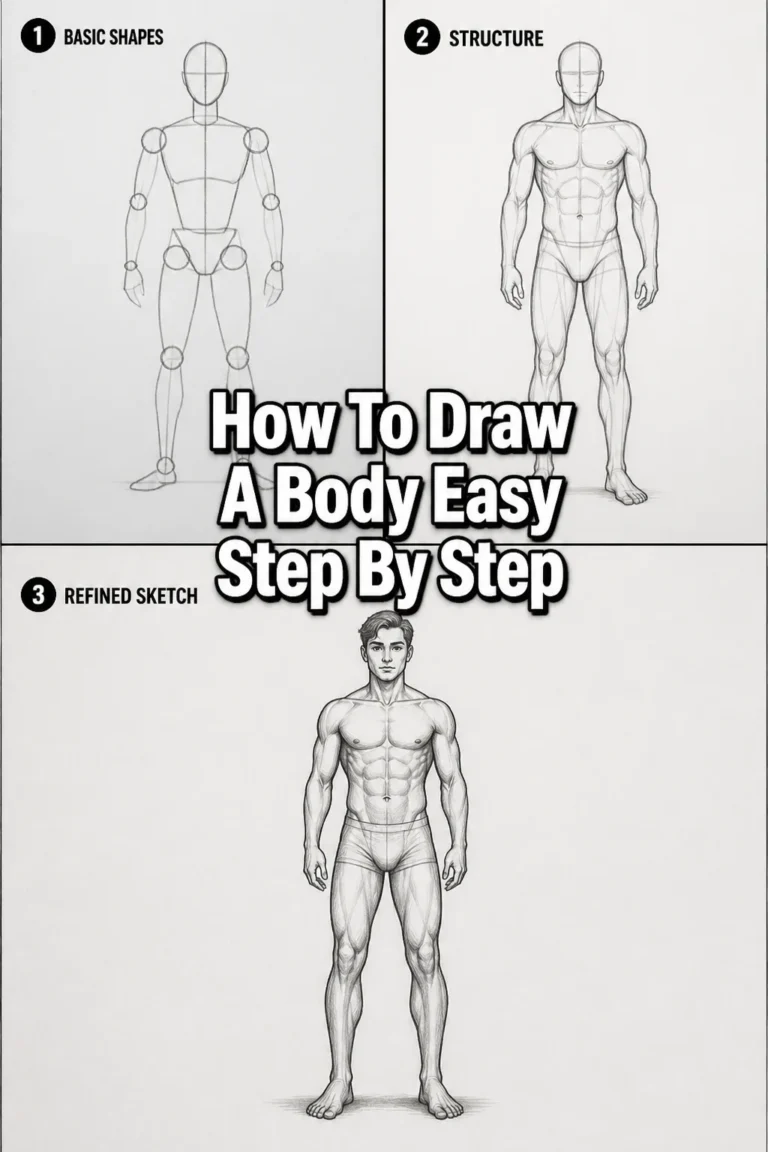
Begin by sketching the fundamental shapes of the torso. Think of the rib cage as an egg or a barrel and the pelvis as a bowl. Connect these with a simple line representing the spine.
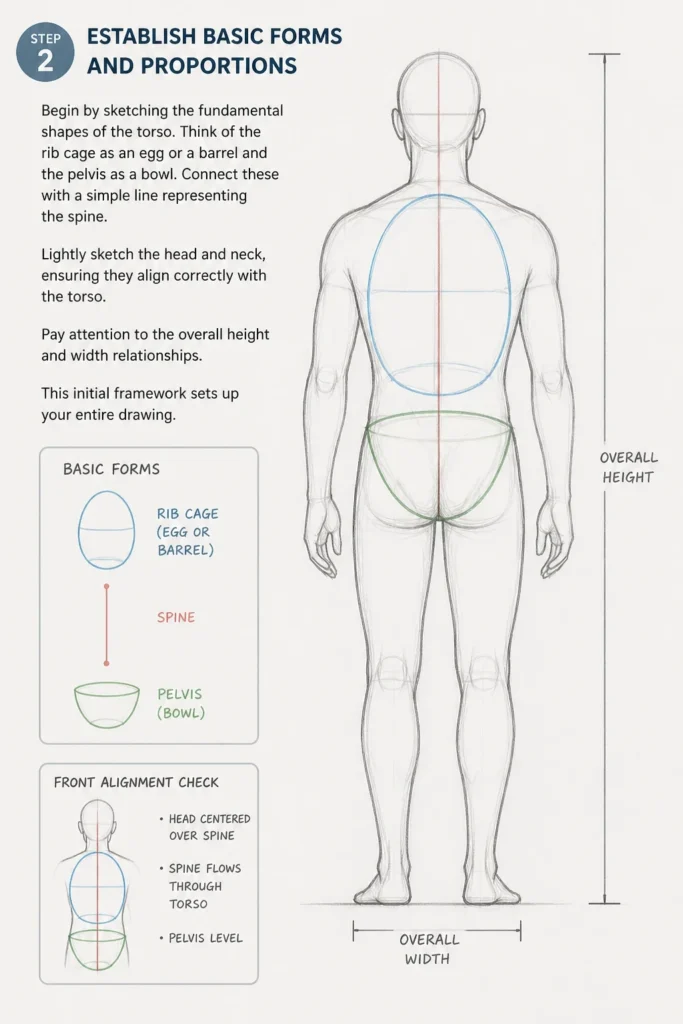
Lightly sketch the head and neck, ensuring they align correctly with the torso. Pay attention to the overall height and width relationships. This initial framework sets up your entire drawing.
Step 3: Define The Spine and Central Line
The spine is the central pillar of the back. Draw a subtle curve to represent its natural S-shape. This line helps you place all other anatomical features accurately.
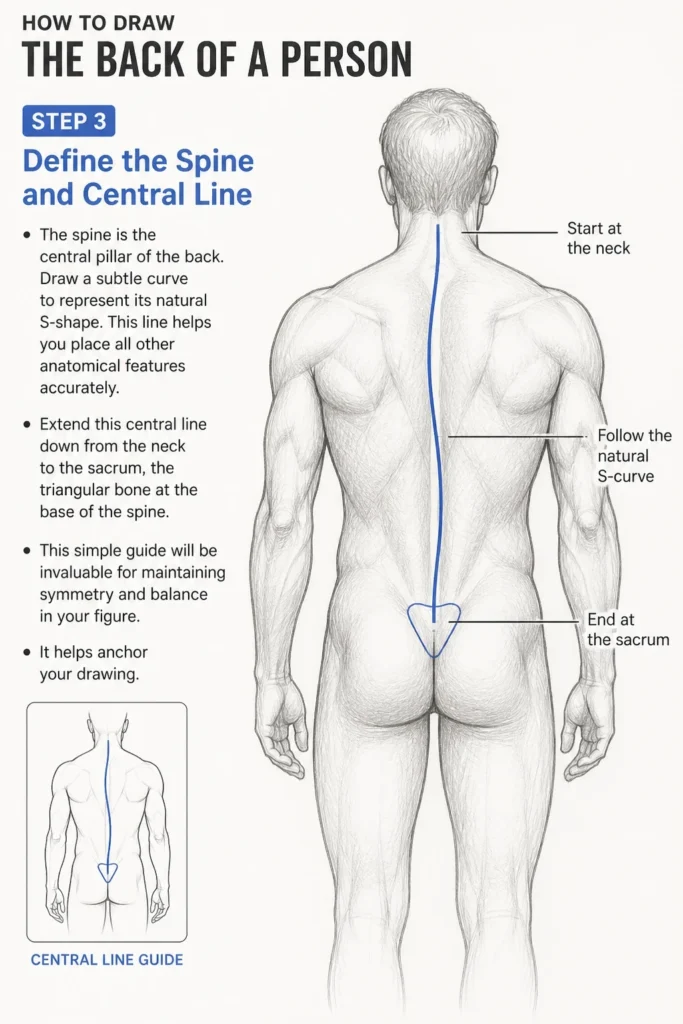
Extend this central line down from the neck to the sacrum, the triangular bone at the base of the spine. This simple guide will be invaluable for maintaining symmetry and balance in your figure. It helps anchor your drawing.
Step 4: Block In Major Muscle Groups
Now, start adding the largest muscle masses. The trapezius muscle forms a large diamond shape from the neck to the mid-back and out to the shoulders. Sketch its broad outline first.
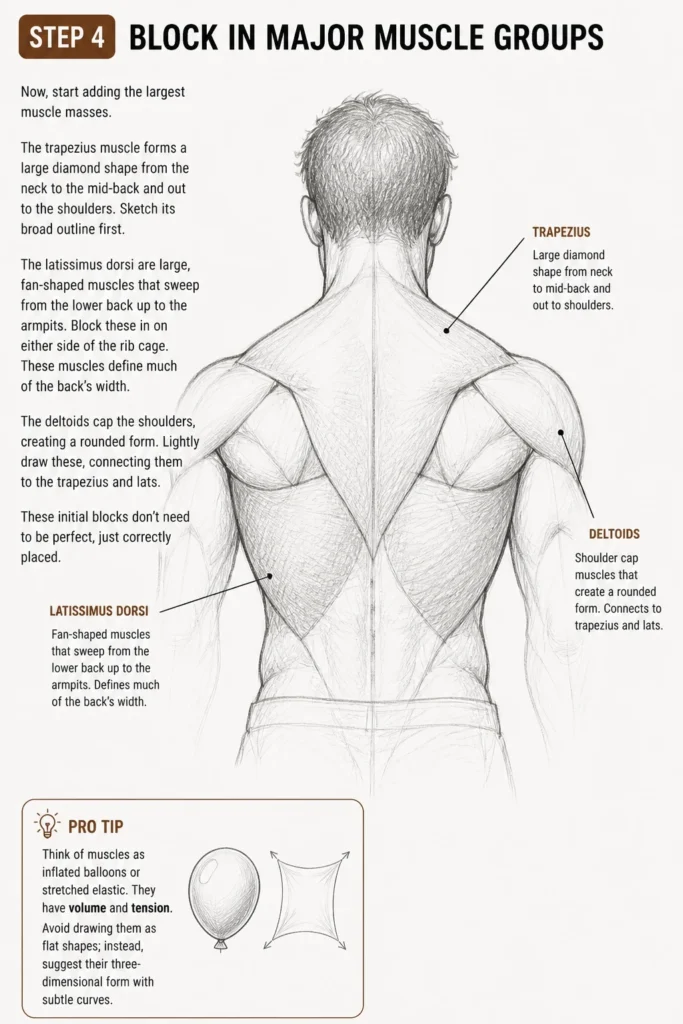
The latissimus dorsi are large, fan-shaped muscles that sweep from the lower back up to the armpits. Block these in on either side of the rib cage. These muscles define much of the back’s width.
The deltoids cap the shoulders, creating a rounded form. Lightly draw these, connecting them to the trapezius and lats. These initial blocks don’t need to be perfect, just correctly placed.
Pro Tip: Think of muscles as inflated balloons or stretched elastic. They have volume and tension. Avoid drawing them as flat shapes; instead, suggest their three-dimensional form with subtle curves.
Step 5: Refine Shoulder Blades and Arm Attachment
The shoulder blades (scapulae) are crucial. They are triangular bones that sit on the upper back, moving with the arms. Sketch them as distinct, somewhat flat shapes, noting their position relative to the spine.
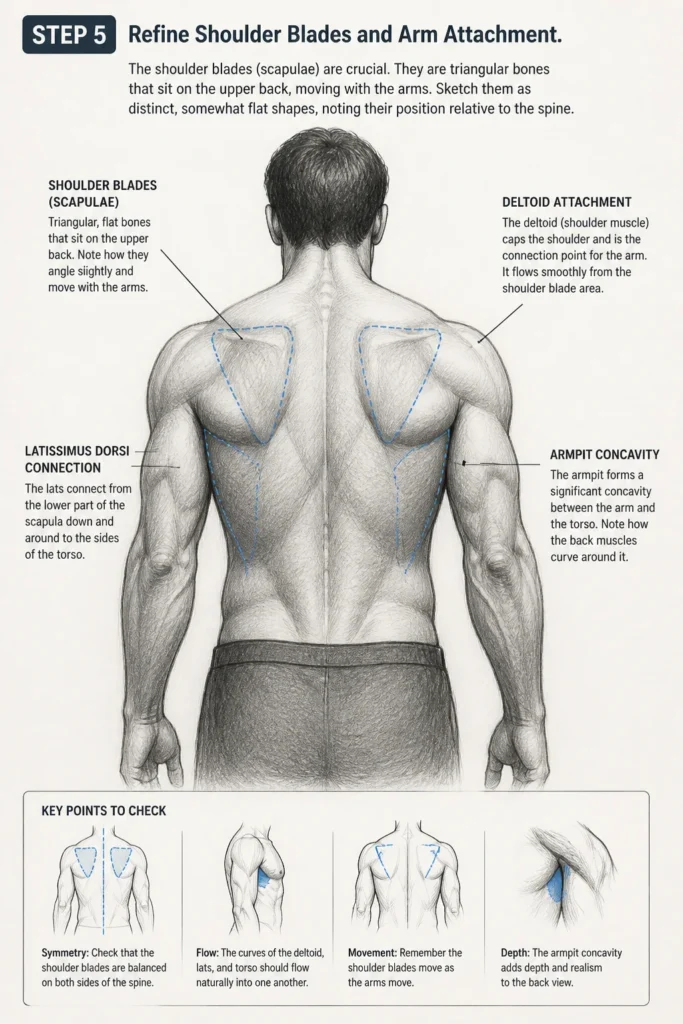
Observe how the arms attach to the torso through the deltoids and where the latissimus dorsi connect. The arm’s upper curve often flows into the back muscles. Pay attention to the armpit area, which forms a significant concavity.
Step 6: Add Details of Lower Back and Glutes
Move down to the lower back, where the erector spinae muscles create two subtle vertical columns on either side of the spine. These are often visible as slight ridges. The small of the back typically curves inward.
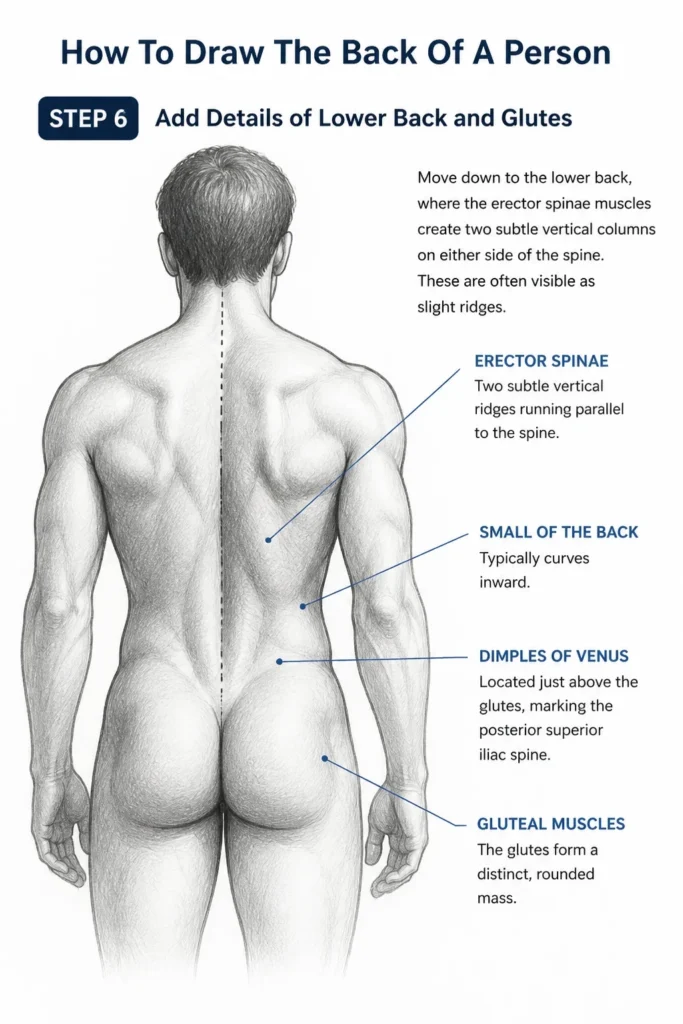
Below this, define the top of the gluteal muscles (buttocks). They form a distinct, rounded mass. The dimples of Venus, if present, are often found just above the glutes, marking the posterior superior iliac spine.
Step 7: Develop Hair, Clothing, and Folds
Once the anatomy is established, you can add secondary elements. If your figure has hair, consider its volume and how it falls over the shoulders and back. Hair can obscure or reveal parts of the form.
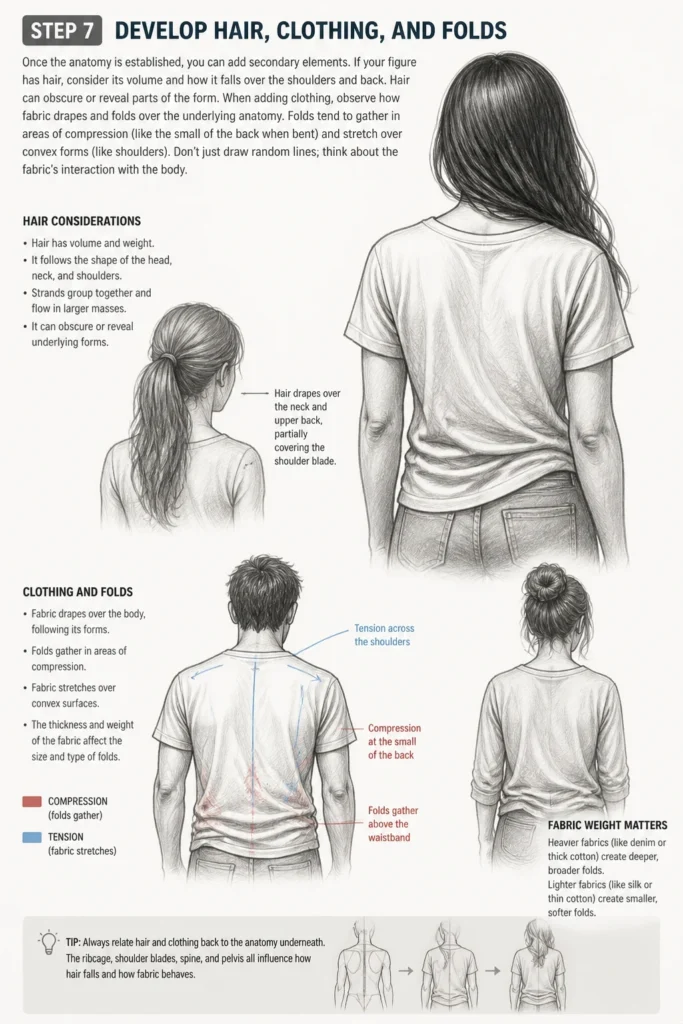
When adding clothing, observe how fabric drapes and folds over the underlying anatomy. Folds tend to gather in areas of compression (like the small of the back when bent) and stretch over convex forms (like shoulders). Don’t just draw random lines; think about the fabric’s interaction with the body.
Step 8: Shade and Add Depth
Begin to add value to your drawing using softer pencils (like 2B). Identify your light source and shade accordingly. Areas in shadow will recede, while highlights will advance.
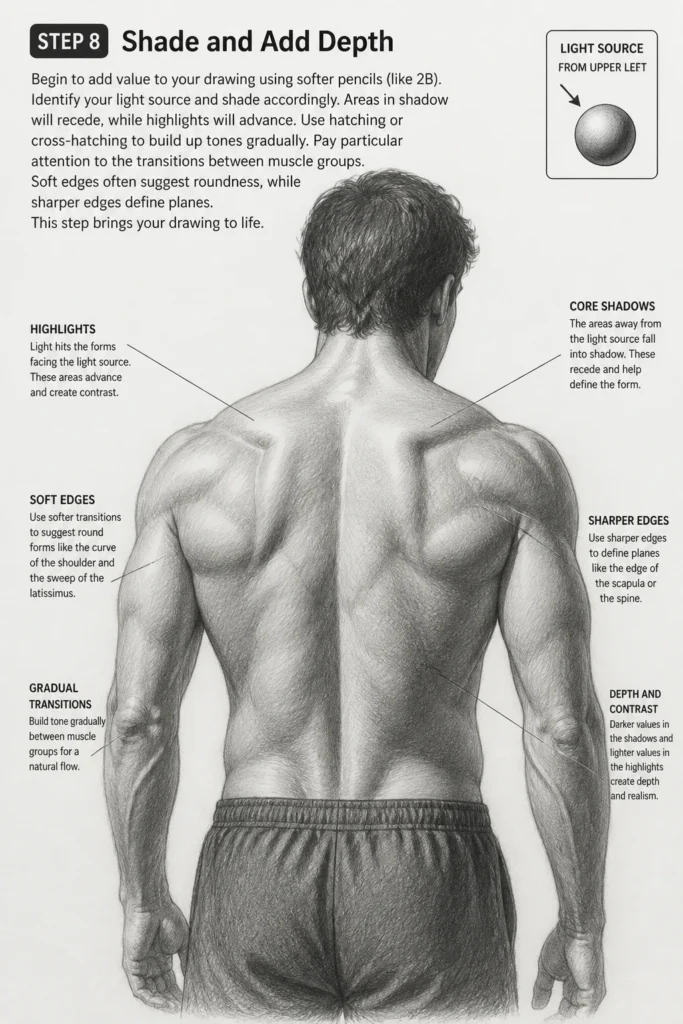
Use hatching or cross-hatching to build up tones gradually. Pay particular attention to the transitions between muscle groups. Soft edges often suggest roundness, while sharper edges define planes. This step brings your drawing to life.
Common Mistakes to Avoid
Ignoring Anatomy
Many beginners draw the back as a flat, featureless plane. This leads to a lifeless and unrealistic figure. The back is a complex interplay of bones and muscles, each contributing to its unique form. Always refer to anatomical charts or real-life references to understand the underlying structure.
To correct this, take time to study the major muscle groups like the trapezius, latissimus dorsi, and deltoids. Understand how they attach and overlap. Even a simplified anatomical understanding makes a huge difference.
Symmetry Over Realism
It’s tempting to draw both sides of the back perfectly symmetrical. However, the human body is rarely perfectly balanced. Slight asymmetries in muscle bulk or shoulder height are natural. Striving for perfect symmetry often results in a rigid, unnatural pose.
Instead, observe your references for subtle differences between the left and right sides. Allow for slight variations, especially in active poses. This adds a sense of dynamism and realism to your drawing.
Flatness/Lack of Depth
A common issue is drawing the back as if it were a two-dimensional cutout. The back has significant volume and depth, with muscles bulging and receding. Ignoring this leads to a very flat image.
To improve depth, use shading and line weight effectively. Darker values and thicker lines can suggest areas that are closer or in shadow. Lighter values and thinner lines can make areas recede. Think about forms turning in space.
Incorrect Shoulder Placement
The shoulders are often drawn too high, too low, or too narrow. This throws off the entire proportion of the upper back. The shoulder girdle is a complex area that connects the arms to the torso.
Pay close attention to how the deltoids connect to the trapezius and how the shoulder blades sit on the rib cage. Use your initial construction lines to ensure the shoulders are correctly aligned with the head and torso.
Troubleshooting
“My back looks stiff/wooden.”
This usually happens when you draw straight lines and hard angles where there should be curves. The human body is full of organic, flowing forms. Stiffness also comes from neglecting the spine’s natural curve.
To fix this, go back to your basic forms. Soften your lines and emphasize the natural S-curve of the spine. Think about how muscles flow into each other rather than being sharply defined blocks. Introduce subtle shifts in weight or posture.
“The muscles don’t look right.”
If your muscles appear lumpy or misplaced, it’s often due to a lack of anatomical understanding or incorrect placement relative to the bones. Guessing where muscles go rarely works.
Revisit your anatomical references. Focus on understanding the origin and insertion points of major muscles. Practice drawing simplified muscle groups over a basic skeletal structure. Start with broad shapes before adding detail.
“The pose feels off-balance.”
An imbalanced pose often stems from an incorrectly established central axis or uneven weight distribution. If your figure looks like it might fall over, check its foundation.
Draw a plumb line (a vertical line) from the head down through the center of gravity. Ensure the mass of the figure is balanced around this line. Adjust the hip and shoulder alignment to suggest proper weight distribution, even in dynamic poses.
Key Takeaways
- Always start with basic geometric forms to establish correct proportions and placement.
- The spine is the central anchor; understand its natural curve and use it as a guide.
- Familiarize yourself with major back muscles (trapezius, latissimus dorsi, deltoids) and their shapes.
- Use reference images extensively to understand anatomical variations and how muscles interact.
- Avoid drawing the back as flat; emphasize its volume and depth through shading and curves.
- Embrace slight asymmetry for a more natural and realistic depiction of the human form.
Frequently Asked Questions
How important is anatomy?
Anatomy is incredibly important. While you don’t need to be a doctor, a basic understanding of bones and muscles helps you draw with conviction. Knowing what lies beneath the surface allows you to suggest form and tension accurately, even in stylized drawings. It moves your work beyond simply copying.
Should I draw nude first, then add clothes?
Yes, drawing the figure nude first is a highly recommended practice. It ensures you have a solid understanding of the underlying form and anatomy before obscuring it with fabric. Once the figure is structurally sound, adding clothes becomes much easier and more realistic, as the fabric will drape correctly over the body.
What if I can’t find good references?
If you struggle to find ideal references, consider using a mirror to observe your own back, or ask a friend to pose. Online resources like Pinterest, posemaniacs.com, or even 3D anatomy apps can provide endless options. Look for clear lighting and diverse body types.
How do I show movement?
Showing movement in the back involves emphasizing the spine’s curve and the twisting or stretching of muscles. Dynamic poses will cause muscles to contract or extend, creating pronounced forms and folds in the skin. Exaggerate the natural curves slightly and use implied lines of action to suggest motion.
Our Top Recommended Finds
- “Anatomy for Artists” by Sarah Simblet: An excellent resource with clear illustrations and explanations of human anatomy specifically for artists. It breaks down complex structures into understandable parts.
- Strathmore 400 Series Sketch Pad: A reliable, acid-free paper with a good tooth, perfect for graphite and charcoal. It can handle multiple layers and erasures without tearing.
- Faber-Castell Graphite Pencil Set (6-piece): Offers a range of hardness (2H to 6B), allowing for versatile line work and shading. Essential for building depth and value in your drawings.
Continue Your Artistic Journey
Drawing the back of a person is a significant step in your figure drawing development. It challenges you to observe complex forms and translate them with skill. Don’t stop here. Apply these principles to other parts of the body, or try drawing the back in more dynamic poses.
Practice is key to improvement. Grab your pencil and paper today, and start sketching. Each line you draw builds your confidence and refines your artistic eye. Keep exploring, keep creating, and watch your skills flourish.
& Painting
No rigid rules or pretension. Just practical guides, medium comparisons, and encouraging tips to help you enjoy the drawing & painting process.