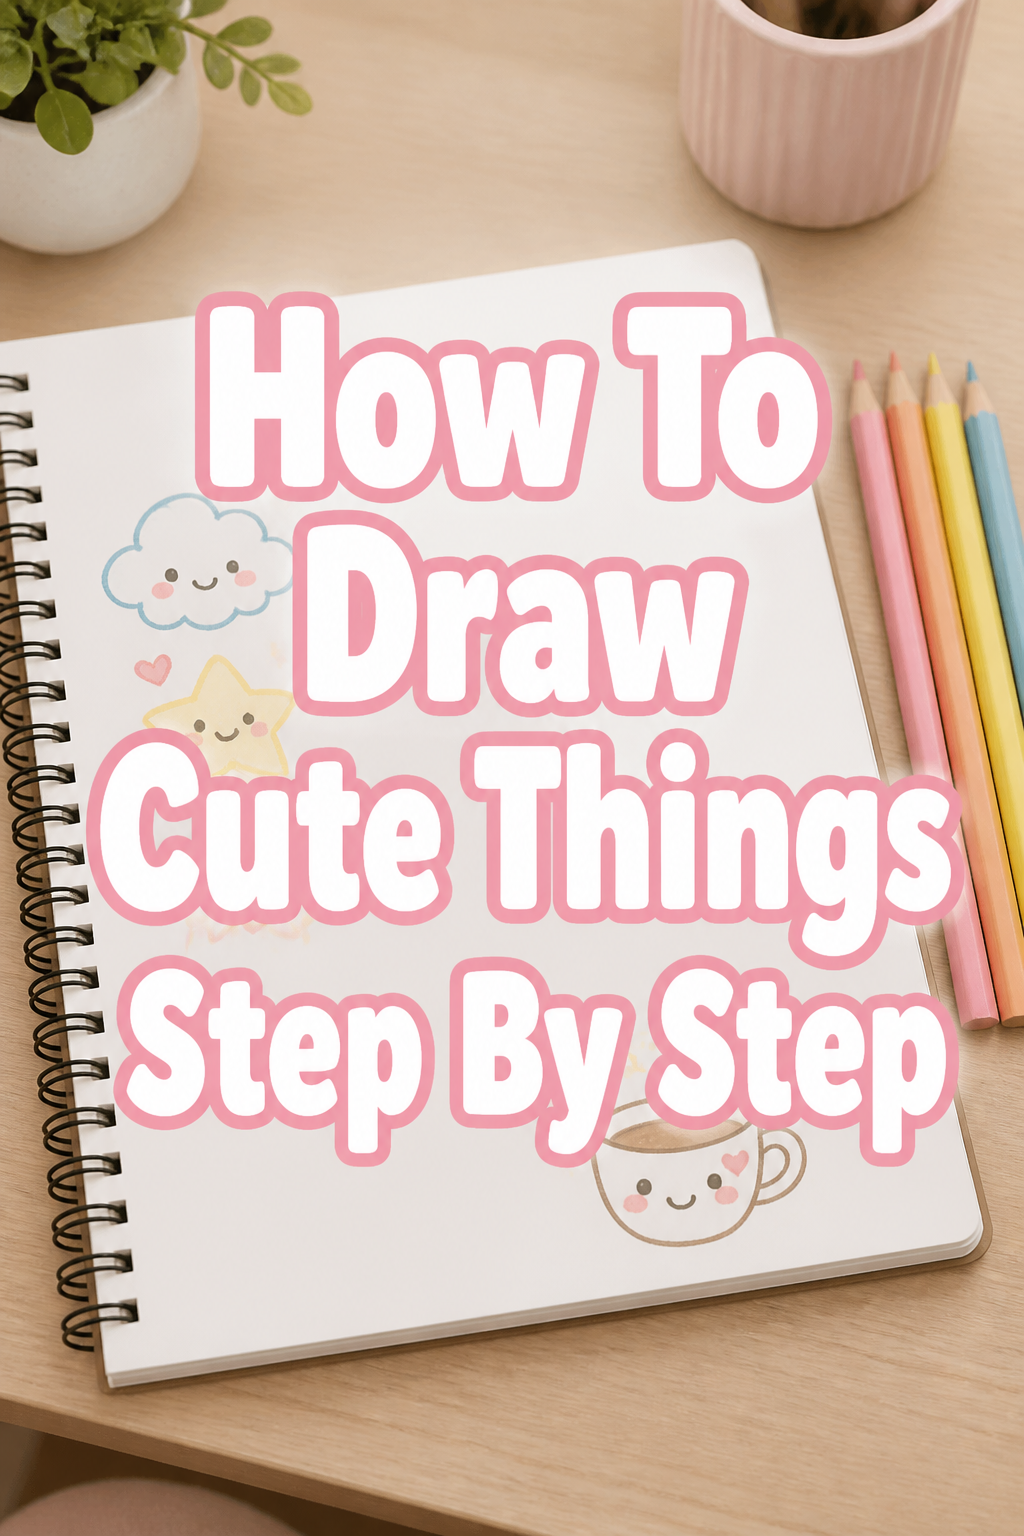
✨ How To Draw Cute Things Step By Step

& Painting
No rigid rules or pretension. Just practical guides, medium comparisons, and encouraging tips to help you enjoy the drawing & painting process.
Do you ever see adorable illustrations online and wish you could create them yourself?
I remember feeling exactly that way, sketching on napkins and dreaming of drawing charming characters.
This guide will share simple techniques I’ve learned, helping you bring your own cute creations to life.
Quick Overview
This guide breaks down the magic of drawing cute things into easy, manageable steps.
You’ll learn the core principles and practical techniques to start drawing your own delightful designs.
- Time needed: 30-60 minutes for a full read-through and initial practice.
- Difficulty: Beginner
- What you’ll need: Paper, pencil, eraser, a positive attitude.
Step-by-Step Instructions
Step 1: Gather Your Tools and Set Your Mind
Collect your drawing essentials. A basic pencil, paper, and a good eraser are all you need to begin this fun journey.
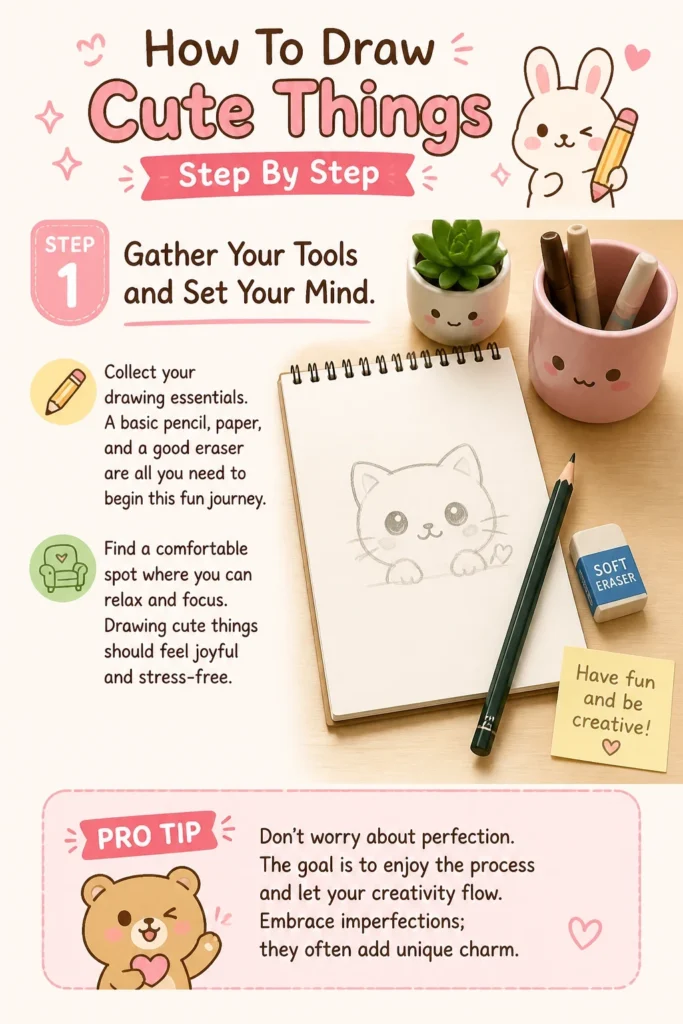
Find a comfortable spot where you can relax and focus. Drawing cute things should feel joyful and stress-free.
Pro Tip: Don’t worry about perfection. The goal is to enjoy the process and let your creativity flow. Embrace imperfections; they often add unique charm.
Step 2: Understand the Anatomy of “Cute”
Recognize what makes something look cute. It often involves oversized features, especially large eyes and heads.
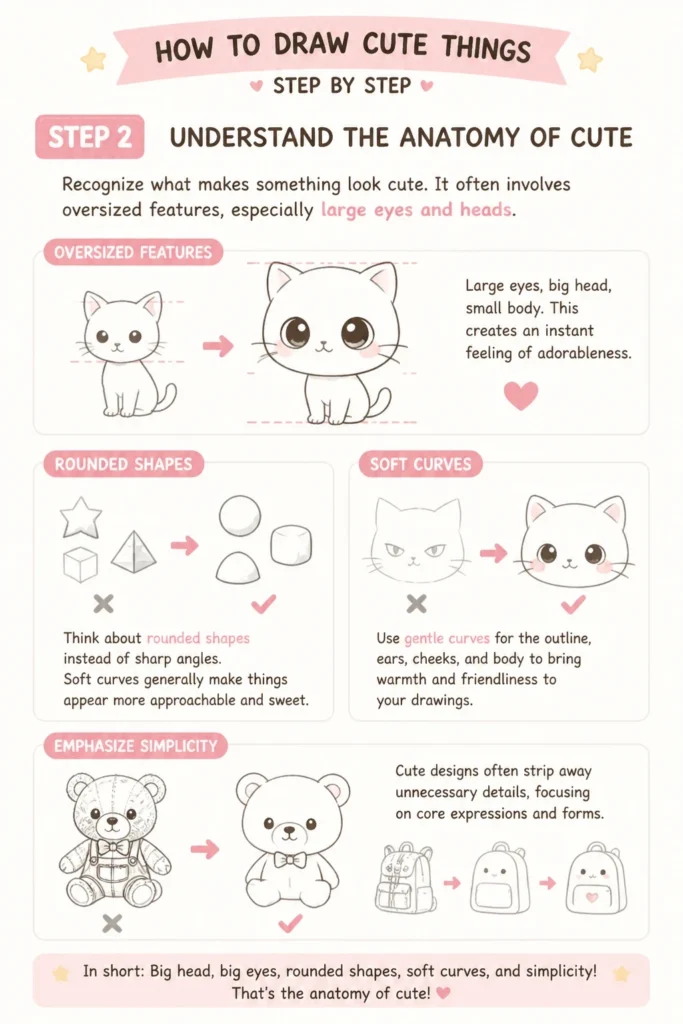
Think about rounded shapes instead of sharp angles. Soft curves generally make things appear more approachable and sweet.
Emphasize simplicity. Cute designs often strip away unnecessary details, focusing on core expressions and forms.
Step 3: Start with Simple Shapes
Begin every drawing with basic geometric shapes. Circles, ovals, and sometimes squares or triangles form the foundation.
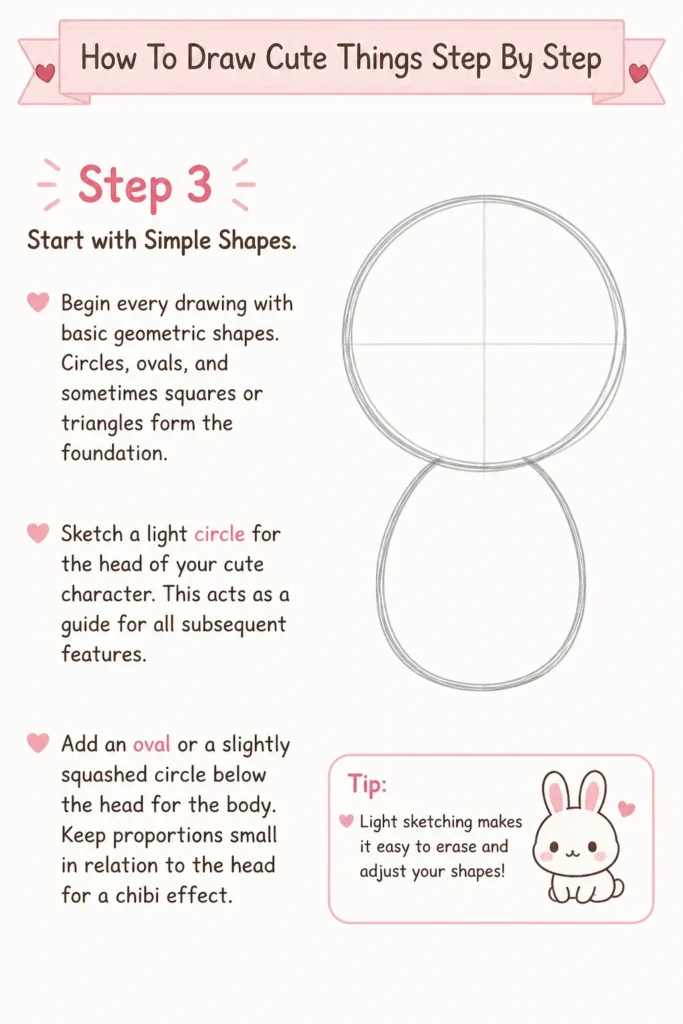
Sketch a light circle for the head of your cute character. This acts as a guide for all subsequent features.
Add an oval or a slightly squashed circle below the head for the body. Keep proportions small in relation to the head for a “chibi” effect.
Step 4: Master the Eyes – The Window to Cuteness
Draw two large ovals or circles for the eyes within the head circle. Position them slightly lower than the center of the face.
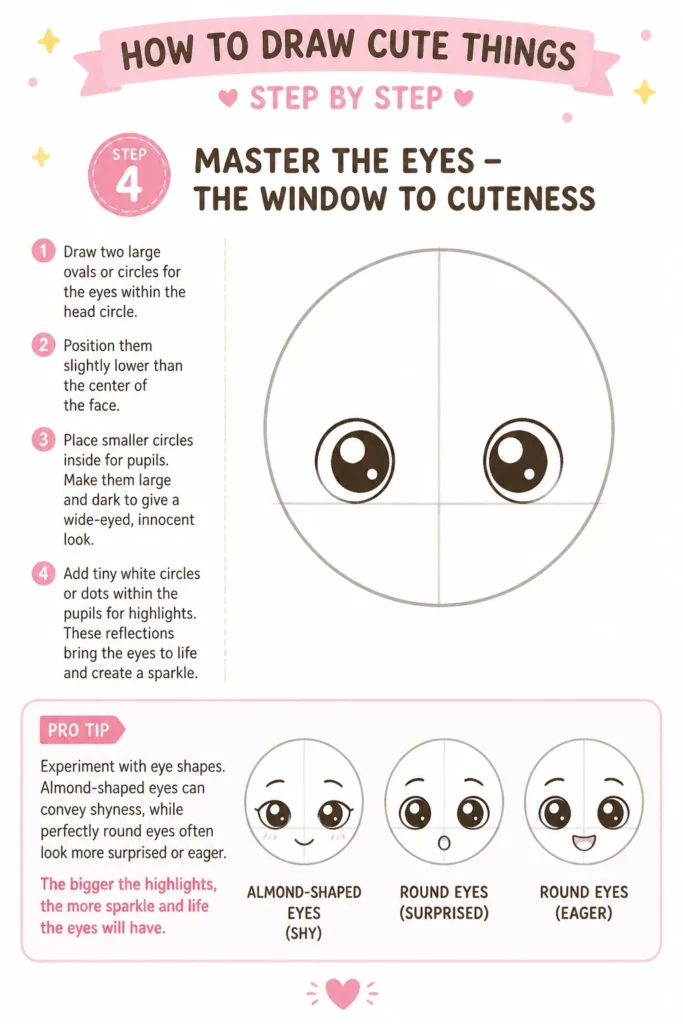
Place smaller circles inside for pupils. Make them large and dark to give a wide-eyed, innocent look.
Add tiny white circles or dots within the pupils for highlights. These reflections bring the eyes to life and create a sparkle.
Pro Tip: Experiment with eye shapes. Almond-shaped eyes can convey shyness, while perfectly round eyes often look more surprised or eager. The bigger the highlights, the more sparkle and life the eyes will have.
Step 5: Adding Noses and Mouths
Sketch a small, simple nose. Often, a tiny dot, a small inverted triangle, or a simple curve is enough for a cute nose.
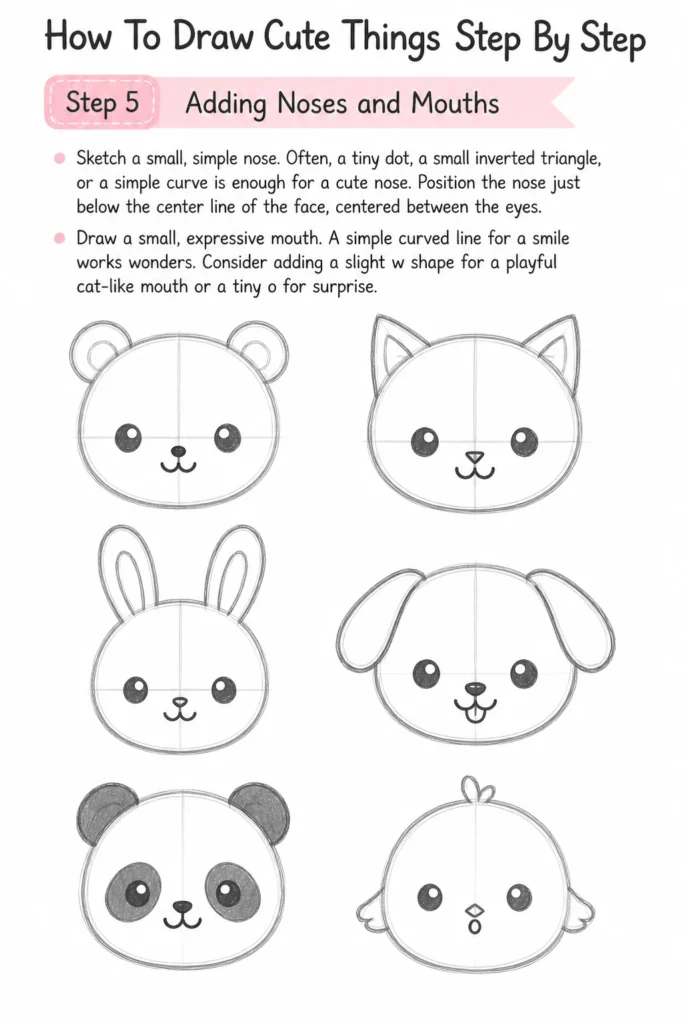
Position the nose just below the center line of the face, centered between the eyes.
Draw a small, expressive mouth. A simple curved line for a smile works wonders.
Consider adding a slight “w” shape for a playful cat-like mouth or a tiny “o” for surprise.
Step 6: Shaping the Head and Adding Ears
Refine the head shape around your initial circle. Make it slightly wider at the cheeks or rounder overall.
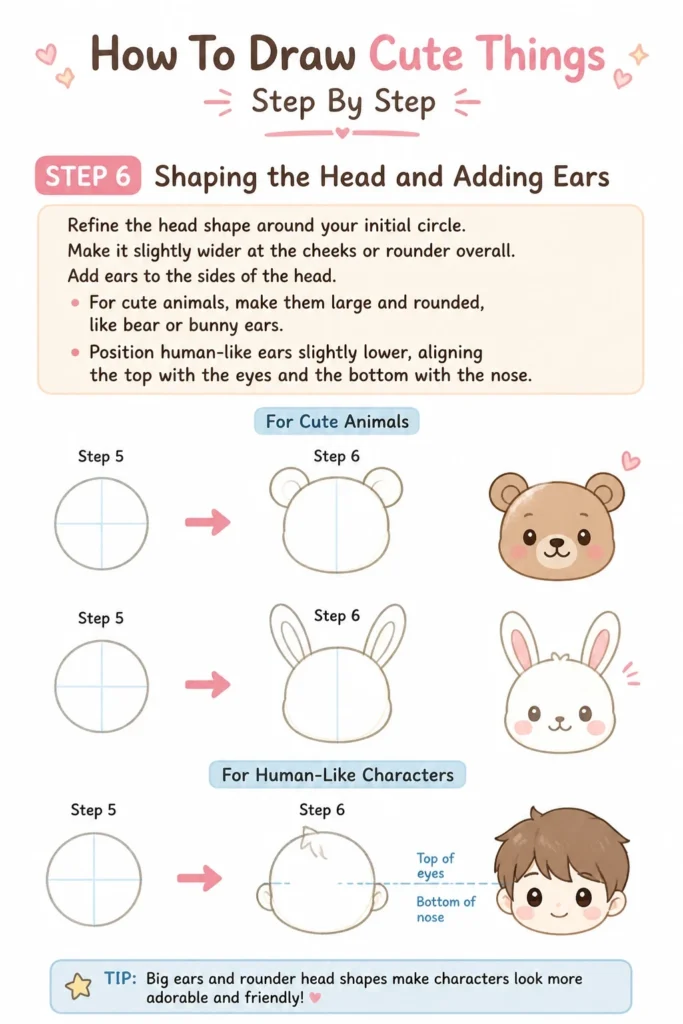
Add ears to the sides of the head. For cute animals, make them large and rounded, like bear or bunny ears.
Position human-like ears slightly lower, aligning the top with the eyes and the bottom with the nose.
Step 7: Developing the Body and Limbs
Connect the head to the body with a short, thick neck or blend them directly for a seamless, rounder look.
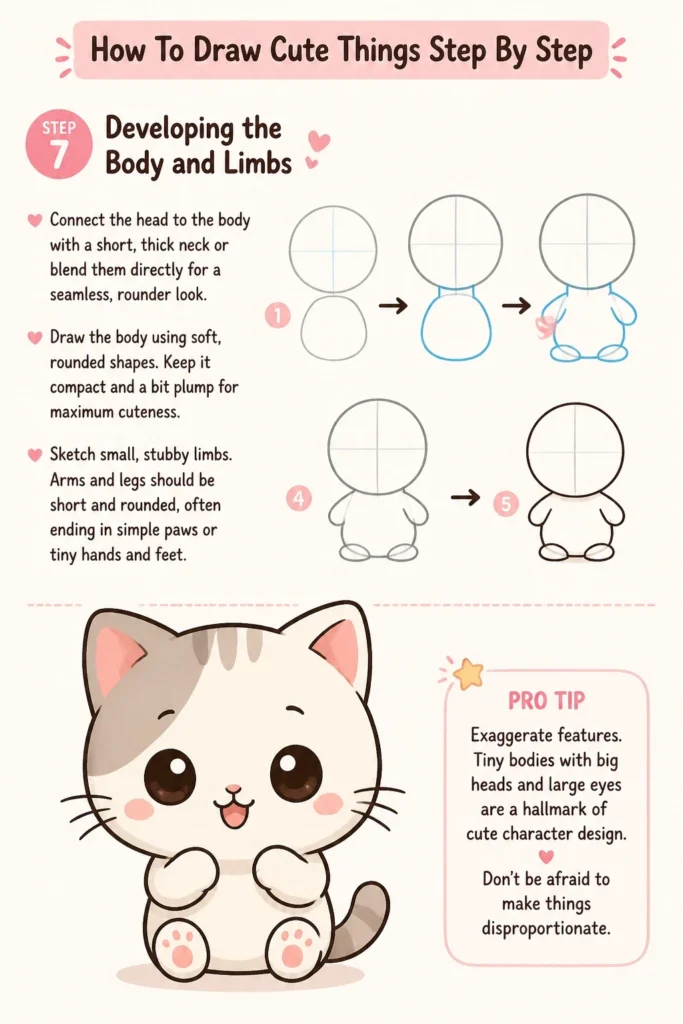
Draw the body using soft, rounded shapes. Keep it compact and a bit plump for maximum cuteness.
Sketch small, stubby limbs. Arms and legs should be short and rounded, often ending in simple paws or tiny hands and feet.
Pro Tip: Exaggerate features. Tiny bodies with big heads and large eyes are a hallmark of cute character design. Don’t be afraid to make things disproportionate.
Step 8: Bringing it to Life with Details and Expression
Add small, charming details. A tiny blush on the cheeks (two small ovals or circles) instantly adds warmth.
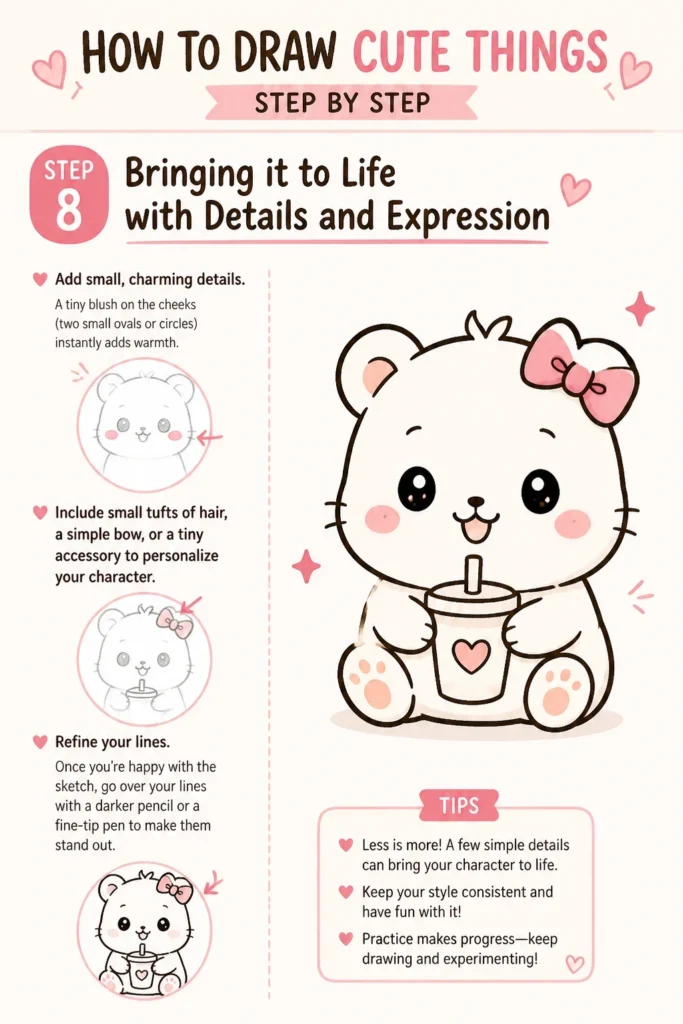
Include small tufts of hair, a simple bow, or a tiny accessory to personalize your character.
Refine your lines. Once you’re happy with the sketch, go over your lines with a darker pencil or a fine-tip pen to make them stand out.
Step 9: Practice and Personalize
Repeat these steps with different characters and objects. Try drawing a cute cat, a small cup, or a simple flower.
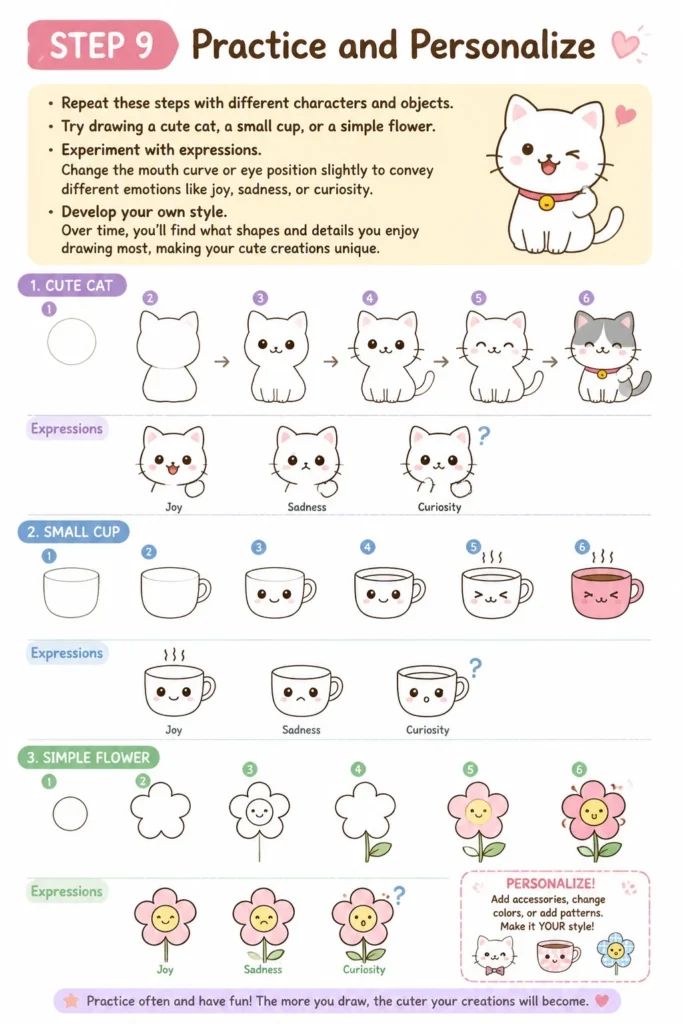
Experiment with expressions. Change the mouth curve or eye position slightly to convey different emotions like joy, sadness, or curiosity.
Develop your own style. Over time, you’ll find what shapes and details you enjoy drawing most, making your cute creations unique.
Common Mistakes to Avoid
Over-complicating Shapes
Many beginners try to draw complex forms from the start. This can lead to frustration and drawings that don’t quite capture the intended cuteness.
Always break down your subject into the simplest circles, ovals, and lines. Refine these basic shapes gradually, rather than attempting intricate details immediately.
Ignoring Eye Placement and Size
The eyes are paramount in cute drawings. Placing them too close together, too far apart, or making them too small can diminish the cute factor significantly.
Make the eyes large and prominent. Ensure they are well-spaced and have those crucial highlights to give them life and expression.
Using Too Many Sharp Angles
Sharp corners and straight lines can make a drawing feel rigid or aggressive, which contrasts with the soft, inviting nature of cute art.
Focus on curves and rounded edges. Even for objects that naturally have angles, try to soften them into gentle arcs to enhance cuteness.
Forgetting Proportions for Cuteness
Drawing realistic proportions won’t always result in a cute aesthetic. Cute often means exaggerating certain features, like a large head or tiny limbs.
Embrace disproportion. A big head on a small body, or oversized eyes, are key elements that contribute to that endearing, cute appeal.
Troubleshooting
My Drawings Don’t Look Cute Enough
If your drawings aren’t quite hitting the cute mark, revisit the core principles.
Focus on making eyes bigger, features rounder, and expressions simpler. Try adding more prominent highlights to the eyes and a soft blush on the cheeks.
I Struggle with Symmetry
Drawing symmetrical eyes or features can be challenging. Don’t worry, perfect symmetry isn’t always necessary for cuteness.
Try drawing a light vertical guideline down the center of the face. This helps align features. You can also embrace slight asymmetry; it often adds character.
My Lines Are Shaky or Uneven
Shaky lines are common, especially when starting out. This usually means you’re pressing too hard or drawing too slowly.
Practice drawing with a lighter touch and try to complete lines in single, confident strokes. Loosen your wrist and arm, rather than just moving your fingers.
Key Takeaways
- Simplify Shapes: Always start with basic circles, ovals, and soft curves.
- Emphasize Eyes: Large, expressive eyes with prominent highlights are crucial for cuteness.
- Round Everything: Avoid sharp angles; prioritize soft, rounded forms.
- Exaggerate Proportions: Big heads, small bodies, and tiny limbs enhance the cute factor.
- Add Simple Details: Blushes, tiny smiles, and minimal accessories bring characters to life.
- Practice Regularly: Consistent drawing helps refine your skills and develop your unique style.
Frequently Asked Questions
What kind of pencil is best for drawing cute things?
A standard HB pencil is excellent for initial sketches. For darker lines, you might use a 2B or 4B. Don’t feel pressured to buy expensive tools; simple pencils work wonderfully.
How do I make my characters look more expressive?
Expression largely comes from the eyes and mouth. Adjusting the curve of a smile, adding slight eyebrows, or changing the direction of the eye highlights can dramatically alter a character’s mood. Practice different combinations.
Should I use color when drawing cute things?
Color can certainly enhance cuteness, but it’s not essential, especially when you’re just starting. Focus on mastering the line art first. When you do add color, soft pastels or bright, cheerful hues often work best for cute themes.
Is it okay to trace other cute drawings for practice?
Tracing can be a helpful learning tool to understand shapes and proportions, especially when you’re a beginner. Just be sure to trace for learning purposes and not to claim it as your original work. Gradually try to draw without tracing.
Our Top Recommended Finds
- Sketchbook with Smooth Paper: A good quality sketchbook makes drawing more enjoyable and allows for smoother lines.
- Kneaded Eraser: This type of eraser is gentle on paper and can lift pencil marks without smudging, perfect for delicate lines.
- Fine-Tip Black Pens: For inking your final lines, a set of waterproof fine-tip pens (like micron pens) will give your drawings a clean, polished look.
Embrace Your Inner Artist Today
You now have the foundations to start drawing your own delightful creations. The journey of drawing cute things is one of continuous discovery and joy.
Don’t wait for the perfect moment; grab your pencil and paper right now. Start with a simple circle, add some big eyes, and see what charming character emerges.
Keep practicing, keep experimenting, and most importantly, keep having fun. Soon, your sketchbook will be filled with an adorable world all your own!
& Painting
No rigid rules or pretension. Just practical guides, medium comparisons, and encouraging tips to help you enjoy the drawing & painting process.