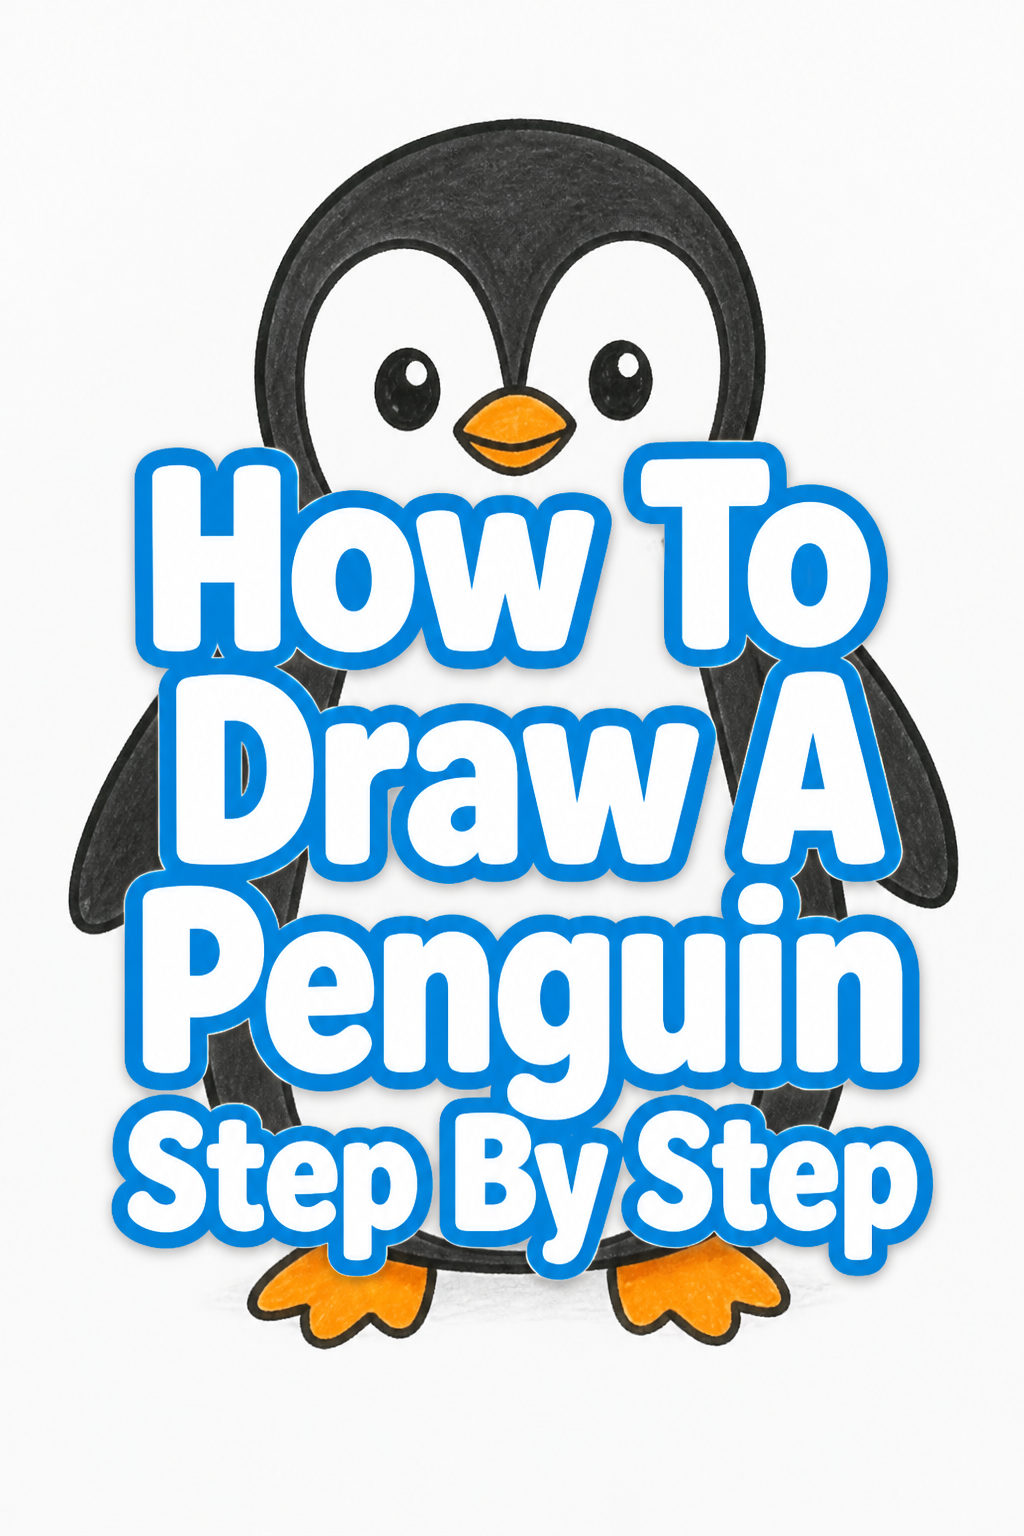
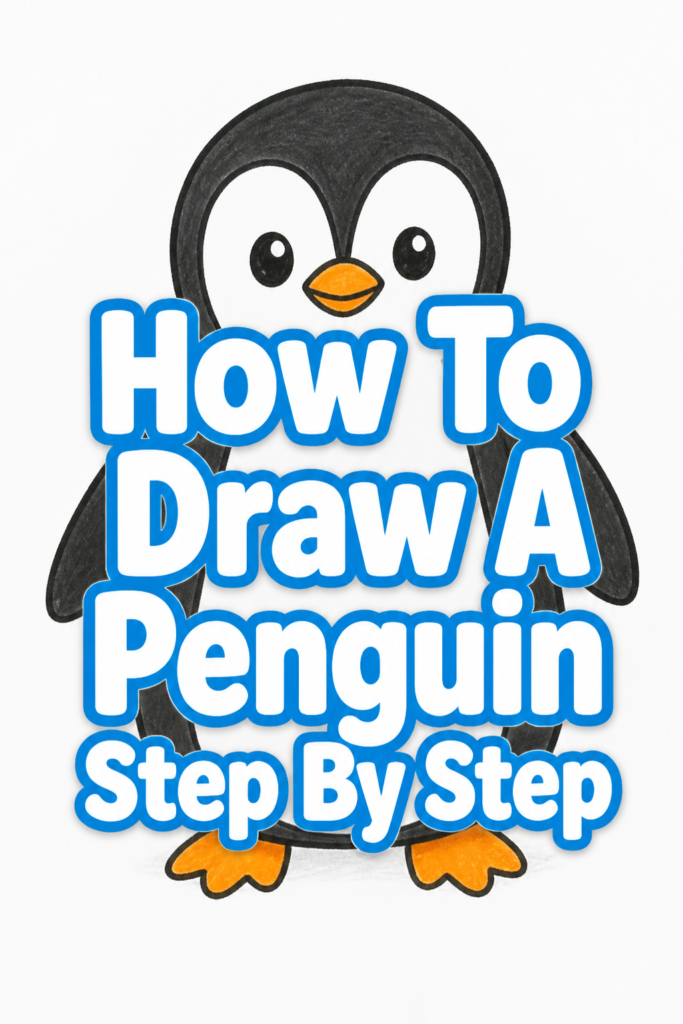
🐧 How To Draw A Penguin Step By Step

& Painting
No rigid rules or pretension. Just practical guides, medium comparisons, and encouraging tips to help you enjoy the drawing & painting process.
Learning to draw a penguin can be a truly delightful experience for artists of all levels.
I remember my own early attempts, trying to capture that charming waddle and distinct shape, often ending up with something more like a potato with feet.
This guide shares the simplified method I’ve found most effective, breaking down the process into easy, enjoyable steps.
Quick Overview
By following these instructions, you’ll create your very own endearing penguin drawing.
You’ll build confidence in basic sketching and shape manipulation, leading to a satisfying finished piece.
- Time needed: 30-60 minutes
- Difficulty: Beginner
- What you’ll need: Pencil (HB or 2B recommended), eraser, drawing paper, optional: black pen or fine-liner, grey markers or colored pencils.
Step-by-Step Instructions
Step 1: Sketch the Foundation Shapes
Begin by lightly drawing two ovals on your paper. These will form the main structure of your penguin.
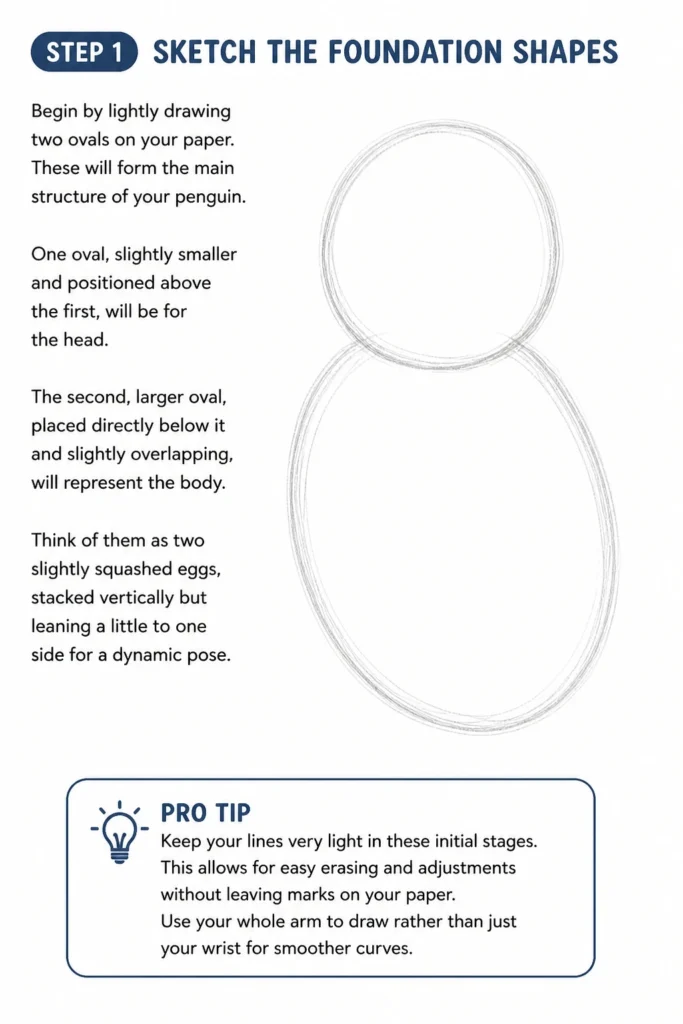
One oval, slightly smaller and positioned above the first, will be for the head. The second, larger oval, placed directly below it and slightly overlapping, will represent the body.
Think of them as two slightly squashed eggs, stacked vertically but leaning a little to one side for a dynamic pose.
Pro Tip: Keep your lines very light in these initial stages. This allows for easy erasing and adjustments without leaving marks on your paper. Use your whole arm to draw rather than just your wrist for smoother curves.
Step 2: Connect the Body and Head
Now, connect the head oval to the body oval with smooth, curved lines.
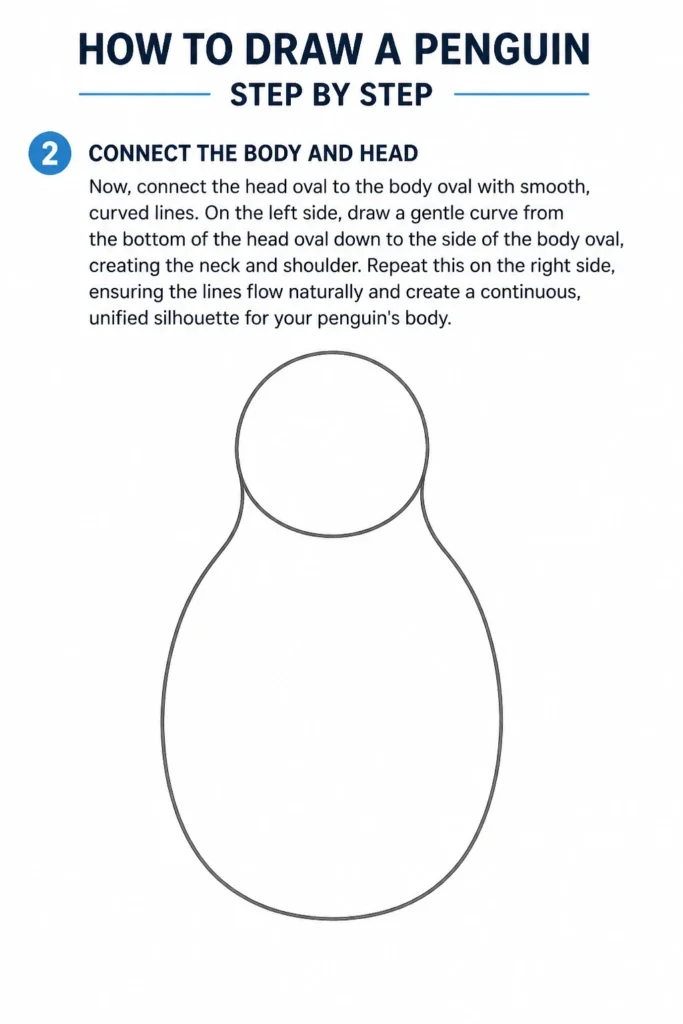
On the left side, draw a gentle curve from the bottom of the head oval down to the side of the body oval, creating the neck and shoulder.
Repeat this on the right side, ensuring the lines flow naturally and create a continuous, unified silhouette for your penguin’s body.
Step 3: Add the Beak and Eyes
Place the penguin’s features on the head. For the beak, draw a small, slightly curved triangle shape on the lower half of the head oval.
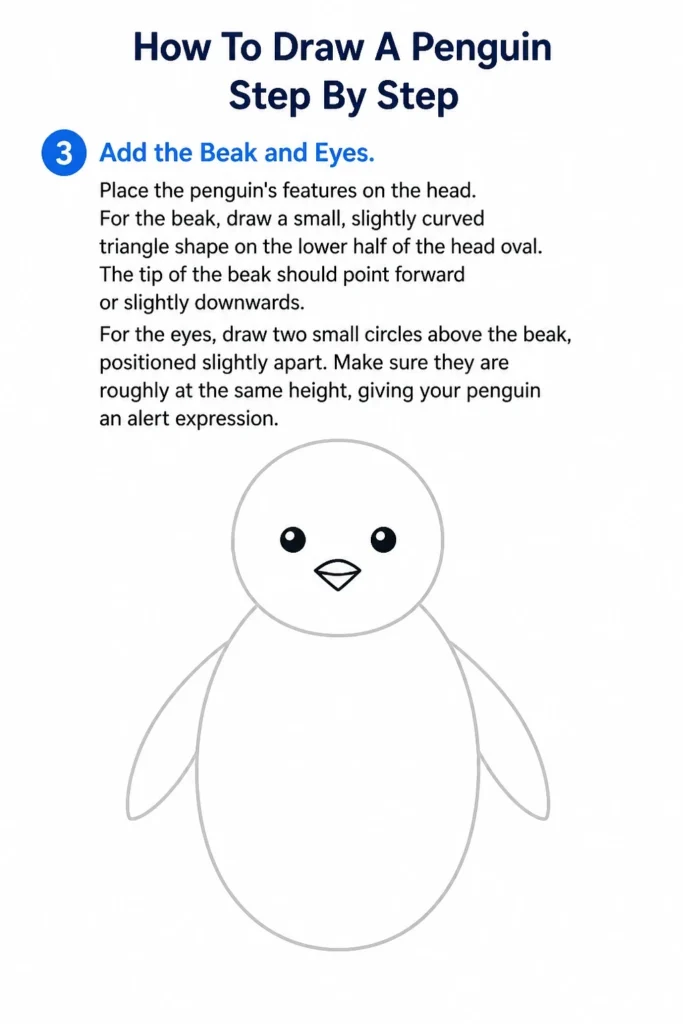
The tip of the beak should point forward or slightly downwards. For the eyes, draw two small circles above the beak, positioned slightly apart.
Make sure they are roughly at the same height, giving your penguin an alert expression.
Step 4: Draw the Wings (Flippers)
Sketch the penguin’s distinctive flippers. These are elongated, somewhat flattened oval shapes that extend from the sides of the body.
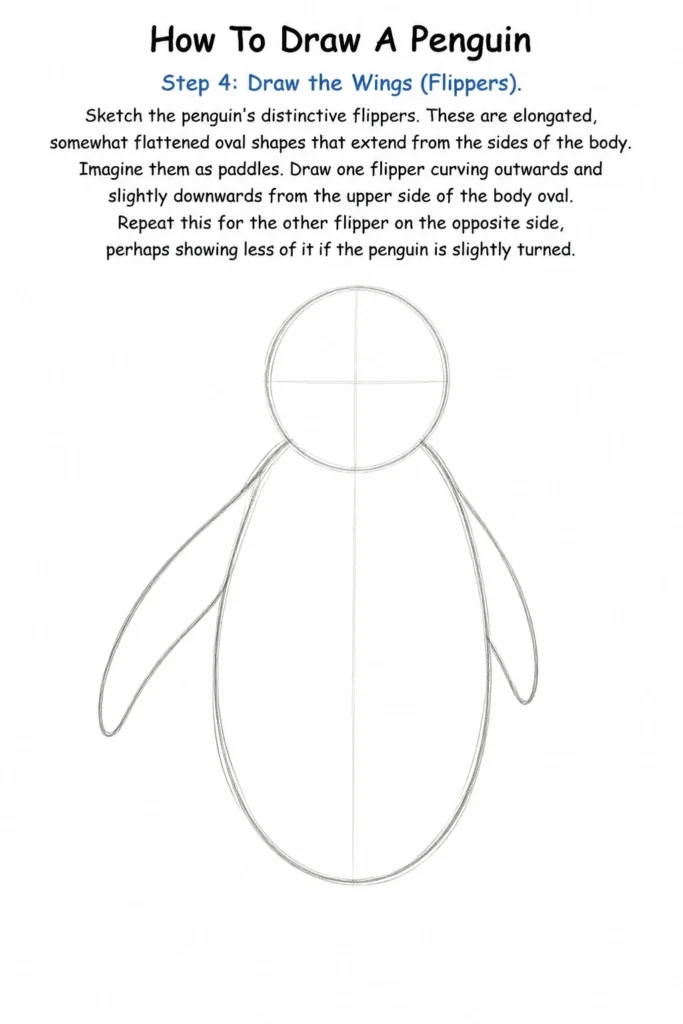
Imagine them as paddles. Draw one flipper curving outwards and slightly downwards from the upper side of the body oval.
Repeat this for the other flipper on the opposite side, perhaps showing less of it if the penguin is slightly turned.
Step 5: Outline the Feet
Illustrate the penguin’s feet at the bottom of the body oval. Penguins have webbed feet, usually depicted with three toes pointing forward.
Draw two small, somewhat triangular shapes for the feet, ensuring they extend slightly outwards from the body.
Give them a hint of dimension by showing the tops of the feet slightly overlapping the bottom of the body.
Pro Tip: Don’t make the feet too large; they are generally quite small in proportion to the rest of the body. Focus on a simple, sturdy base.
Step 6: Define the White Belly
Create the classic white belly patch that is characteristic of most penguins. Draw a large, curved “U” or “C” shape within the main body outline.
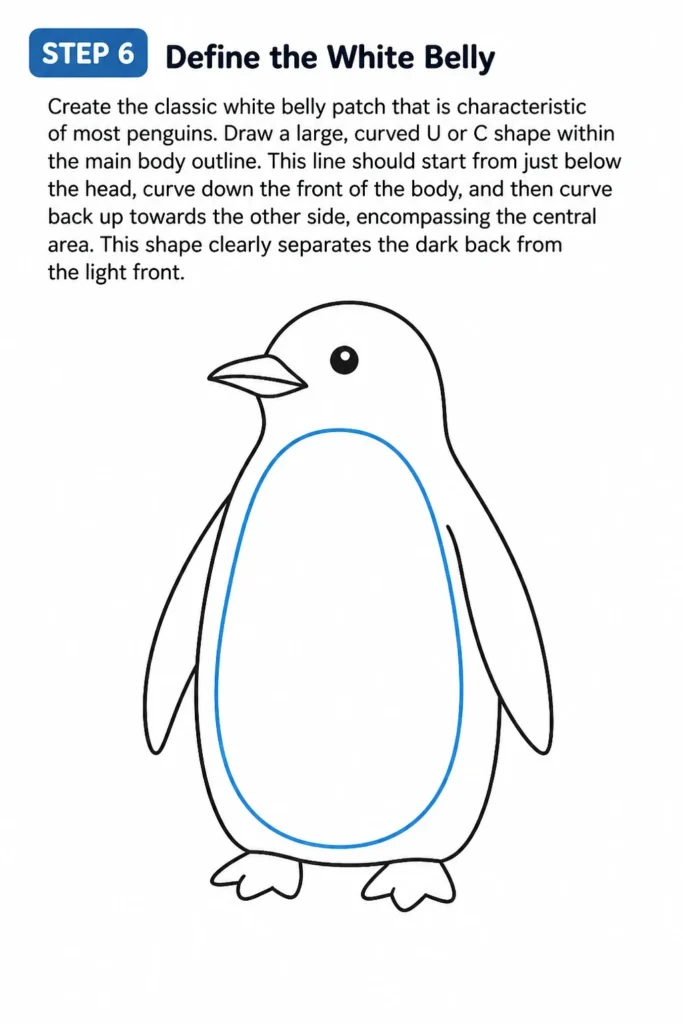
This line should start from just below the head, curve down the front of the body, and then curve back up towards the other side, encompassing the central area.
This shape clearly separates the dark back from the light front.
Step 7: Refine and Erase Guide Lines
Now it’s time to clean up your drawing. Carefully go over your desired lines, making them darker and more confident.
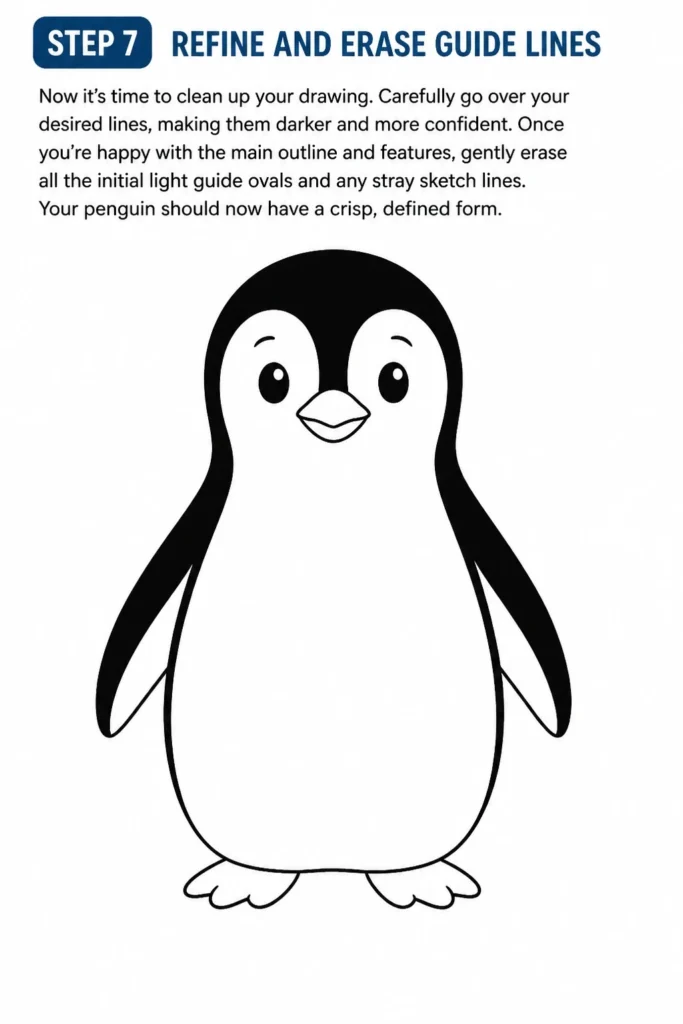
Once you’re happy with the main outline and features, gently erase all the initial light guide ovals and any stray sketch lines.
Your penguin should now have a crisp, defined form.
Step 8: Add Details and Shading (Optional)
To bring your penguin to life, incorporate some final details. You can add a small highlight in the eyes to make them sparkle.
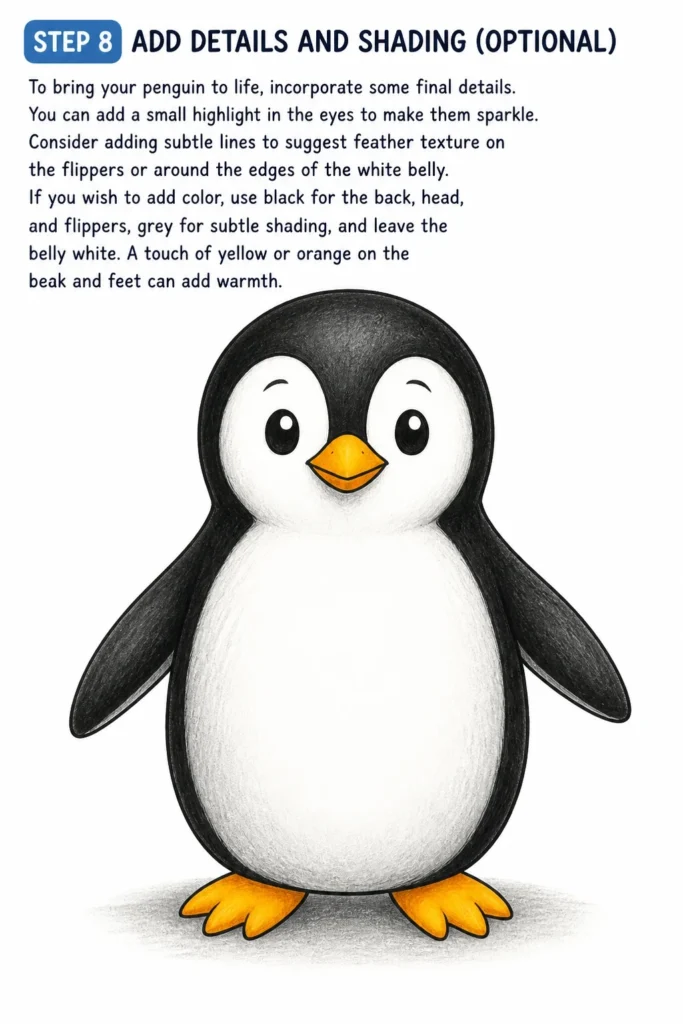
Consider adding subtle lines to suggest feather texture on the flippers or around the edges of the white belly.
If you wish to add color, use black for the back, head, and flippers, grey for subtle shading, and leave the belly white. A touch of yellow or orange on the beak and feet can add warmth.
Common Mistakes to Avoid
Disproportionate Shapes
One common pitfall is making the head too large or too small in relation to the body. This can make your penguin look unbalanced or cartoonish in an unintended way.
Always start by comparing the sizes of your initial ovals to ensure they have a harmonious relationship, aiming for a head that is roughly one-third to one-quarter the size of the body.
Stiff Flippers
Drawing the flippers as straight, rigid lines can make your penguin look unnatural and static. Penguins’ flippers are powerful, yet graceful, for swimming.
Ensure your flippers have a gentle, natural curve, suggesting movement and flexibility, even in a standing pose.
Flat Feet
Simply drawing two flat shapes for the feet can make your penguin appear as if it’s floating or stuck to the ground. Penguins have distinct, slightly angled feet.
Try to give the feet a subtle three-dimensional quality by showing a slight overlap with the body and indicating the thickness of the foot pads.
Over-Complicating Details Early
Many beginners try to add intricate feather patterns or tiny details before the basic form is solid. This can lead to a messy drawing and frustration.
Focus on getting the major shapes and outlines correct first. Details should always be the last layer, built upon a strong foundation.
Troubleshooting
Lines Look Wobbly or Uneven
If your lines appear shaky, it often means you’re drawing with too much tension in your hand or just your wrist. Try to relax your grip on the pencil.
Practice drawing long, smooth curves using your whole arm, not just your wrist and fingers. Light, repeated strokes also help to build a confident line.
Can’t Get Symmetry
Achieving perfect symmetry can be challenging, but it’s not always necessary for a charming drawing. If you’re struggling, lightly draw a vertical center guideline through your initial body ovals.
This central axis can help you align features like eyes and flippers more evenly on both sides. Remember, slight imperfections add character.
Drawing Looks Flat or Lacks Depth
A flat drawing usually means you’re focusing only on the outline. To add depth, think about overlapping shapes and subtle shading.
Ensure the flippers slightly overlap the body, and the feet slightly overlap the body. Add light shadows under the flippers or around the edges of the white belly to give a sense of dimension.
Key Takeaways
- Always start with basic geometric shapes as your foundation.
- Build your drawing gradually, from large forms to smaller details.
- Don’t hesitate to use your eraser; it’s a crucial tool for refining your work.
- Practice is key; the more you draw, the more confident your lines will become.
- Observe real penguins in photos or videos for inspiration on poses and features.
- Enjoy the process and allow for your unique artistic style to emerge.
Frequently Asked Questions
What if my circles and ovals aren’t perfect?
It’s absolutely fine if your initial shapes aren’t perfect. They are merely guide marks to help establish proportion and placement. The important part is the final, refined lines you draw over them.
Can I use markers instead of pencils for the whole drawing?
While you can use markers for the final outline and coloring, it’s highly recommended to start with a light pencil sketch. Markers are permanent, making mistakes difficult to correct. Pencil allows for much more flexibility and refinement.
How do I make my penguin look more realistic?
For a more realistic look, focus on subtle details like feather texture, realistic eye reflections, and nuanced shading. Study reference photos to understand how light falls on a penguin’s body and creates shadows and highlights. Adding a simple, icy background can also enhance realism.
What’s the best paper to use for drawing?
Any smooth drawing paper will work well for this exercise. If you plan to add color with markers or watercolors, consider a slightly thicker paper (like Bristol board or watercolor paper) to prevent bleed-through or buckling.
Our Top Recommended Finds
- Sketching Pencils Set: A set with varying lead hardness (e.g., HB, 2B, 4B, 6B) provides versatility for initial sketches and darker outlines.
- Kneaded Eraser: These soft, moldable erasers are excellent for lifting pencil marks gently without damaging the paper, ideal for refining sketches.
- Smooth Drawing Paper Pad: A simple pad of smooth, acid-free drawing paper offers a great surface for pencils, pens, and light coloring.
Your Penguin Journey Begins!
You’ve now walked through each step of creating your very own charming penguin drawing.
This process builds not just a picture, but also confidence in your artistic abilities.
Take your newfound skills and try drawing penguins in different poses, or even add a fun scarf or hat! The world of animal drawing is vast and exciting.
Grab your pencil and paper today, and let your creativity take flight.
& Painting
No rigid rules or pretension. Just practical guides, medium comparisons, and encouraging tips to help you enjoy the drawing & painting process.