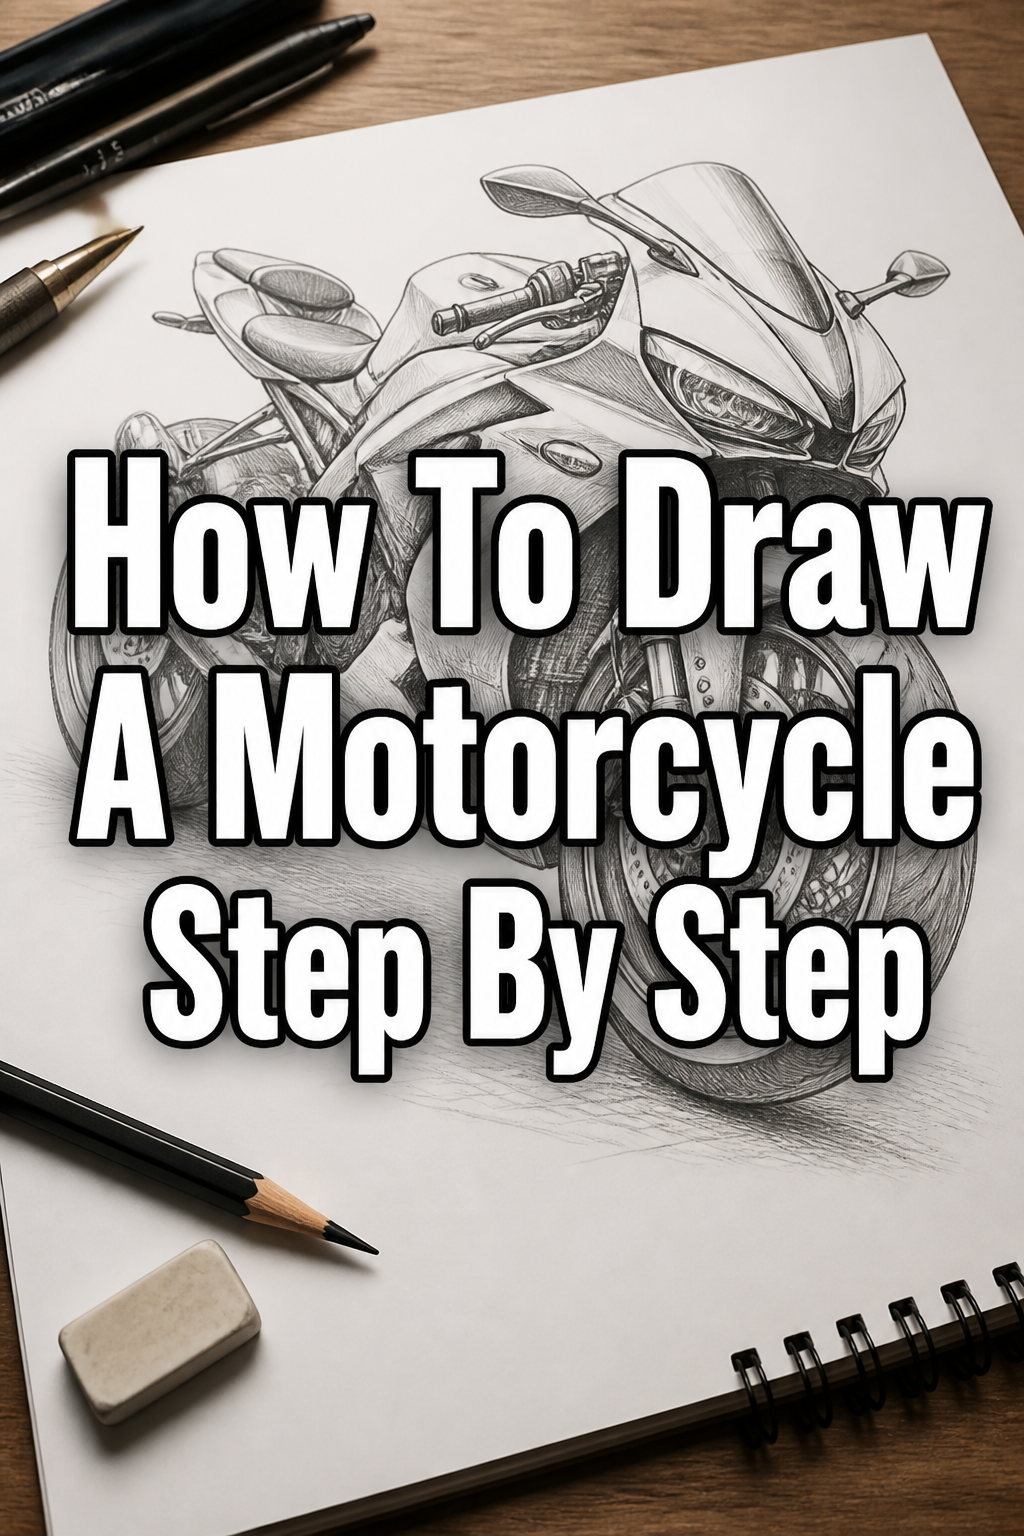
🏍️ How To Draw A Motorcycle Step By Step

& Painting
No rigid rules or pretension. Just practical guides, medium comparisons, and encouraging tips to help you enjoy the drawing & painting process.
I remember the first time I tried to sketch my father’s vintage cruiser in the garage.
It ended up looking more like a tangled mess of wire than a powerful machine.
After years of practicing mechanical illustration and studying bike anatomy, I have developed a foolproof method to help you master the curves and chrome of any motorcycle.
Quick Overview
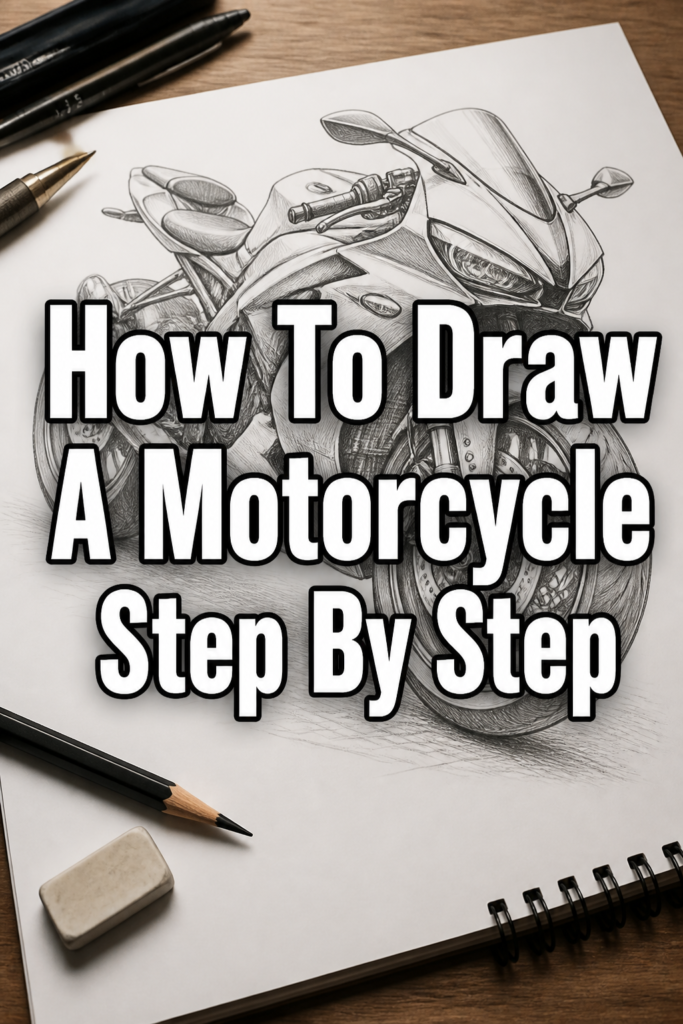
This guide will take you from a blank page to a fully realized, three-dimensional motorcycle drawing.
- Time needed: 45 to 60 minutes
- Difficulty: Intermediate
- What you’ll need: Graphite pencils (HB, 2B, 4B), a high-quality eraser, a ruler, and smooth drawing paper.
Step-by-Step Instructions
Step 1: Map the Foundation Wheels
Start by drawing two identical circles on the lower half of your paper to represent the tires.
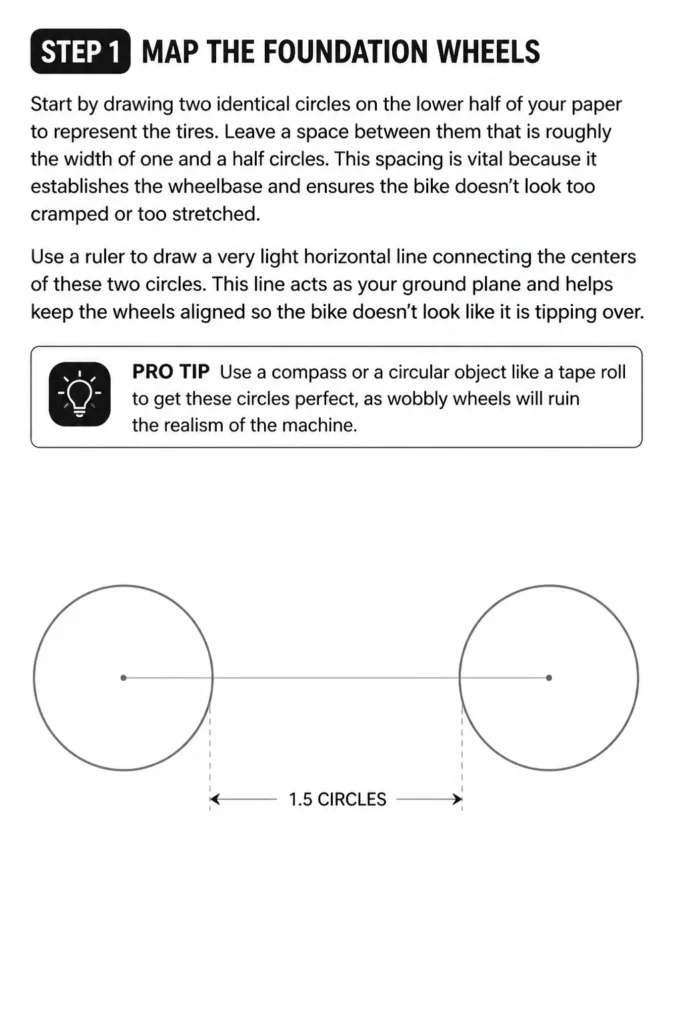
Leave a space between them that is roughly the width of one and a half circles.
This spacing is vital because it establishes the wheelbase and ensures the bike doesn’t look too cramped or too stretched.
Use a ruler to draw a very light horizontal line connecting the centers of these two circles.
This line acts as your ground plane and helps keep the wheels aligned so the bike doesn’t look like it is tipping over.
Pro Tip: Use a compass or a circular object like a tape roll to get these circles perfect, as wobbly wheels will ruin the realism of the machine.
Step 2: Construct the Frame Skeleton
Sketch a large triangle-like shape that connects the front wheel’s center to the area above the rear wheel.
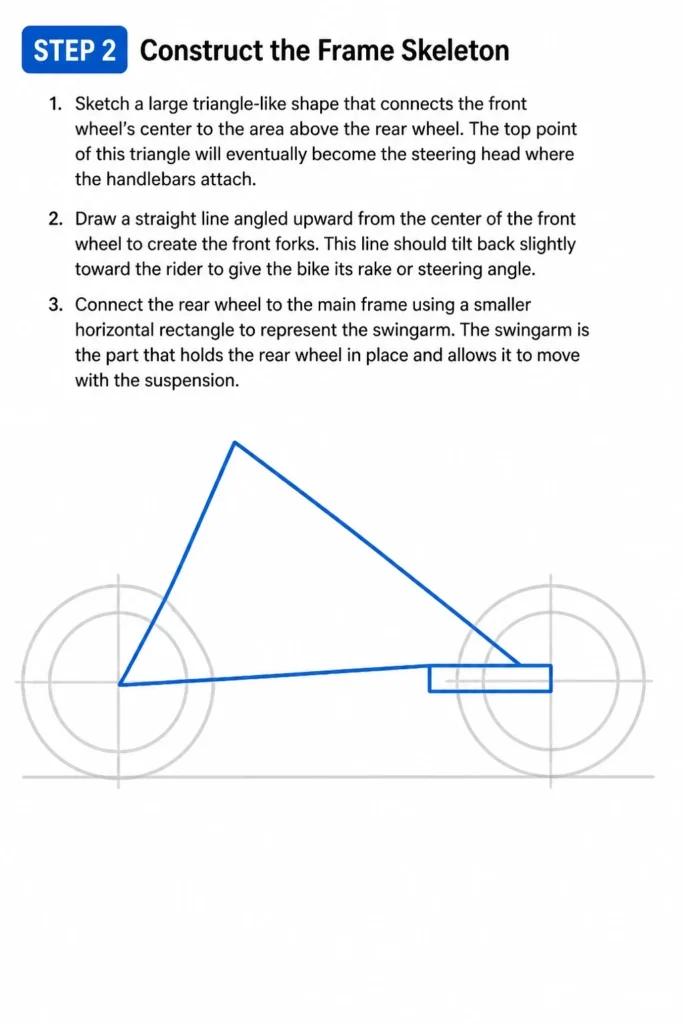
The top point of this triangle will eventually become the steering head where the handlebars attach.
Draw a straight line angled upward from the center of the front wheel to create the front forks.
This line should tilt back slightly toward the rider to give the bike its “rake” or steering angle.
Connect the rear wheel to the main frame using a smaller horizontal rectangle to represent the swingarm.
The swingarm is the part that holds the rear wheel in place and allows it to move with the suspension.
Step 3: Block in the Engine Heart
Identify the empty space in the middle of your frame and draw a large, slightly tilted square.
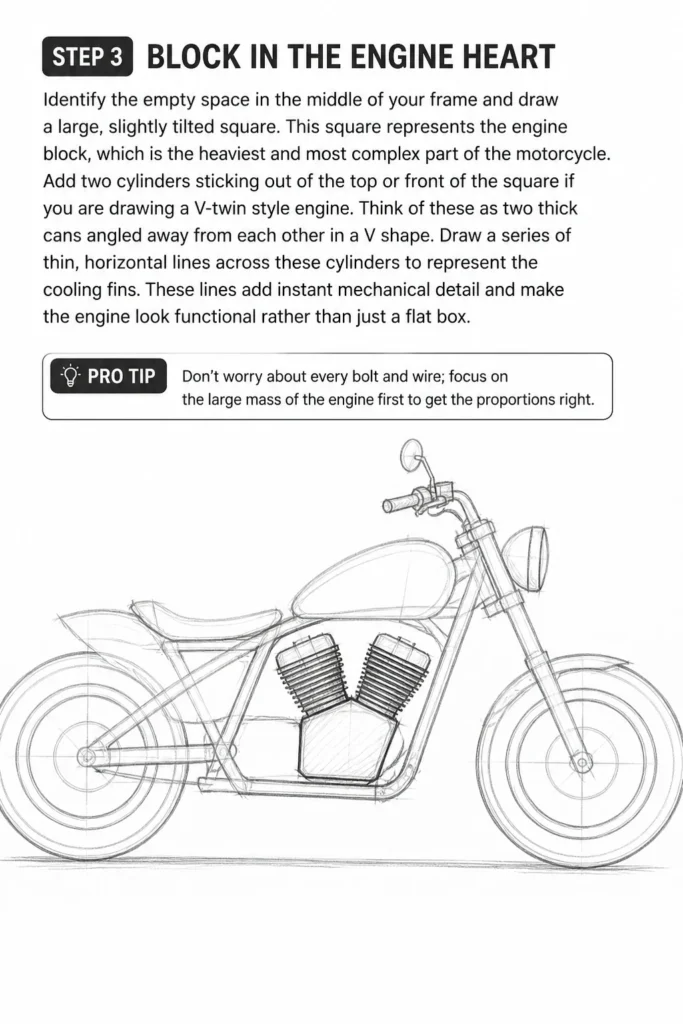
This square represents the engine block, which is the heaviest and most complex part of the motorcycle.
Add two cylinders sticking out of the top or front of the square if you are drawing a V-twin style engine.
Think of these as two thick cans angled away from each other in a “V” shape.
Draw a series of thin, horizontal lines across these cylinders to represent the cooling fins.
These lines add instant mechanical detail and make the engine look functional rather than just a flat box.
Pro Tip: Don’t worry about every bolt and wire; focus on the large “mass” of the engine first to get the proportions right.
Step 4: Shape the Gas Tank and Seat
Create a smooth, teardrop shape resting on top of the frame, starting just behind the front forks.
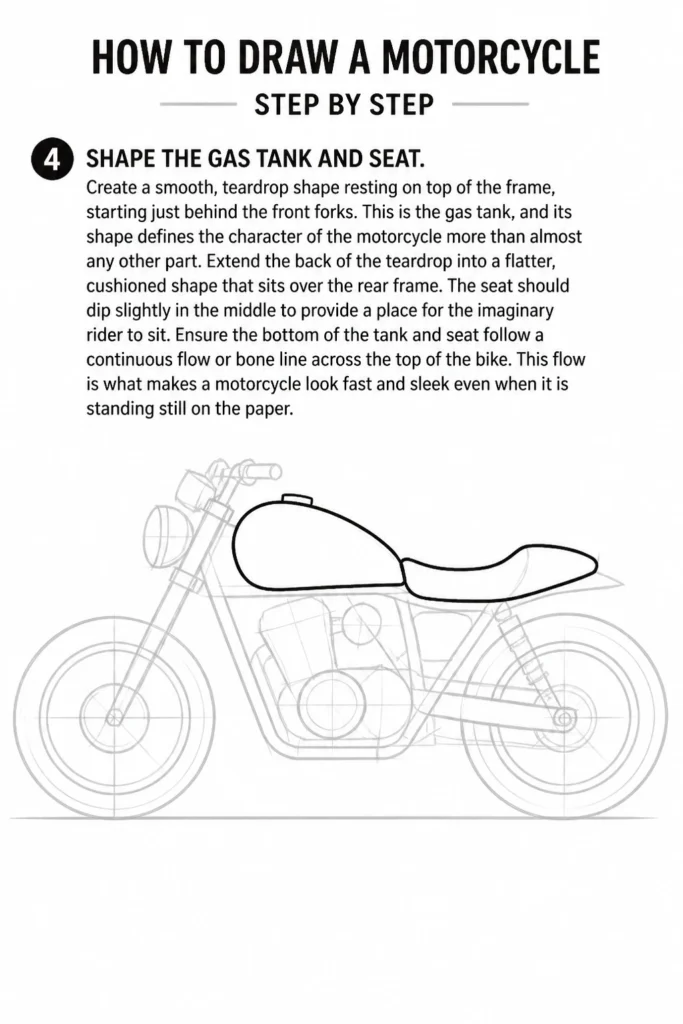
This is the gas tank, and its shape defines the character of the motorcycle more than almost any other part.
Extend the back of the teardrop into a flatter, cushioned shape that sits over the rear frame.
The seat should dip slightly in the middle to provide a place for the imaginary rider to sit.
Ensure the bottom of the tank and seat follow a continuous flow or “bone line” across the top of the bike.
This flow is what makes a motorcycle look fast and sleek even when it is standing still on the paper.
Step 5: Add Handlebars and Front Controls
Draw two lines extending upward from the top of the front forks to create the handlebars.
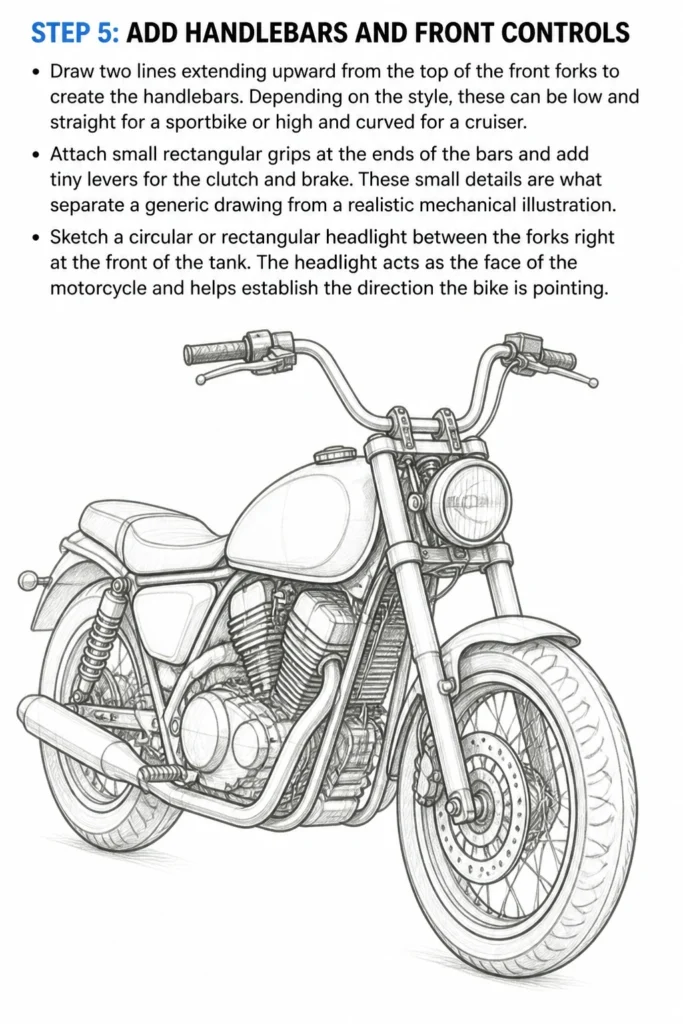
Depending on the style, these can be low and straight for a sportbike or high and curved for a cruiser.
Attach small rectangular grips at the ends of the bars and add tiny levers for the clutch and brake.
These small details are what separate a generic drawing from a realistic mechanical illustration.
Sketch a circular or rectangular headlight between the forks right at the front of the tank.
The headlight acts as the “face” of the motorcycle and helps establish the direction the bike is pointing.
Step 6: Detail the Exhaust and Fenders
Draw a long, thick tube starting from the engine and running back toward the rear wheel.
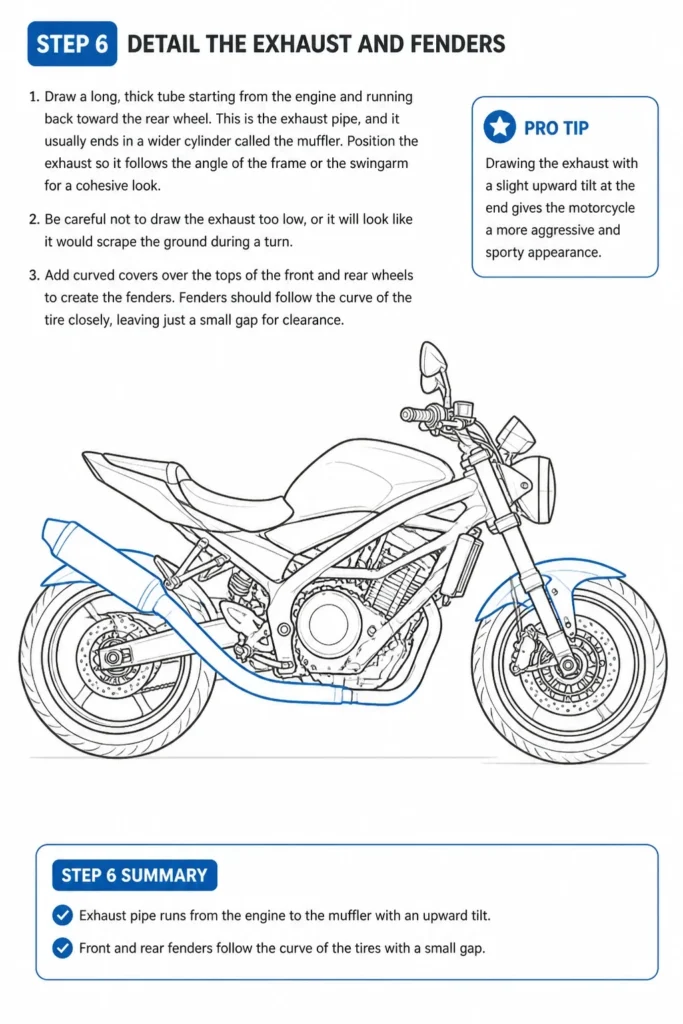
This is the exhaust pipe, and it usually ends in a wider cylinder called the muffler.
Position the exhaust so it follows the angle of the frame or the swingarm for a cohesive look.
Be careful not to draw the exhaust too low, or it will look like it would scrape the ground during a turn.
Add curved covers over the tops of the front and rear wheels to create the fenders.
Fenders should follow the curve of the tire closely, leaving just a small gap for “clearance.”
Pro Tip: Drawing the exhaust with a slight upward tilt at the end gives the motorcycle a more aggressive and sporty appearance.
Step 7: Refine Tires and Rims
Thicken the outer circles of your wheels to give the tires some “meat” and volume.
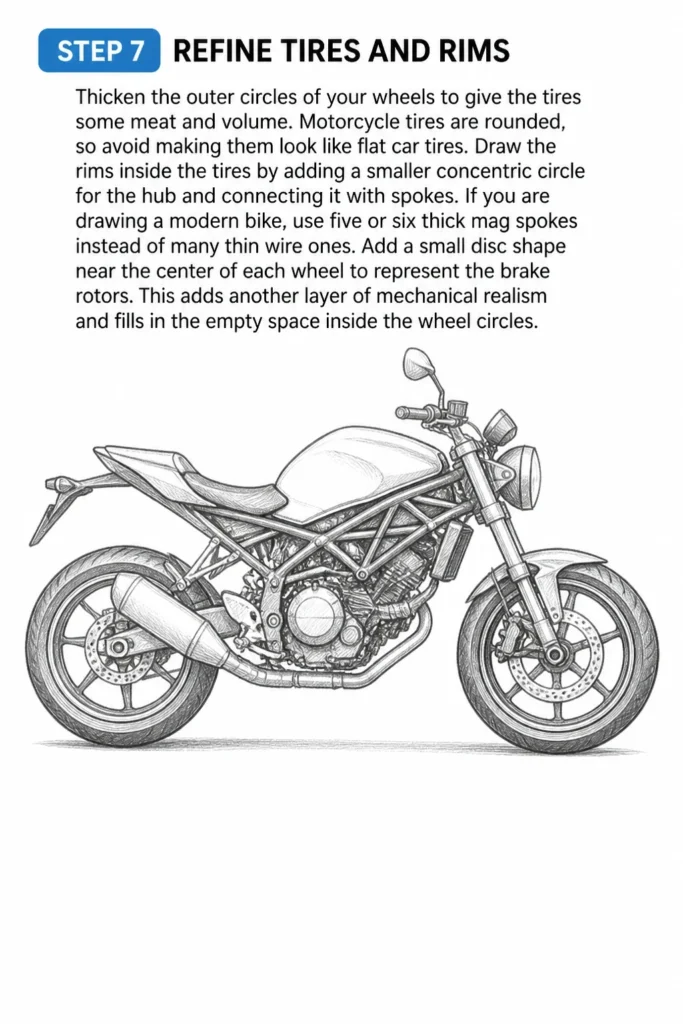
Motorcycle tires are rounded, so avoid making them look like flat car tires.
Draw the rims inside the tires by adding a smaller concentric circle for the hub and connecting it with spokes.
If you are drawing a modern bike, use five or six thick “mag” spokes instead of many thin wire ones.
Add a small disc shape near the center of each wheel to represent the brake rotors.
This adds another layer of mechanical realism and fills in the empty space inside the wheel circles.
Step 8: Shading and Final Textures
Identify your light source and add dark shadows to the underside of the engine and the inside of the fenders.
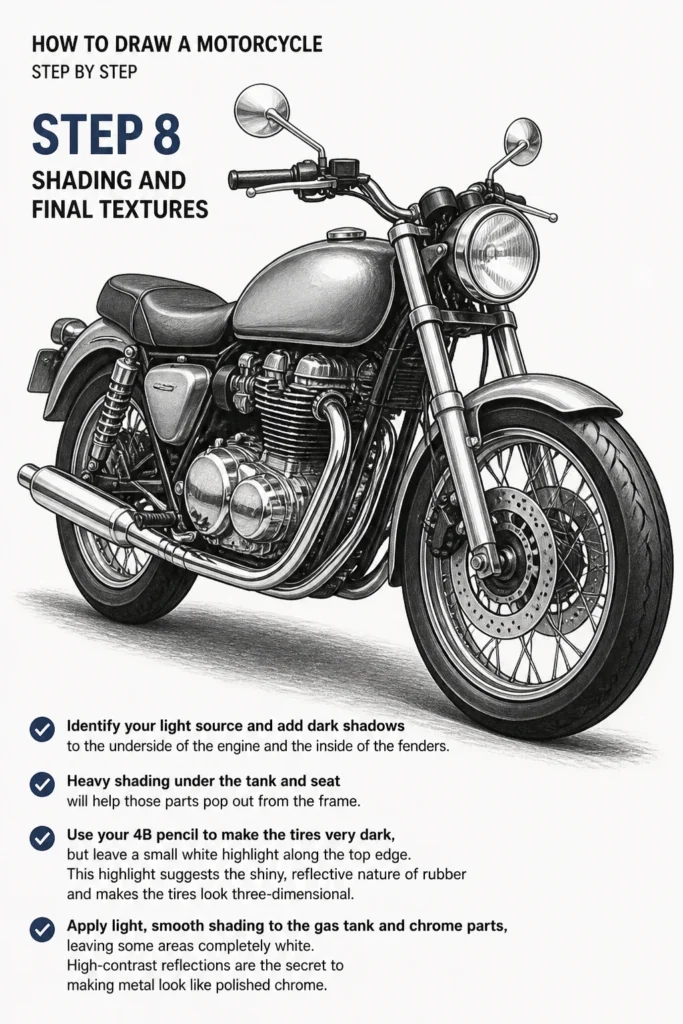
Heavy shading under the tank and seat will help those parts “pop” out from the frame.
Use your 4B pencil to make the tires very dark, but leave a small white highlight along the top edge.
This highlight suggests the shiny, reflective nature of rubber and makes the tires look three-dimensional.
Apply light, smooth shading to the gas tank and chrome parts, leaving some areas completely white.
High-contrast reflections are the secret to making metal look like polished chrome.
Common Mistakes to Avoid
The Tiny Wheel Syndrome
Many beginners draw the wheels much too small compared to the body of the bike.
This makes the motorcycle look like a toy or a scooter rather than a powerful machine.
Always check that the height of the wheels is roughly half the total height of the entire bike.
Ignoring the Chain or Belt Drive
A motorcycle cannot move without a way to transfer power from the engine to the rear wheel.
Forgetting to draw the chain or belt on the side of the rear wheel makes the bike look incomplete.
Sketch a thin loop connecting the back of the engine to the center of the rear wheel to fix this.
Flattening the Gas Tank
The gas tank is a three-dimensional volume that wraps around the frame of the bike.
If you draw it as a flat oval, the whole drawing will lose its sense of depth and weight.
Use curved shading lines that follow the contour of the tank to give it a rounded, metallic feel.
Troubleshooting
The Bike Looks Like It Is Sagging
This usually happens when the line connecting the two wheels isn’t perfectly horizontal.
Check your ground plane with a ruler and ensure the axles of both wheels sit on the same level.
If one wheel is higher than the other, the bike will look like the frame is broken or bent.
The Engine Looks Like a Mess of Scribbles
It is easy to get overwhelmed by the pipes, wires, and bolts found in a real engine bay.
Simplify the engine into three main shapes: the transmission box, the primary cylinders, and the air intake.
Once those large shapes are solid, you can add a few small circles for bolts to suggest detail without overcomplicating it.
The Handlebars Are Uneven
Drawing handlebars in perspective is one of the hardest parts of a motorcycle sketch.
Draw a light “guide line” that connects the ends of the bars to ensure they are the same length and height.
If one side is longer or higher than the other, the bike will look like it is in the middle of a crash.
Key Takeaways
- Start with the wheels to establish the scale and wheelbase before drawing any other parts.
- Use geometric skeletons like triangles and squares to map out the frame and engine placement.
- Focus on the flow of the “bone line” from the headlight through the tank to the rear seat.
- Layer your details by starting with large shapes and saving small bolts and wires for the very end.
- Master chrome reflections by using high-contrast shading with deep blacks and bright white highlights.
- Check your proportions frequently to ensure the wheels are large enough to support the frame.
Frequently Asked Questions
How do I draw different types of motorcycles like dirt bikes or sportbikes?
The basic steps remain the same, but you change the proportions of the skeleton.
For a dirt bike, draw the wheels further apart and make the seat much higher and flatter.
For a sportbike, wrap the engine in large, aerodynamic plastic panels called fairings so you see less of the mechanical parts.
What is the best way to draw spokes on a wheel?
Start by drawing a small circle for the hub in the very center of the wheel.
Draw four spokes in a “plus” sign shape, then fill in the gaps with diagonal lines until you have the desired density.
Always draw the spokes from the hub outward to the rim to keep them straight and centered.
How do I make the chrome look shiny?
Chrome is all about reflecting the world around it, which creates very sharp edges between light and dark.
Instead of blending your shadows smoothly, leave crisp white shapes right next to your darkest pencil marks.
This “hard edge” shading mimics the way light bounces off a polished metal surface.
Should I draw the rider first or the bike first?
It is almost always better to draw the motorcycle first so you have a solid structure for the rider to sit on.
Once the bike is finished, you can “pose” the rider by placing their hands on the grips and feet on the pegs.
This ensures the person actually fits the machine and looks natural rather than floating above it.
Our Top Recommended Finds
- Graphite Pencil Set: A range from 4H to 6B allows you to create both technical light lines and deep, oily shadows for tires.
- Kneaded Eraser: This tool is essential for “lifting” graphite to create those bright white highlights on the gas tank and chrome.
- Precision Ruler: A clear plastic ruler helps you keep the wheelbase and frame geometry perfectly aligned without guessing.
Bringing Your Machine To Life
Now that you have the basic structure down, the best way to improve is to look at real machines.
Try walking through a parking lot or visiting a local dealership to see how the exhaust pipes curve and how the light hits the paint.
You can apply these same steps to draw vintage cafe racers, heavy touring bikes, or even futuristic sci-fi cycles.
Grab your sketchbook and try drawing a different style of bike today to see how the geometry changes.
& Painting
No rigid rules or pretension. Just practical guides, medium comparisons, and encouraging tips to help you enjoy the drawing & painting process.