🐝 How To Draw A Bumble Bee Step By Step

& Painting
No rigid rules or pretension. Just practical guides, medium comparisons, and encouraging tips to help you enjoy the drawing & painting process.
I remember my first attempt at drawing a bee – it looked more like a fuzzy potato than an insect.
But with a few simple techniques and some patience, anyone can capture their charming, plump form.
This guide breaks down the process into manageable steps, drawing on practical sketching experience to make it easy for you to create your own buzzing masterpiece.
Quick Overview
In this guide, you’ll learn to sketch a delightful bumblebee, focusing on its iconic shape, fuzzy texture, and delicate wings. You’ll gain confidence in building complex forms from simple shapes and adding character to your drawings.
- Time needed: 30-60 minutes
- Difficulty: Beginner
- What you’ll need: Pencil (HB recommended), eraser, drawing paper, optional: black fineliner pen, yellow and black coloring tools.
Step-by-Step Instructions
Step 1: Lay Down Basic Shapes for the Body
Every great drawing begins with foundational shapes. For our bumblebee, we’ll start with two overlapping ovals that will form the main body.
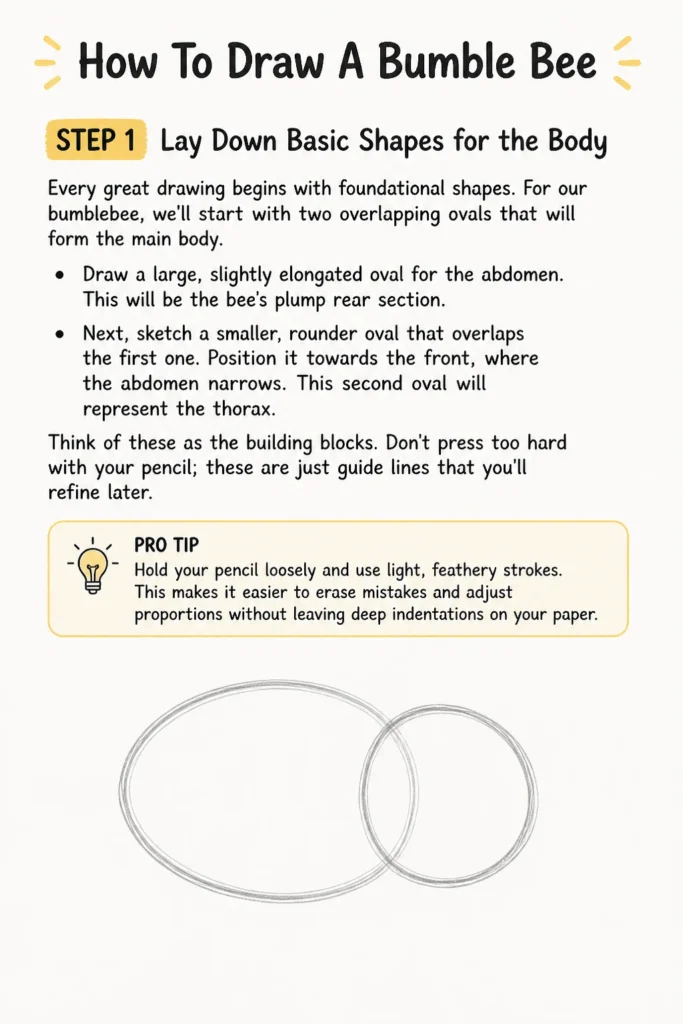
Draw a large, slightly elongated oval for the abdomen. This will be the bee’s plump rear section.
Next, sketch a smaller, rounder oval that overlaps the first one. Position it towards the front, where the abdomen narrows. This second oval will represent the thorax.
Think of these as the building blocks. Don’t press too hard with your pencil; these are just guide lines that you’ll refine later.
Pro Tip: Hold your pencil loosely and use light, feathery strokes. This makes it easier to erase mistakes and adjust proportions without leaving deep indentations on your paper.
Step 2: Define the Head and Connect the Body
Now that the main body segments are in place, let’s add the head and smooth out the connections.
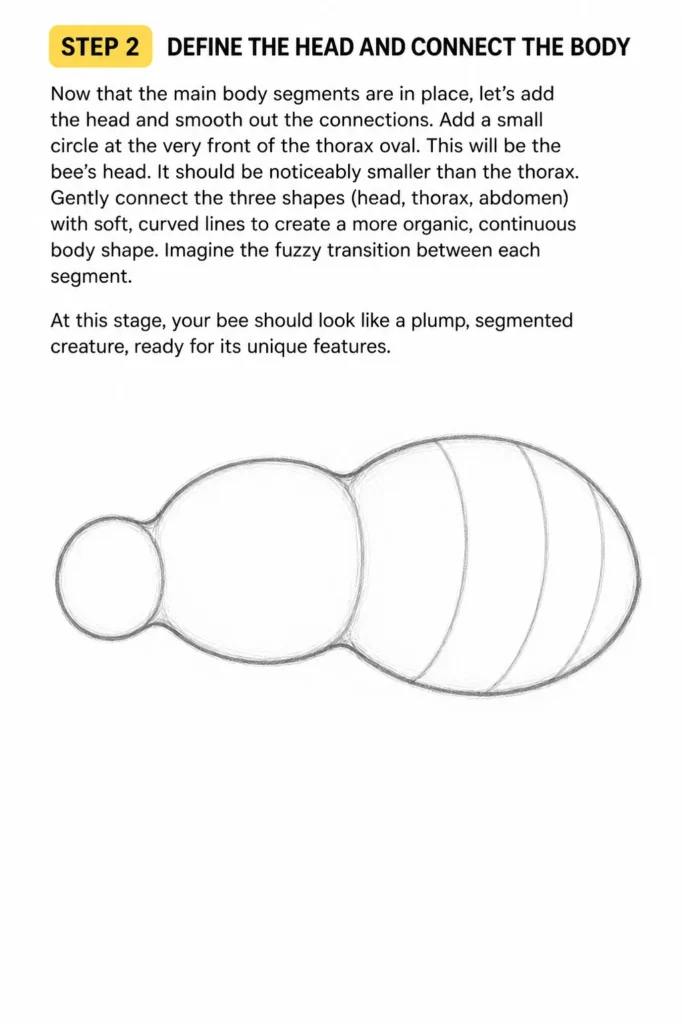
Add a small circle at the very front of the thorax oval. This will be the bee’s head. It should be noticeably smaller than the thorax.
Gently connect the three shapes (head, thorax, abdomen) with soft, curved lines to create a more organic, continuous body shape. Imagine the fuzzy transition between each segment.
At this stage, your bee should look like a plump, segmented creature, ready for its unique features.
Step 3: Sketch the Wings
Bumblebees have two pairs of wings, but from most angles, they appear as two main structures extending from the thorax.
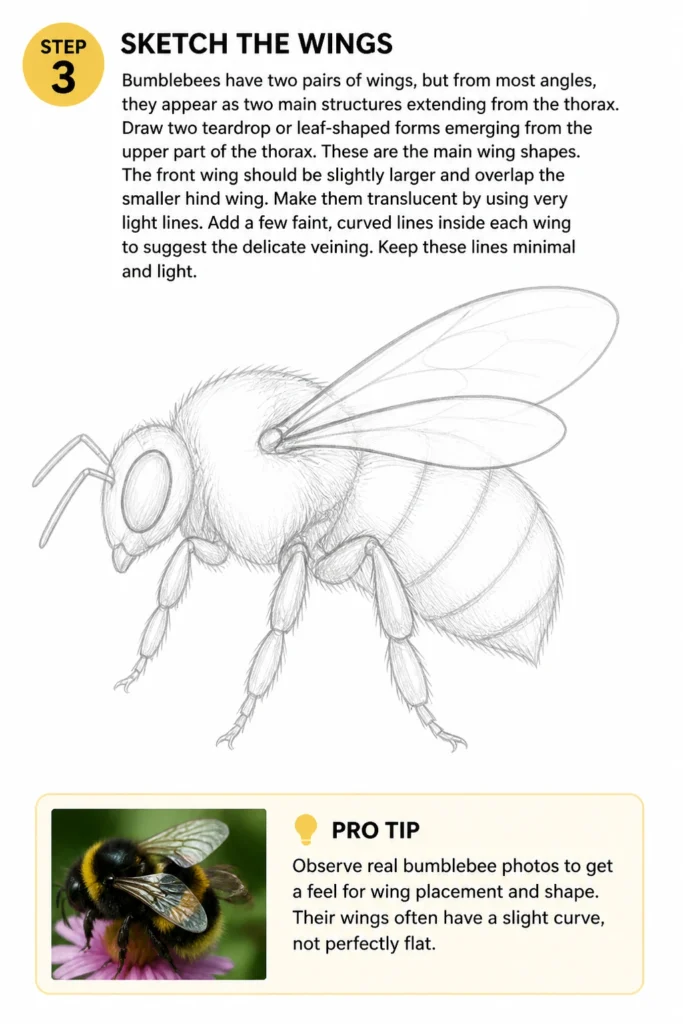
Draw two teardrop or leaf-shaped forms emerging from the upper part of the thorax. These are the main wing shapes.
The front wing should be slightly larger and overlap the smaller hind wing. Make them translucent by using very light lines.
Add a few faint, curved lines inside each wing to suggest the delicate veining. Keep these lines minimal and light.
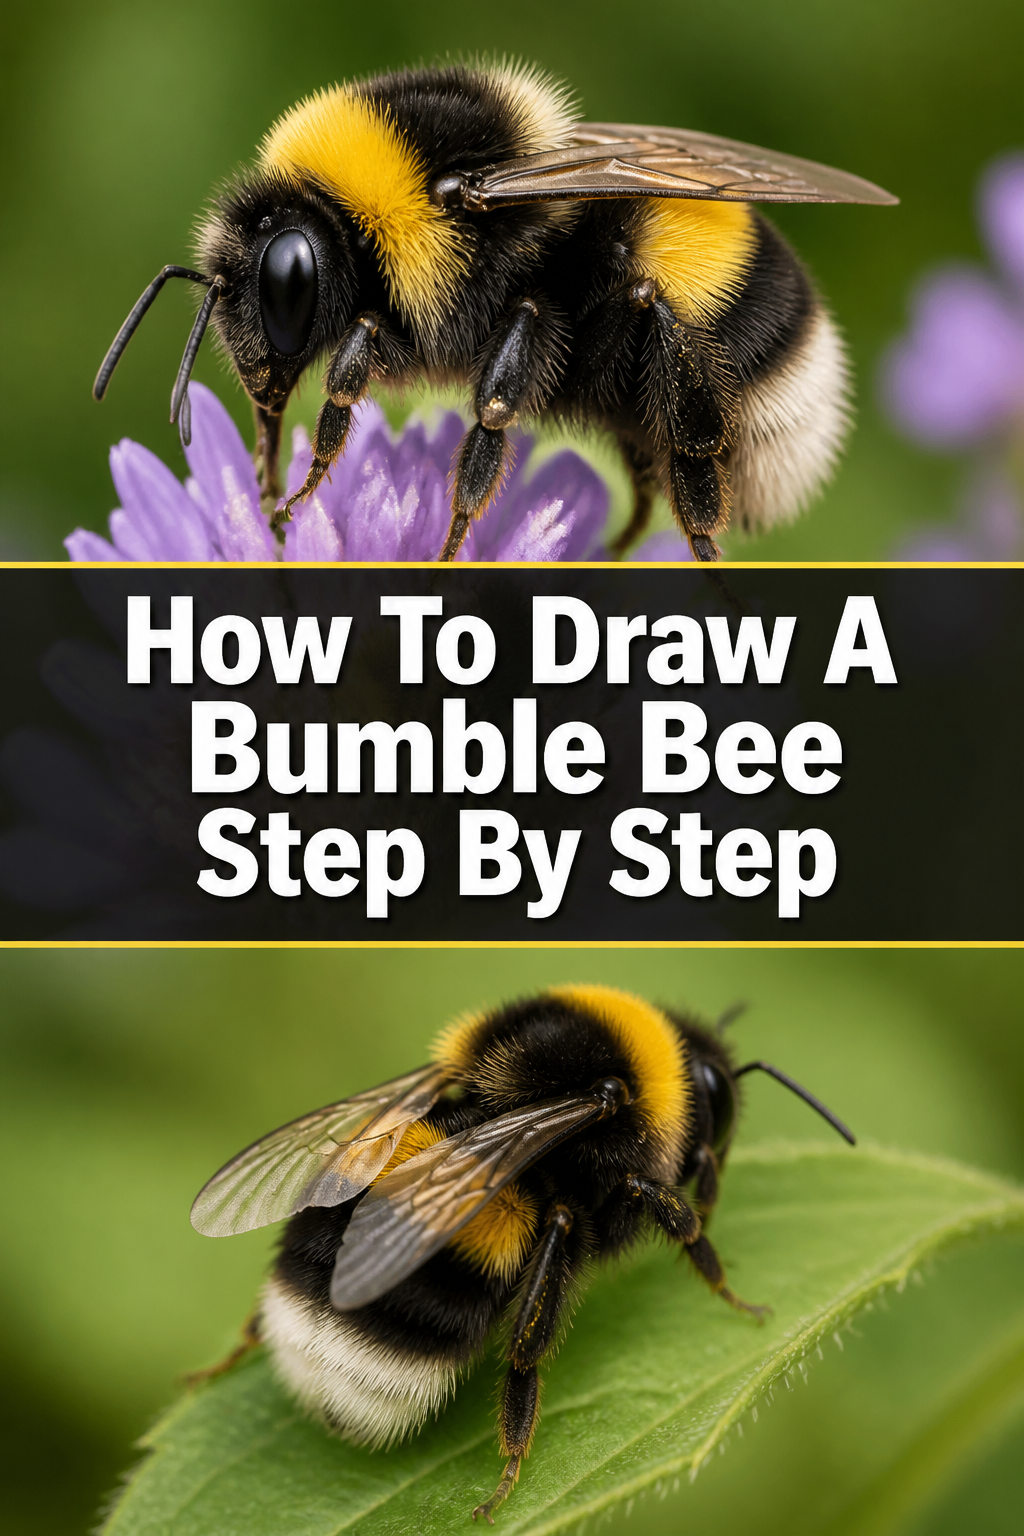
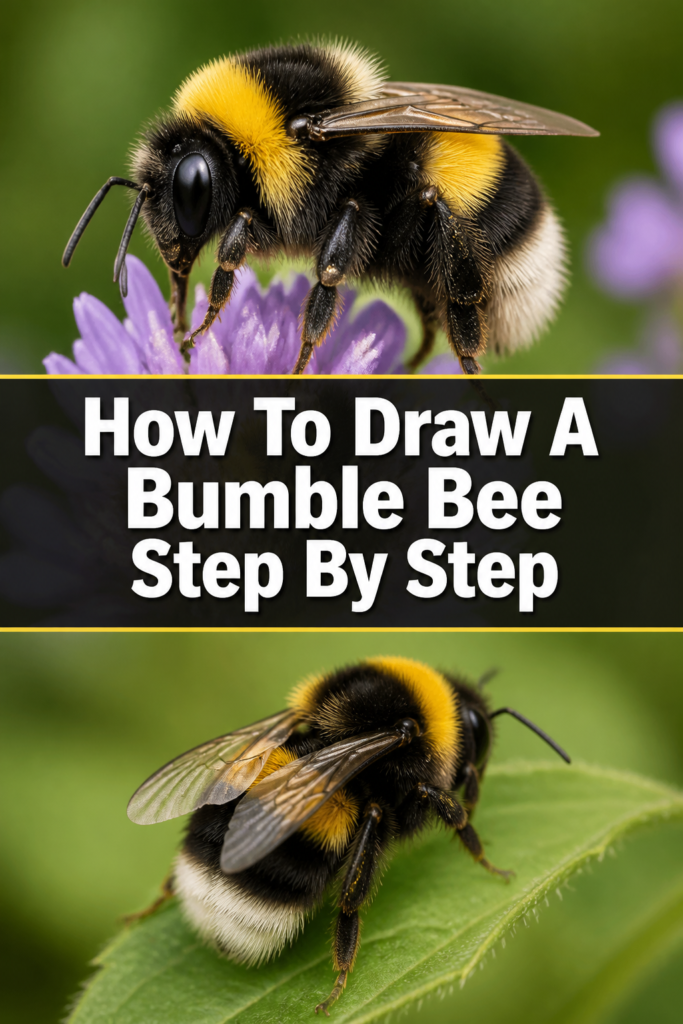
Pro Tip: Observe real bumblebee photos to get a feel for wing placement and shape. Their wings often have a slight curve, not perfectly flat.
Step 4: Place the Legs and Antennae
Bumblebees have six legs and two antennae, crucial for their movement and sensory perception.
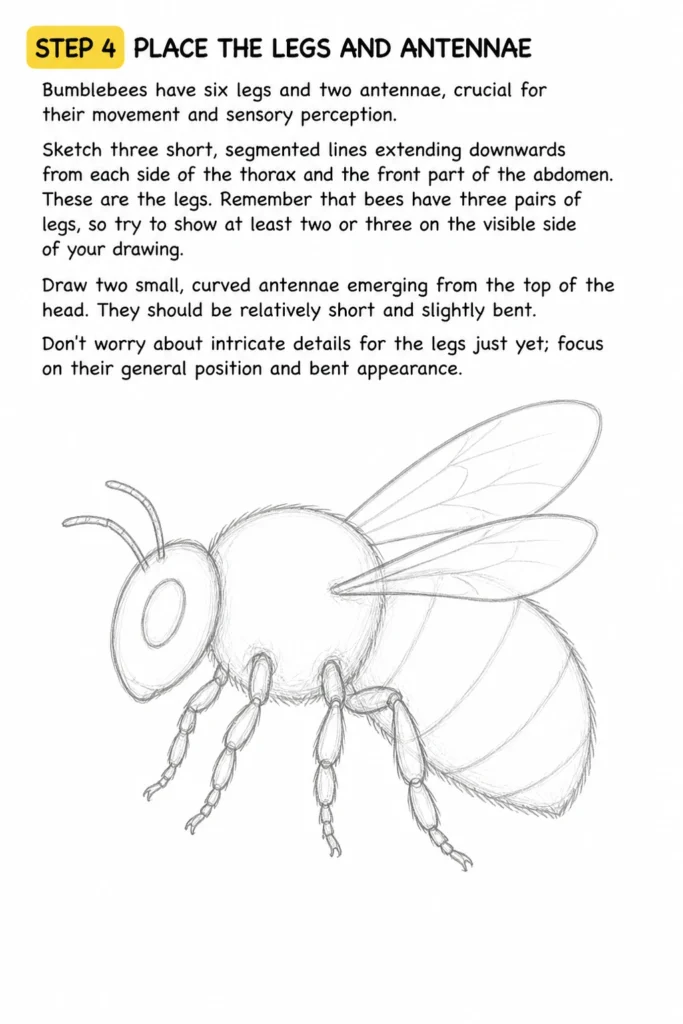
Sketch three short, segmented lines extending downwards from each side of the thorax and the front part of the abdomen. These are the legs.
Remember that bees have three pairs of legs, so try to show at least two or three on the visible side of your drawing.
Draw two small, curved antennae emerging from the top of the head. They should be relatively short and slightly bent.
Don’t worry about intricate details for the legs just yet; focus on their general position and bent appearance.
Step 5: Add Facial Details and Fuzziness
Now let’s bring the bee’s face to life and start adding its signature texture.
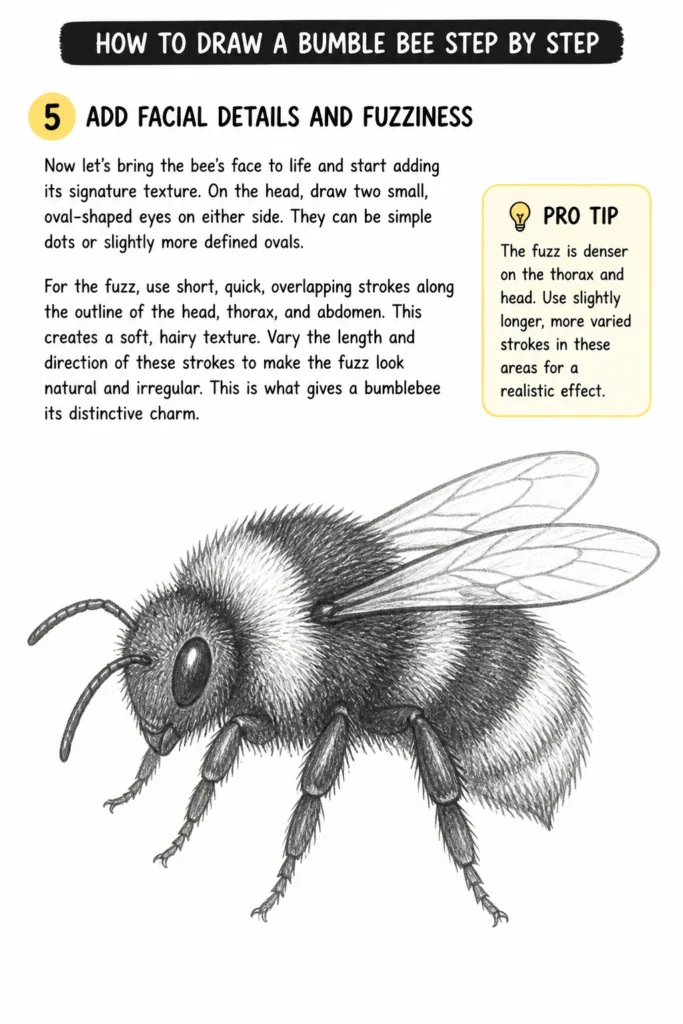
On the head, draw two small, oval-shaped eyes on either side. They can be simple dots or slightly more defined ovals.
For the fuzz, use short, quick, overlapping strokes along the outline of the head, thorax, and abdomen. This creates a soft, hairy texture.
Vary the length and direction of these strokes to make the fuzz look natural and irregular. This is what gives a bumblebee its distinctive charm.
Pro Tip: The fuzz is denser on the thorax and head. Use slightly longer, more varied strokes in these areas for a realistic effect.
Step 6: Incorporate Stripes and Final Details
The iconic black and yellow stripes are what truly make a bumblebee recognizable.
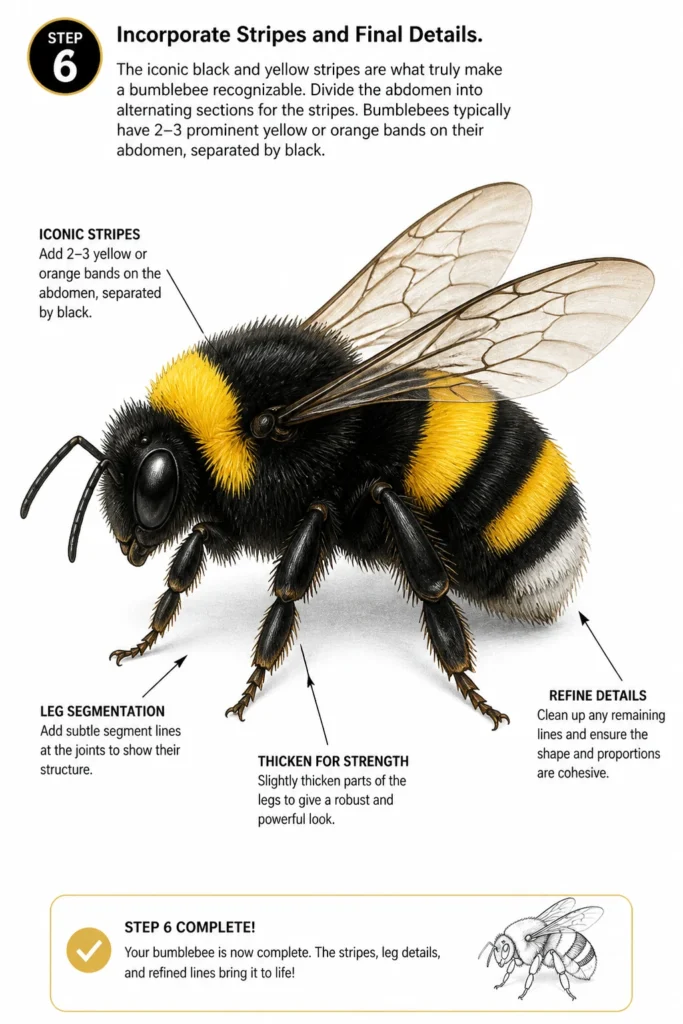
Divide the abdomen into alternating sections for the stripes. Bumblebees typically have 2-3 prominent yellow or orange bands on their abdomen, separated by black.
Add subtle segmentation lines on the legs to hint at their jointed structure. You can also thicken certain areas of the legs for a more robust appearance.
Refine any remaining lines, making sure the overall form is cohesive and pleasing to the eye.
Step 7: Outline and Erase Guide Lines
It’s time to clean up your drawing and make your bee stand out.
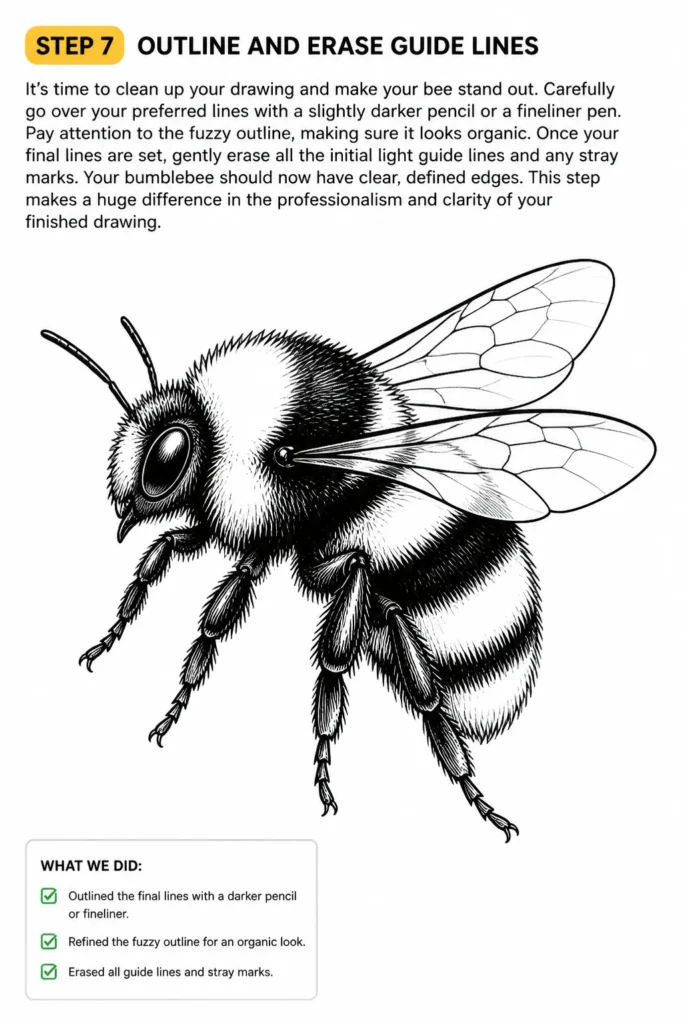
Carefully go over your preferred lines with a slightly darker pencil or a fineliner pen. Pay attention to the fuzzy outline, making sure it looks organic.
Once your final lines are set, gently erase all the initial light guide lines and any stray marks. Your bumblebee should now have clear, defined edges.
This step makes a huge difference in the professionalism and clarity of your finished drawing.
Step 8: Add Color (Optional)
Color brings your bumblebee to life, though a black and white sketch can be beautiful too.
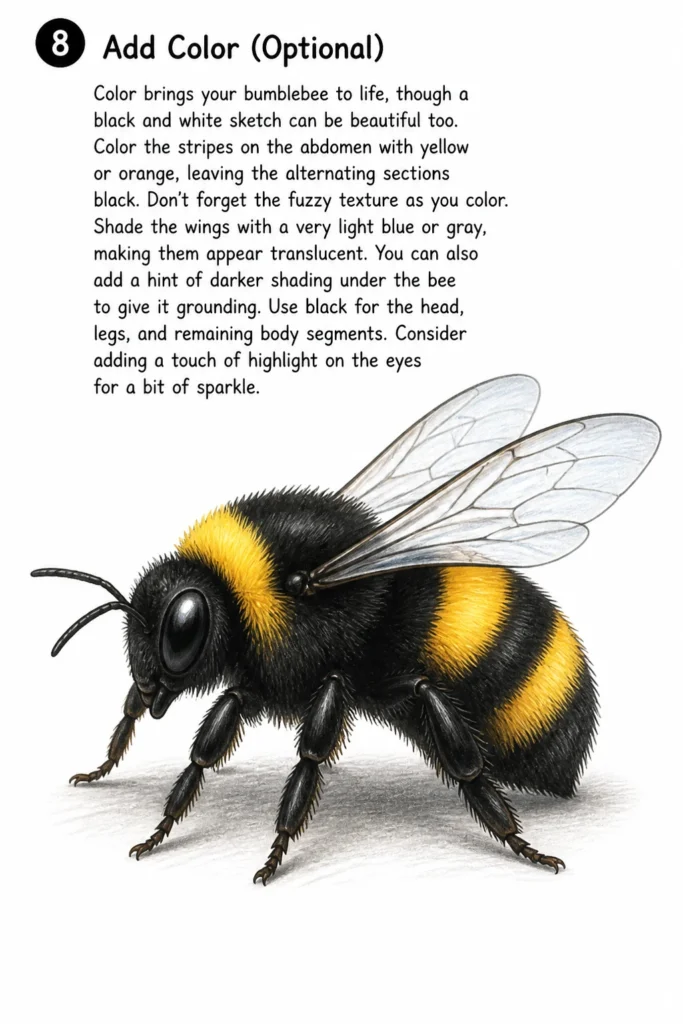
Color the stripes on the abdomen with yellow or orange, leaving the alternating sections black. Don’t forget the fuzzy texture as you color.
Shade the wings with a very light blue or gray, making them appear translucent. You can also add a hint of darker shading under the bee to give it grounding.
Use black for the head, legs, and remaining body segments. Consider adding a touch of highlight on the eyes for a bit of sparkle.
Common Mistakes to Avoid
Drawing an Overly Symmetrical Body
Beginners often try to make both sides of the bee perfectly identical, leading to a stiff and unnatural look. Real creatures, including bees, have subtle asymmetries and organic curves.
Instead of aiming for perfect symmetry, focus on the overall balance and flow of the form. Allow for slight variations in the fuzz and wing placement to give your bee a more dynamic and lifelike appearance.
Making the Body Too Thin or Rigid
Bumblebees are known for their plump, fuzzy, and somewhat rounded bodies. Drawing them with a slender or overly angular shape takes away from their characteristic charm.
Remember to emphasize the ovals and circles from the initial steps. Keep the curves soft and generous, especially for the abdomen and thorax, to capture that lovable, chunky bee aesthetic.
Adding Details Before the Structure is Solid
Jumping straight to drawing stripes, fuzz, or intricate wing veins before establishing the basic body shape can lead to a messy and disproportionate drawing. It’s like decorating a house before building the foundation.
Always work from general to specific. Get the main forms and proportions correct first, then gradually layer on the smaller details. This approach ensures a strong underlying structure for all your embellishments.
Forgetting the “Fuzz”
The fuzzy texture is perhaps the most defining characteristic of a bumblebee. Neglecting this detail can make your bee look like a common fly or another less endearing insect.
Dedicate time to adding those short, overlapping strokes. Experiment with their direction and density. The fuzz adds volume, character, and realism, making your bumblebee instantly recognizable and appealing.
Troubleshooting
My Bee Looks Stiff or Unnatural
If your bumblebee appears too rigid, it might be due to overly straight lines or a lack of organic curves. Remember that living creatures are rarely composed of perfect geometric shapes.
Try softening your lines. Use more curved and flowing strokes, especially when connecting body segments. Practice drawing freehand ovals and circles from various angles to improve your ability to create natural forms. Observing real bee photos can also help you capture their natural posture.
The Wings Don’t Look Transparent
Achieving transparency in wings can be tricky. If your wings look opaque or too heavy, you might be pressing too hard or using too dark a pencil for the initial sketch.
For transparency, use very light lines for the wing outlines and even fainter lines for the internal veins. When coloring, use a very pale wash of color (like light blue or gray) or leave them mostly uncolored. The surrounding darker areas of the bee and background will make the light wings appear more translucent by contrast.
I’m Struggling with Proportions
Proportion issues are common when starting out. If your head is too big, or wings are too small, it throws off the whole drawing.
Go back to the basic shapes in Step 1. Visually compare the size of your head circle to your thorax oval, and your thorax oval to your abdomen oval. Use a reference image and mentally (or lightly with your pencil) measure the relative sizes. Don’t be afraid to erase and redraw these initial shapes until they feel right.
Key Takeaways
- Start with simple, light geometric shapes to build the foundation of your bee.
- Embrace the unique fuzziness of the bumblebee by using short, varied strokes for texture.
- Pay attention to the natural curves and slight asymmetries that make a drawing feel lifelike.
- Don’t be afraid to use an eraser; it’s an essential tool for refining your work.
- Practice regularly and observe real bees or high-quality reference images for inspiration.
- Coloring is optional but can add significant character and depth to your finished drawing.
Frequently Asked Questions
What’s the best pencil hardness for sketching?
For initial light sketches and guide lines, an H or 2H pencil is ideal as it leaves faint marks that are easy to erase. For general drawing and outlining, an HB pencil is versatile. For darker lines and shading, B or 2B pencils work well, offering richer tones.
How do I make the fuzz look realistic?
To create realistic fuzz, use many short, quick, overlapping strokes. Vary the direction of these strokes slightly, following the natural contours of the bee’s body. Don’t make them all perfectly uniform; a little irregularity adds to the organic feel. Build up layers of these strokes rather than trying to draw a solid block of fur.
Can I draw different types of bees with this method?
Absolutely! The foundational principles of starting with basic shapes, building up the body, and adding wings and legs are applicable to almost any insect. You’ll just need to adjust the specific proportions, wing shapes, stripe patterns, and level of fuzziness to match the particular bee species you’re aiming for.
What if my drawing doesn’t look perfect?
Drawing is a skill that improves with practice, not a talent you’re born with. It’s completely normal for early attempts not to be “perfect.” Focus on the learning process, enjoy the act of creating, and celebrate your progress with each new drawing. Every line you draw, even if you erase it, contributes to your growth as an artist.
Our Top Recommended Finds
- Quality Sketchbook: A sketchbook with good quality, slightly textured paper (around 80-100 gsm) will hold pencil marks well and withstand erasing.
- Drawing Pencil Set: A basic set of drawing pencils ranging from H to 2B provides versatility for light sketching, outlining, and shading.
- Kneaded Eraser: Unlike traditional erasers, a kneaded eraser lifts graphite without damaging the paper or leaving crumbs, perfect for subtle corrections.
Keep the Creativity Buzzing
You’ve just created your very own bumblebee, a testament to what you can achieve with simple steps and a little patience. This guide offers a solid foundation, but your artistic journey is just beginning.
Why not try drawing your bee from a different angle next time, or adding a flower for it to land on? You could even explore other fascinating insects like butterflies or ladybugs, applying the same methodical approach.
Grab your pencil, find some inspiration, and let your creativity take flight. Happy drawing!
& Painting
No rigid rules or pretension. Just practical guides, medium comparisons, and encouraging tips to help you enjoy the drawing & painting process.