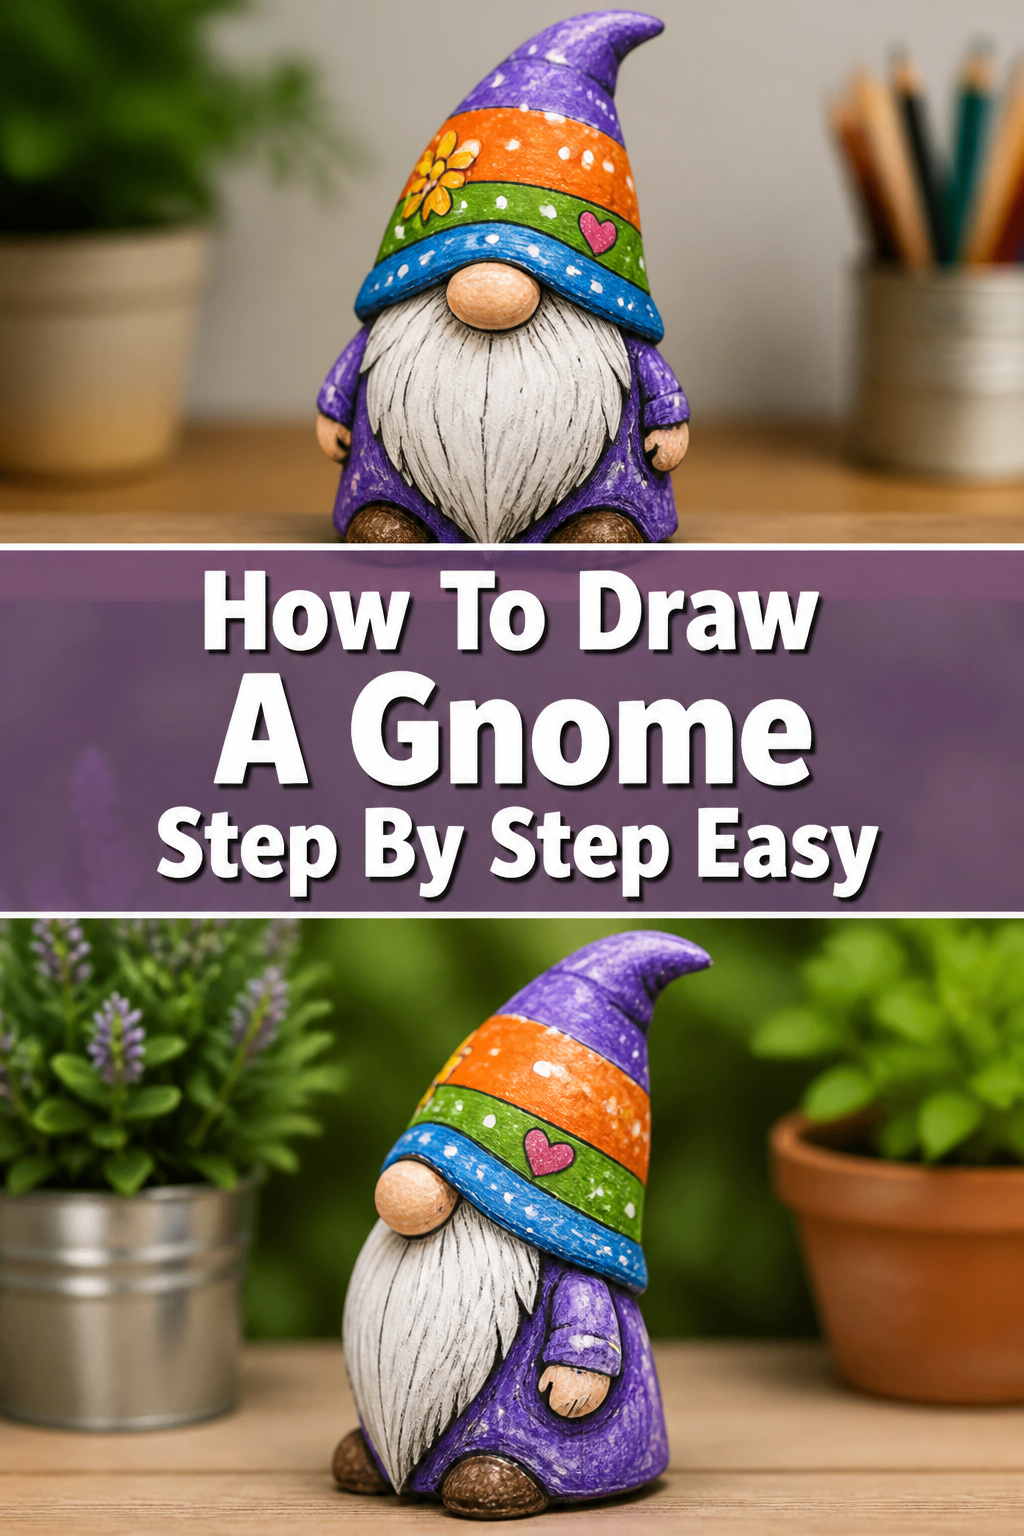
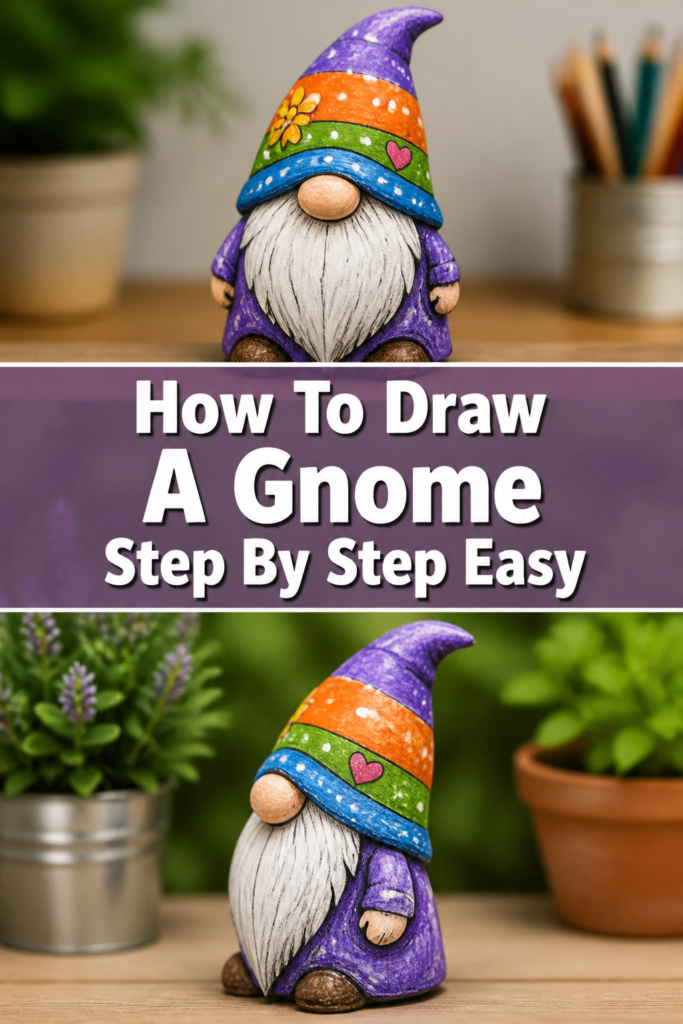
🎨 How To Draw A Gnome Step By Step Easy

& Painting
No rigid rules or pretension. Just practical guides, medium comparisons, and encouraging tips to help you enjoy the drawing & painting process.
I remember sitting at my kitchen table years ago, trying to sketch a garden gnome for a friend’s birthday card.
My first few attempts looked more like lumpy potatoes with hats than magical woodland creatures.
After filling dozens of sketchbooks with these bearded fellows, I discovered that the secret lies in breaking them down into simple, cozy shapes.
Quick Overview
Drawing a gnome is a fantastic way to practice your character design skills without the pressure of drawing complex facial features.
- Time needed: 15 to 20 minutes
- Difficulty: Beginner
- What you’ll need: A graphite pencil (HB or 2B), an eraser, a sheet of drawing paper, and a fine-liner pen for outlining.
Step-by-Step Instructions
Step 1: Sketch the Button Nose
Start by drawing a medium-sized oval right in the center of your paper.
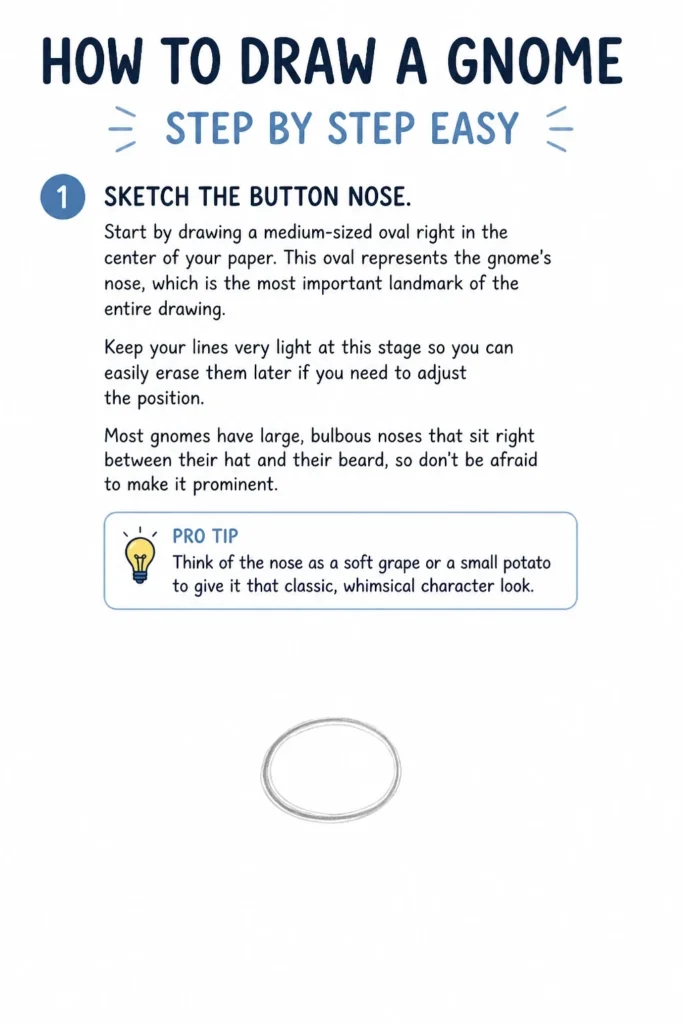
This oval represents the gnome’s nose, which is the most important landmark of the entire drawing.
Keep your lines very light at this stage so you can easily erase them later if you need to adjust the position.
Most gnomes have large, bulbous noses that sit right between their hat and their beard, so don’t be afraid to make it prominent.
Pro Tip: Think of the nose as a soft grape or a small potato to give it that classic, whimsical character look.
Step 2: Create the Hat Rim
Draw a curved line that starts from the left side of the nose, arches up slightly, and ends on the right side.
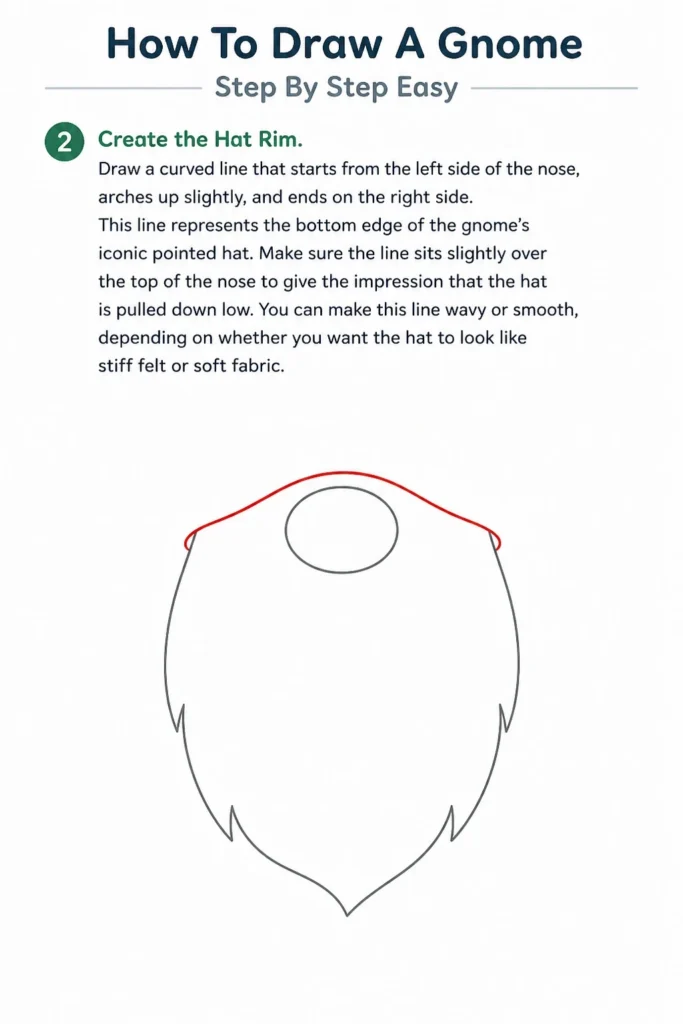
This line represents the bottom edge of the gnome’s iconic pointed hat.
Make sure the line sits slightly over the top of the nose to give the impression that the hat is pulled down low.
You can make this line wavy or smooth, depending on whether you want the hat to look like stiff felt or soft fabric.
Step 3: Build the Pointy Hat
Extend two long lines upward from the ends of the hat rim you just drew.
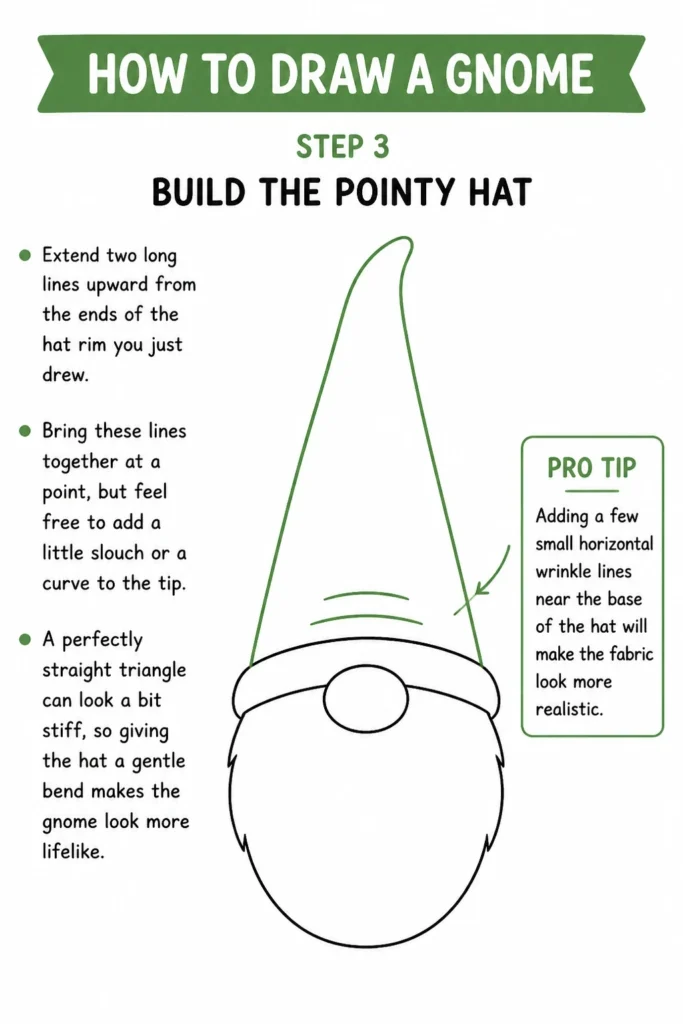
Bring these lines together at a point, but feel free to add a little “slouch” or a curve to the tip.
A perfectly straight triangle can look a bit stiff, so giving the hat a gentle bend makes the gnome look more lifelike.
You can make the hat extra tall or short and stout to give your character a unique personality.
Pro Tip: Adding a few small horizontal “wrinkle” lines near the base of the hat will make the fabric look more realistic.
Step 4: Shape the Fluffy Beard
Outline the beard by starting from the edges of the hat rim and curving down toward the bottom of the page.
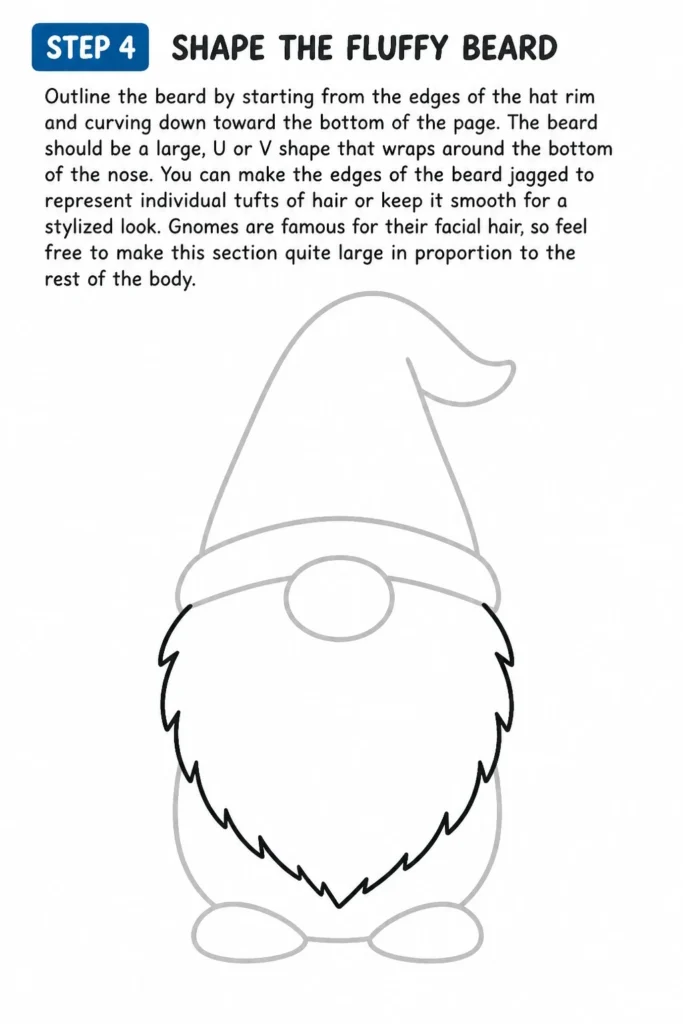
The beard should be a large, “U” or “V” shape that wraps around the bottom of the nose.
You can make the edges of the beard jagged to represent individual tufts of hair or keep it smooth for a stylized look.
Gnomes are famous for their facial hair, so feel free to make this section quite large in proportion to the rest of the body.
Step 5: Add the Round Body
Sketch a wide, rounded shape emerging from underneath the beard to form the gnome’s tunic.
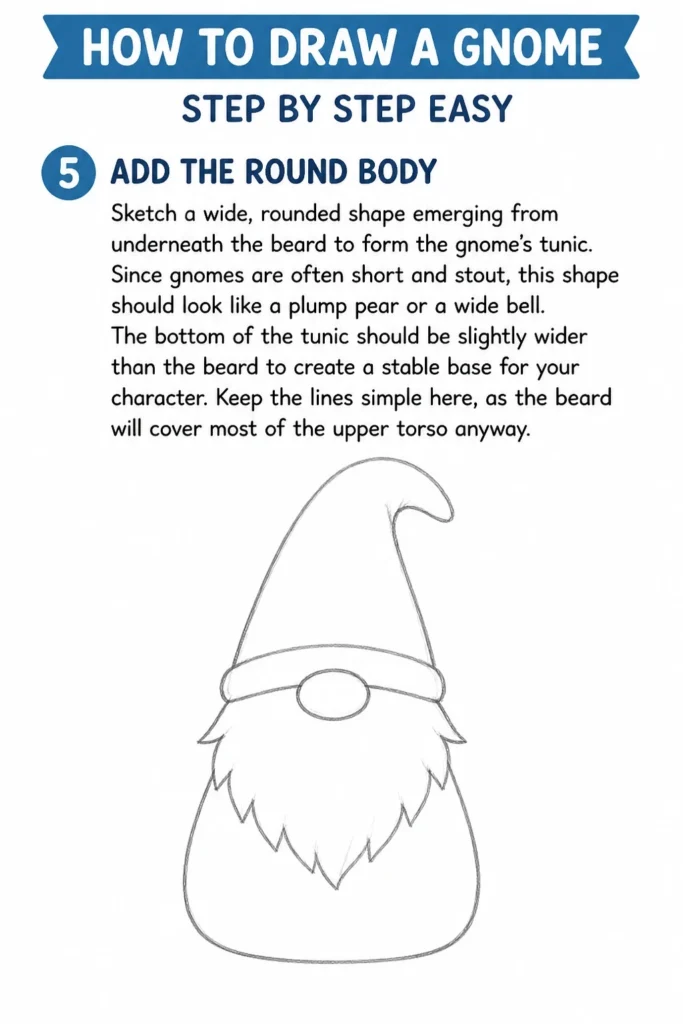
Since gnomes are often short and stout, this shape should look like a plump pear or a wide bell.
The bottom of the tunic should be slightly wider than the beard to create a stable base for your character.
Keep the lines simple here, as the beard will cover most of the upper torso anyway.
Step 6: Draw the Arms and Mittens
Position two simple tube shapes on either side of the body to represent the arms.
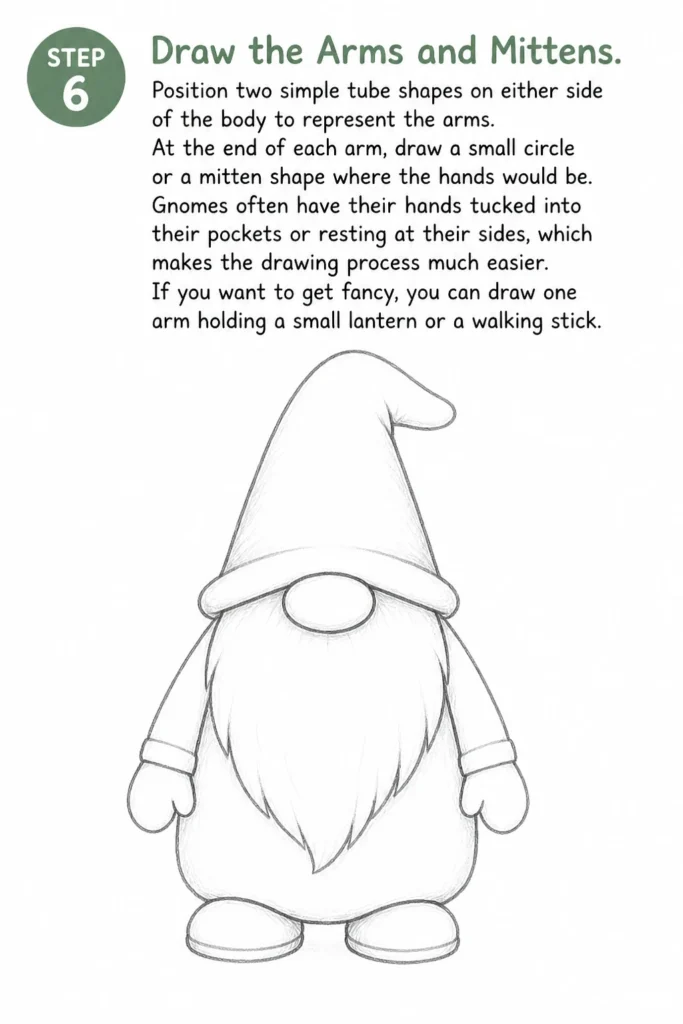
At the end of each arm, draw a small circle or a “mitten” shape where the hands would be.
Gnomes often have their hands tucked into their pockets or resting at their sides, which makes the drawing process much easier.
If you want to get fancy, you can draw one arm holding a small lantern or a walking stick.
Step 7: Place the Sturdy Boots
Form two rounded rectangles at the very bottom of the tunic to act as the feet.
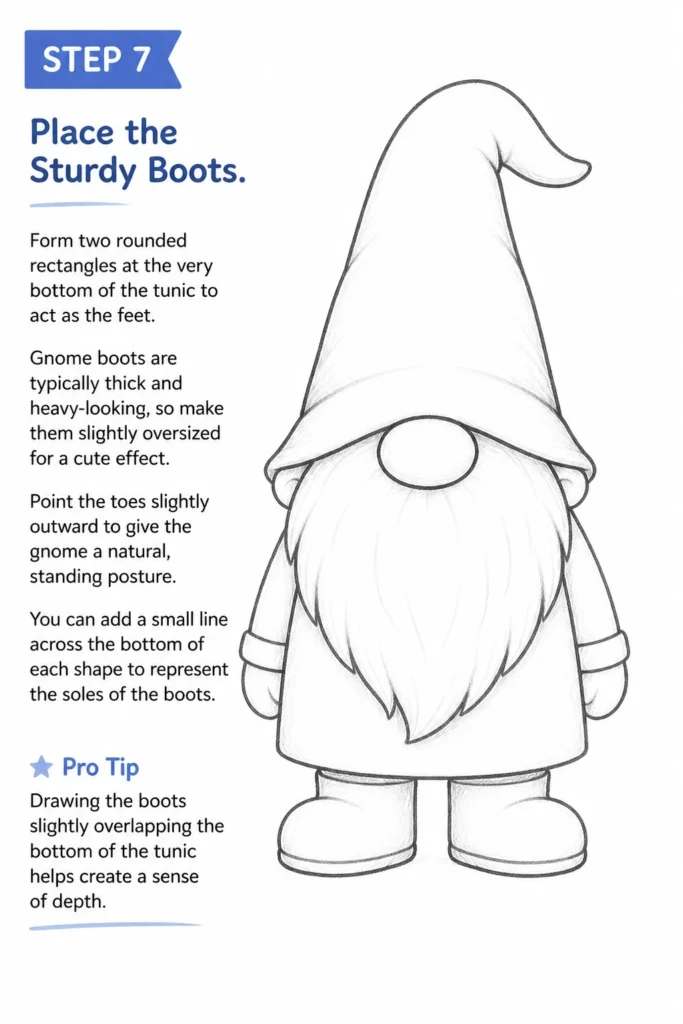
Gnome boots are typically thick and heavy-looking, so make them slightly oversized for a cute effect.
Point the toes slightly outward to give the gnome a natural, standing posture.
You can add a small line across the bottom of each shape to represent the soles of the boots.
Pro Tip: Drawing the boots slightly overlapping the bottom of the tunic helps create a sense of depth.
Step 8: Detail the Beard and Hat
Add long, flowing lines within the beard shape to give the impression of hair texture.
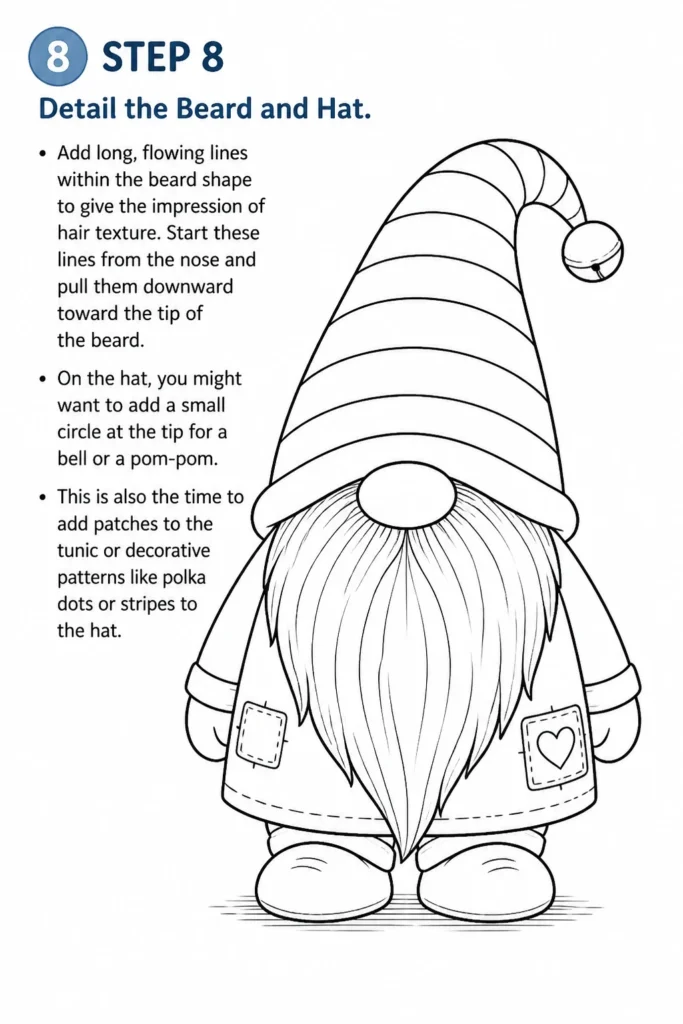
Start these lines from the nose and pull them downward toward the tip of the beard.
On the hat, you might want to add a small circle at the tip for a bell or a pom-pom.
This is also the time to add patches to the tunic or decorative patterns like polka dots or stripes to the hat.
Step 9: Refine and Ink
Trace over your final pencil lines with a fine-liner pen or a dark marker.
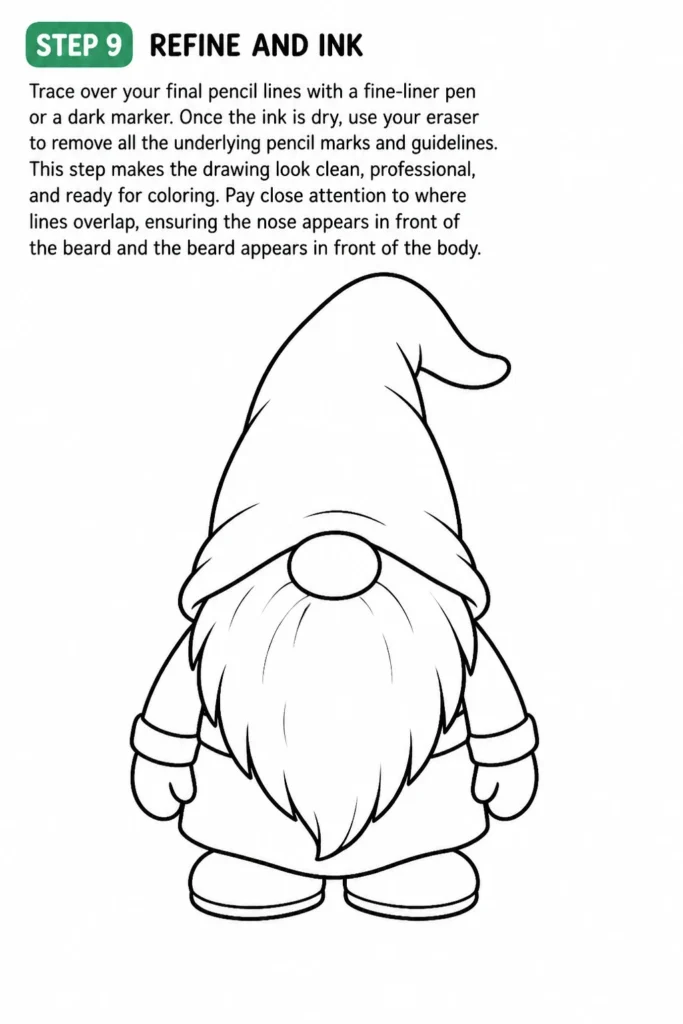
Once the ink is dry, use your eraser to remove all the underlying pencil marks and guidelines.
This step makes the drawing look clean, professional, and ready for coloring.
Pay close attention to where lines overlap, ensuring the nose appears in front of the beard and the beard appears in front of the body.
Common Mistakes to Avoid
The Disappearing Face
Many beginners forget to leave enough space for the nose because they focus too much on the hat.
If the nose is too small or tucked too far under the hat, the gnome loses its characteristic “peeking” look.
Always ensure the nose is the first thing you draw to keep the proportions balanced.
Stiff and Straight Lines
Using perfectly straight lines for the hat and body can make your gnome look like a traffic cone.
Gnomes are organic, magical creatures, so their clothes should look lived-in and soft.
Try to use “C” curves and “S” curves instead of straight lines to give the drawing more movement.
Ignoring the Weight
If the boots are too small, the gnome will look like it is about to tip over.
The base of the gnome (the boots and the bottom of the tunic) should feel heavy and solid.
Make sure the feet are wide enough to support the large hat and beard you’ve drawn above them.
Troubleshooting
My Beard Looks Like a Solid Block
If your beard looks more like a chin strap than hair, you likely need more internal detail lines.
Avoid drawing a single outline; instead, use flicking motions with your pencil to create varied line weights.
Vary the length of these lines so they don’t all end at the same spot, which creates a more natural, feathered texture.
The Hat Looks Too Small
A common issue is making the hat the same width as the nose, which makes the gnome look pin-headed.
The hat should be the widest part of the upper drawing, extending well past the sides of the nose.
If you’ve already drawn it too small, simply draw a second, wider rim over the first one and incorporate the old line as a fold in the fabric.
The Drawing Smudges Easily
If you are a left-handed artist or simply press hard, your graphite might smear across the page as you work.
Place a clean piece of scrap paper under your drawing hand to act as a barrier between your skin and the pencil lead.
Working from the top-left to the bottom-right (for righties) also helps prevent your hand from dragging over finished sections.
Key Takeaways
- The nose is the anchor of the drawing and should be placed first.
- Use curved, organic lines to make the clothing and beard look soft and whimsical.
- Oversized features like a big hat and large boots contribute to the classic gnome aesthetic.
- Adding texture to the beard with light, flicking strokes creates depth without making it look messy.
- Cleaning up your sketch with a pen and erasing pencil marks is the best way to get a professional finish.
- Practice different hat shapes and beard lengths to create a whole family of unique gnomes.
Frequently Asked Questions
What colors should I use for my gnome?
Traditional gnomes often wear red hats, blue tunics, and brown boots, but there are no strict rules.
For a garden gnome, earth tones like forest green and terracotta work beautifully.
If you are drawing a holiday gnome, try using sparkling silver, deep evergreens, or candy-cane stripes.
Do gnomes have eyes?
In many modern “Scandinavian” style gnome drawings, the eyes are completely hidden by the hat.
This adds to their mysterious and cozy charm, making them very easy for beginners to draw.
However, if you want to add eyes, place two small dots or “n” shaped lines just above the nose, peeking out from under the hat rim.
What kind of pencil is best for sketching gnomes?
An HB pencil is perfect for the initial layout because it is easy to erase.
Once you are happy with the shape, you can switch to a 2B or 4B pencil to add darker shadows and richer textures to the beard.
Softer pencils allow for more expression in the lines, which suits the magical theme of the subject.
Can I draw a gnome on a tablet?
Absolutely, the same step-by-step process applies to digital art.
The benefit of drawing digitally is that you can put the nose, hat, and beard on separate layers.
This allows you to resize the hat or move the nose around without having to redraw the entire character.
Our Top Recommended Finds
- Acid-Free Sketchbook: A high-quality sketchbook ensures your gnome drawings won’t yellow over time and provides a smooth surface for your pencil.
- Kneaded Eraser: This tool is excellent for dabbing away excess graphite without damaging the paper fibers or leaving crumbs.
- Blending Stumps (Tortillons): These are perfect for softening the shadows on the gnome’s nose and creating a smooth gradient on the hat.
Bring Your Magical Garden To Life
Now that you have mastered the basic shape of a gnome, you can start experimenting with their environment.
Try drawing your gnome sitting on a spotted mushroom or leaning against a watering can in a lush garden.
You could even draw a whole village of gnomes, each with different hat patterns and beard styles.
The more you draw these little characters, the more you will find your own unique style emerging.
Grab your favorite pencil and start sketching your next gnome companion today.
& Painting
No rigid rules or pretension. Just practical guides, medium comparisons, and encouraging tips to help you enjoy the drawing & painting process.