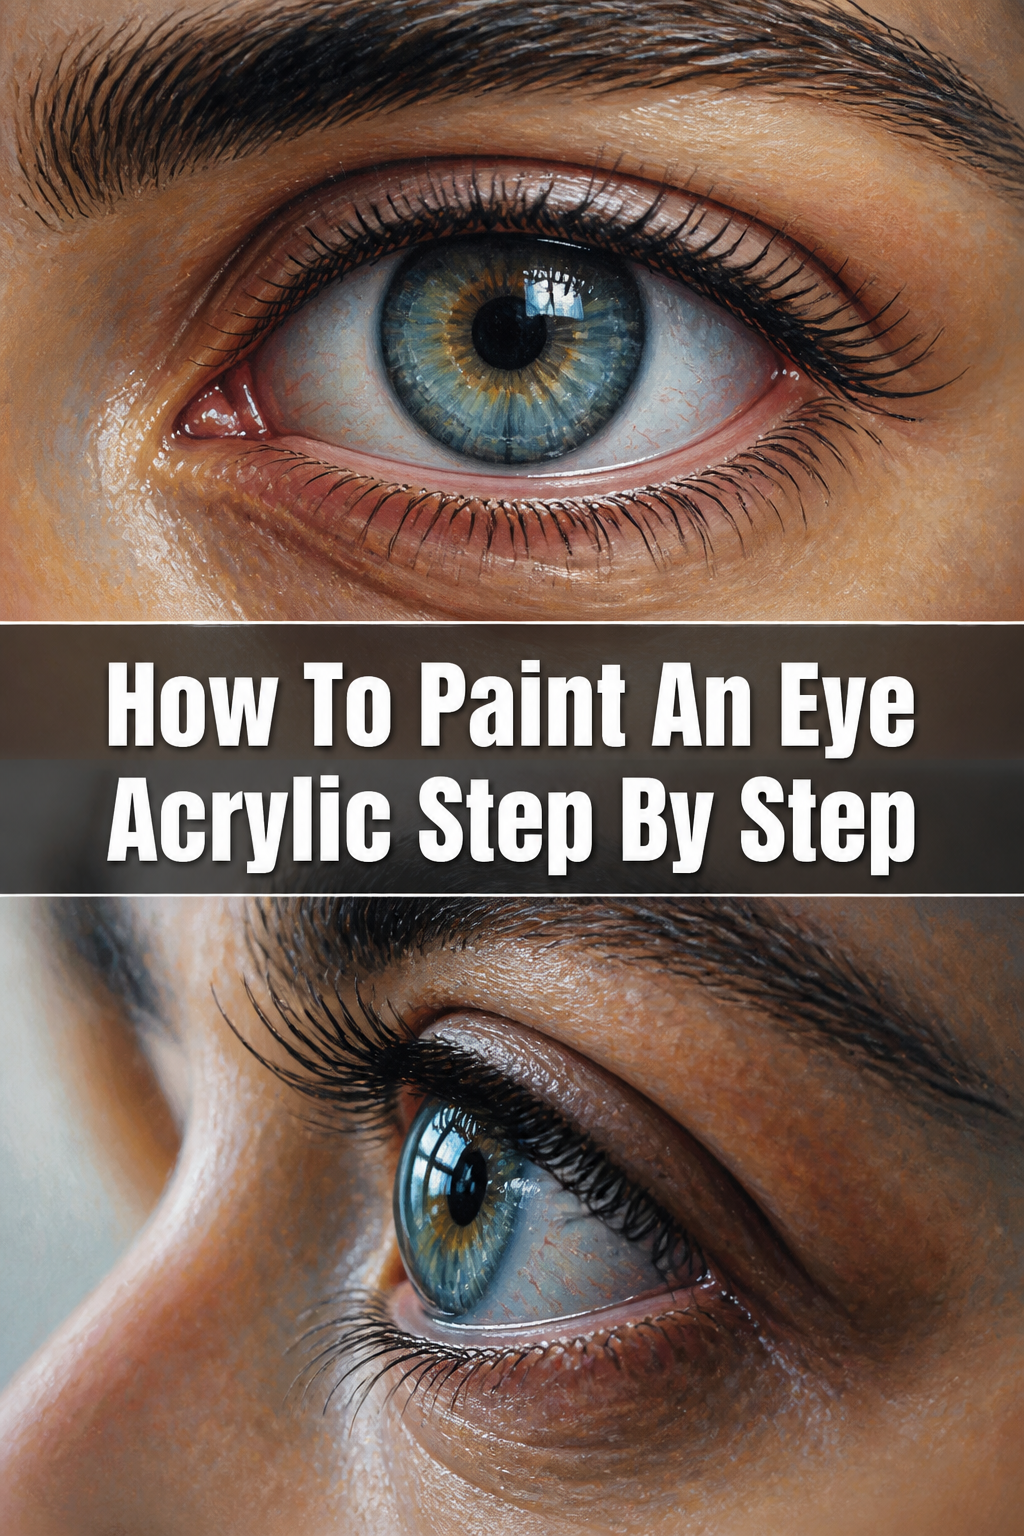
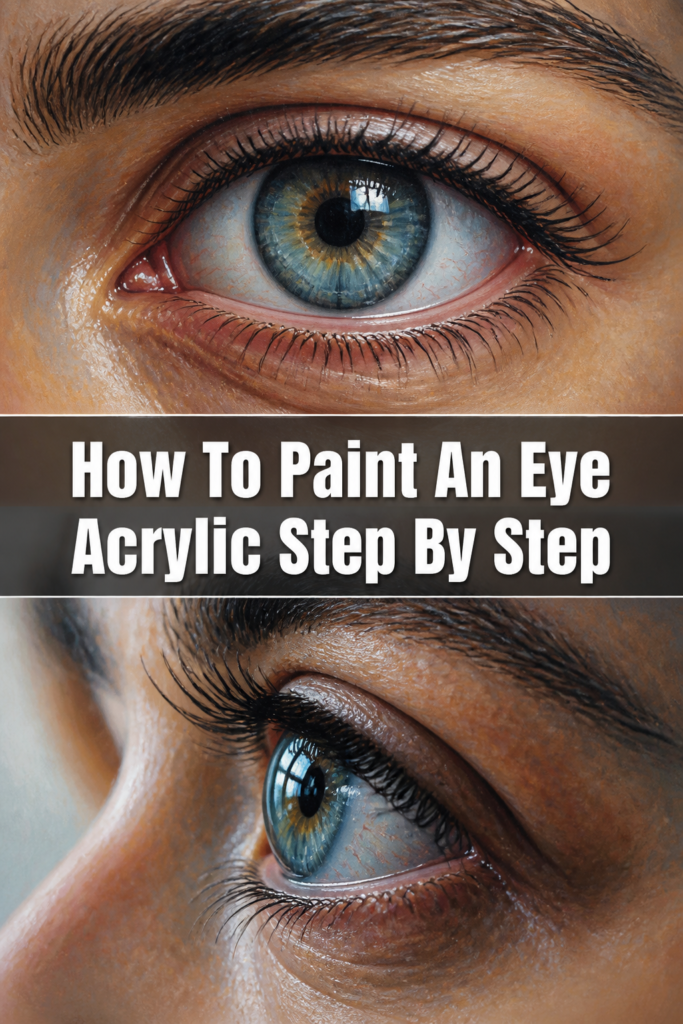
👁️ How To Paint An Eye Acrylic Step By Step

& Painting
No rigid rules or pretension. Just practical guides, medium comparisons, and encouraging tips to help you enjoy the drawing & painting process.
Learning to paint a realistic eye can seem daunting at first.
I remember struggling with my first attempts, frustrated by flat, lifeless results.
This guide distills years of practice into clear, actionable steps, making the process enjoyable and successful for you.
Quick Overview
You’re about to embark on a rewarding journey. By following these steps, you’ll learn to create an acrylic eye painting with depth, realism, and captivating expression.
- Time needed: 2-4 hours
- Difficulty: Intermediate
- What you’ll need: Acrylic paints (titanium white, mars black, raw umber, burnt sienna, yellow ochre, cadmium red, ultramarine blue, viridian green), various brushes (small round, fine detail, flat), canvas or acrylic paper, palette, water, paper towels, a sharp pencil, and a clear reference photo.
Step-by-Step Instructions
Step 1: Gather Your Tools and Reference
Gather all your necessary art supplies before you begin. Having everything at hand prevents interruptions and keeps your creative flow going.
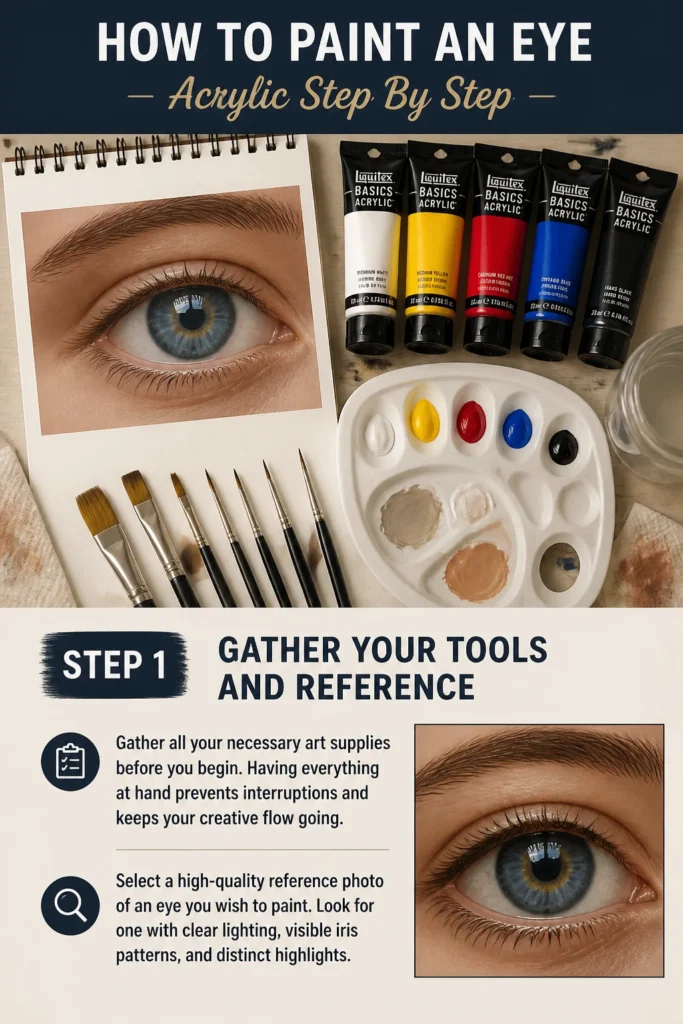
Select a high-quality reference photo of an eye you wish to paint. Look for one with clear lighting, visible iris patterns, and distinct highlights.
Step 2: Sketch the Basic Structure
Lightly sketch the outline of the eye onto your canvas using a pencil. Focus on the overall shape of the eyeball, the upper and lower eyelids, and the tear duct.
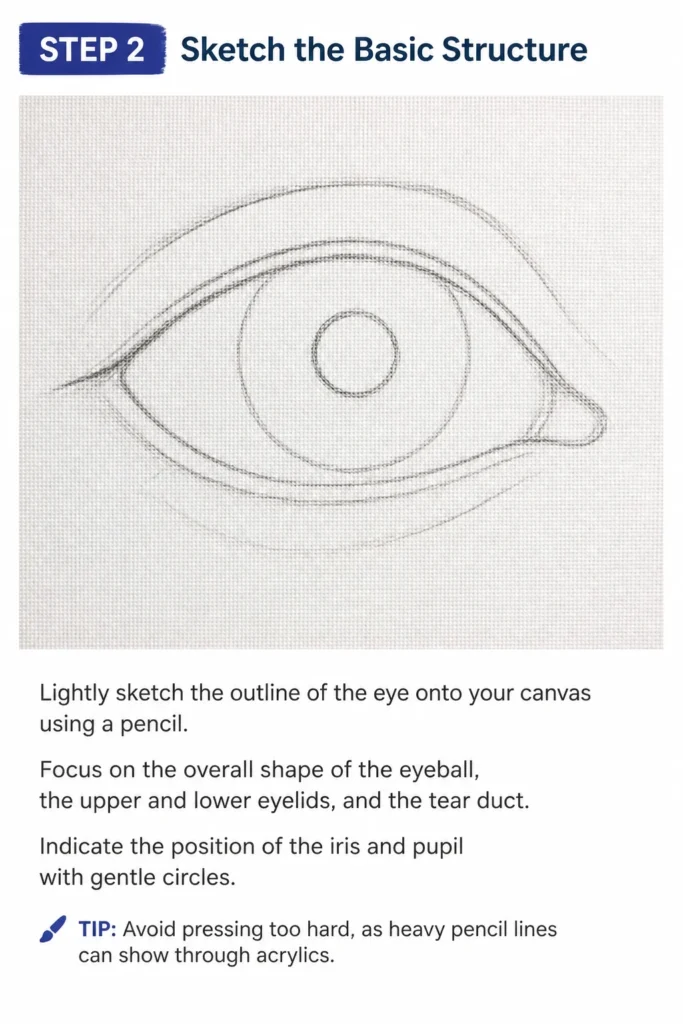
Indicate the position of the iris and pupil with gentle circles. Avoid pressing too hard, as heavy pencil lines can show through acrylics.
Step 3: Lay Down the Base Skin Tones
Mix a mid-tone skin color that matches the general tone around the eye in your reference. Use a combination of yellow ochre, cadmium red, and white, adjusting with a touch of raw umber if needed.
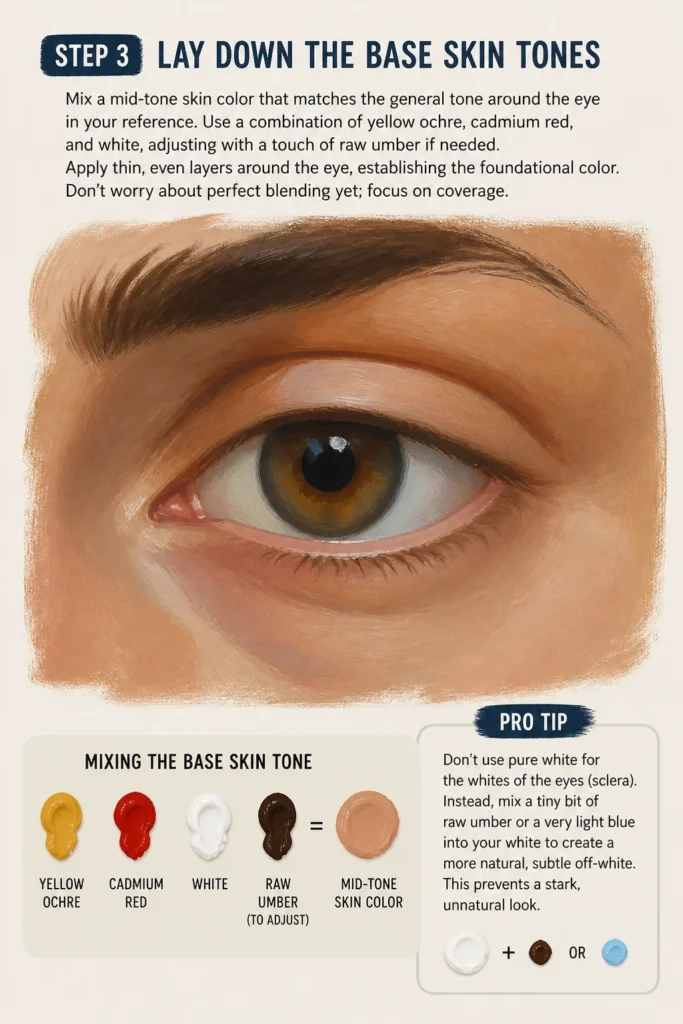
Apply thin, even layers around the eye, establishing the foundational color. Don’t worry about perfect blending yet; focus on coverage.
Pro Tip: Don’t use pure white for the whites of the eyes (sclera). Instead, mix a tiny bit of raw umber or a very light blue into your white to create a more natural, subtle off-white. This prevents a stark, unnatural look.
Step 4: Establish the Iris and Pupil
Paint the darkest parts of the iris first, using a small round brush. Mix a dark brown, deep blue, or dark green depending on your reference eye color.
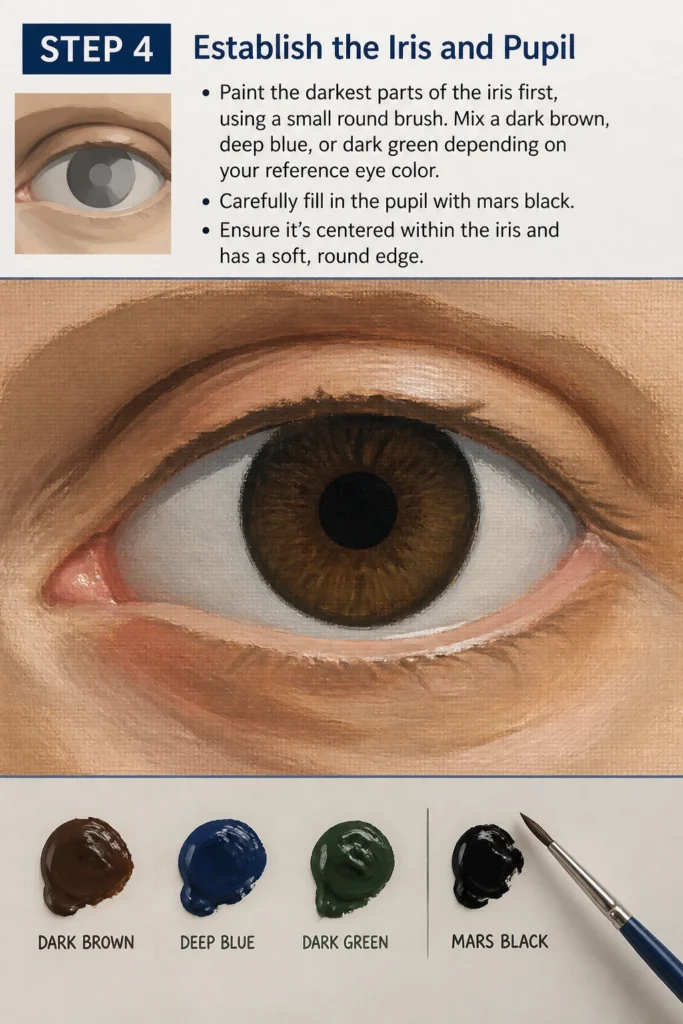
Carefully fill in the pupil with mars black. Ensure it’s centered within the iris and has a soft, round edge.
Step 5: Build Depth in the Iris
Introduce lighter and more vibrant colors into the iris, working outwards from the pupil in radial strokes. Observe your reference for the specific color variations and patterns.
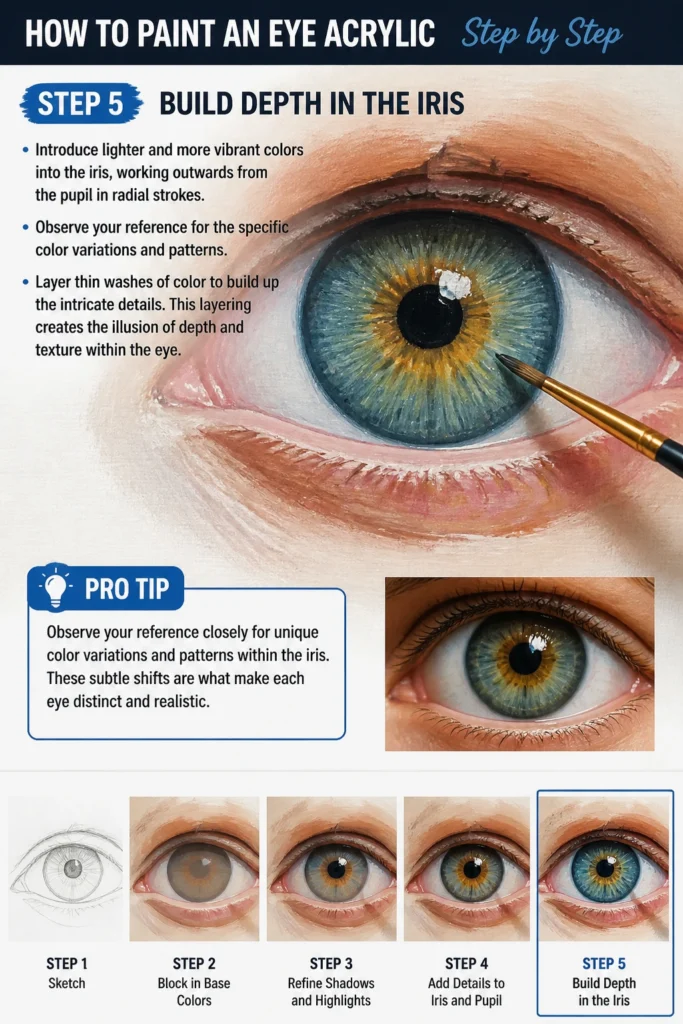
Layer thin washes of color to build up the intricate details. This layering creates the illusion of depth and texture within the eye.
Pro Tip: Observe your reference closely for unique color variations and patterns within the iris. These subtle shifts are what make each eye distinct and realistic.
Step 6: Add Highlights and Reflections
Apply the crucial catchlights and reflections using titanium white and a fine detail brush. These are the bright spots where light hits the wet surface of the eye.
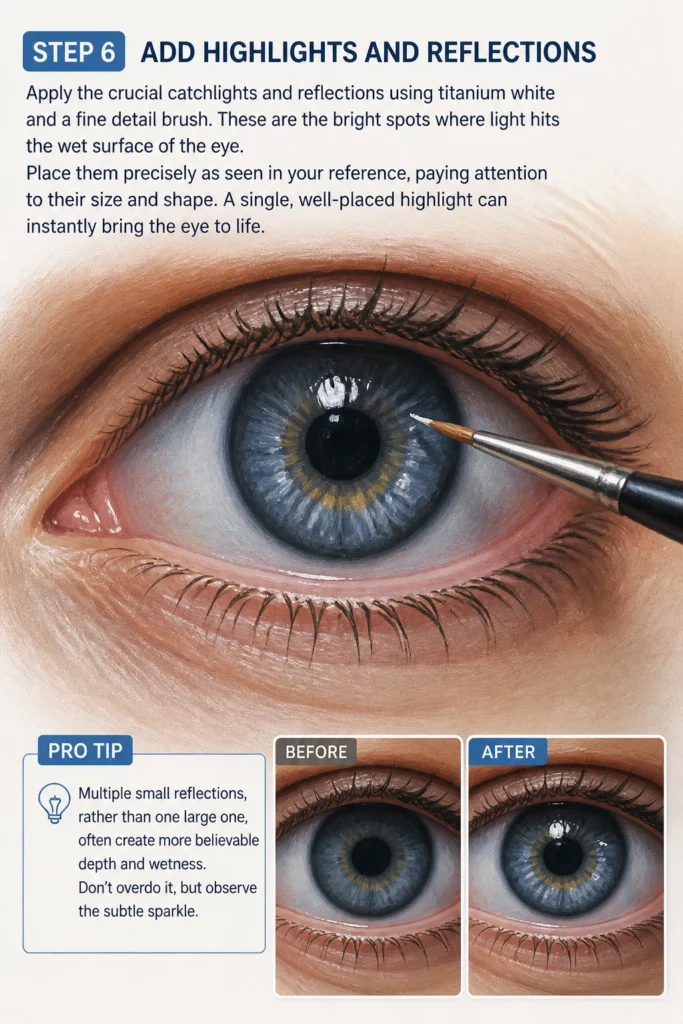
Place them precisely as seen in your reference, paying attention to their size and shape. A single, well-placed highlight can instantly bring the eye to life.
Pro Tip: Multiple small reflections, rather than one large one, often create more believable depth and wetness. Don’t overdo it, but observe the subtle sparkle.
Step 7: Define Eyelids, Lashes, and Brows
Add subtle shadows and creases to the eyelids using slightly darker skin tones. This gives them form and dimension.
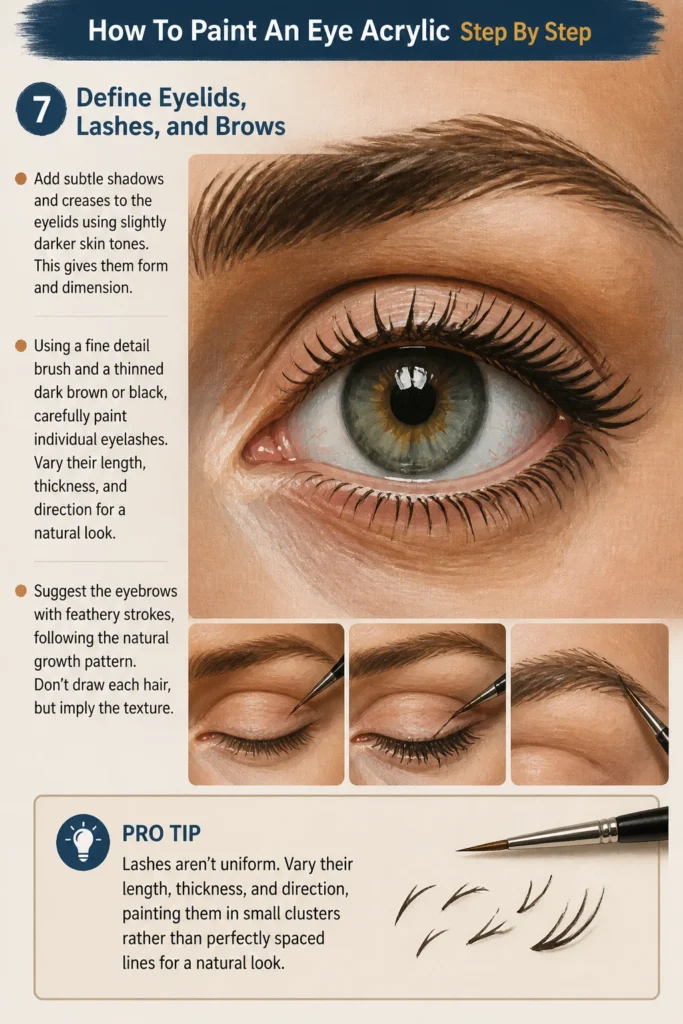
Using a fine detail brush and a thinned dark brown or black, carefully paint individual eyelashes. Vary their length, thickness, and direction for a natural look.
Suggest the eyebrows with feathery strokes, following the natural growth pattern. Don’t draw each hair, but imply the texture.
Pro Tip: Lashes aren’t uniform. Vary their length, thickness, and direction, painting them in small clusters rather than perfectly spaced lines for a natural look.
Step 8: Refine and Blend
Step back and assess your work. Look for any harsh edges that need softening or areas that could benefit from further blending.
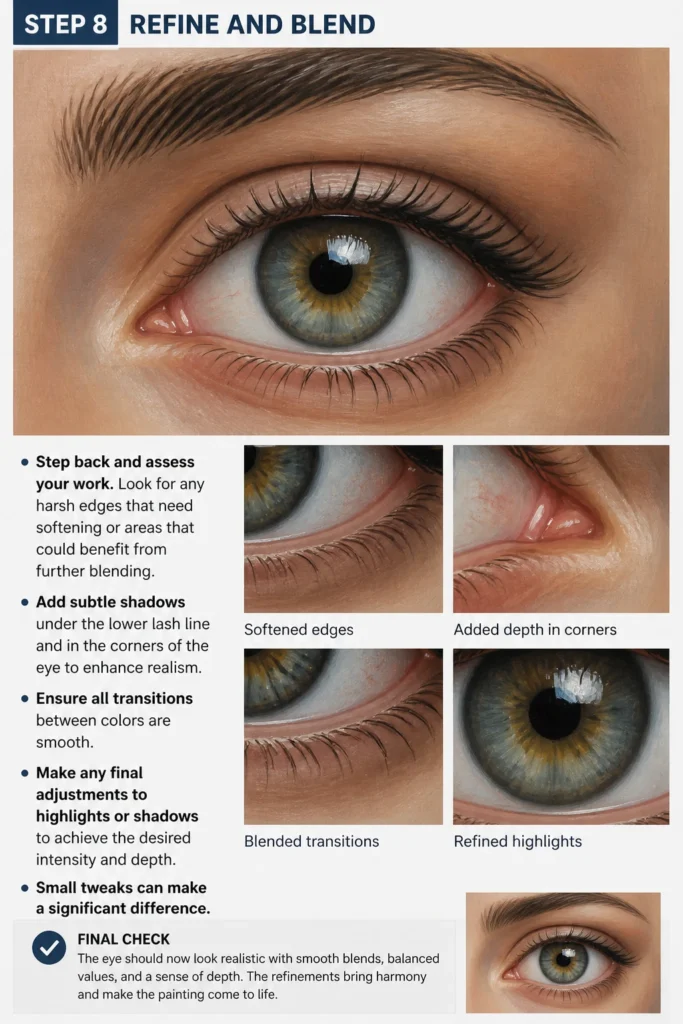
Add subtle shadows under the lower lash line and in the corners of the eye to enhance realism. Ensure all transitions between colors are smooth.
Make any final adjustments to highlights or shadows to achieve the desired intensity and depth. Small tweaks can make a significant difference.
Common Mistakes to Avoid
Flat, Lifeless Eyes
Many beginners struggle with eyes that look dull or lack vibrancy. This often happens when there isn’t enough contrast between light and shadow, or when highlights are missing.
To fix this, focus on layering your colors, ensuring a full range of tones from dark shadows to bright highlights. The strategic placement of catchlights is vital for bringing an eye to life.
Too Much Symmetry
Perfectly symmetrical eyes can appear unnatural, almost robotic. Real eyes have subtle differences in their shape, the way eyelids fold, and lash patterns.
Embrace slight imperfections and variations. Study your reference photo for these natural asymmetries and incorporate them into your painting for a more organic and believable result.
Overly Defined Lines
Using hard, dark outlines around the iris or eyelids can make the eye look cartoonish. Acrylics can dry quickly, leading to sharp edges if not blended.
Instead of hard lines, aim for softer transitions and edges. Use blending techniques or thin washes of color to create subtle definitions rather than stark boundaries.
Incorrect Color Choices
Using pure black for shadows or pure white for highlights is a common pitfall. This can make the eye appear stark and unrealistic.
Always mix your colors. For shadows, use dark blues, purples, or browns. For highlights, add a tiny touch of yellow or blue to your white to make it appear more luminous and integrated with the surrounding skin tones.
Troubleshooting
My eye looks “staring” or “dead”
This often occurs when there aren’t enough realistic highlights or subtle reflections. The eye lacks the wet, reflective quality that makes it appear alive.
Revisit Step 6 and ensure your catchlights are accurately placed and appropriately sized. Consider adding a few tiny, secondary reflections to mimic the wet surface of the eye.
The skin around the eye looks flat
If the skin appears one-dimensional, it’s likely due to a lack of color variation and insufficient shading. Skin is rarely a single, uniform tone.
Introduce subtle warm and cool tones around the eye. Add delicate shadows in the creases and under the brow bone, and gentle highlights on prominent areas like the cheekbone, blending them seamlessly.
Lashes look like “spikes”
When eyelashes are painted too thickly, too straight, or too evenly spaced, they can resemble stiff spikes rather than delicate hairs.
Use a very fine detail brush and thinned paint. Paint individual lashes in short, slightly curved strokes, varying their length and direction. Paint them in small, natural-looking clusters rather than a perfect row.
Key Takeaways
- Reference images are vital for accuracy and capturing subtle details.
- Layering colors builds depth and realism, especially in the iris and skin.
- Well-placed highlights and reflections are crucial for bringing an eye to life.
- Embrace subtlety and natural imperfections over striving for absolute symmetry.
- Practice is key; each attempt refines your observation and brush control.
Frequently Asked Questions
What brushes are essential for painting eyes?
For painting eyes, you’ll definitely need a fine detail brush for lashes and highlights, a small round brush for the iris and blending, and a small flat brush for applying base skin tones and softening edges.
How do I make the iris look realistic?
To make the iris realistic, focus on layering multiple colors in radial strokes, working from dark to light. Observe the intricate patterns in your reference and use thin washes to build up translucent depth.
Should I use pure white for the highlights?
It’s generally best to avoid pure titanium white for highlights. Instead, mix a tiny touch of yellow ochre, raw umber, or even a pale blue into your white. This creates a more integrated, luminous highlight that feels part of the eye rather than sitting on top of it.
How do I prevent the eye from looking too cartoonish?
To avoid a cartoonish look, focus on soft edges, subtle color variations, and a full range of values. Blend transitions between colors, avoid hard outlines, and incorporate the natural imperfections found in real eyes.
Our Top Recommended Finds
- Fine Detail Brush Set: Essential for precision work on lashes, highlights, and intricate iris patterns.
- Acrylic Glazing Medium: Extends drying time, allowing for smoother blending and translucent layering, especially useful for skin tones.
- High-Quality Reference Photo Book: Provides a wealth of diverse eye references, inspiring new projects and aiding accurate observation.
Your Artistic Journey Begins Now
You now have the tools and knowledge to create captivating acrylic eye paintings. Don’t be afraid to experiment with different eye colors and expressions.
Every stroke is a step towards mastery, and each finished eye will deepen your understanding of light, form, and color.
Pick up your brush today and watch your vision come to life on canvas!
& Painting
No rigid rules or pretension. Just practical guides, medium comparisons, and encouraging tips to help you enjoy the drawing & painting process.