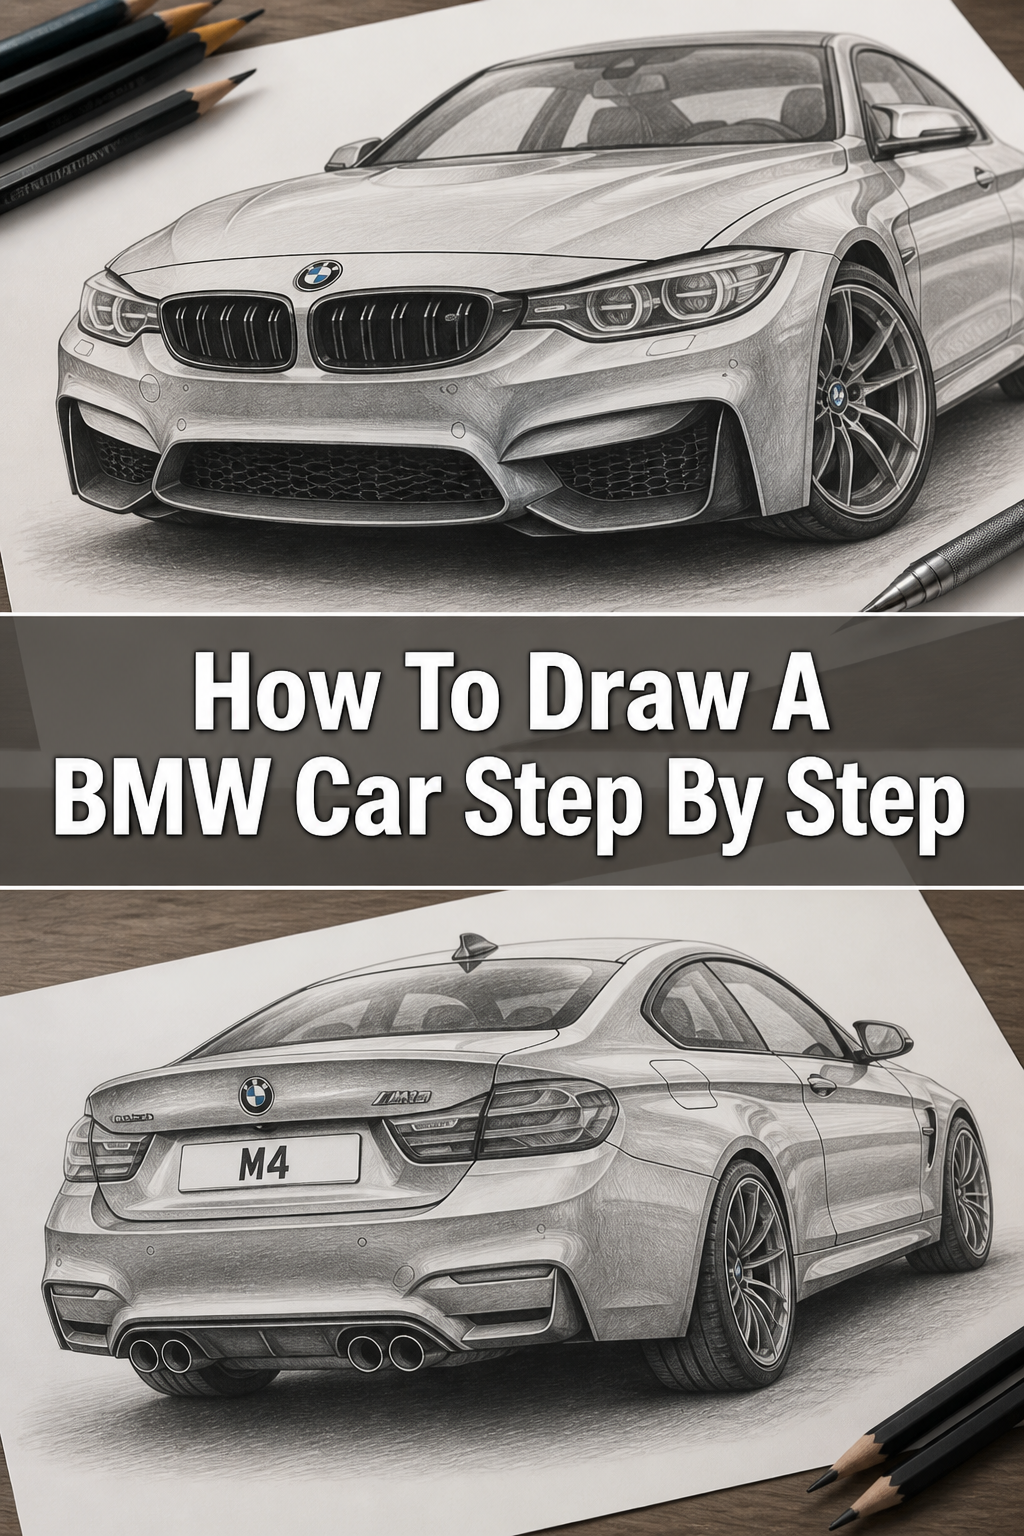
🚗 How To Draw A BMW Car Step By Step

& Painting
No rigid rules or pretension. Just practical guides, medium comparisons, and encouraging tips to help you enjoy the drawing & painting process.
I remember the first time I tried to sketch a BMW, captivated by its sleek lines and powerful presence.
It felt daunting at first, but I quickly learned that breaking it down into manageable steps makes all the difference.
This guide shares those insights, helping you capture that iconic automotive design on paper with confidence.
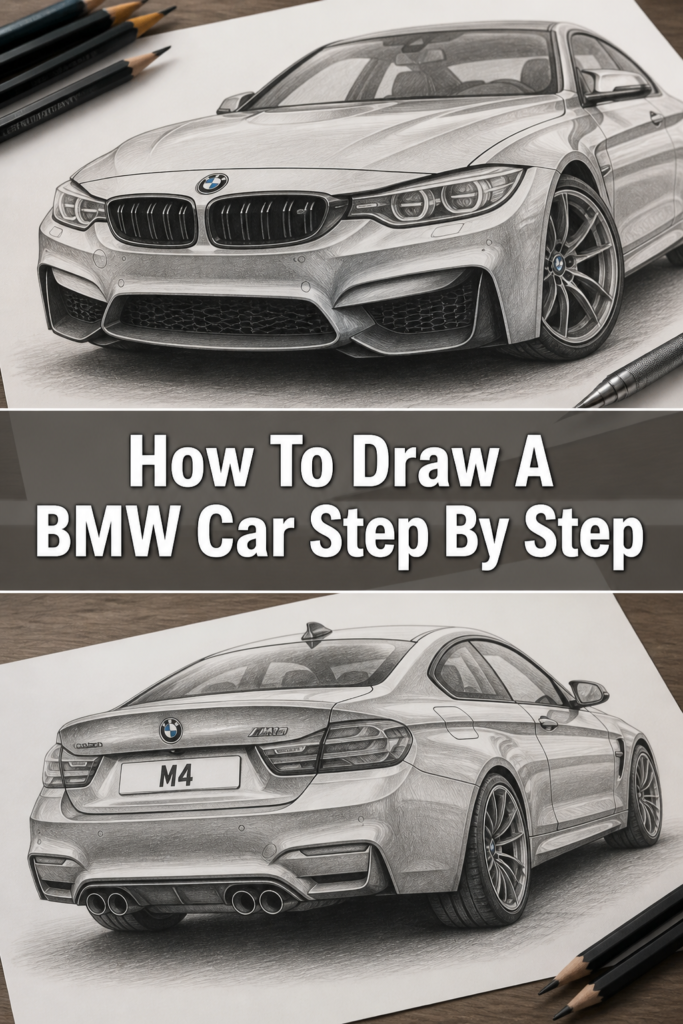
Quick Overview
This guide will walk you through the process of sketching a dynamic BMW car.
You’ll learn to build the structure from basic shapes, add signature details, and introduce shading for a professional finish.
- Time needed: 45-60 minutes
- Difficulty: Intermediate
- What you’ll need: Sketching pencils (HB, 2B, 4B), an eraser (kneaded and regular), drawing paper, a ruler, and reference images of your chosen BMW model.
Step-by-Step Instructions
Step 1: Laying the Foundation – The Basic Proportions
Begin by lightly sketching a simple rectangular box on your paper. This box will define the overall length and height of your BMW.
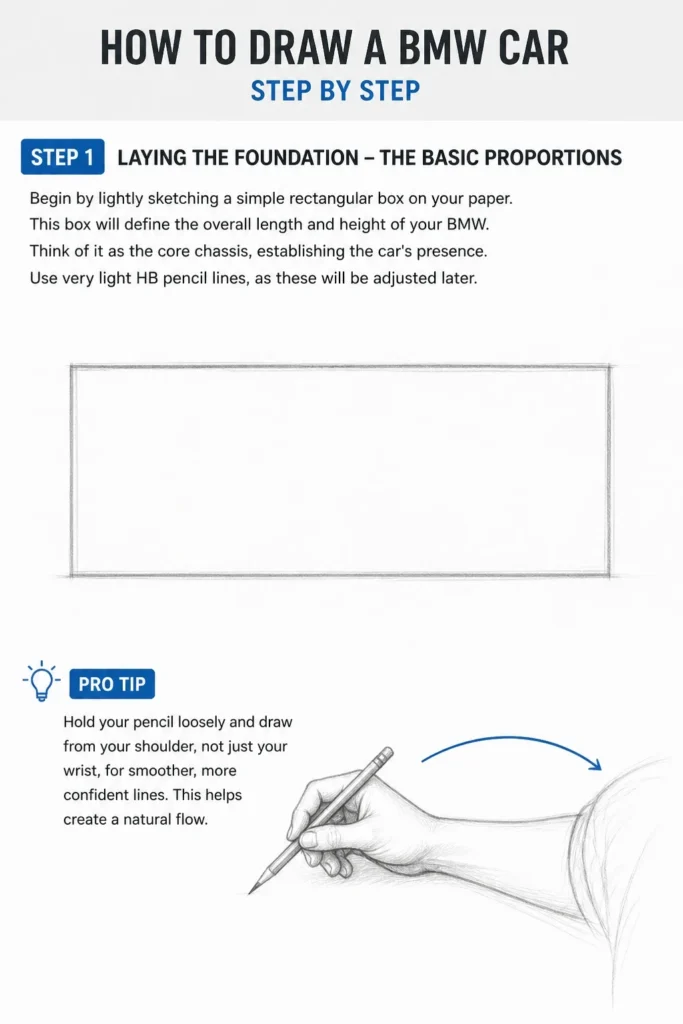
Think of it as the core chassis, establishing the car’s presence.
Use very light HB pencil lines, as these will be adjusted later.
Pro Tip: Hold your pencil loosely and draw from your shoulder, not just your wrist, for smoother, more confident lines. This helps create a natural flow.
Step 2: Defining the Silhouette – Roofline and Wheel Arches
Within your initial box, start to carve out the basic shape of the car’s body. Sketch the gentle curve of the roofline, the slant of the windshield, and the rear window.
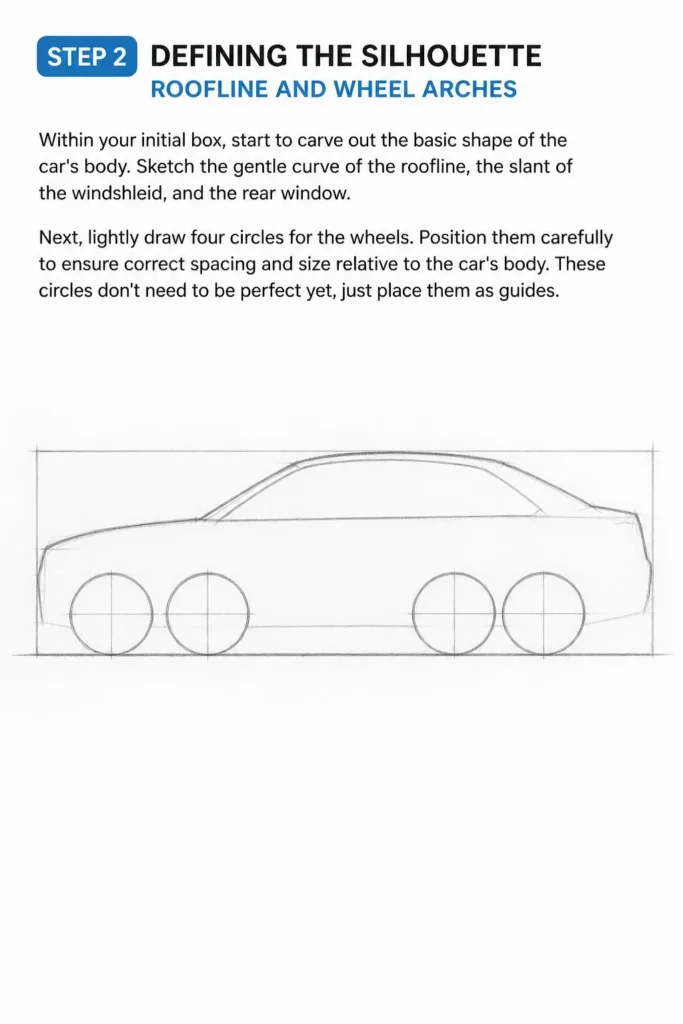
Next, lightly draw four circles for the wheels. Position them carefully to ensure correct spacing and size relative to the car’s body.
These circles don’t need to be perfect yet, just place them as guides.
Step 3: Sculpting the Body Lines – Hood and Fenders
Now, begin to refine the contours of the hood, trunk, and fenders. BMWs are known for their strong, flowing lines.
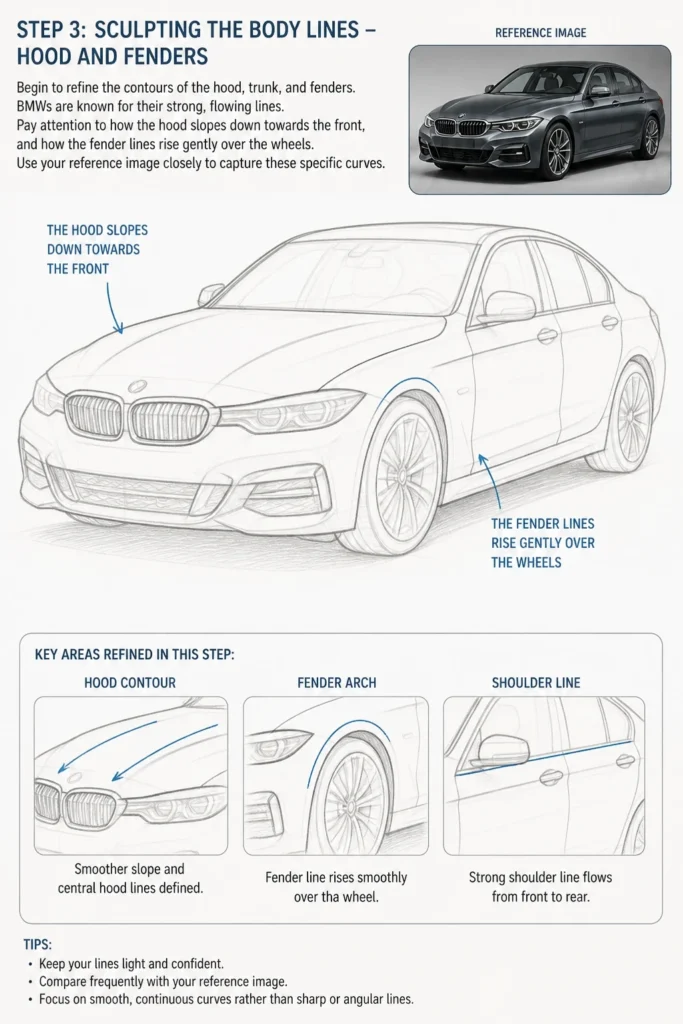
Pay attention to how the hood slopes down towards the front, and how the fender lines rise gently over the wheels.
Use your reference image closely to capture these specific curves.
Step 4: Adding the Iconic Features – Grille and Headlights
This is where your drawing truly starts to look like a BMW. Sketch the distinctive kidney grille at the front of the car.
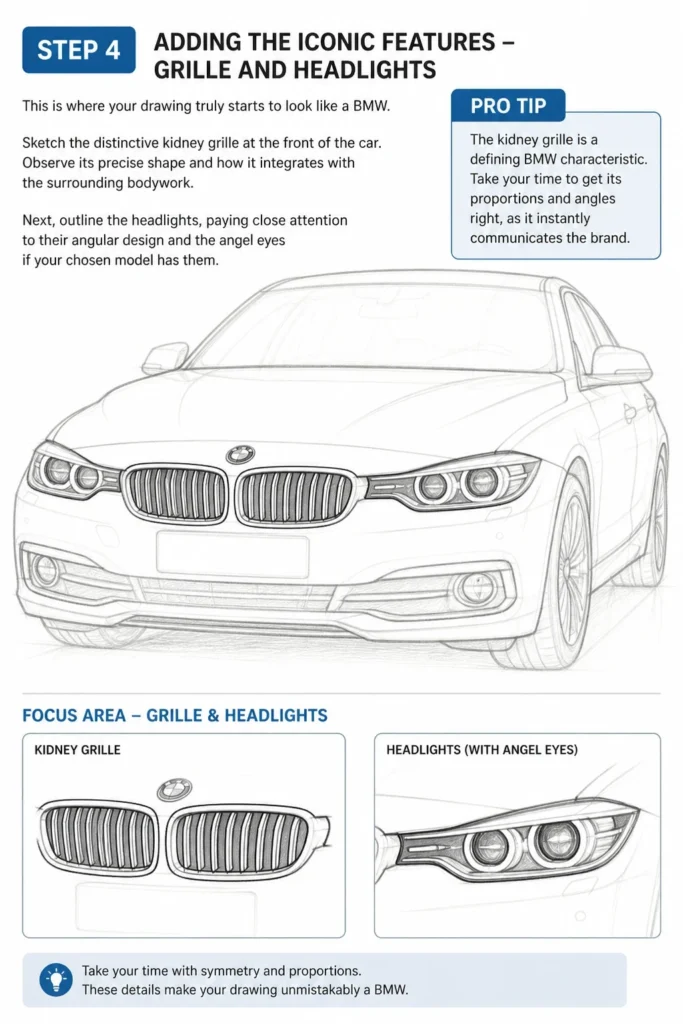
Observe its precise shape and how it integrates with the surrounding bodywork.
Next, outline the headlights, paying close attention to their angular design and the “angel eyes” if your chosen model has them.
Pro Tip: The kidney grille is a defining BMW characteristic. Take your time to get its proportions and angles right, as it instantly communicates the brand.
Step 5: Detailing the Wheels – Rims and Tires
Move back to the wheels and begin to add more detail. Darken the outer circle for the tires, giving them some thickness.
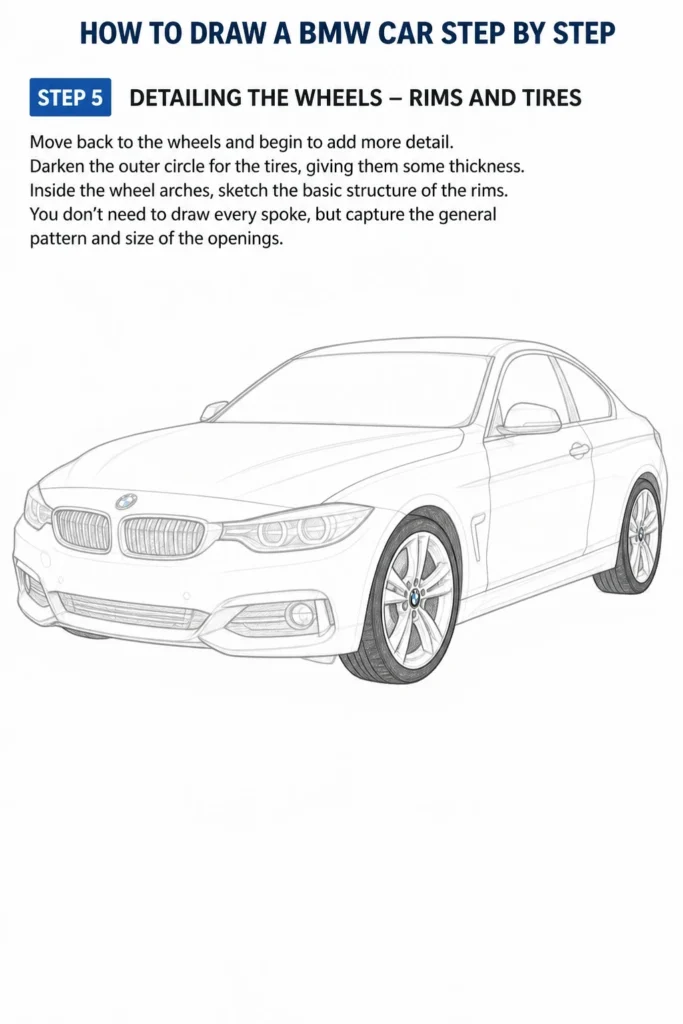
Inside the wheel arches, sketch the basic structure of the rims.
You don’t need to draw every spoke, but capture the general pattern and size of the openings.
Step 6: Windows, Doors, and Mirrors
Outline the windows on the side of the car, defining the windshield, side windows, and rear window.
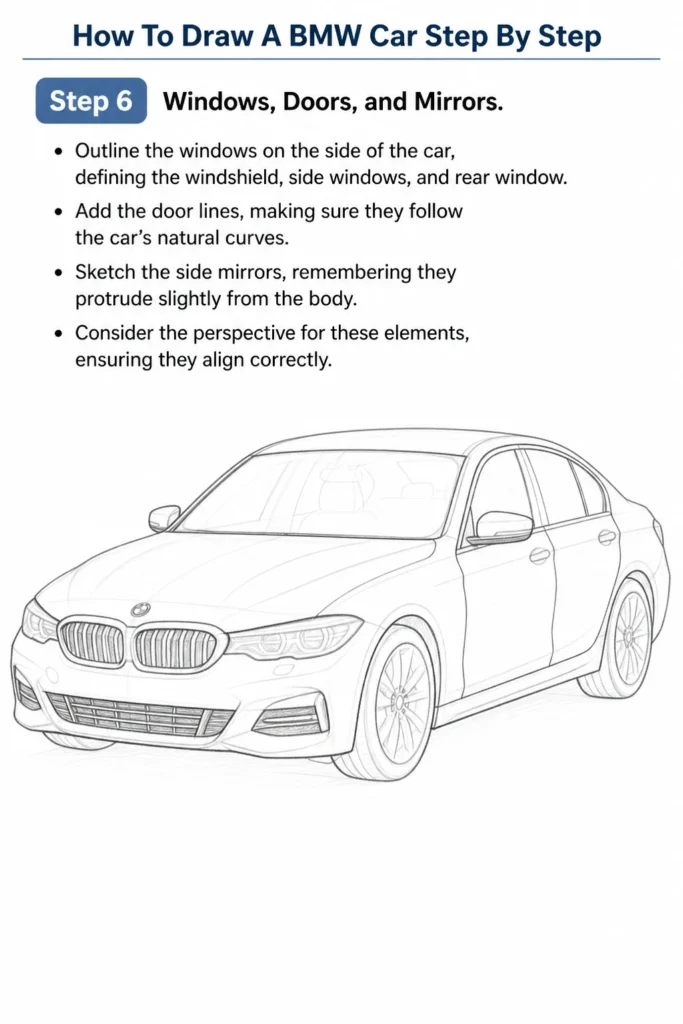
Add the door lines, making sure they follow the car’s natural curves.
Sketch the side mirrors, remembering they protrude slightly from the body.
Consider the perspective for these elements, ensuring they align correctly.
Step 7: Refining the Details – Logos and Vents
With the main structure in place, it’s time for the smaller, yet crucial, details. Add the BMW logo to the hood and trunk, if visible.
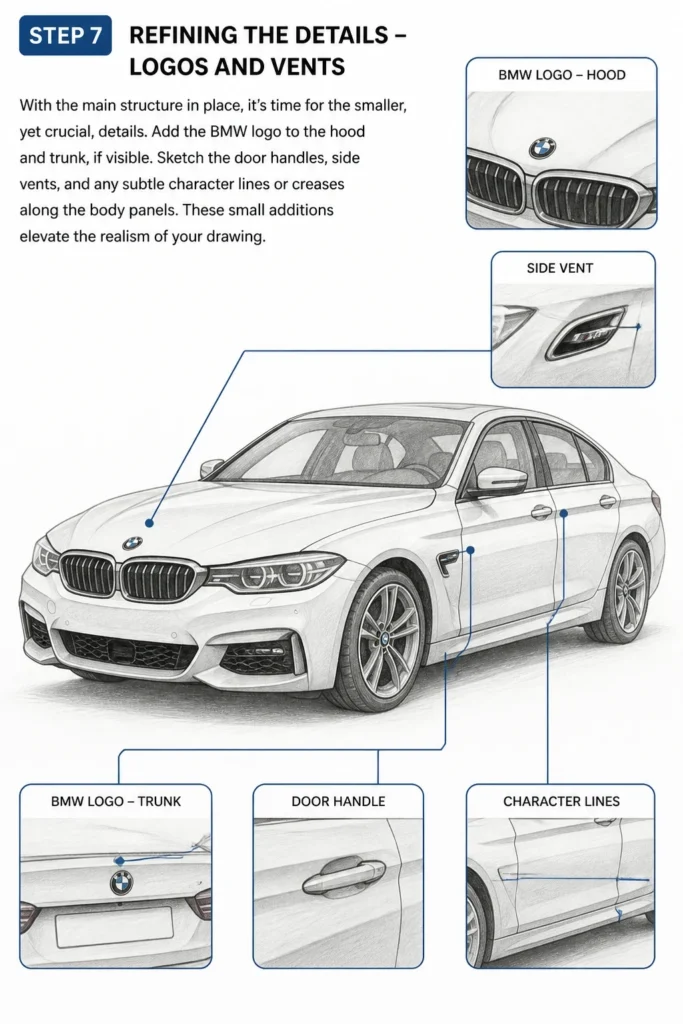
Sketch the door handles, side vents, and any subtle character lines or creases along the body panels.
These small additions elevate the realism of your drawing.
Step 8: Shading and Finishing Touches
Now, bring your drawing to life with shading. Use your 2B and 4B pencils to add depth and form.
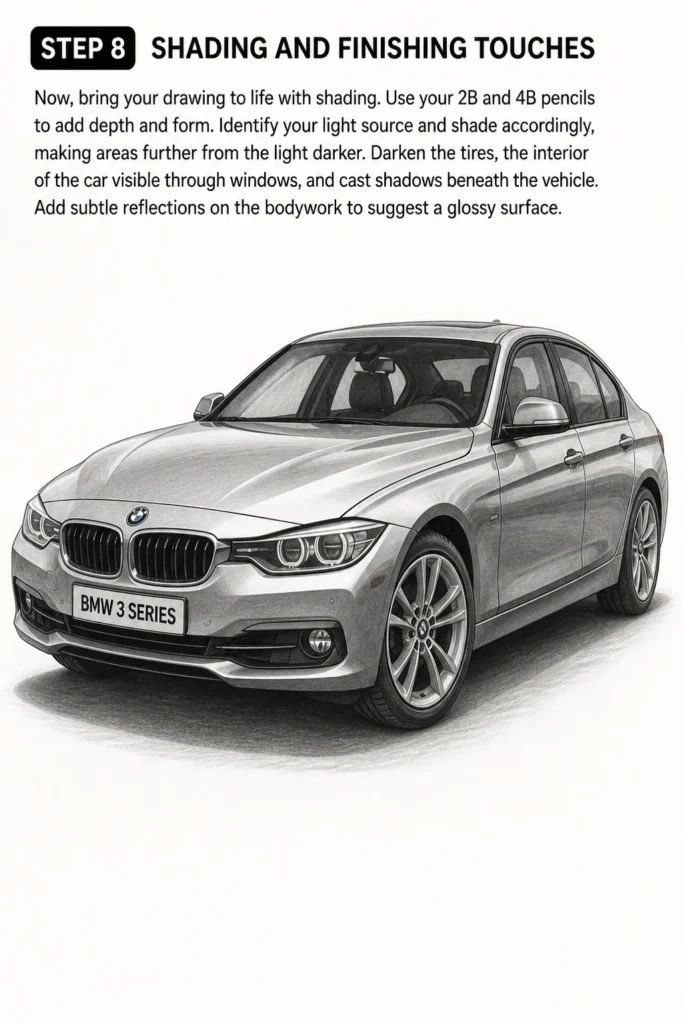
Identify your light source and shade accordingly, making areas further from the light darker.
Darken the tires, the interior of the car visible through windows, and cast shadows beneath the vehicle.
Add subtle reflections on the bodywork to suggest a glossy surface.
Common Mistakes to Avoid
Incorrect Proportions
One of the most common pitfalls is getting the car’s proportions wrong from the start. A car that’s too long, too short, or too wide will look off, no matter how detailed the features are.
Always begin with light, basic shapes and constantly compare your sketch to your reference image to ensure everything is scaled correctly before adding details.
Neglecting Reference Images
Attempting to draw a specific car model like a BMW from memory alone often leads to inaccuracies. Each BMW model has unique design cues, from headlight shapes to body creases.
Always use high-quality reference photos from multiple angles. This ensures you capture the authentic look and feel of the car.
Rushing the Details
It’s tempting to jump straight to drawing the intricate wheels or the detailed grille. However, starting with details before the overall structure is solid can make your drawing look disjointed.
Build your drawing in layers, moving from general shapes to specific features. This methodical approach allows for corrections and ensures a cohesive final piece.
Heavy-Handed Outlines
Pressing too hard with your pencil in the early stages makes it difficult to erase mistakes or refine lines later on. This can lead to visible indentations on your paper.
Keep your initial sketches very light and gradually darken your lines as you become more confident in your shapes and proportions. Use an HB pencil for initial sketching.
Troubleshooting
My Car Looks Squashed or Stretched
If your BMW appears disproportionate, the initial bounding box or circles for the wheels might be off. Revisit Step 1 and 2.
Carefully measure the width-to-height ratio from your reference image and apply it to your initial sketch.
A ruler can be very helpful in verifying these fundamental measurements.
Wheels Look Uneven or Flat
Drawing perfect circles and ellipses for wheels can be challenging. If your wheels look wobbly or not circular, try using a compass or even tracing a coin for the initial perfect circle.
Remember that wheels in perspective will appear as ellipses, not perfect circles, so practice drawing consistent ellipses.
Details Don’t Look Like a BMW
If your finished drawing doesn’t quite capture the BMW essence, it’s likely in the unique design elements. Focus on the kidney grille, the headlight design (e.g., “angel eyes”), and distinct body creases.
Compare these specific features to your reference image with extra scrutiny. Sometimes, a slight tweak in an angle or curve makes all the difference.
Key Takeaways
- Always begin your drawing with light, basic geometric shapes to establish the car’s overall proportions and perspective.
- Reference images are indispensable for capturing the unique characteristics and precise details of a specific BMW model.
- Build your drawing gradually, moving from general forms and outlines to intricate details like grilles, headlights, and rims.
- Shading is crucial for adding depth, dimension, and a sense of realism to your car sketch, bringing it to life.
- Don’t be afraid to erase and adjust; the drawing process is iterative, and corrections are a natural part of improvement.
- Consistent practice is the most effective way to refine your observational skills and drawing techniques for automotive art.
Frequently Asked Questions
What’s the best pencil for car drawing?
A good set of graphite pencils ranging from HB to 4B is ideal. HB is great for light initial sketches and outlines, while 2B and 4B are perfect for adding darker tones, shadows, and depth to your drawing.
How do I make the car look shiny?
To create a shiny effect, focus on strong contrasts in your shading. Use very dark tones right next to very light, unshaded areas (highlights). Sharp, defined edges for these highlights will give the impression of reflected light on a glossy surface.
Should I draw from a specific angle?
For beginners, a 3/4 front view is often recommended. This angle allows you to showcase the front, side, and top planes of the car, providing a dynamic and comprehensive view that highlights many of its signature features.
How long does it take to get good?
Mastering automotive drawing, like any skill, requires consistent practice and patience. You’ll see improvement with each drawing session, but truly “getting good” is an ongoing journey of learning and refinement over weeks, months, or even years.
Our Top Recommended Finds
- Artist’s Sketchbook: A good quality sketchbook with smooth, durable paper (around 100-120 gsm) provides a pleasant surface for your pencils and stands up to erasing.
- Graphite Pencil Set: A comprehensive set of drawing pencils (e.g., Staedtler Mars Lumograph or Faber-Castell Castell 9000) offers a range of hardness for all your sketching and shading needs.
- Kneaded Eraser: Unlike a standard eraser, a kneaded eraser can be molded to a point for precise corrections and can gently lift graphite without damaging the paper.
Your Journey into Automotive Art Begins Now
You now have the tools and steps to start sketching your very own BMW.
Remember, every line you draw is a step towards mastering this engaging art form.
Why not try drawing another angle or a different BMW model next?
Grab your pencils, find a great reference image, and let your creativity take the wheel today!
& Painting
No rigid rules or pretension. Just practical guides, medium comparisons, and encouraging tips to help you enjoy the drawing & painting process.