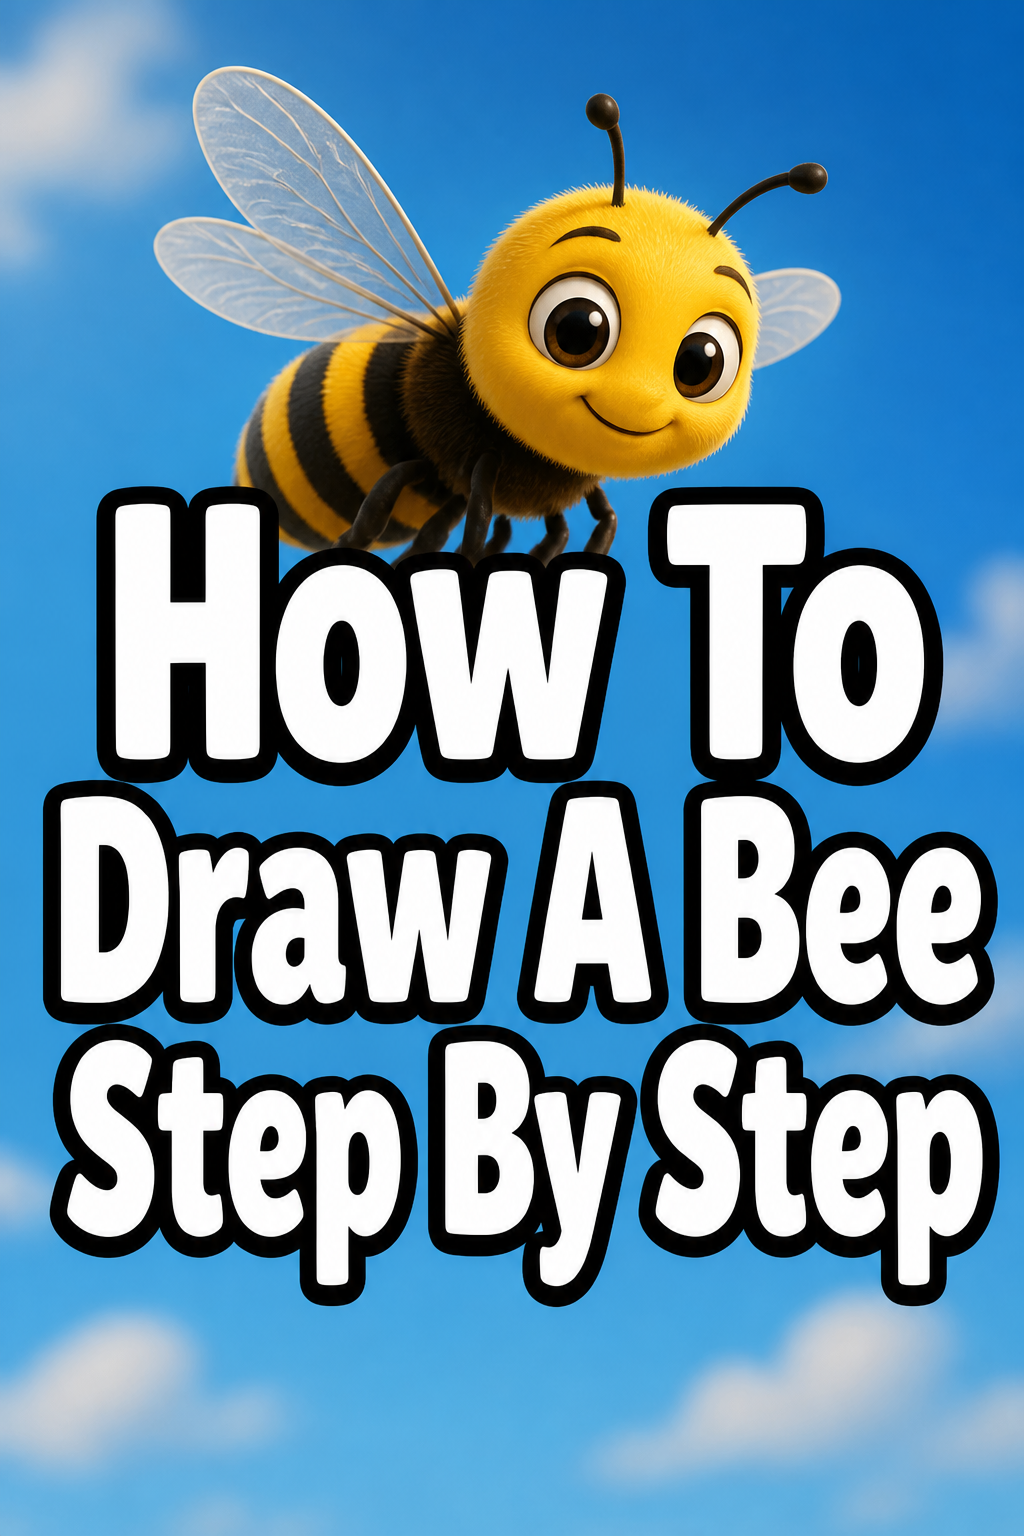
🐝 How To Draw A Bee Step By Step

& Painting
No rigid rules or pretension. Just practical guides, medium comparisons, and encouraging tips to help you enjoy the drawing & painting process.
Learning to draw can be incredibly rewarding, especially when you start with something as charming as a bee.
I remember the joy of my first successful bee sketch, how a few simple shapes transformed into a buzzing friend.
This guide will walk you through each line and curve, making the process easy and enjoyable for everyone.
Quick Overview
You’re about to create your very own buzzing masterpiece. This guide breaks down the bee’s structure into manageable, easy-to-follow steps.
By the end, you’ll have a delightful bee drawing and a greater understanding of basic drawing principles.
- Time needed: 30-45 minutes
- Difficulty: Beginner
- What you’ll need: Pencil, eraser, paper, optional: black pen, colored pencils/markers
Step-by-Step Instructions
Step 1: Lay Down the Basic Shapes
Begin by lightly sketching three overlapping ovals for the bee’s main body. The smallest oval will be the head, slightly larger for the thorax (middle section), and the largest for the abdomen (rear section).
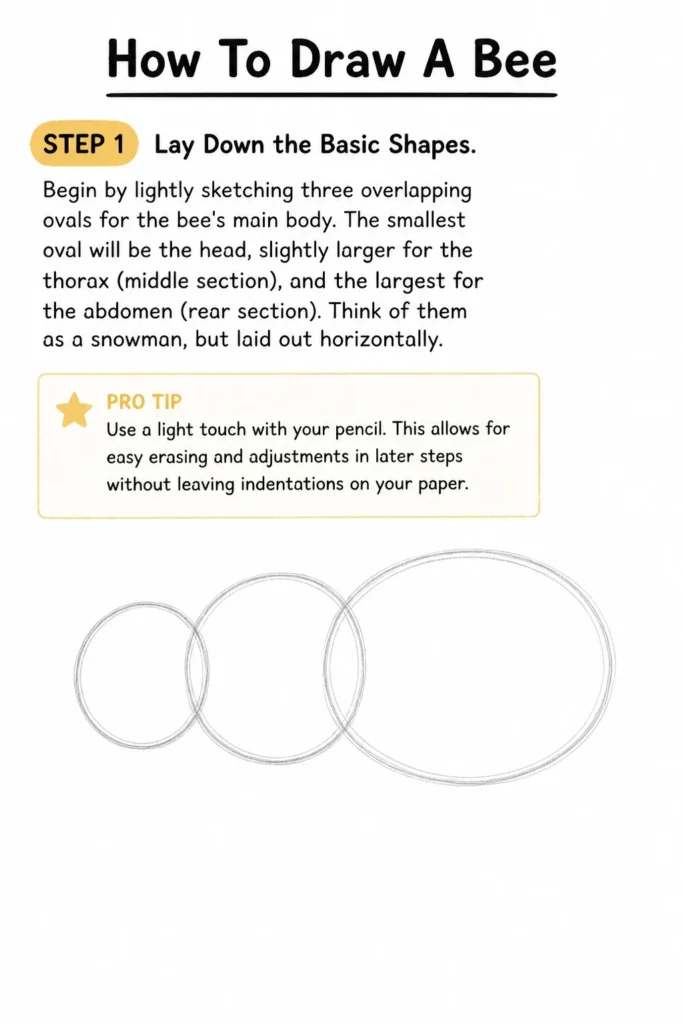
Think of them as a snowman, but laid out horizontally. Keep these lines very light, as they are just a guide.
Pro Tip: Use a light touch with your pencil. This allows for easy erasing and adjustments in later steps without leaving indentations on your paper.
Step 2: Connect the Body and Add Antennae
Smoothly connect the three ovals you’ve drawn, creating a more cohesive, organic body shape for your bee. Gently erase any harsh overlapping lines.
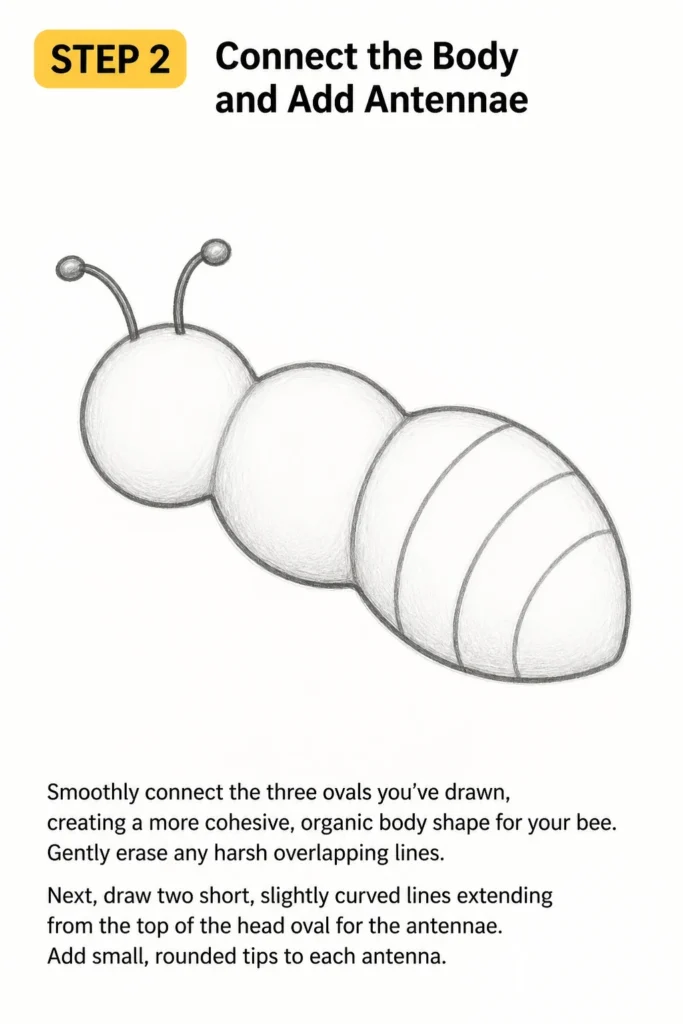
Next, draw two short, slightly curved lines extending from the top of the head oval for the antennae. Add small, rounded tips to each antenna.
Step 3: Sketch the Wings
Draw two sets of wings on the bee’s thorax. Bees have two pairs: a larger set and a smaller set.
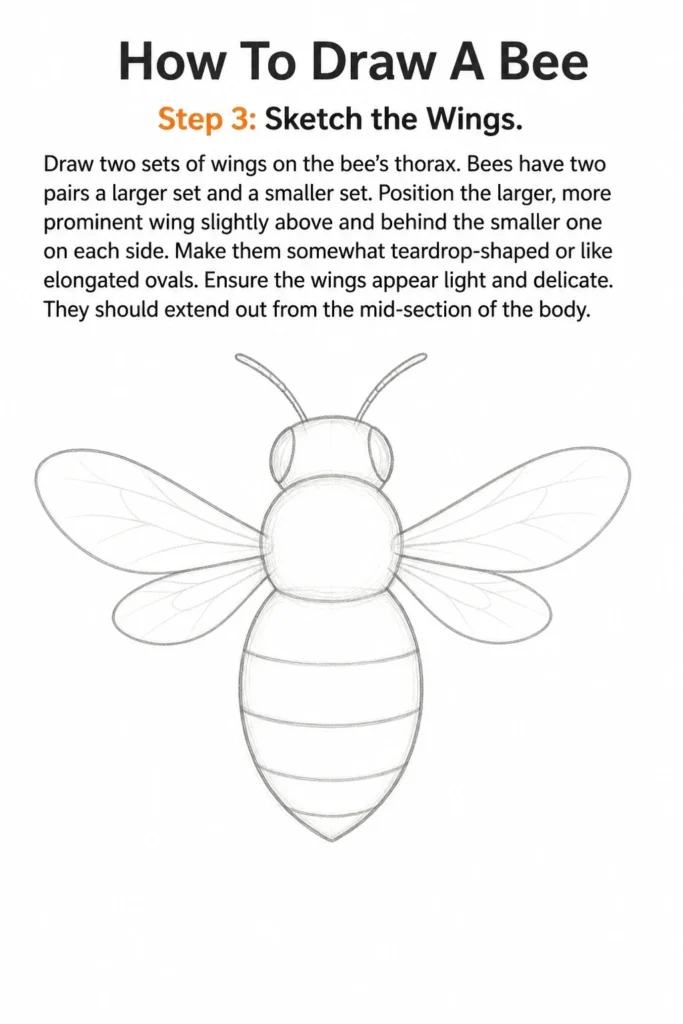
Position the larger, more prominent wing slightly above and behind the smaller one on each side. Make them somewhat teardrop-shaped or like elongated ovals.
Ensure the wings appear light and delicate. They should extend out from the mid-section of the body.
Step 4: Add the Legs
Illustrate three pairs of legs, one pair for each segment of the thorax. Bees have six legs in total.
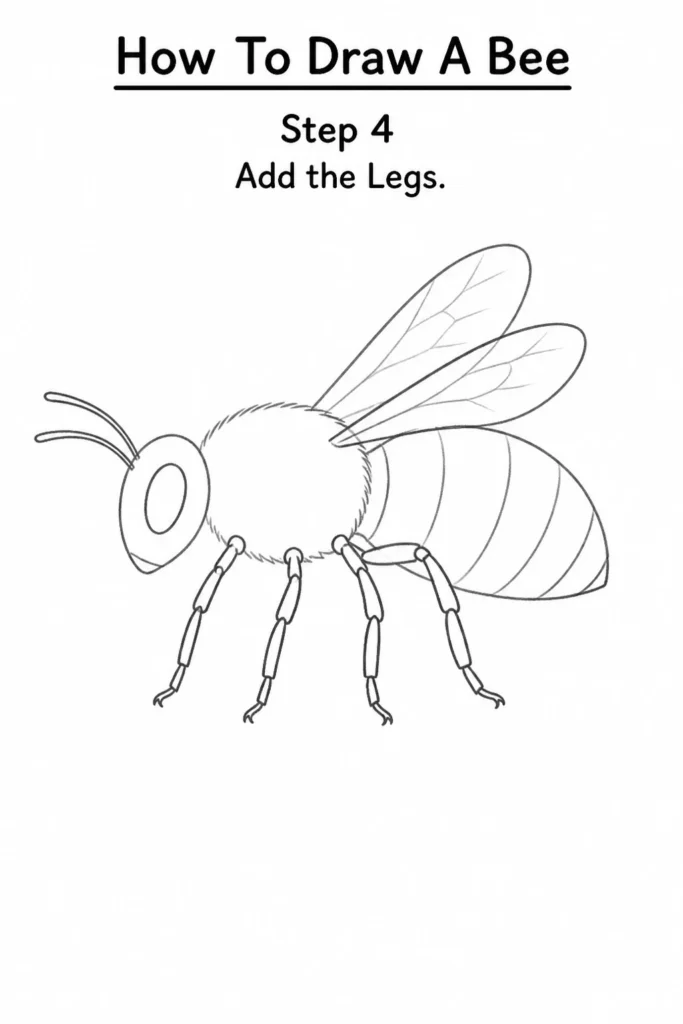
Draw them as simple, jointed lines extending downwards from the body. Show a slight bend at the “knee” and “foot” areas.
Keep the legs relatively thin and not overly detailed at this stage.
Step 5: Define Facial Features
Focus on the bee’s head. Draw two prominent, oval-shaped compound eyes on either side of the head.
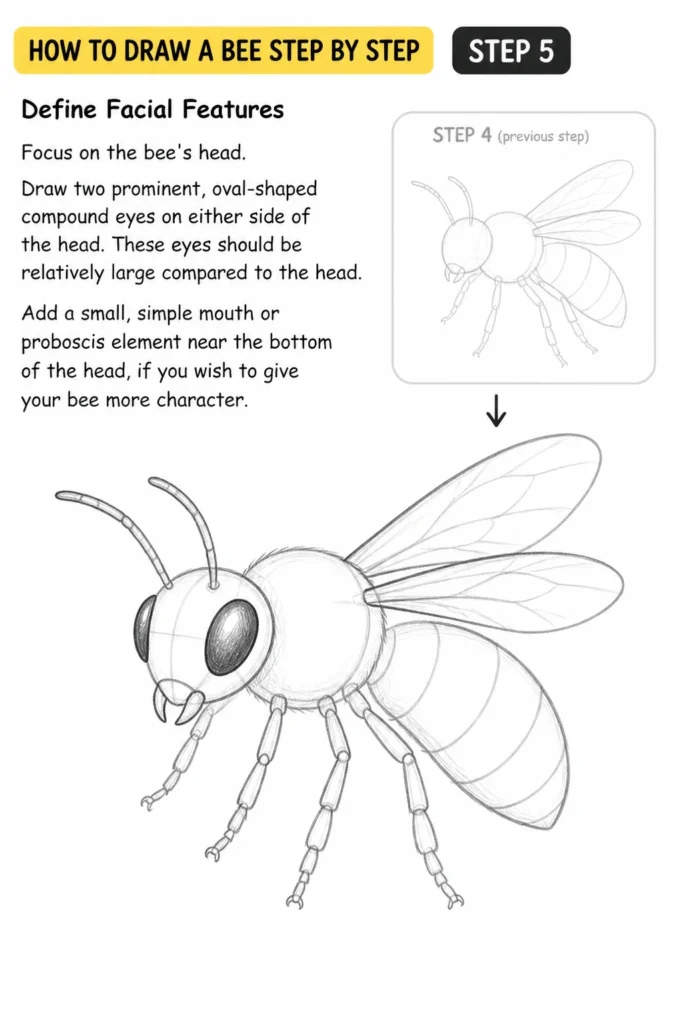
These eyes should be relatively large compared to the head. Add a small, simple mouth or proboscis element near the bottom of the head, if you wish to give your bee more character.
Step 6: Introduce Stripes and Details
Sketch the characteristic black and yellow stripes on the bee’s abdomen. These usually alternate and curve with the shape of the body.
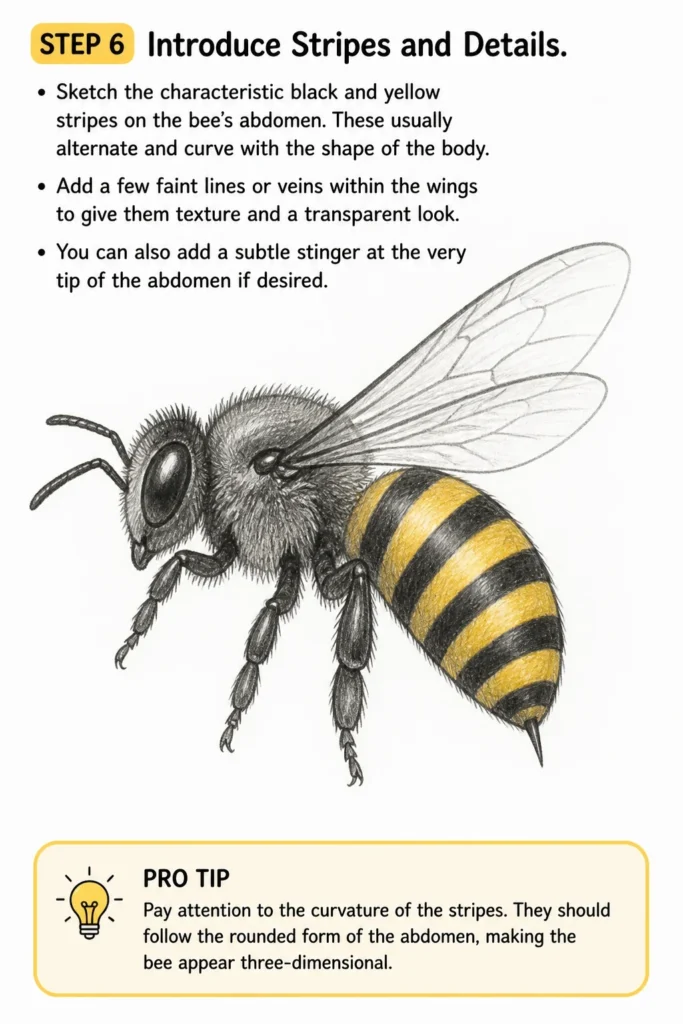
Add a few faint lines or veins within the wings to give them texture and a transparent look. You can also add a subtle stinger at the very tip of the abdomen if desired.
Pro Tip: Pay attention to the curvature of the stripes. They should follow the rounded form of the abdomen, making the bee appear three-dimensional.
Step 7: Refine Your Lines and Erase Guides
Go over your preferred sketch lines with a slightly firmer hand or a darker pencil. This will solidify the outline of your bee.
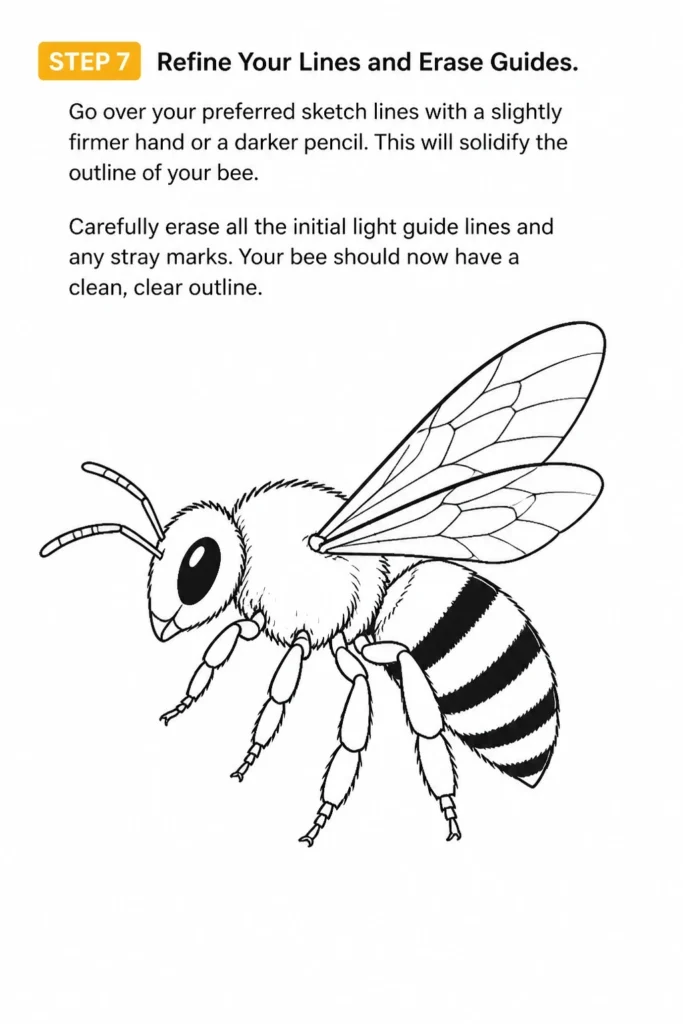
Carefully erase all the initial light guide lines and any stray marks. Your bee should now have a clean, clear outline.
Step 8: Add Color and Shading (Optional)
Bring your bee to life with color. Use yellow for the stripes and black for the alternating sections, head, and legs.
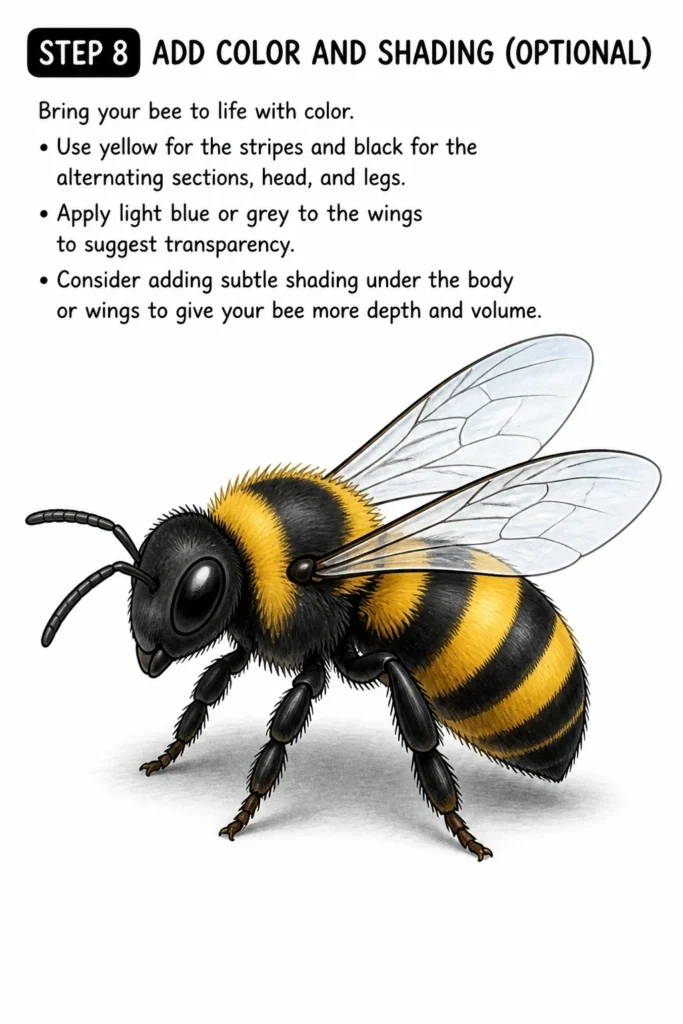
Apply light blue or grey to the wings to suggest transparency. Consider adding subtle shading under the body or wings to give your bee more depth and volume.
Common Mistakes to Avoid
Disproportionate Body Parts
A common pitfall is making the head too large or the abdomen too small. This can make your bee look less like an actual bee and more like a cartoon character, unless that is your specific intention.
Always start with light guide shapes to establish good proportions from the beginning. Compare the sizes of the head, thorax, and abdomen frequently as you draw.
Flat, Lifeless Wings
Drawing wings as simple, flat shapes can make your bee look static. Bees’ wings are delicate and often have a slight curve or angle.
Try to give them a subtle arc and hint at their transparency with light lines or very faint coloring. Consider how they would overlap slightly in nature.
Uneven Stripes
The stripes on a bee’s abdomen follow the natural curve of its body. Drawing them as perfectly straight lines can flatten the bee’s appearance.
Ensure your stripes curve around the abdomen, giving it a rounded, three-dimensional look. Varying the thickness slightly can also add realism.
Over-detailing Too Soon
Jumping straight into tiny details like fur or intricate wing patterns can be overwhelming. It often leads to a messy drawing if the foundational shapes aren’t solid.
Always establish the basic form and proportions first. Add details only after the main structure is clearly defined and refined.
Troubleshooting
My Bee Looks Lopsided
If your bee appears unbalanced, it often means the initial guide ovals weren’t symmetrical or aligned correctly. Go back to Step 1 and re-evaluate your basic shapes.
Use very light lines and check the balance of the head, thorax, and abdomen against each other. Sometimes flipping your paper upside down can help you spot inconsistencies.
My Wings Don’t Look Transparent
Achieving a transparent look for wings can be tricky. Avoid drawing heavy, dark outlines for them. Instead, use very light pencil strokes for the veins.
If coloring, use a very pale blue, grey, or even just leaving them white with light shading can suggest transparency. Don’t press too hard with your coloring medium.
I Can’t Get the Stripes Even
Evenness in stripes comes with practice. Try sketching very light, curved guidelines across the abdomen before drawing the actual stripes.
You can also start by drawing the middle stripe first, then work outwards, ensuring they maintain similar widths and spacing. Remember, slight variations add character.
Key Takeaways
- Always start with basic, light geometric shapes to establish proportion.
- Build the bee’s body by smoothly connecting these initial guide shapes.
- Pay attention to the delicate nature of wings and the curvature of stripes.
- Refine your lines and erase construction marks only after the main form is complete.
- Practice makes perfect; don’t be afraid to draw multiple bees.
- Adding color and subtle shading can bring your drawing to life.
Frequently Asked Questions
Is it hard to draw a bee?
Drawing a bee is quite approachable, especially if you break it down into simple shapes. It’s often recommended for beginners because its core components are easy to visualize and sketch.
With practice and patience, anyone can draw a charming bee.
What materials are best for drawing bees?
You really only need a pencil (HB or 2B is great), an eraser, and paper to start. For more advanced work, you might enjoy using a fine-liner pen for outlining and colored pencils or watercolors for adding vibrant color.
Any basic art supplies will do for your first attempts.
How can I make my bee drawing more unique?
To add uniqueness, consider varying the bee’s pose, perhaps mid-flight or landing on a flower. You can also experiment with different expressions for its eyes, or add details like pollen sacs on its legs.
Playing with shading and lighting can also create a distinct mood.
Should I draw the bee’s fuzzy texture?
Adding a fuzzy texture can make your bee more realistic. You can achieve this by using very short, light, hair-like strokes on the head and thorax, following the contours of the body.
Don’t overdo it, as too much fuzz can make the bee look messy. A subtle suggestion is often enough.
Our Top Recommended Finds
- Graphite Sketch Pencils Set: A good set offers various lead hardnesses, perfect for light sketching and darker outlines.
- Eraser Kit (Kneaded & Vinyl): A kneaded eraser is fantastic for lifting graphite without smudging, while a vinyl eraser handles harder marks.
- Sketchbook (Acid-Free Paper): High-quality paper holds pencil better and resists yellowing over time, preserving your artwork.
Your Next Artistic Flight
You’ve successfully drawn a bee, transforming simple shapes into a lively creature. This journey from basic outlines to detailed features builds fundamental drawing skills.
Now, consider drawing your bee in a new context, perhaps buzzing around a flower or interacting with other elements.
Keep experimenting with different angles, colors, and textures. Every drawing is a step forward in your artistic development. Grab your pencil and create another one today!
& Painting
No rigid rules or pretension. Just practical guides, medium comparisons, and encouraging tips to help you enjoy the drawing & painting process.