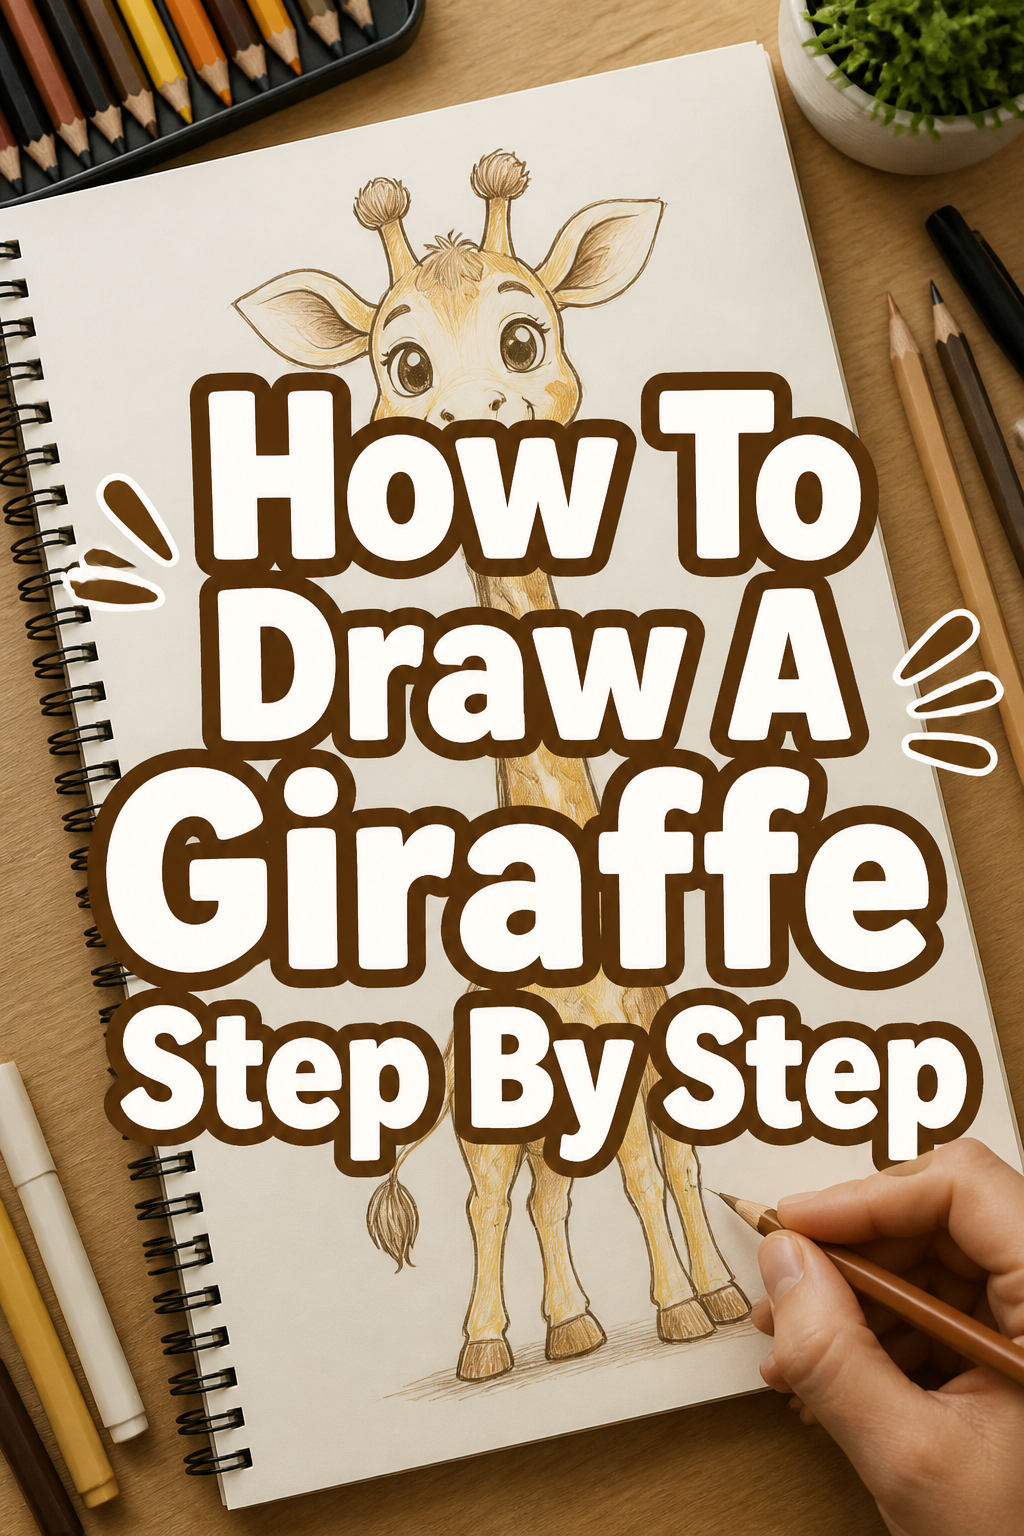
🦒 How To Draw A Giraffe Step By Step

& Painting
No rigid rules or pretension. Just practical guides, medium comparisons, and encouraging tips to help you enjoy the drawing & painting process.
I remember my first attempt at drawing a giraffe; it looked more like a lumpy horse with a stretched neck.
It took practice and understanding their unique anatomy to get it right.
This guide shares the practical steps and insights I’ve gathered to help you create a beautiful giraffe drawing.
Quick Overview
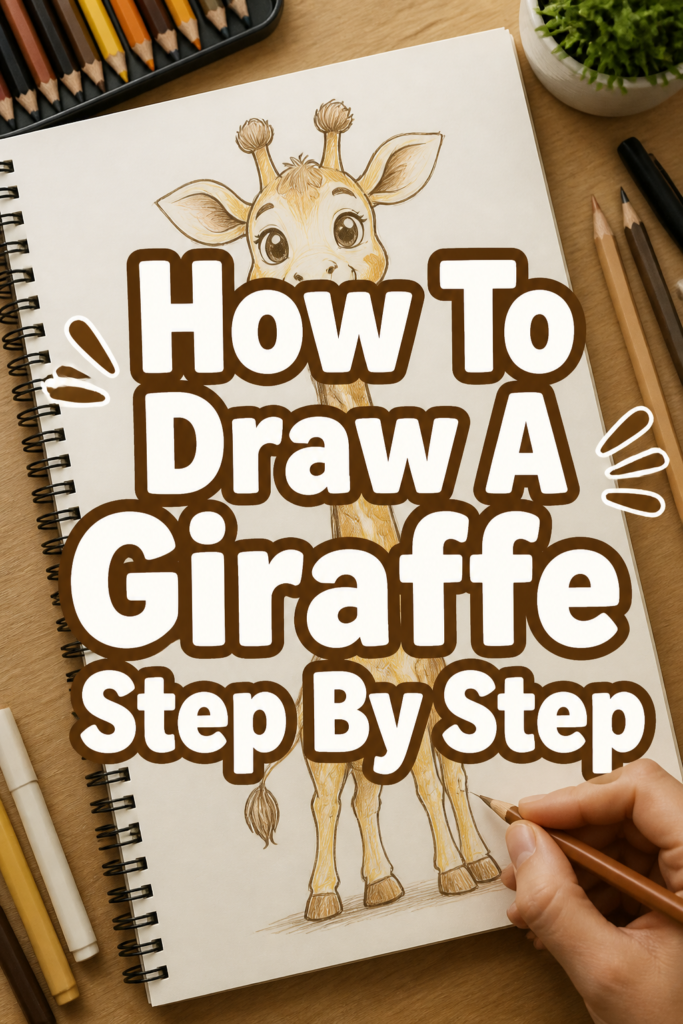
You’re about to embark on a delightful artistic journey. By the end, you’ll have a charming giraffe drawing, complete with its distinctive features and graceful stance. This process focuses on building from basic shapes to intricate details.
- Time needed: 45-60 minutes
- Difficulty: Intermediate
- What you’ll need: Sketching pencils (HB, 2B), eraser, drawing paper, optional reference image
Step-by-Step Instructions
Step 1: Laying Down the Basic Shapes
Begin by lightly sketching the fundamental forms of your giraffe. Think of its body as two main ovals. One larger oval will represent the torso, and a slightly smaller, more elongated oval will be the hips.
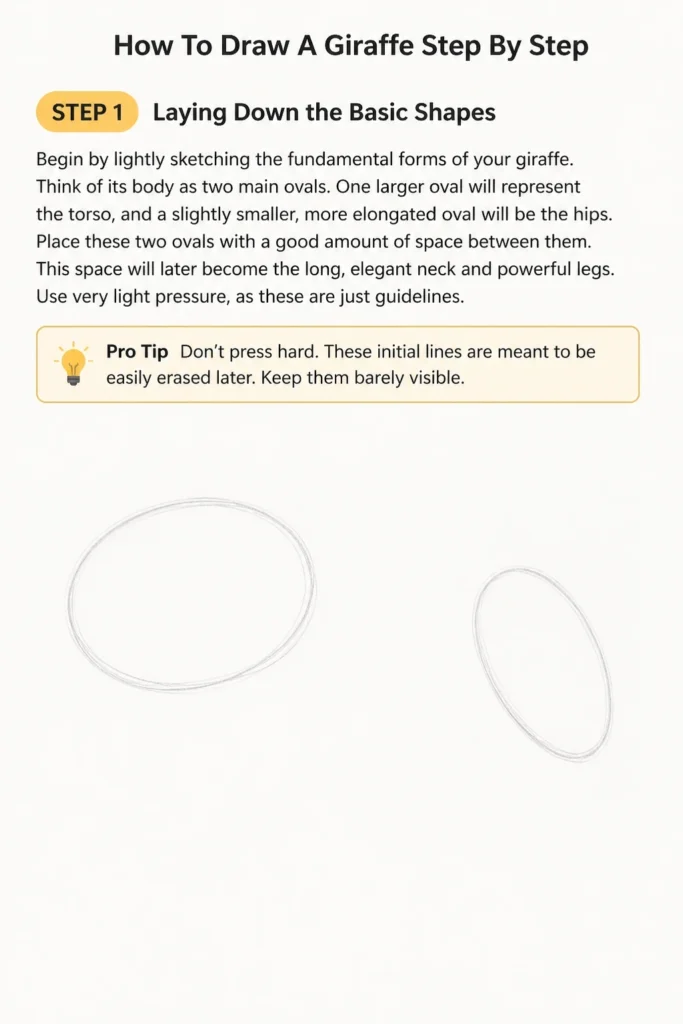
Place these two ovals with a good amount of space between them. This space will later become the long, elegant neck and powerful legs. Use very light pressure, as these are just guidelines.
Pro Tip: Don’t press hard. These initial lines are meant to be easily erased later. Keep them barely visible.
Step 2: Constructing the Neck and Head
Now, connect the body ovals with a long, tapering line for the neck. The neck should be thick at the base, where it meets the torso, and gradually narrow as it reaches the head. Sketch a small, rounded rectangle or a slightly elongated oval for the head at the top of the neck.
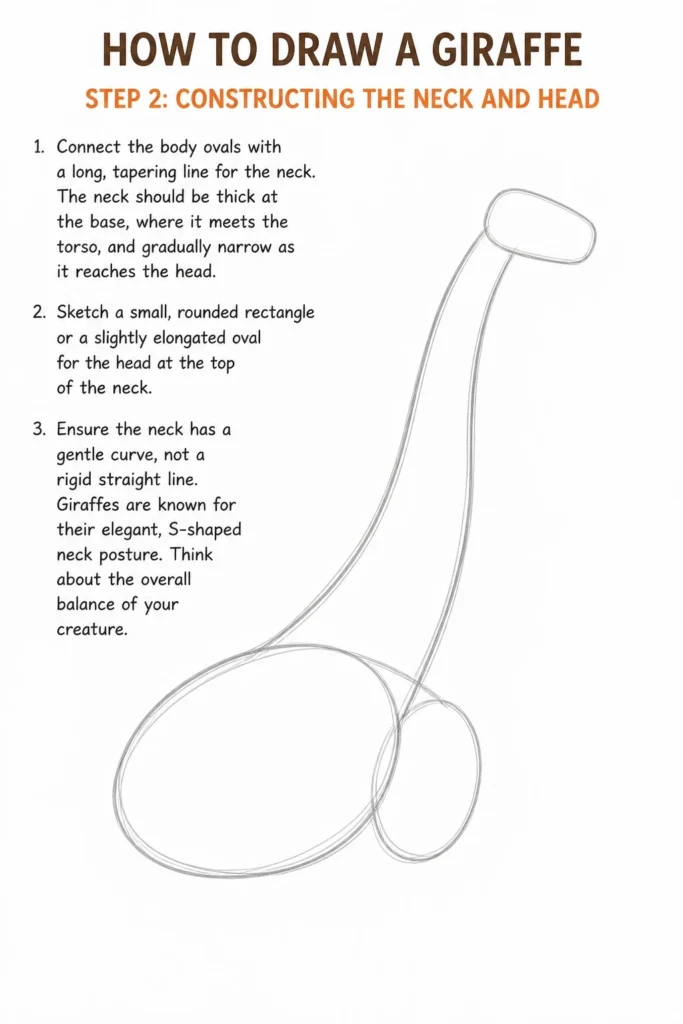
Ensure the neck has a gentle curve, not a rigid straight line. Giraffes are known for their elegant, S-shaped neck posture. Think about the overall balance of your creature.
Step 3: Positioning the Legs
Giraffes have incredibly long legs. From the hip oval, draw two long, parallel lines extending downwards for the back legs. For the front legs, start from the shoulder area of the torso oval.
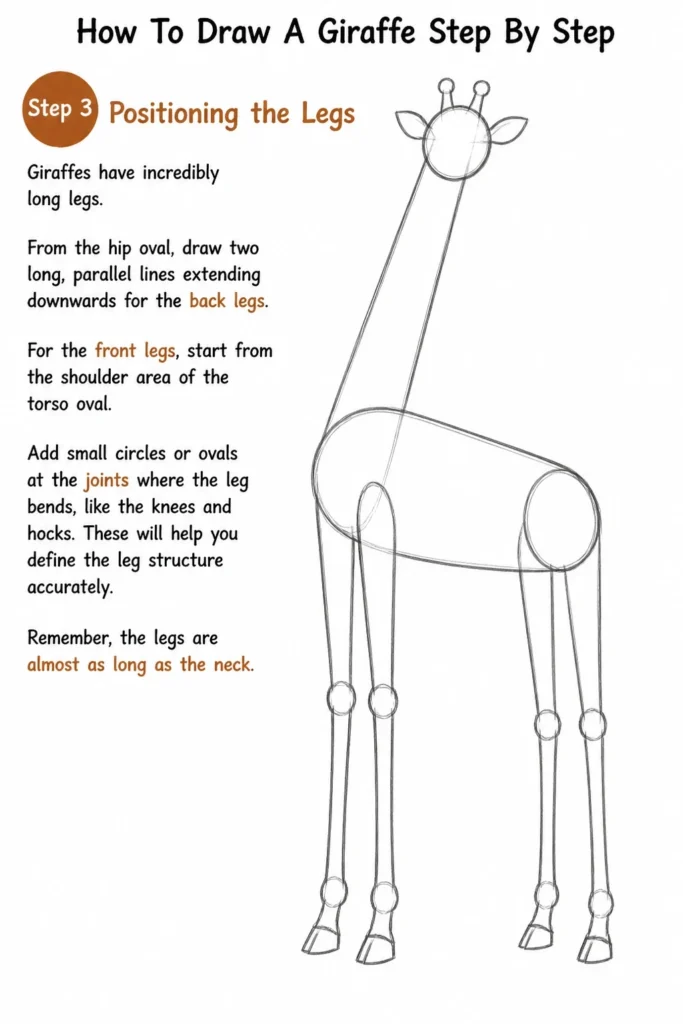
Add small circles or ovals at the joints where the leg bends, like the knees and hocks. These will help you define the leg structure accurately. Remember, the legs are almost as long as the neck.
Step 4: Refining the Head and Facial Features
Let’s bring the head to life. On the small oval you drew for the head, sketch a slightly longer, narrower shape for the muzzle. This will be the front part of the giraffe’s face.
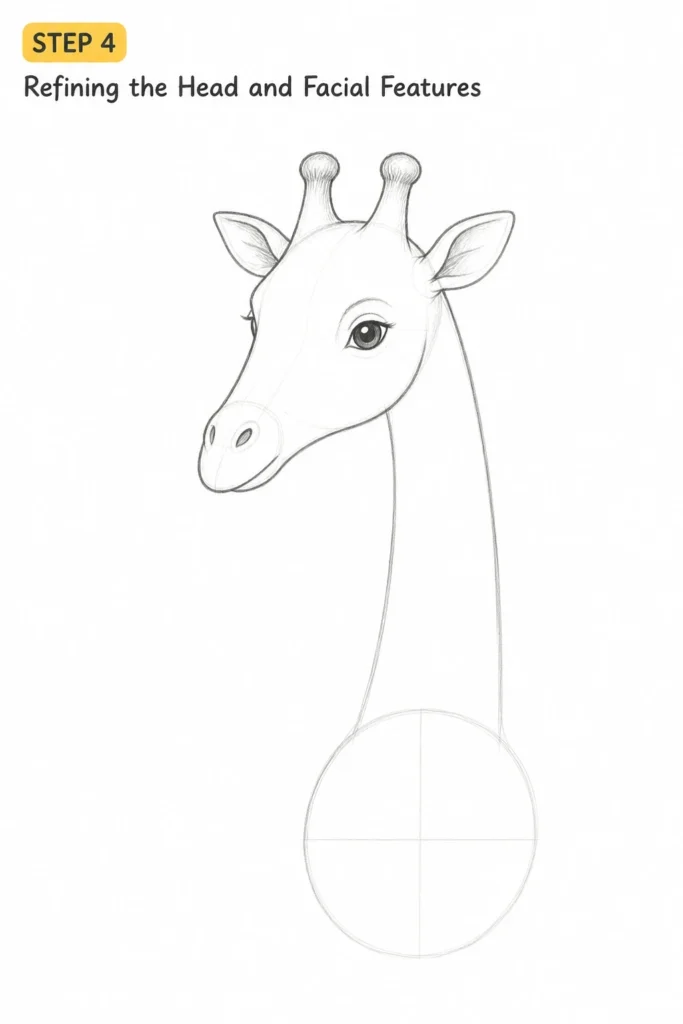
Add two small, leaf-like shapes for the ears on either side of the head. Then, draw the ossicones – those distinctive horn-like structures – on top of the head. They typically have a rounded, club-like appearance.
Sketch a small eye towards the front of the head, and tiny nostrils on the muzzle. Give the giraffe a gentle, observant expression.
Step 5: Detailing the Legs and Hooves
Go back to the leg guidelines and start adding muscle definition. The legs aren’t perfectly straight; they have subtle curves and bulges, especially around the joints. Thicken the lines to give them form.
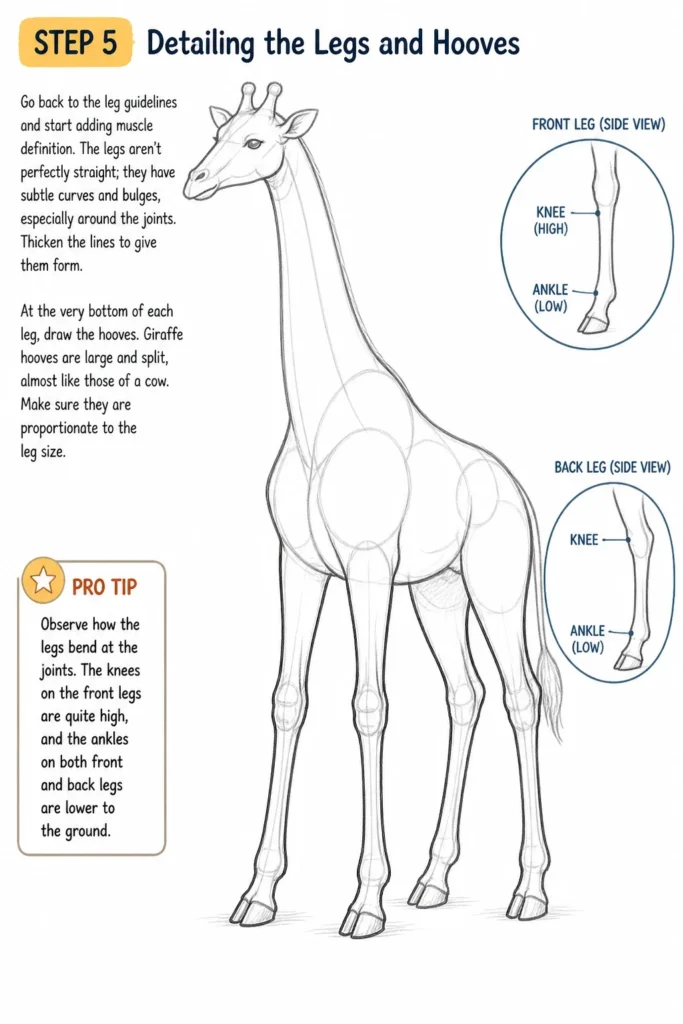
At the very bottom of each leg, draw the hooves. Giraffe hooves are large and split, almost like those of a cow. Make sure they are proportionate to the leg size.
Pro Tip: Observe how the legs bend at the joints. The “knees” on the front legs are quite high, and the “ankles” on both front and back legs are lower to the ground.
Step 6: Adding the Mane and Tail
Giraffes have a short, bristly mane that runs down the back of their neck. Use short, upward strokes to suggest this mane. It doesn’t need to be very prominent.
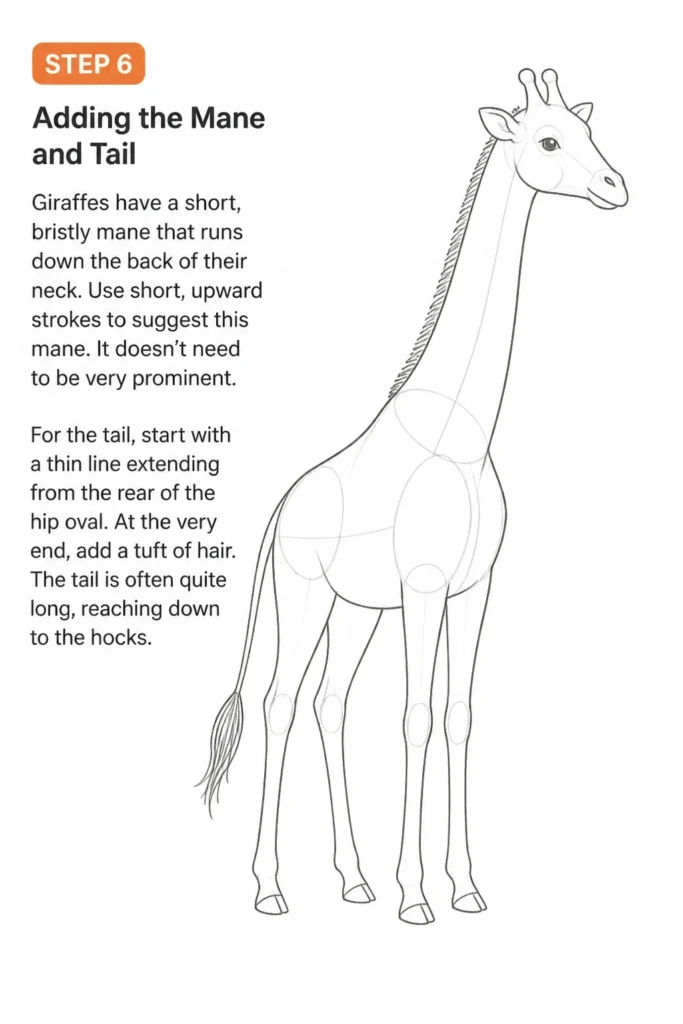
For the tail, start with a thin line extending from the rear of the hip oval. At the very end, add a tuft of hair. The tail is often quite long, reaching down to the hocks.
Step 7: Outlining and Erasing
Now that you have all your basic shapes and features in place, it’s time to refine your drawing. Use a slightly darker pencil (like a 2B) to go over the lines you want to keep. Make these lines smoother and more confident.
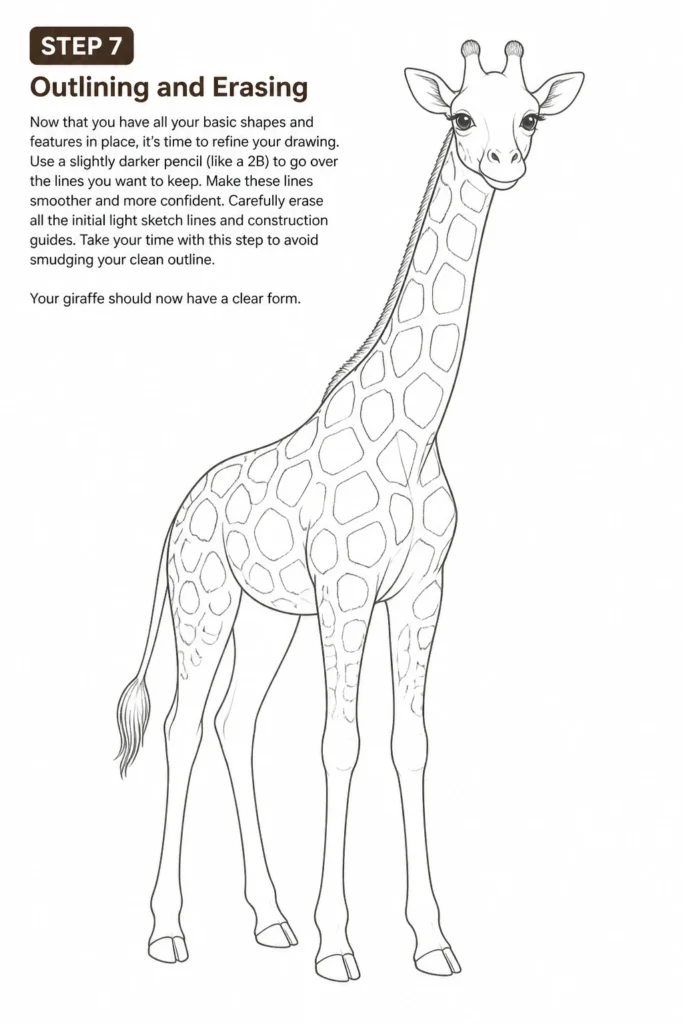
Carefully erase all the initial light sketch lines and construction guides. Take your time with this step to avoid smudging your clean outline. Your giraffe should now have a clear form.
Step 8: Applying Patches and Shading
The most iconic feature of a giraffe is its distinctive patch pattern. These patches are irregular and vary in size and shape. Start by lightly sketching the outlines of these patches all over the body, neck, and even some on the legs.
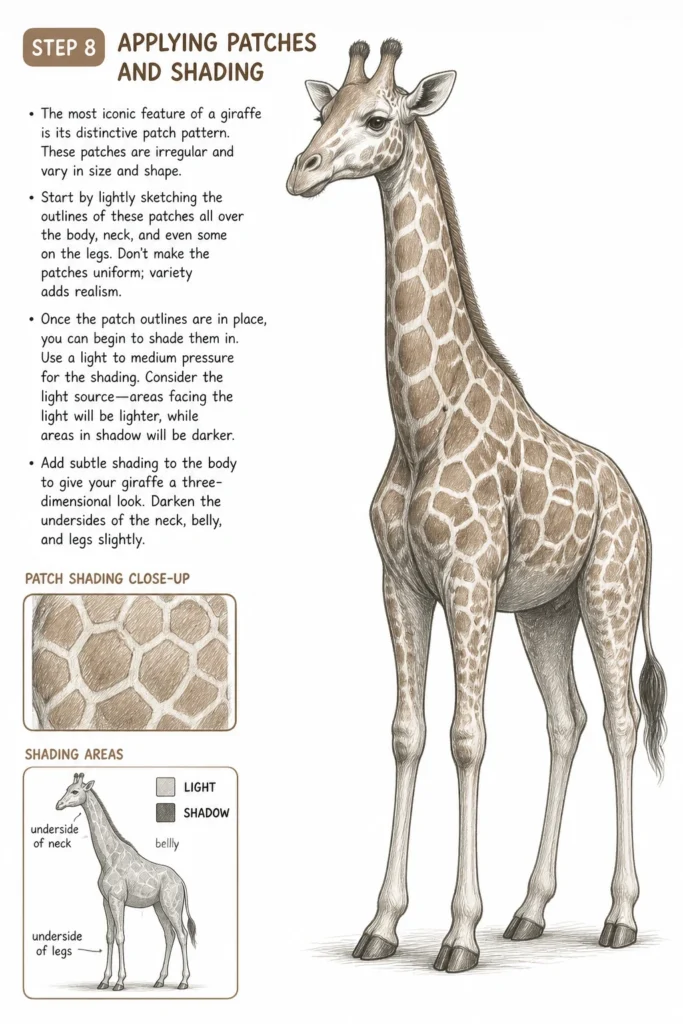
Don’t make the patches uniform; variety adds realism. Once the patch outlines are in place, you can begin to shade them in. Use a light to medium pressure for the shading.
Consider the light source: areas facing the light will be lighter, while areas in shadow will be darker. Add subtle shading to the body to give your giraffe a three-dimensional look. Darken the undersides of the neck, belly, and legs slightly.
Step 9: Final Touches and Details
Review your drawing for any areas that need refinement. You might want to add more texture to the mane and tail tuft. Darken the eyes and nostrils to make them stand out.
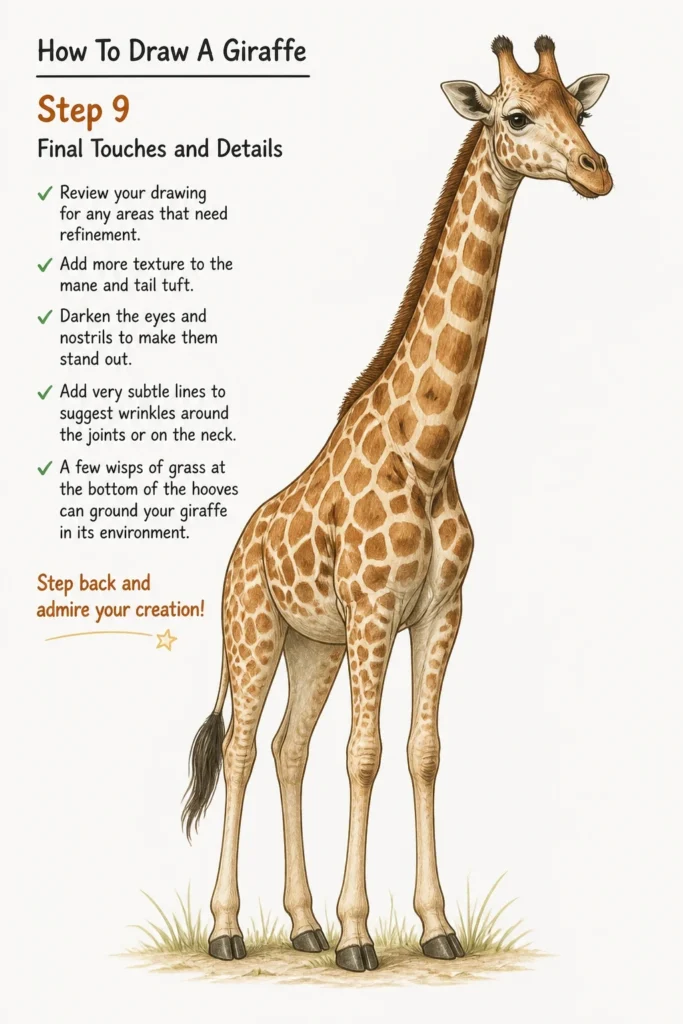
Add very subtle lines to suggest wrinkles around the joints or on the neck. A few wisps of grass at the bottom of the hooves can ground your giraffe in its environment. Step back and admire your creation!
Common Mistakes to Avoid
Disproportionate Neck
Many beginners draw the giraffe’s neck too short or too thin. This makes the giraffe look less like itself and more like a horse with a slightly elongated neck. Remember, the neck is a defining feature and should be substantial, both in length and thickness, to support the head. Always compare its length to the body and legs.
Flat Patches
If the patches are drawn as perfectly geometric shapes or are all the same size, the giraffe can look unnatural. Giraffe patches are organic, irregular, and wrap around the body’s contours. Vary their size and shape and ensure they follow the form of the animal, not just sit flat on the surface.
Stiff Pose
Drawing a giraffe in a rigid, straight-legged pose can make it look lifeless. Giraffes, despite their size, are graceful animals. Introduce subtle curves in the neck and a slight bend in the legs to convey movement or a relaxed posture. Even a slight lean can add dynamism.
Ignoring Reference
While drawing from imagination is great, especially for practice, neglecting to look at real giraffe photos can lead to inaccuracies. Reference images help you understand their unique bone structure, muscle definition, and how their patches naturally flow. Use a few different photos to get a comprehensive understanding.
Troubleshooting
My drawing looks flat.
A common reason for flatness is a lack of dimension through shading. To fix this, identify your light source. Then, add darker shading to the areas that would naturally be in shadow, such as the underside of the neck, belly, and the back of the legs. Using a harder pencil (like HB) for lighter areas and a softer one (like 2B or 4B) for darker areas can help create depth.
The legs look wobbly.
Wobbly legs often stem from inconsistent line weight or a lack of understanding of the underlying bone structure. To strengthen them, ensure your leg lines are firm and continuous. Revisit Step 5 and focus on the joints; drawing small circles for joints before connecting them with lines can help create more stable and anatomically correct limbs. Using a straight edge lightly to check vertical alignment can also be helpful.
I can’t get the patches right.
The patch pattern can be tricky. Instead of trying to replicate an exact pattern, focus on the irregularity of giraffe patches. Start by sketching very light, organic shapes across the body. Don’t worry about perfection; aim for variety in size and form. Gradually fill them in, remembering that some patches might be lighter or darker than others, and they should follow the contours of the body. Practice drawing just patches on a separate sheet to get a feel for them.
Key Takeaways
- Always start with light, basic shapes to establish the giraffe’s overall proportions.
- Pay close attention to the neck’s length and thickness, as it’s a defining characteristic.
- Refine the head by carefully adding the muzzle, ears, and distinct ossicones.
- Give your giraffe dynamic legs by understanding their joint placement and adding subtle muscle.
- Embrace the natural irregularity of giraffe patches; avoid making them too uniform.
- Use shading to add depth and make your giraffe appear three-dimensional.
Frequently Asked Questions
What kind of paper is best for drawing a giraffe?
For sketching, a smooth or slightly textured drawing paper works well. Bristol board offers a very smooth surface, while a medium-tooth sketch paper allows for easier blending of graphite. Avoid very rough paper, as it can make fine details challenging.
Should I use color for my giraffe drawing?
While this guide focuses on graphite, you can absolutely add color! Once your graphite drawing is complete and outlines are firm, you can use colored pencils, pastels, or even watercolors. Just be mindful of how the colors layer over the graphite.
How can I make my giraffe drawing unique?
To make your drawing unique, consider different poses – perhaps a giraffe bending to drink, or interacting with another giraffe. Experiment with various patch patterns, or add a simple background like acacia trees or a savanna landscape. Each artist’s hand has a unique touch.
Is it okay to trace to learn?
Tracing can be a useful tool for understanding proportions and muscle structure, especially when starting out. However, don’t rely on it entirely. Use tracing as a stepping stone to build confidence, then challenge yourself to sketch freehand using reference images and the techniques you’ve learned here.
Our Top Recommended Finds
- Sketching Pencil Set (HB, 2B, 4B): Having a range of graphite hardness allows for varied line weights and shading, essential for adding depth.
- Kneaded Eraser: This soft, pliable eraser lifts graphite without smudging and can be molded into fine points for precise corrections.
- Quality Sketchbook: A good sketchbook with durable paper encourages regular practice and keeps all your artistic progress in one place.
Your Artistic Adventure Awaits
Drawing a giraffe is a wonderful way to practice proportion, form, and texture. Each step you’ve taken builds your skill and confidence. Don’t be afraid to experiment and personalize your artwork.
Keep practicing, keep observing, and most importantly, keep enjoying the process of creation. Grab your pencil and paper today, and let your imagination roam free on the savanna!
& Painting
No rigid rules or pretension. Just practical guides, medium comparisons, and encouraging tips to help you enjoy the drawing & painting process.