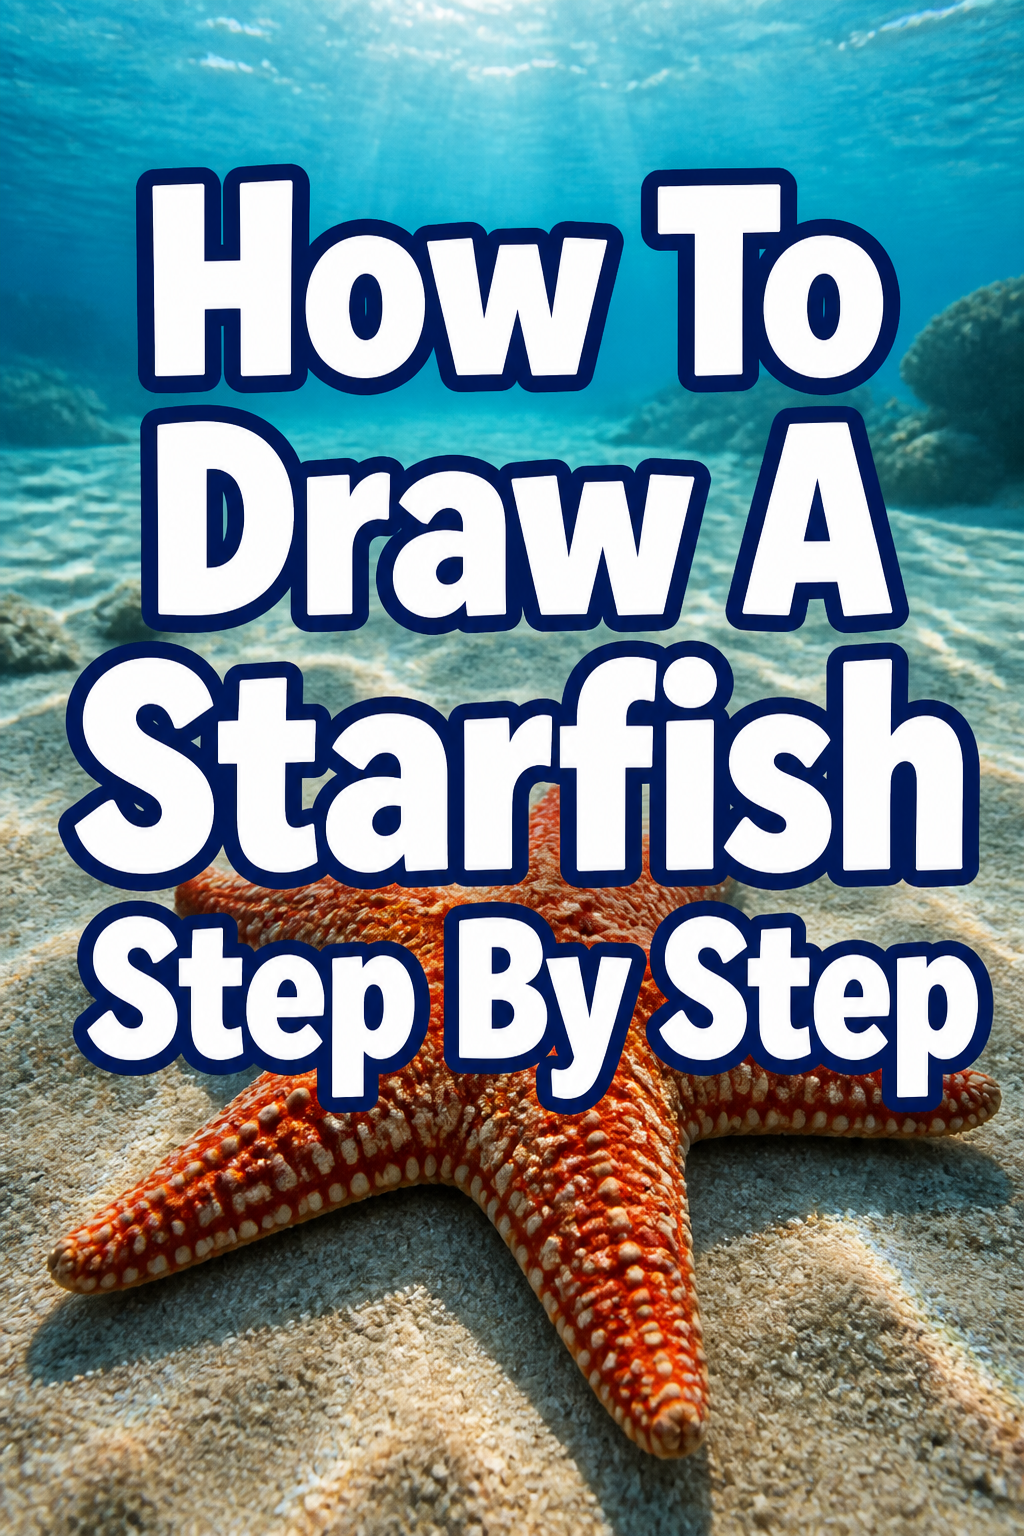
⭐ How To Draw A Starfish Step By Step

& Painting
No rigid rules or pretension. Just practical guides, medium comparisons, and encouraging tips to help you enjoy the drawing & painting process.
Drawing can feel like a magical way to bring the ocean’s wonders to life. I remember the first time I tried to sketch a starfish, fascinated by its unique shape. This guide comes from years of enjoying simple, accessible art.
You’ll discover how easy it is to create your own beautiful marine creature.
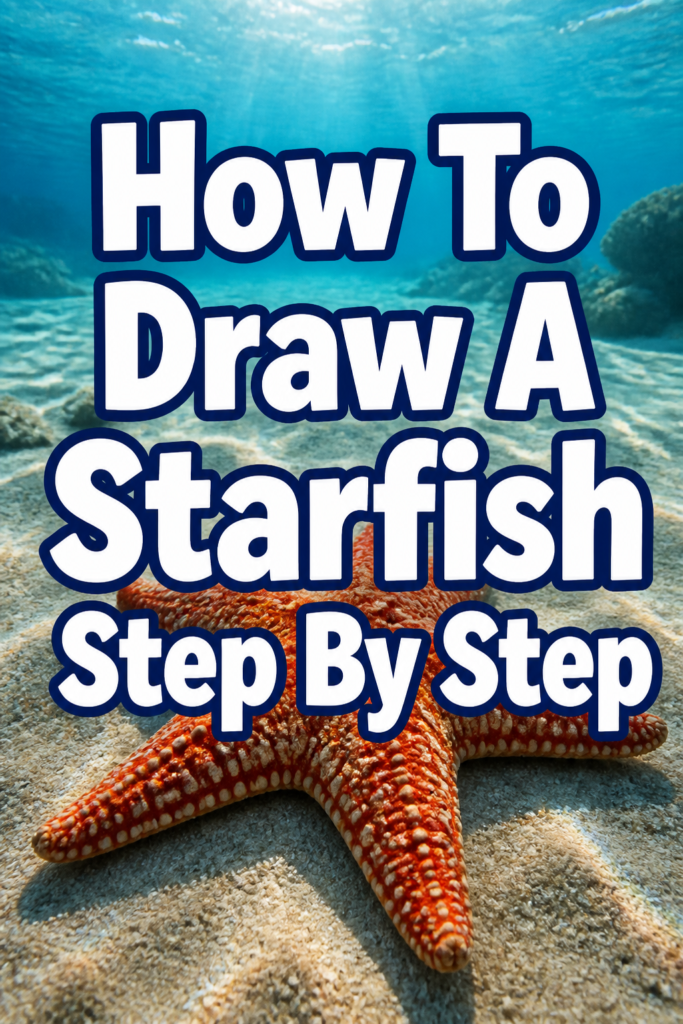
Quick Overview
By following these steps, you’ll learn to draw a charming starfish, complete with its textured skin and iconic arms. It’s a rewarding project that builds fundamental drawing skills.
- Time needed: 20-35 minutes
- Difficulty: Beginner
- What you’ll need: Pencil (HB or 2B), eraser, drawing paper, optional: colored pencils or markers
Step-by-Step Instructions
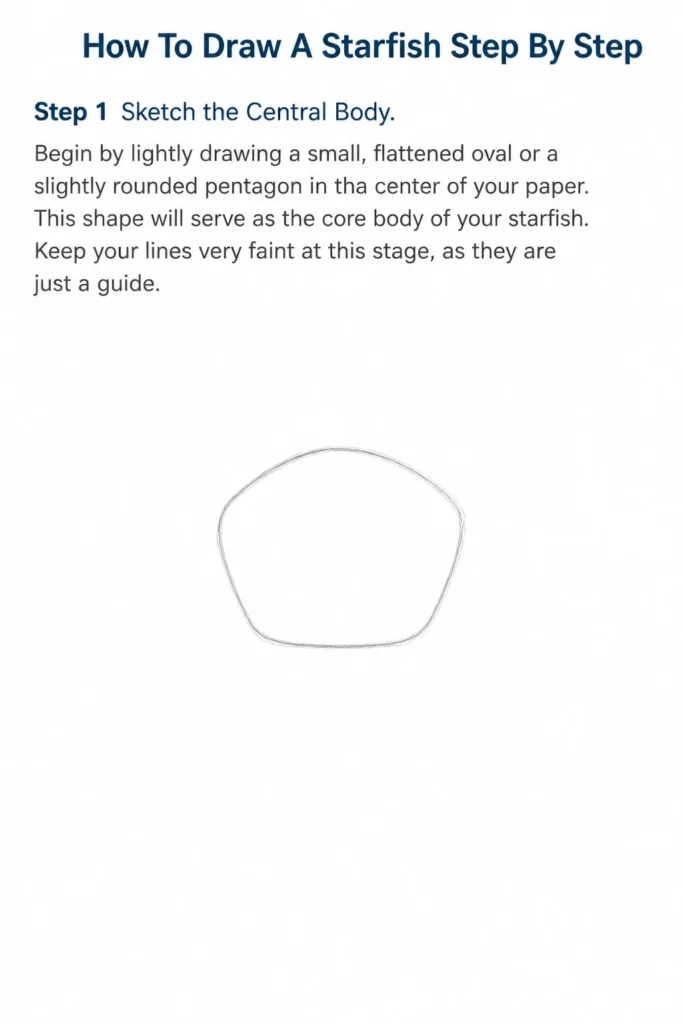
Step 1: Sketch the Central Body
Begin by lightly drawing a small, flattened oval or a slightly rounded pentagon in the center of your paper. This shape will serve as the core body of your starfish. Keep your lines very faint at this stage, as they are just a guide.
Step 2: Add the Five Arms
From the central body, gently extend five arm shapes outwards. Think of these as rounded triangles or blunt ovals. Ensure they are spaced somewhat evenly around the central shape.
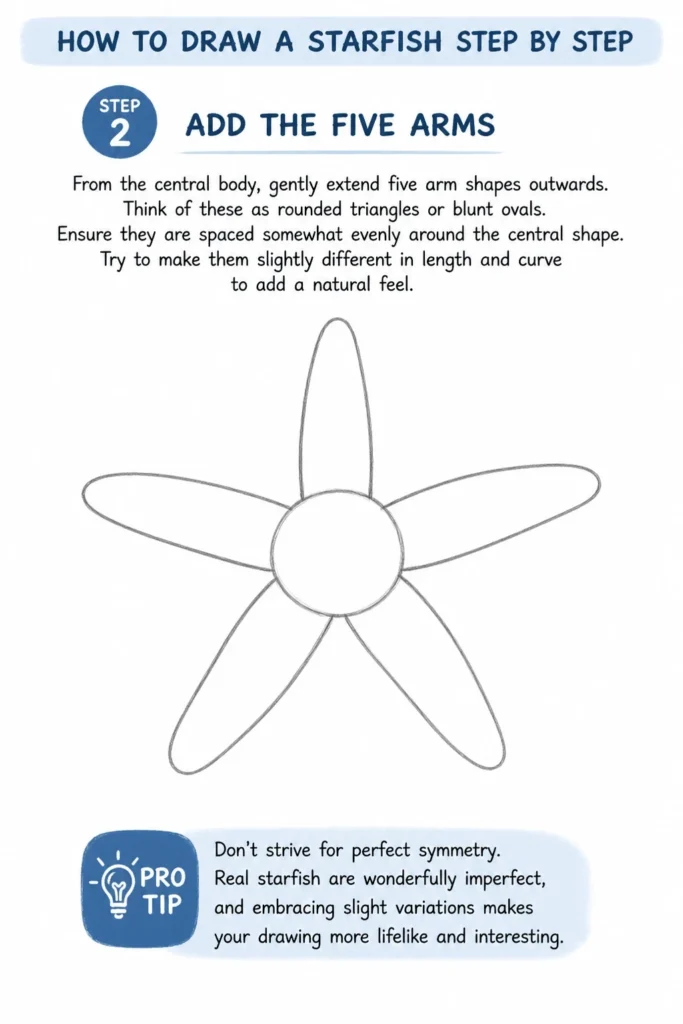
Try to make them slightly different in length and curve to add a natural feel.
Pro Tip: Don’t strive for perfect symmetry. Real starfish are wonderfully imperfect, and embracing slight variations makes your drawing more lifelike and interesting.
Step 3: Define the Arm Shapes
Now, refine the outlines of each arm. Make the lines smoother and more deliberate. Each arm should gradually taper towards a rounded tip.
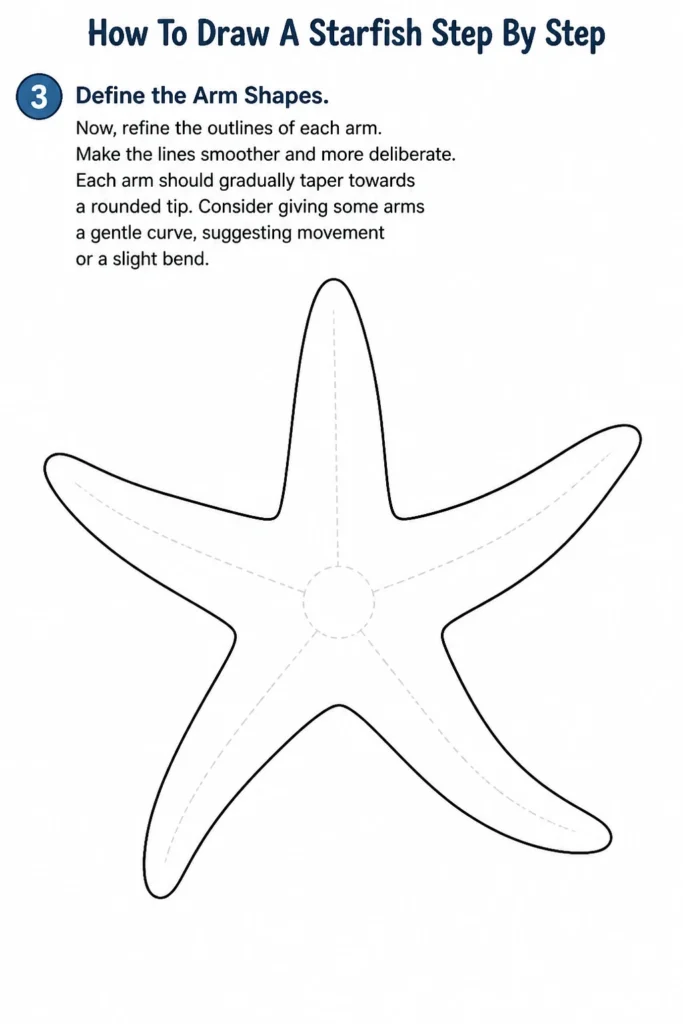
Consider giving some arms a gentle curve, suggesting movement or a slight bend.
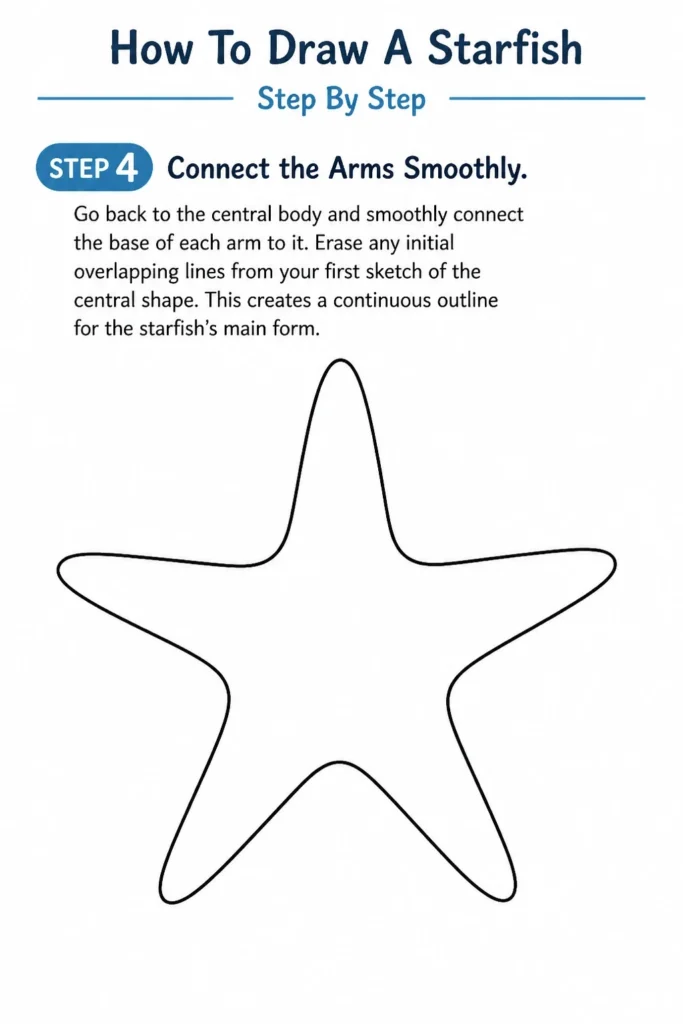
Step 4: Connect the Arms Smoothly
Go back to the central body and smoothly connect the base of each arm to it. Erase any initial overlapping lines from your first sketch of the central shape. This creates a continuous outline for the starfish’s main form.
Step 5: Add Texture and Details
Starfish aren’t smooth; they have fascinating bumpy textures. Draw small circles, dots, or tiny irregular shapes scattered across the surface of your starfish. Concentrate these details along the top surface of the arms and body.
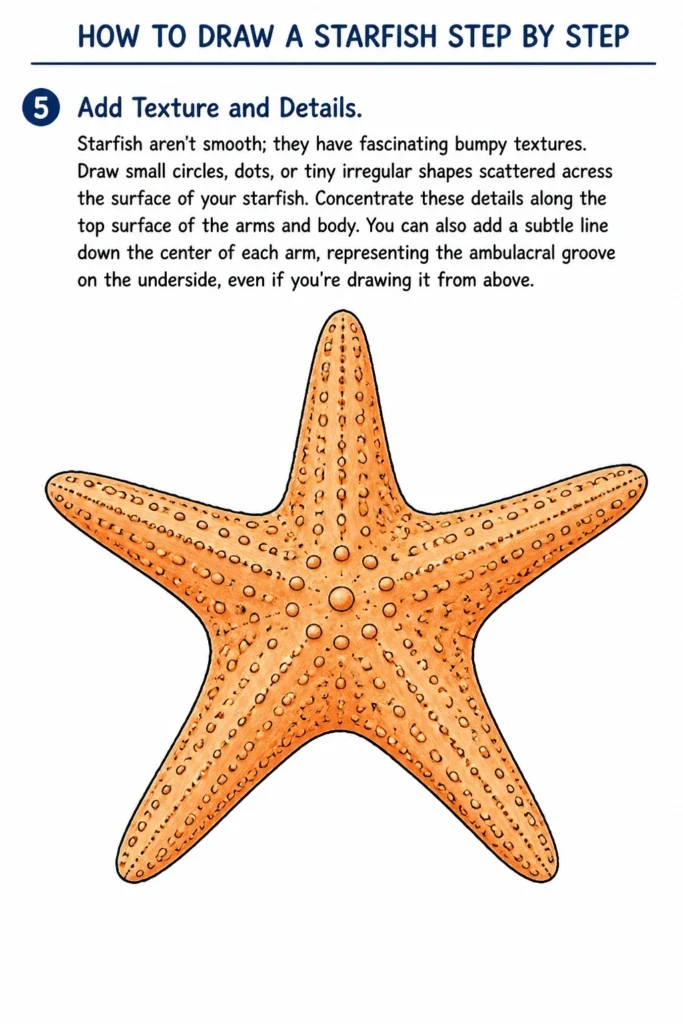
You can also add a subtle line down the center of each arm, representing the ambulacral groove on the underside, even if you’re drawing it from above.
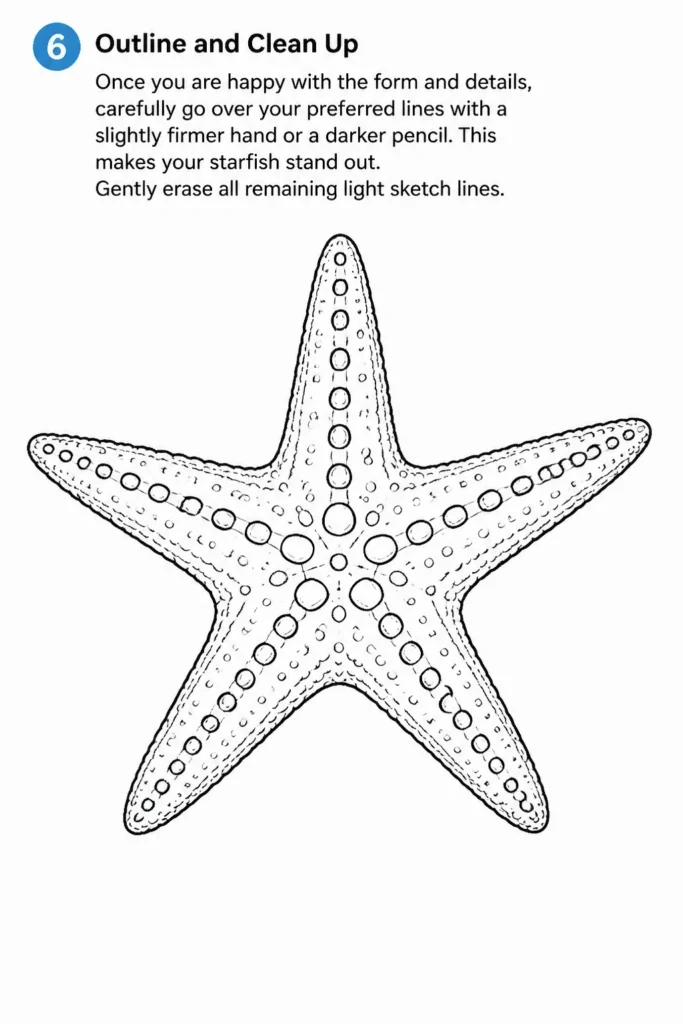
Step 6: Outline and Clean Up
Once you are happy with the form and details, carefully go over your preferred lines with a slightly firmer hand or a darker pencil. This makes your starfish stand out. Gently erase all remaining light sketch lines.
Step 7: Introduce Shading and Depth
To give your starfish dimension, add light shading. Imagine a light source coming from one direction. Shade the areas that would be in shadow, such as the undersides of the arms or where the arms meet the body.
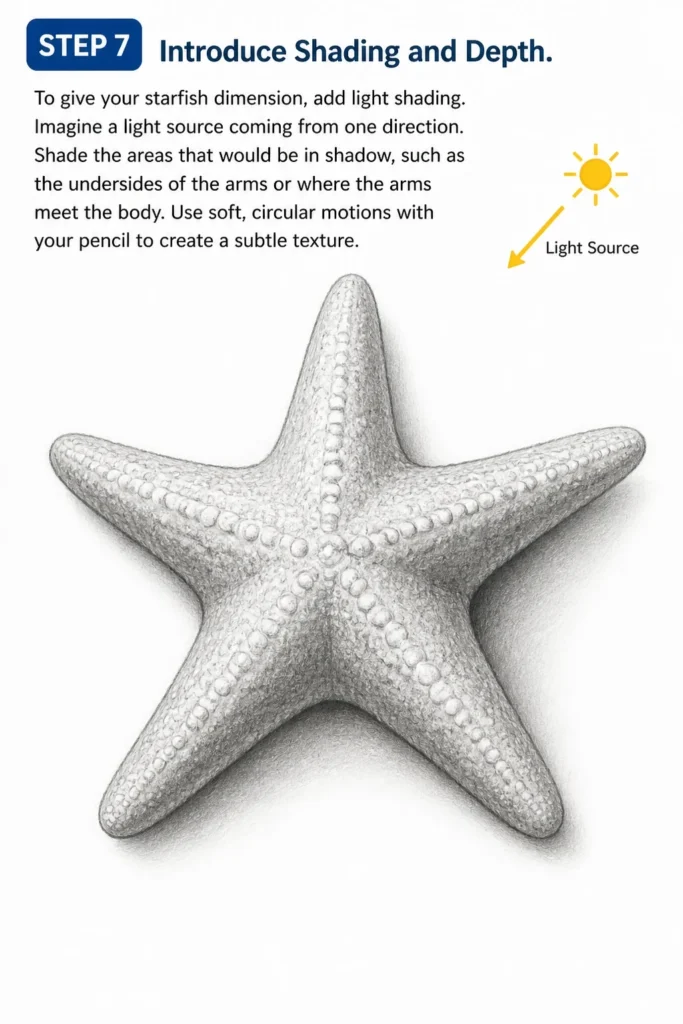
Use soft, circular motions with your pencil to create a subtle texture.
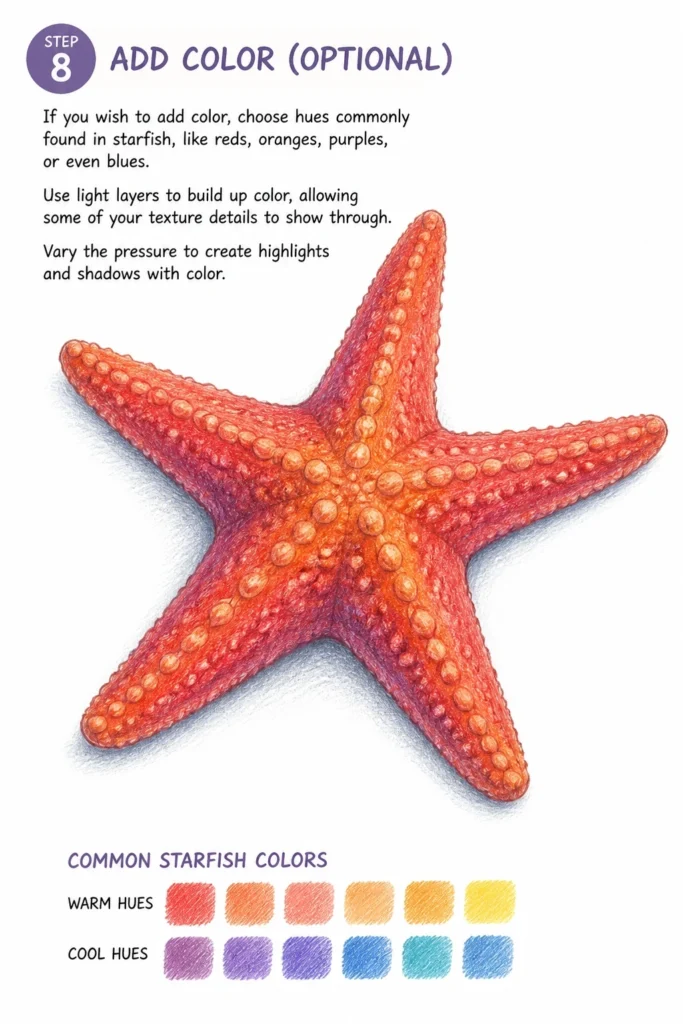
Step 8: Add Color (Optional)
If you wish to add color, choose hues commonly found in starfish, like reds, oranges, purples, or even blues. Use light layers to build up color, allowing some of your texture details to show through. Vary the pressure to create highlights and shadows with color.
Common Mistakes to Avoid
Drawing Arms Too Uniform
Many beginners draw starfish arms as perfectly symmetrical and identical. This often results in a stiff, unnatural appearance. Real starfish have slight variations in arm length and curvature.
Embrace these subtle differences to give your drawing a more organic and believable look. Allow for natural imperfections.
Ignoring Texture
A common oversight is drawing starfish with completely smooth skin. Starfish are known for their rough, often spiky or bumpy surfaces. Without incorporating these textures, the drawing can look flat and less realistic.
Remember to add small dots, bumps, or patterns to convey this characteristic texture.
Over-Shading Too Early
Applying heavy shading too soon can make it difficult to correct mistakes or refine details. Dark lines are hard to erase completely without leaving smudges. Always start with very light sketch lines.
Build up your shading gradually, allowing you to adjust values and refine contours as you progress.
Lack of Dimension
A starfish drawing can sometimes appear flat, without any sense of volume. This often happens when shading is neglected or applied without considering a light source. Flat drawings lack visual interest.
Think about where light would hit and where shadows would fall to create depth and make your starfish pop off the page.
Troubleshooting
My Starfish Looks Flat
If your starfish lacks dimension, it likely needs more deliberate shading. Start by identifying a consistent light source for your drawing. Then, gently shade the areas that would naturally be in shadow, such as the undersides of the arms or the crevices between them.
Use varying pressure with your pencil to create a range of tones, from light to dark. This contrast will help create the illusion of depth.
My Lines Are Too Messy
Messy lines often result from pressing too hard during the initial sketching phase or not using a light hand. To fix this, practice drawing very light, feathery lines that are barely visible. When you’re happy with a line, then you can go over it more firmly.
A good quality eraser can also help clean up stray marks without damaging the paper.
The Arms Don’t Look Natural
If your starfish arms seem rigid or unnatural, try incorporating more curves and subtle bends. Real starfish are flexible and often have slightly curled tips or arms that aren’t perfectly straight. Don’t be afraid to make one arm a little shorter or more curved than another.
Observe reference photos of real starfish to get a better sense of their organic forms and movement.
Key Takeaways
- Start with light, foundational shapes for easy adjustments.
- Embrace asymmetry to create a more natural and realistic starfish.
- Incorporate surface texture with small dots or bumps for authenticity.
- Use gradual shading to add depth and make your drawing three-dimensional.
- Clean up your lines and erase guides for a polished final look.
- Practice observation by looking at real starfish photos for inspiration.
Frequently Asked Questions
What kind of pencil is best for drawing a starfish?
An HB or 2B pencil is excellent for starting. HB provides a good balance for sketching and light lines, while a 2B is slightly softer, allowing for darker lines and easier shading. You can use different grades to vary line weight and tone.
How do I make the texture look realistic?
To create realistic texture, avoid drawing perfect circles or patterns. Instead, use small, irregular dots, dashes, and tiny bumps. Vary their size and density across the starfish’s surface. Layering these small marks adds depth and mimics the natural unevenness.
Should I draw the underside of the starfish?
While this guide focuses on a top-down view, drawing the underside can be a great next challenge. It would involve depicting the ambulacral groove and tiny tube feet. For a beginner, mastering the top view first is recommended.
Can I use different colors for my starfish?
Absolutely! Starfish come in an incredible array of colors, from vibrant oranges and reds to deep blues and purples. Feel free to experiment with your favorite shades. Using multiple colors and blending them can create a stunning, unique piece.
Our Top Recommended Finds
- Sketchbook with Quality Paper: A good sketchbook prevents bleed-through and holds pencil marks well, making your art more enjoyable.
- Set of Drawing Pencils (HB, 2B, 4B, 6B): Having a range of pencil hardness allows for greater control over shading and line variation.
- Kneaded Eraser: This type of eraser is excellent for lifting pencil marks gently without smudging and can be molded into fine points for precision.
Dive Into Your Artistic Journey Today!
You’ve just taken the first exciting step into bringing a beautiful starfish to life on paper. Don’t stop here. The world of drawing is vast and full of creative possibilities.
Consider trying other marine creatures next, like a playful dolphin or a graceful jellyfish. Each new drawing builds your skills and confidence. Pick up your pencil right now and let your imagination swim free!
& Painting
No rigid rules or pretension. Just practical guides, medium comparisons, and encouraging tips to help you enjoy the drawing & painting process.