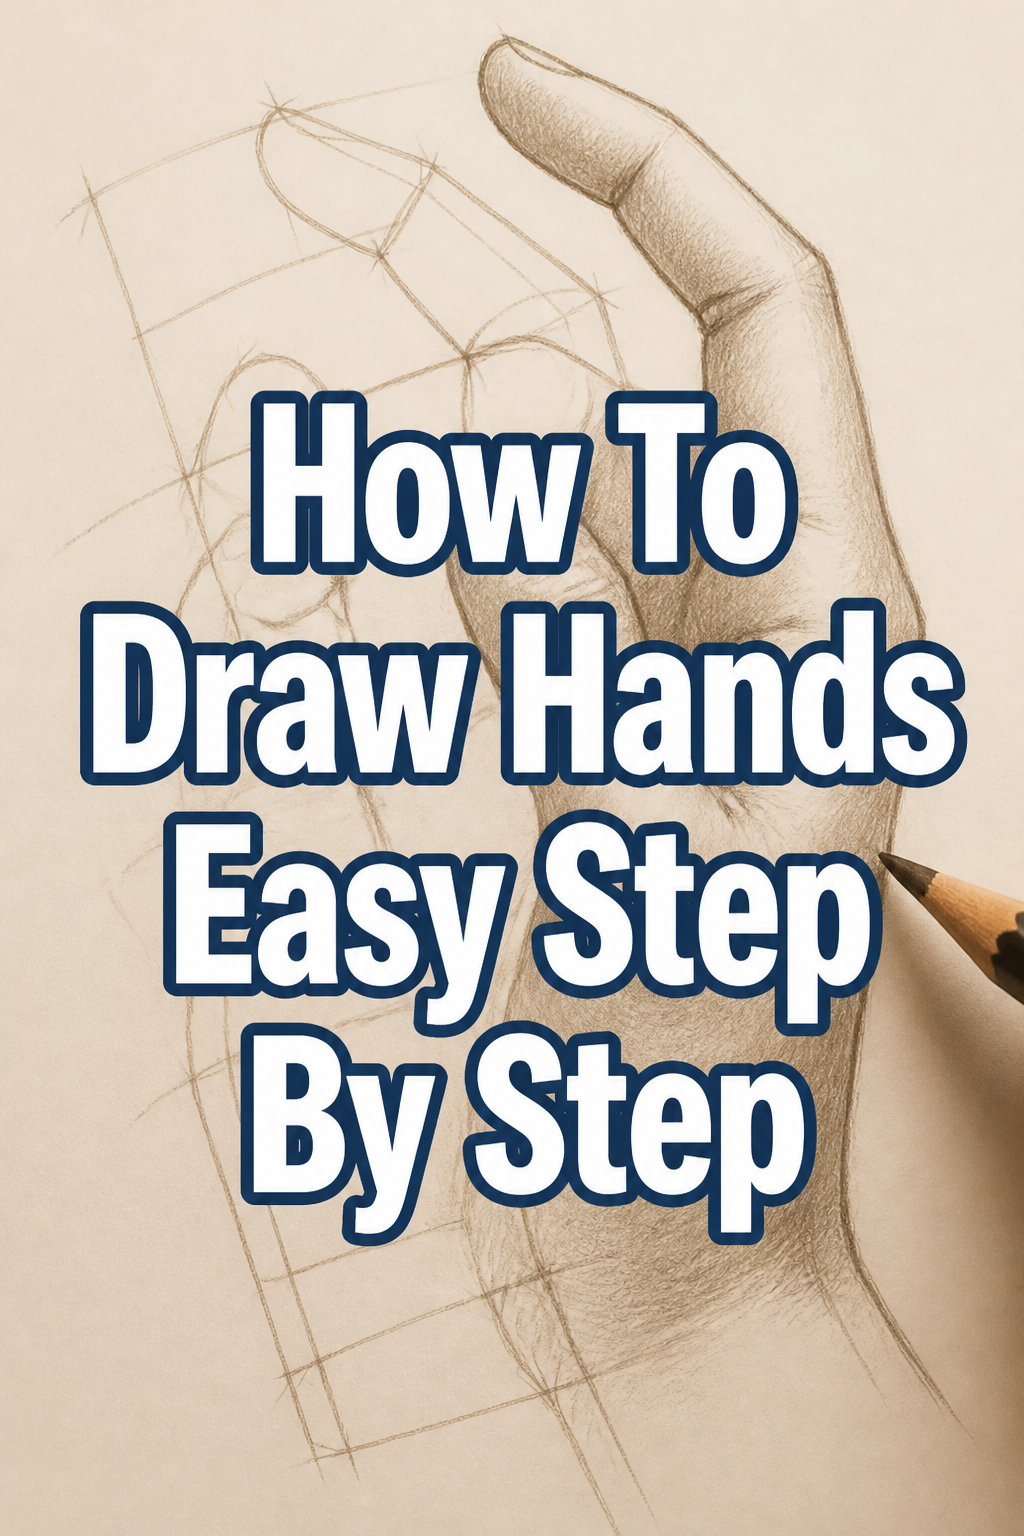
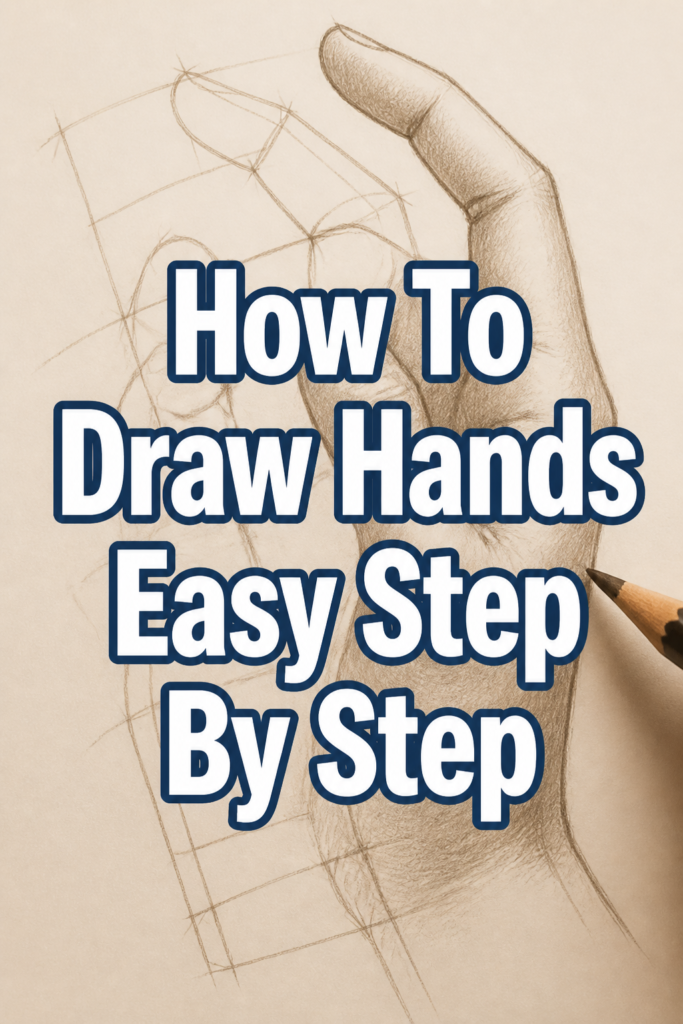
✍️ How To Draw Hands Easy Step By Step

& Painting
No rigid rules or pretension. Just practical guides, medium comparisons, and encouraging tips to help you enjoy the drawing & painting process.
Drawing hands is often considered the ultimate challenge for any aspiring artist.
I spent years hiding hands in pockets or behind backs until I discovered a simple geometric approach that changed everything.
This guide breaks down the complex anatomy of the hand into manageable shapes you can master in a single sitting.
Quick Overview
In this tutorial, you will learn how to construct a realistic hand by building from simple shapes to refined details.
- Time needed: 45 minutes
- Difficulty: Beginner
- What you’ll need: HB pencil, 2B pencil, kneaded eraser, and smooth drawing paper.
Step-by-Step Instructions
Step 1: Construct the Primary Palm Shape
Start by drawing a simple, four-sided shape that resembles a slightly lopsided square or a shovel head.
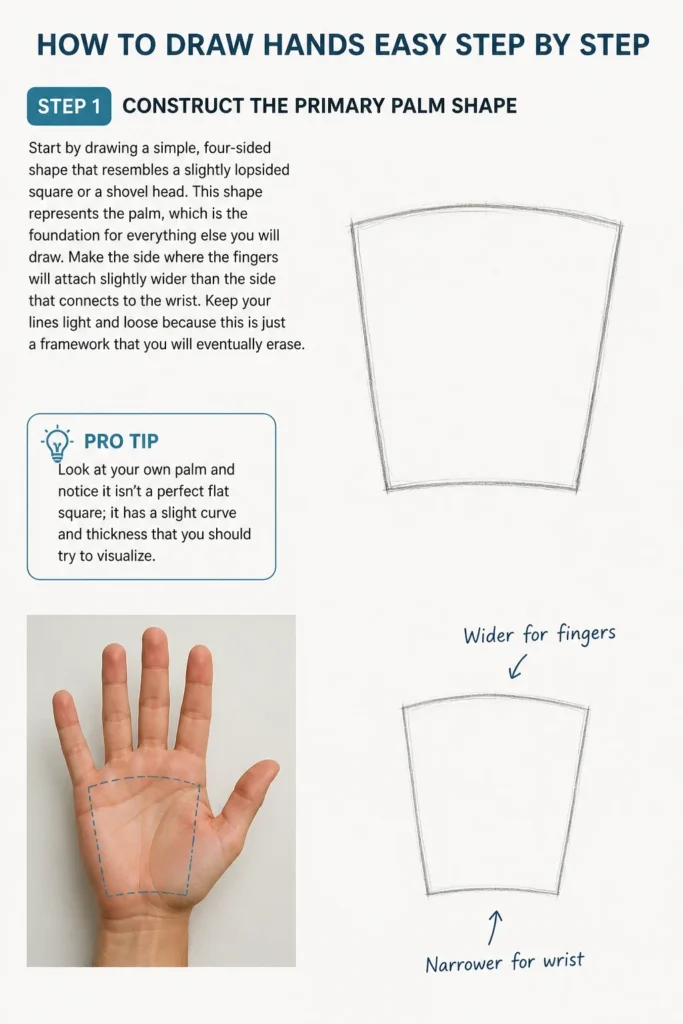
This shape represents the palm, which is the foundation for everything else you will draw.
Make the side where the fingers will attach slightly wider than the side that connects to the wrist.
Keep your lines light and loose because this is just a framework that you will eventually erase.
Pro Tip: Look at your own palm and notice it isn’t a perfect flat square; it has a slight curve and thickness that you should try to visualize.
Step 2: Establish the Knuckle Arc
Draw a curved line across the top of your palm shape where the fingers will begin.
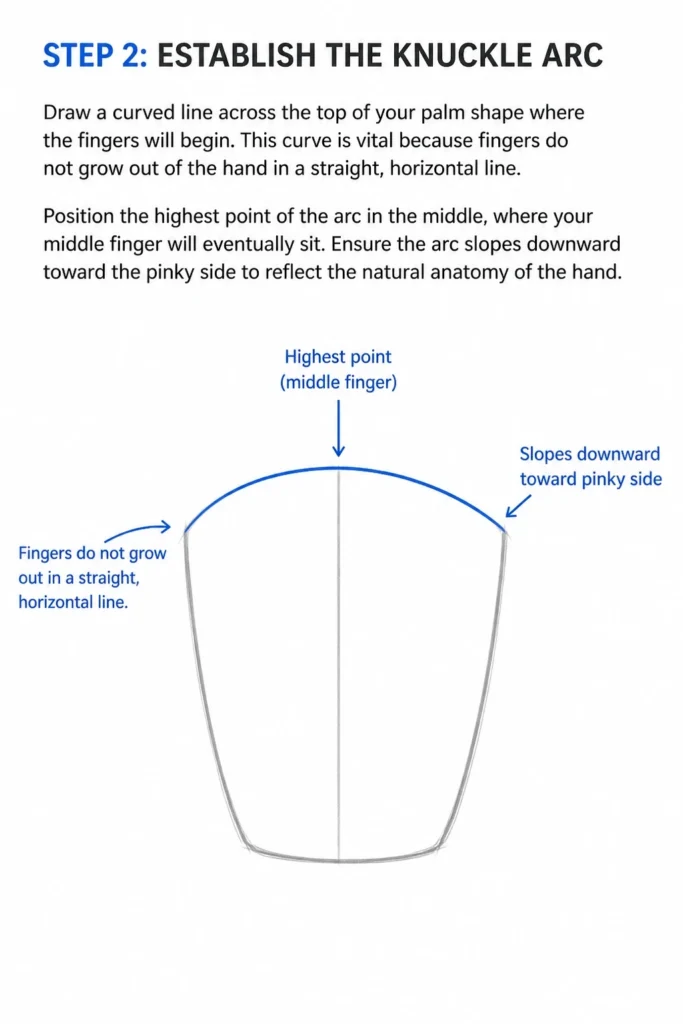
This curve is vital because fingers do not grow out of the hand in a straight, horizontal line.
Position the highest point of the arc in the middle, where your middle finger will eventually sit.
Ensure the arc slopes downward toward the pinky side to reflect the natural anatomy of the human hand.
Step 3: Map Out the Finger Proportions
Sketch four straight lines extending from the knuckle arc to represent the skeleton of each finger.
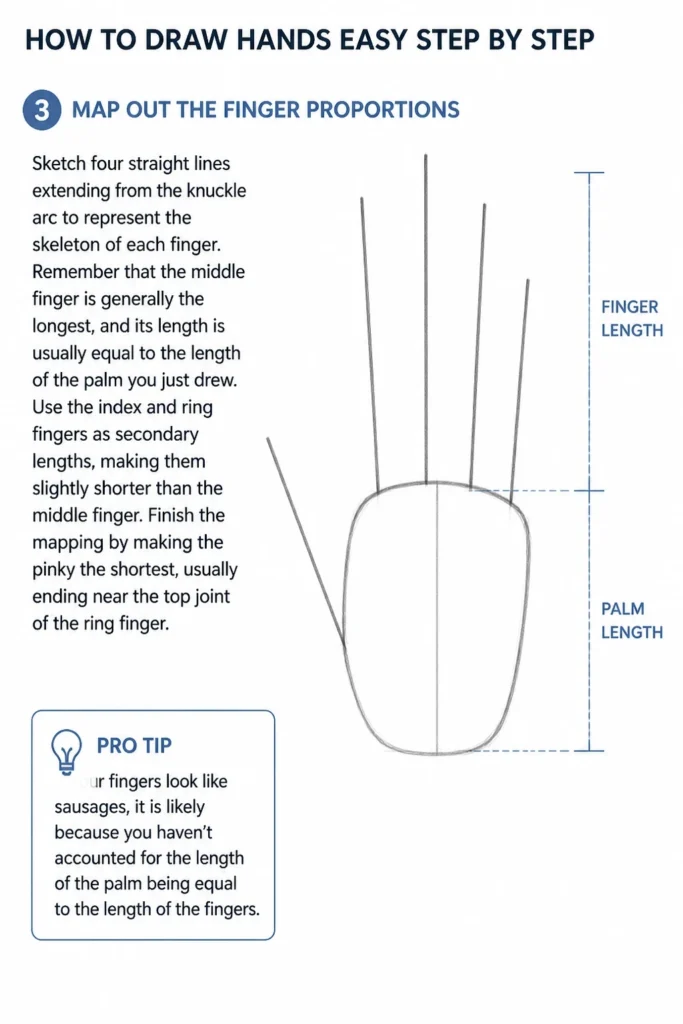
Remember that the middle finger is generally the longest, and its length is usually equal to the length of the palm you just drew.
Use the index and ring fingers as secondary lengths, making them slightly shorter than the middle finger.
Finish the mapping by making the pinky the shortest, usually ending near the top joint of the ring finger.
Pro Tip: If your fingers look like sausages, it is likely because you haven’t accounted for the length of the palm being equal to the length of the fingers.
Step 4: Attach the Thumb Base
Add a triangular shape to the side of the palm to serve as the base for the thumb.
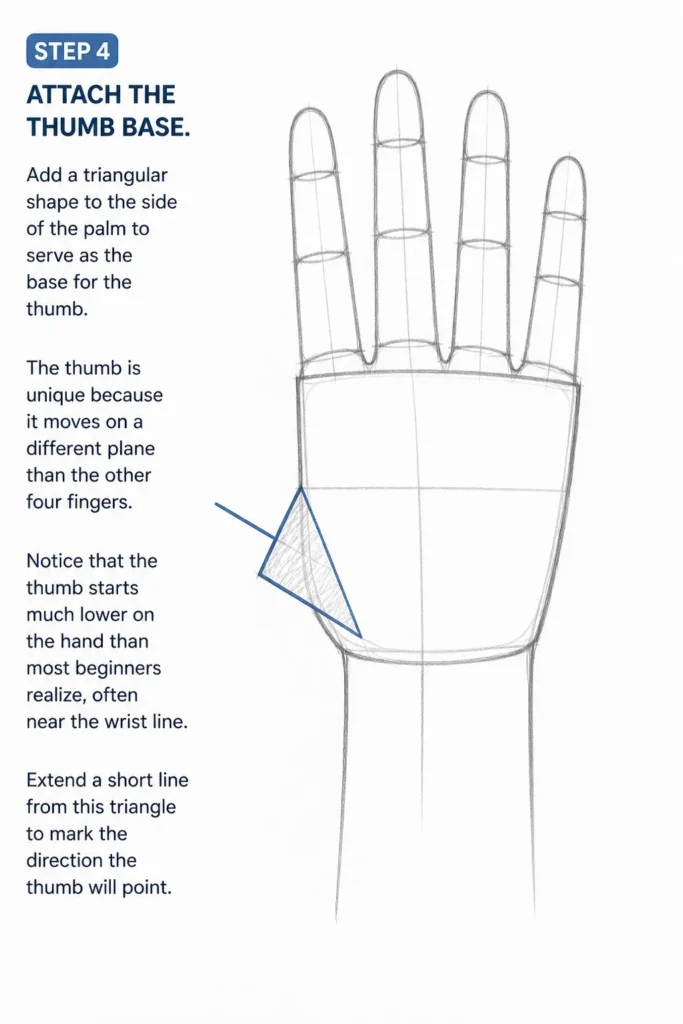
The thumb is unique because it moves on a different plane than the other four fingers.
Notice that the thumb starts much lower on the hand than most beginners realize, often near the wrist line.
Extend a short line from this triangle to mark the direction the thumb will point.
Step 5: Define the Finger Segments
Divide each finger line into three distinct sections using small circles or dots for the joints.
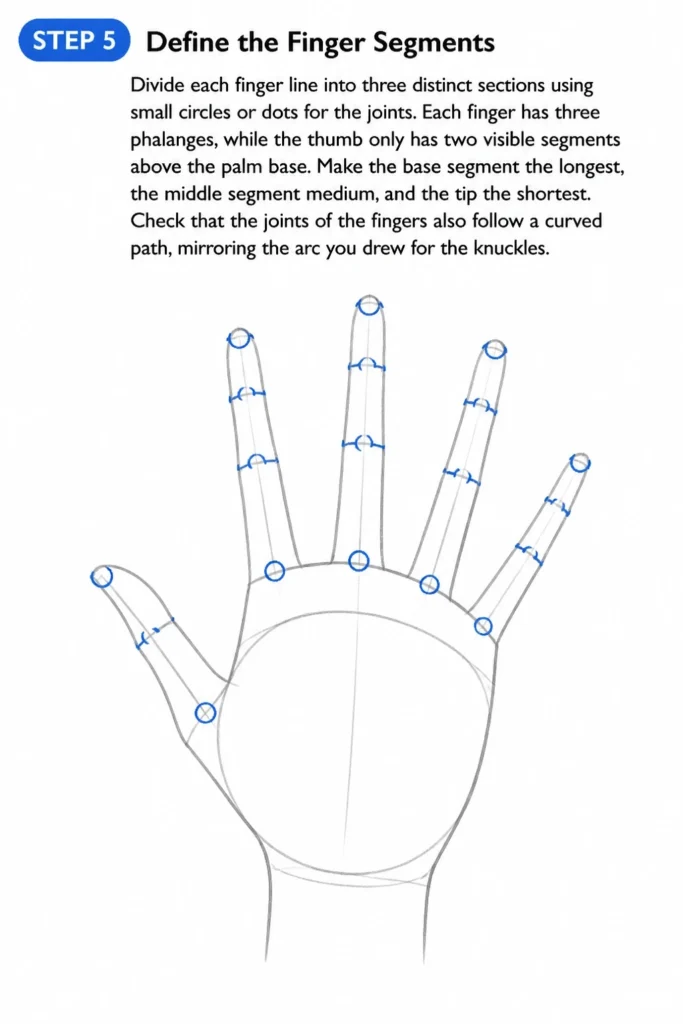
Each finger has three phalanges, while the thumb only has two visible segments above the palm base.
Make the base segment the longest, the middle segment medium, and the tip the shortest.
Check that the joints of the fingers also follow a curved path, mirroring the arc you drew for the knuckles.
Step 6: Build the Fleshy Silhouette
Outline around your skeletal lines to create the actual “meat” of the fingers and palm.
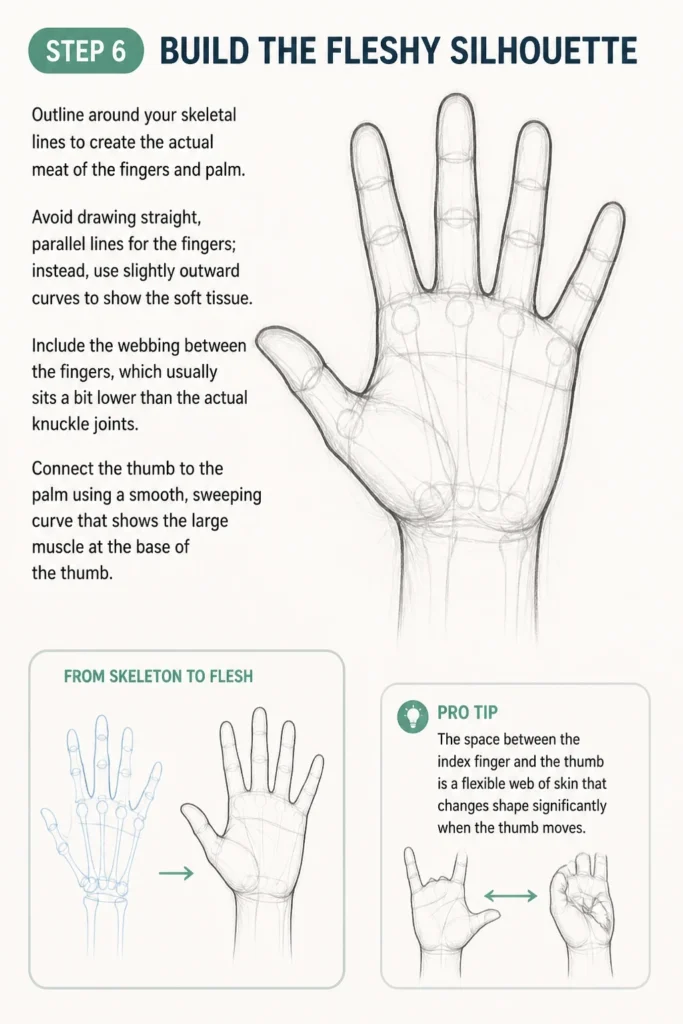
Avoid drawing straight, parallel lines for the fingers; instead, use slightly outward curves to show the soft tissue.
Include the webbing between the fingers, which usually sits a bit lower than the actual knuckle joints.
Connect the thumb to the palm using a smooth, sweeping curve that shows the large muscle at the base of the thumb.
Pro Tip: The space between the index finger and the thumb is a flexible web of skin that changes shape significantly when the thumb moves.
Step 7: Refine the Knuckles and Wrinkles
Add small, subtle lines at the joints to represent the skin folds that occur when the fingers bend.
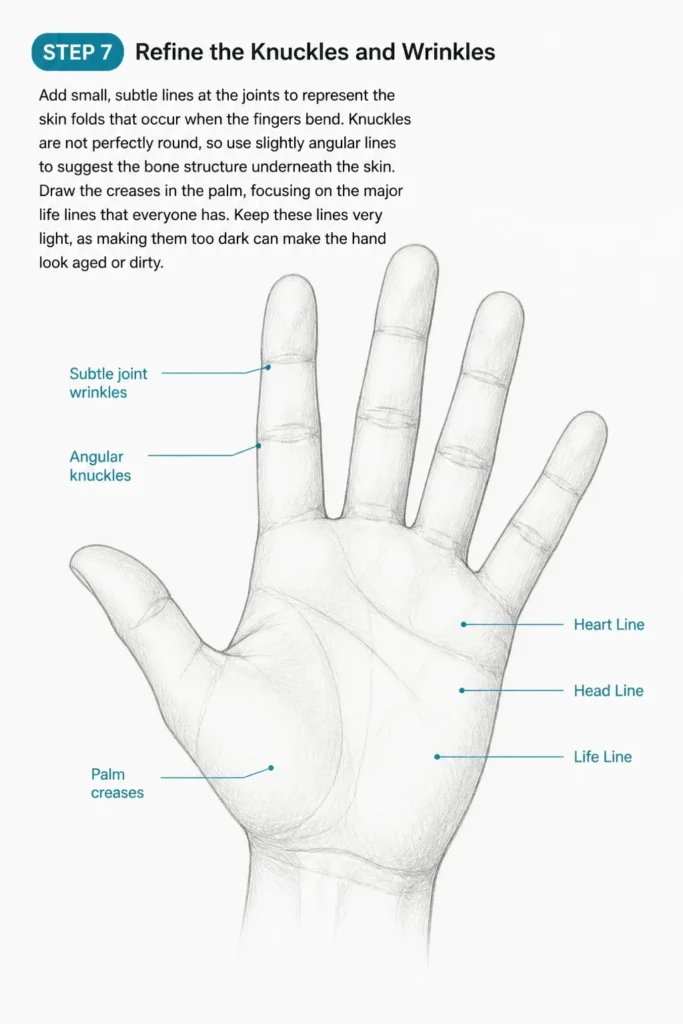
Knuckles are not perfectly round, so use slightly angular lines to suggest the bone structure underneath the skin.
Draw the creases in the palm, focusing on the major “life lines” that everyone has.
Keep these lines very light, as making them too dark can make the hand look aged or dirty.
Step 8: Add Fingernails and Final Details
Place the fingernails at the tips of the fingers, making sure they follow the perspective of the hand.
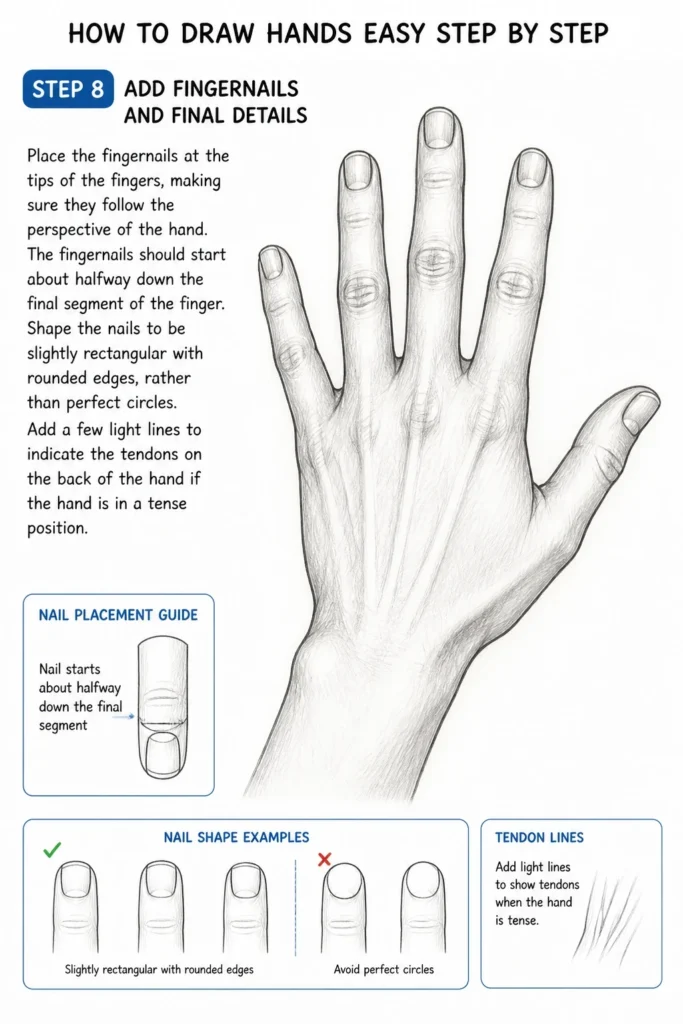
The fingernails should start about halfway down the final segment of the finger.
Shape the nails to be slightly rectangular with rounded edges, rather than perfect circles.
Add a few light lines to indicate the tendons on the back of the hand if the hand is in a tense position.
Step 9: Shade for Volume
Identify your light source and add soft shading to one side of the fingers and the palm.
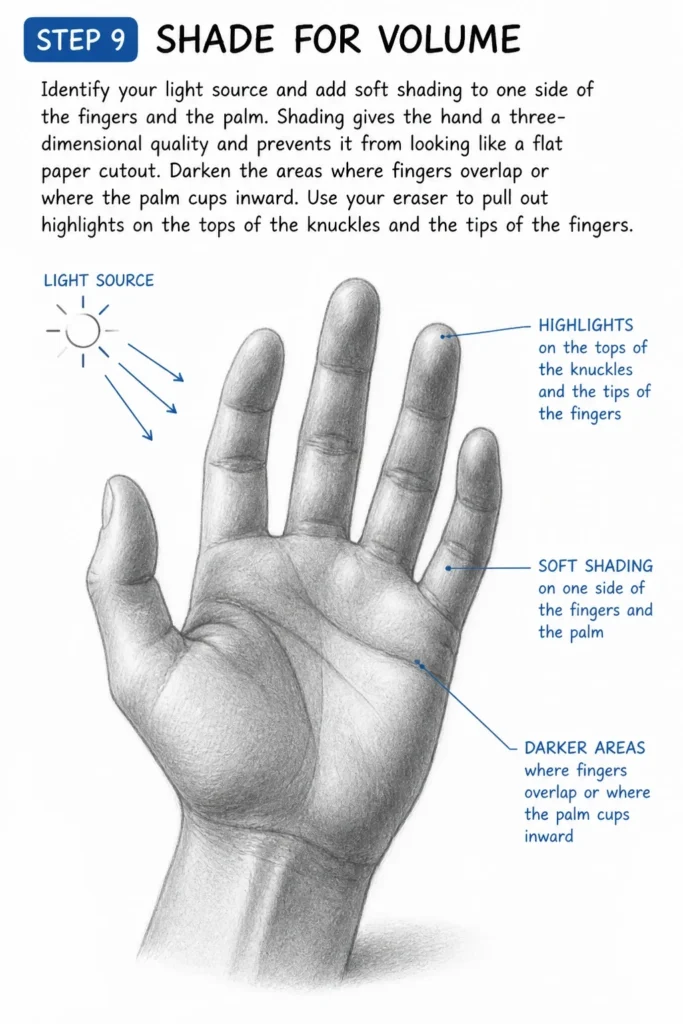
Shading gives the hand a three-dimensional quality and prevents it from looking like a flat paper cutout.
Darken the areas where fingers overlap or where the palm cups inward.
Use your eraser to pull out highlights on the tops of the knuckles and the tips of the fingers.
Common Mistakes to Avoid
The Sausage Finger Effect
Many beginners draw fingers as uniform cylinders with no variation in width. This looks unnatural because real fingers tapers slightly at the tips and bulge slightly at the joints. Focus on making the joints a bit wider than the segments between them to create a realistic rhythm.
The Flat Spade Palm
Treating the palm as a flat, rigid board is a frequent error. The palm is actually composed of several muscle groups that allow it to fold and cup. Always remember to include the “thenar eminence,” which is the thick muscle at the base of the thumb, to give the palm depth.
Misaligned Thumb Placement
The thumb does not grow out of the side of the index finger. It is attached much lower, almost at the wrist, and has a very wide range of motion. If your thumb looks like a fifth finger stuck on the side, move the attachment point lower and give it a thicker base.
Identical Finger Lengths
Drawing all fingers the same length makes the hand look like a cartoon or a glove. Always reference the “arc” of the knuckles and ensure the middle finger is the clear peak. Even a small difference in length makes a massive difference in how believable the hand looks.
Troubleshooting
The Hand Looks Too Stiff
If your drawing looks like a wooden mannequin hand, your lines are likely too straight. Human hands are rarely perfectly still or perfectly straight. Try drawing the hand with a slight curve in the fingers or a tilt in the wrist to introduce a “gesture” to the pose.
The Proportions Feel Off
When the hand looks too small or too large for the arm, check the “face rule.” A standard human hand is roughly the same size as the face from the chin to the middle of the forehead. Use this comparison to scale your hand drawing correctly within a full-body sketch.
The Fingers Look Disconnected
This usually happens when the webbing between the fingers is ignored. The skin between your fingers starts about half an inch above where the fingers actually meet the palm bones. Make sure to draw that “U” shape between the fingers to bridge the gap naturally.
Key Takeaways
- Start with a palm box to establish the foundation and scale of the hand before adding any fingers.
- Use the knuckle arc to ensure fingers are placed at varying heights, mimicking natural anatomy.
- Apply the 1:1 ratio by making the length of the middle finger equal to the length of the palm.
- Build the thumb lower on the hand than the other fingers to account for its unique skeletal structure.
- Add joint creases and subtle shading to transform flat shapes into a three-dimensional, realistic hand.
Frequently Asked Questions
Why is drawing hands so difficult?
Hands are difficult because they have a high range of motion and many small, moving parts. They can be seen from thousands of different angles, and the proportions change slightly with every movement. Mastering them requires understanding the underlying bone structure rather than just the surface skin.
Should I draw the fingernails on every hand?
You do not always need to draw fingernails, especially if the hand is viewed from a distance. In close-up drawings, fingernails add a level of realism that helps define the orientation of the finger. However, keep them subtle so they do not distract from the overall shape of the hand.
How can I practice drawing hands effectively?
The best way to practice is to use your own non-dominant hand as a reference model. Set up a mirror or take photos of your hand in various poses like gripping a cup or pointing. Draw 5 to 10 “quick sketches” every day focusing only on the basic shapes before trying to do a finished piece.
Is it better to use a pencil or a pen for hand studies?
Pencils are generally better for beginners because they allow you to ghost in the construction shapes and erase them later. Pens are great for “gesture drawing” where you want to commit to lines quickly. Use a pencil for this specific step-by-step guide to ensure you can refine your proportions as you go.
Our Top Recommended Finds
- Wooden Mannequin Hand: A life-sized wooden model is excellent for understanding how the fingers fold and overlap in three dimensions.
- Kneaded Eraser: This tool is essential for dabbing away light construction lines without damaging the surface of your paper.
- Graphite Pencil Set: Having a range of leads from 4H to 6B allows you to transition from light mapping to deep, realistic shadows.
Master Your Craft Through Daily Sketching
The secret to drawing hands is not hidden in a single tutorial but in the repetition of these basic steps.
Once you feel comfortable with the “mitten” method, try drawing hands holding different objects like a pencil, a ball, or a phone.
You can also explore drawing feet, which follow a very similar structural logic to the hands you just mastered.
Grab your sketchbook and try to draw five different hand poses before the day ends to lock in what you have learned.
& Painting
No rigid rules or pretension. Just practical guides, medium comparisons, and encouraging tips to help you enjoy the drawing & painting process.