📸 How To Take A Photo Of The Moon

& Painting
No rigid rules or pretension. Just practical guides, medium comparisons, and encouraging tips to help you enjoy the drawing & painting process.
Capturing the moon’s ethereal glow can feel like an impossible feat for many photographers.
I remember my first attempts, resulting in a tiny, overexposed blob against a black sky, far from the stunning craters I envisioned.
This guide distills years of trial and error into clear, actionable steps, helping you achieve breathtaking lunar shots with confidence.
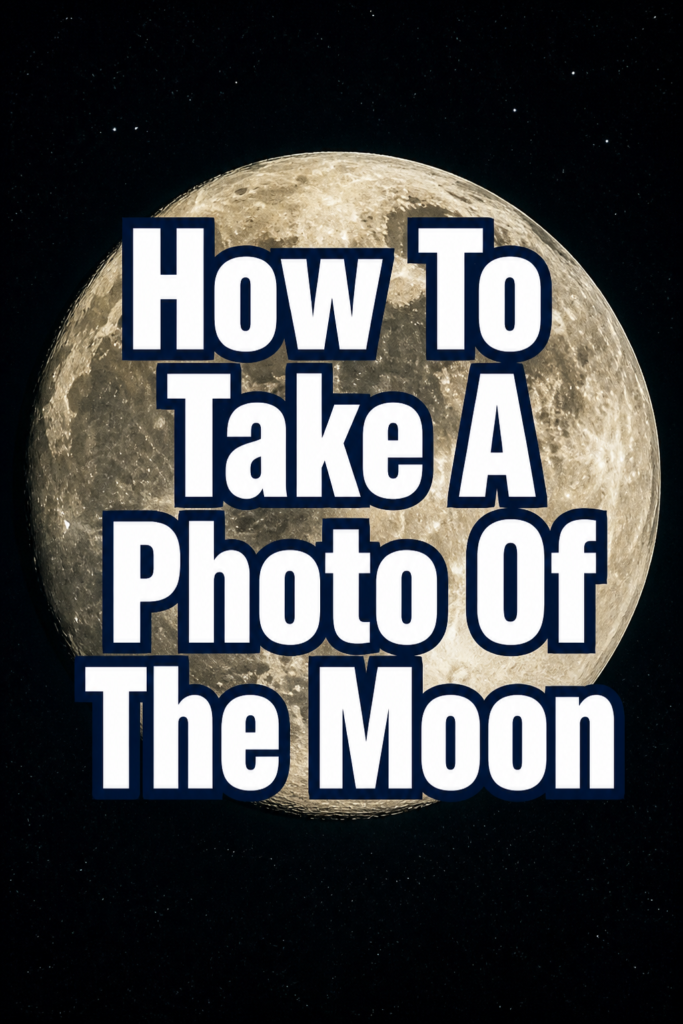
Quick Overview
This guide will equip you with the knowledge to photograph the moon, from selecting the right gear to fine-tuning your camera settings.
You’ll learn how to overcome common challenges and capture detailed images of our celestial neighbor.
- Time needed: 30 minutes for initial setup + actual shooting time (15-60 minutes)
- Difficulty: Intermediate (requires manual camera control)
- What you’ll need: DSLR or Mirrorless camera, telephoto lens, sturdy tripod, remote shutter release (optional but recommended)
Step-by-Step Instructions
Step 1: Gather Your Essential Gear
The right equipment makes a significant difference in moon photography.
You don’t need the absolute most expensive gear, but certain types are crucial for success.
- Camera Body: Use a DSLR or mirrorless camera. These offer manual controls essential for precise exposure.
- Telephoto Lens: This is arguably the most important piece of equipment. You need a lens with a long focal length, ideally 200mm or more. For truly impressive detail, 400mm, 600mm, or even 800mm (with extenders) are ideal.
- Sturdy Tripod: A stable base is non-negotiable. Long focal lengths amplify even the slightest camera shake, leading to blurry images.
- Remote Shutter Release: This prevents camera shake caused by pressing the shutter button directly. Both wired and wireless options work well.
- Extra Batteries: Cold nights can drain batteries faster. Always have spares charged and ready.
Pro Tip: If you don’t own a super-telephoto lens, consider renting one for a night. This allows you to experience the difference without a large investment.
Step 2: Plan Your Shoot Location and Time
Where and when you photograph the moon impacts your results dramatically.
Careful planning ensures you have the best conditions.
- Check Moon Phases: The full moon is easiest to photograph due to its brightness, but it can lack contrast. Quarter moons or crescent moons can offer more dramatic shadows and texture.
- Monitor Weather Forecasts: Clear skies are essential. Clouds will obscure your view and ruin your shot.
- Find a Dark Location: Light pollution from cities can wash out the sky and reduce the moon’s contrast. Seek out rural areas if possible.
- Consider Moonrise/Moonset: Photographing the moon when it’s low on the horizon can offer unique opportunities to include foreground elements, adding context and scale.
Step 3: Set Up Your Camera and Tripod
Proper setup ensures stability and readiness for capturing the moon.
Take your time with these initial steps.
- Mount Camera Securely: Attach your camera to the tripod. Ensure all legs are extended and locked firmly.
- Attach Remote Shutter: Connect your remote release if you have one. This is a small but critical step to avoid blur.
- Disable Image Stabilization (IS/VR): When using a tripod, turn off your lens’s image stabilization feature. Leaving it on can sometimes introduce subtle blur on a stable platform.
- Set to Manual Mode (M): Full manual control is vital. You need to dictate every setting to achieve the correct exposure.
Step 4: Dial In Your Initial Camera Settings
These are starting points; you will adjust them as you shoot.
Understanding why you choose each setting is key.
- Aperture (f-stop): Start with an aperture around f/8 to f/11. This provides good sharpness and sufficient depth of field for the moon, which is essentially a flat object from our perspective.
- ISO: Keep your ISO as low as possible, ideally ISO 100 or 200. This minimizes digital noise, which can degrade image quality, especially in dark skies.
- Shutter Speed: This is the setting you’ll adjust most frequently. Start with a shutter speed around 1/125th to 1/250th of a second for a full moon. The moon is surprisingly bright.
- White Balance: Set your white balance to “Daylight” or “Sunny.” This will render the moon’s natural color accurately. Auto White Balance can sometimes misinterpret the light.
Pro Tip: The “Looney 11” rule is a good starting point for full moon photography: f/11, ISO 100, and a shutter speed of 1/125th of a second. Adjust from there based on your specific conditions.
Step 5: Achieve Pinpoint Focus
Focusing on the moon accurately is one of the most challenging aspects.
Manual focus is almost always superior here.
- Switch to Manual Focus (MF): On both your lens and camera, switch to manual focus. Autofocus systems often struggle with small, distant subjects in low light.
- Use Live View: Activate your camera’s Live View mode. Zoom in digitally (typically 5x or 10x) on the moon on your LCD screen.
- Adjust Focus Ring: Carefully turn the focus ring on your lens until the moon’s craters appear as sharp as possible.
- Check Focus Constantly: Even slight movements can throw off focus. Recheck periodically, especially if you move your camera.
Step 6: Take Your First Shots and Review
Don’t expect perfection on the first try.
Use your initial images to guide your adjustments.
- Fire the Shutter: Use your remote release to take a few shots.
- Review the LCD: Immediately check your camera’s LCD screen. Zoom in to assess sharpness and exposure.
- Check the Histogram: Look at your histogram. You want a good spread of tones without clipping highlights (too bright) or shadows (too dark). The peak should be roughly in the middle, indicating a balanced exposure.
Step 7: Adjust Settings for Optimal Exposure
This iterative process refines your image.
Small changes can have a big impact.
- Adjust Shutter Speed: If the moon is too bright, increase your shutter speed (e.g., from 1/125 to 1/250). If it’s too dark, decrease it (e.g., from 1/125 to 1/60).
- Fine-tune Aperture: While f/8 to f/11 is a good range, you might try f/16 for maximum sharpness if your lens performs well there, but this will require a slower shutter speed or higher ISO.
- Consider Exposure Bracketing: If you’re unsure about exposure, use exposure bracketing (if your camera has it). This takes multiple shots at different exposures, giving you options.
Step 8: Experiment and Refine
Photography is an art of continuous learning.
Try different approaches to find what works best.
- Vary Your Shutter Speed: Even subtle changes in lunar brightness or atmospheric conditions might require minor shutter speed adjustments.
- Capture Multiple Shots: Take many photos. The moon moves surprisingly fast across the sky, and you’ll want several options to choose from.
- Look for Atmospheric Effects: Sometimes, thin clouds or atmospheric haze can create interesting effects around the moon.
Step 9: Post-Processing Your Lunar Images
Even the best raw moon photo can benefit from some digital darkroom work.
This step enhances details and overall appeal.
- Import to Software: Load your chosen images into editing software like Adobe Lightroom, Photoshop, or a free alternative.
- Adjust Exposure and Contrast: Fine-tune the overall brightness and increase contrast to make craters pop.
- Sharpening: Apply a small amount of sharpening to bring out fine details. Be careful not to overdo it, as this can introduce noise.
- Noise Reduction: If you had to use a slightly higher ISO, apply noise reduction sparingly.
- Crop: Crop your image to frame the moon effectively. Often, you’ll need to crop significantly due to the moon’s small size in the frame.
Common Mistakes to Avoid
Using Autofocus
Many photographers assume their camera’s autofocus will handle distant subjects. However, the moon is often too small and far away for autofocus to lock on reliably, especially in the dark. This results in soft, blurry images. Always switch to manual focus and use Live View with digital zoom for critical focusing.
Ignoring the Tripod
Handholding a camera, even with image stabilization, at telephoto focal lengths will almost certainly lead to blurry photos of the moon. The moon’s apparent movement and the slightest shake of your hands are magnified. A sturdy tripod is fundamental for sharp, detailed shots.
Overexposing the Moon
The moon is incredibly bright, despite appearing against a dark sky. Many beginners overexpose it, turning it into a blown-out white disc with no discernible features. Remember the “Looney 11” rule as a starting point and prioritize a faster shutter speed to capture detail.
Too High ISO
While a high ISO might seem necessary in low light, it introduces digital noise, which looks like grainy speckles in your image. Since you’re using a tripod and the moon is bright, you can afford to keep your ISO very low (100-200) for cleaner, more detailed results.
Troubleshooting
Moon Appears as a White Blob
This indicates overexposure. Your camera settings are allowing too much light to hit the sensor. The solution is to decrease your shutter speed (make it faster, e.g., from 1/125 to 1/250 or 1/500). If it’s still too bright, slightly close down your aperture (increase the f-number, e.g., from f/8 to f/11 or f/16), but prioritize shutter speed for initial adjustments.
Image is Blurry or Soft
Blurriness typically stems from two main issues: focus or camera shake. First, recheck your manual focus using Live View and maximum digital zoom. Ensure it’s critically sharp. Second, confirm your camera is on a sturdy tripod and you’re using a remote shutter release or the camera’s 2-second timer to eliminate shake from pressing the shutter button.
Sky Around the Moon is Not Black
If the sky around the moon appears gray or blue instead of black, it could be due to light pollution or an overly slow shutter speed. A slower shutter speed, while potentially exposing the moon correctly, will also start to pick up ambient light from the sky. Speed up your shutter slightly to darken the sky, then adjust other settings if the moon becomes too dark.
Key Takeaways
- Manual Mode is Essential: Take full control of your camera’s settings (aperture, shutter speed, ISO).
- Telephoto Lens is Key: A focal length of 200mm or more is crucial for capturing detail.
- Tripod and Remote are Non-Negotiable: Eliminate camera shake for sharp images.
- Focus Manually with Live View: Achieve precise focus by zooming in on the moon through Live View.
- Prioritize Low ISO and Faster Shutter Speed: Keep noise down and prevent overexposure of the bright moon.
- Post-Process for Detail: Enhance sharpness, contrast, and crop for a compelling final image.
Frequently Asked Questions
Can I photograph the moon with a smartphone?
While modern smartphones have impressive cameras, their small sensors and fixed lenses make detailed moon photography very challenging. You might capture a bright dot, but not the crisp craters seen with dedicated cameras and telephoto lenses. Some phones allow for digital zoom, but this often results in significant quality loss.
How do I know what shutter speed to use?
Start with the “Looney 11” rule: f/11, ISO 100, 1/125th second for a full moon. From there, adjust. If the moon looks too bright, increase your shutter speed (make it faster). If it’s too dark, decrease your shutter speed (make it slower). The moon’s brightness can vary slightly based on atmospheric conditions and phase.
What’s the best moon phase for photography?
The full moon is the brightest and easiest to expose, but it can lack contrast. For more dramatic texture and shadows on the craters, consider shooting during a crescent or quarter moon. These phases offer more topographical detail as light hits the moon at an angle.
Do I need an expensive camera for this?
You don’t need the absolute top-of-the-line camera, but a DSLR or mirrorless camera that allows full manual control is necessary. The quality of your telephoto lens often makes a bigger difference than the camera body itself. Entry-level models with manual settings will work well with a good lens.
Our Top Recommended Finds
- Sturdy Carbon Fiber Tripod: Offers excellent stability and reduces weight for portability compared to aluminum.
- Wireless Remote Shutter Release: Provides complete freedom from touching your camera, eliminating any chance of vibration.
- 500mm f/8 Mirror Lens: A more affordable entry point into super-telephoto photography, often compact and surprisingly sharp for its price.
Embrace the Celestial Canvas
Photographing the moon is a rewarding journey that blends technical precision with artistic vision.
Each attempt refines your skills, teaching you more about your gear and the night sky.
Don’t let initial challenges deter you; the beauty of a well-captured lunar image is truly unparalleled.
Grab your camera, set your sights skyward, and start documenting the moon’s timeless elegance tonight.
& Painting
No rigid rules or pretension. Just practical guides, medium comparisons, and encouraging tips to help you enjoy the drawing & painting process.