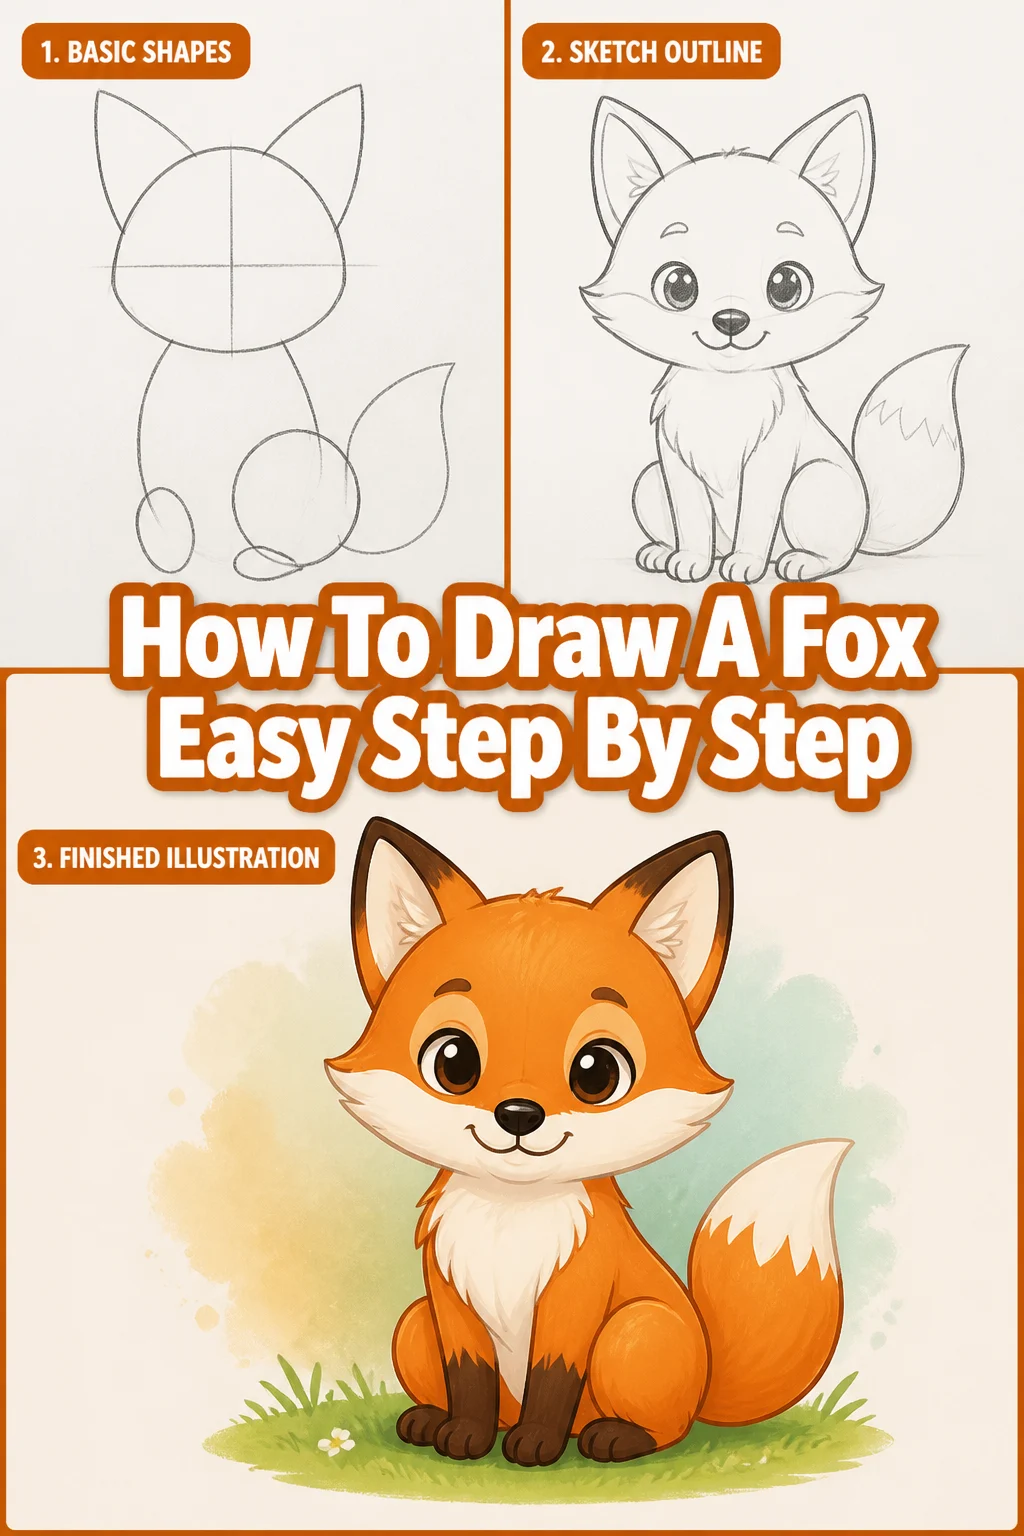
🦊 How To Draw A Fox Easy Step By Step
Learning to draw can feel daunting, but it doesn’t have to be.
I remember my first attempts at drawing animals; they often looked more like abstract art than anything recognizable.
This guide is built from years of sketching, focusing on breaking down complex shapes into simple, manageable steps, so you can confidently create your own charming fox.
Quick Overview
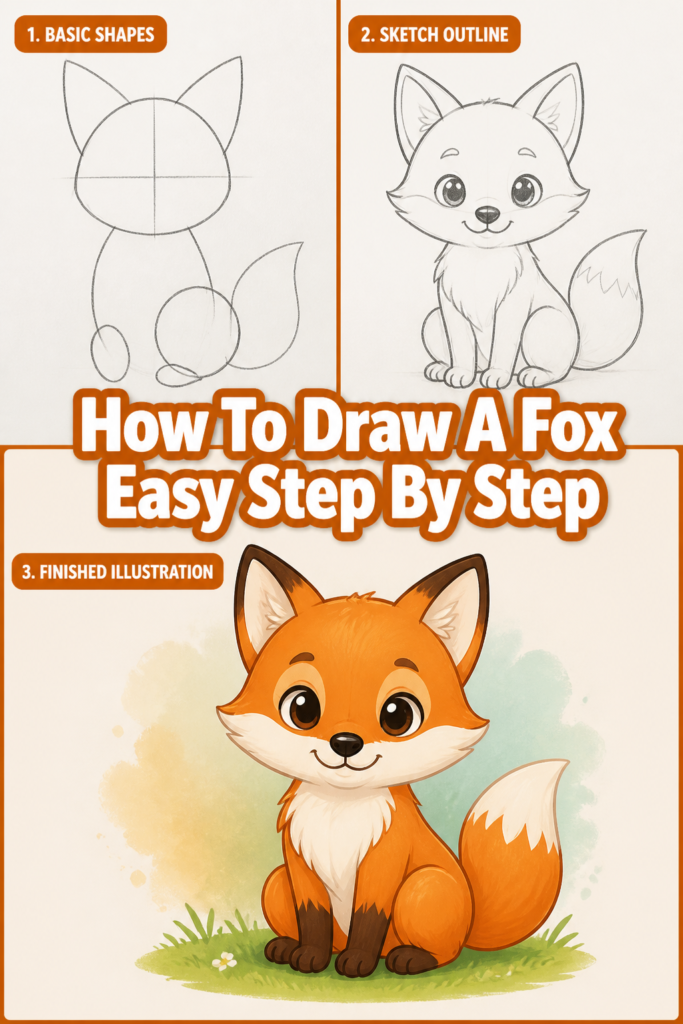
In this guide, you will learn to construct a delightful fox illustration from basic shapes, adding details and personality as you go. You’ll finish with a complete drawing you can be proud of.
- Time needed: 30-60 minutes (depending on detail and pace)
- Difficulty: Beginner
- What you’ll need: Pencil (HB or 2B recommended), eraser, paper, optional fine-liner pen, and colored pencils.
Step-by-Step Instructions
Step 1: Lay Down the Basic Shapes for the Body
Start by lightly sketching two overlapping circles. One larger circle will form the fox’s main body, and a slightly smaller one, overlapping it towards the front, will become the chest area.
Think of these as the fundamental building blocks. Don’t press too hard with your pencil at this stage; these lines are just guides.
Position the larger circle slightly towards the back and bottom of your page, leaving room for the head and tail.
Pro Tip: Always start with very light lines. This makes corrections much easier and keeps your final drawing clean. You can always darken lines later.
Step 2: Define the Head and Muzzle
Draw another medium-sized circle above and slightly in front of the chest circle to establish the head.
For the muzzle, add a small oval or an elongated circle extending from the bottom front of the head circle.
Connect the head and chest circles with two gentle, curving lines to form the neck.
Step 3: Add the Ears and Tail
Now, let’s give our fox its distinctive features. Draw two triangular shapes on top of the head circle for the ears.
Make sure they are slightly rounded at the base and pointed at the top, like little pyramids. Position them on either side of the head’s top curve.
For the bushy tail, draw a large, sweeping, curved shape extending from the back of the body circle. Imagine a fluffy plume, wider at the base and tapering to a soft point.
Step 4: Sketch the Legs and Paws
Flesh out the fox’s stance by adding the legs. From the bottom of the chest circle, draw two slightly bent lines for the front legs.
Add small oval shapes at the bottom of these lines for the paws. Remember, foxes have relatively slender legs.
For the back legs, draw two more lines extending from the bottom of the main body circle, bending at the joint, and ending with similar oval paws.
Step 5: Connect and Refine the Outline
Now it’s time to bring all these basic shapes together. Begin to draw a continuous, flowing outline over your guide shapes.
Connect the head to the body, curving around the chest and back. Smooth out the angles where the legs meet the body.
Refine the shape of the muzzle, making it slightly more pointed and less perfectly oval. Define the chin area.
Pro Tip: Observe real fox anatomy if you can. Notice how their fur often gives them a slightly ‘fluffy’ outline, especially around the neck and tail. Don’t make your lines too rigid.
Step 6: Add Facial Features and Details
Inside the head circle, roughly halfway down, draw two small, almond-shaped eyes. Position them on either side of the muzzle’s base.
Draw a small, inverted triangle for the nose at the tip of the muzzle. Below the nose, add a gentle curved line for the mouth.
Inside the ears, draw smaller triangular shapes to indicate the inner ear fur. Add small, subtle lines on the paws to suggest toes.
Step 7: Erase Guide Lines and Darken Essential Outlines
Carefully use your eraser to remove all the initial light guide circles and lines that are no longer needed.
Once the drawing looks clean, go over the final outline with a darker pencil or a fine-liner pen. This will make your fox stand out.
Pay attention to areas that would naturally be shadowed or have more definition, like the underside of the body or the edges of the tail.
Step 8: Add Fur Texture and Shading
To give your fox a realistic feel, add short, directional strokes for fur. Think about the direction the fur grows on a fox, usually downwards and backwards.
Start with light shading to define areas like the belly, the inside of the ears, and around the eyes and nose. Foxes often have white fur on their chest, belly, and tail tip.
Use cross-hatching or circular motions for smoother shading. Consider where your light source is coming from to create highlights and shadows, adding depth to your drawing.
Step 9: Color Your Fox (Optional)
If you wish, bring your fox to life with color. Foxes are typically reddish-orange or brown on their backs and sides, with white undersides and black legs and ear tips.
Use colored pencils, crayons, or markers. Start with light layers and build up the intensity of the color.
Remember to leave the tip of the tail white for that classic fox look. Adding a light background can also help your fox pop off the page.
Common Mistakes to Avoid
Making Shapes Too Rigid
Many beginners tend to draw circles and ovals perfectly, making the animal look stiff. Foxes are fluid and graceful creatures.
Instead of rigid geometry, think of your initial shapes as soft suggestions. Allow your lines to curve naturally and don’t be afraid to make slight imperfections; they often add character.
Disproportionate Features
A common pitfall is making the head too big or the legs too short, which distorts the fox’s anatomy. Always compare the size of one part to another.
For example, the head should be roughly one-third the size of the main body circle. Step back frequently to assess your drawing and ensure everything looks balanced.
Over-Darkening Guide Lines Too Early
Pressing too hard with your pencil during the initial sketching phase can make it impossible to fully erase guide lines later, leaving smudges or visible construction lines.
Keep your initial sketches extremely light, almost barely visible. Only commit to darker lines once you are completely satisfied with the underlying structure.
Ignoring Fur Direction
When adding texture, simply scribbling lines can make the fur look messy or unnatural. Fur grows in specific directions on an animal’s body.
Pay attention to how fur flows around curves and muscles. Use short, consistent strokes that follow the contours of the fox’s body, especially on the tail and around the neck.
Troubleshooting
My Fox Looks Stiff and Lifeless
If your fox appears too rigid, it’s likely due to overly straight lines or sharp angles where curves should be. Revisit your initial basic shapes.
Ensure your circles are slightly organic, not perfect. Focus on creating gentle, flowing lines for the body outline, legs, and tail. Imagine the fox moving and try to capture that subtle energy in your curves.
The Proportions Seem Off
If the head is too large, or the legs are too short, take a step back and compare the sizes of your basic shapes.
Use your pencil as a measuring tool by holding it up to your drawing and comparing lengths. Don’t be afraid to erase and redraw individual components until they feel balanced within the whole.
I Can’t Get the Fur Texture Right
Achieving convincing fur involves short, overlapping strokes rather than long, continuous lines. The key is variety and direction.
Experiment with different pencil pressures and stroke lengths. Focus on building up layers of short, feathery lines, always following the natural flow of the fur, rather than drawing individual hairs.
Key Takeaways
- Start with Basic Shapes: Break down the fox into simple circles and ovals to establish its core structure.
- Draw Lightly First: Use a light hand for initial sketches to allow for easy corrections and a cleaner final drawing.
- Refine Gradually: Connect and smooth out your guide lines slowly, building up the fox’s form step by step.
- Pay Attention to Proportions: Regularly check that the head, body, and limbs are in balance with each other.
- Add Directional Fur: Use short, consistent strokes that follow the fox’s natural fur growth for realistic texture.
- Practice Makes Perfect: Don’t be discouraged by initial attempts; consistent practice will improve your skills over time.
Frequently Asked Questions
What kind of pencil is best for drawing?
An HB pencil is a great all-rounder for sketching as it’s not too hard or too soft. For initial light lines, a 2H can be helpful, and for darker outlines and shading, a 2B or 4B will give you richer tones.
How can I make my fox look more realistic?
To enhance realism, focus on subtle details like the slight curve of the spine, the way the fur bunches at joints, and the light reflection in the eyes. Adding varied shading and texture, along with a sense of weight to the paws, also helps immensely.
Should I use references when drawing animals?
Absolutely! Using reference photos of real foxes is incredibly helpful. They provide accurate information on anatomy, fur patterns, and poses. Don’t copy directly, but use them to inform your understanding of the animal’s form.
What if my drawing doesn’t look like the example?
That’s perfectly normal and even desirable! Every artist has a unique style. The goal of this guide is to teach you the steps, not to make an exact replica. Embrace your own interpretation and enjoy the process of creating something unique.
Our Top Recommended Finds
- Sketchbook with Quality Paper: Look for paper that can handle erasures without tearing and has a slight tooth for pencil grip, like a Canson XL Series Sketch Pad.
- Set of Drawing Pencils (HB, 2B, 4B, 6B): A basic set allows you to experiment with different line weights and shading intensities, such as the Faber-Castell Pitt Graphite Set.
- Kneaded Eraser: Unlike standard erasers, a kneaded eraser lifts graphite without smudging or damaging the paper, perfect for subtle corrections and highlights.
Your Next Artistic Adventure Awaits
You’ve successfully drawn a charming fox, a testament to your patience and creativity.
Now that you’ve mastered the basic shapes and techniques, imagine all the other creatures you can bring to life.
Why not try drawing your fox in a different pose, or even add a playful background? The possibilities are endless when you approach drawing one step at a time.