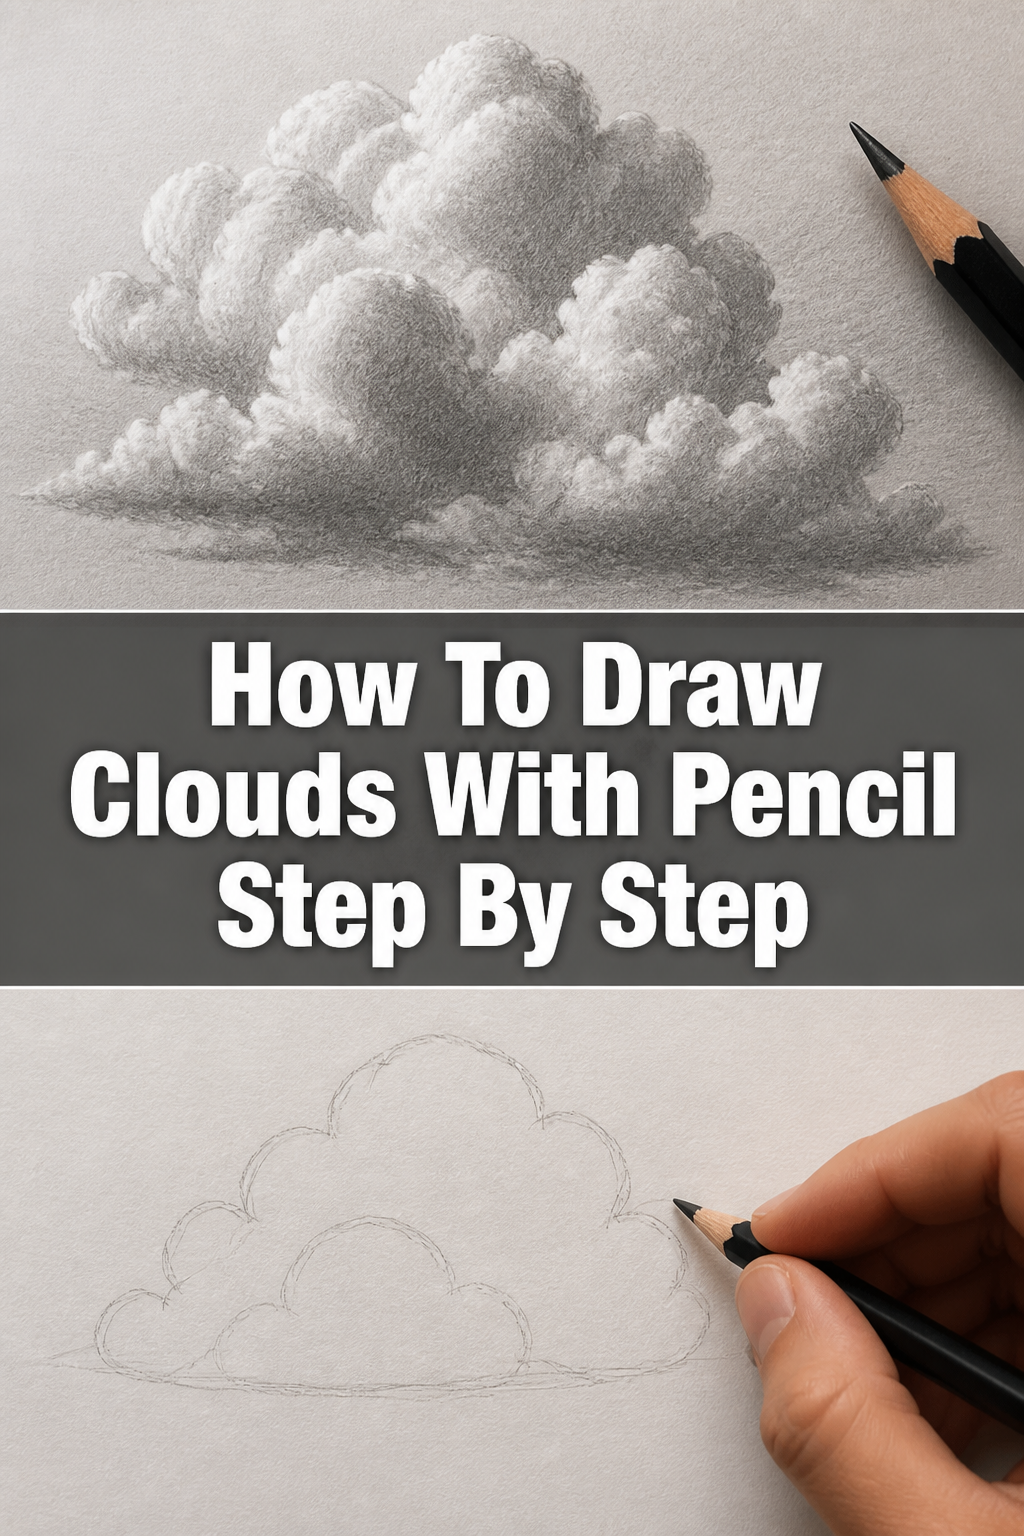
☁️ How To Draw Clouds With Pencil Step By Step

& Painting
No rigid rules or pretension. Just practical guides, medium comparisons, and encouraging tips to help you enjoy the drawing & painting process.
I spent years trying to capture the sky on paper only to end up with shapes that looked more like lumpy mashed potatoes than airy clouds.
It wasn’t until I stopped drawing the clouds themselves and started focusing on the light around them that my sketches finally began to breathe.
I have taught hundreds of students this exact method, and it consistently turns a flat drawing into a window looking out at a stormy afternoon.
Quick Overview
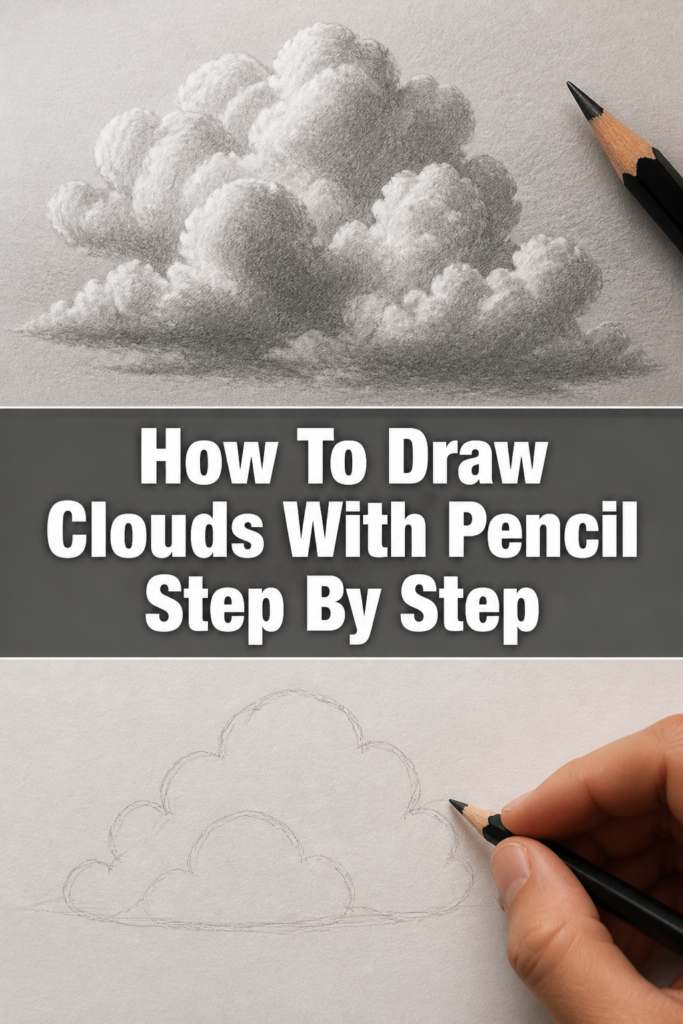
This guide will show you how to use graphite to build depth, texture, and light in a realistic sky scene.
- Time needed: 40 to 60 minutes
- Difficulty: Beginner
- What you’ll need: Drawing pencils (HB, 2B, 4B), a kneaded eraser, a blending stump or tissue, and medium-texture drawing paper.
Step-by-Step Instructions
Step 1: Prepare Your Drawing Surface and Tools
Select a piece of paper with a slight “tooth” or texture rather than something completely smooth like printer paper.
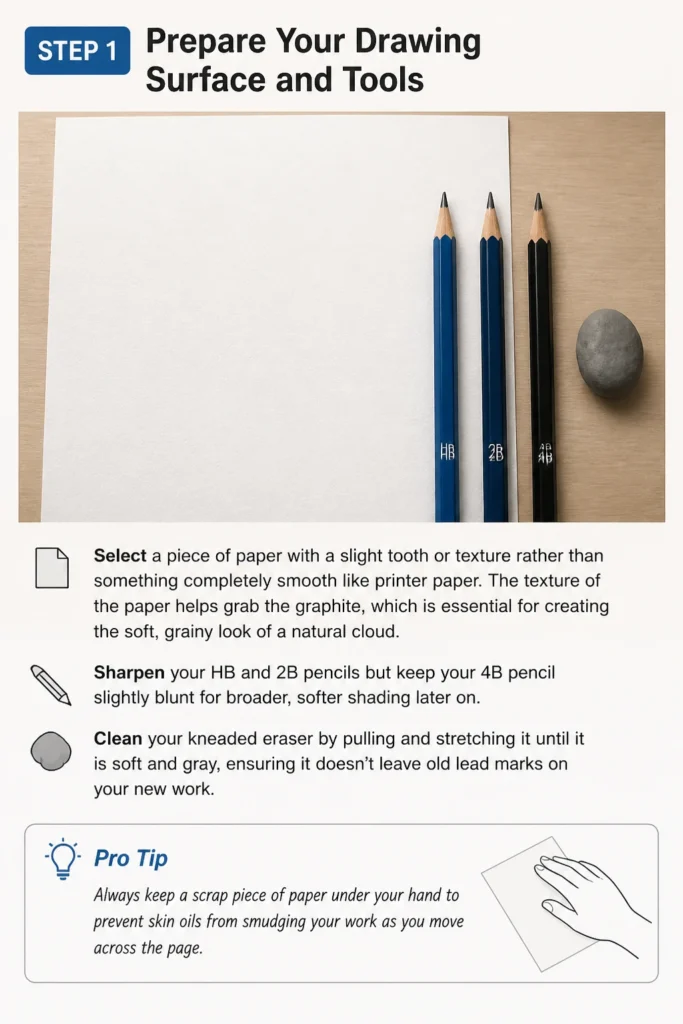
The texture of the paper helps grab the graphite, which is essential for creating the soft, grainy look of a natural cloud.
Sharpen your HB and 2B pencils but keep your 4B pencil slightly blunt for broader, softer shading later on.
Clean your kneaded eraser by pulling and stretching it until it is soft and gray, ensuring it doesn’t leave old lead marks on your new work.
Pro Tip: Always keep a scrap piece of paper under your hand to prevent skin oils from smudging your work as you move across the page.
Step 2: Establish Your Light Source
Decide exactly where the sun is located in relation to your clouds before you make a single mark on the paper.
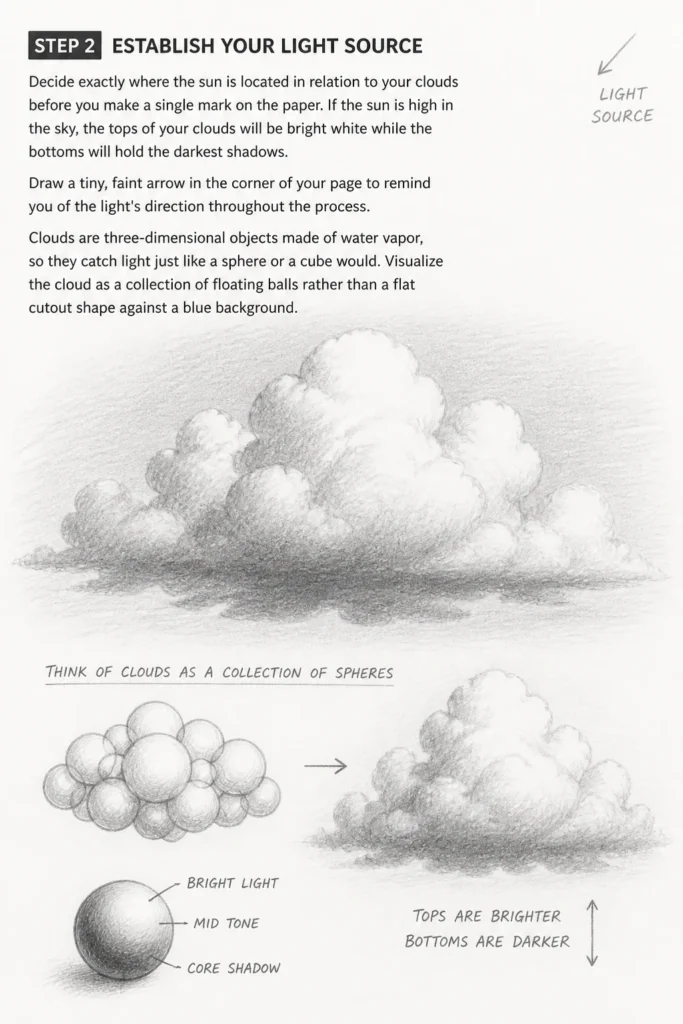
If the sun is high in the sky, the tops of your clouds will be bright white while the bottoms will hold the darkest shadows.
Draw a tiny, faint arrow in the corner of your page to remind you of the light’s direction throughout the process.
Clouds are three-dimensional objects made of water vapor, so they catch light just like a sphere or a cube would.
Visualize the cloud as a collection of floating balls rather than a flat cutout shape against a blue background.
Step 3: Lightly Map Out the Cloud Placement
Use your HB pencil to ghost in the very basic shapes of your clouds using extremely light, circular motions.
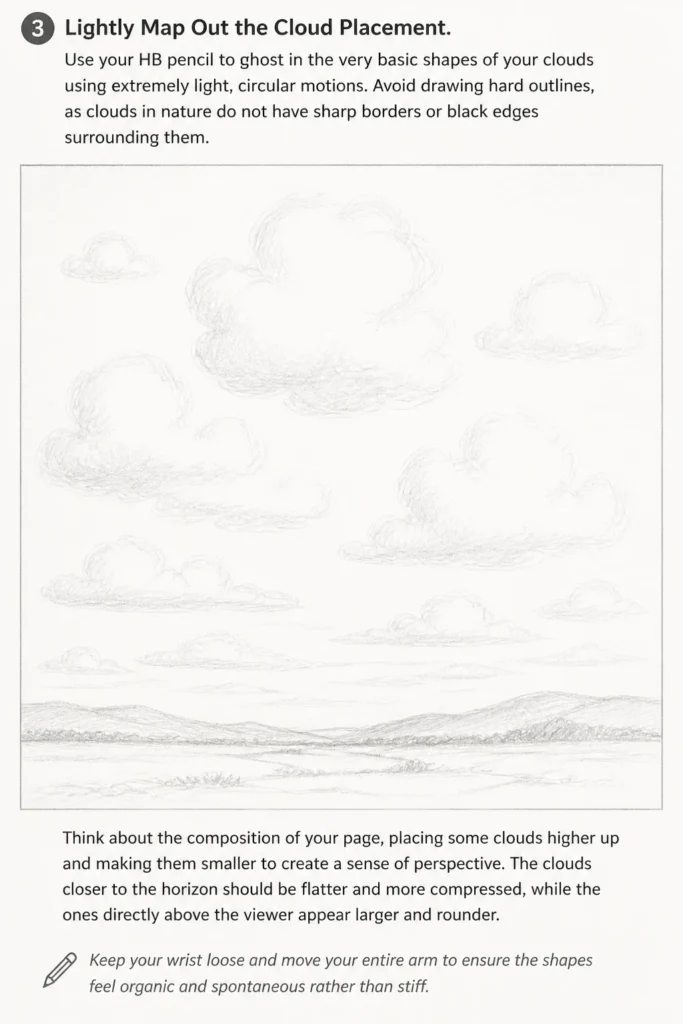
Avoid drawing hard outlines, as clouds in nature do not have sharp borders or black edges surrounding them.
Think about the composition of your page, placing some clouds higher up and making them smaller to create a sense of perspective.
The clouds closer to the horizon should be flatter and more compressed, while the ones directly above the viewer appear larger and rounder.
Keep your wrist loose and move your entire arm to ensure the shapes feel organic and spontaneous rather than stiff.
Step 4: Shade the Sky Using Negative Space
Begin shading the area around the clouds rather than the clouds themselves to define their edges naturally.
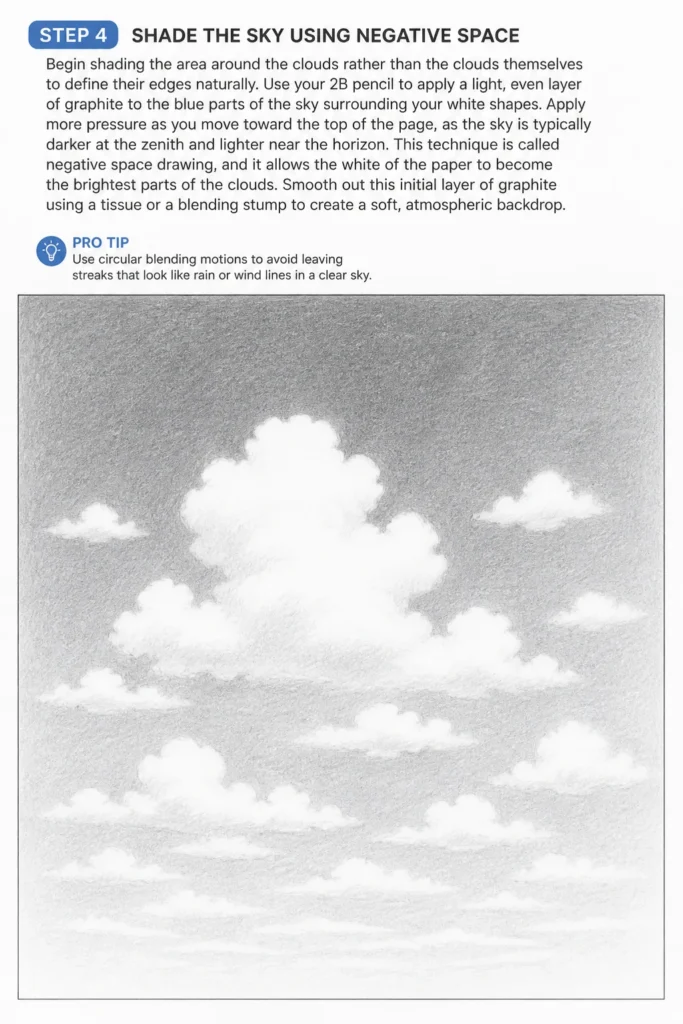
Use your 2B pencil to apply a light, even layer of graphite to the “blue” parts of the sky surrounding your white shapes.
Apply more pressure as you move toward the top of the page, as the sky is typically darker at the zenith and lighter near the horizon.
This technique is called negative space drawing, and it allows the white of the paper to become the brightest parts of the clouds.
Smooth out this initial layer of graphite using a tissue or a blending stump to create a soft, atmospheric backdrop.
Pro Tip: Use circular blending motions to avoid leaving streaks that look like rain or wind lines in a clear sky.
Step 5: Build the Core Shadows
Identify the areas of the cloud that face away from your light source and begin adding darker tones there.
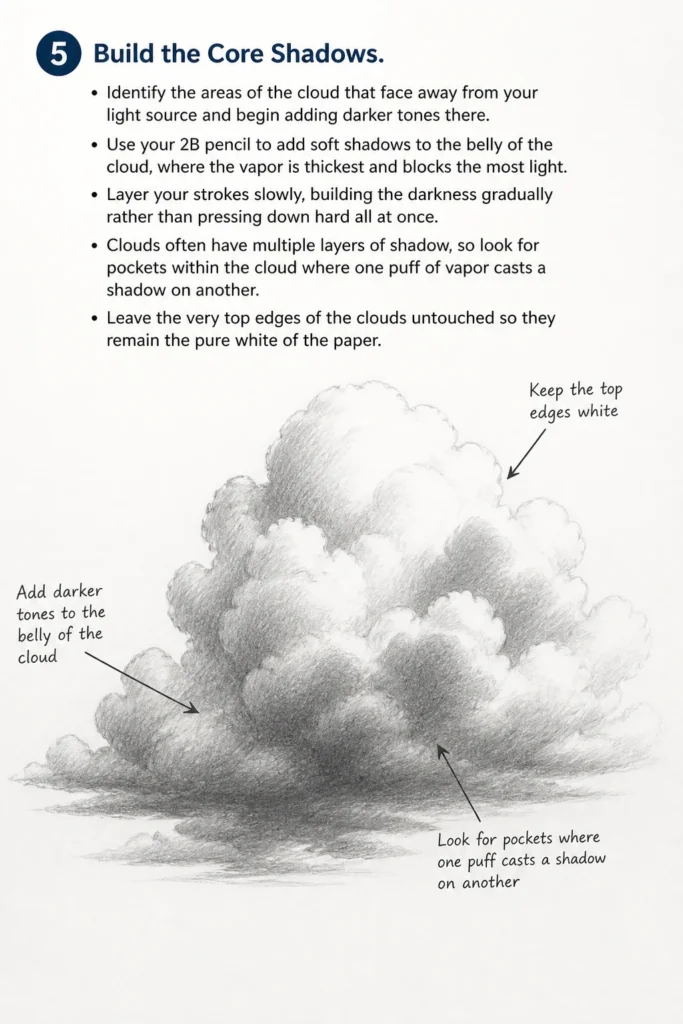
Use your 2B pencil to add soft shadows to the “belly” of the cloud, where the vapor is thickest and blocks the most light.
Layer your strokes slowly, building the darkness gradually rather than pressing down hard all at once.
Clouds often have multiple layers of shadow, so look for “pockets” within the cloud where one puff of vapor casts a shadow on another.
Leave the very top edges of the clouds untouched so they remain the pure white of the paper.
Step 6: Blend for Softness and Volume
Take your blending stump and gently soften the transition between the shadowed areas and the white highlights.
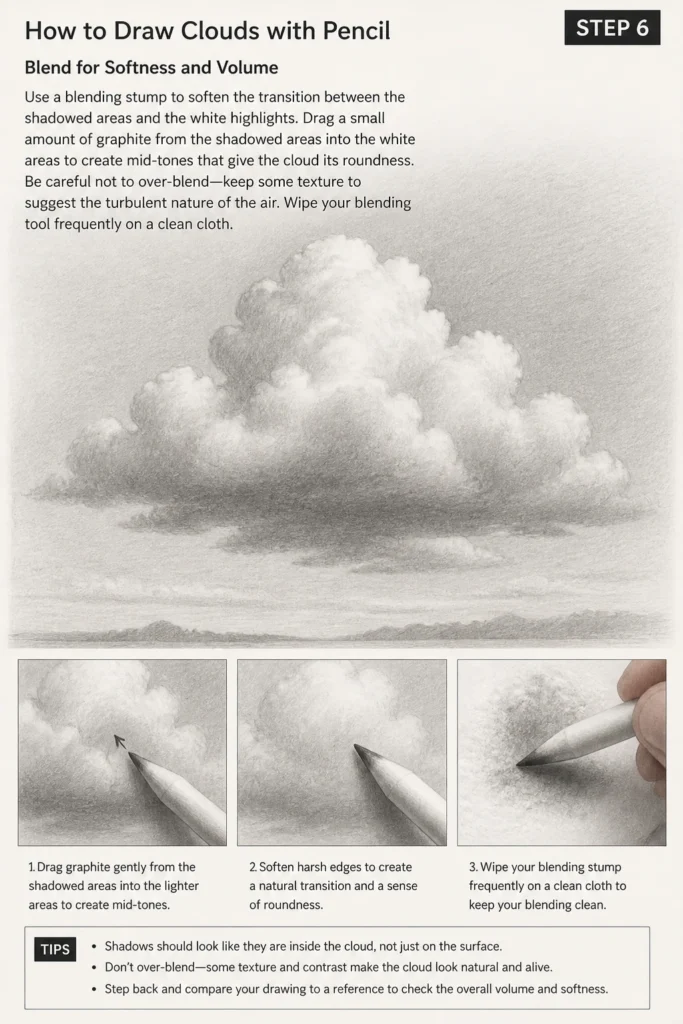
You want the shadows to look like they are inside the cloud, not just sitting on top of the surface like a stain.
Drag a small amount of graphite from the shadowed areas into the white areas to create “mid-tones” that give the cloud its roundness.
Be careful not to over-blend, as you still want some variation in texture to suggest the turbulent nature of the air.
Wipe your blending tool frequently on a clean cloth to ensure you aren’t just moving mud around your drawing.
Step 7: Lift Highlights with a Kneaded Eraser
Pinch your kneaded eraser into a fine point or a thin edge to act as a “white pencil” for your drawing.
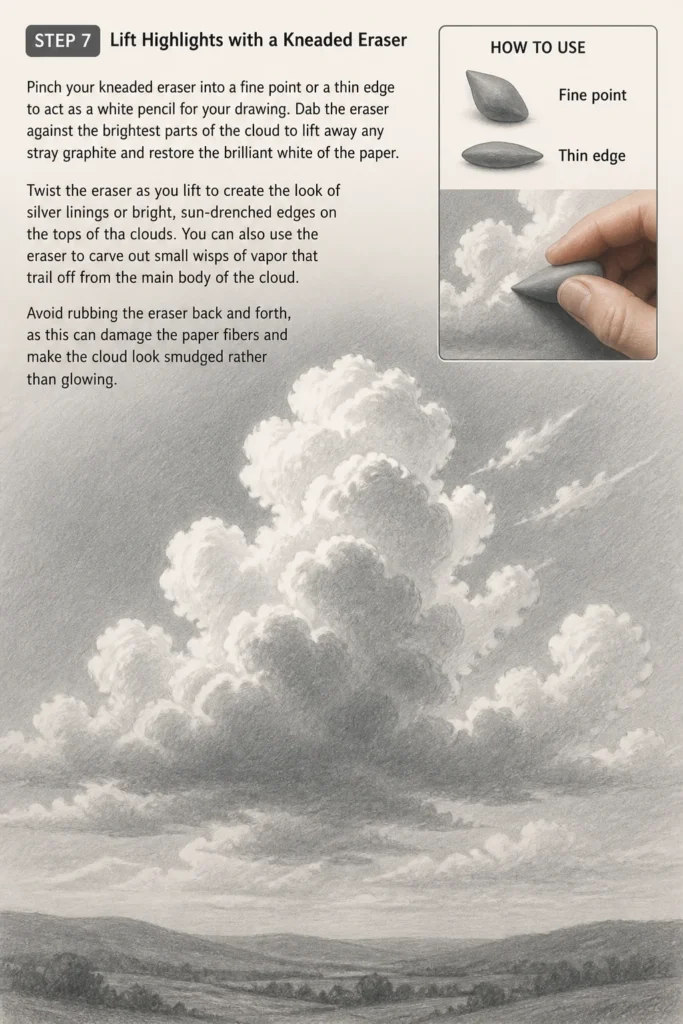
Dab the eraser against the brightest parts of the cloud to lift away any stray graphite and restore the brilliant white of the paper.
Twist the eraser as you lift to create the look of “silver linings” or bright, sun-drenched edges on the tops of the clouds.
You can also use the eraser to “carve” out small wisps of vapor that trail off from the main body of the cloud.
Avoid rubbing the eraser back and forth, as this can damage the paper fibers and make the cloud look smudged rather than glowing.
Step 8: Add Deep Contrast and Final Details
Switch to your 4B pencil to deepen the very darkest parts of the shadows, usually at the very bottom of the cloud formation.
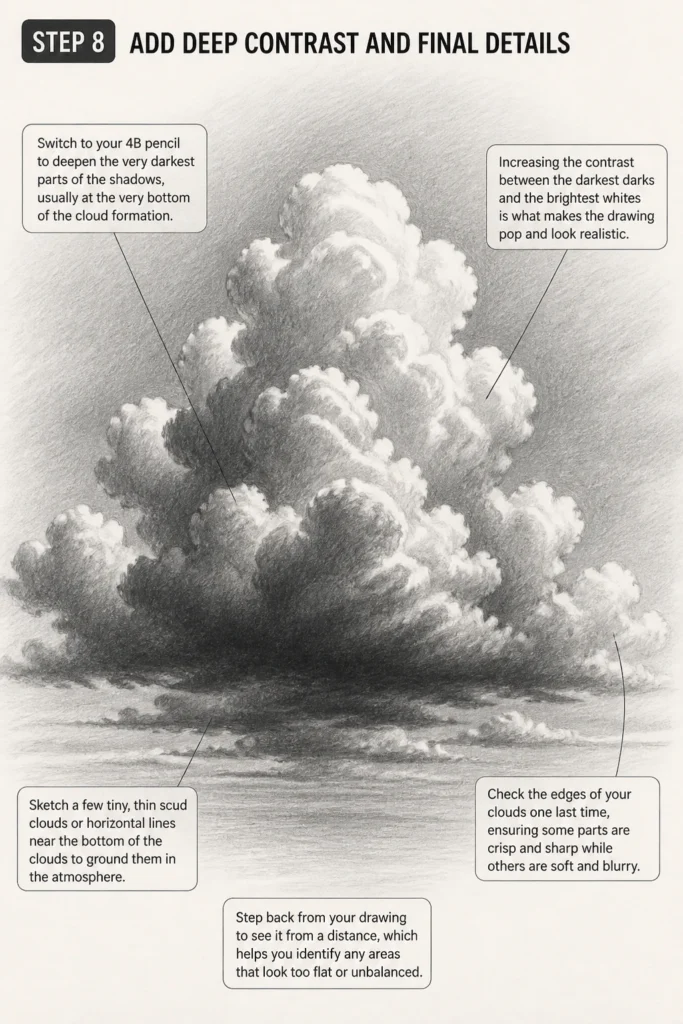
Increasing the contrast between the darkest darks and the brightest whites is what makes the drawing “pop” and look realistic.
Sketch a few tiny, thin “scud” clouds or horizontal lines near the bottom of the clouds to ground them in the atmosphere.
Check the edges of your clouds one last time, ensuring some parts are crisp and sharp while others are soft and blurry.
Step back from your drawing to see it from a distance, which helps you identify any areas that look too flat or unbalanced.
Common Mistakes to Avoid
Outlining the Clouds Like a Cartoon
One of the most frequent errors is drawing a solid dark line around the entire cloud shape.
In reality, clouds are made of light and shadow, and their edges are defined by the contrast against the sky behind them.
Instead of a line, use the shading of the sky to reveal where the cloud begins and ends.
Making Clouds Perfectly Symmetrical
Nature rarely produces perfectly round or identical shapes, so avoid making your clouds look like a row of identical cotton balls.
Vary the sizes, heights, and thicknesses of your clouds to create a more believable and interesting composition.
Real clouds are often jagged, stretched by the wind, or broken into smaller fragments that float nearby.
Over-Blending Into a Gray Blur
If you blend every single part of the cloud, you will lose the definition that makes it look three-dimensional.
The eye needs to see some “hard” edges and distinct tonal changes to understand the volume of the object.
Keep your highlights clean and your shadows deep to maintain the necessary contrast for realism.
Troubleshooting
The Clouds Look Flat and Two-Dimensional
This usually happens when there isn’t enough variation in the shading inside the cloud itself.
Make sure you have a clear range of tones: pure white highlights, light gray mid-tones, and dark gray shadows.
Ensure your shadows follow the curve of the cloud’s underside to suggest a rounded, spherical volume.
The Sky Looks Streaky and Distracting
Streaks occur when the pencil pressure is uneven or the blending tool is used in straight lines rather than circles.
To fix this, add another very light layer of graphite over the streaks and blend again using a clean tissue in a circular motion.
Working in multiple thin layers is always better than trying to get the sky dark enough in a single pass.
Key Takeaways
- Negative Space: Define the clouds by shading the sky around them rather than outlining the shapes.
- Light Source: Keep your light direction consistent to ensure the shadows and highlights make sense.
- Kneaded Eraser: Use this tool to “sculpt” the light back into the drawing and create soft textures.
- Tonal Range: Use a variety of pencil grades (HB to 4B) to create deep contrast and realistic depth.
- Organic Shapes: Avoid symmetry and hard lines to mimic the natural, fluid look of water vapor in the air.
Frequently Asked Questions
What is the best pencil for drawing clouds?
A 2B pencil is the most versatile for clouds because it is soft enough to blend easily but hard enough to keep some detail.
You should also use an HB for light mapping and a 4B for the deepest shadows to provide a full range of tones.
Can I draw clouds on colored paper?
Yes, drawing on toned or gray paper is a fantastic way to make clouds stand out even more.
On toned paper, you can use a white charcoal pencil for the highlights and a graphite pencil for the shadows, which creates a stunning effect.
How do I make clouds look like they are moving?
To suggest motion, use horizontal strokes and slightly “smear” the edges of the cloud in the direction of the wind.
Adding long, thin wisps of clouds (cirrus clouds) trailing behind the larger masses can also create a sense of a breezy day.
Why does my kneaded eraser leave marks?
If your eraser is leaving dark marks, it has probably absorbed too much graphite and needs to be “cleaned.”
Stretch and fold the eraser repeatedly until a clean, lighter gray surface appears, or simply use a fresh piece of eraser.
Our Top Recommended Finds
- Prismacolor Kneaded Rubber Eraser: This is the gold standard for lifting highlights without damaging the paper surface.
- General’s Graphite Pencil Set: A high-quality set that includes a range of hardness levels is essential for building depth.
- Strathmore 400 Series Drawing Paper: The medium surface of this paper provides the perfect amount of tooth for smooth cloud blending.
Master the Art of the Atmosphere
Drawing clouds is a meditative process that teaches you more about light and shadow than almost any other subject.
Once you master the basic cumulus cloud, try experimenting with the long, streaky lines of cirrus clouds or the heavy, dramatic weight of storm clouds.
Take your sketchbook outside today and spend fifteen minutes just observing how the light hits the edges of the clouds in real time.
The more you look at the sky with an artist’s eye, the more naturally these shapes will flow from your pencil to the page.
& Painting
No rigid rules or pretension. Just practical guides, medium comparisons, and encouraging tips to help you enjoy the drawing & painting process.