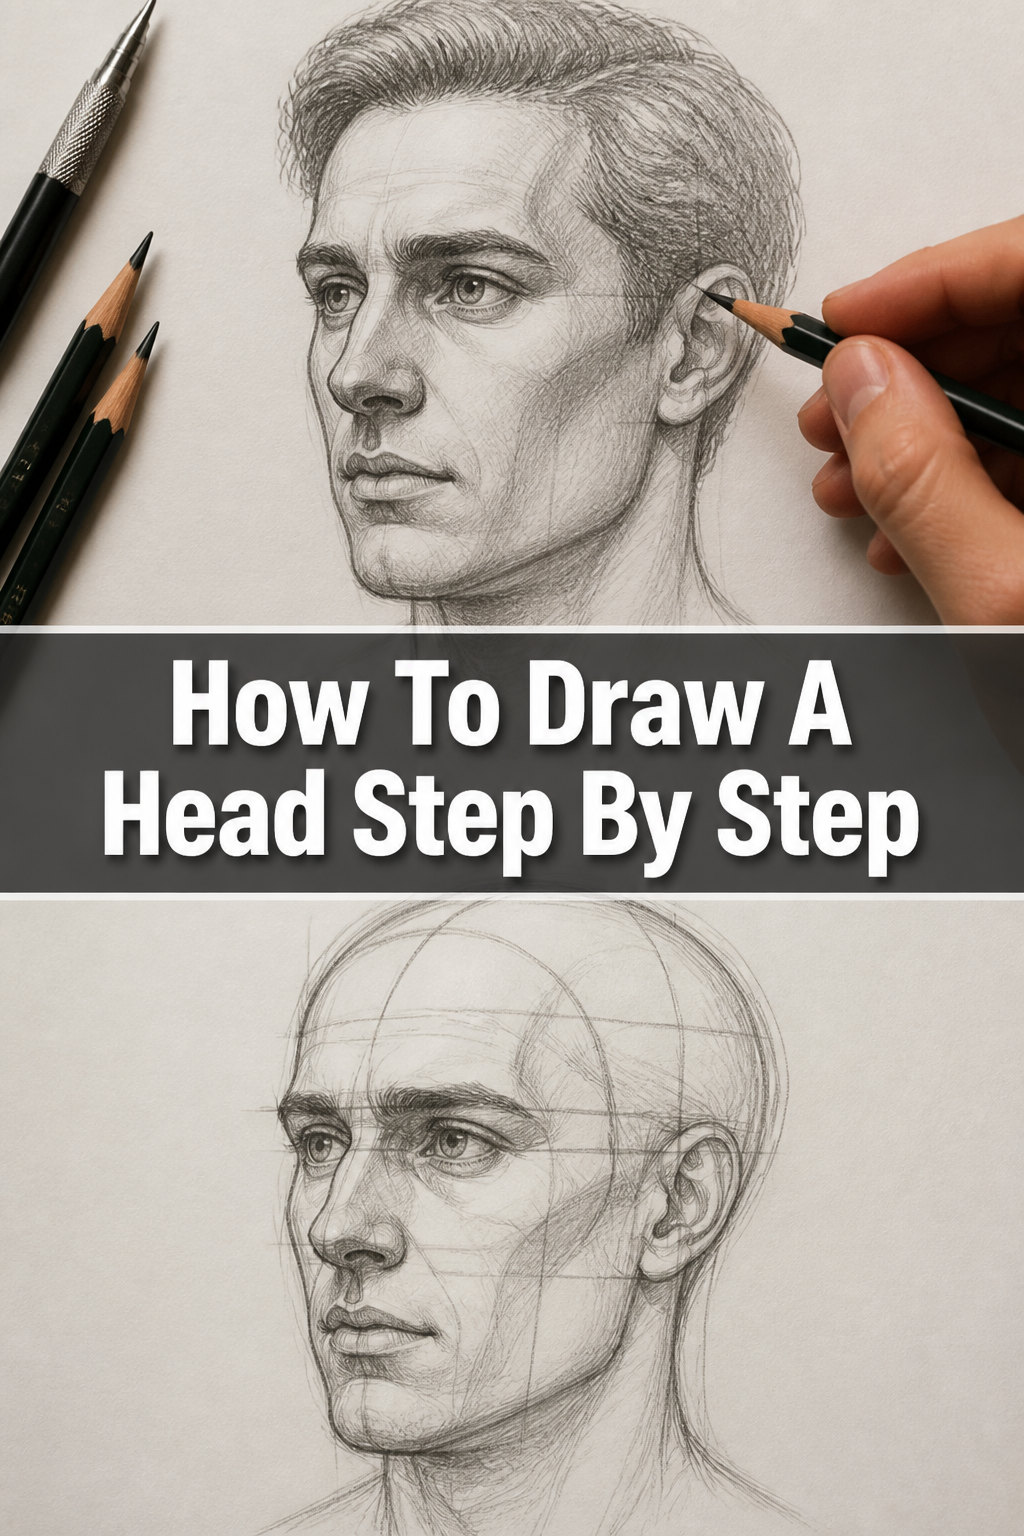
🎨 How To Draw A Head Step By Step

& Painting
No rigid rules or pretension. Just practical guides, medium comparisons, and encouraging tips to help you enjoy the drawing & painting process.
Learning to draw a head can feel like a daunting task, but it’s one of the most rewarding skills an artist can develop.
I remember my early attempts, grappling with proportions and getting frustrated when things didn’t look quite right.
This guide will break down the process into manageable steps, drawing from years of practice to help you build a solid foundation.
Quick Overview
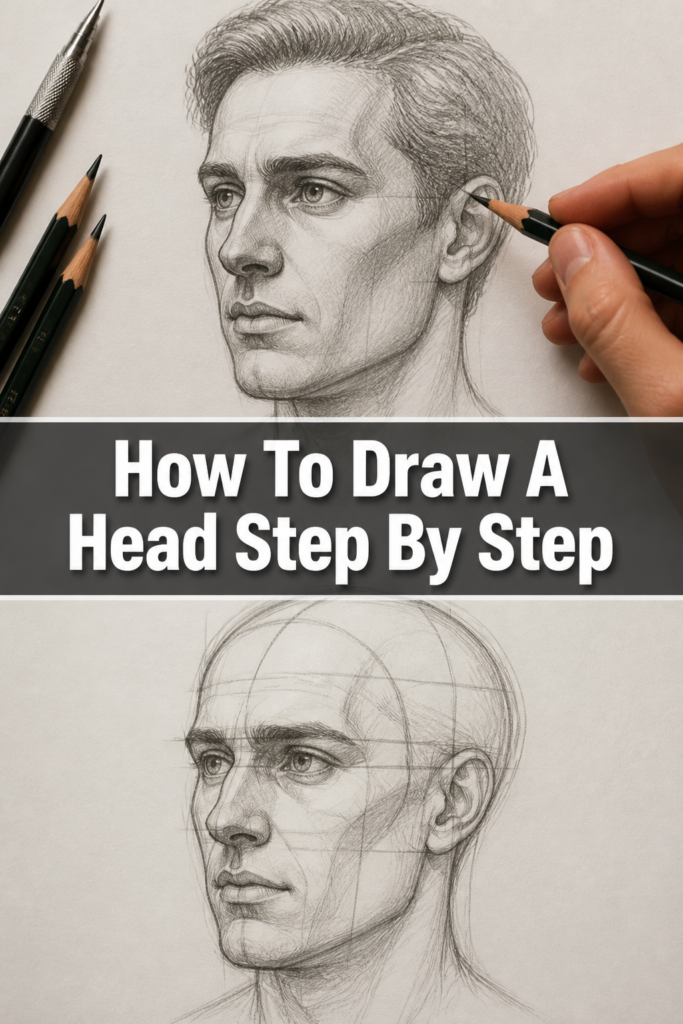
This guide will equip you with a fundamental method for constructing a realistic head from any angle.
You’ll learn how to establish basic shapes, place features accurately, and understand the underlying structure.
- Time needed: 30-60 minutes per practice session
- Difficulty: Beginner to Intermediate
- What you’ll need: Pencil (HB, 2B), paper, eraser, ruler (optional)
Step-by-Step Instructions
Step 1: Start with a Simple Sphere
Every head, regardless of gender or age, begins with a basic spherical form. This sphere represents the cranium, the largest part of the skull.
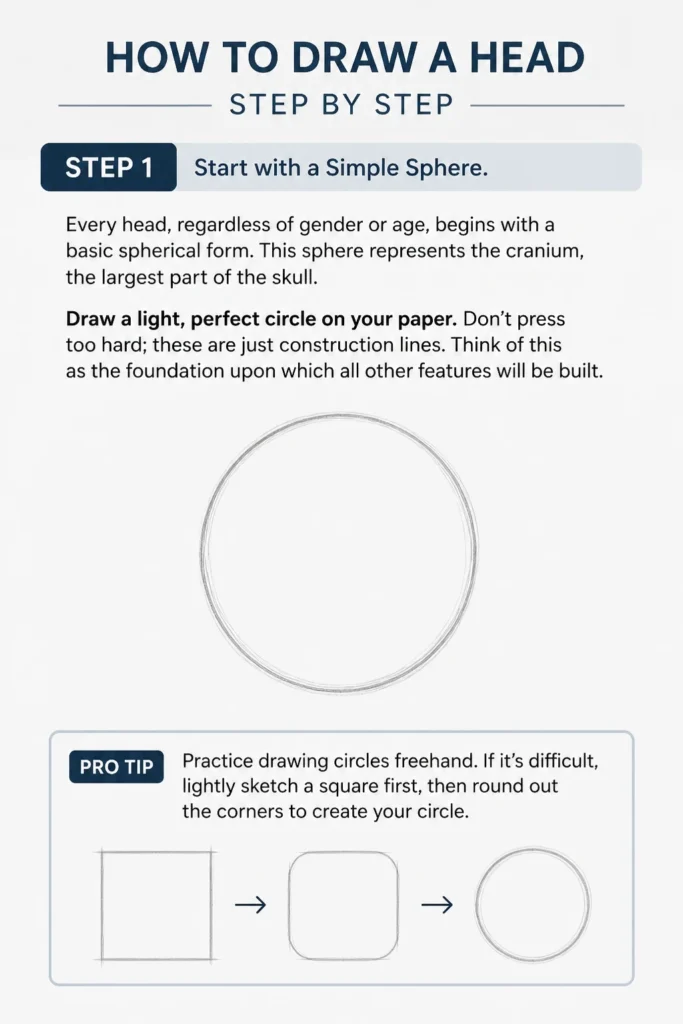
Draw a light, perfect circle on your paper. Don’t press too hard; these are just construction lines.
Think of this as the foundation upon which all other features will be built.
Pro Tip: Practice drawing circles freehand. If it’s difficult, lightly sketch a square first, then round out the corners to create your circle.
Step 2: Establish the Center and Brow Lines
Now, we’ll give our sphere some direction. Draw a vertical line down the exact center of the circle.
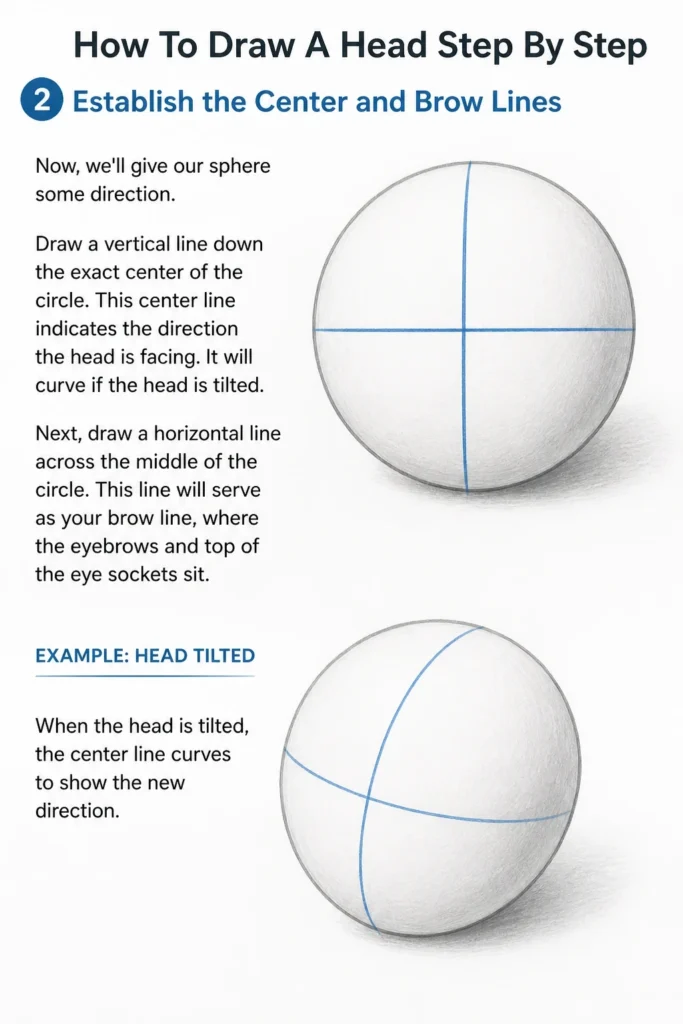
This center line indicates the direction the head is facing. It will curve if the head is tilted.
Next, draw a horizontal line across the middle of the circle. This line will serve as your brow line, where the eyebrows and top of the eye sockets sit.
Step 3: Define the Jawline and Side Planes
The sphere accounts for the cranium, but we need to add the jaw and chin. Extend the vertical center line downwards from the bottom of the circle.
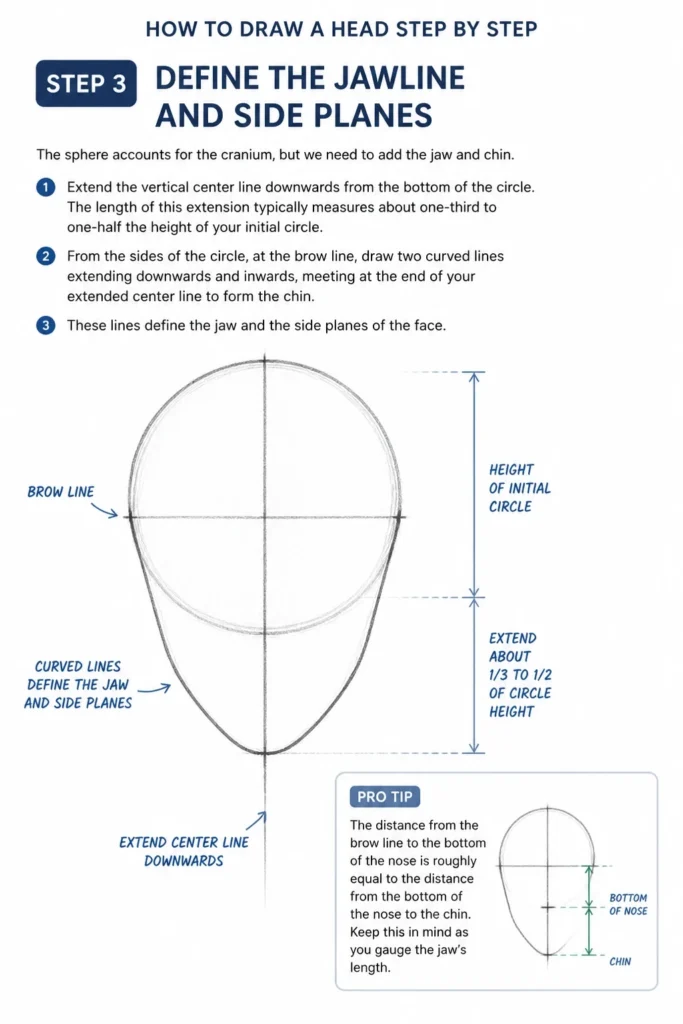
The length of this extension typically measures about one-third to one-half the height of your initial circle.
From the sides of the circle, at the brow line, draw two curved lines extending downwards and inwards, meeting at the end of your extended center line to form the chin.
These lines define the jaw and the side planes of the face.
Pro Tip: The distance from the brow line to the bottom of the nose is roughly equal to the distance from the bottom of the nose to the chin. Keep this in mind as you gauge the jaw’s length.
Step 4: Mark the Proportional Divisions
The human face follows general proportions. We’ll use our existing lines to divide the face into thirds.
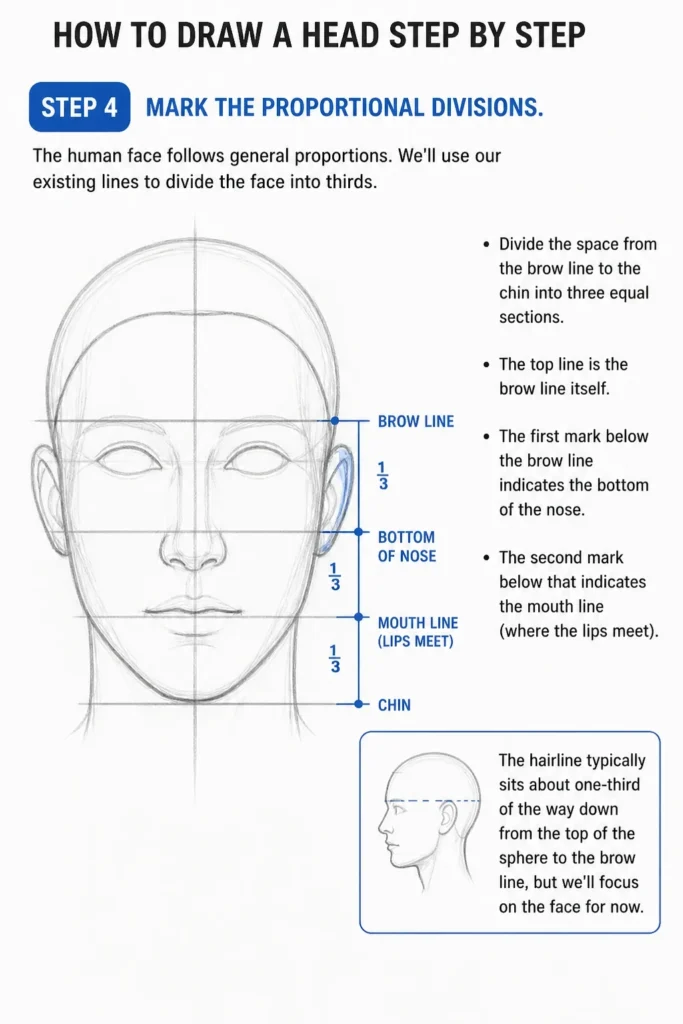
Divide the space from the brow line to the chin into three equal sections. The top line is the brow line itself.
The first mark below the brow line indicates the bottom of the nose. The second mark below that indicates the mouth line (where the lips meet).
The hairline typically sits about one-third of the way down from the top of the sphere to the brow line, but we’ll focus on the face for now.
Step 5: Place the Eyes and Ears
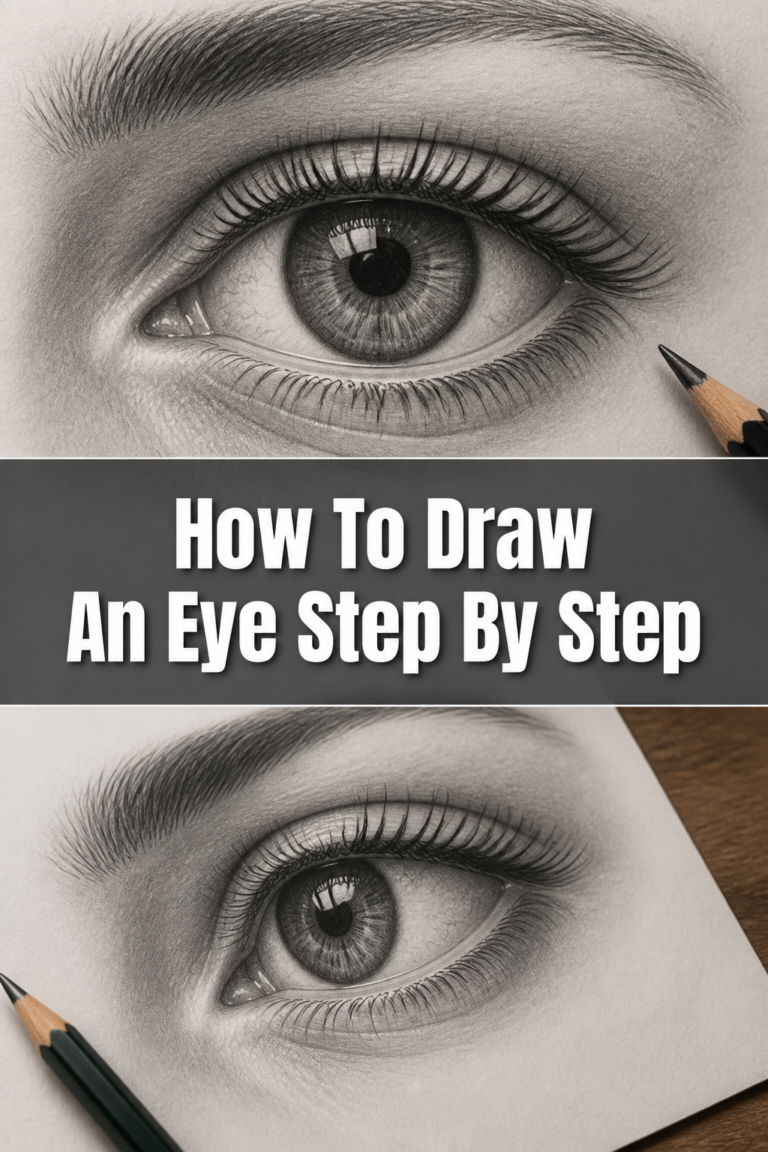
The eyes are crucial for expression. Draw a horizontal line midway between the brow line and the bottom of the nose line. This is your eye line.
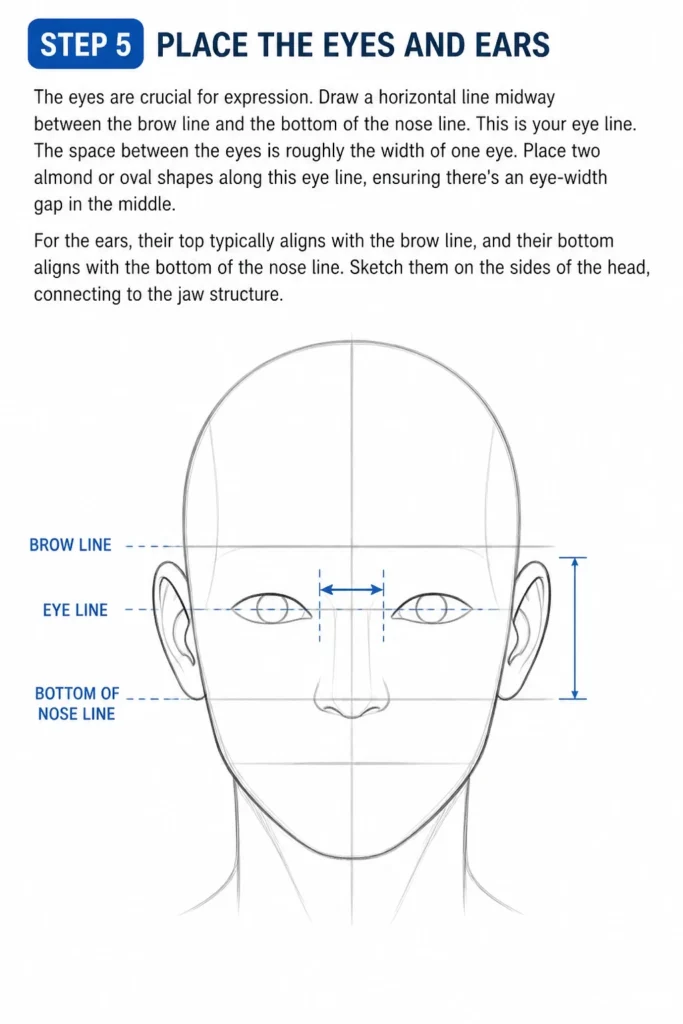
The space between the eyes is roughly the width of one eye. Place two almond or oval shapes along this eye line, ensuring there’s an eye-width gap in the middle.
For the ears, their top typically aligns with the brow line, and their bottom aligns with the bottom of the nose line. Sketch them on the sides of the head, connecting to the jaw structure.
Step 6: Construct the Nose and Mouth
Now, let’s build out the central features. For the nose, draw a simple wedge or trapezoid shape, with its base sitting on the nose line you established.
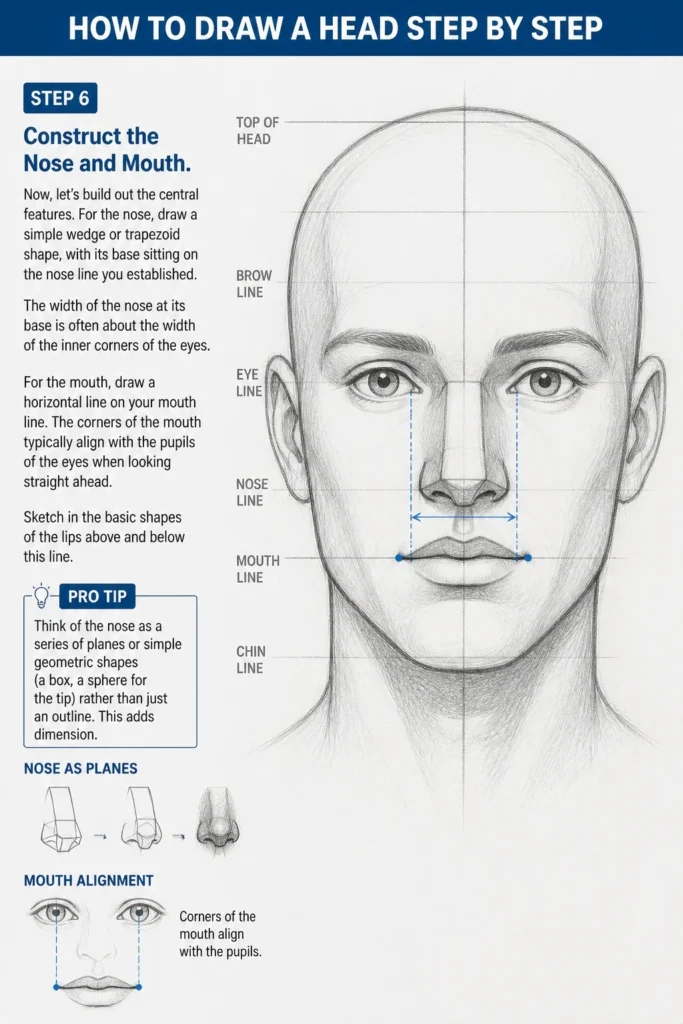
The width of the nose at its base is often about the width of the inner corners of the eyes.
For the mouth, draw a horizontal line on your mouth line. The corners of the mouth typically align with the pupils of the eyes when looking straight ahead.
Sketch in the basic shapes of the lips above and below this line.
Pro Tip: Think of the nose as a series of planes or simple geometric shapes (a box, a sphere for the tip) rather than just an outline. This adds dimension.
Step 7: Refine the Head Shape and Neck
At this point, you have a basic framework. Refine the contours of the head, smoothing out the initial sphere and jawline into more natural curves.
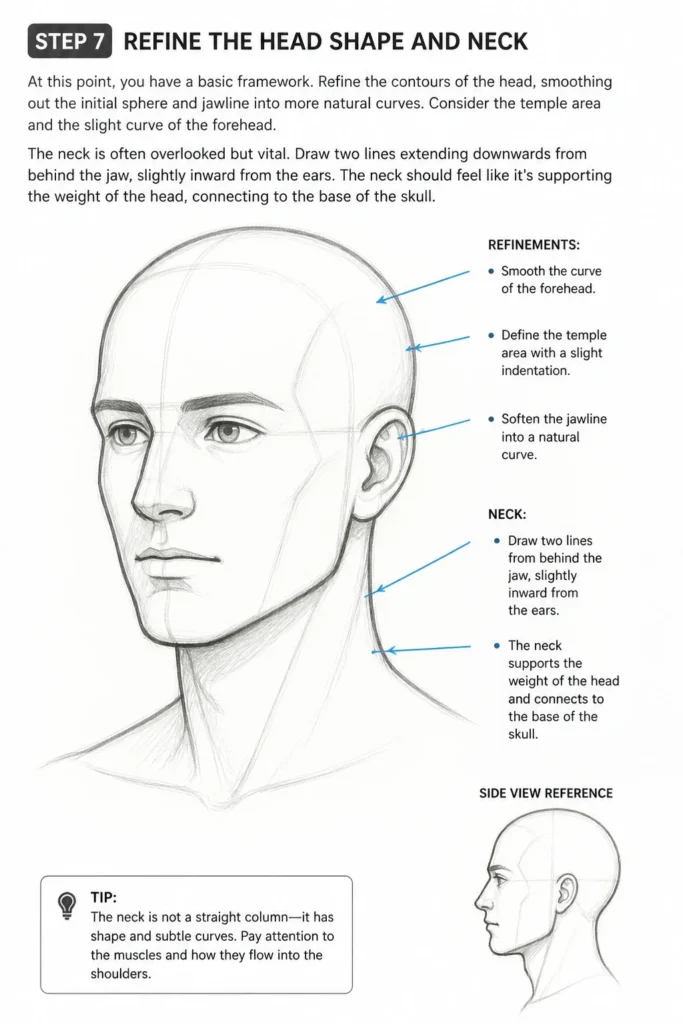
Consider the temple area and the slight curve of the forehead.
The neck is often overlooked but vital. Draw two lines extending downwards from behind the jaw, slightly inward from the ears.
The neck should feel like it’s supporting the weight of the head, connecting to the base of the skull.
Step 8: Add Hair and Facial Details
Hair isn’t just an outline; it has volume. Sketch the general mass of the hair, starting from the hairline (which you can now place roughly a third of the way up from the brow line to the top of the sphere).
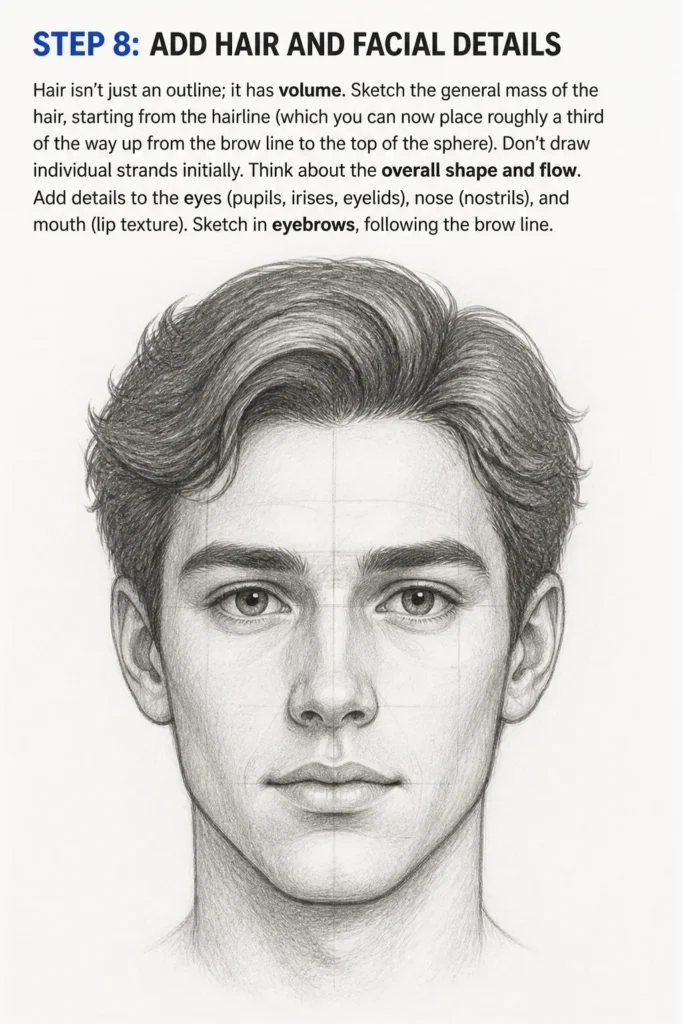
Don’t draw individual strands initially. Think about the overall shape and flow.
Add details to the eyes (pupils, irises, eyelids), nose (nostrils), and mouth (lip texture). Sketch in eyebrows, following the brow line.
Step 9: Clean Up and Shade (Optional)
Once you’re happy with the structure and features, erase your initial construction lines lightly.
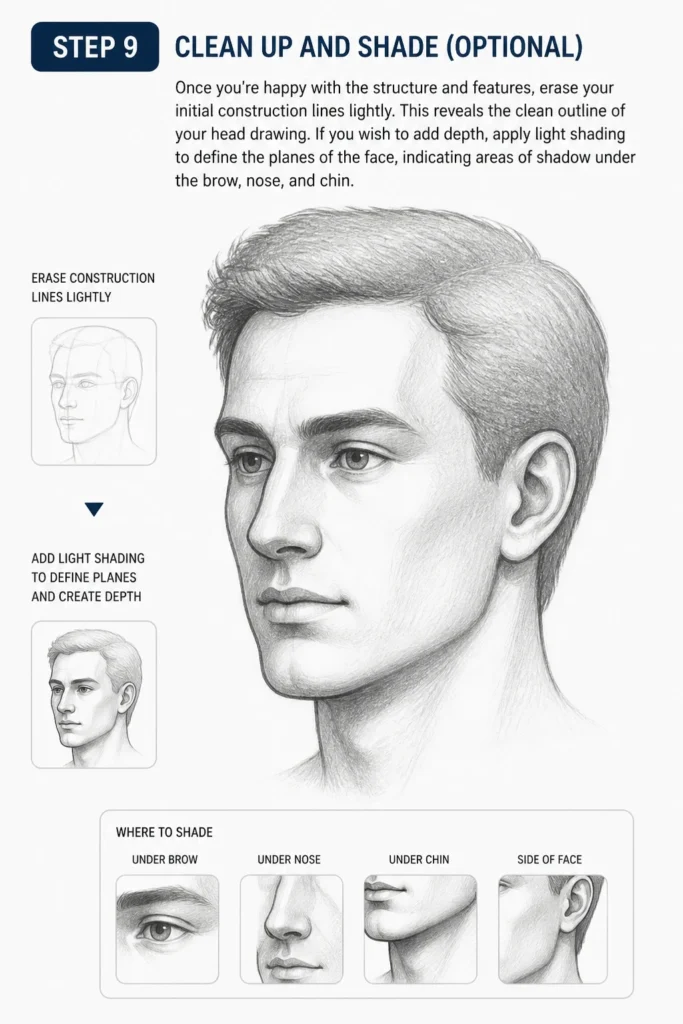
This reveals the clean outline of your head drawing.
If you wish to add depth, apply light shading to define the planes of the face, indicating areas of shadow under the brow, nose, and chin.
Common Mistakes to Avoid
Drawing a Flat Head
Many beginners treat the head as a flat, two-dimensional shape. This results in a lifeless drawing without form.
Remember that the head is a three-dimensional object, a sphere with a jaw attached. Always think about the curves and planes that wrap around this form.
Use your initial sphere and center lines to guide the curvature of features like eyes and mouths when drawing from an angle.
Incorrect Eye Placement
A common error is placing eyes too high or too low. The eyes are almost always located on the horizontal centerline of the entire head, not just the face.
If you measure from the top of the skull to the chin, the eyes sit right in the middle.
Also, ensure the space between the eyes is roughly the width of one eye; this maintains accurate proportions.
Symmetrical Features on an Angled Head
When a head is turned, features like the eyes, eyebrows, and mouth should follow the curve of the head. Drawing them perfectly symmetrical and flat makes the head look disjointed.
Use your curved center line and brow line as guides to ensure features recede correctly into perspective.
One eye will appear slightly smaller or foreshortened than the other when the head is angled.
Stiff or Disconnected Neck
The neck is often an afterthought, drawn as two straight lines. This can make the head appear to float or look like it’s on a stick.
The neck is a powerful muscular structure that supports the head’s weight. It connects to the base of the skull and widens as it meets the shoulders.
Consider the trapezius muscles that rise from the shoulders to the neck, giving it a more natural and supportive appearance.
Troubleshooting
My Head Looks Squashed or Too Long
This usually indicates an issue with your initial vertical proportions. Revisit Step 3 and Step 4.
Ensure the extension for the jawline isn’t too short or too long relative to the initial sphere.
Also, double-check that the divisions for the brow, nose, and mouth lines are roughly equal, as these are critical for a balanced face.
The Features Are Uneven or Crooked
If your eyes or mouth appear lopsided, it’s likely a problem with your horizontal guidelines, especially if the head is angled.
Make sure your brow line and eye line truly follow the curve of the head’s form.
Use light construction lines to measure distances from the center line to ensure symmetry (or appropriate asymmetry for an angled head).
The Head Appears Too Wide or Too Narrow
This relates to the overall width of your initial sphere and how you define the jawline.
If it’s too wide, your initial circle might be too broad or your jawlines are extending too far outwards.
If it’s too narrow, your circle might be too small, or you’re drawing the jawlines too sharply inwards without enough width for the cheekbones.
Remember that the head is wider at the temples and narrows towards the chin.
Key Takeaways
- Always begin with a spherical form to establish the cranium.
- Use a clear center line and brow line to orient the head and place features.
- Proportional divisions (thirds for brow-nose-mouth) are essential for a balanced face.
- Think in three dimensions; the head is a form, not a flat shape.
- Pay attention to the natural curves and planes of the face as you refine your drawing.
- The neck is a crucial supporting structure and should be drawn with consideration for its volume and connection.
Frequently Asked Questions
Should I always start with a perfect circle?
While a perfect circle is ideal for practice, the goal is to quickly establish a roughly spherical shape. Don’t spend too much time perfecting it. As you gain experience, your initial circle will become more intuitive and less rigid.
How do I draw a head from different angles?
The core method remains the same. Your initial sphere, center line, and brow line will curve to reflect the head’s tilt or turn. For example, if the head looks up, the horizontal lines will curve upwards, and the vertical line will curve to follow the skull’s contour.
What if my drawing doesn’t look like the person I’m trying to draw?
This guide focuses on generic head construction. Capturing likeness involves studying specific features, subtle proportions, and expressions unique to an individual. Master the basic construction first, then layer on observation of your subject’s unique characteristics.
How can I make my heads look more masculine or feminine?
Masculine heads often feature a more prominent brow ridge, squarer jawline, and wider neck. Feminine heads typically have a softer jawline, less pronounced brow, and slightly larger eyes relative to the face. Adjusting these subtle differences will help differentiate gender.
Our Top Recommended Finds
- Sketchbook with medium-weight paper: A good quality sketchbook prevents bleed-through and holds up to erasing.
- Graphite pencil set (HB, 2B, 4B): Different lead hardness allows for varied line weights and shading, from light construction lines to darker details.
- Kneaded eraser: This versatile eraser can lift graphite without damaging paper and can be molded into precise shapes for fine adjustments.
Embrace the Journey of Drawing
You now have a robust framework for drawing the human head. This method is a launchpad, not a rigid rulebook.
The real magic happens when you combine this knowledge with observation and consistent practice.
Take your newfound skills and apply them. Sketch heads from photos, from life, or even from your imagination.
Each drawing is a step forward in your artistic journey, so pick up your pencil and create something today!
& Painting
No rigid rules or pretension. Just practical guides, medium comparisons, and encouraging tips to help you enjoy the drawing & painting process.