⛵ How To Draw A Boat Step By Step

& Painting
No rigid rules or pretension. Just practical guides, medium comparisons, and encouraging tips to help you enjoy the drawing & painting process.
Have you ever watched a boat glide across the water and wished you could capture that serene image on paper? Sketching a boat can seem challenging at first glance. It involves understanding basic shapes and perspective.
I’ve spent countless afternoons by the harbor, sketching various vessels. This guide will share my practical approach. You’ll learn how to break down complex forms into simple, manageable steps.
Quick Overview
This guide will walk you through creating a charming boat drawing from scratch. You’ll build confidence in sketching dynamic shapes. We will cover everything from initial outlines to final shading.
- Time needed: 45-75 minutes
- Difficulty: Beginner
- What you’ll need: Pencil, paper, eraser, a straight edge (optional)
Step-by-Step Instructions
Step 1: Gather Your Materials and Set Up
Before you begin, ensure you have all your tools ready. A comfortable workspace makes a big difference. Good lighting is also very helpful for seeing your lines clearly.
Prepare your pencil by sharpening it to a fine point. Keep your eraser within easy reach. A clean sheet of paper is your canvas.
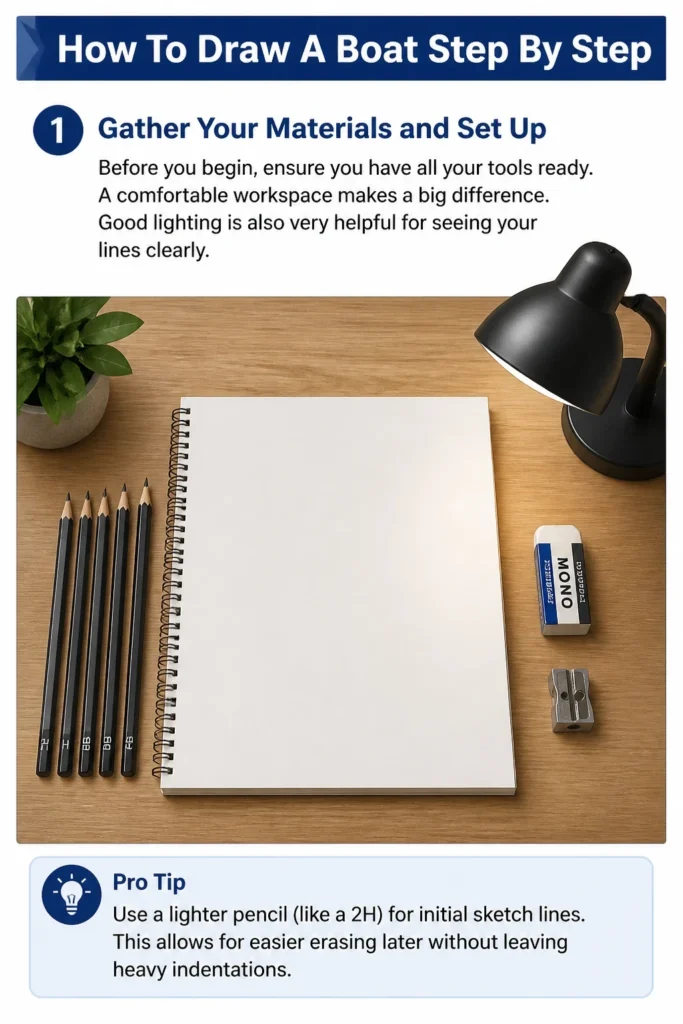
Pro Tip: Use a lighter pencil (like a 2H) for initial sketch lines. This allows for easier erasing later without leaving heavy indentations.
Step 2: Sketch the Basic Hull Shape
The hull is the main body of the boat. It forms the foundation of your drawing. We’ll start with a simple, curved shape.
Draw a long, gentle curve for the bottom of the hull. This line represents the keel. It will set the length and general direction of your boat.
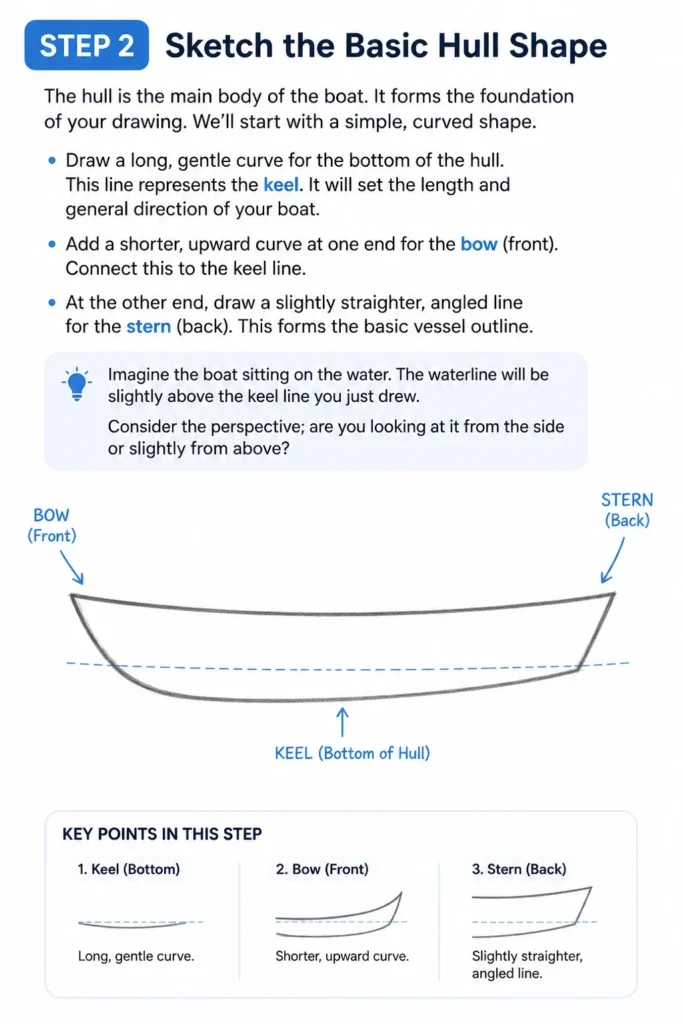
Add a shorter, upward curve at one end for the bow (front). Connect this to the keel line. At the other end, draw a slightly straighter, angled line for the stern (back). This forms the basic vessel outline.
Imagine the boat sitting on the water. The waterline will be slightly above the keel line you just drew. Consider the perspective; are you looking at it from the side or slightly from above?
Step 3: Define the Deck and Cabin Structure
Now, we’ll give our boat a top and some structure. This will start to make it look like a three-dimensional object.
Draw a line parallel to your keel line, but above it. This will be the top edge of the hull. Connect this line to the bow and stern points you already established.
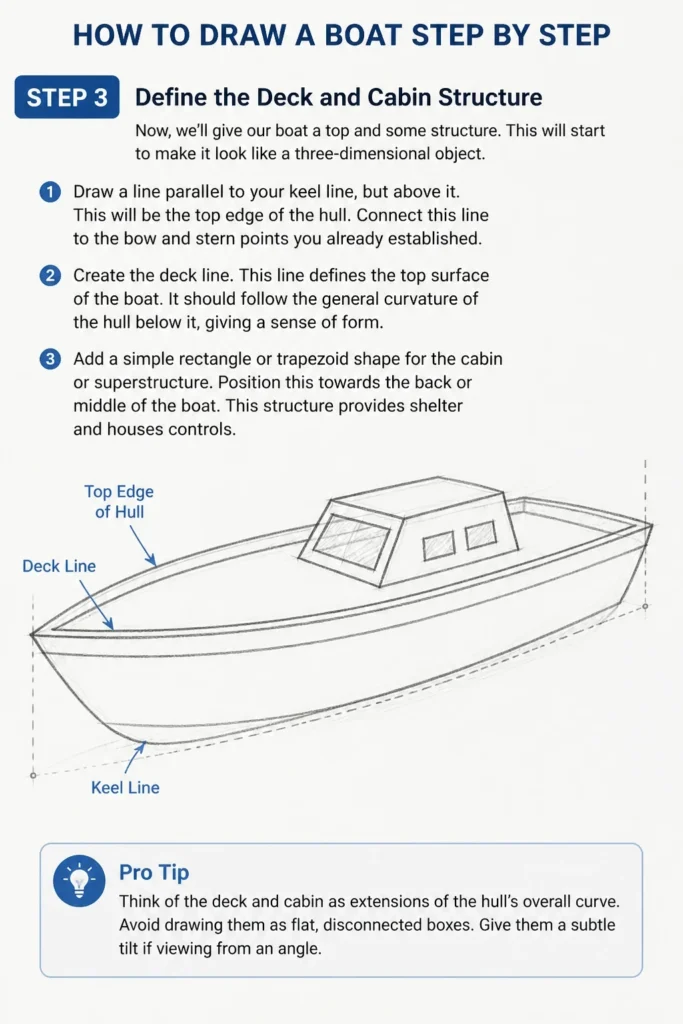
Create the deck line. This line defines the top surface of the boat. It should follow the general curvature of the hull below it, giving a sense of form.
Add a simple rectangle or trapezoid shape for the cabin or superstructure. Position this towards the back or middle of the boat. This structure provides shelter and houses controls.
Pro Tip: Think of the deck and cabin as extensions of the hull’s overall curve. Avoid drawing them as flat, disconnected boxes. Give them a subtle tilt if viewing from an angle.
Step 4: Introduce Masts and Sails (for a sailboat) or Other Details
This step adds the iconic elements that make a boat recognizable. If you’re drawing a motorboat, you might add a windshield or radar.
Draw a vertical line from the deck for the mast. A sailboat typically has one or two masts. Ensure it stands tall and relatively straight.
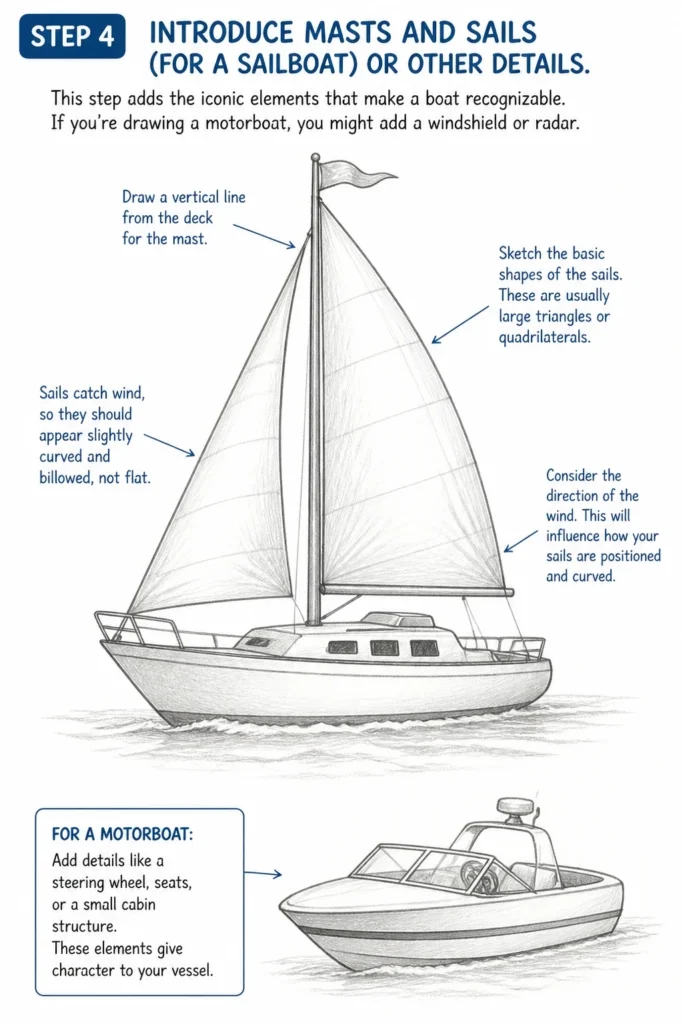
Sketch the basic shapes of the sails. These are usually large triangles or quadrilaterals. Remember that sails catch wind, so they should appear slightly curved and billowed, not flat.
Consider the direction of the wind. This will influence how your sails are positioned and curved. A gentle curve suggests movement and volume.
For a motorboat, add details like a steering wheel, seats, or a small cabin structure. These elements give character to your vessel.
Step 5: Add Rigging and Essential Features
Details bring your boat to life. These small additions make a big impact on realism.
Draw the boom, a horizontal spar extending from the mast. Then, connect the sails to the mast and boom with light lines. These are the rigging lines.
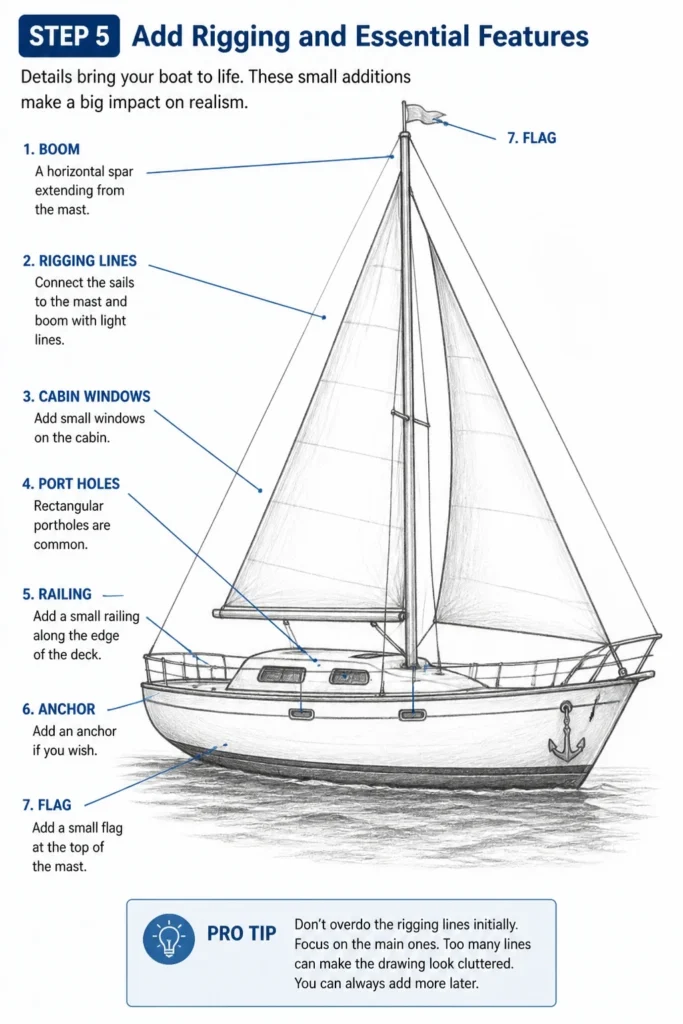
Include small windows on the cabin. Rectangular portholes are also common. Add a small railing along the edge of the deck. This defines the perimeter.
Sketch an anchor if you wish. Perhaps add a small flag at the top of the mast. These details contribute to the story of your boat.
Pro Tip: Don’t overdo the rigging lines initially. Focus on the main ones. Too many lines can make the drawing look cluttered. You can always add more later.
Step 6: Refine Outlines and Erase Guidelines
Now it’s time to clean up your drawing. This step makes your boat look polished and complete.
Go over your preferred lines with a slightly darker pencil or a firmer hand. Strengthen the main outlines of the hull, deck, cabin, and sails. Make these lines stand out.
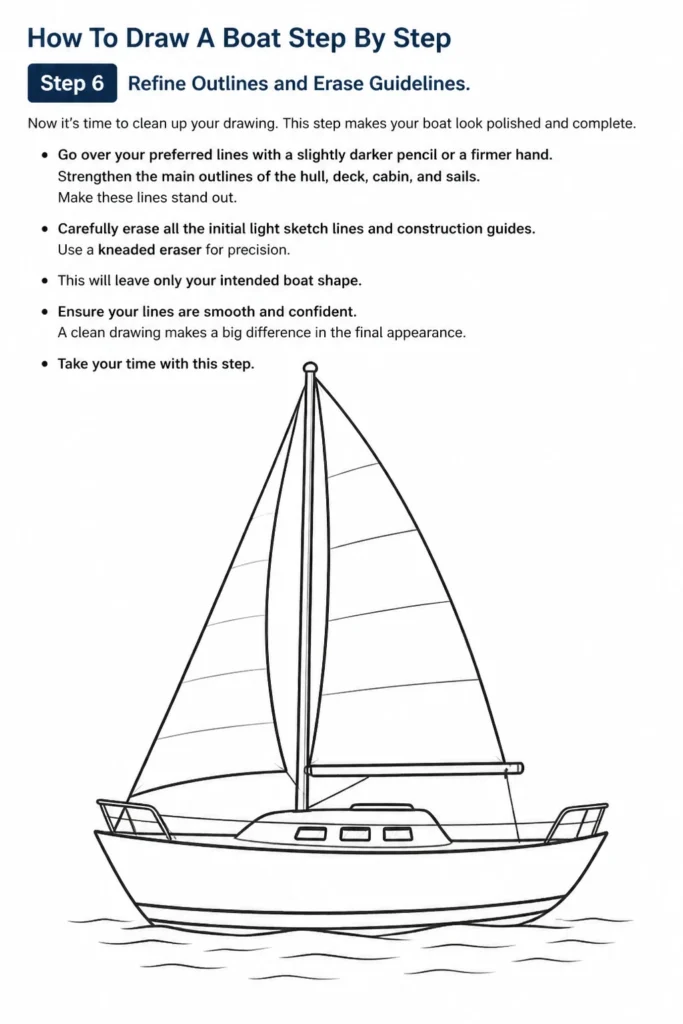
Carefully erase all the initial light sketch lines and construction guides. Use a kneaded eraser for precision. This will leave only your intended boat shape.
Ensure your lines are smooth and confident. A clean drawing makes a big difference in the final appearance. Take your time with this step.
Step 7: Introduce Water and Background Elements
A boat doesn’t float in a vacuum. Adding its environment enhances the drawing.
Draw a gentle, wavy line for the waterline. This line should intersect the hull. It indicates where the boat meets the water.
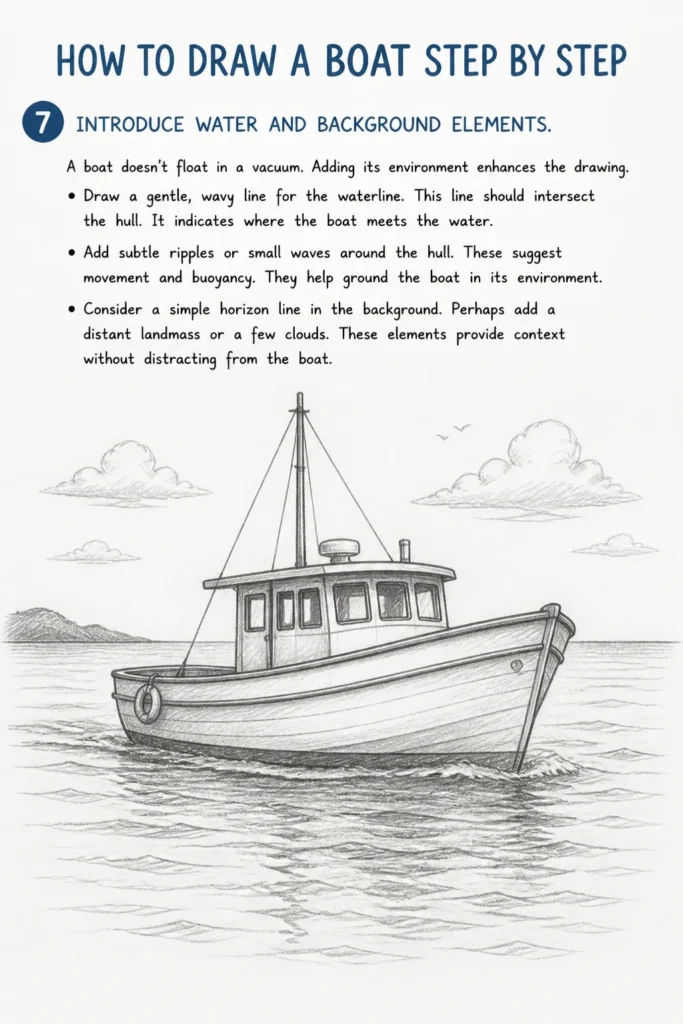
Add subtle ripples or small waves around the hull. These suggest movement and buoyancy. They help ground the boat in its environment.
Consider a simple horizon line in the background. Perhaps add a distant landmass or a few clouds. These elements provide context without distracting from the boat.
Step 8: Add Shading and Final Touches
Shading gives your boat dimension and makes it pop off the page. It adds realism and depth.
Determine a light source. This will guide where you add shadows. Areas away from the light source will be darker.
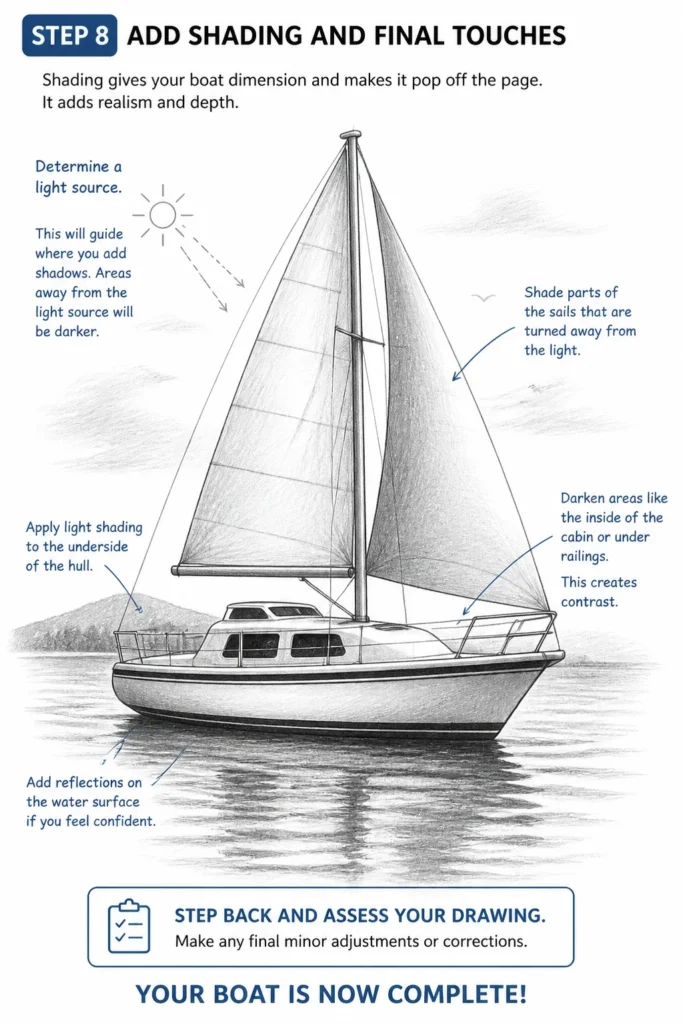
Apply light shading to the underside of the hull. Also shade parts of the sails that are turned away from the light. Use smooth, consistent strokes.
Darken areas like the inside of the cabin or under railings. This creates contrast. Add reflections on the water surface if you feel confident.
Step back and assess your drawing. Make any final minor adjustments or corrections. Your boat is now complete!
Common Mistakes to Avoid
Disproportionate Hull
Many beginners draw the hull too short, too wide, or with an unnatural curve. This makes the boat look unrealistic or unbalanced. Always start with a long, gentle curve for the keel. Build the rest of the hull around this foundation. Pay attention to the overall length versus height.
Flat-Looking Sails
Sails are often drawn as simple, flat triangles or rectangles. This ignores the fact that they are fabric catching wind. To avoid this, always add a subtle curve or bulge to your sails. Imagine them being pushed by an invisible force. This instantly adds dynamism and realism.
Forgetting the Waterline or Context
A boat floating in mid-air looks strange. Neglecting the waterline or any background elements can make your drawing feel incomplete. Always include a waterline that interacts with the hull. Even simple waves or a horizon line can greatly enhance the overall composition.
Overcomplicating Details Too Early
It’s tempting to jump straight to drawing intricate windows or rigging. However, this often leads to a messy drawing if the underlying structure isn’t solid. Focus on the big shapes first – hull, deck, cabin, sails. Add smaller details only after the main forms are established and refined.
Troubleshooting
My boat looks lopsided or uneven.
This often happens when you don’t use light construction lines initially. Go back to Step 2 and lightly re-sketch your keel and deck lines. Use a straight edge if necessary for the main horizontal elements. Focus on symmetry for the hull’s main body. You can also flip your drawing upside down to spot imbalances more easily.
The details (like windows or railings) feel too complex.
Break down complex details into simpler shapes. A window can start as a rectangle. A railing can be two parallel lines. Don’t try to draw every tiny component at once. Simplify and suggest details rather than explicitly drawing every single one. Practice drawing these elements separately first.
My drawing lacks depth and looks flat.
Depth comes primarily from shading and perspective. Ensure you’ve identified a light source and applied shading consistently. Darker values recede, lighter values come forward. Also, use overlapping elements. For example, parts of the cabin covering parts of the hull create depth. Adding background elements also helps create a sense of space.
Key Takeaways
- Start with basic shapes: Build your boat from simple lines and curves for the hull, deck, and cabin.
- Embrace light sketch lines: Use a light touch for initial outlines, allowing for easy corrections.
- Consider perspective: Even a slight angle can give your boat a three-dimensional feel.
- Add dynamic elements: Curved sails and wavy water bring your boat to life.
- Refine and shade: Strengthen your lines and add shadows to create depth and realism.
- Context matters: Include a waterline and simple background to ground your boat in its environment.
Frequently Asked Questions
What’s the best type of boat to start drawing?
A simple sailboat or a small fishing boat is often best for beginners. They have clear, recognizable shapes and fewer complex mechanical details than large yachts or cargo ships. The basic hull, mast, and sails are excellent for practicing fundamental drawing skills.
How do I make my boat look like it’s actually on water?
The key is the interaction between the hull and the waterline. Draw the waterline slightly wavy where it meets the boat. Add small ripples or V-shaped lines trailing behind the stern. This suggests movement and displacement. Reflections can also enhance this effect.
Should I use a ruler for drawing a boat?
While drawing freehand helps develop skill, a ruler can be very useful for initial construction lines, especially for the deck or cabin edges, or for ensuring a straight mast. Use it lightly for guidelines, then refine the lines freehand for a more organic feel. It’s a tool, not a crutch.
How can I draw different boat types?
Once you master the basic principles, research different boat types. Observe their unique hull shapes, mast configurations, or cabin designs. Break them down into simple forms first. Practice drawing from reference photos to understand their distinct characteristics.
Our Top Recommended Finds
- Sketching Pencil Set: A good range of graphite pencils (2H to 6B) allows for varied line weights and shading.
- Quality Sketchbook: Acid-free paper with a good tooth provides an excellent surface for pencil work and prevents smudging.
- Kneaded Eraser: This soft, pliable eraser lifts graphite without damaging the paper and is perfect for precise clean-up.
Embarking on Your Artistic Voyage
You’ve now navigated the waters of drawing a boat, from the first line to the final detail. This journey isn’t just about creating a picture; it’s about building confidence in your artistic abilities. Every stroke you make is a step forward in your creative expression.
Keep practicing, and don’t be afraid to experiment with different boat styles or add your unique flair. Try sketching your boat from different angles next time. Perhaps add a bustling harbor scene or a tranquil sunset. Your artistic adventure has just begun.
& Painting
No rigid rules or pretension. Just practical guides, medium comparisons, and encouraging tips to help you enjoy the drawing & painting process.