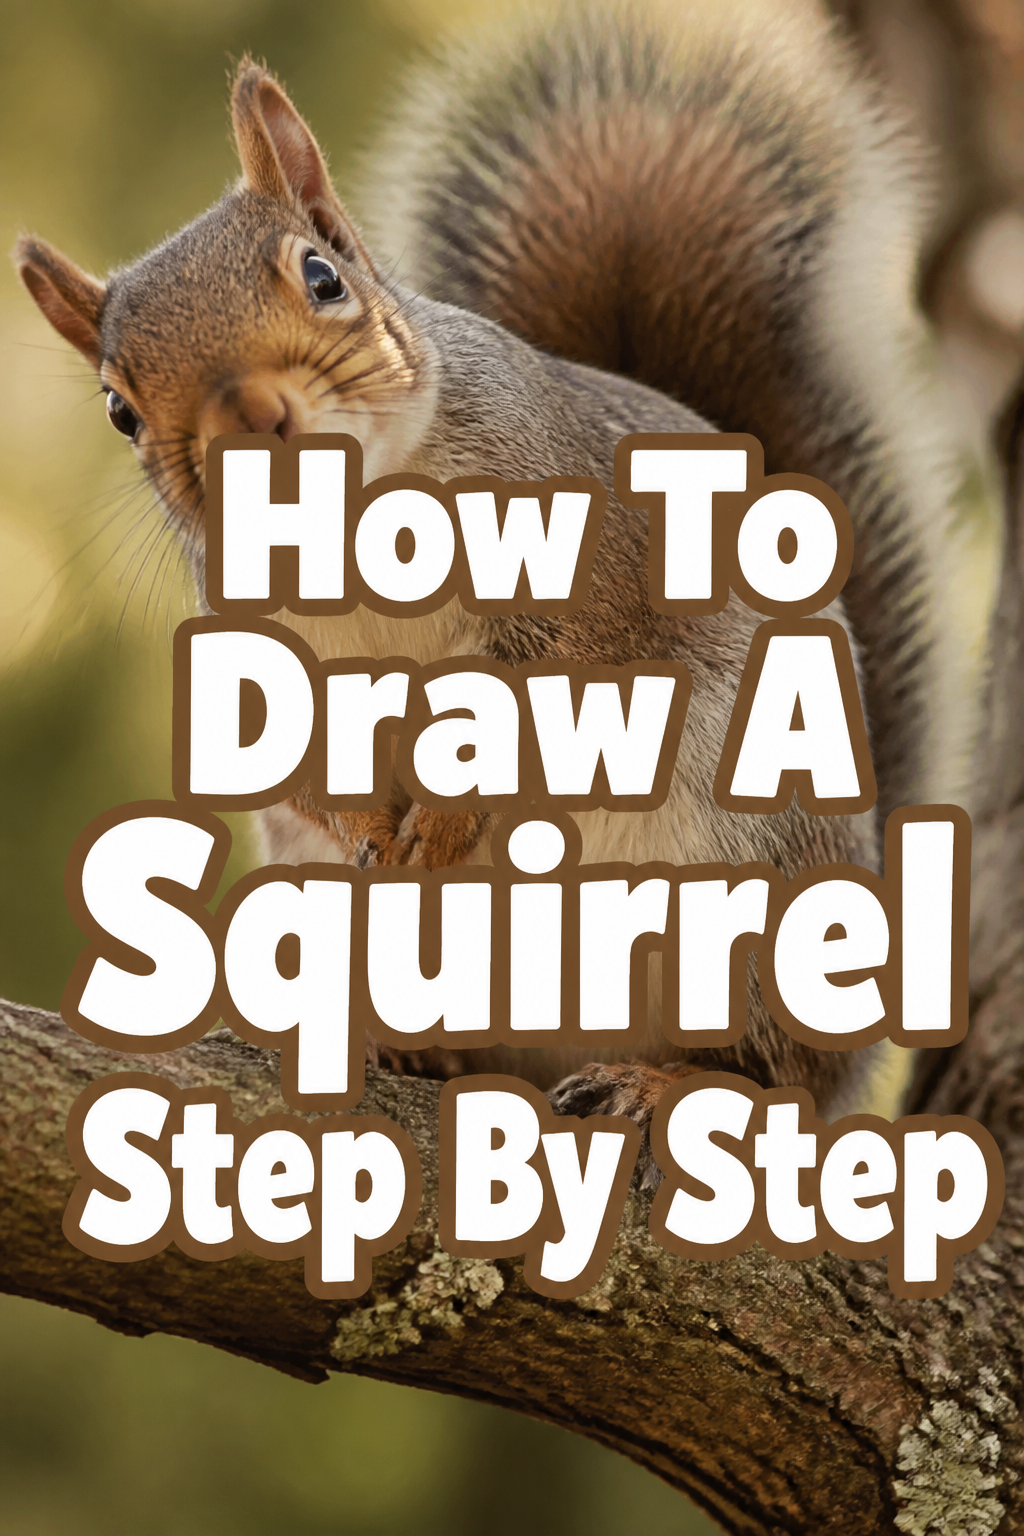
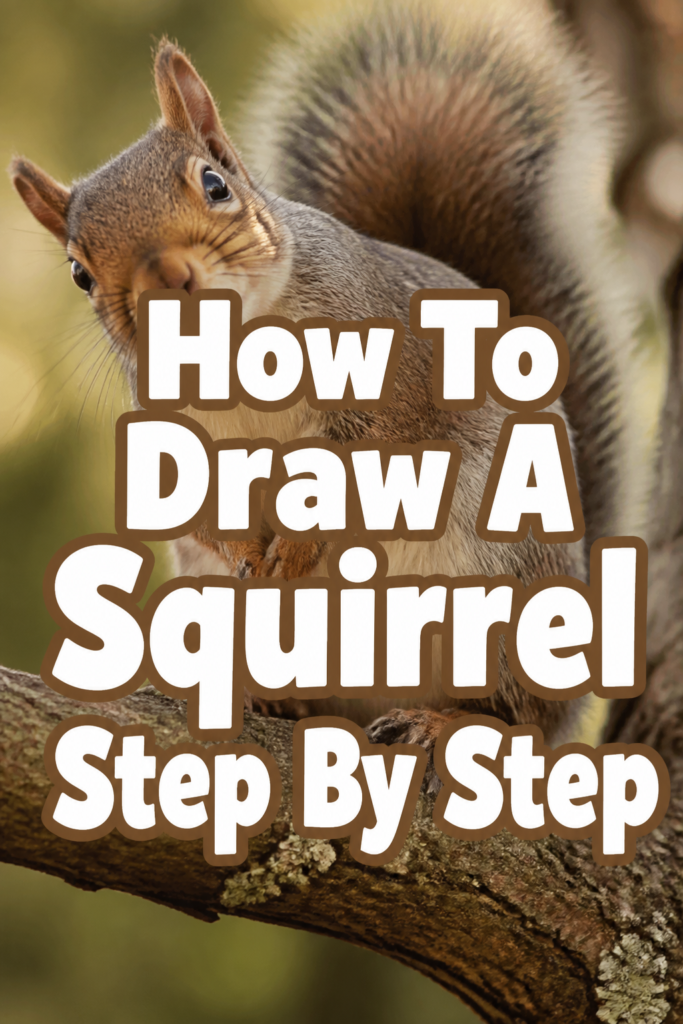
🐿️ How To Draw A Squirrel Step By Step

& Painting
No rigid rules or pretension. Just practical guides, medium comparisons, and encouraging tips to help you enjoy the drawing & painting process.
I remember my first attempt at sketching a squirrel from memory; it looked more like a lumpy, furry potato than a nimble forest creature.
It took countless observations and many failed drawings to truly understand their unique anatomy and playful spirit.
This guide distills those lessons into clear, actionable steps, helping you capture the charm of these busy animals with confidence.
Quick Overview
This guide will walk you through creating a realistic and lively squirrel drawing, from initial shapes to detailed fur textures. You’ll learn foundational techniques that apply to drawing many other animals too. By the end, you’ll have a complete squirrel drawing and a better understanding of animal anatomy.
- Time needed: 45-75 minutes
- Difficulty: Intermediate
- What you’ll need: Sketching pencils (HB, 2B, 4B), drawing paper, kneaded eraser, reference photo (optional but recommended)
Step-by-Step Instructions
Step 1: Lay Down the Basic Shapes
Start by lightly sketching the fundamental forms that make up the squirrel’s body. Think of simple geometric shapes to establish proportion and pose. This stage is all about building a solid foundation for your drawing.
Begin with two overlapping ovals. A larger, slightly elongated oval will form the main body, angled to suggest movement or posture. A smaller, rounder oval, positioned above and slightly to the front, will represent the head.
Connect these two ovals with a soft, curved line to indicate the neck. Don’t press hard with your pencil; these are just guidelines that will be erased later. Focus on the overall balance and placement on your paper.
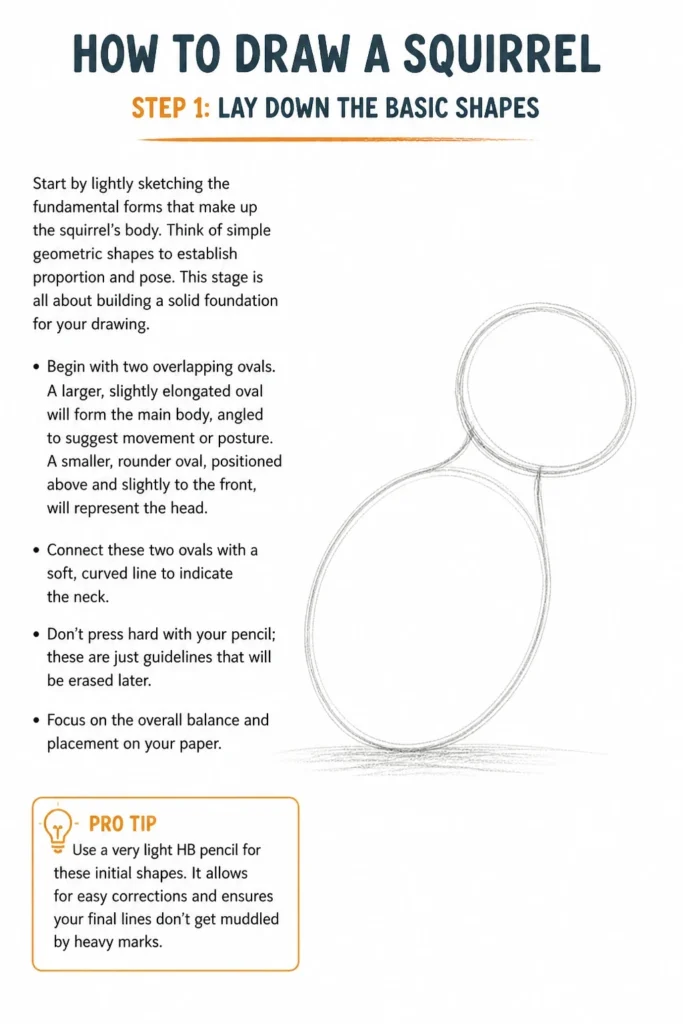
Pro Tip: Use a very light HB pencil for these initial shapes. It allows for easy corrections and ensures your final lines don’t get muddied by construction lines. Hold your pencil further back for lighter strokes.
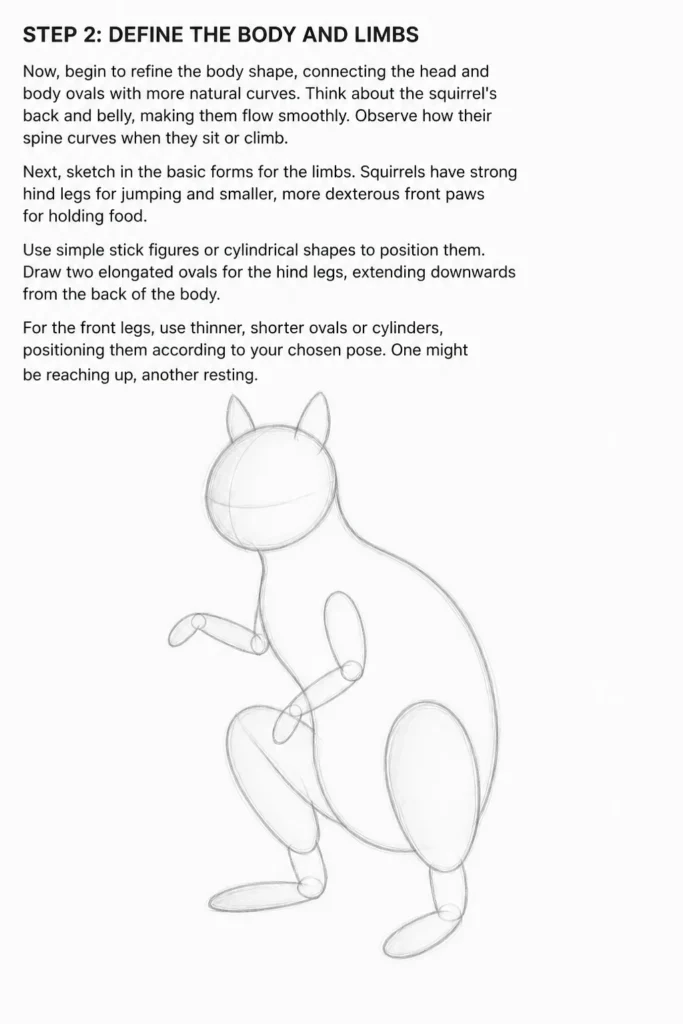
Step 2: Define the Body and Limbs
Now, begin to refine the body shape, connecting the head and body ovals with more natural curves. Think about the squirrel’s back and belly, making them flow smoothly. Observe how their spine curves when they sit or climb.
Next, sketch in the basic forms for the limbs. Squirrels have strong hind legs for jumping and smaller, more dexterous front paws for holding food. Use simple stick figures or cylindrical shapes to position them.
Draw two elongated ovals for the hind legs, extending downwards from the back of the body. For the front legs, use thinner, shorter ovals or cylinders, positioning them according to your chosen pose. One might be reaching up, another resting.
Step 3: Sketch the Head and Facial Features
Focus on the head, refining the initial oval into a more squirrel-like shape. Give it a slightly pointed snout and a rounded forehead. Pay attention to the overall profile.
Position the eyes, ears, and nose. Squirrels have relatively large, expressive eyes placed on the sides of their head, giving them a wide field of vision. Sketch small, rounded ears on top of the head, often angled slightly back.
Place a small, dark oval for the nose at the tip of the snout. Gently indicate the mouth with a subtle curved line below the nose. These features are crucial for conveying the squirrel’s character.
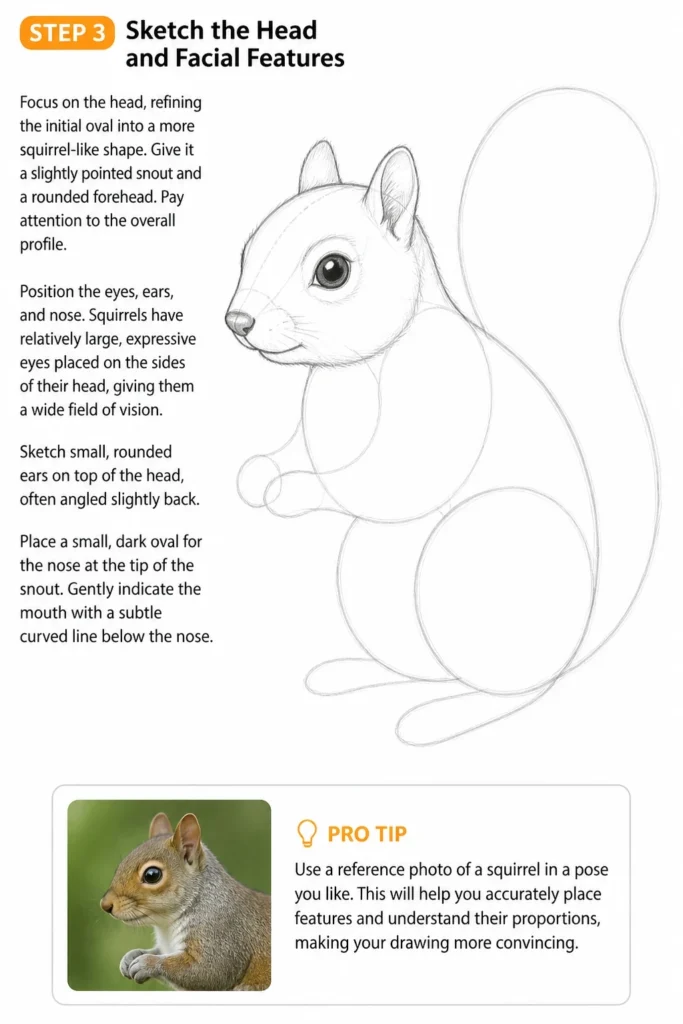
Pro Tip: Use a reference photo of a squirrel in a pose you like. This will help you accurately place features and understand their proportions, making your drawing more convincing.
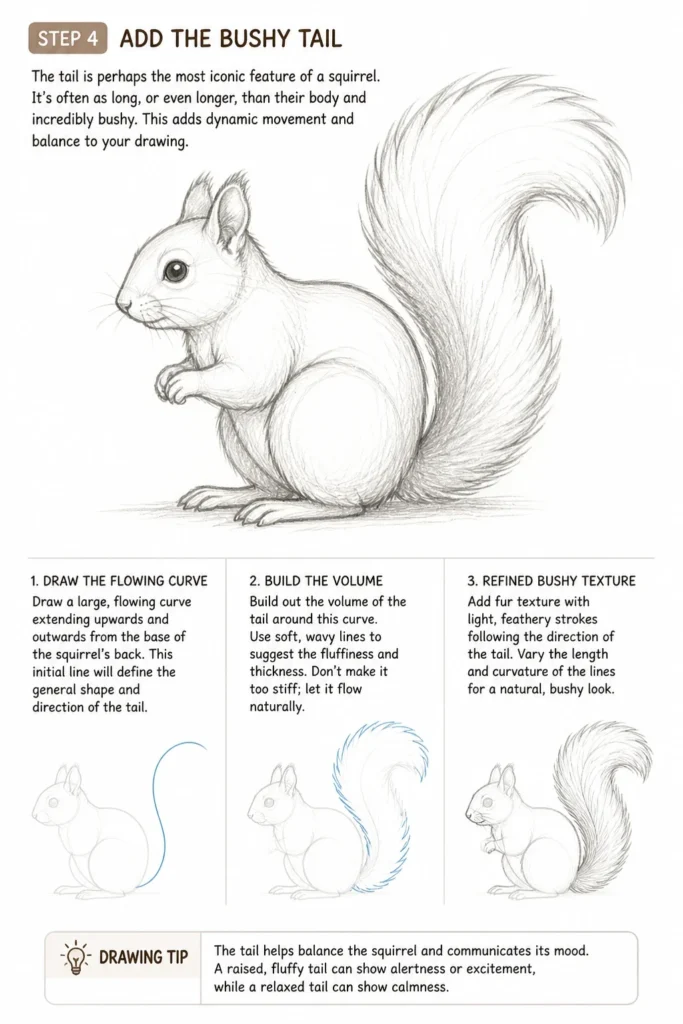
Step 4: Add the Bushy Tail
The tail is perhaps the most iconic feature of a squirrel. It’s often as long, or even longer, than their body and incredibly bushy. This adds dynamic movement and balance to your drawing.
Draw a large, flowing curve extending upwards and outwards from the base of the squirrel’s back. This initial line will define the general shape and direction of the tail. Think of it as a large, feathery plume.
Now, build out the volume of the tail around this curve. Use soft, wavy lines to suggest the fluffiness and thickness. Don’t make it too stiff; let it flow naturally. The tail helps balance the squirrel and communicates its mood.
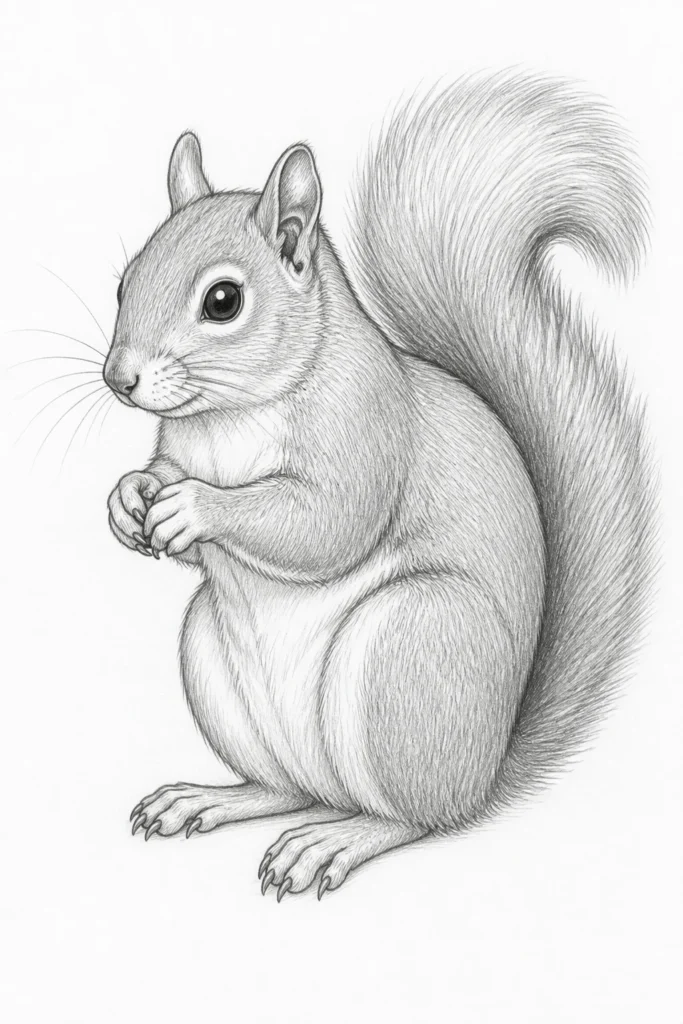
Step 5: Refine the Outline and Add Details
Carefully go over your entire drawing, refining all the rough construction lines into a cleaner, more definitive outline. Use slightly darker pressure with your HB pencil for these final contour lines. Erase any unnecessary guidelines from previous steps.
Add details to the paws, indicating the toes and small claws. Sketch in the whiskers around the snout; these are vital for their sensory perception. Pay attention to any folds of skin or muscle definition you can observe.
Refine the eyes by adding a small highlight to give them life. A tiny unshaded spot will create a sparkling effect. Ensure the ears have a slight inner curve to show their depth.
Step 6: Begin Shading and Texturing Fur
Start applying light layers of shading to give your squirrel three-dimensionality. Identify your light source and begin shading the areas that would be in shadow. Use a 2B pencil for these initial mid-tones.
Think about the direction of the fur. Squirrel fur isn’t uniform; it flows differently across various parts of the body. Use short, fine strokes that follow the natural growth pattern to create texture.
Build up the fur texture gradually, starting with lighter strokes and adding more pressure or darker pencils (like 4B) for deeper shadows. Pay special attention to the tail, using longer, feathery strokes to emphasize its bushiness. The body fur will be shorter and denser.
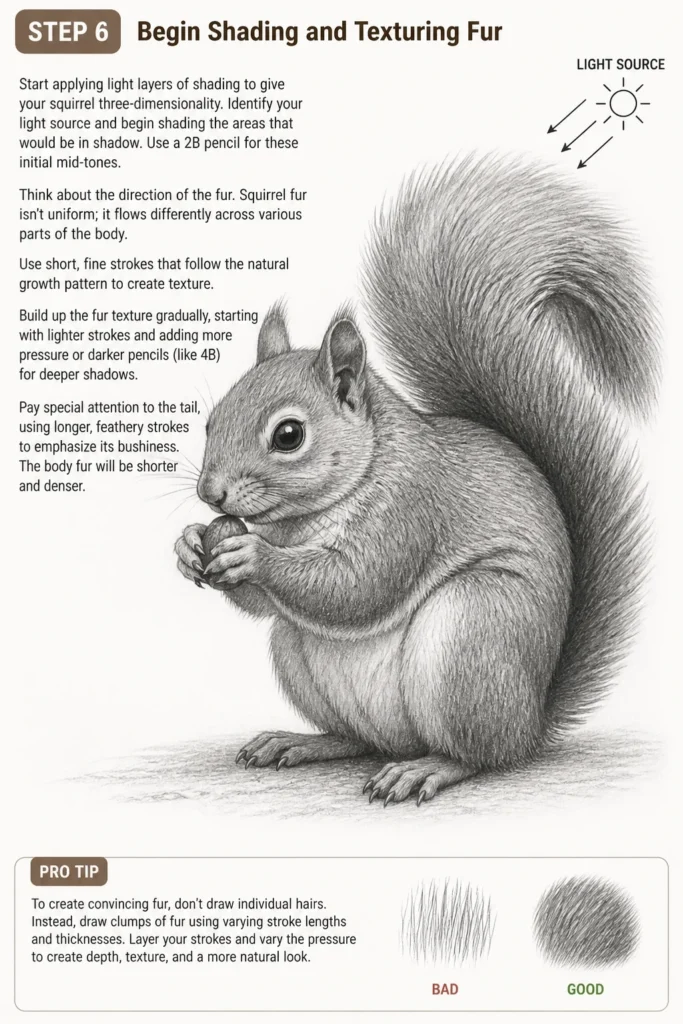
Pro Tip: To create convincing fur, don’t draw individual hairs. Instead, draw clumps of fur using varying stroke lengths and directions. Layering these strokes will give a rich, textured appearance.
Step 7: Add Depth and Final Touches
Deepen the shadows in areas like under the chin, beneath the limbs, and where the tail meets the body. Use your 4B pencil for the darkest values to create strong contrast and make the drawing pop. This will give your squirrel a sense of weight and presence.
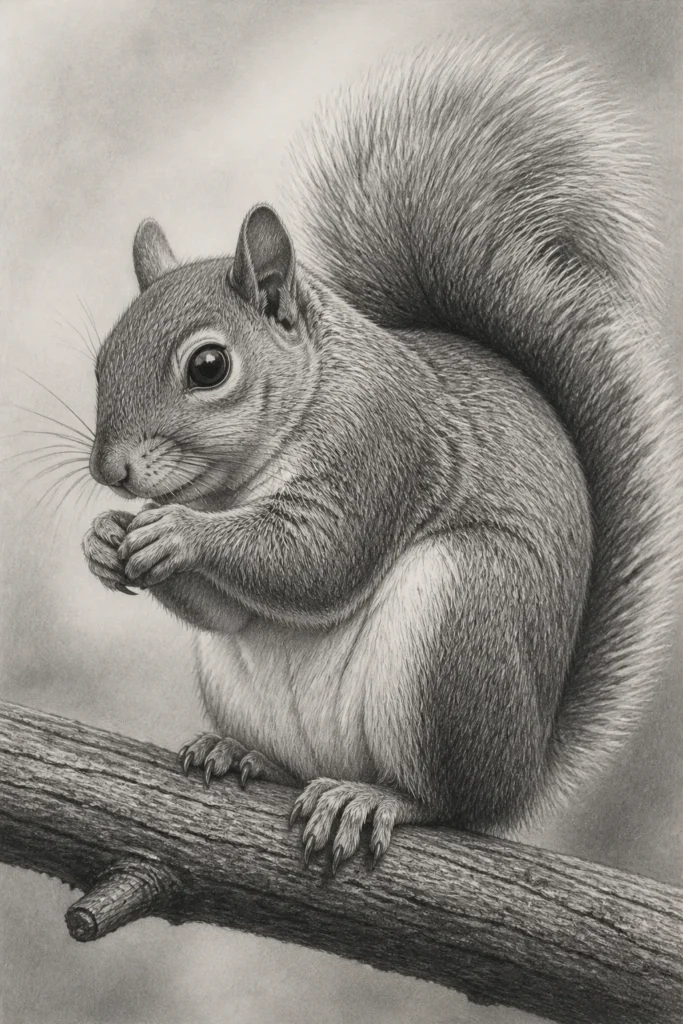
Refine the eyes further by darkening the pupil and the area around it, leaving the highlight bright. Add tiny details like individual whiskers with very fine, sharp lines. Consider adding a subtle ground line or a branch for the squirrel to sit on.
Review your entire drawing. Are the proportions correct? Is the fur texture consistent? Make any final adjustments, softening harsh lines with your kneaded eraser or adding a few more dark accents. Your lively squirrel is now complete!
Common Mistakes to Avoid
Disproportionate Features
One common pitfall is drawing parts of the squirrel too large or too small relative to the rest of the body. For instance, a tail that’s too short or a head that’s too big can make the drawing look awkward. Always start with basic shapes to establish correct proportions, and refer to your reference photo frequently.
Stiff, Lifeless Pose
Squirrels are incredibly agile and energetic, but sometimes drawings can end up looking rigid. This often happens when artists rely too much on straight lines or symmetrical poses. To avoid this, try to incorporate dynamic curves and angles in your initial sketch, suggesting movement even in a static pose. Think about the flow of their spine and the bend in their limbs.
Flat Fur Texture
Drawing fur can be challenging, and a common mistake is making it look flat or like a solid block of color. This usually occurs when strokes are all uniform or too heavily applied. To create realistic fur, remember to use varying pressure, different pencil grades, and strokes that follow the natural direction of growth. Layering is key to achieving depth and softness.
Rushing Details
It’s tempting to jump straight into drawing eyes and whiskers, but rushing the foundational steps can lead to an unstable drawing. If the underlying structure is weak, even perfectly drawn details won’t save it. Always build your drawing from general shapes to specific details, giving each stage its due attention. Patience at the beginning pays off in the end.
Troubleshooting
My squirrel looks stiff and unnatural.
If your squirrel appears rigid, you likely focused too much on straight lines or static shapes in the early stages. Try to loosen your hand and sketch with more fluidity. Practice drawing curved lines and dynamic poses from reference photos. Remember that even a sitting squirrel has a relaxed curve to its spine and limbs.
I’m having trouble making the fur look fluffy.
Achieving fluffy fur requires layering and varying your pencil strokes. Avoid drawing harsh, uniform lines. Instead, use short, feathery strokes that follow the fur’s direction, building up density with lighter layers first. Use a kneaded eraser to lift highlights, creating the illusion of individual hairs catching the light. Don’t be afraid to leave some areas lighter and others darker.
The eyes don’t look lively or expressive.
Lifeless eyes often lack depth and a crucial highlight. Make sure the pupil is dark and well-defined. Crucially, add a small, unshaded white spot (or use your eraser to create one) to represent the reflection of light. This tiny detail can instantly bring the eye to life. Also, ensure the eyelids and surrounding fur give the eye a natural setting within the head.
Key Takeaways
- Start with Basic Shapes: Always begin with simple ovals and circles to establish correct proportions and pose before adding details.
- Observe References: Use clear reference photos to accurately capture anatomy, fur direction, and expressive features.
- Build Layers Gradually: Apply shading and fur texture in light layers, slowly building up darkness and detail for a realistic effect.
- Emphasize the Tail: The bushy tail is a defining feature; ensure it’s large, flowing, and textured to add dynamism.
- Focus on Contrast: Use a range of pencil values from light to dark to create depth, form, and visual interest in your drawing.
- Practice Patience: Drawing takes time and practice. Don’t rush the process, and enjoy each step of your artistic journey.
Frequently Asked Questions
What kind of pencil should I use for drawing squirrels?
For a detailed squirrel drawing, a set of graphite sketching pencils is ideal. An HB pencil is perfect for initial sketches and light outlines. A 2B pencil works well for mid-tones and general shading. For darker shadows, rich fur textures, and strong accents, a 4B or even 6B pencil will be very useful.
How do I make the squirrel’s tail look extra fluffy?
To achieve a very fluffy tail, use long, sweeping, slightly wavy strokes that extend outwards from the main tail shape. Don’t press too hard. Layer these strokes, varying their length and direction slightly to mimic natural fur growth. Use your kneaded eraser to gently lift small areas, creating highlights that enhance the fluffy appearance.
Can I add color to my squirrel drawing?
Absolutely! Once your graphite drawing is complete, you can add color using colored pencils, pastels, or even watercolors. If using colored pencils, apply light layers to build up the natural brown, reddish, or gray tones of the squirrel’s fur. Remember to follow the fur’s direction when applying color, just as you did with graphite.
How long does it take to get good at drawing animals?
The time it takes to “get good” varies greatly from person to person. Consistency and deliberate practice are key. With regular practice, focusing on observation, basic shapes, and understanding anatomy, you can see significant improvement in a few months. Don’t be discouraged by initial results; every drawing is a learning opportunity.
Our Top Recommended Finds
- Derwent Graphic Drawing Pencils: These pencils offer a smooth application and a wide range of hardness, perfect for detailed work and varied shading.
- Strathmore 400 Series Sketch Pad: A reliable choice for artists, offering good tooth for graphite adhesion and durability for erasing.
- Faber-Castell Kneaded Eraser: Essential for lifting graphite gently without damaging the paper, ideal for creating highlights and softening lines.
Cultivating Your Artistic Vision
Bringing a squirrel to life on paper is a rewarding experience, blending careful observation with artistic interpretation. Each stroke you make builds confidence and refines your skills, not just for drawing squirrels, but for any subject you choose to tackle.
Don’t stop here! Try drawing your squirrel in different poses, perhaps holding a nut or scampering up a tree. Experiment with adding a simple background to place your squirrel in its natural habitat. The more you practice, the more your unique artistic voice will emerge.
Pick up your pencil right now and find a new reference photo. Embrace the joy of creation, and watch as your drawings evolve with every attempt. Your next masterpiece awaits!
& Painting
No rigid rules or pretension. Just practical guides, medium comparisons, and encouraging tips to help you enjoy the drawing & painting process.